You can easily add buttons, text, images, etc. to your page and make them links using Pixpa’s link builder in just a few clicks.
In this article:
- Link Builder Overview
- Link Website Content
- Link External Content
- Link an Email
- Link a Phone Number
- Find Link Builder here
Link builder overview
For different elements, the interface might look a little different. Here are the different elements that can be converted as links using the Link builder:
Buttons
You can easily add any custom link on a button using the link builder.
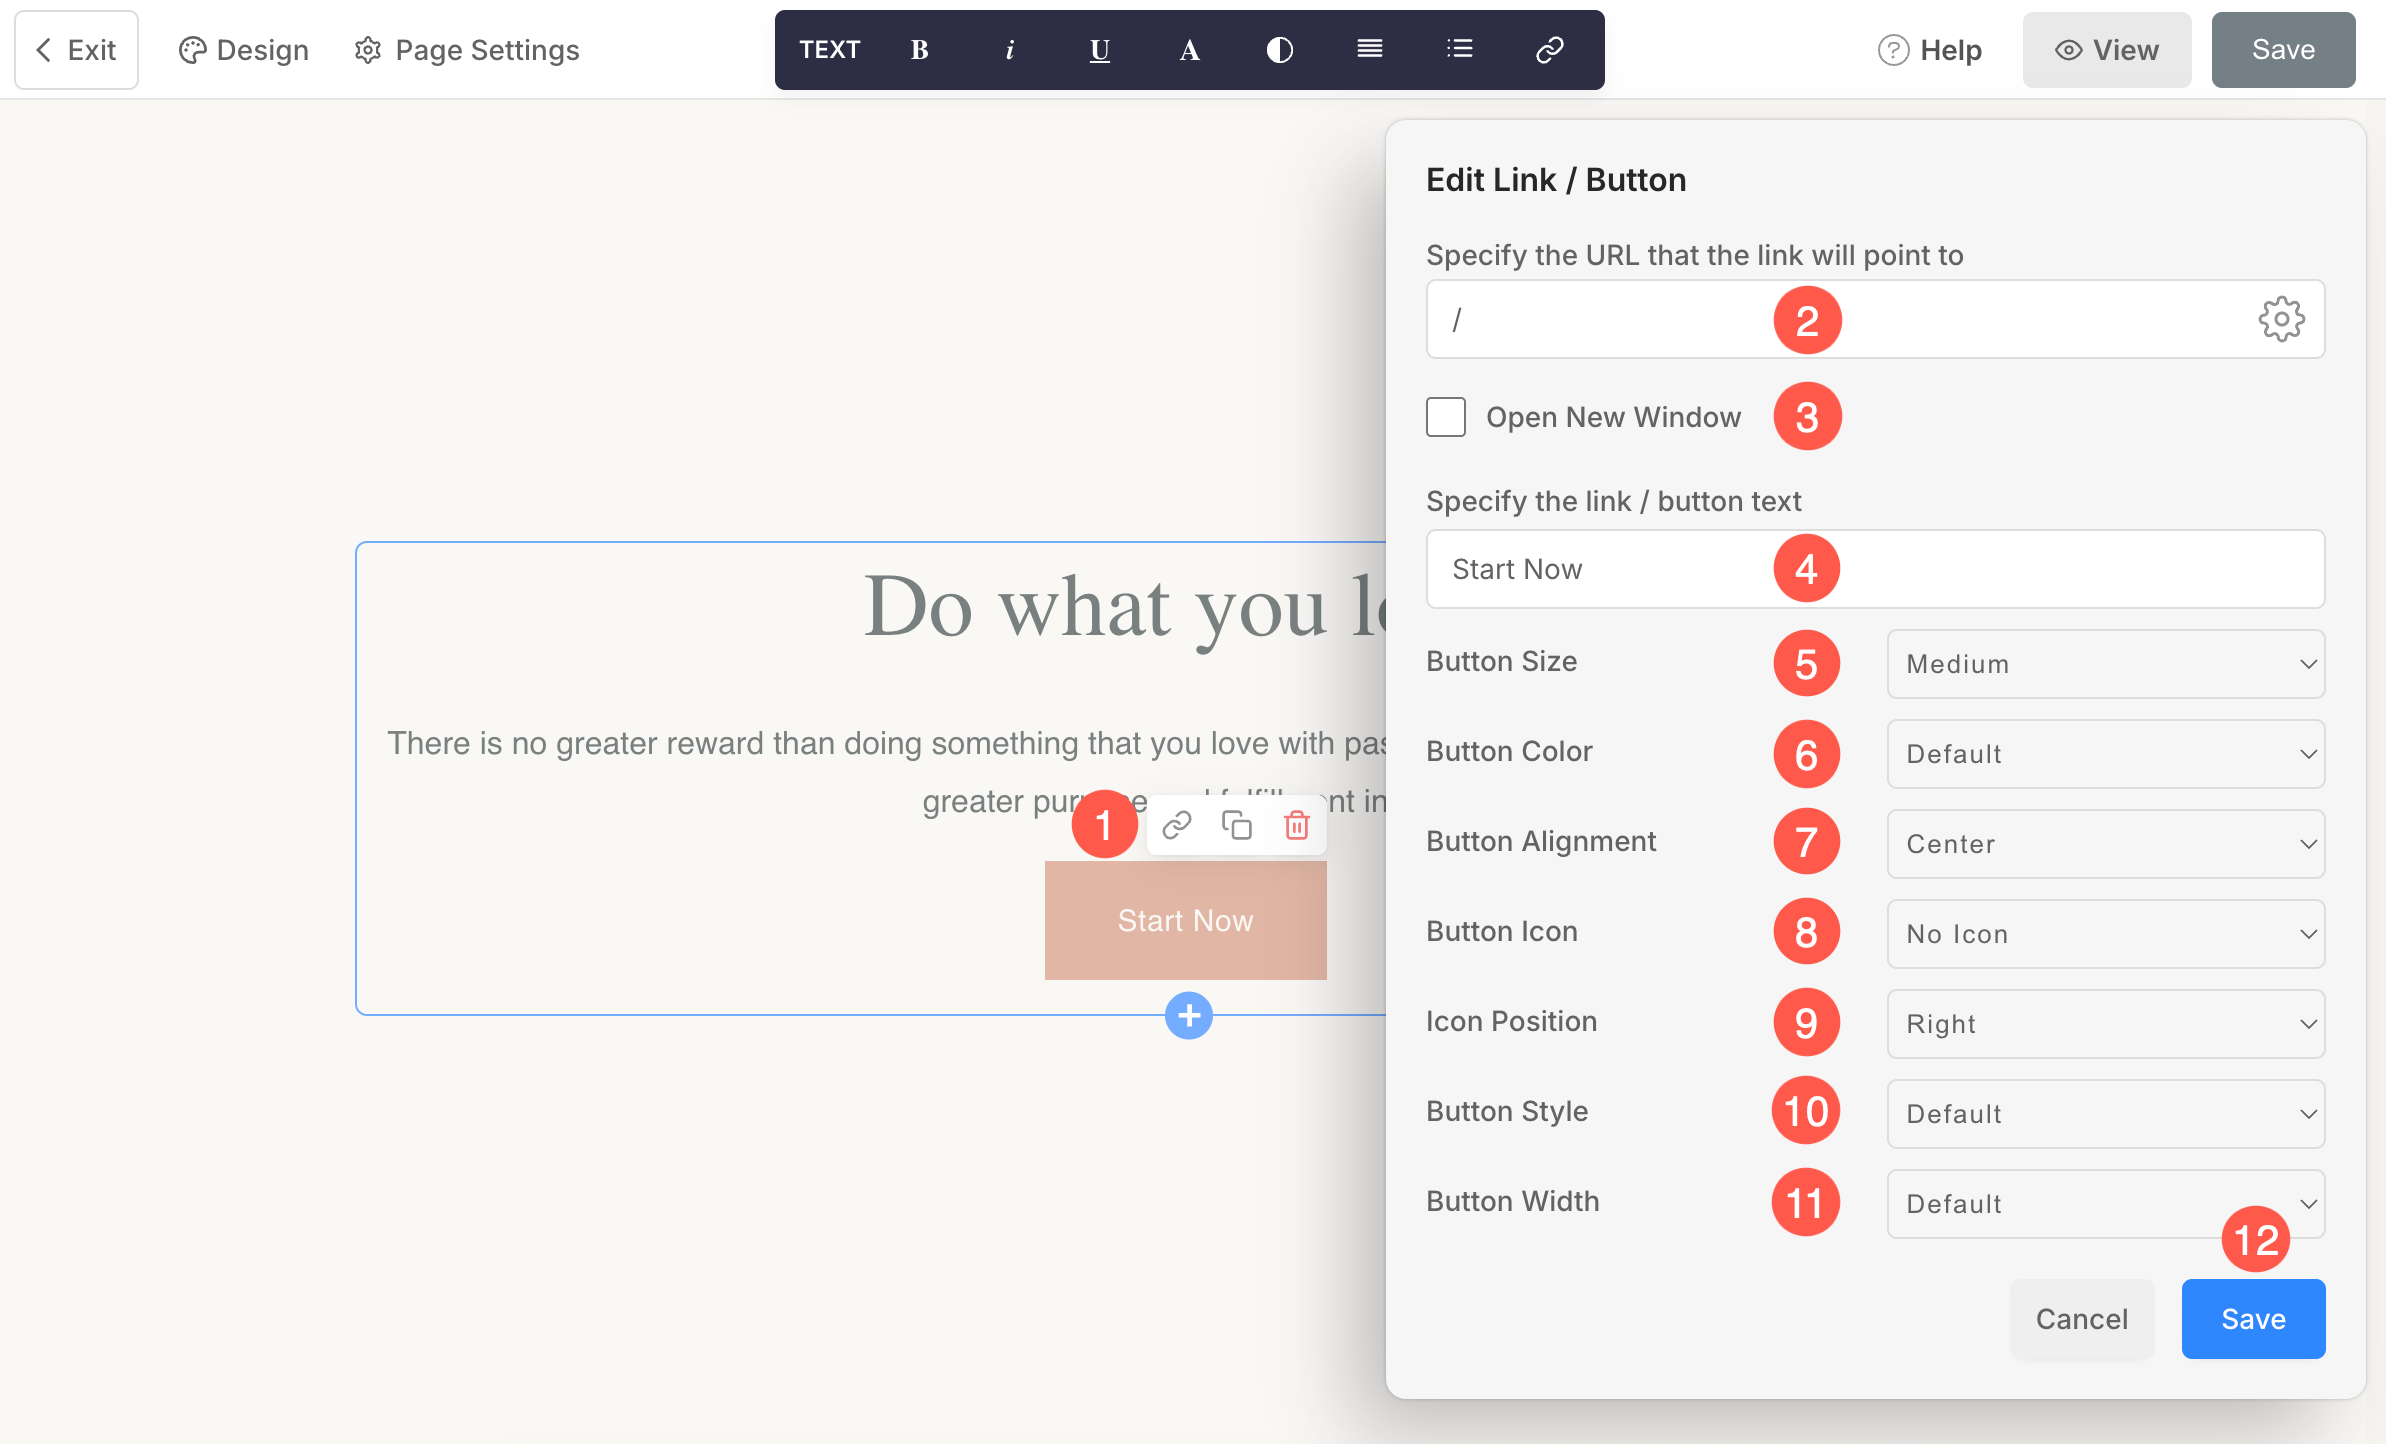
- Link Icon: Click on the link icon to view the Edit link/button pop-up where you can manage all the button options.
- Specify the URL: Click on the Settings (⚙️) icon to link the button. Know more.
- Open New Window: If you want the link to open in a new browser window, check this otherwise, keep it unchecked.
- Button Text: Set the label / text of the button.
- Button Size: Set the button size to be small, medium, or large.
- Button Color: Specify the button color from here. If you have chosen to invert the button color, the button text color will be applied to the button background, and vice versa.
- Button Alignment: Set the button alignment as left, center, or right.
- Button Icon: Set the icon that will appear over the button.
- Icon Position – Choose whether the icon should appear on the left or right side of the button text.
- Button Style: You can set the style for the buttons to be solid or outline or a text link.
- Button Width – Set the button width as Default, Large, X Large, or Full Width.
- Save – Click on the Save button to apply and save the button settings.
Text
Add links to text on your pages using the link builder.
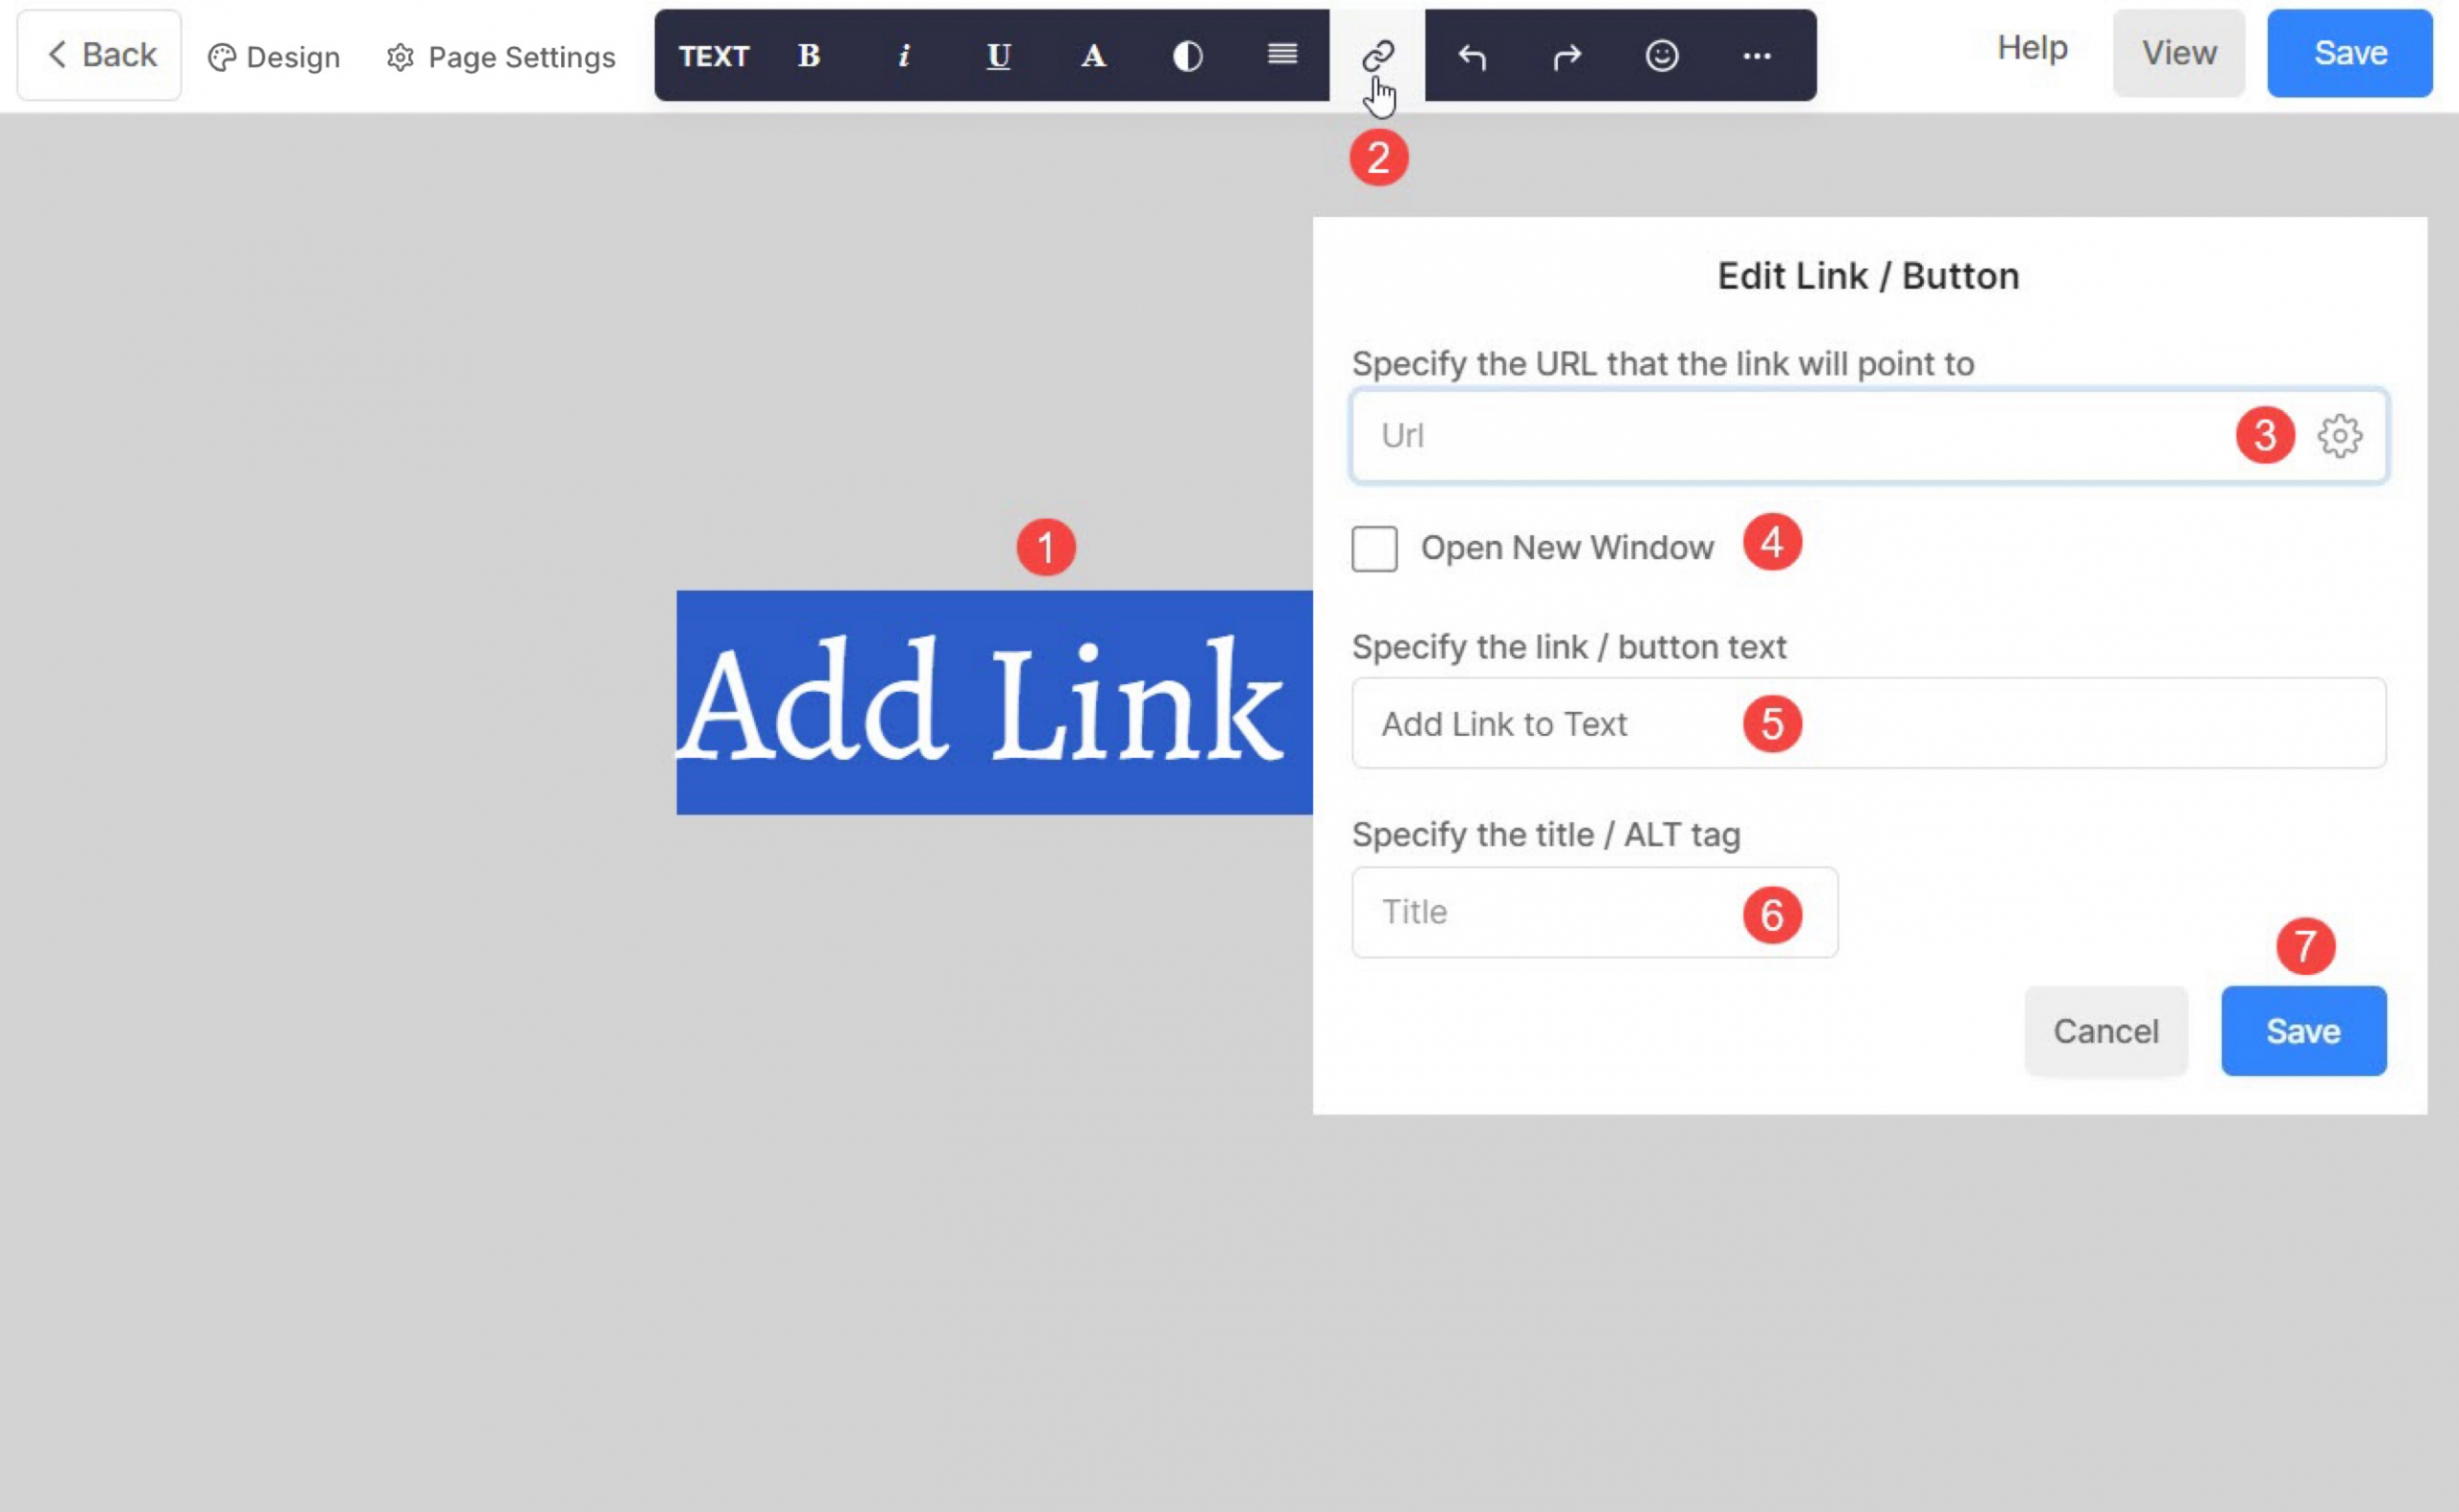
- Text: Select the text where you want to add the link.
- Link Icon: Once the text is selected, you will see a toolbar at the top. Click on the link icon.
- Specify the URL: Click on the Settings (⚙️) icon to link the button. Know more.
- Open New Window: If you want the link to open in a new browser window, check this otherwise, keep it unchecked.
- Link / Button Text: Set the label / text of the link.
- Title / Alt Tag: Specify the Alt tag which will be used by the search engines. Learn more.
- Save: Hit Save button to save the changes.
Images
Add links to images using link builder.
- Image: Select the image on which you want to add a link.
- Link Icon: Once the image is selected, you will see a link icon. Click on it.
- Title / Alt Tag: Specify the Title / Alt tag for the image which will be used by the search engines. Learn more.
- Specify the URL: Click on the Settings (⚙️) icon to link the button. Know more.
- Open New Window: If you want the link to open in a new browser window, check this otherwise, keep it unchecked.
- Save the changes.

Link Website Content
Website content refers to the all the content that are present inside your website. Some examples are pages, galleries, folders, blogs, etc. You can easily link them to any other element of your website using the link builder.
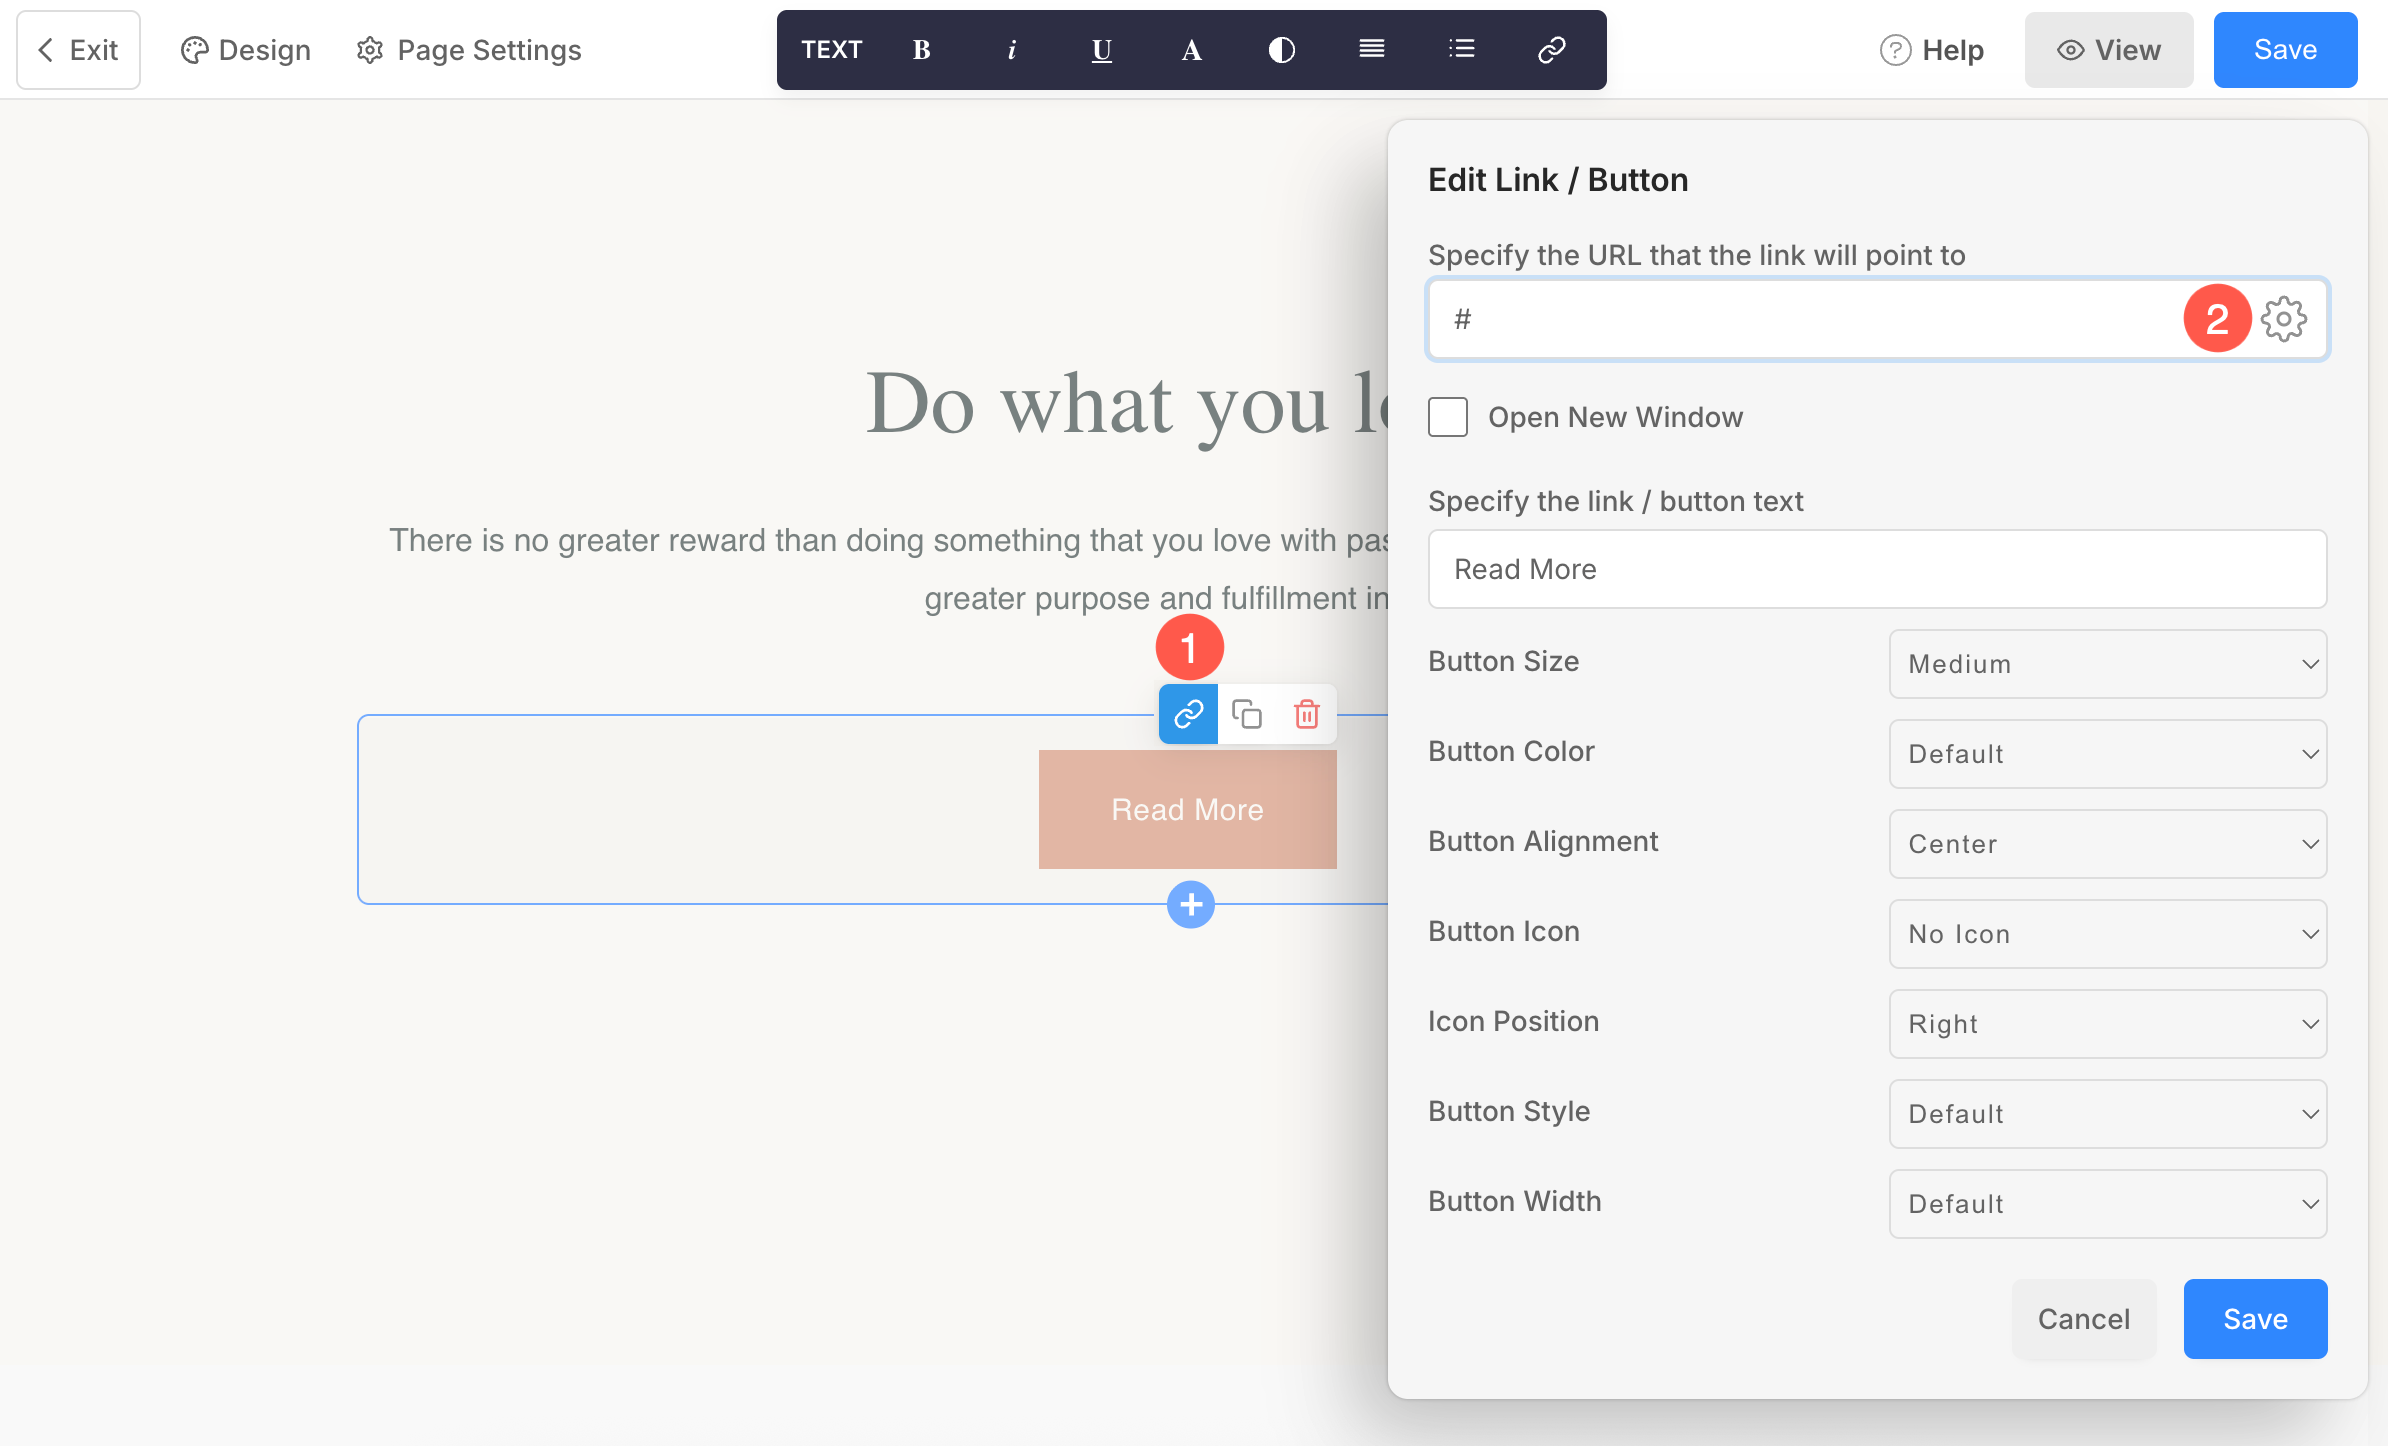
To open the link builder popup, click on the Link (1) icon and Settings ⚙️ (2).
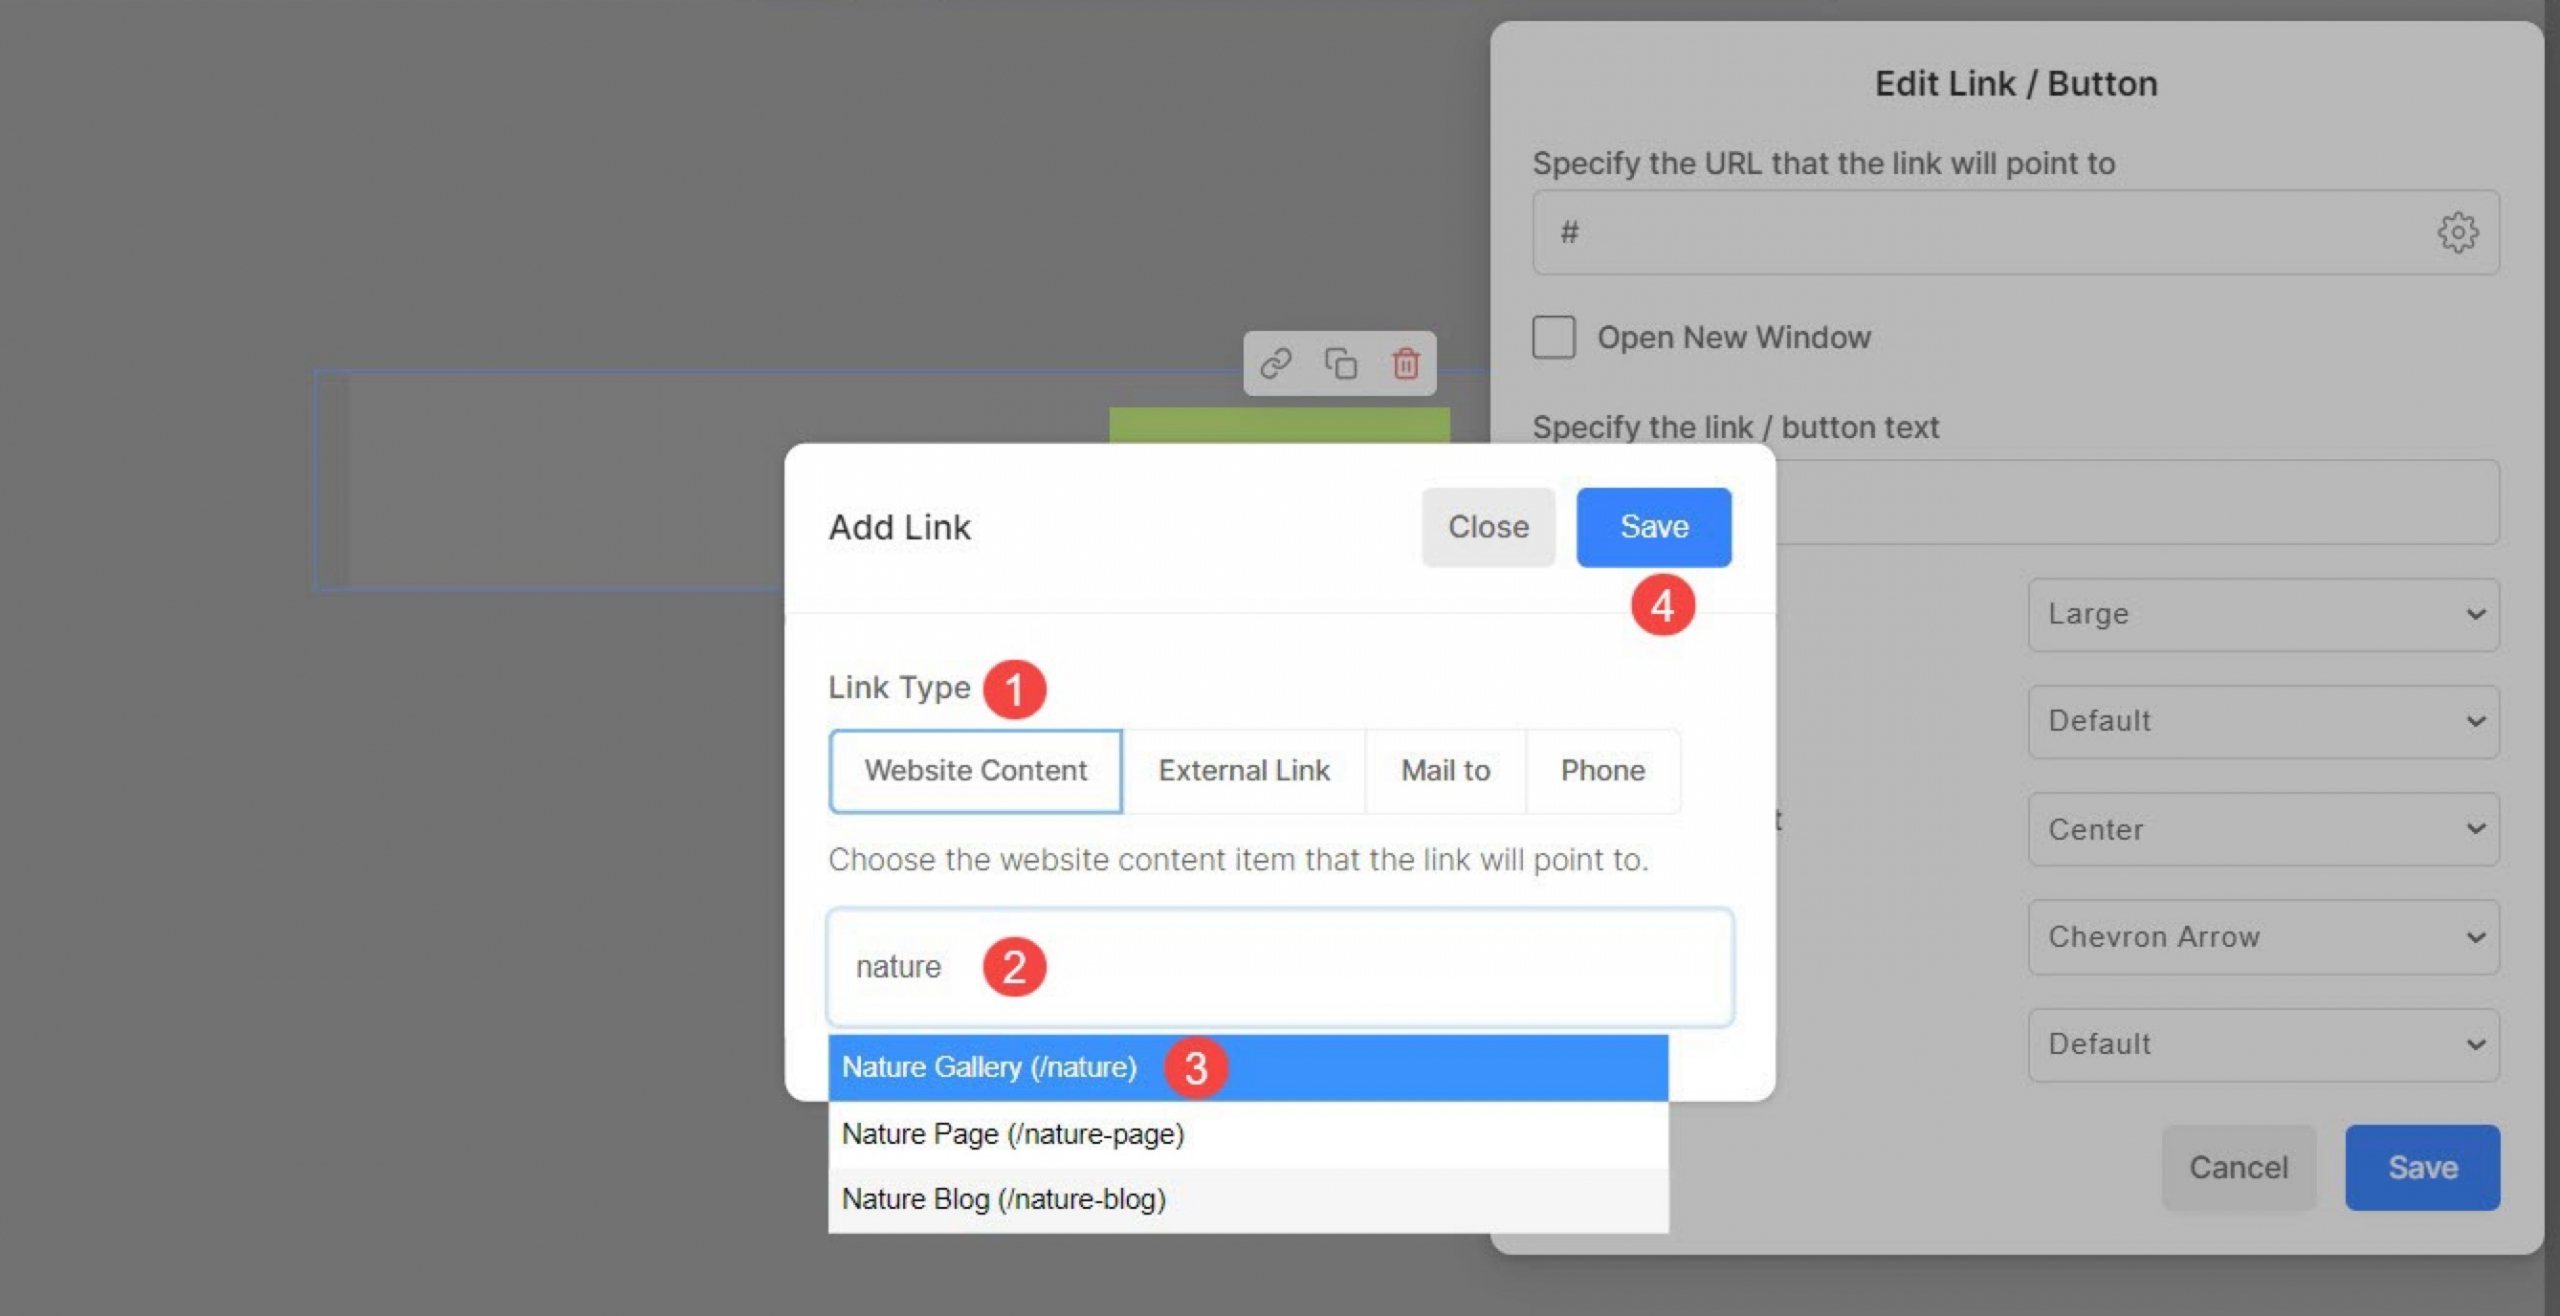
- Here you will see Website Content (1) option.
- To link the content of your website, you simply have to enter the name of the content. For example, if you want to link a gallery named ‘Nature’, then just type ‘nature’ in Search Field (2). A dropdown will appear listing all the content having ‘Nature’ name.
- Select (3) the content according to your preference and Save (4) the changes.
Congratulations, the button is now linked to the gallery. It’s as simple as that!
Link External Content
It is used to specify a page or any other content outside your website.
- Click on the External Link (1) option.
- Enter the external URL into the Search Field (2).
- Save (3) the changes.

Link an Email
This is used to specify an E-mail address. Clicking on this link will compose a new Email by picking up all the defaults set.
- Click on the Mail to (1) option.
- Specify Email address (2).
- Specify Subject (3), Body (4), CC (5) and BCC (6). These are optional fields.
- Save (7) the changes.

Link a Phone Number
You can easily link your phone number on your website. This works on mobile devices only.
- Click on the Phone (1) option.
- Specify your phone number in the Field (2).
- Hit Save (3) button.

Find Link Builder here
You will find link builder in all the sections mentioned below:
- Image List Section
- Text List Section
- Video List Section
- Banner Section
- FAQs Section
- Testimonial Section
- Teams Section
- Pricing Section
- Logo Section
Using the Link builder, you can easily customize the links of all these section item’s titles.
Apart from this, you will find the link builder inside Title & Logo, Footer Text, Menu Button, Store Policies, Buttons & Links inside different sections, etc.