Pixpa Help
Login / Signup
EN
  • English
  • Español
  • Français
  • Deutsch
  • Português
  • Nederlands
  • Italiano
  • 日本語
  • Norsk
  • Polski
  • Русский
  • Svenska
  • Türkçe
  • Dansk
  • ไทย
  • Corsu
  • Suomi
  • 한국어
  • Українська
  • Indonesia
  • Melayu
  1. Home
  2. Knowledge Base
  3. Website
  4. Pages
  5. Types of sections
  6. Logo Section
Searching...
  • Getting started – Showcase, sell and share your work online. No coding knowledge needed.
    • What is Pixpa?
    • Getting started with Pixpa
    • How does the 15-day free trial work?
    • Hire a Pixpa expert – Website setup service
    • Prepare to build your website
    • All about templates
    • Build your website
    • Website launch checklist
    • Selling images from Pixpa
  • FAQs – Answers to the most frequently asked questions.
    • Where is my site hosted?
    • Does Pixpa provide SSL certificate
    • Image limit on Basic plan
    • Storage space for original files
    • One year free domain registration
    • Create multiple sites for each language
    • Pixpa Prime
    • Using store & sell images
    • Can I host my own website?
    • Can I download my Pixpa website?
    • Does Pixpa provide email account(s)?
    • Supported browsers
    • 30-day money-back guarantee
    • What is meant by unlimited usage/bandwidth?
    • System reserved keywords
    • Site showing Not Secure on the browser bar
    • How to get Facebook/Google to fetch your website/page changes quickly
    • My text is jumbled up when I copy & paste it in the Pixpa text editor
    • Images are not showing up?
    • Website changes not showing up?
  • How to guides
    • Prepare to build your website
    • Build your website
    • Website launch checklist
    • Style your website
    • Use AI text editor
    • Sell images using Pixpa
    • Build your Store
    • Manage Client galleries
    • Manage website SEO
    • Reviewing Search Console Warnings
    • Add Terms of Use and Privacy Policy page
    • Embed any external (third party) script
    • Create a multilingual site in Pixpa
    • Manage QR codes
    • Manage tags in Pixpa
  • Design – Customise your website’s theme with our Style Editor.
    • Design and templates – Design section overview to customize the look and feel of your site.
      • Design section overview
      • Design FAQ’s
      • Change your website template
      • What happens when I change the template?
      • Switch back to earlier theme and style
      • Reset website template – Trial websites only
    • Style your website
      • Title & logo
      • Website colors – Using color palettes
      • Website fonts
      • Website spacing
      • Website header
      • Website menu
      • Website gallery
      • Buttons & links
      • Website footer
      • Website animation
      • Custom fonts
    • Custom CSS – Learn how to override global design style
      • Disable sharing from blogposts
      • Reduce the sidebar width in 2-column themes
      • Disable large image viewer
      • Add overlay color in horizontal slider gallery layout
      • Fix overlay elements in grid mode
  • Website – Manage your website navigation links
    • Website menu – See how many different types of menu items that you can create.
      • Website FAQ’s
      • Types of menu items
      • Add Page to site menu
      • View website
      • View specific Page on website
      • Sequence site menu items
      • Set a page as homepage
      • Change the titles of any page
      • Change URL (Slug) of any menu item
      • Add a link item to your website menu
      • Use separator in site menu
      • Add menu button to site menu
      • Edit your website content
      • Create a landing page for your website
      • Styling the header of any page
      • Add a pre-footer to your website
      • Build a single page website
      • Create a resume page on your website
    • Folders – Organize your website navigation.
      • Add a folder to your website navigation
      • Show folder as a dropdown or a listing page
      • Add any menu item to a folder
      • Folder settings
      • Folder listing page design
      • Add a banner to the folder page
      • Delete folder
      • Create a nested folder
      • Breadcrumb navigation
      • Filtering folder items using tags
    • Galleries – Everything you need to know about image, video and text/HTML slide galleries
      • Overview
      • Add a gallery to your website
      • Delete/Hide a gallery/page
      • Settings
      • Preparing your images – Image size
      • Preparing your images – Image color profiles
      • Image quality
      • Add content to a gallery
      • Upload images
      • Add videos
      • Add HTML slide
      • Manage items
      • Sort items
      • Best practices for image file naming and sequencing
      • Rotate images
      • Import gallery items
      • Download your images
      • Create a contact sheet
      • Delete gallery items
      • Design options
      • Change gallery layout
      • Image grid spacing
      • Design overview – Global design vs individual gallery design
      • Slideshow settings
      • Image properties – captions & accent colors
      • Add overview text/description
      • Import IPTC data
      • Set focal point of images
    • Pages – Create pages using our Pixpa’s drag-and-drop PageBuilder
      • Overview – Getting started with pages
        • Add a page
        • Import page from any template
        • Manage page settings
        • Delete page
        • Edit page HTML
        • Duplicate a page
        • The contact page
      • Using sections to build pages – Understanding sections and section editing options
        • Understanding page sections and snippets
        • Add a section to a page
        • Add a spacer/divider between sections
        • Add snippet to a section
        • Section visibility
        • Section settings
        • Section – Color style
        • Section – Custom Color Options
        • Sequencing the sections
        • Duplicate a section
        • Delete a section
        • The page text editor
        • Format input text HTML
        • Linking text/button
        • Image border
        • Cards in dynamic sections
        • Using separator in page sections
        • Using border in page sections
      • Types of sections – Using different types of sections to build your pages
        • Types of sections
        • Cover section
        • Image list section
        • Text list section
        • Video list section
        • Headline section
        • Banner section
        • Gallery section
        • Images section
        • Text section
        • Contact section
        • Payment & donation section
        • Embed media & apps section
        • Newsletter section
        • Location section
        • FAQs section
        • Testimonials section
        • Reviews section
        • Team section
        • Pricing section
        • Logos section
        • Timeline section
        • Marquee section
        • Instagram feed section
        • Products section
        • Blog feed section
        • Client gallery section
        • Before & after images section
        • Buttons & links
        • Export contact form submissions
        • Connect a Google sheet & sync contact form submissions
    • Website options – Use the website section to add and update content for your website.
      • Managing website SEO
      • Payments & donations
      • Banner functionality
      • The Banner layouts
      • Add thumbnail image
      • Social links
      • Link builder
      • Password protect your website
      • Change system labels / language
      • Multilingual website – Weglot
      • Multilingual website – Gtranslate
      • Activate cookie information bar
      • Uploading files to your website
  • Store – Sell images as prints or downloads in your website.
    • Overview
      • How to build your store on Pixpa
      • Build your store on Pixpa
      • Does Pixpa charge any commissions on orders?
      • Using store & sell Images
      • Enable or disable store
      • Add store to your site menu
      • Add e-Commerce galleries to your website menu
      • Store FAQs
      • Ecommerce tools
    • Store settings
      • Settings
      • The storefront page
      • Storefront (all products) – settings
      • Storefront (all categories) – settings
      • Managing taxes – e-Commerce
      • Set base currency & supported currencies
      • Supported payment gateways
      • Use Stripe
      • Use Paypal
      • Use Razorpay – store
      • Use PayUmoney
      • Enable/disable offline payments
      • SEO
      • Discount coupons
      • Customer accounts – store
      • Using customer accounts
    • Shipping – Manage your ecommerce shipping
      • Understanding shipping
      • Select the best suitable shipping option
      • Flat rate shipping
      • Free shipping
      • Based on order weight
      • Based on order total
      • Based on number of Items
      • Store pickup
      • Selling heavy products
      • Migrate from old shipping to new shipping
    • Products
      • Add products to store
      • Info sections
      • Product banner
      • Physical products
      • Service products
      • Digital products
      • Status
      • Categories
      • Category banner
      • Product images
      • Product options
      • Product description
      • How often can I update my store products?
      • Product on sale
      • Using tags
      • Applying tax
      • Product weight
      • Inventory
      • Manage inventory of individual products
      • Sold out products
      • Low inventory notifications
      • Change products sequence on your store
    • Sell Images
      • Add e-Commerce galleries to your website menu
      • Enable/disable sell images
      • Sell images as prints & downloads
      • Price list
      • Add category
      • Apply price list
      • Design
      • Settings
    • Ecommerce gallery fulfilment – ecomerce gallery fulfillment using self fulfillment, WHCC or Custom Labs
      • Overview – order fulfillment
      • Self-fulfillment
      • Setup print vendor
      • Print vendor price list
      • Add self fulfillment/image download items to print vendor price list
      • Understand WHCC lab fulfillment
      • Setup WHCC lab
      • WHCC price list
      • Add self fulfillment/image download items to WHCC price list
      • Order fulfillment – WHCC order
      • Order fulfillment – print vendor order
      • Sell images as packages
      • Order emails
    • Checkout
      • Checkout flow
      • Enable newsletter option
      • Set minimum order amount
      • Hide discount coupon box
      • Accept pre-orders
      • Take orders for free products
      • Customise order confirmation messages
      • Specify terms of use policy
      • Restrict checkout based on address
      • Send new order notifications to staff
      • Order status page
      • Conversion pixels and tracking
      • Google ads conversion tracking
      • Adding a Facebook pixel
    • Orders
      • Manage orders
      • Order fulfillment
      • Download order invoice
      • Update order payment and fulfillment status
      • Status history
      • Resend order confirmation email
      • Notify customers when you update order status
      • Export order filenames as CSV
      • Regenerate digital download links of an order
      • Review and approve orders
      • Process an offline order
      • Adjust printing crop area
      • Replace original files
      • Export orders
      • Export customers list
      • Abandoned carts
      • Cancel and refund a paid order
      • Connect a Google sheet & sync orders
    • Design
      • Product listing page
      • Category list page
      • Product detail page
      • Product labels
      • Using sidebar
      • Image buy button
      • Cart icon style
      • Add a banner
  • Client galleries – Share, proof, sell and deliver your work to clients.
    • Overview – Learn how to use Client Galleries to streamline your workflow and earn more revenue.
      • Getting started with client galleries
      • Client galleries FAQ’s
      • Manage client galleries on Pixpa
      • Album list page
      • Image tools, user guides, and email templates
      • Album pages
      • Master login page
    • Albums – Create public or private Albums to share your work with clients.
      • Album overview
      • Add album
      • Add gallery to album
      • Share album
      • View album
      • Delete album
      • Album design and layout
      • Album cover image
      • Album banner
      • Enable filtering by tags
      • Move galleries between albums
      • Add an album to your website navigation
      • Client galleries activity
      • Using commenting in albums
      • Download original images
    • Album settings – Manage album settings like favoriting, downloads and ecommerce in albums
      • Manage album settings
      • Album presets
      • Manage Album Design
      • Manage privacy options
      • Manage favorites and commenting
      • Compare images
      • Download settings
      • Ecommerce settings
      • Announcement bar
    • Album activity – Track the login, favorites, download and ecommerce activity of your album
      • Album activity overview
      • Favorites & comments activity
      • Downloads activity
      • Ecommerce activity
      • Login activity
    • Sell images – Sell images as prints and downloads
      • Sell images using client galleries
      • Settings
      • Customize order confirmation message
      • Connect a Google sheet & sync orders
      • Specify terms of use policy
      • Supported payment gateways
      • Connect Stripe
      • Connect Paypal
      • Use Razorpay
      • Connect PayUmoney
      • Enable or disable offline payments
      • Manage orders
      • Update order payment and fulfillment status
      • Regenerate digital download order link
      • Export customer list
      • Create discount coupons
      • Manage taxes
      • Cancel and refund a paid order
      • Abandoned carts
    • Client galleries fulfillment – client gallery order fulfillment – Self Fulfillment, Custom Lab, WHCC, Digital Download
      • Overview – order fulfillment
      • Price lists
      • Product categories
      • Apply price list to album
      • Self-fulfilment
      • Understand WHCC lab fulfilment
      • Setup WHCC lab
      • Create WHCC price List
      • WHCC order fulfilment
      • Setup print vendor for automatic fulfillment
      • Price list for print vendor
      • Print vendor order fulfillment
      • Adjust printing crop area for images in an order
      • Replace original files of images in an order
      • Review and approve orders for fulfilment
      • Order success page
      • Resend order confirmation email
      • Export orders
    • Shipping
      • Understanding shipping
      • Select the best suitable shipping options
      • Set shipping for store pickup
      • Flat rate shipping
      • Free shipping
      • Shipping based on order weight
      • Shipping based on order total
      • Shipping based on number of items
      • Set shipping for store pickup
      • Migrate from old shipping to new shipping
  • Blogs – Add and manage blogs in your website. Get blogging.
    • Blog overview
    • Create a blog
    • Blog post overview
    • How to use the Pixpa text editor?
    • Set up your blog
    • Schedule a blog post
    • Profiles
    • Blog listing page design
    • Blog post page design
    • Set up a sidebar on a blog
    • Show a banner on your blog
    • Add a banner to a blog post
    • Add media to your blog post
    • Blog categories
    • All Posts page – blog
    • Blog comments
    • Enable Disqus comments
    • Blog RSS feed
    • Can I add multiple blogs in my website?
  • Marketing tools – Tools to market your business and increase your website traffic
    • Marketing popups – overview
    • Create/edit marketing popups
    • Quick action bar
    • The announcement bar
    • Add WhatsApp widget to website
  • Gallery apps – Create personalised mobile gallery apps for your clients
    • What are gallery apps?
    • Add a gallery app
    • Add description to gallery app
    • Gallery app settings
    • Add contact form to gallery app
    • Add your info to a gallery app
    • Add a call to action button to mobile gallery app
    • Share gallery app with your clients
    • Install a gallery app
  • Contacts – Manage all website contacts in one place
    • Contacts overview
    • Add new contacts
    • View/update information of any contact
    • Search or filter your contacts
    • Export the contacts
    • Bulk actions
  • Settings – Manage your website settings
    • Website settings overview
    • Enable Website Search
    • Right-click protection
    • Transfer site ownership
    • Transfer site ownership – The recipient end
    • Contributors
    • Users and permissions – The user end
    • General settings
    • Site activity
    • The email notifications
    • Using Google analytics
    • Image quality
    • Import IPTC data
    • Enable Disqus comments
    • Sell images using Fotomoto
    • Inbox – form submissions
    • Email lists
    • Site domain name
    • Create URL redirects
    • External scripts
    • Watermark images
    • Recover deleted items
  • Account and billing – Your Pixpa account, profile and subscription information
    • Manage your Pixpa account
    • Change Pixpa domain name
    • Change account email address
    • Recovering account email address
    • Change password
    • Change owner information
    • Change business information
    • Localization – currency, unit of weight, timezone
    • Set your site language
    • Managing multiple websites
    • Logging into your Pixpa account
    • Forgot password
    • Upgrading to a paid subscription
    • Automatic subscription renewals
    • Change subscription plan
    • Checking your subscription details
    • Checking current resource usage
    • Cancelling website subscription
    • Update your credit card details
    • What happens if your subscription renewal is past due date?
    • Refund policy
    • Put your subscription on hold
    • Reactivate your website
    • Review and download subscription invoice
    • Discount on multiple websites
    • Students/educators discount
    • Refer a friend and get rewarded
    • Pixpa partner discounts
    • What happens to your active subscription if your credit card expires?
    • What payment types do you accept?
  • Connect domain name – Easily connect your custom domain name with your Pixpa website.
    • Connect custom domain name with your Pixpa website
    • Connect domain from GoDaddy
    • Connect domain from Google domains
    • Connect domain from Namecheap
    • Connect domain from Name.com
    • Connect domain from Bluehost
    • Connect domain from IONOS
    • Connect domain using Cloudflare
    • Connect domain from Squarespace domains
    • Issues with domain name forwarding
    • Using domain name based emails
    • Using Google Business Email with your domain name
  • Search Engine Optimization – SEO best practices and guides to improve your search rankings.
    • SEO guidelines for your website
    • SEO – Optimize your website for search engines
    • Add SEO metadata for your website, gallery and page
    • Hide website or pages from search engine results
    • My sitemap
    • Verify Pixpa domain ownership with Google Webmaster
    • Verify custom domain ownership with Google Webmaster
    • Verify domain ownership with Google Webmaster
    • Using Google analytics
    • How long will it take for me to be searchable on Google?
    • Improving web accessibility of your website on Pixpa
  • Integrations – Achieve more with your Pixpa website using these popular web services.
    • Add JotForm forms to your website
    • Add Simplybook booking widget to your website
    • Verify your website ownership on Pinterest
    • Adding a Facebook pixel to your Pixpa store
    • Google ads conversion tracking
    • Add Affiliatly to your website
    • Add ShareThis widget to your website
    • Add Square appointments to your website
    • Embed Issuu PDF file to your website
    • Add OpenTable restaurant reservations
    • Add Availability calendar widget to your website
    • Add Ticketleap widget to your website
    • Add Eventbrite widget to your website
    • Get embed code for videos
    • Add StatCounter to your website
    • Embed Facebook page and post
    • Add your social feed in custom page
    • Add PayPal donation/buy now button in your website
    • Use Feedburner for your Pixpa blog feeds
    • Use Feedly for your Pixpa blog feeds
    • Use Feedreader for your Pixpa blog feeds
    • Add a Shopify buy button
    • Add Spotify music albums
    • Embed Yumpu PDF file to your website
    • Add jrni.com calendar widget to your website
    • Add Setmore – appointment button to your website
    • Add GetSiteControl widget to your website
    • Add Sumo apps to your website
    • Add Hello Bar to your website
    • Add MailChimp subscriber pop-up to your website
    • Add Mailerlite newsletter pop-up to your website
    • Add Soundcloud file to your website
    • Add Vimeo video to your website
    • Add Muut comment widget to your website
    • Add SentryLogin to your website
    • Add Tawk.to widget to your website
    • Add Olark widget to your website
    • Add Chatra widget to your website
    • Add Snapwidget Instagram widget to your website
    • Add Google calendar to your website
    • Add a cookie consent bar to your website

Logo Section

It is a dedicated section where you can display a set of logos and relevant text by adding items to the list.

Ideally, you can use this section in your website’s pre-footer to display your affiliates, brands, awards and recognitions, etc.

In this article:

  • Add Logo Section
  • Manage Logo Section
  • Add & Edit List Items
  • Sequencing List Items
  • Manage Layout
  • Style Logo Section

Add Logo Section

  • To add a section, you need to add a page to your website first.
  • On your page, click on the blue + icon to add a new section.

  • You will now see the section categories on the left side.
  • Scroll to Logo (1) section and click on it. A screen will pop up allowing you to choose from different layouts (2) of the Logo Section.

  • Choose any section layout and click on it to add it to your page.

Manage Logo Section

Once you have added the section:

  • Click on the Manage Logo (1) button to open the Logo Section (2) Settings.


Add & Edit List Items

Add a List Item

  • Click on the Add Item (1) button to add a new item to the list.
  • Duplicate or Delete (2) the list items.


Edit List Item

Click on the list item that you want to edit. It will open that particular List item’s editing options. From here you can:

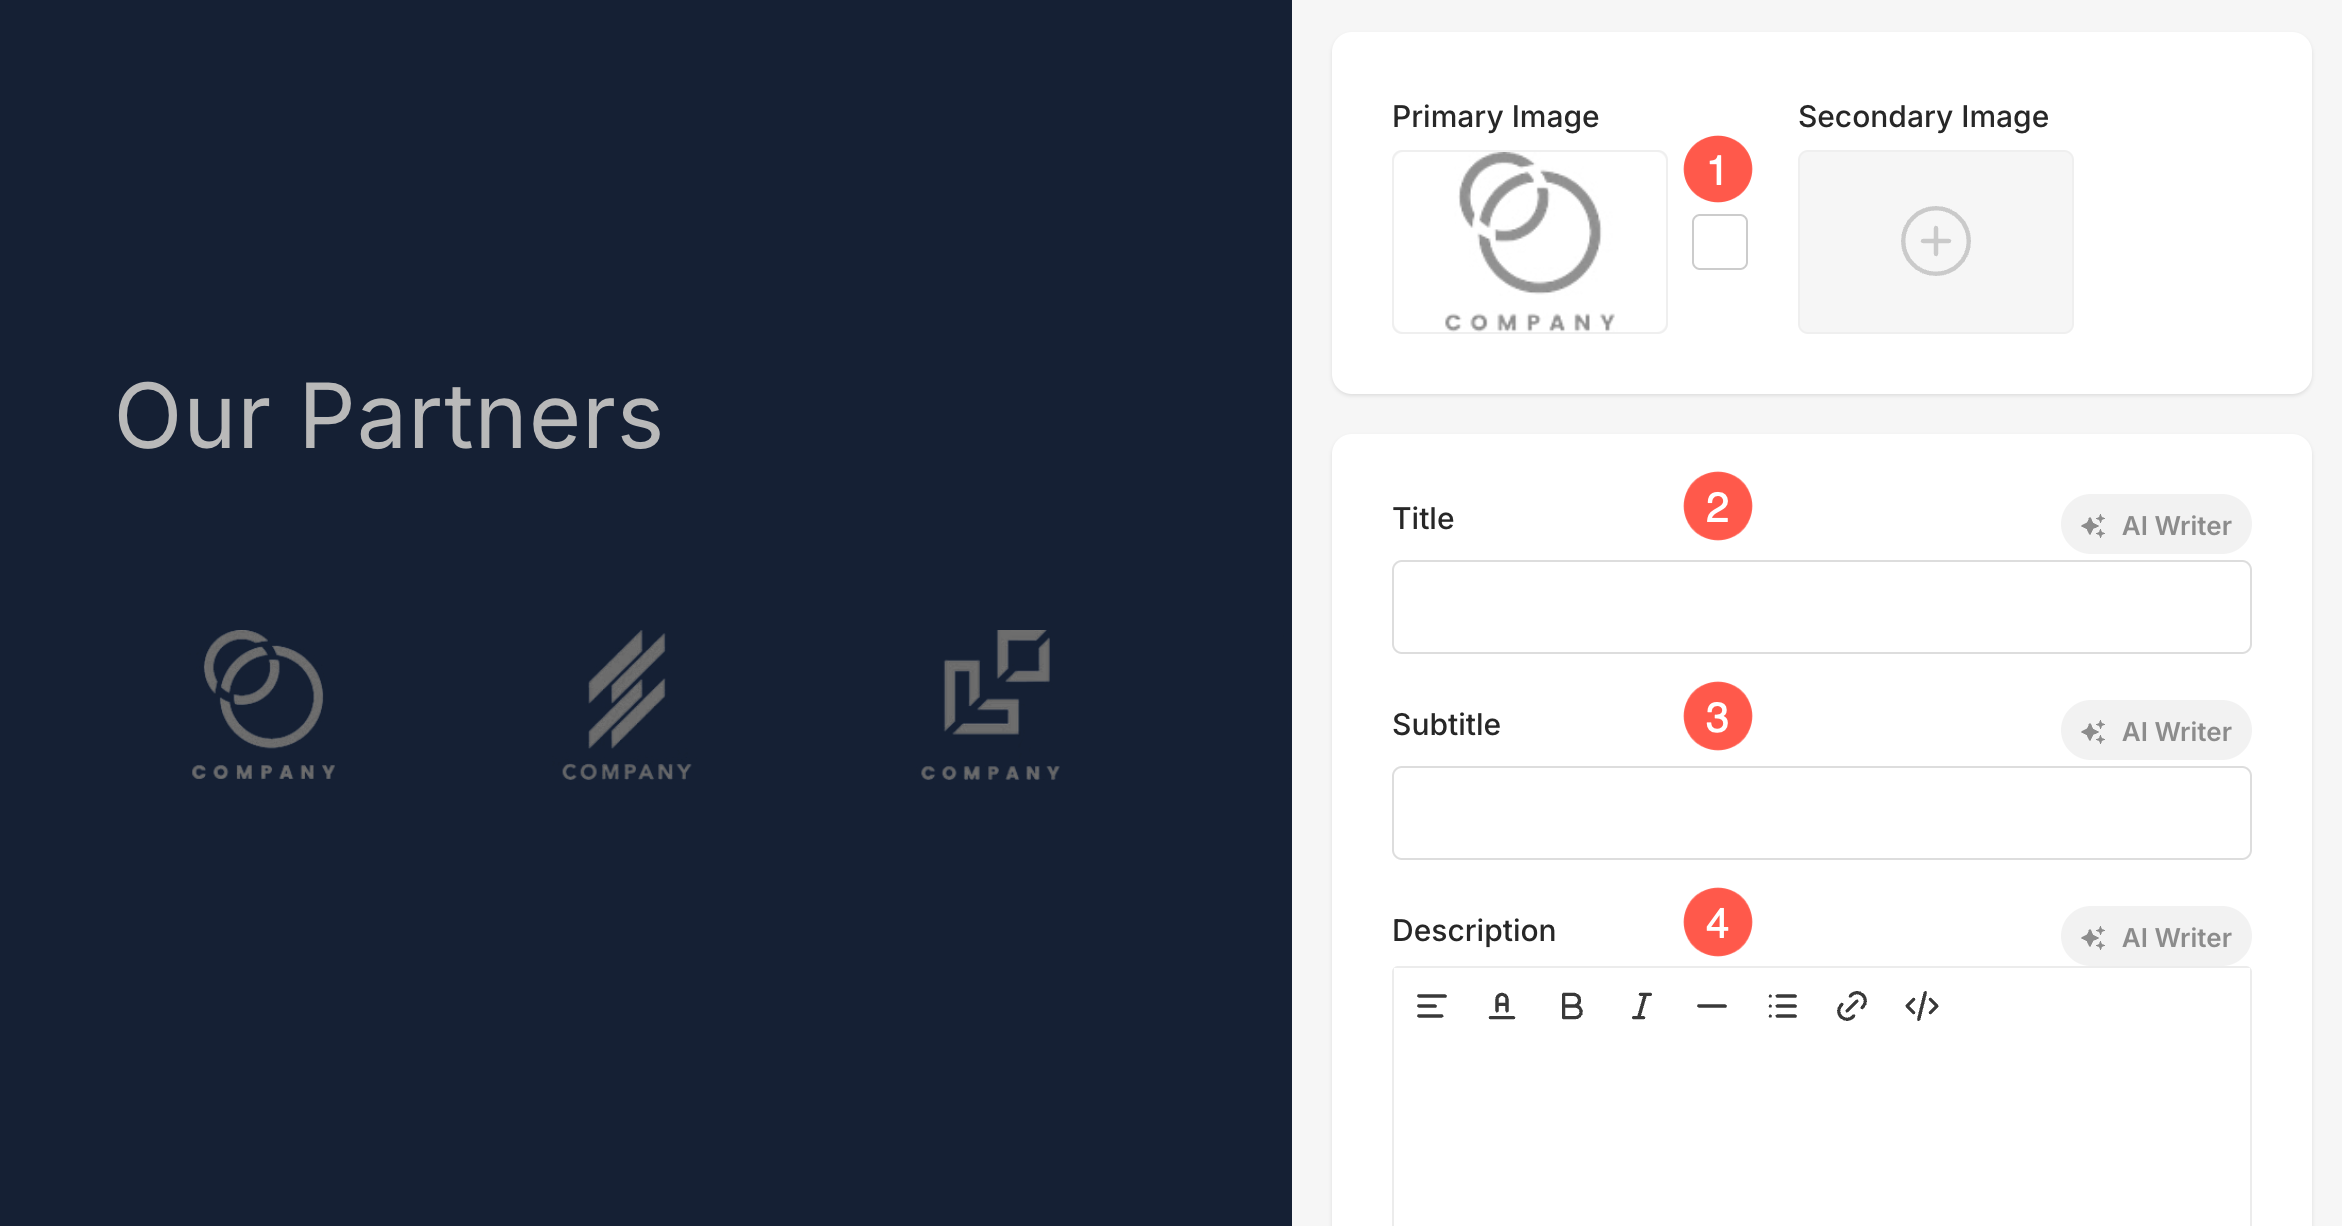
  • Upload or Delete (1) the image. You can also edit the Accent Color which will be visible while hovering cursor over the image.
  • Add a Title (2), Subtitle (3), and Description (4) of the list item.

Note

Before adding the description, check this article.

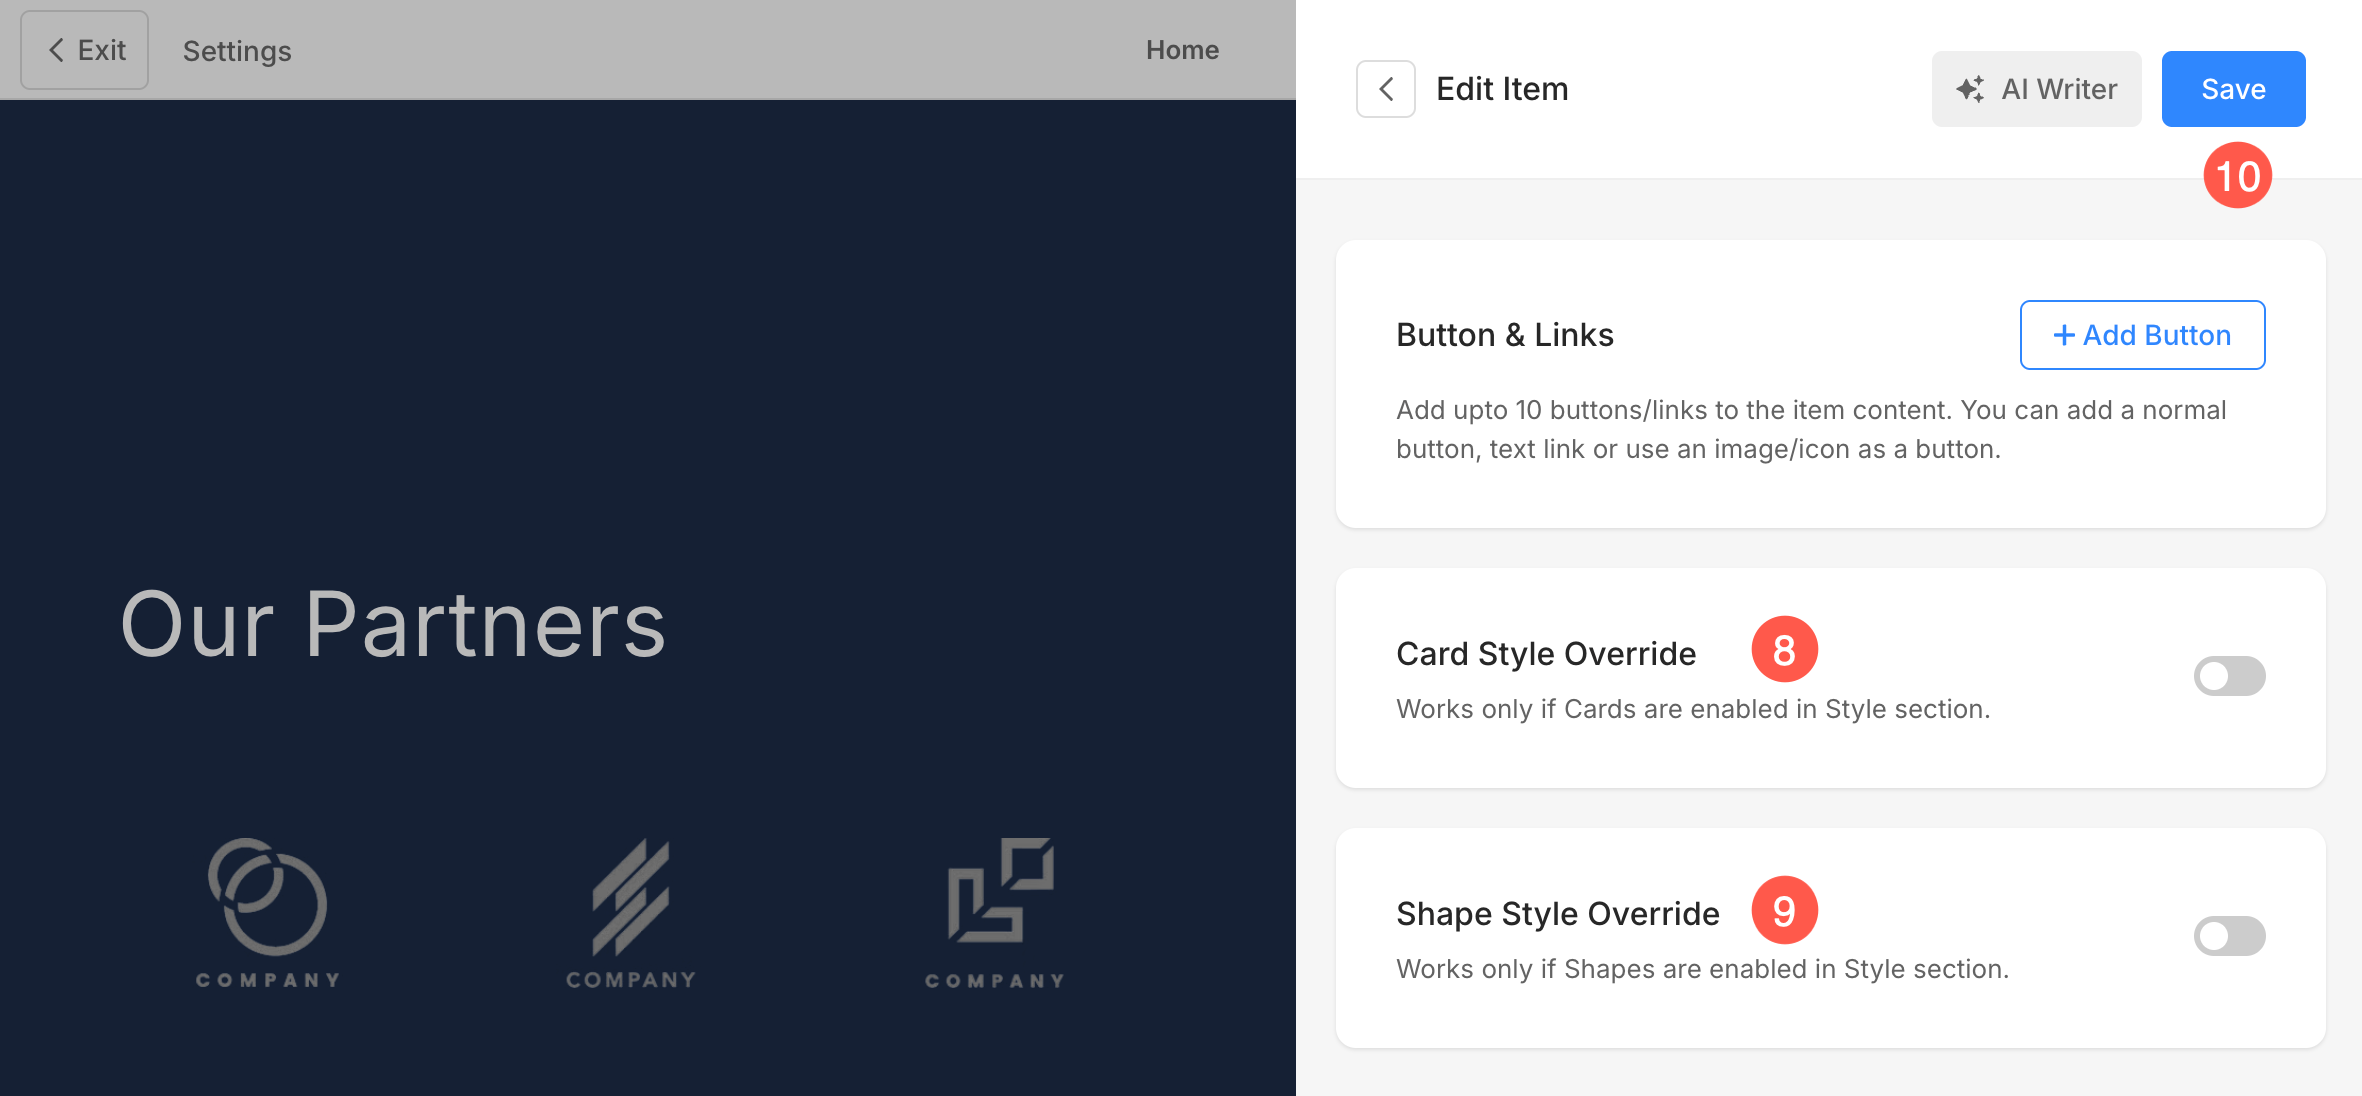
  • Link a List Item’s Title by clicking on the toggle (5). Click here to know more.
  • Set the Link to open in a New Tab or in the Same Tab (6).
  • Add other Links (7) to the list item. You can add a Button/Text Link/Image link/Social Icon. Learn more.
  • Save (8) your changes.


Sequencing List Items

You can easily change the sequence of the List Items by Dragging and Dropping them. See sequencing the Logo Items List in action: 

https://help.pixpa.com/wp-content/uploads/2023/07/Sequencing-list-item.mp4

Manage Layout

  • Click on the Edit Logo button to open the section editing panel.
  • Choose the Layout tab.
  • From here, you can easily change the layout of the section even after adding it to the page.

While changing the layout, you will see the section-related layouts on the top.

Apart from these, you also have the option to choose a layout from other sections under the More Layouts heading.


Style Logo Section

You can customize different aspects of the Logo section using various styling options. To navigate to the Styling options, click on the Manage Logo (1) button, and choose the Style (2) tab.


Items Styling options

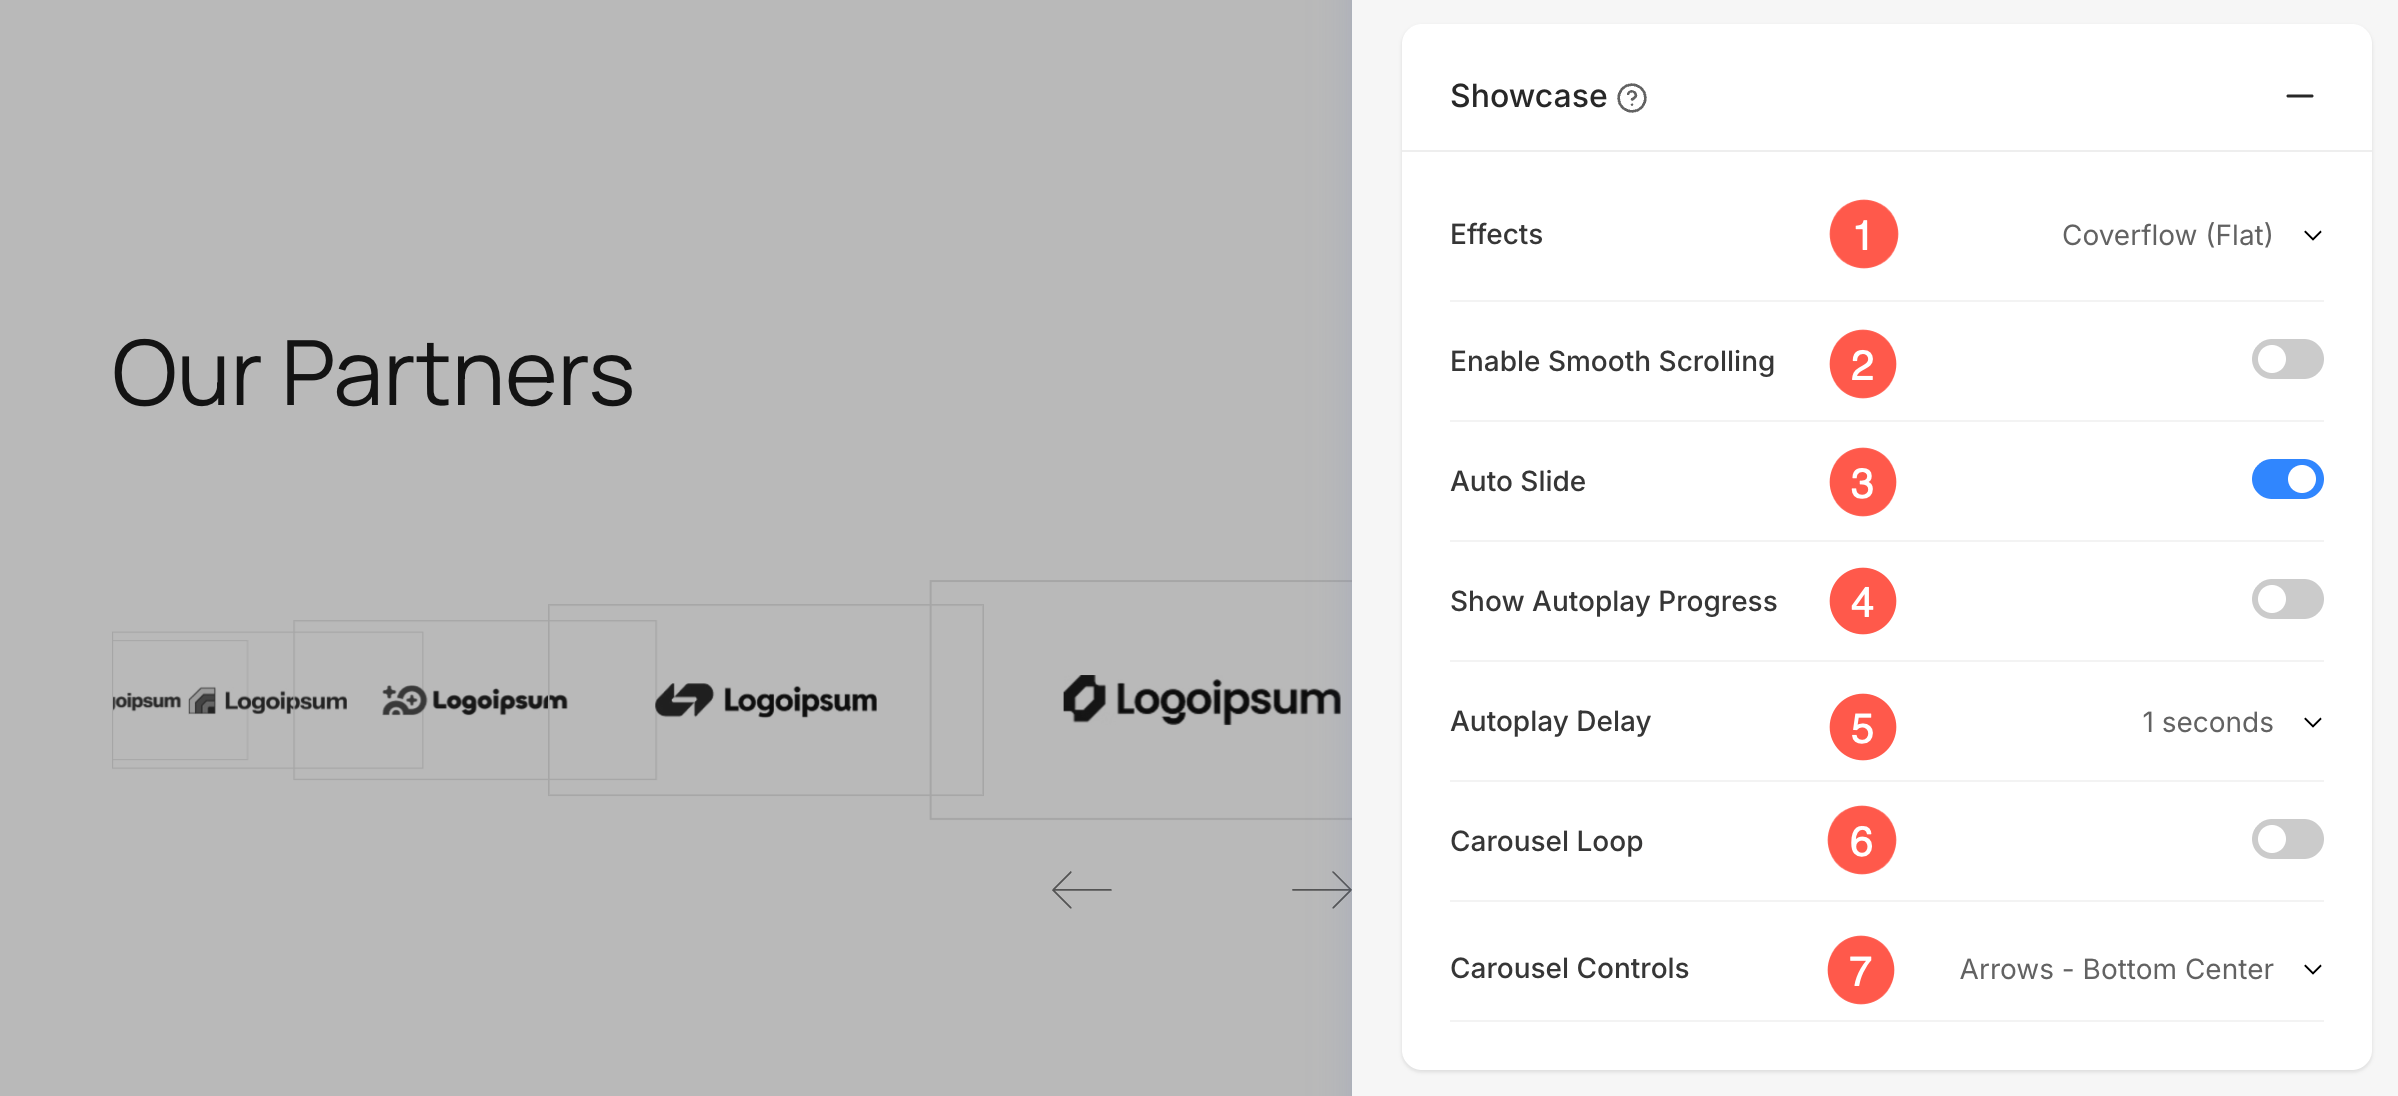
  • Display the items in Rows and Columns or in Carousel mode (1).
  • Set the Number of Columns (2). You can select up to a maximum of 10 columns.
  • Specify the Space Between Columns (3) of the list items. This value is defined in Pixels.
  • Specify the Space Between Rows (4) of the list items. This option will not be visible if the Carousel mode is active. This value is defined in Pixels.
  • Choose the Content Order (5) i.e., the images of the list items to be displayed first or the associated text.

  • Manage the Content Alignment within the section Horizontally (6).
  • Manage the Content Alignment within the section Vertically (7).
  • Specify the Number of Columns on Mobile devices (8). You can select up to a maximum of 3 columns.
  • Manage the spacing between the items Vertically and Horizontally (9).


Image Styling options

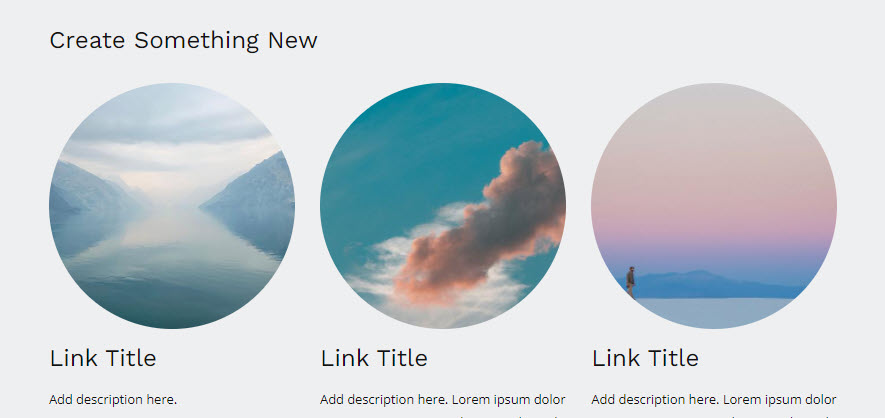
  • Choose the Image Crop (10) for the list items. You can set the images as Square, Circle, Landscape,  Portrait, and Original.
  • Using Corner Radius (11) the corners of the images can be managed for their sharpness. You can also choose to manage the corners Individually.
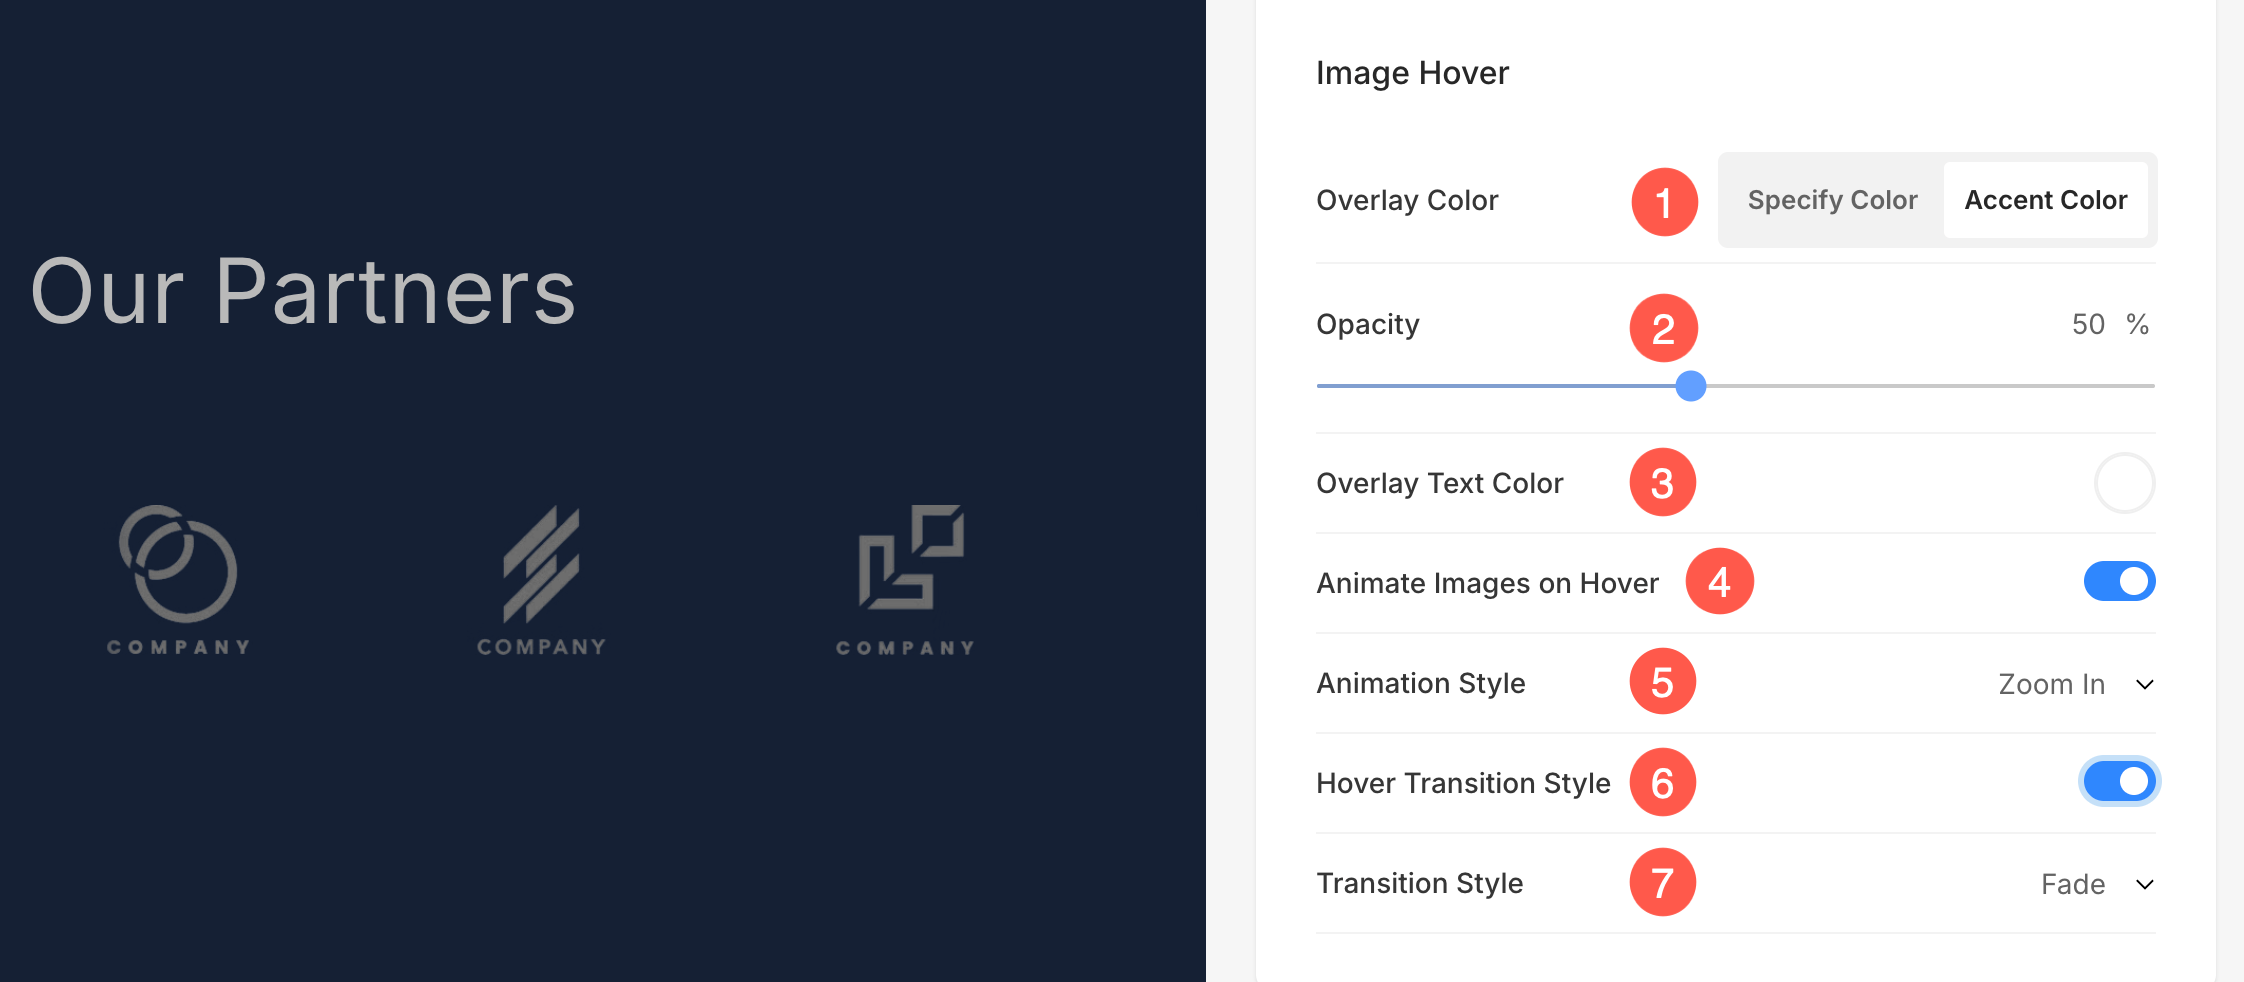
  • Choose the Image Hover Color (12) to be the accent color or to be specified. If you have chosen the accent color, then specify the opacity.
  • Choose the Base Color (13) and Opacity that you want while hovering over the images. This option will only be visible when Specify Color is selected.
  • Set the Elements Color (14) for the list items of the section.
  • Choose to Animate Images (15) while hovering. If enabled, you can also change the Animation Style (16).


Shape Mask

  1. Shape Mask: Enable this toggle to apply a shape mask to the images in the Logo section. Once enabled, the selected shape will visually clip the image into that form.
  2. Select Shape: Choose from various predefined shapes to apply to your images. This allows you to creatively stylize your content by displaying images in unique forms like rounded, diamond, drop, etc.
  3. Stretch: Enable this option to stretch the selected shape to better fit the image container. This ensures the shape fills the available space proportionally, enhancing visual alignment across different screen sizes.


Notes

  • The Stretch option is layout-dependent – It may not appear under certain layouts. On layouts where text like title or subtitle is displayed over the image, the entire Shape Mask option might not be available.
  • The Stretch setting depends on multiple factors – including image size, alignment, and crop settings defined under the Style tab.
  • If Image Crop is set to Original, the image’s actual dimensions will determine whether it gets stretched vertically or horizontally.


Size & Space and Text Style options

  • Specify the Image Width (17) for items’ images.
  • Specify the Content Width (18) for the List Items.
  • Specify the Space Below Section Headline (19) in Pixels.
  • Specify the Space Below Image (20) in Percent.
  • Specify the Space Below Title (21) of the List Items in Percent.
  • Specify the Space Below Subtitle (22) of the List Items in Percent.
  • Specify the Title (23) Font Style of the List Items.
  • Specify the Subtitle (24) Font Style of the List Items.
  • Specify the Description (25) Font Style of the List Items.


Cards and Shadow

  • See how to manage Cards (26).
  • Specify how to Display (27) the shadow.
  • Style (28) the shadow. There are several Presets and also you can Customize the shadow with Box Shadow Generator tool.
  • If the Presets option is selected, then Choose Shadow Styles (29) from the dropdown.


Buttons & Links

  • See how to manage the styling of Buttons & Links (30).


Related Articles

  • Types of Sections
  • Add a Pre-footer to your website
  • Add a Spacer/Divider between Sections
Tagged: add sectionadd section to pageaffiliatebrandlogologo sectionprefootersection

Can't find what you're looking for?

Get in touch with a Pixpa Expert.

Contact Us
© Copyright Pixpa
Contact Terms of Use Privacy Policy
Follow us on