A Profile / Author is a person who has written a blog. The author’s name is displayed at the top of the blog post so that the visitor is aware of the author. Using the author phenomenon for your blog helps your readers know about all the writers of your blog.
In most cases, you may not be the only writer for your blog. You can allow guest writers to write posts for your blog and you’ll also have an option of whether or not to show the name of the author on the blog post.
Pixpa allows you to add multiple author profiles to your blog.

In this article:
- Blog Authors – Owner profile
- Add a profile
- Edit profile
- Display the author’s name on the blog/blog post
Blog Authors
Owner profile
As you create a new blog post, your name appears as the default author. However, you can change it from the Contributors settings page.
Apart from specifying the blog author individually, you can specify a single author for all your blog posts using the bulk actions.

- Under the Settings page, click on Profiles (3) option in the left sidebar.
- Here, you will see the list of Profiles / Blog Authors.
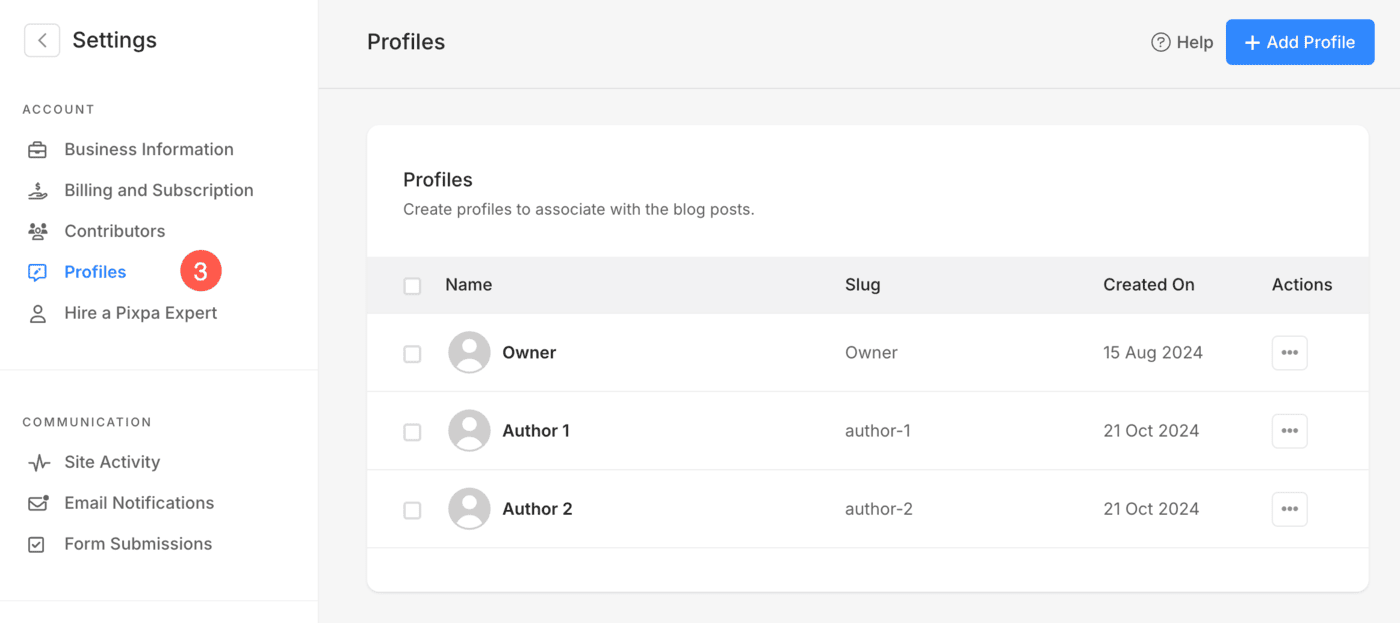
- The owner of the website will be the default author of the blog.
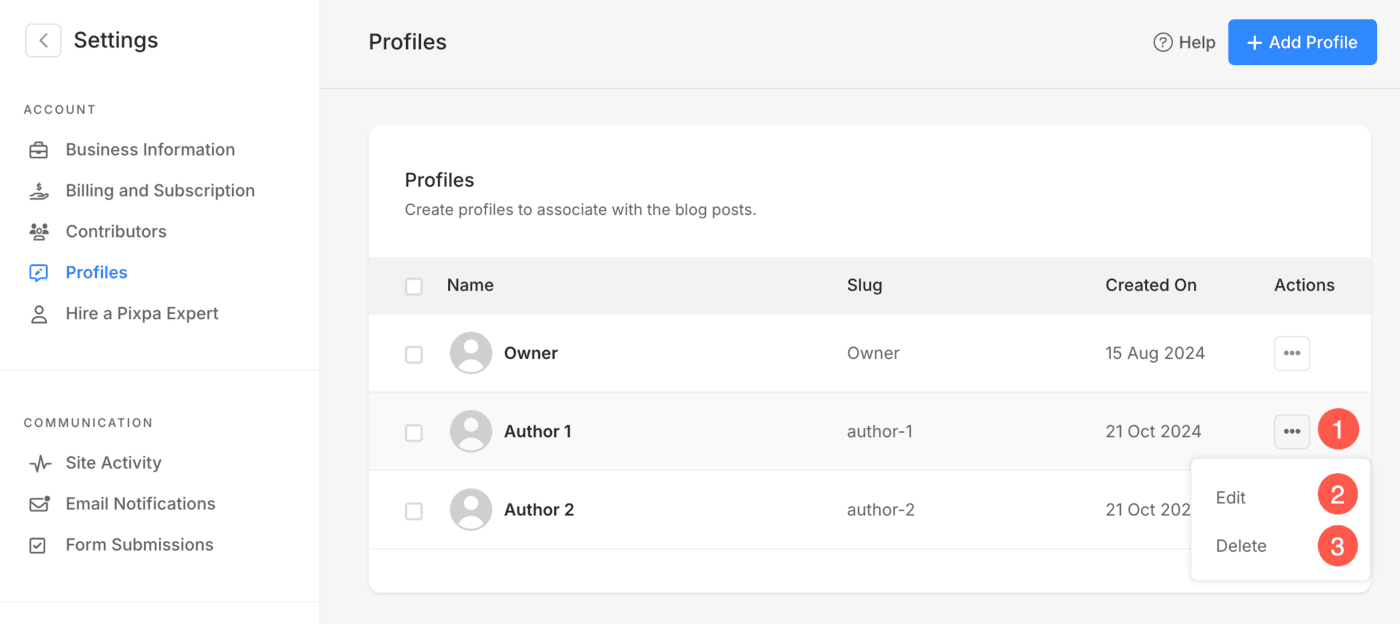
- To edit your Name and Slug, click on the three-dot icon (1) under Actions, and then click on the Edit (2) button.
- Click on Delete (3) option to remove the author.
- To change the owner’s name, visit the Business Information page.

Add a Profile
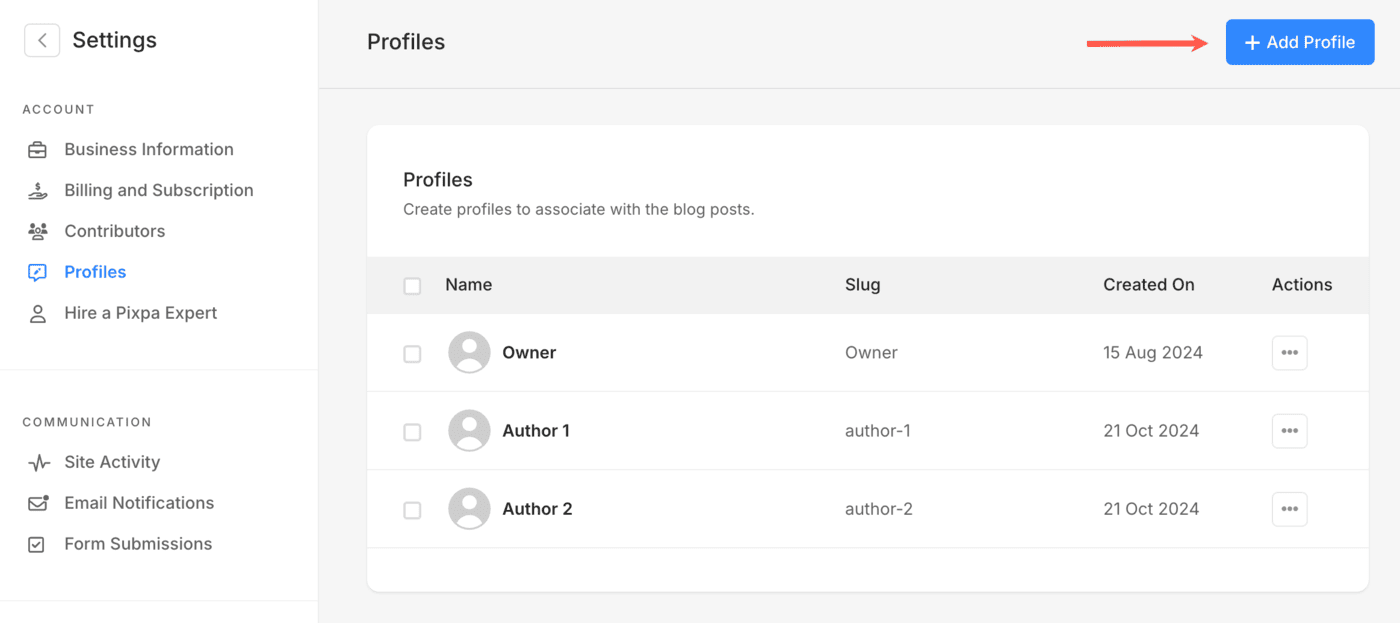
- To add an author to your blog, click on the + Add Profile button.
A new screen will open up where you can specify the following details:
- Upload Profile Image of the author.
- Enter First and Last Name of the author.
- Specify a Title/Role for the author.
- Specify the Slug of author.
- Enter Tags which are used to search and filter Profiles.
- Specify Bio of the author.
- Select Social Links to be displayed with the author’s profile.
- Save the details.
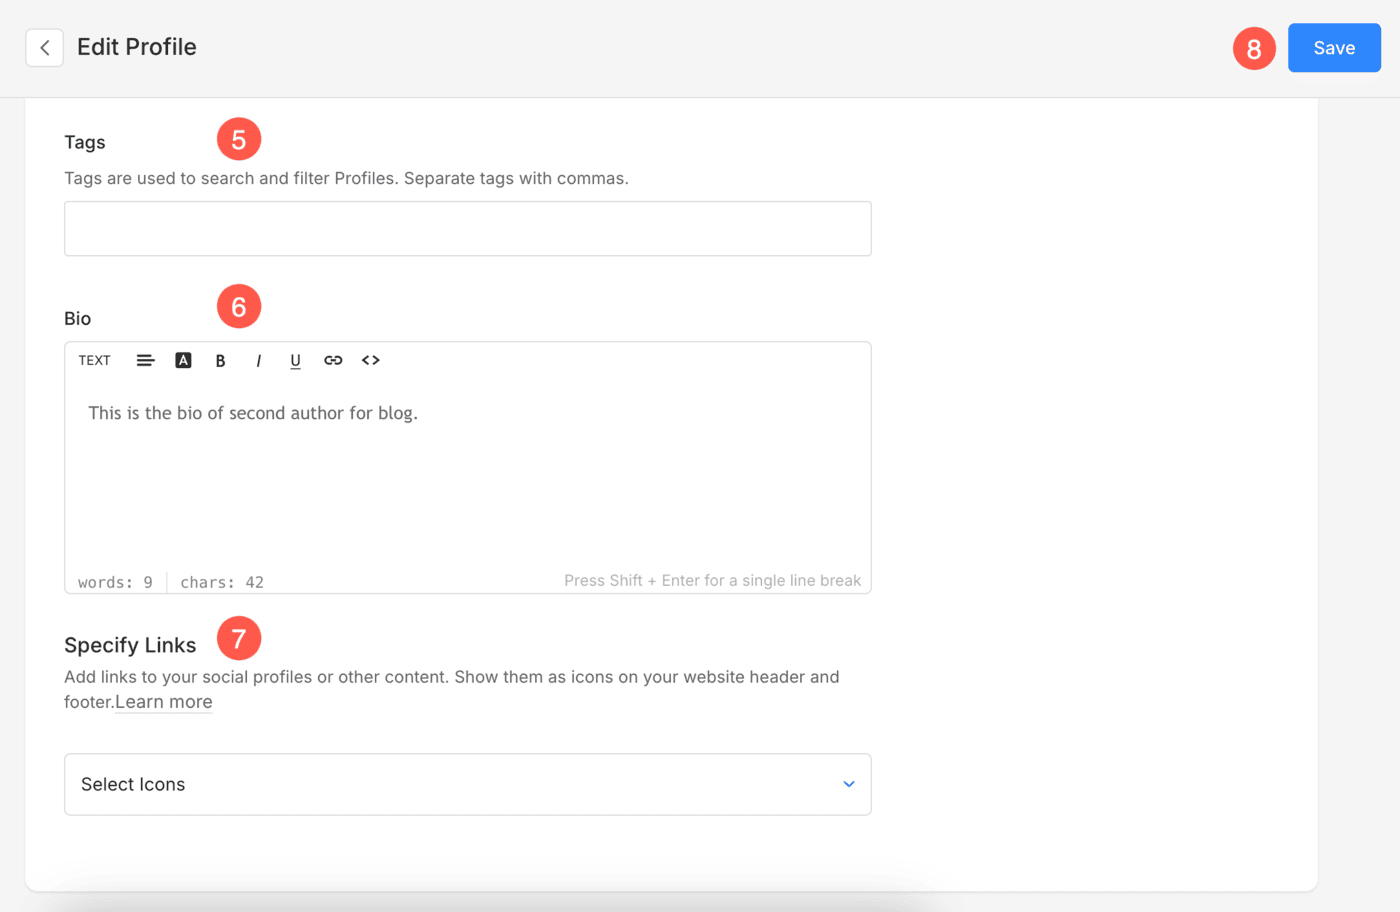
Edit Profile
- Click on the three-dot icon (1) under Actions, and then click on the Edit (2) button.

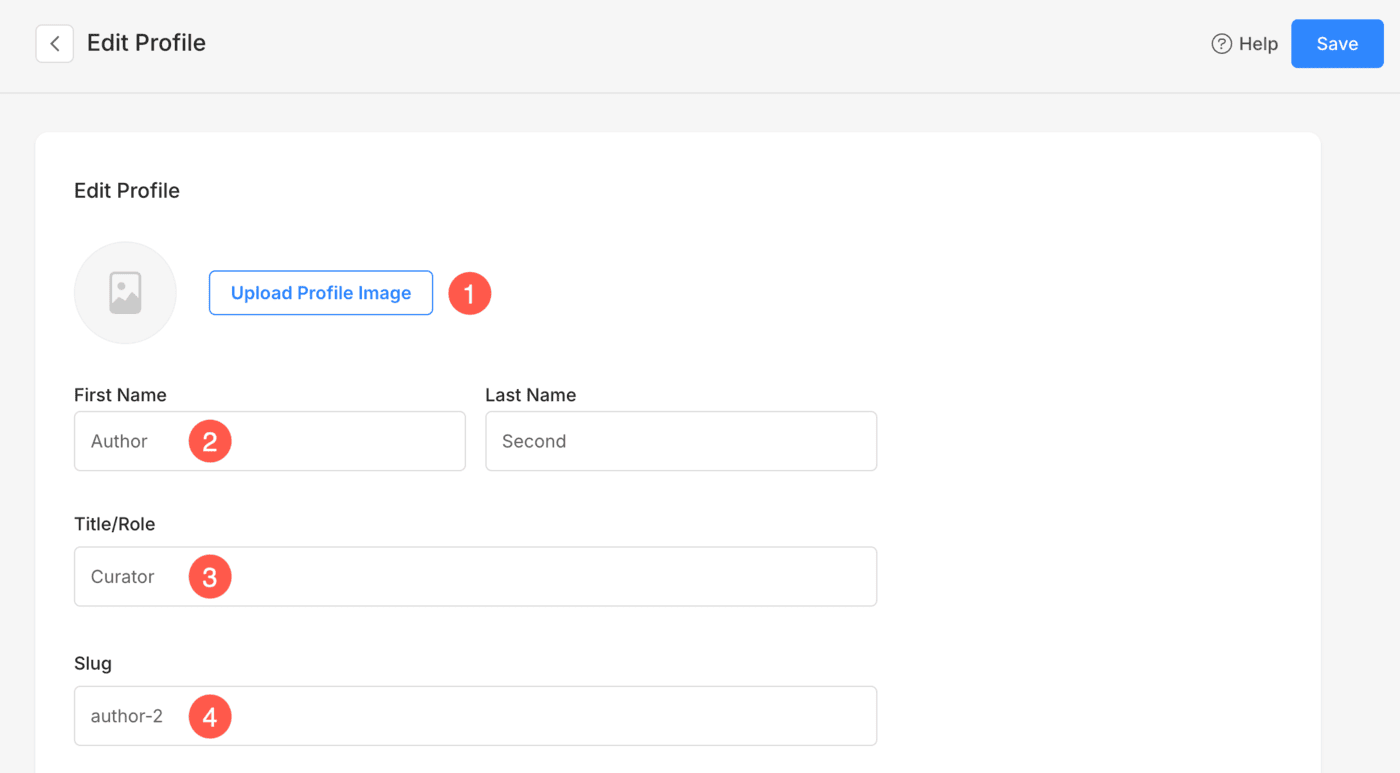
The editing screen will open from where you can edit the following details:
- Upload Profile Image of the author.
- Edit the First and Last Name of the author.
- Specify a Title/Role for the author.
- Edit the Slug of author.
- Enter Tags which are used to search and filter Profiles.
- Specify Bio of the author.
- Select Social Links to be displayed with the author’s profile.
- Save the details.
Display the author’s name on the blog/blog post
To show the author’s name on a blog post, follow the steps below:
- From the Blog Settings (1), click on the Design (2) tab.
- Then, click on the Blog Listing Page (3) tab and select Yes next to Show Author (4) to show the author’s name on the blog listing page.

- Click on the Blog Post Page (3) tab and again select Yes next to Show Author (4) to show the author’s name on the blog post page.
See: Blog Design. - Save (5) your changes.
