When building your website with Pixpa, one of the essential aspects to consider is the navigation menu, which plays a crucial role in how visitors interact with your site.
As you create these menu items, they will show up in your website navigation and will be used by the visitor to look into your website content. In this article, you will know about the types of menu items that can be added to your website.
In this article:
- Different types of menu items
- Add a menu item to your website
- Sequence site menu items
- Make changes to a menu item
- Further steps
Different types of menu items
Pixpa provides two primary types of menus: the Header Menu and the Footer Menu. Each menu type serves a different purpose and can be customized with various items to improve user experience and website functionality.
1. Header Menu
The Header Menu is typically located at the top of your Pixpa website and serves as the primary navigation tool for visitors. The Header Menu can be customized with various subcategories and items to suit your needs.
Subcategories under Header Menu:
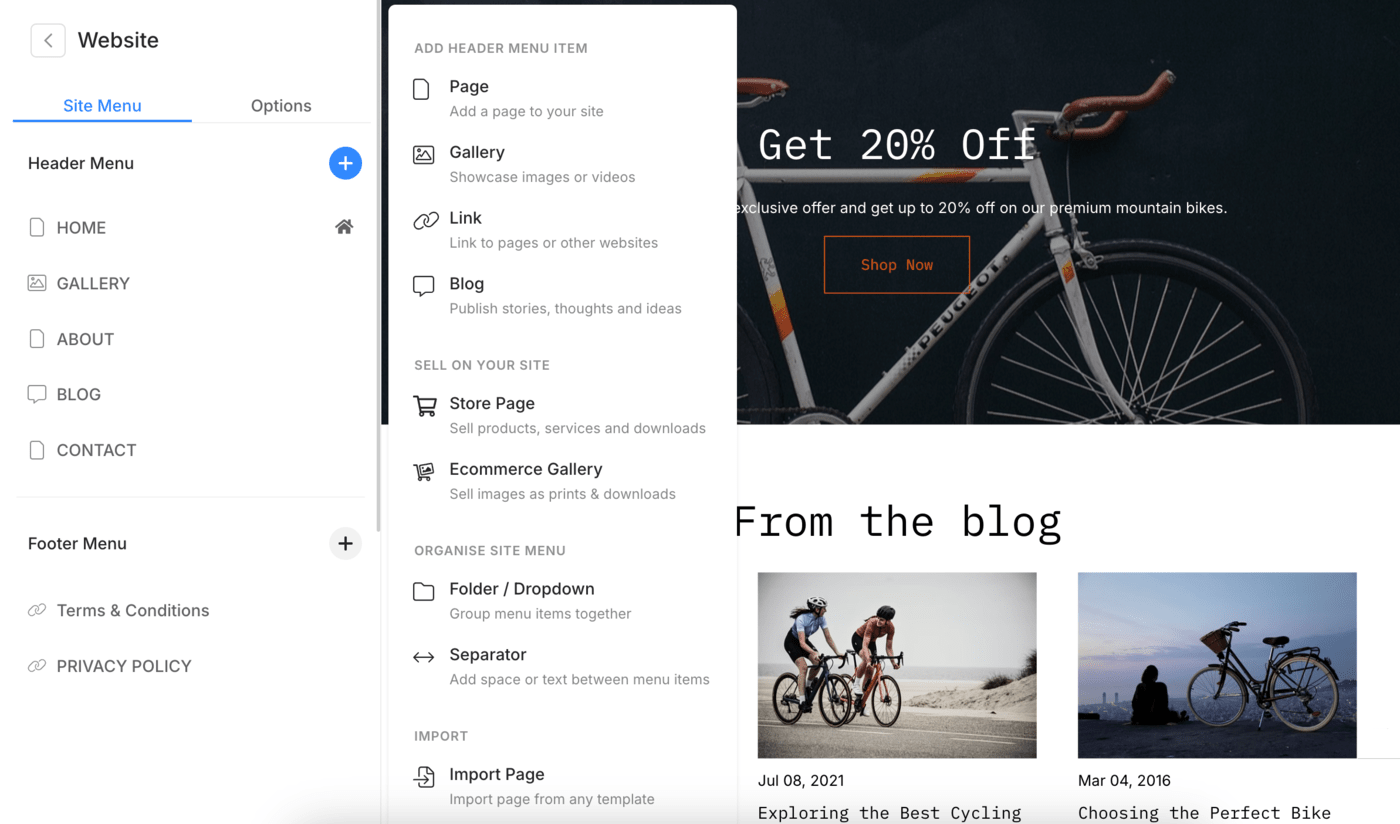
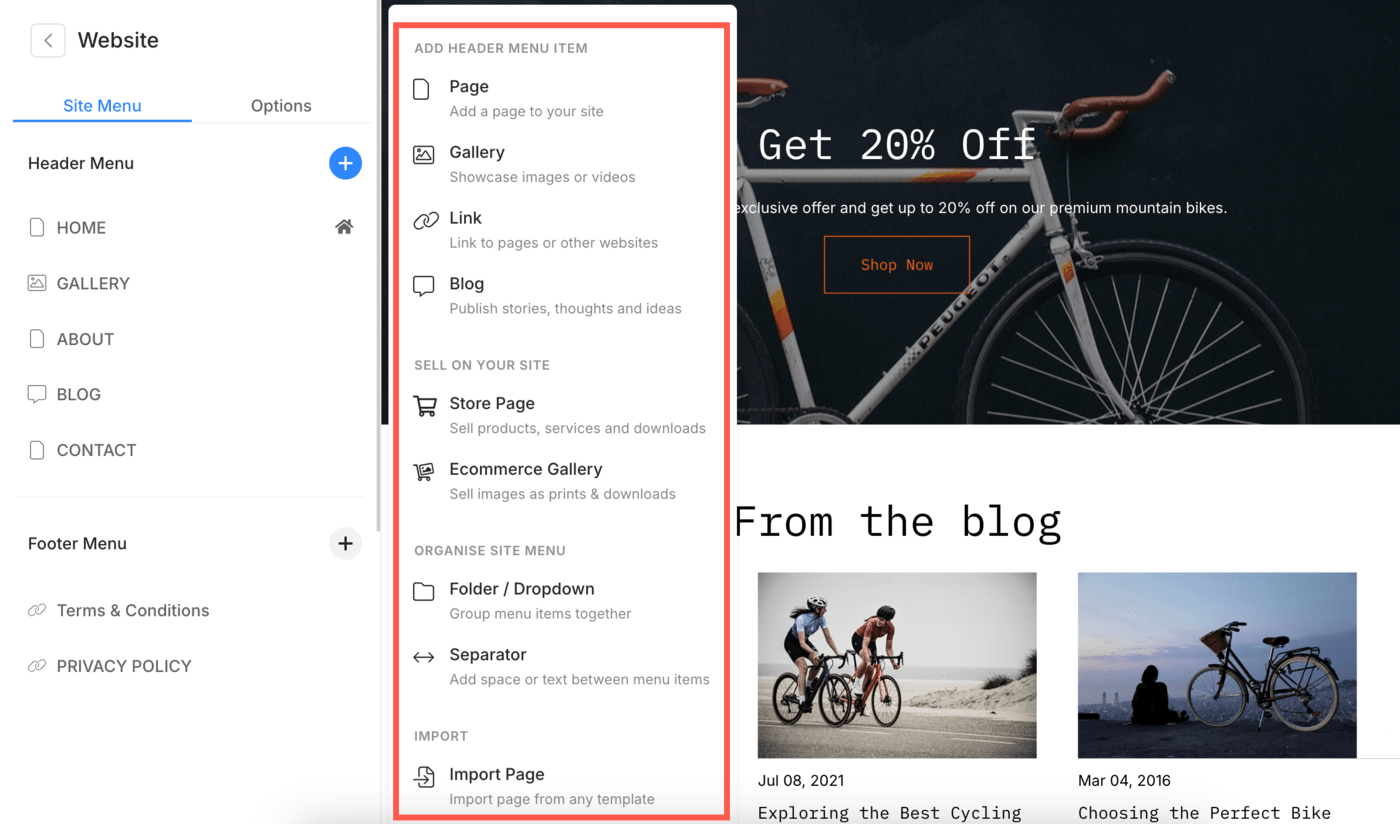
1.1 Essential Header Menu Items
- Page: This option allows you to add a new page to your header menu. Pages are static content areas that can include text, images, forms, and other elements. Examples include an “About Us” page, a “Services” page, or a “Contact” page. Click here to learn more about Pages.
Here’s a demo page. - Gallery: You can add a gallery to the header menu, which is perfect for showcasing portfolios, photography, or visual content on your site. Galleries are collections of images, videos, and Text/HTML slides. When you want to showcase your images or videos with minimal text content you can use a gallery. Know more.
Here’s a demo gallery. - Link: This item allows you to add external or internal links to your header menu. It’s useful for directing visitors to specific sections of your site, other websites, or external resources such as social media profiles. Know more.
- Blog: Adding a blog to your header menu is an excellent way to keep your audience engaged with regular content updates on your website. The blog can be used for news, articles, updates, or any other type of written content you wish to share. Know more.
Here’s a demo blog.
1.2 Sell on Your Site
- Store Page: This option allows you to add a store page to your website’s header menu, where you can list products or services for sale. It integrates seamlessly with your website, enabling you to manage and showcase your e-commerce offerings directly. Know more.
Here’s a demo Store page. - Ecommerce Gallery: These are a smarter choice for photographers and other visual artists who want to sell hundreds or even thousands of images as prints and downloads. Once you add these galleries to your website menu, photo buyers can seamlessly purchase your images each in varying print sizes/mediums/resolutions. Know more.
Here’s a demo Ecommerce Gallery.
1.3 Organize Site Menu
- Folder/Dropdown: Folders or dropdowns help you organize your header menu by grouping related items under a single menu item. This feature is particularly useful for websites with extensive content, allowing visitors to navigate easily without overwhelming the menu bar. A folder can contain multiple galleries and pages. Know more.
Here’s a demo folder. - Separator: Add a separator between your menu items. You can also use this to show a phrase in your website navigation. Know more.
Here’s a demo separator.
1.4 Import
- Import Page from Another Template: This feature allows you to import pages from another template into your current template. It’s beneficial if you’re combining content from multiple templates or if you want to bring in a specific layout or page design from a different template you’ve worked on within Pixpa.
2. Footer Menu
The Footer Menu is located at the bottom of your website and typically contains links to less prominent but still important pages. These may include legal pages like Terms of Service and Privacy Policy, contact information, and links to social media profiles. Items that you can add under footer menu are:
- Page: You can add links to important pages such as “Contact Us,” “Privacy Policy,” “Terms of Service,” and other relevant pages that visitors might need to access from the footer. Click here to learn more about Pages.
Here’s a demo page. - Link: This option allows you to add custom links to external websites, resources, or internal sections of your Pixpa site, providing additional navigation options. Know more.
- Separator: Add a separator between your menu items. You can also use this to show a phrase in your website navigation. Know more.
Here’s a demo separator.
By organizing your footer menu with these options, you can ensure that visitors can easily access important information and resources at the bottom of your website.
Add a menu item to your website
You can add menu items in two different types:
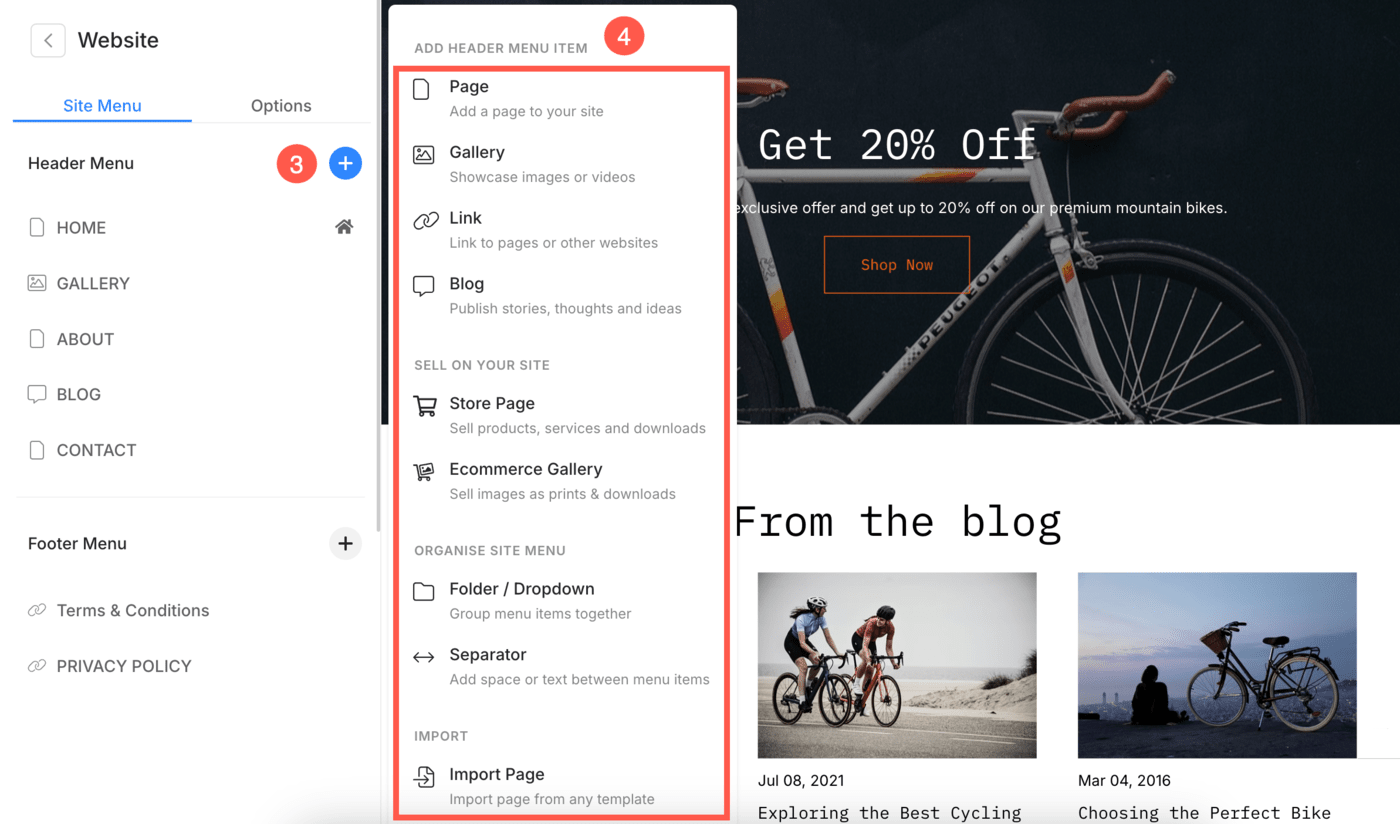
Add Menu Items to Header menu
- From the Dashboard (1) of the studio, click on the Website (2) section.

- Here, you will see a + Plus (3) icon next to the Header Menu heading.
- Clicking on it will open a Sidebar (4) from where you can add different menu items to your website’s header menu.
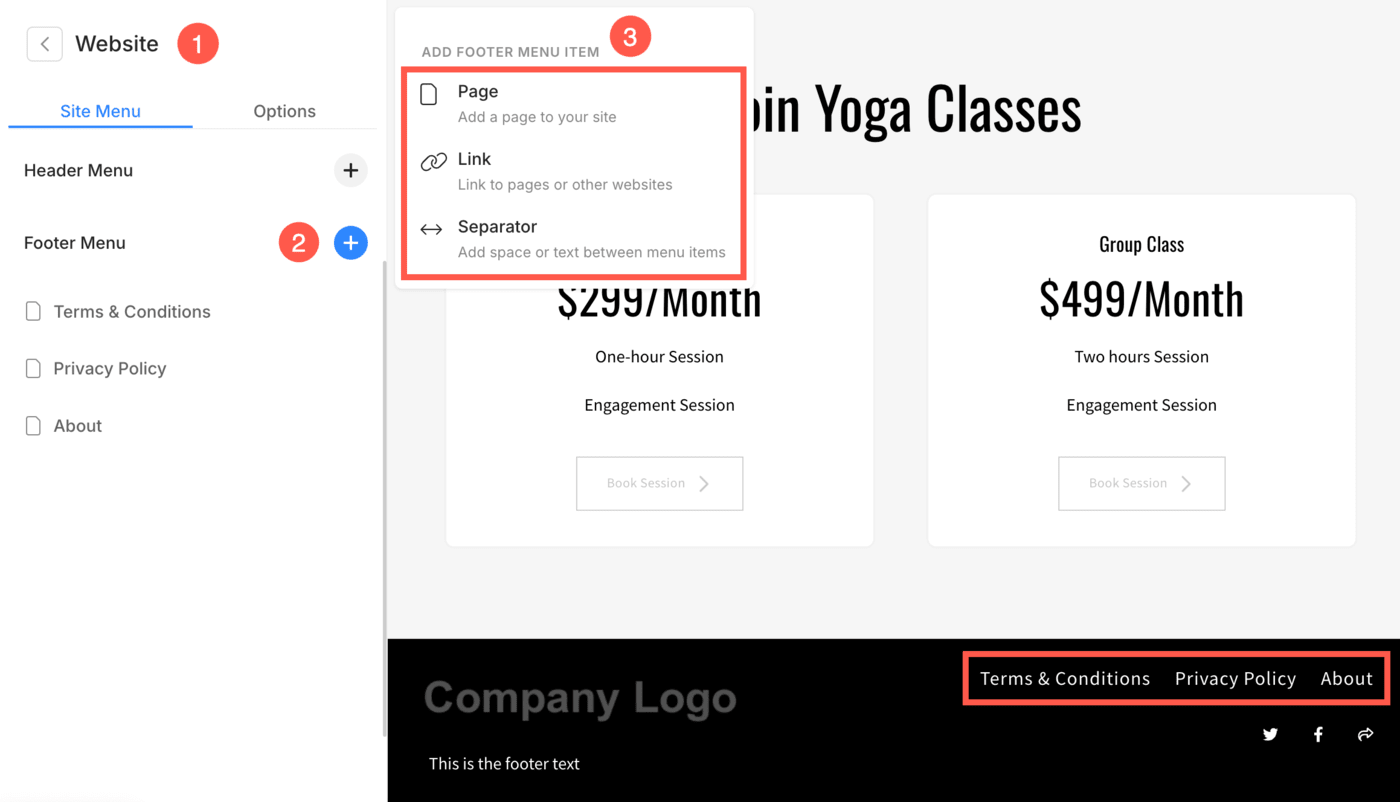
Add Menu Items to Footer menu
- From the Website (1) section, click on + Plus (2) icon next to the Footer Menu heading.
- You will see a Sidebar (3) from where you can add different menu items to your website’s footer menu.
Alternatively, you can use Pixpa’s search option to add menu items.
- Enter add page/gallery/link/blog (1) in the Search Bar. You will see the related results.
- Click on the respective option (2) under Actions.
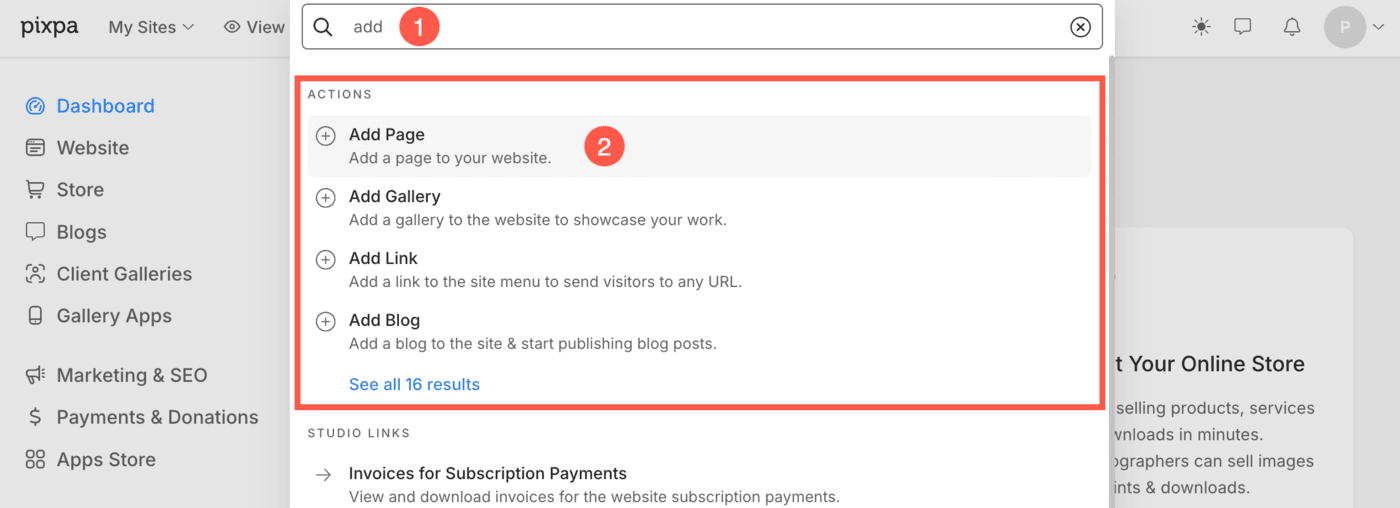
- This will open up a popup window that lets you choose different types of menu items for your website.
- You can click on any one option to proceed further.
Sequence site menu items
Sequencing the menu items in Pixpa is a breeze, thanks to its intuitive drag-and-drop functionality. The easy-to-use website builder allows you to organize your site’s navigation effortlessly, ensuring a smooth user experience.
- Under the Website (1) section, Click and hold (2) on the menu item you want to move. This will highlight the item and make it ready for dragging.
- Drag the menu item to the desired position within the menu list. Release the mouse button to drop the item to its new position.
Changes will be saved automatically.
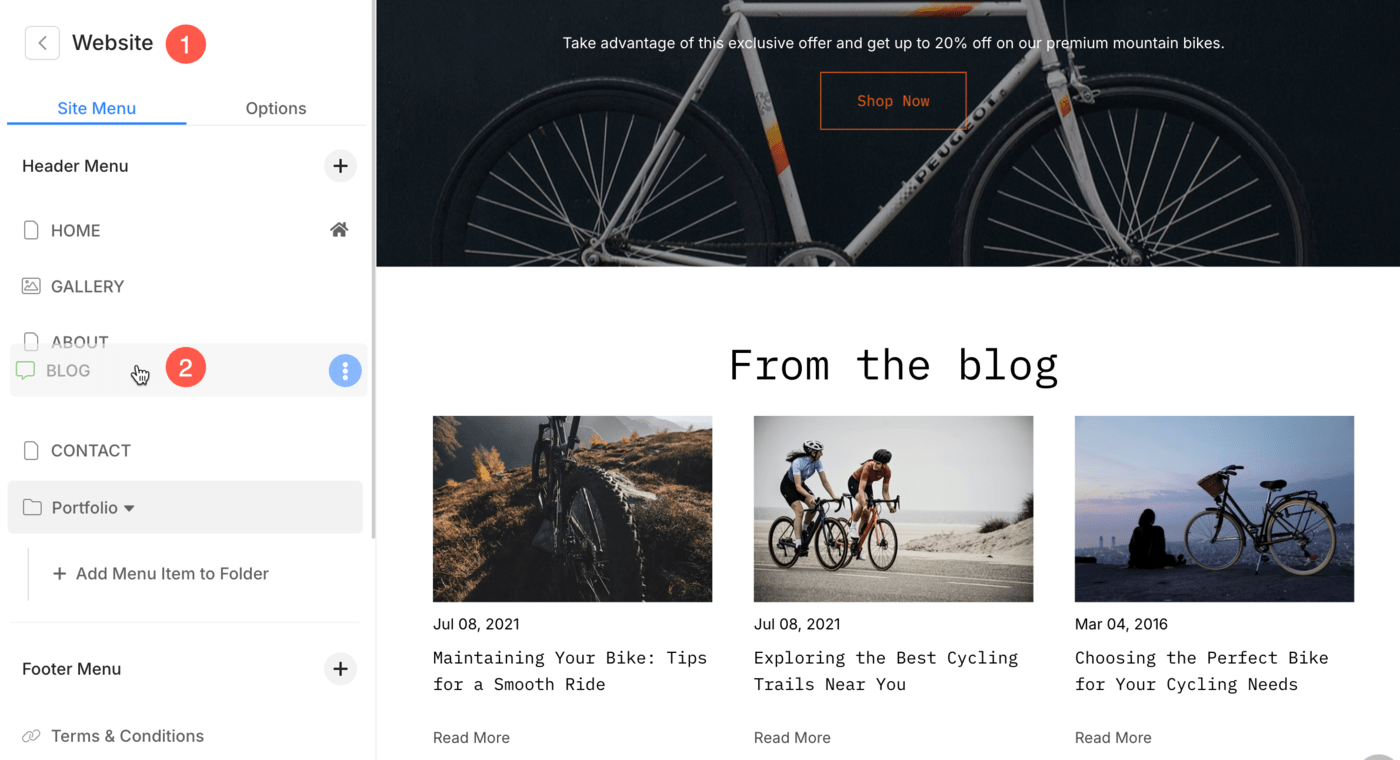
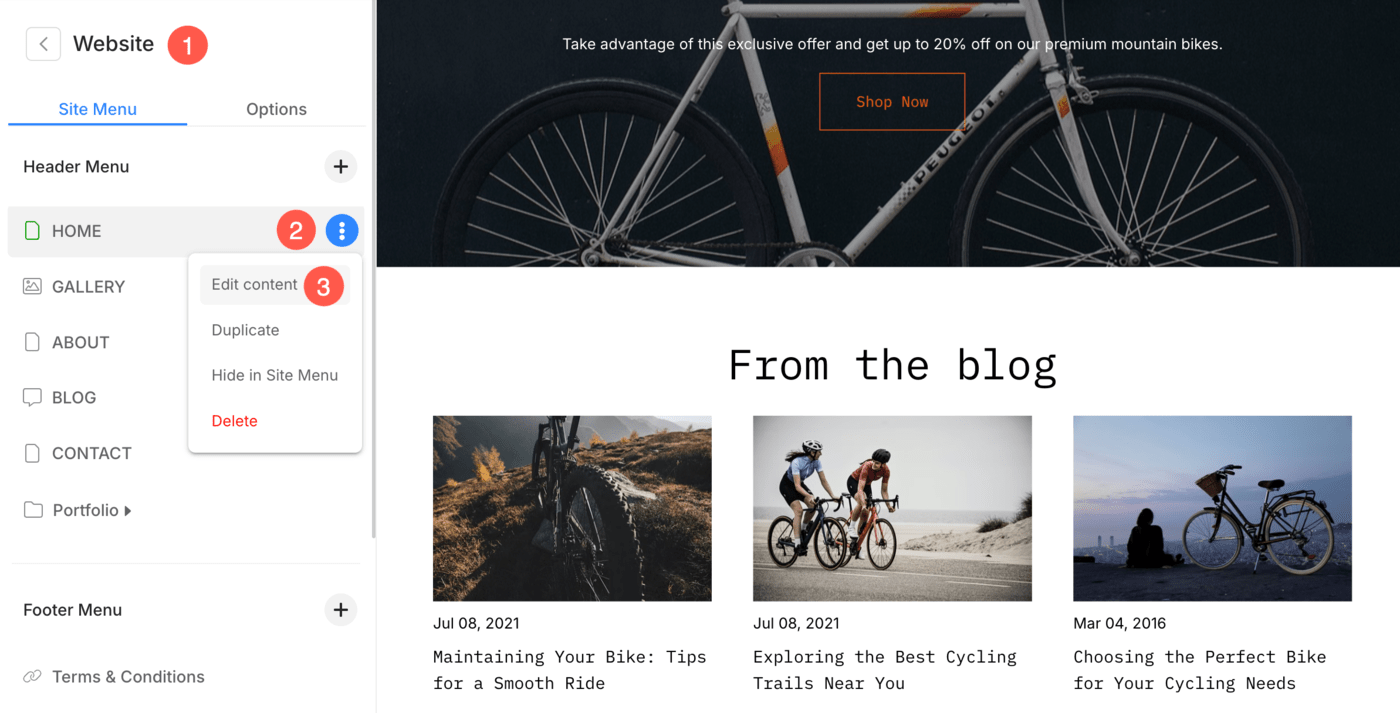
Make changes to a menu item
- Under the Website (1) section of the studio, you will see all the menu items that you have added to your website.
- Click on the Three Dots (2) icon next to the menu item that you want to edit.
- A popup will open up allowing you to Edit the Content (3) of the menu item.
Further steps
Once you have created these menu items, you can sequence/delete them, manage their settings, enable a banner, and style the header items.
- From the settings page, you can manage the title, SEO metadata, visibility, and a few other important particulars.
- To sequence your navigation links, you can drag and drop them from the Site Menu.
- You can delete your menu items from the Site Menu. In case you want to restore any menu item, you can do it within 30 days.
- Using a Banner adds character to your content whether it’s a gallery, page, folder, client album, or blog.Banners can be placed either top or bottom of your content (under the website header) and are typically used to show a full-width banner image/image slideshow/video.
- Specify the Header items’ color for each menu item of your website. For a page, you can set the header items’ color from the Settings. For all other menu items, you can visit the Banner Settings.
Check out some example websites that creative pros have built using these menu items.