Adding watermarks to your images is a crucial step in safeguarding your creative work and maintaining your brand identity. Watermarks not only protect your photos from unauthorized use but also serve as a suitable signature that can enhance your professional image.
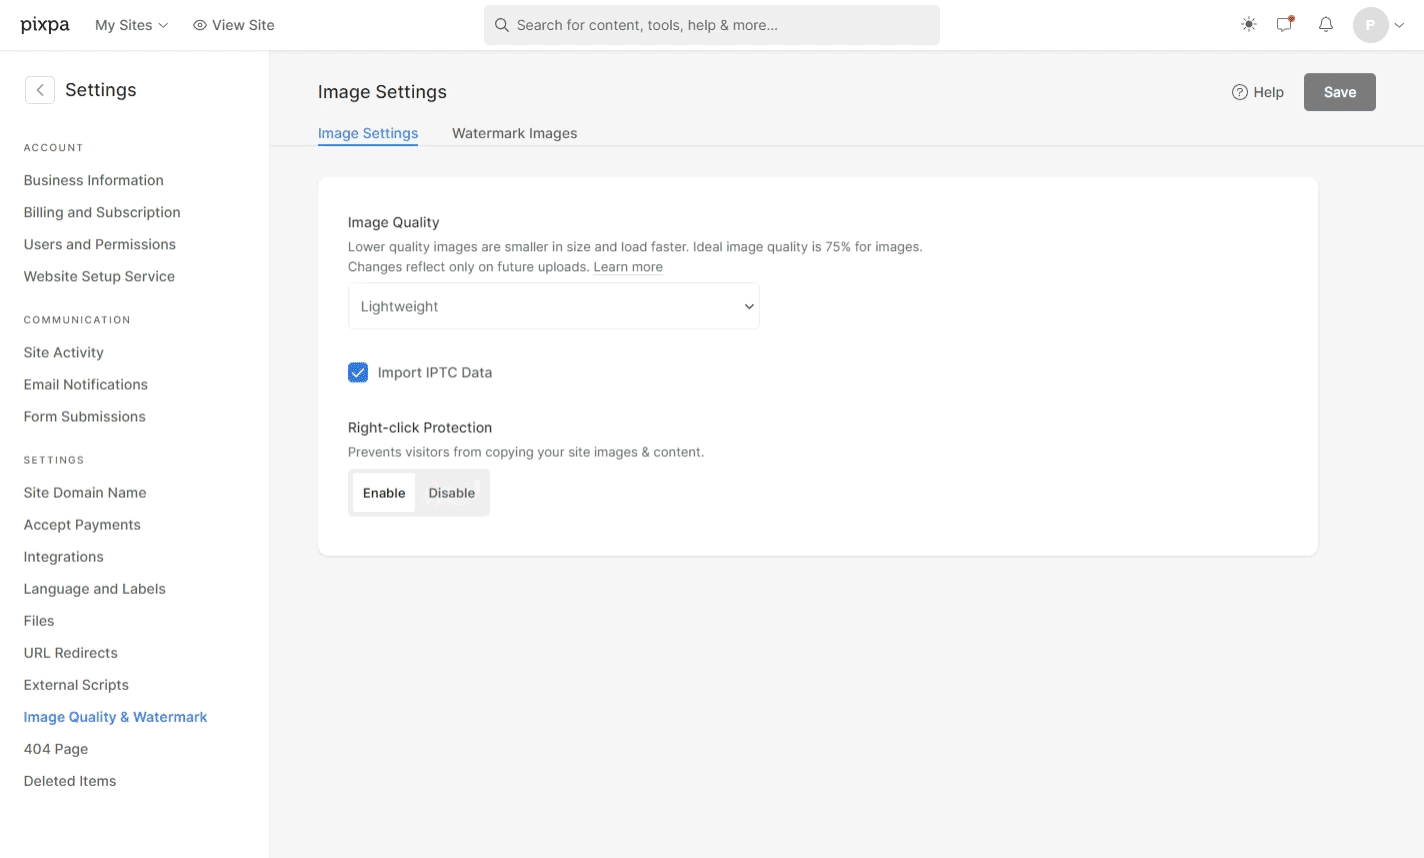
You don’t just add a watermark on images. Customize it to your liking.
Multiple watermarks: You can maintain a collection of multiple watermarks within your Pixpa account. You can choose between text-based and image-based watermarks.
Tiled watermark display: You can determine how you want the watermark to look on your images.
Flexibility in size, position, & transparency: Whether you choose a fixed position or tile, you can decide the transparency, size, and exact positioning of your watermark. Simply adjust the marker to the left or right. Opacity will help you decide how bold or transparent your watermark should be. Scale will help you decide how big or small your watermark should be. Offset will help you decide the exact positioning of your watermark.
Easy to apply: You don’t need to upload a fresh set of photos when trying to change the watermark. All you need is a click of a button to update the watermark on your entire gallery of images. Easy peasy!
In this article:
Add Watermark
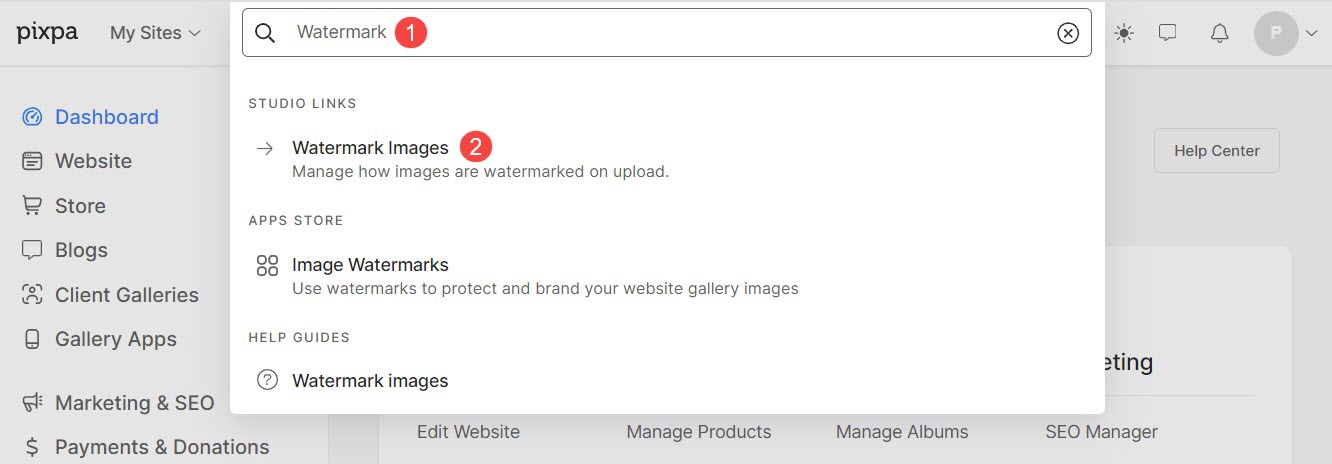
- Enter Watermark (1) in the Search Bar.
- From the related results, click on the Watermark Images option (2).
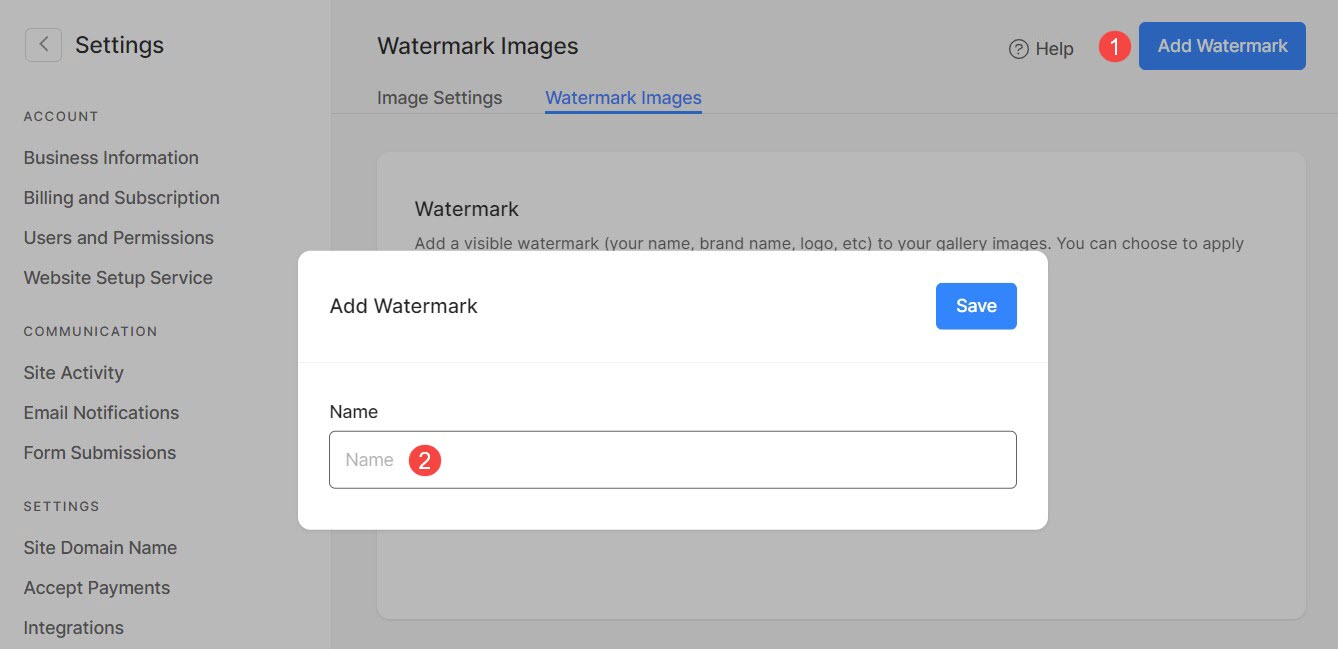
- You will now reach the Watermark Images page. Here, you will see a list of watermarks that have been added.
- To add a new watermark, click on Add Watermark (1) button.
- A popup will open. Enter the name (2) of watermark.
You can add two types of watermarks to your images.
Text Watermark
- Watermark Name: Specify a distinctive name that allows clear differentiation among various watermarks.
- Text: Add your watermark text here like brand name, your name, etc.
- Font Family: Choose the style of the watermark text.
- Font Color: Choose the color text of the watermark text.
- Opacity: Specify the opacity of watermark text.
- Scale: Specify the size of the watermark text.
- Offset: Set the position of watermark on images.
- Display: Set the watermark placement on images, allowing for both fixed positioning and tiling, which means repeating the watermark pattern across the image for a textured effect.
- Position: If you have chosen a Fixed watermark position, specify the location on the images where it will be placed.
- Save the changes.
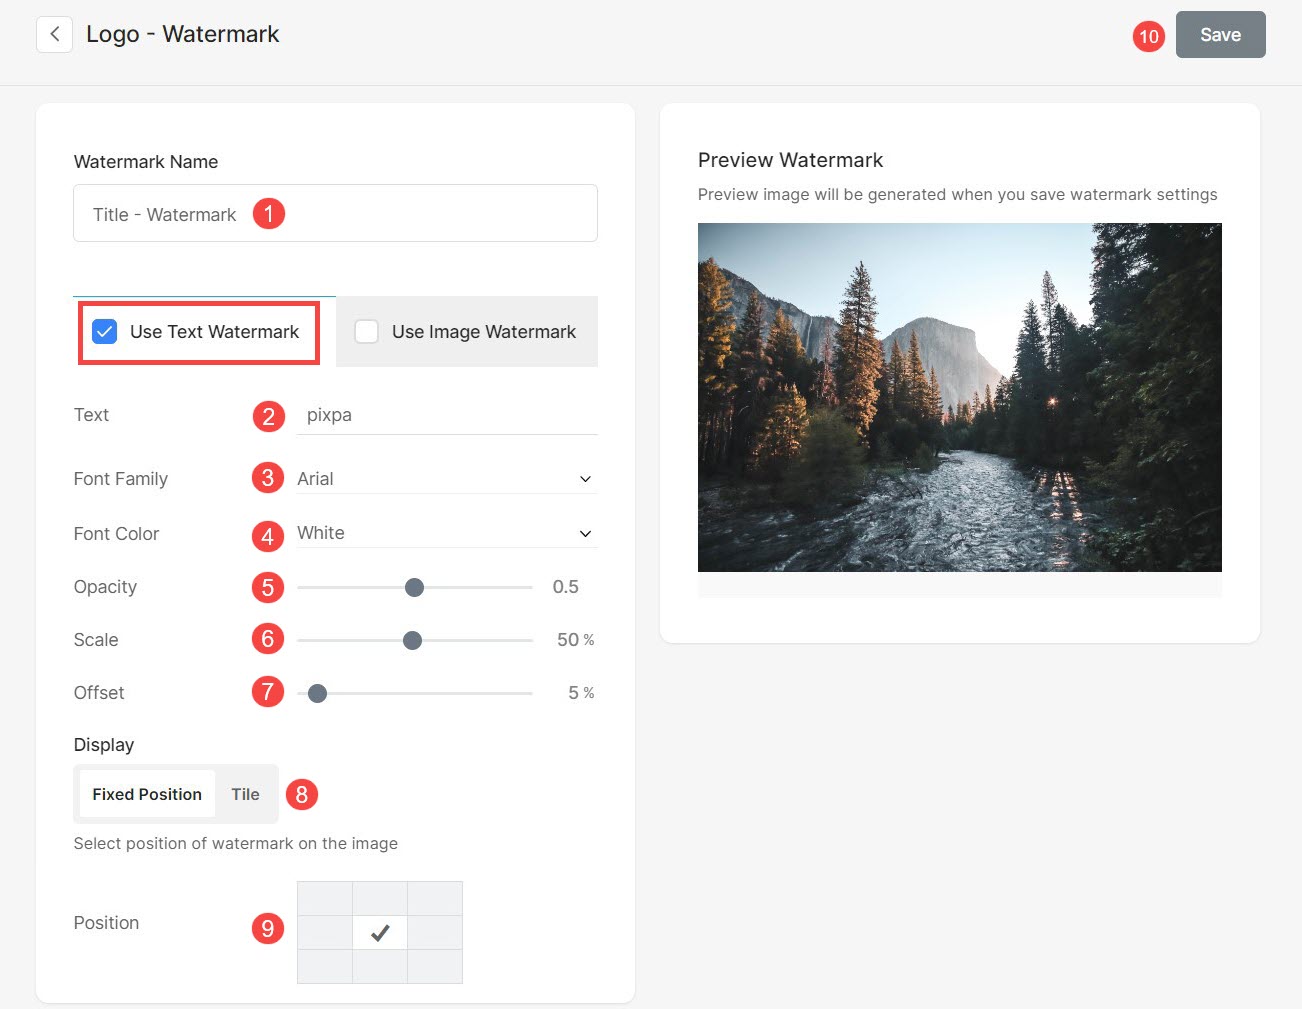
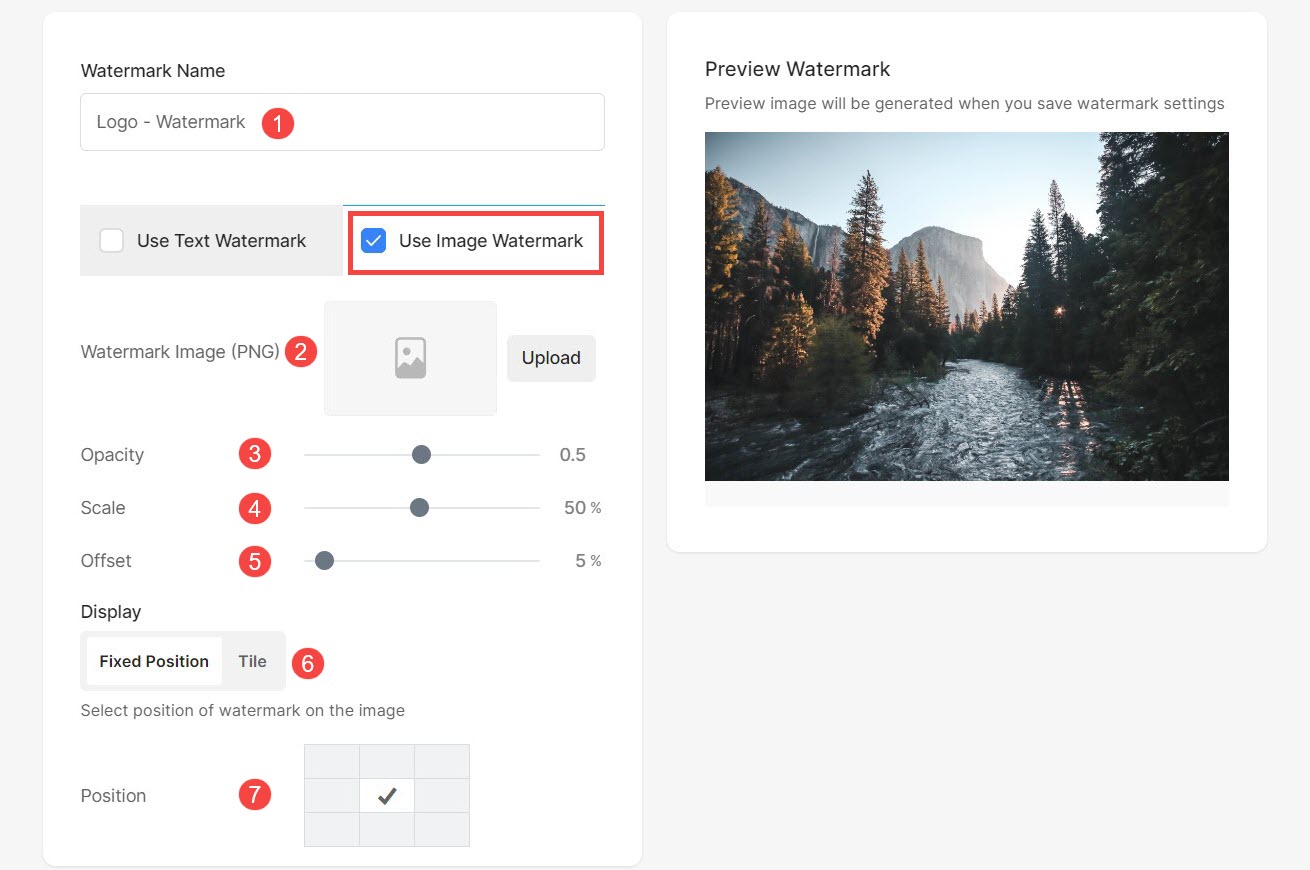
Image Watermark
Go to the Watermark section to add an image watermark.
- Watermark Name: Specify a distinctive name that allows clear differentiation among various watermarks.
- Watermark Image: Upload the image (in PNG format only) that you want to use as your watermark.
- Opacity: Specify the opacity of watermark image.
- Scale: Specify the size of the watermark image.
- Offset: Set the position of watermark on images.
- Display: Set the watermark placement on images, allowing for both fixed positioning and tiling, which means repeating the watermark pattern across the image for a textured effect.
- Position: If you have chosen a Fixed watermark position, specify the location on the images where it will be placed.
Apply Watermark
Watermarks can be applied to images in Website Galleries (Normal galleries and Page galleries), Client Galleries, E-Commerce Galleries, Store Products, Blog Galleries, and Gallery apps.
Normal Gallery
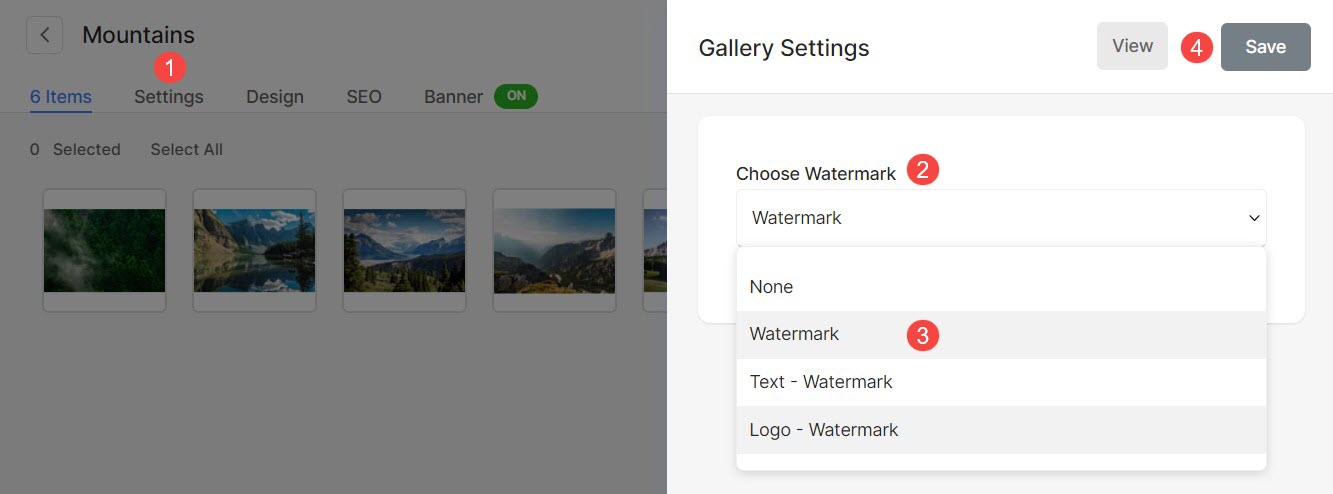
- Navigate to the gallery and click on Settings (1) button.
- From Gallery settings, click on Choose Watermark (2) option and select the preferred watermark (3).
- Select None if you don’t want to apply watermark to images in that particular gallery.
- Save (4) the changes.
Watermark on Page Gallery
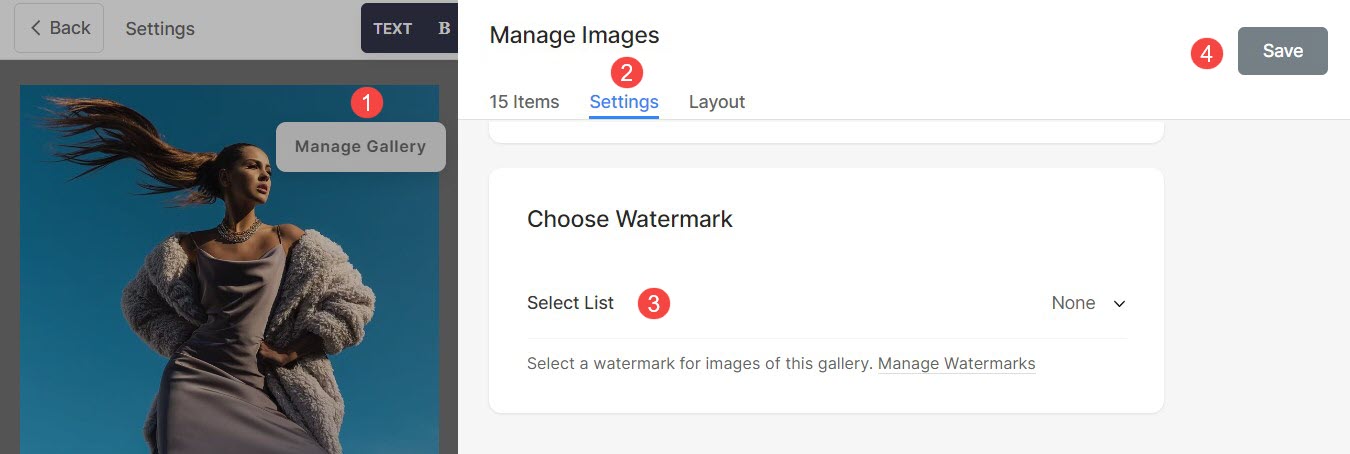
- To apply watermark on images inside a page gallery, click on Manage Gallery (1) button.
- Open Settings (2) tab and scroll at the bottom where you will find Choose Watermark (3) option.
- Select your preferred watermark and Save (4) the changes.
Blog Post Gallery
- Click on Manage Gallery (1) button to open gallery options sidebar.
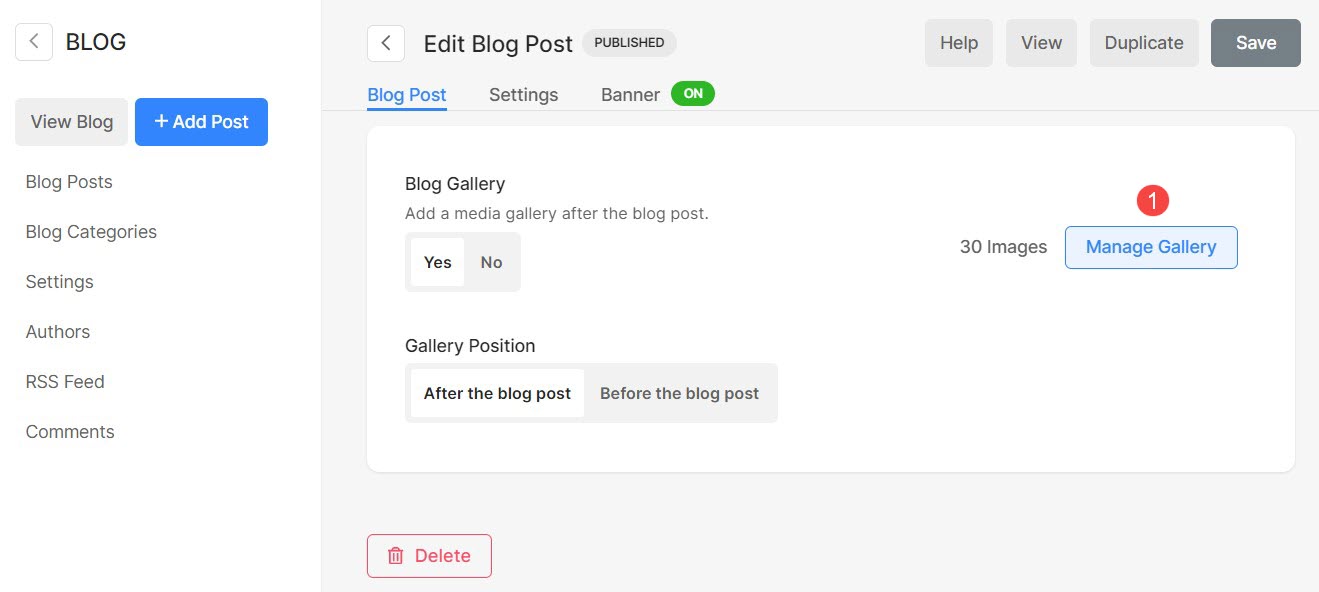
- Click on Settings (2) tab and scroll to the bottom.
- You will find the option to Choose Watermark (3). Select your preferred watermark.
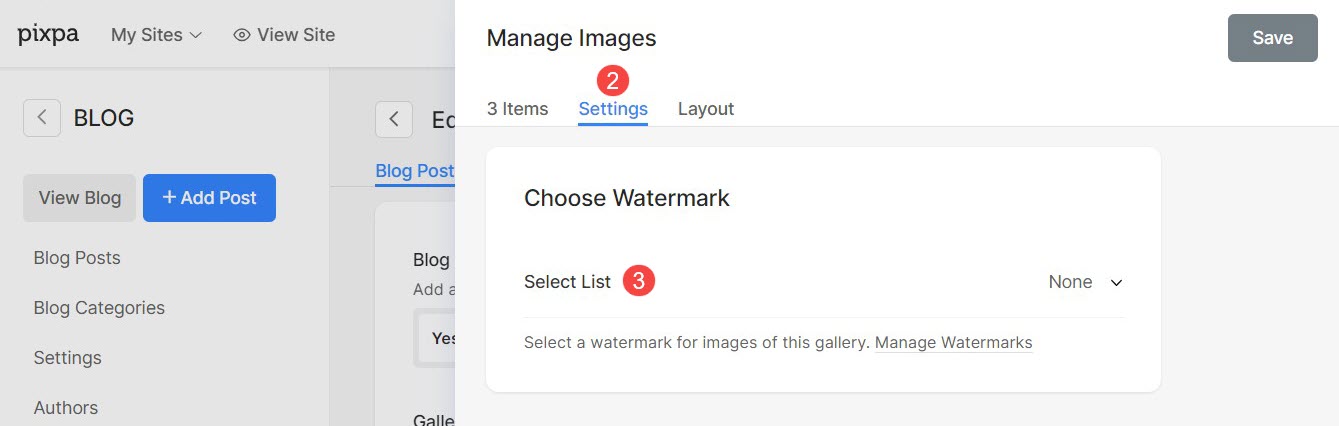
Finally, Save the changes. Watermarks will be applied to all the images inside the gallery.
Store Products
Watermarking is also supported for all store-related images. Once enabled, the same watermark will be applied across all store images (except thumbnails).
This ensures that your product visuals are consistently protected from unauthorized use while maintaining a professional look.
To apply a watermark for store images, follow the steps mentioned below:

- Click on the Settings (3) option.
- From Settings screen, you can select a Watermark (4) from the dropdown and Save (5) the changes.
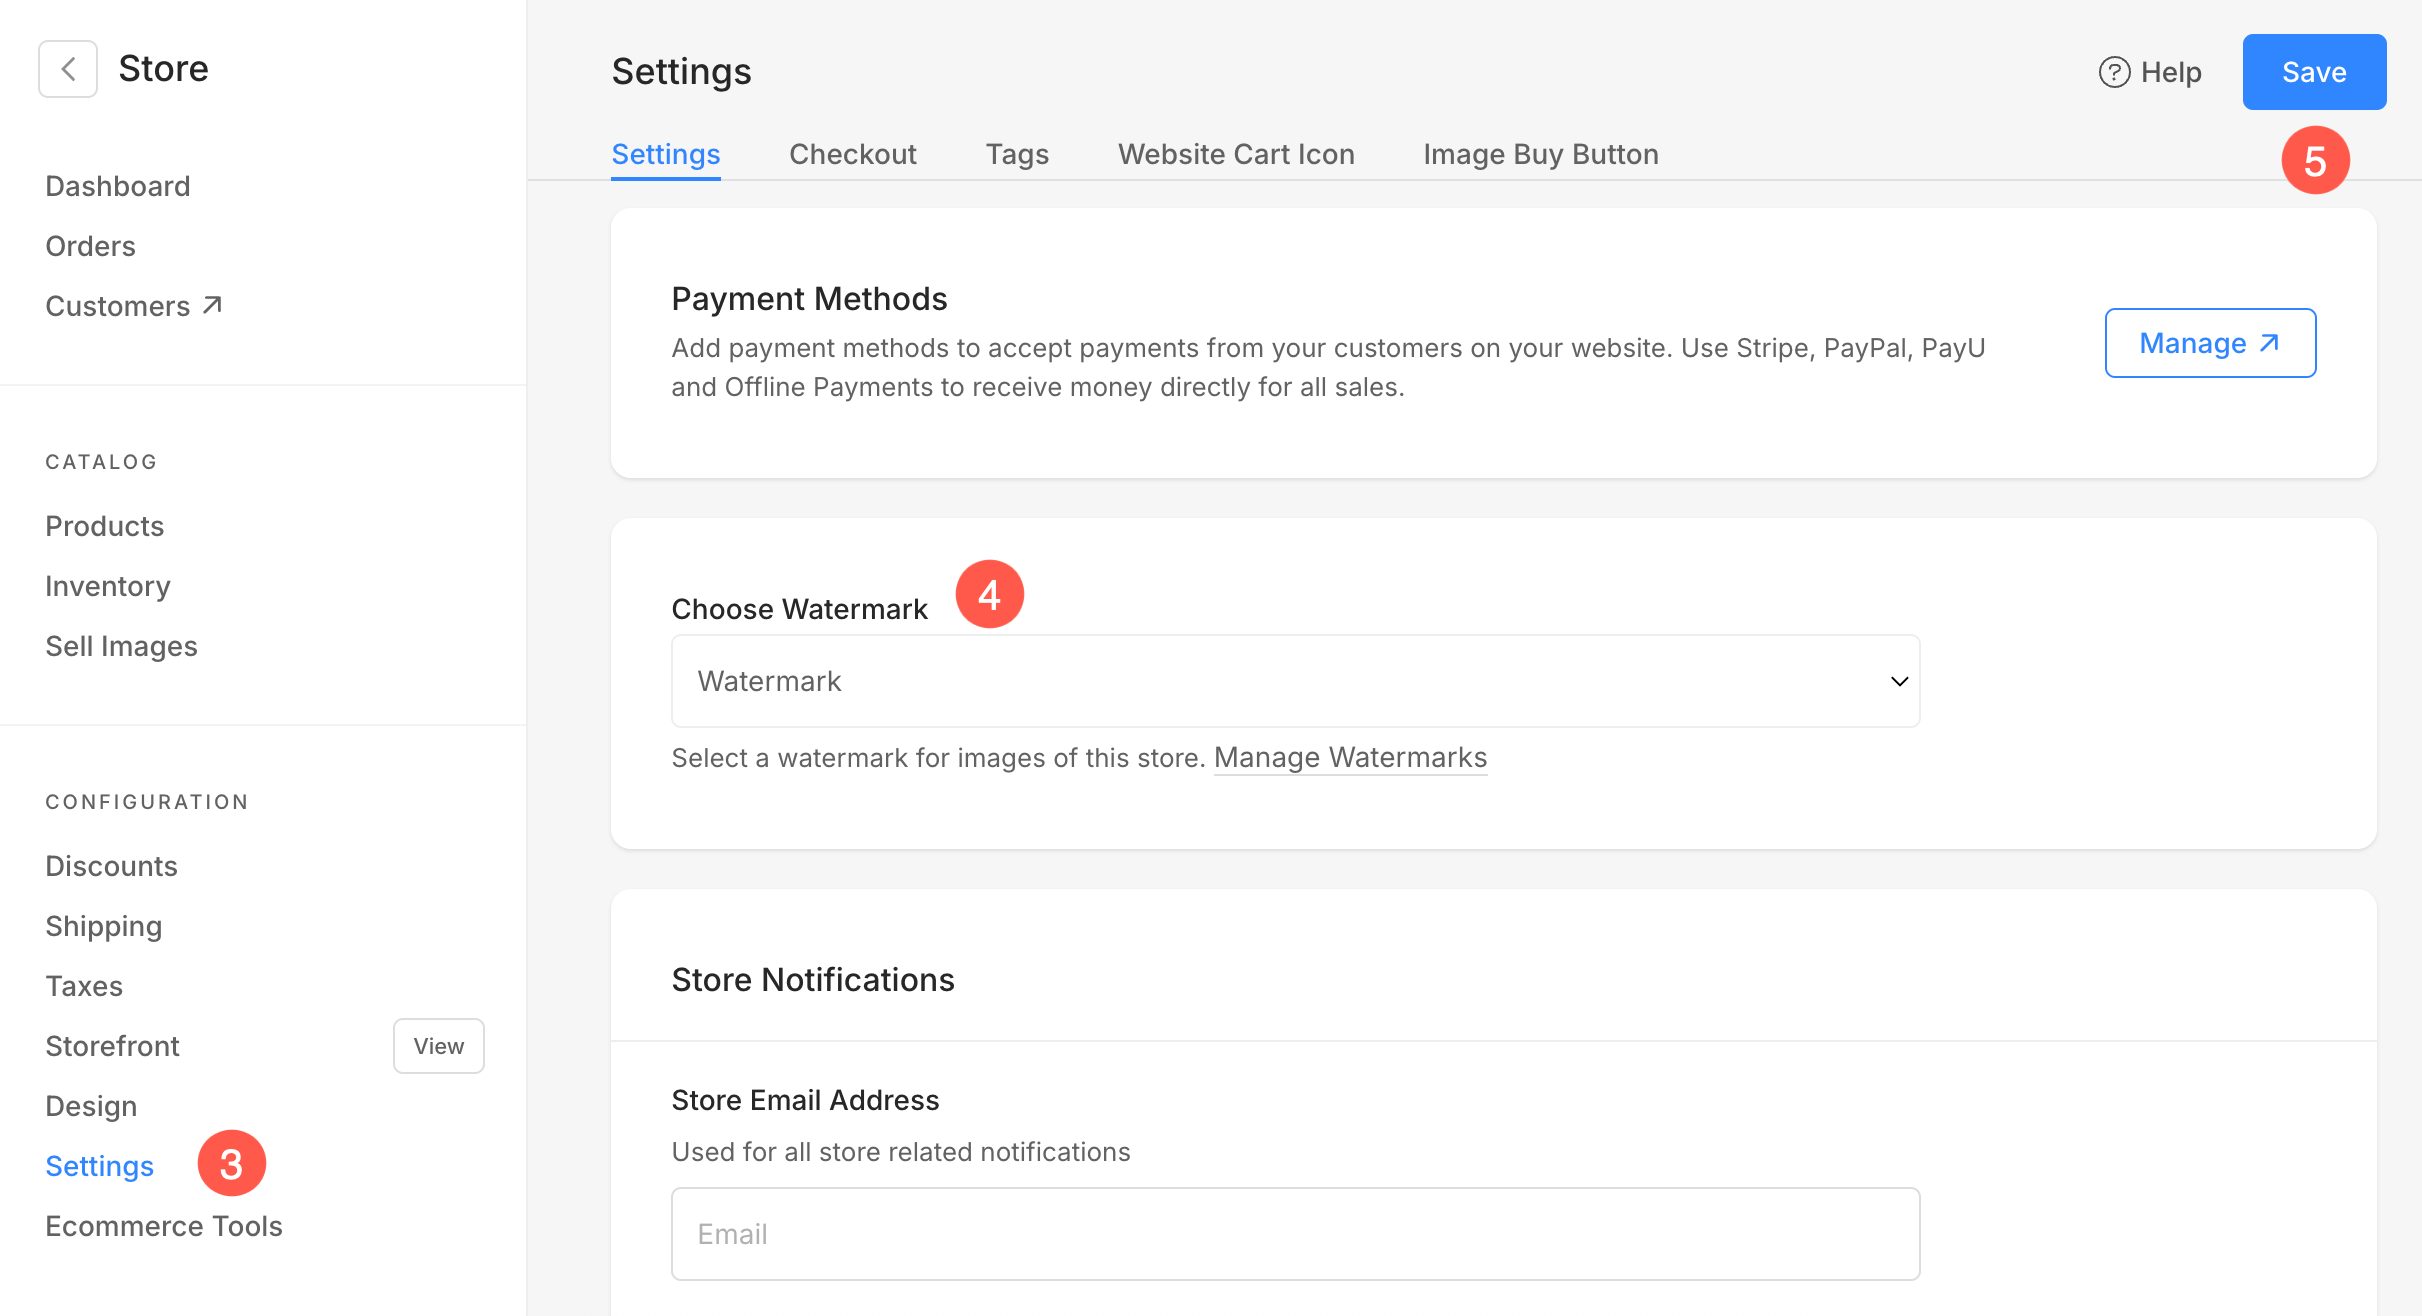
The watermark selected for store will appear in the following areas:
- Store product front and product listing
- Category storefront and category listing
- Product detail pages (main image and lightbox, excluding thumbnails)
- Related products section
- Product tags display
- Page builder product section (listing view)
- Page builder product section (detailed view)
- Website search results displaying product listings