Pixpa’s Client Galleries platform enables you to share your work easily with clients and let them view, favorite, comment, and download images on any device.
You can manage these favorites and comments settings for your albums as shown below.
Enabling Favorites for a Client Album lets visitors mark images as favorites from any gallery of that album. The visitors can:
- Mark images as favorites.
- Send feedback to you on their favorites.
- Share their favorite images with family or friends.
Enabling Comments for a Client Album lets visitors tag and comment on the images from any gallery of that album.
In this article:
- Favorites Settings
- Add / Edit Favorite List
- Create Shared Favorite List
- Favorite List Overview
- Comments Settings
Navigate to Favorites and Comments settings
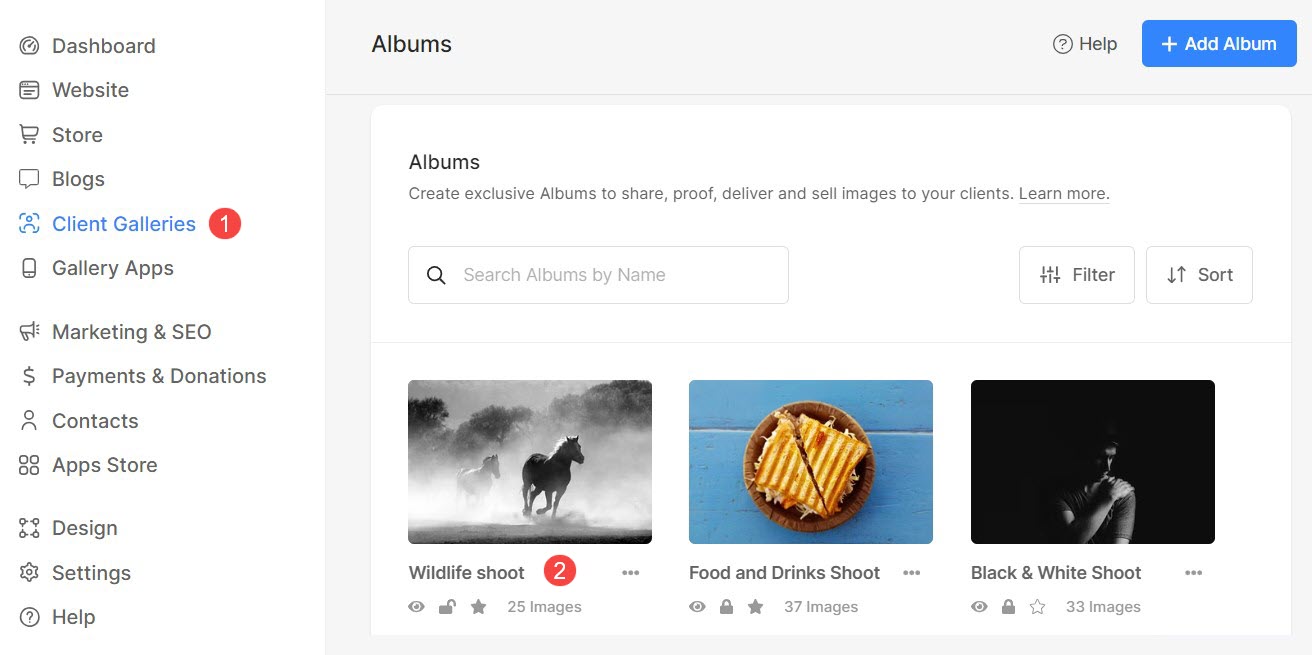
From the Dashboard of studio, click on Client Galleries (1) section and open the Album (2) that you want to edit.
Click on the Settings (3) icon and Favorites & Comments (4) tab.

Alternatively, you can use studio’s search function to navigate to Favorites & Comments settings.
- Enter Album title (1) in the Search Bar.
- From the related results, click on the Album that you are searching for (2) under Client Galleries.

- You will now reach the Album page.
- Click on the Settings (3) icon and then, click on the Favorites & Comments (4) menu to view the Favorites Settings (5) page.

Manage Favorite Settings
From here, you can configure favorite setting for client albums.
- Enable Favorites –
- Set the maximum limit here so that your client can only mark favorites up to this limit. Set 0 for unlimited.
- Default Favorite List: Enable this so that system automatically creates a default favorite list. Clients will not have to necessarily create a favorite list to mark images as favorites.
- Clients’ Favorite List: Enabling this allows customers to create new favorite lists on their own. There can be multiple favorite lists inside an album.

Add or Edit a Favorite List
- Add Favorite List: You can easily add a new favorite list for your clients.
- Edit Favorite List: Individual Favorite lists that are already created can also be edited by clicking on the pencil icon.

Add a Favorite List
- Client Email: Enter the Email address of the client for whom you are creating the favorite list.
- Enable Favorite list for all users to create a shared favorite list. Know more.
- Favorite List Name: Specify a name for the favorite list.
- Max Selection: Enter the maximum number of images that can be added to the favorite list. Set as 0 (zero) for unlimited additions.
- Description: Specify a description of the favorite list.

Finally, Save (6) the changes. A new favorite list will be created.
Edit a Favorite List
- Client Email: While editing a favorite list, you cannot change the Email ID.
- Enable Favorite list for all users to create a shared favorite list. Know more.
- Favorite List Name: Specify a name for the favorite list.
- Max Selection: Enter the maximum number of images that can be added to the favorite list. Set as 0 (zero) for unlimited additions.
- Description: Specify a description of the favorite list.

Save (6) the changes.
Create a Shared Favorite List
You can create a personalized favorite list that can be shared seamlessly among all the visitors to the album. Even when clients login to an album using different email IDs, they can easily access the shared favorite list.
This feature is extremely useful when there are multiple entities involved in a particular event.
While adding or editing a favorite list, you simply need to check Enable this favorite list for all users of the album option to create a Shared Favorite List.

Favorite List Overview
Clients can follow the steps mentioned below to open their favorite lists.
- Open the album and click on the Favorites (1) icon.

- A popup will open up allowing the clients to enter the Name (2) and Email (3) address to access the favorite lists.
- Hit Save (4) button to save the details and login.

All the favorite lists that the client has created will appear here including those that are created as Shared Lists.
Manage Comments Settings
Here, you can manage settings regarding comments inside an album.
- Favorites Activity – View the favorite activity on this album.
- Hit the Save button.

Preview
This is how you will see the Favorite icon (heart) on your Client Album.
Do check out the Demo Album in action here.
