Pixpa offers the option to add labels to store products that serve as visual indicators to customers, offering information such as trending items, bestsellers, stock availability, etc.
These labels are displayed to enhance the shopping experience by providing valuable insights and guiding customers towards relevant products based on their interests and preferences.
In this article:
To navigate to the Product labels section, follow the steps mentioned below:

- You will see the Store Dashboard. From here click on the Design (3) section.
- Click on Product Labels (4) tab from where you can customize all the labels.

System Labels
System labels in Pixpa’s store functionality are dynamic in nature, meaning that they automatically get applied to products based on various factors such as stock availability, ongoing sale offers, sold-out products, etc.
These labels serve to provide real-time information to customers, enhancing their shopping experience by quickly conveying important details about each product’s status.
- Enable or Disable (1) the label by switching the toggle.
- Label Name (2) specifies the default name of the label. You can change it according to your preference.
- Set the Base Color (3). It is the background color of the label.
- Set the Text Color (4) of the label.
- You will see a Preview (5) of the label in real-time.
- To check all the store labels, click on the See more Store Labels (6) button. Learn more.

Custom Labels
Custom labels need to be applied manually by the store owner based on their specific preferences or criteria. Unlike system labels, which are automatically generated based on factors like stock availability or sale status, custom labels allow the store owner to tailor the labeling system to suit their unique needs.
This provides greater flexibility and control over how products are categorized and displayed within the store, allowing for a more personalized shopping experience for customers.
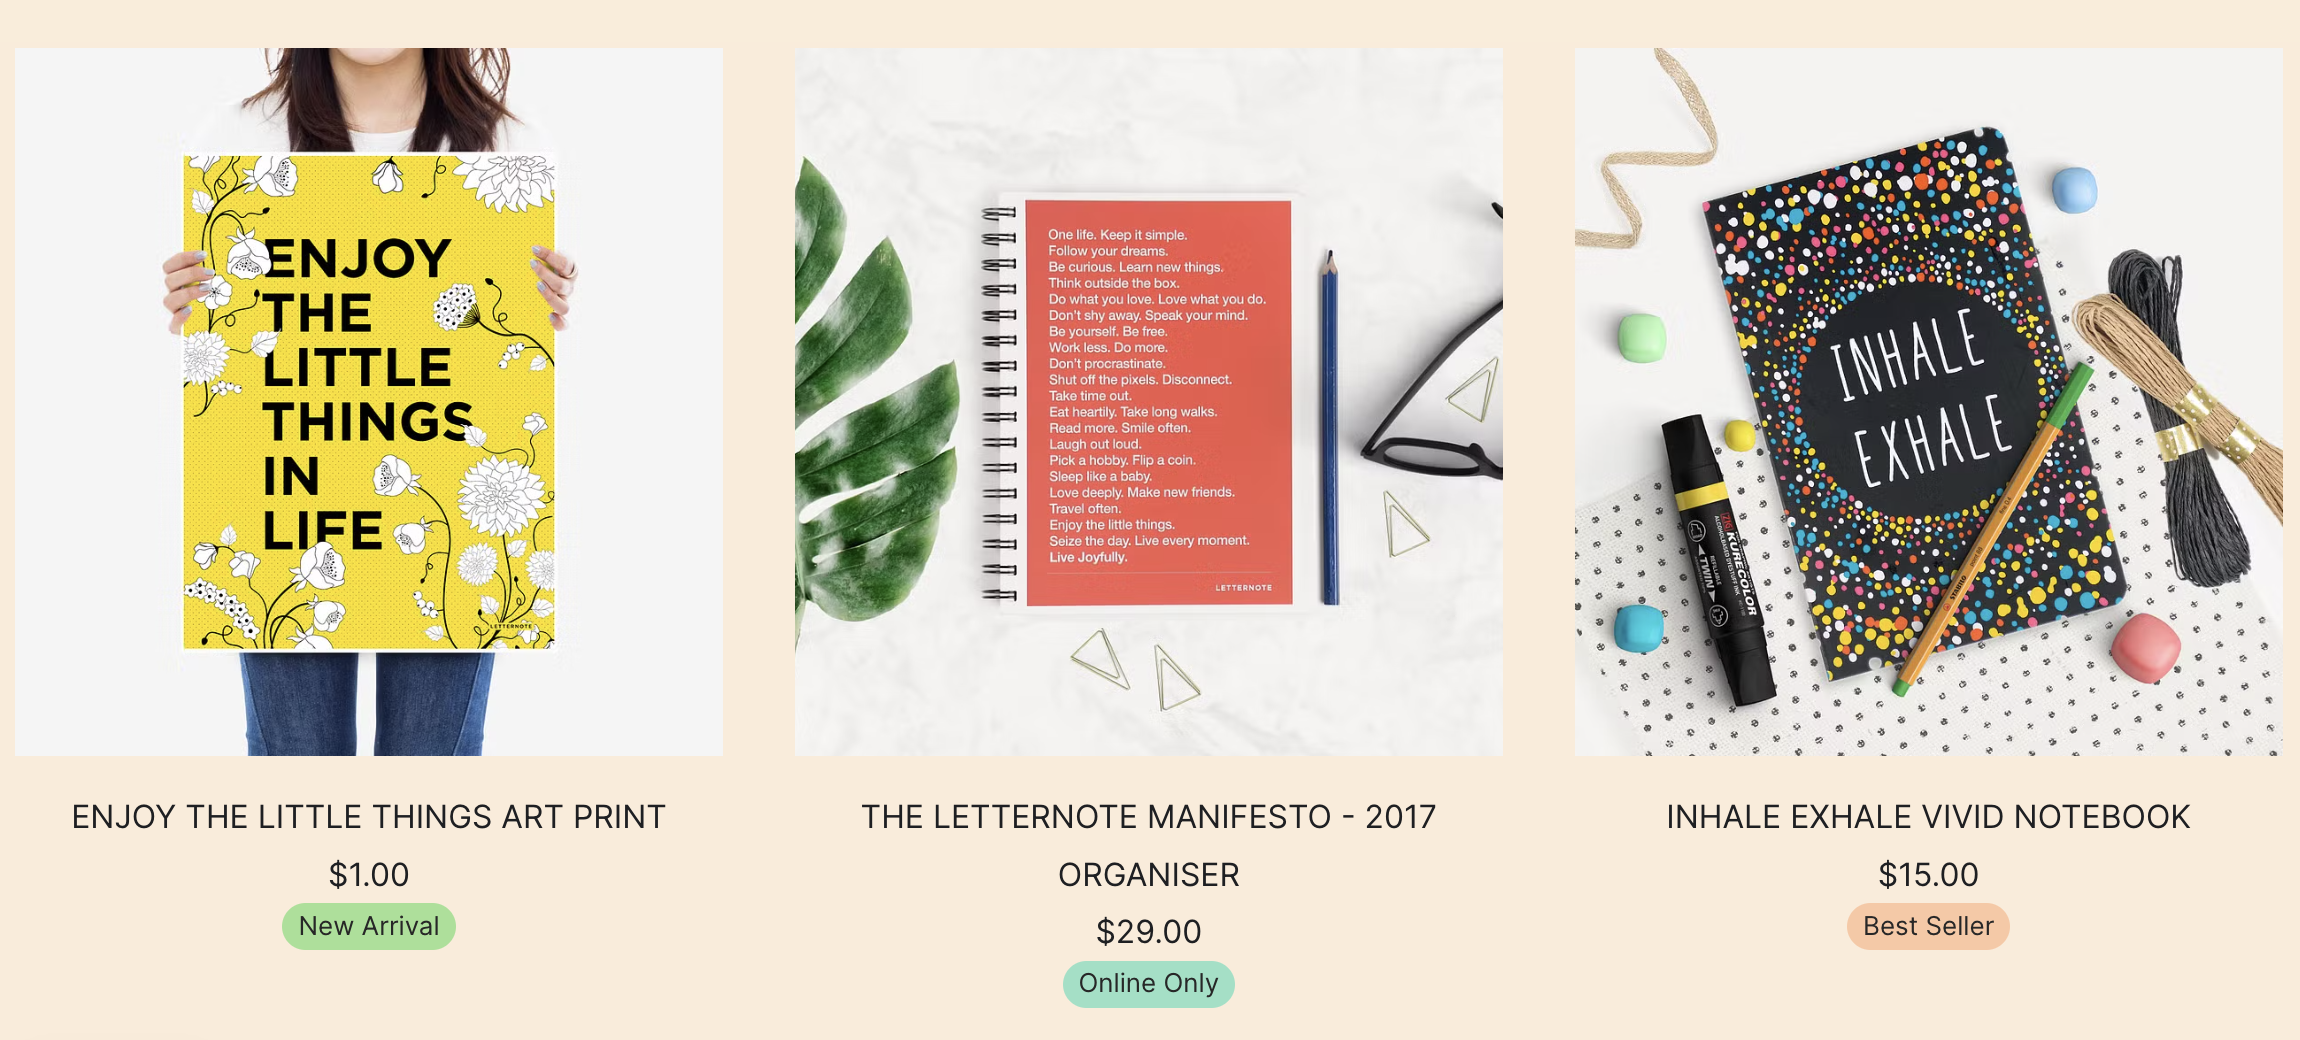
Some of the custom labels may include New Arrival, Trending, Best Seller, etc.

Apply Label to a Product
You can apply a label to products in two different ways.
-
Apply Label to a Single Product
- Open the particular product (1) in which you want to apply the label.
- Scroll to the Product Label section and click on the Select Label (2) dropdown.
- Select (3) the preferred label and Save (4) the changes.

-
Apply Label to Multiple Products
- From the Products (1) section, select (2) the product for which you want to update the labels.
- After selecting the products, click on the Actions (3) button and Update Product Label (4) option.

- A pop-up will open up allowing you to choose label from the dropdown (5).
- Select a label (6) and click on Submit (7) button to save the changes.
- Click on Close (8) button if you want to close the pop-up without applying the label.
