Blog post is a written article on a website or blog, typically expressing personal thoughts, experiences, opinions or providing information on a specific topic for the readers.
Using Pixpa’s Blogs feature, you can easily create simple yet attractive blog posts.
In this article:
Once you have created a blog, it’s time to start adding blog posts inside it.
Add a Blog post
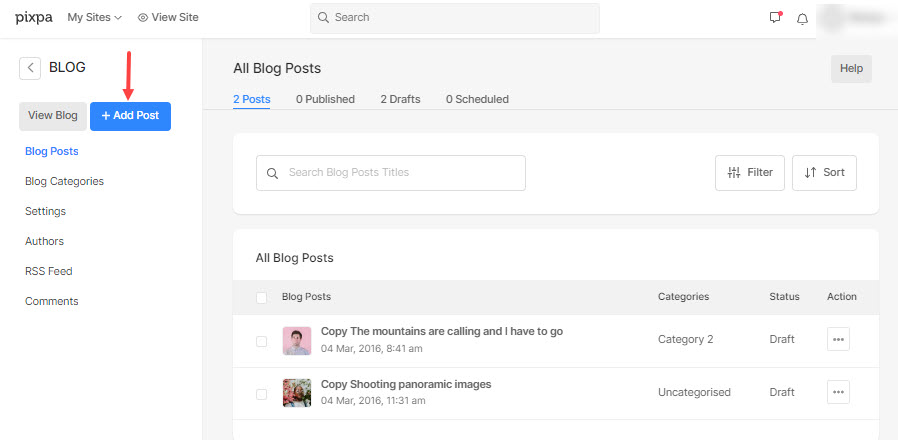
- Go to the Website section.
- Click on the Blog where you want to add a blog post.
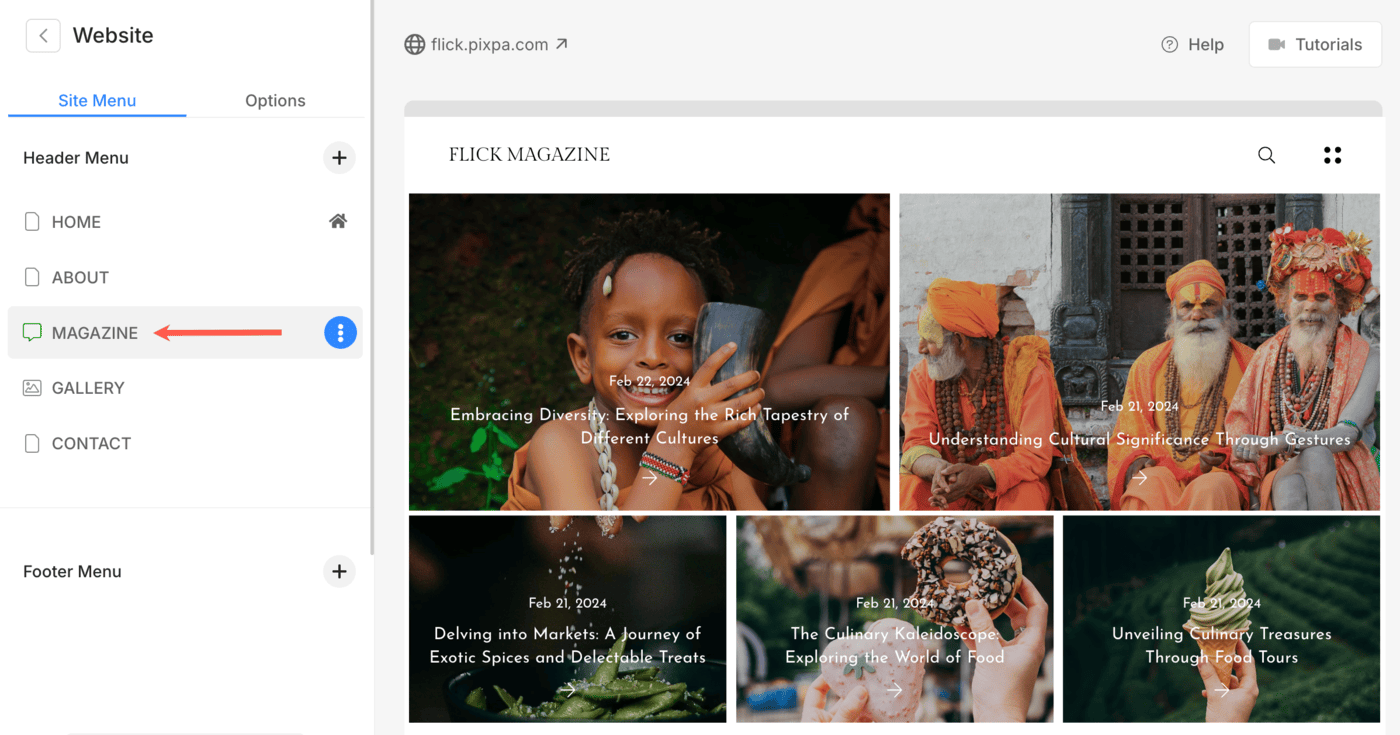
- This will bring you to the page where you can see a list of all your blog posts.
- To add a new blog post, click on the + Add Post button.
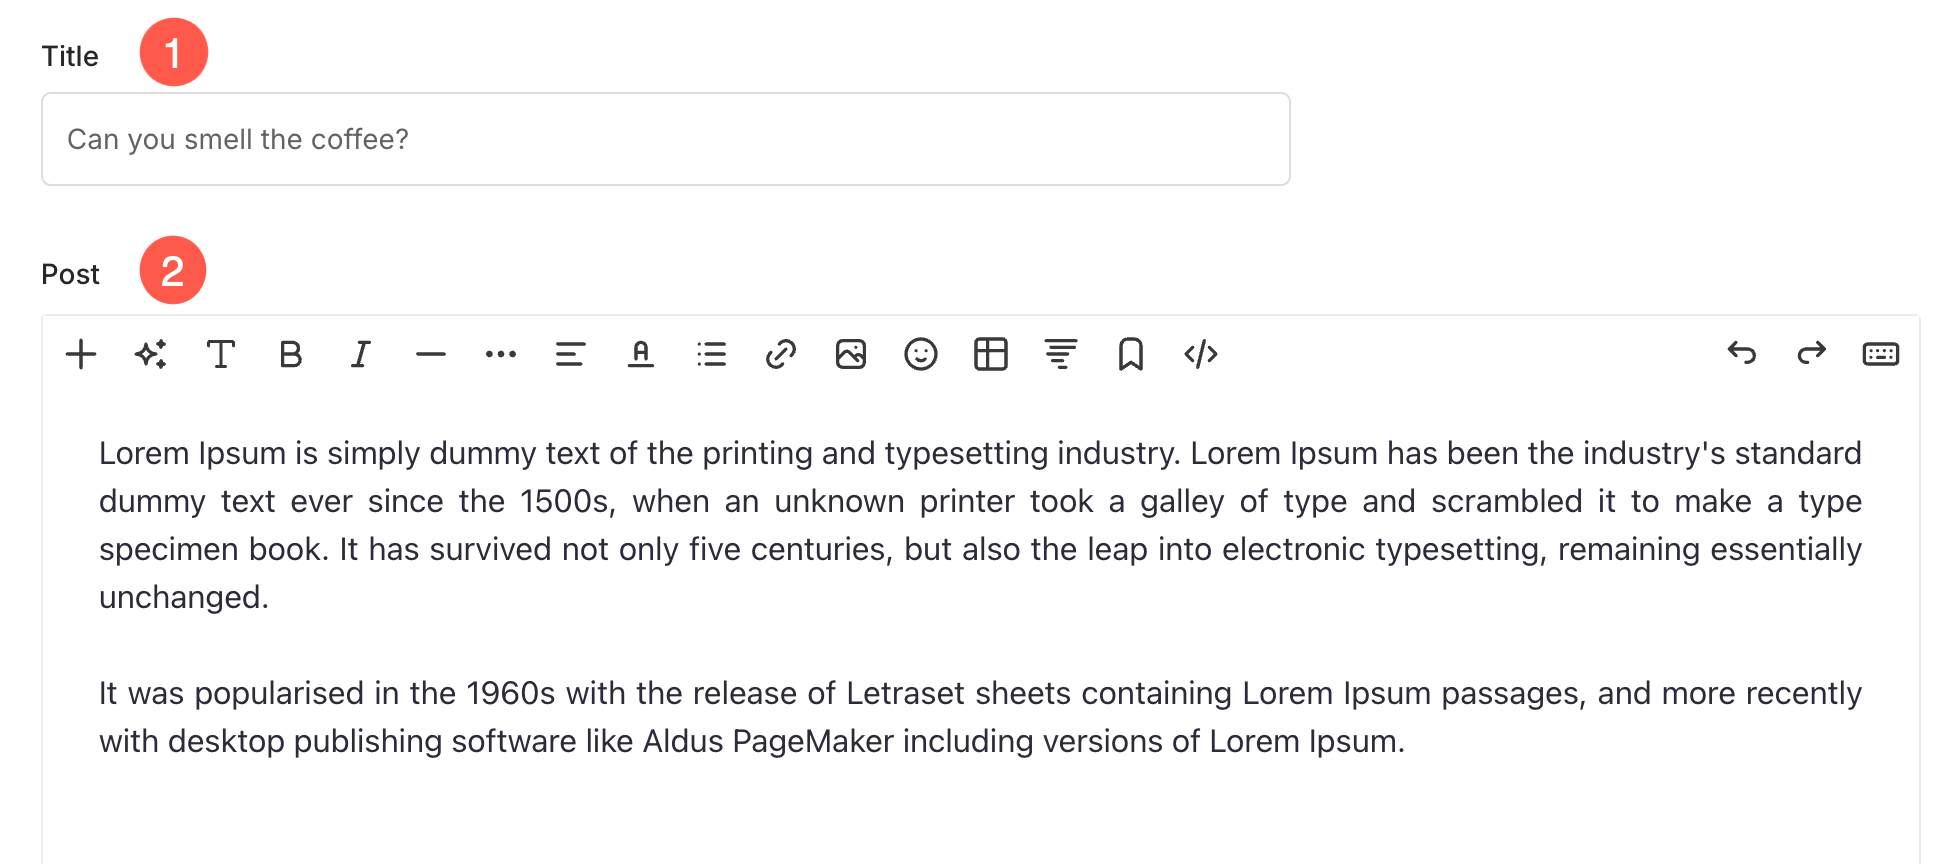
It will bring you to the Edit Blog Post page, where you can create and edit your blog post. The settings are classified as:
Edit a Blog post
- Title– Specify the title of this blog post.
- Post – Type your blog article here. See: The Pixpa text editor.
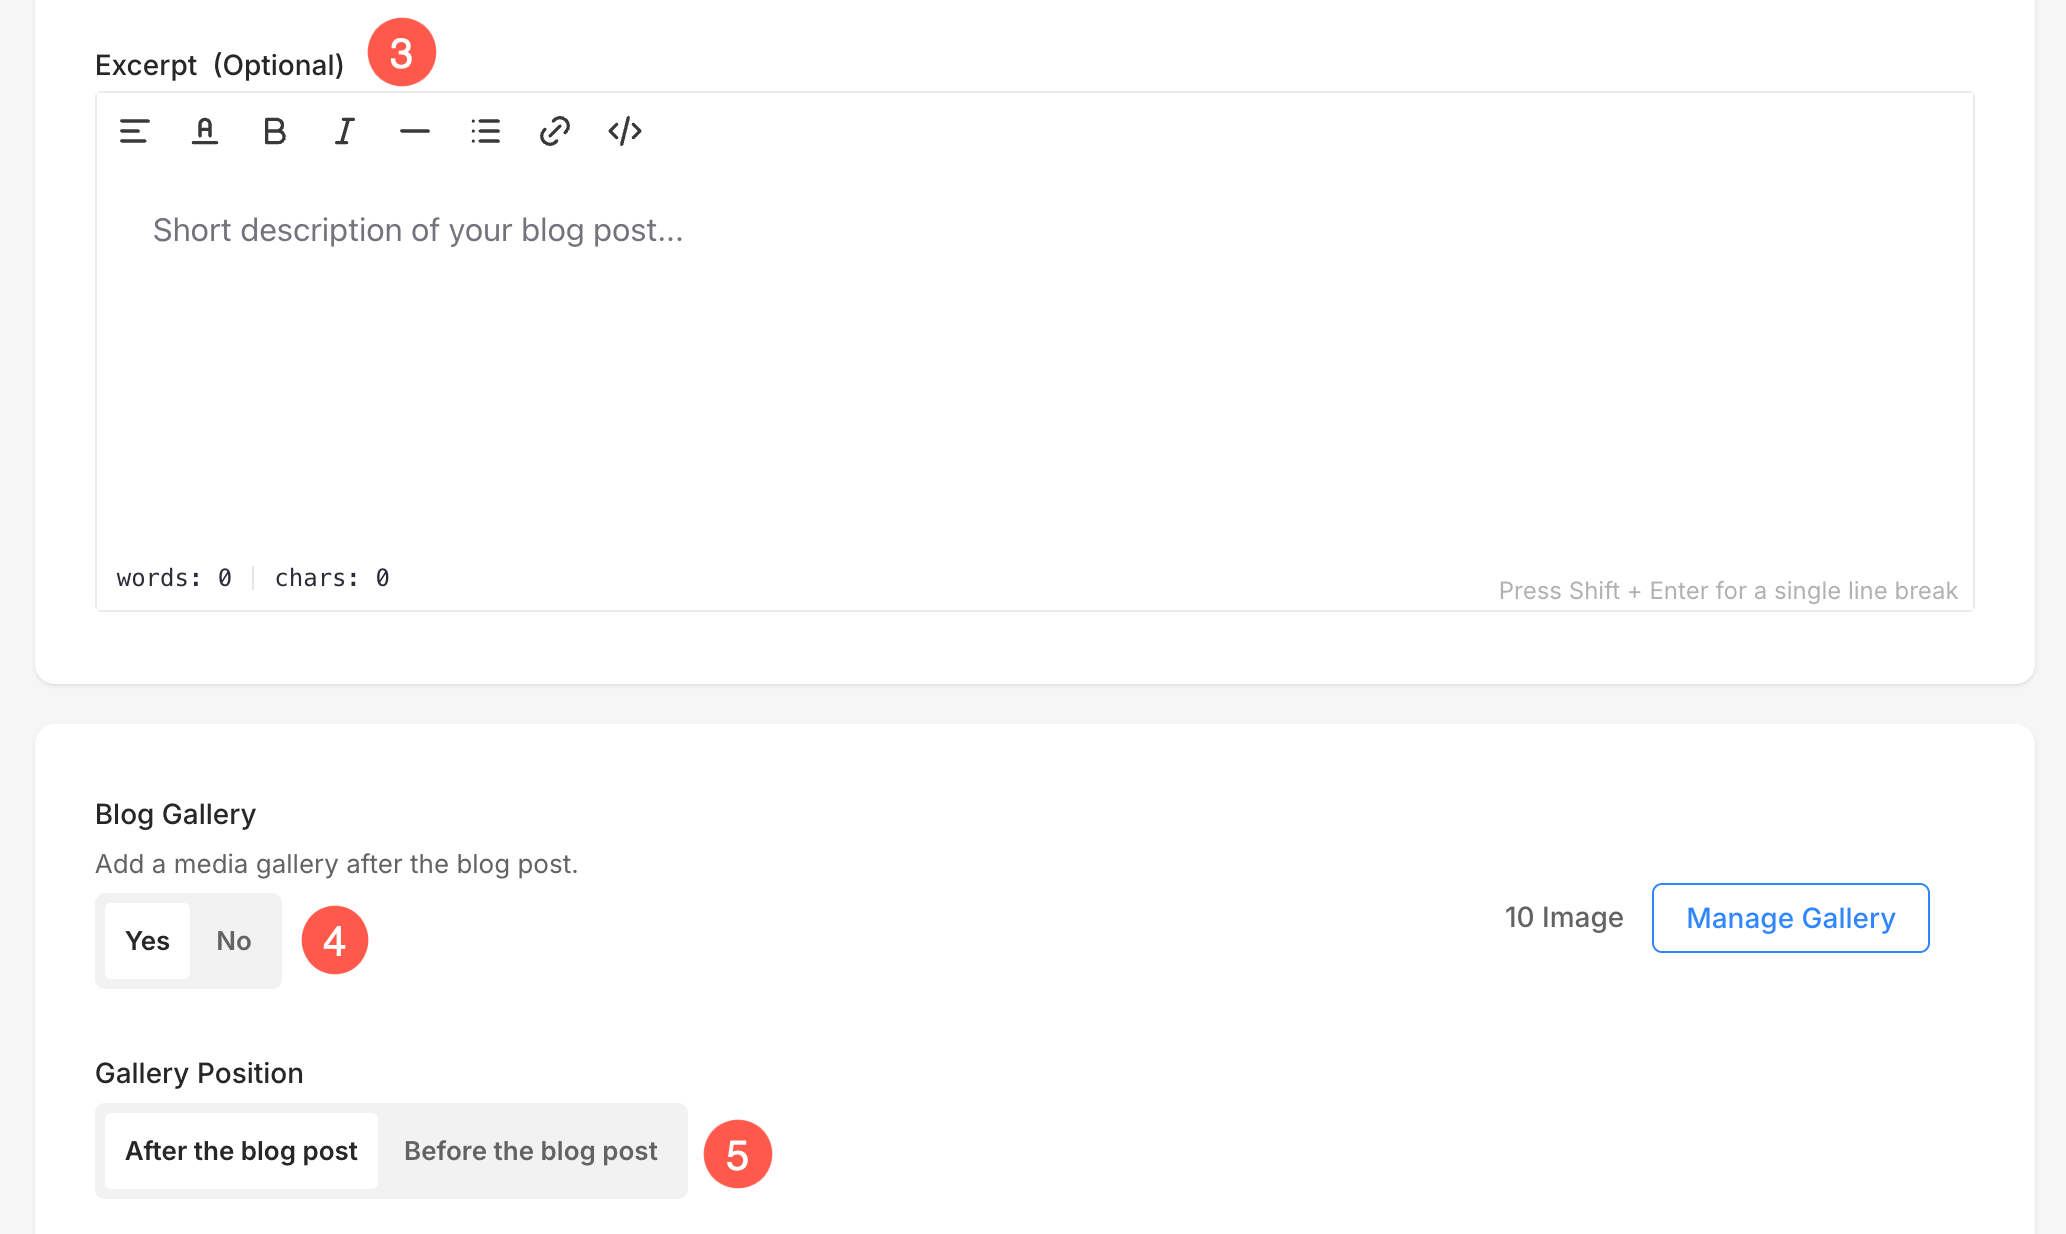
- Excerpt –An optional hand-crafted summary of your blog post.
- Blog gallery
-
- Select Yes to add a media gallery below the blog post.
- Select No if you don’t want to display a media gallery below the blog post.
- Gallery Position – Choose if the blog gallery should be above/below the blog post content.
Blog post Settings
- Status
-
- Select Published to publish the post.
- Select Draft to save the post as a draft.
- Select Scheduled to save the post as a draft. See: Schedule a blog post.
- Publish on – Select the date on which you want the post to be published. By default, it will show the date on which the blog post was created.
- Featured Image – Add a thumbnail image for the post here.

- Author – Select an author from the dropdown. See: Blog authors.
- Categories – Select a category from the dropdown. See: Blog categories.
- Tags – Add your post tags. Separate tags with commas.

12. Search Engine Optimization (SEO) – Specify SEO metadata for this blog post. It will override the site’s main SEO data, specified in the website settings section. See: Managing Website SEO.
-
- Page URL – Manage the URL for this blog post.
- Page Title – Appears in search results and browser tabs (55-70 characters).
- Page Description – Describe your business and the purpose of this page (50 – 300 characters).
- Choose to hide this blog post from search engines.

- Page Code Injection – Type additional code/external script here. Also Check: Embed any external script.

- Banner – Enable and manage the banner of this blog post.
- View this blog post on the live site.
- Create a Duplicate of this blog post.
- Save your changes.
