A Shipping Region is a set of country-based shipping rates that will be applied to each order. Based on the country and state, the shipping rates can be altered.
With the new shipping options, you can specify the shipping rates based on total order value, order weight, rate per item, free shipping, number of items in the order, and store pick up.
Also Check:
To migrate to the new shipping and create the shipping rates, follow these steps:
- Enter Shipping (1) in the Search Bar.
- From the related results, click on the Client Galleries – Shipping option (2) under Studio Links.

- You will now reach the Shipping (3) page.
- Now, you need to:
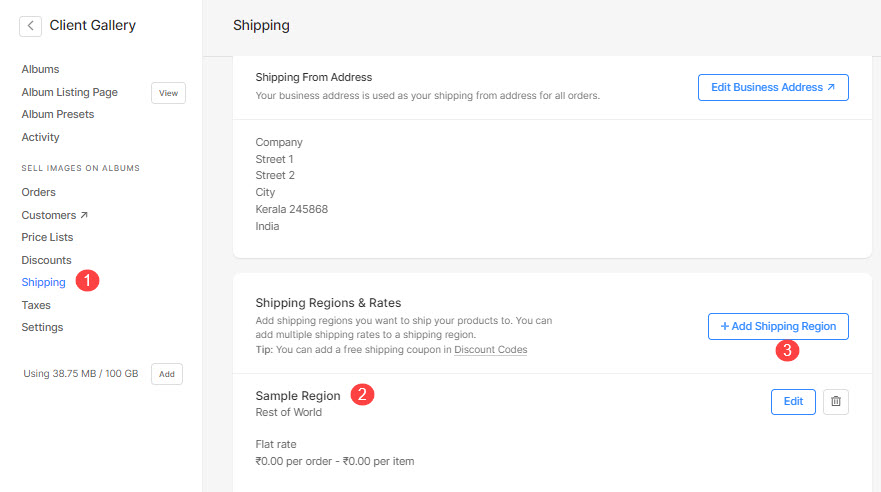
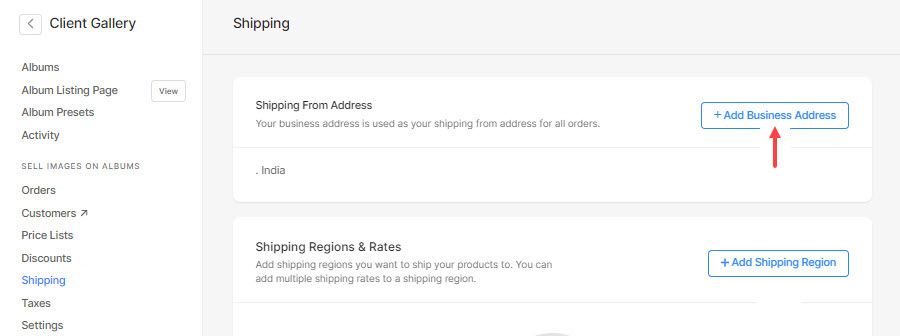
Step 1: Add Business Address
- Click on the +Add Business Address button to add your business address. Know more.
Step 2: Add Shipping Region
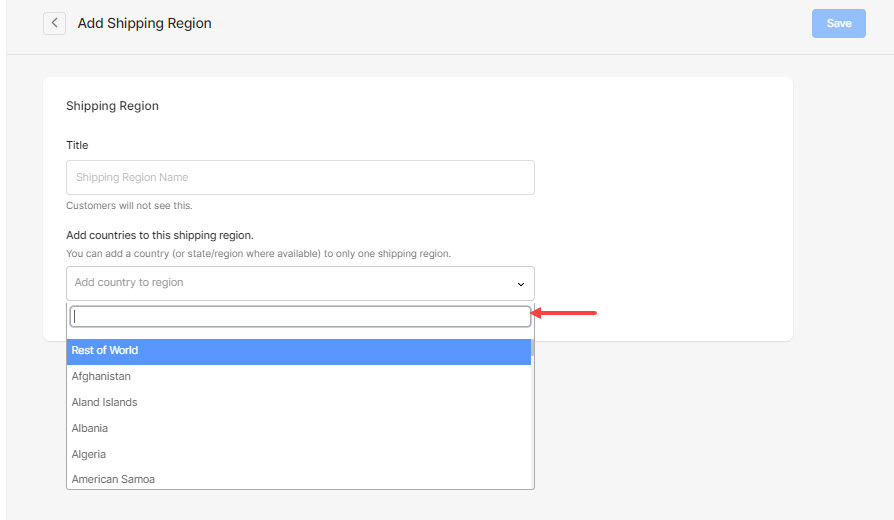
- Once you have entered the business address, click on the + Add Shipping Region button to specify the shipping rates.
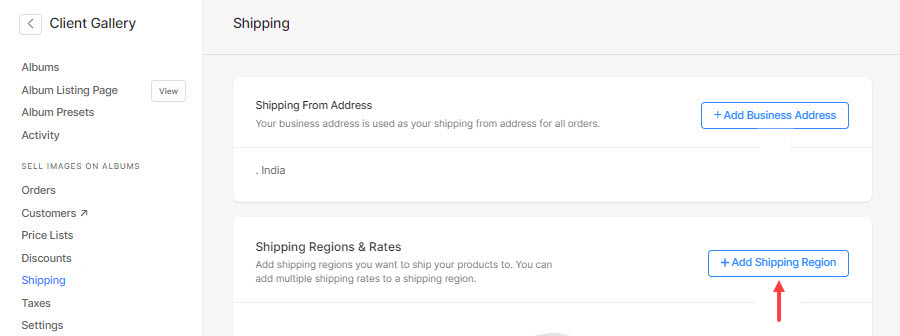
- Select the countries to specify the shipping rates.
Step 3: Specify Shipping Rates
- Once you have specified the countries, click on the +Add Shipping Rate button to create the shipping rates.
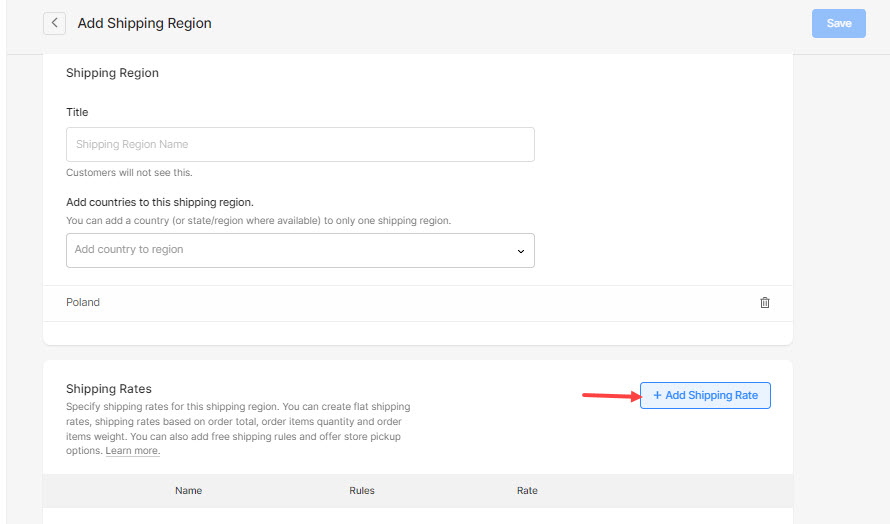
- From here, select the type of shipping rate that you prefer and click on it.
- Flat Rate Shipping – Specify flat shipping for the entire order and additional flat shipping for the items in the order.
- Free Shipping – Create a free shipping option for the order.
- Shipping based on Order Weight – Specify different shipping rates based on the weight range of the order
- Shipping based on Order Total – Specify different shipping rates based on the order total range of the order
- Shipping based on Number of Items – Specify different shipping rates for a range of the number of items in the order
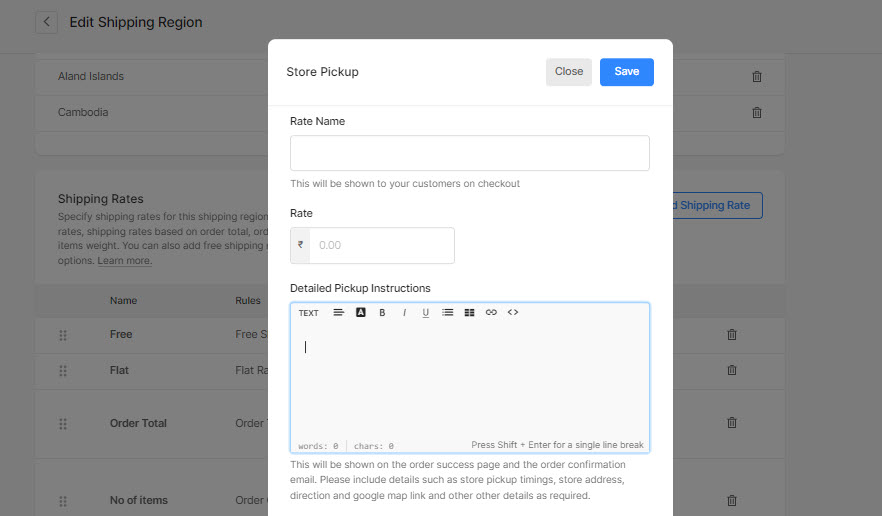
- Shipping for Store Pickup – Give the customers an option to pick the order from your store.

- Then, enter the shipping rate.
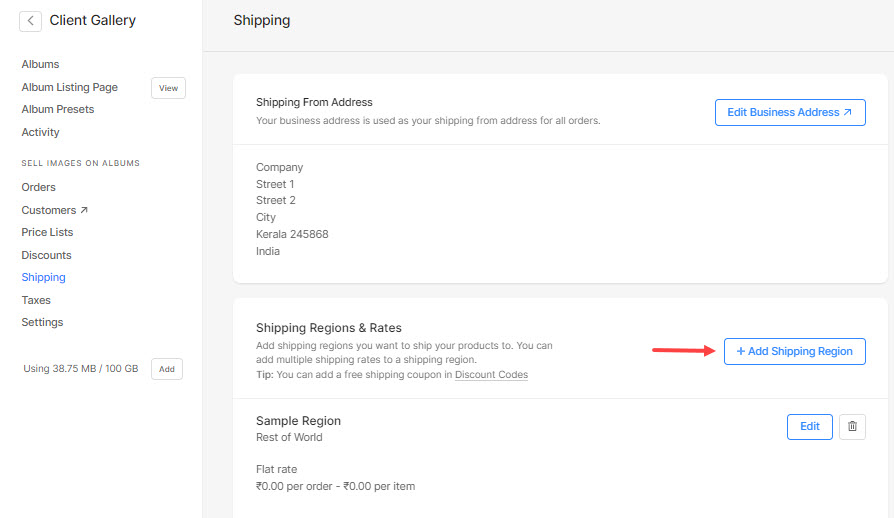
- Once you have added the shipping rate, it would show up this way.
- You can click on the +Add Shipping Rate button and create any number of shipping rates that would apply to all the countries specified above.
- Finally, hit the Save button to save the shipping rates.

- When you have specified the shipping rates for specific countries and wish to specify other rates for the remaining countries, go back to the Shipping page, click on the +Add Shipping Region button, and specify the shipping rates as suggested above.
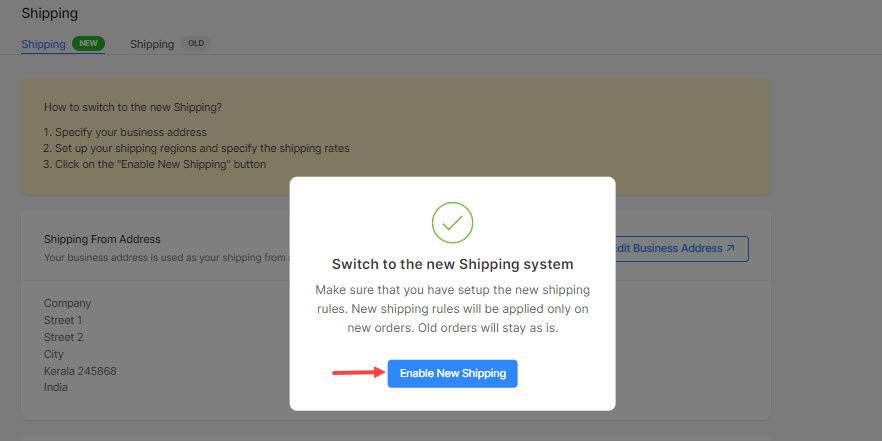
Step 4: Enable New Shipping
- Finally, click on the Enable New Shipping button present at the top right corner of the page.
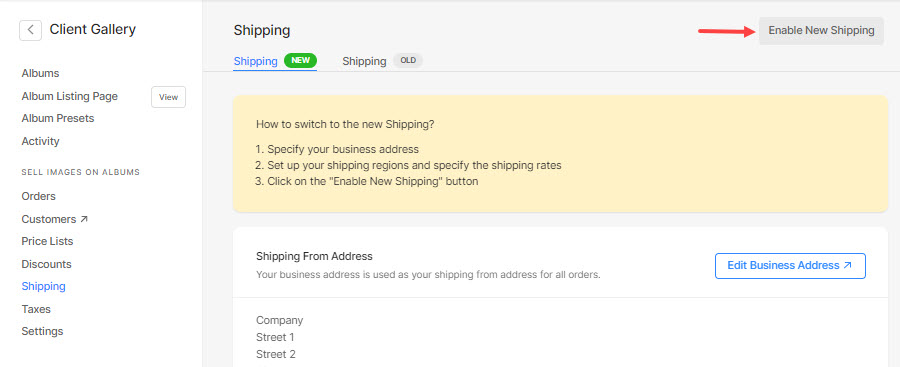
- Again, click on the Enable New Shipping button in the confirmation popup.
- As you upgrade to the new shipping, you would see the below screen.
