Info sections are useful to show more content in addition to the product description.
In this article:
Create Info Section
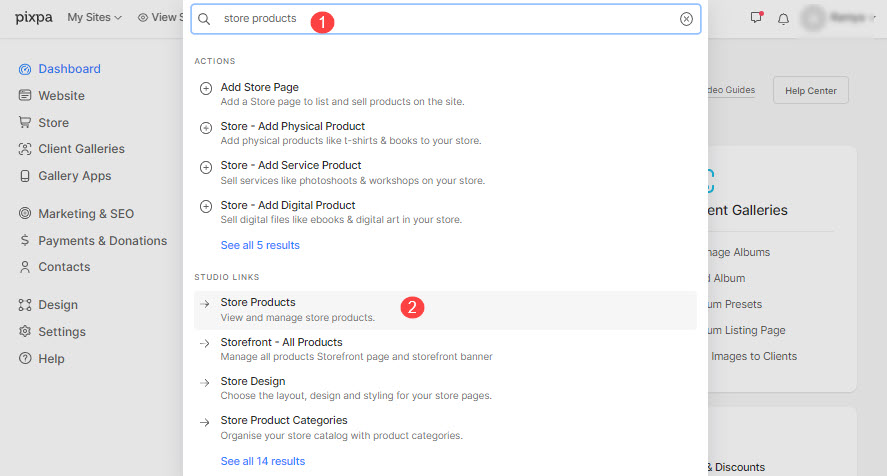
- Enter Store products (1) in the Search Bar.
- From the related results, click on the Store products option (2) under Studio Links.
- You will now reach the Products page.
- On this page, you would see the listing of all the existing products.
- Click on the Info Sections tab.

- Click on the + Add Info Section button to add a new info section.

- Now, specify the info section title (1) and description (2).
Also Check: The Pixpa text editor. - You can add any text content, or insert images/videos/table/code.
- Finally, hit the Save button (3).

- Once you have created info sections, you will be able to sequence them by simple drag and drop.

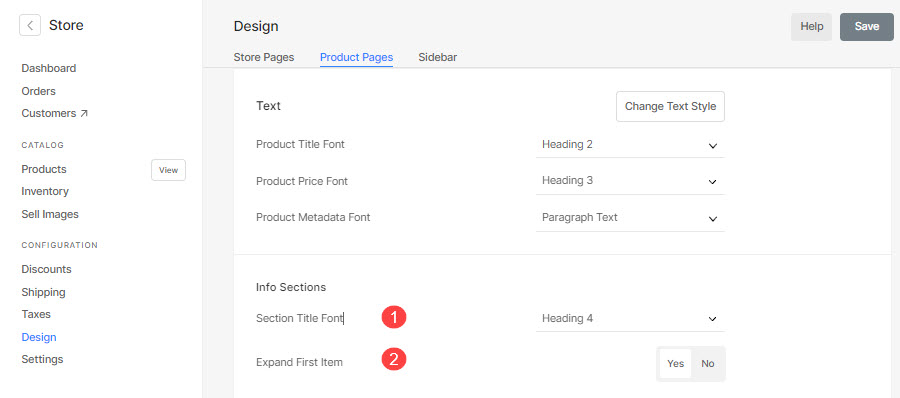
- Visit the Store Design > Product pages tab to manage the section title font (1) and choose to expand the first info section added to the product by default. Know more.
Add Info Section to Products
- Enter the title of the product (1) that you want to work on.
- From the results, click on product (2) under the STORE PRODUCTS.

- You will now reach the product edit page.
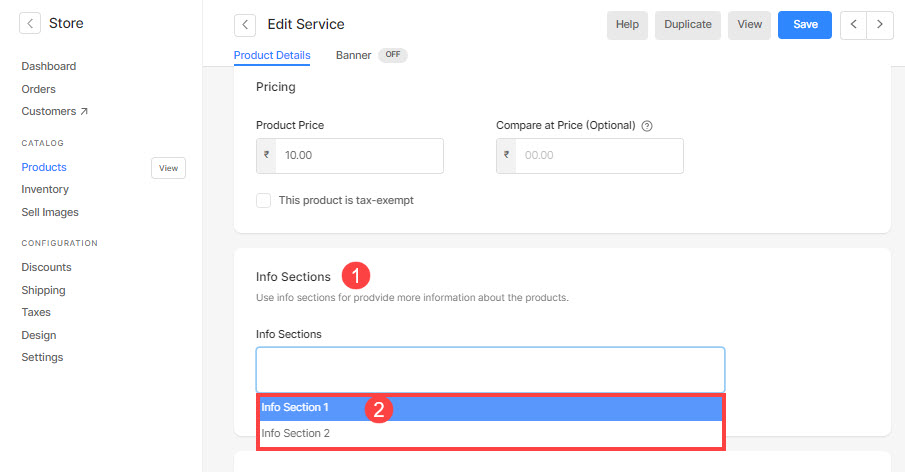
- Scroll down to the Info Sections (1), click on the text box and then, click on the desired info section(s) (2) to be included on the product page.
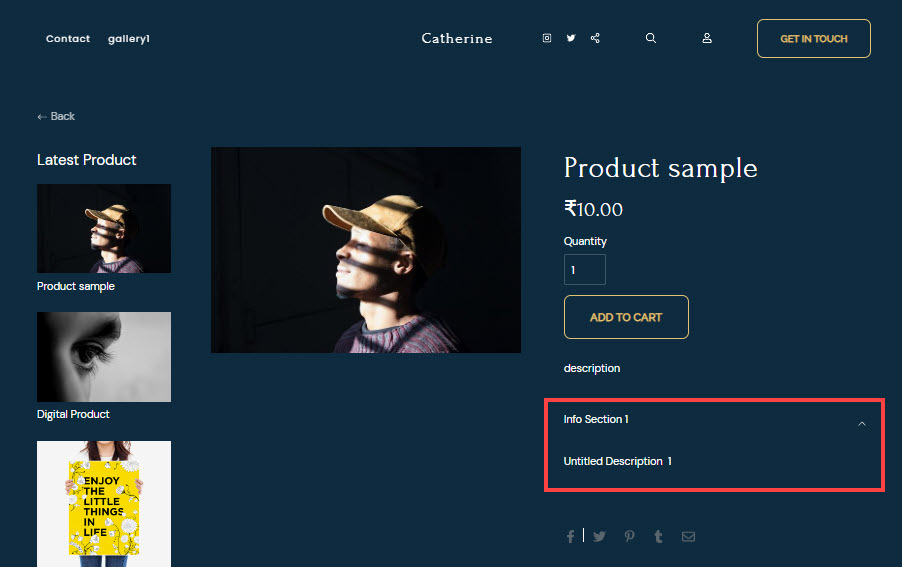
- Now, view the product to check the info section(s) under the description.
Style Info Section
You can easily manage the styling of Info Section from here.
- Manage the info section title font. Also Check: Website Text style.
- Choose the style of Info sections in Product pages. You can either display the info sections in Verticle Accordion or Horizontal (Tabbed) Accordion.
- Choose to expand the first info section added to the product by default. This will work only with Vertical Accordion option.

- When Allow multiple open items (4) option is enabled, users can expand multiple accordions simultaneously.
- Display Divider between accordions of the info section.
- Display a divider before the First info section item. This option will be visible only when Divider is enabled.
- Display a divider after the Last info section item. This option will be visible only when Divider is enabled.
- Select the Icon for info sections. You can choose to display an Arrow or a Plus icon.
- Specify the placement of icon. You can set it to the left or right side of the accordions.
- Specify the space between items of the info section (in pixels).
