Pixpa allows you to create URL redirects to ensure visitors are sent to the correct pages on your website. This helps maintain smooth navigation and avoids broken links when URLs change.
In this article:
What is a Redirect?
A redirect is a way to send both users and search engines to a different URL from the one they originally requested.
Redirects help you forward visitors automatically from an Original URL (the source) to the New URL (the destination). Typically, this is used when an old or broken page is not accessible and the content has moved to a different URL or has been deleted. To redirect visitors to your site’s homepage, just use / (forward slash) as New URL.
Pixpa does support 301 redirect which is a permanent redirect that passes between 90-99% of link juice (ranking power) to the redirected page. In most instances, the 301 redirect is the best method for implementing redirects on a website.
To create a redirect, follow these steps:
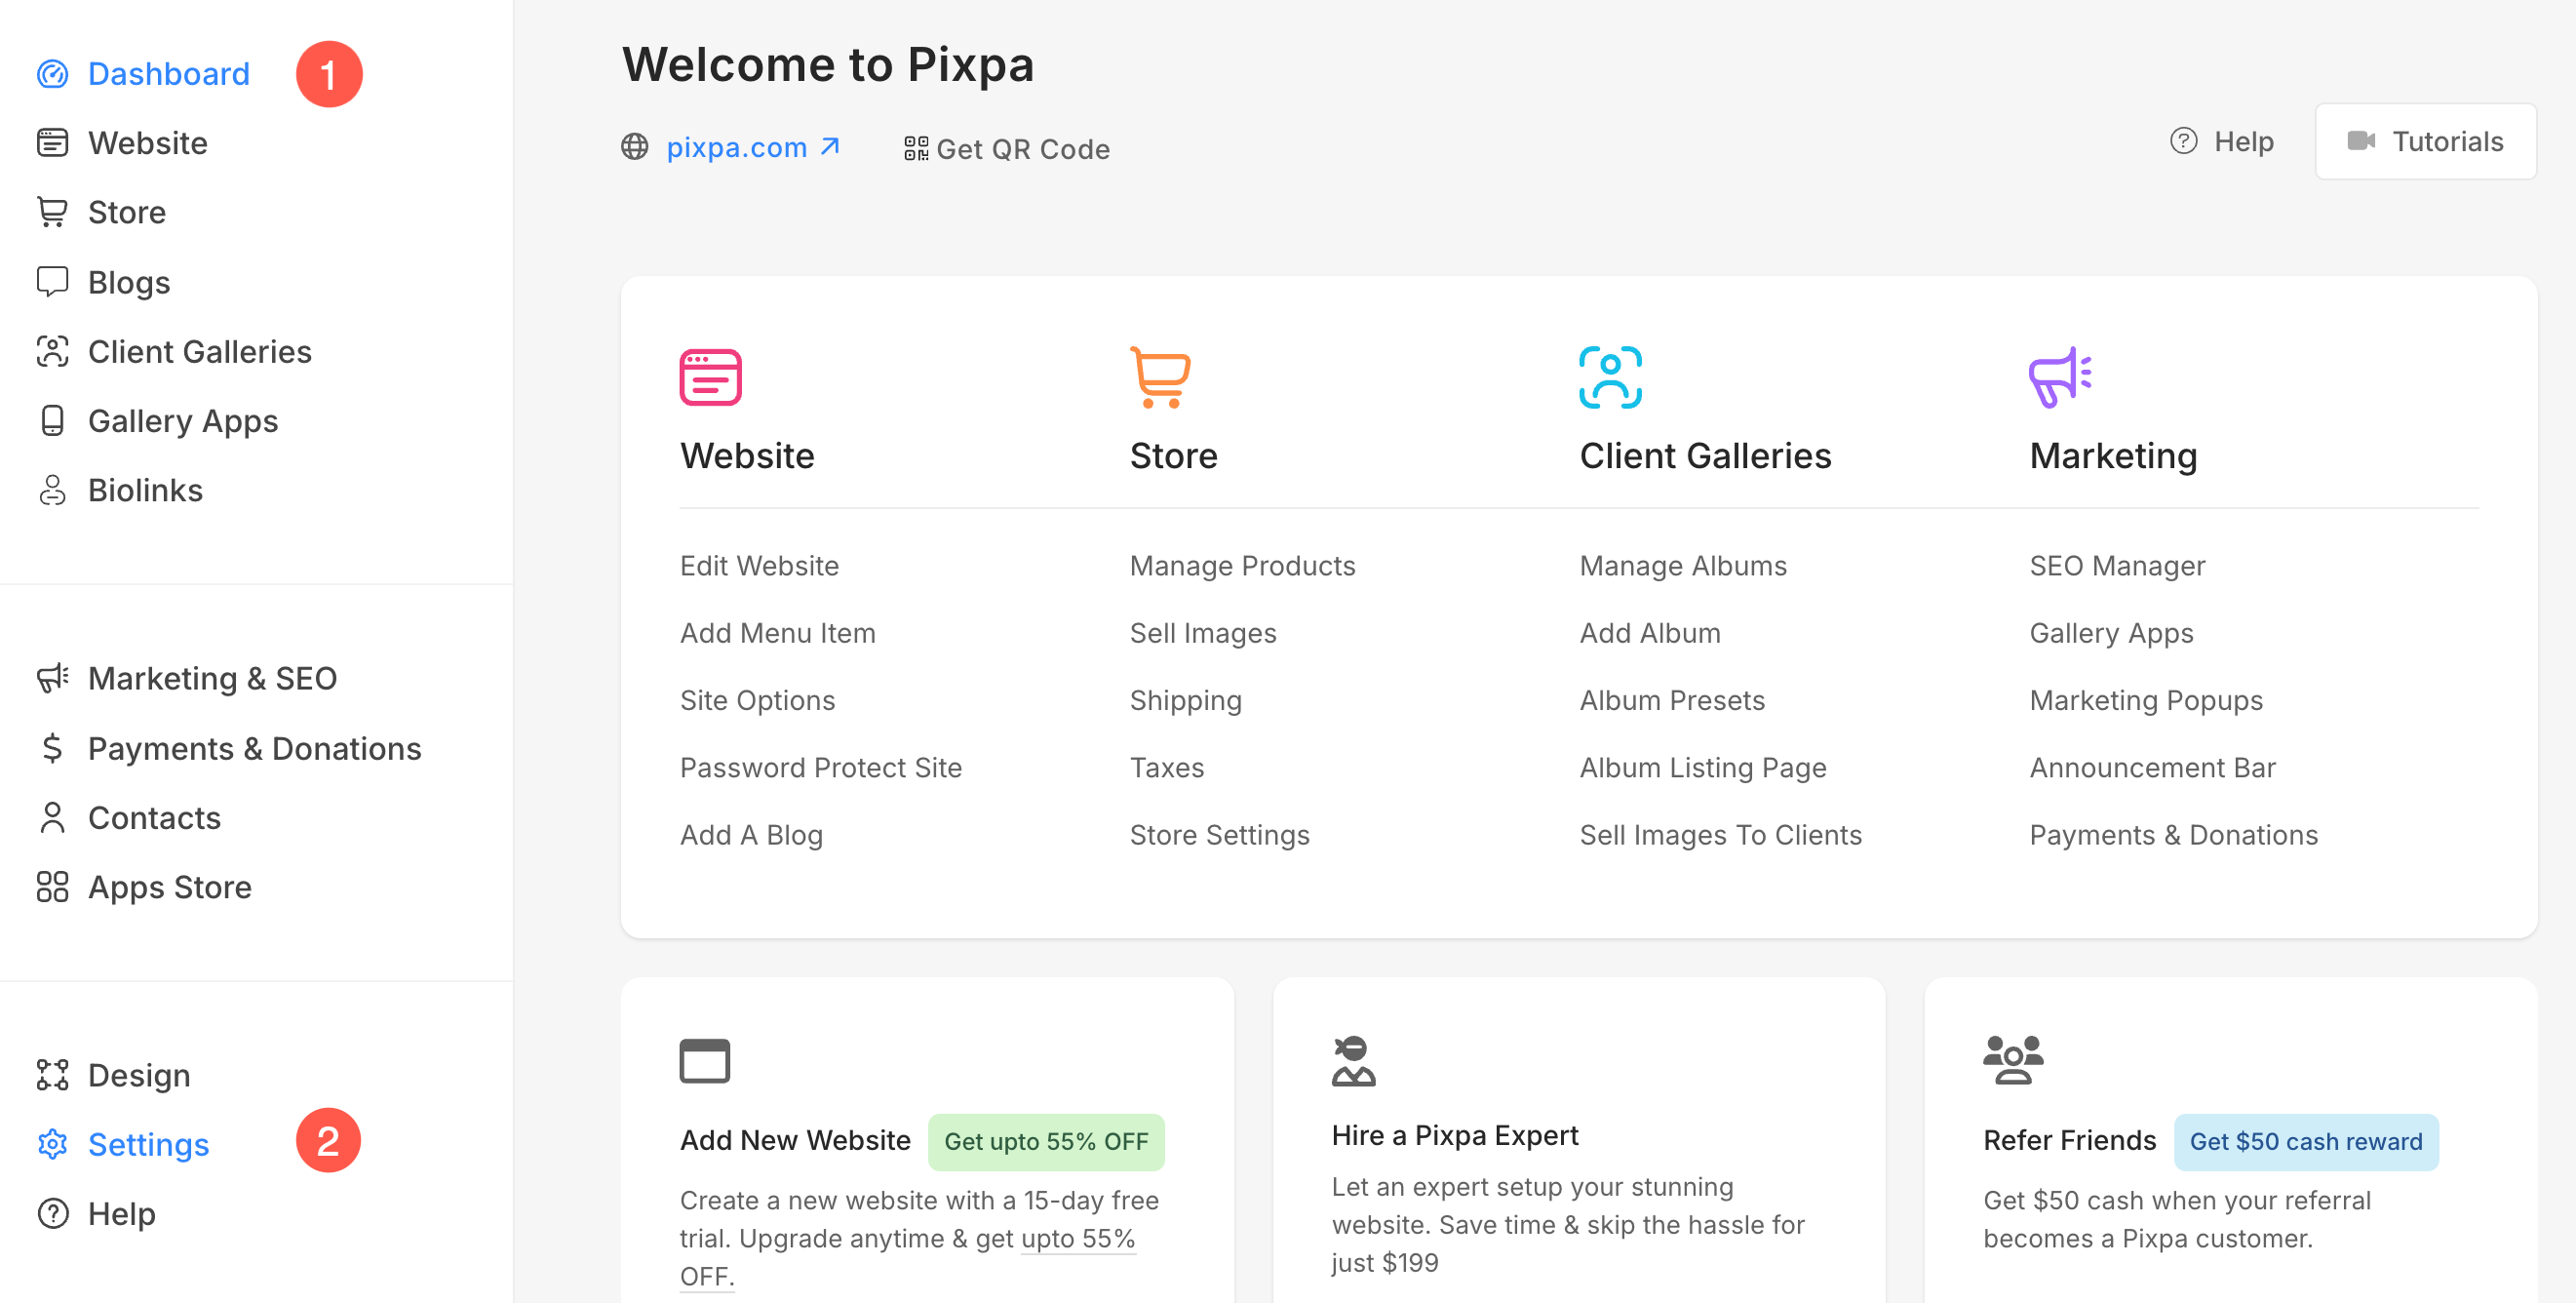
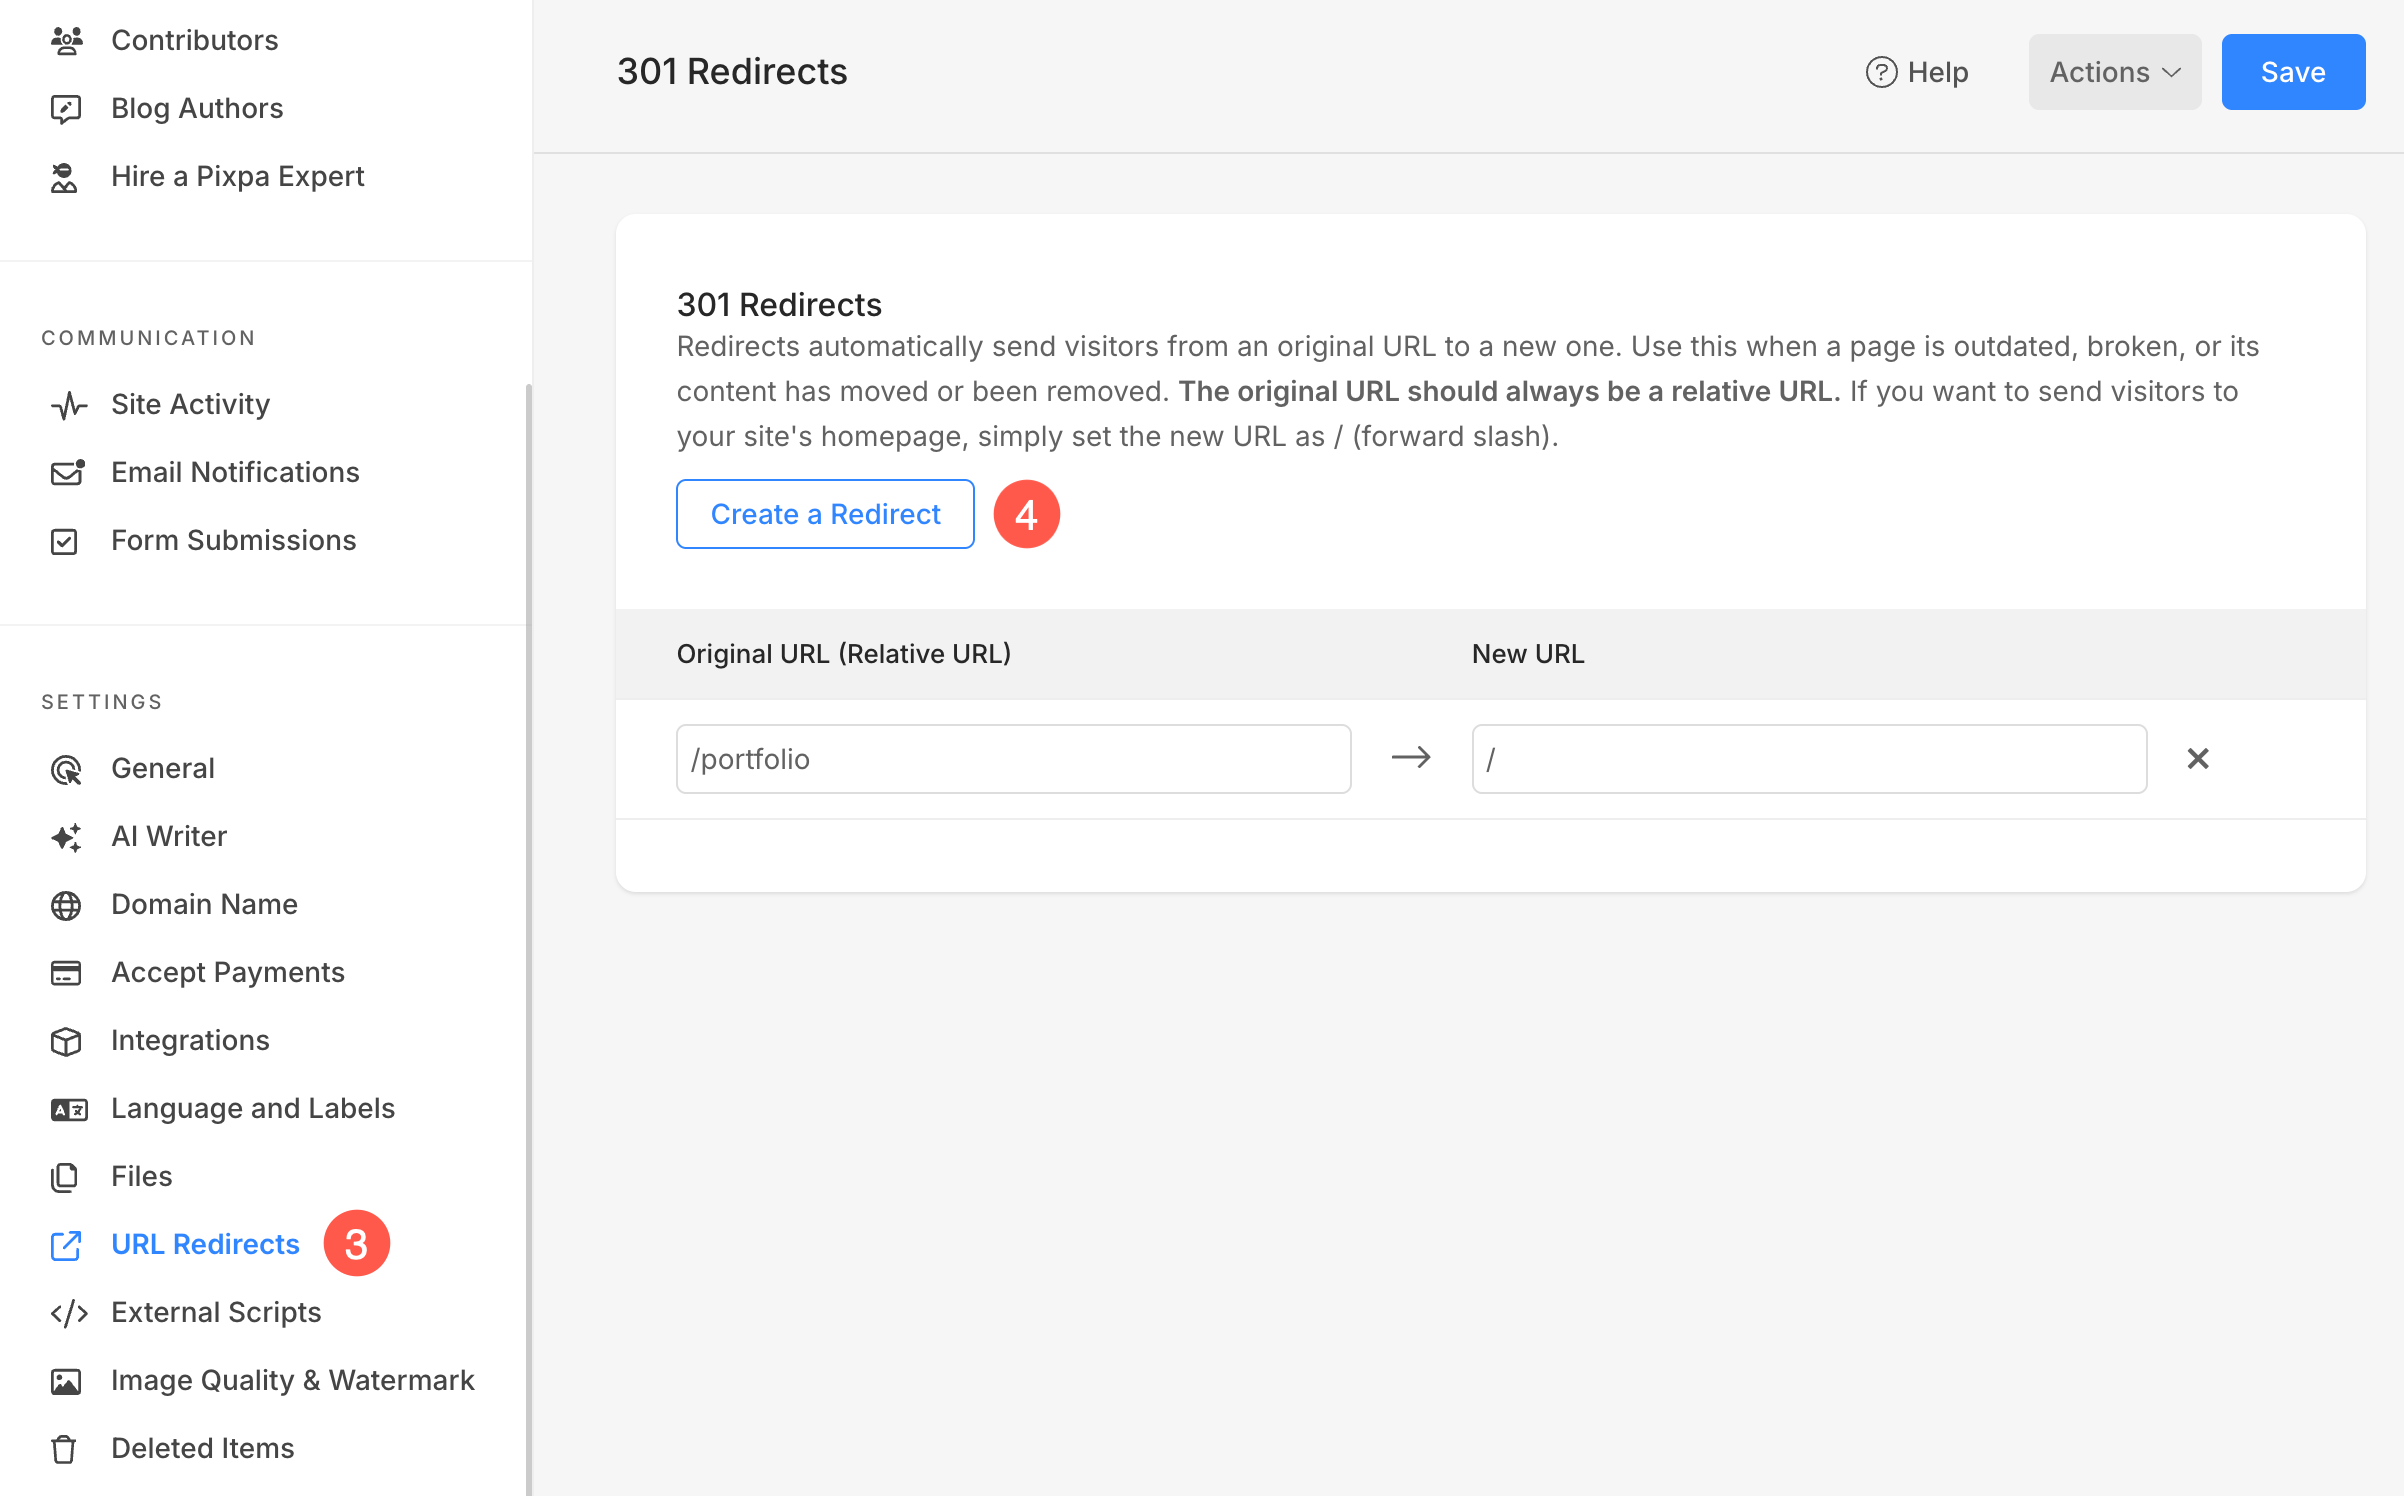
- From the left sidebar, click on URL Redirects (3) option.
- You will now reach the URL Redirects page. Click on the Create a Redirect (4) button to add URL redirect.
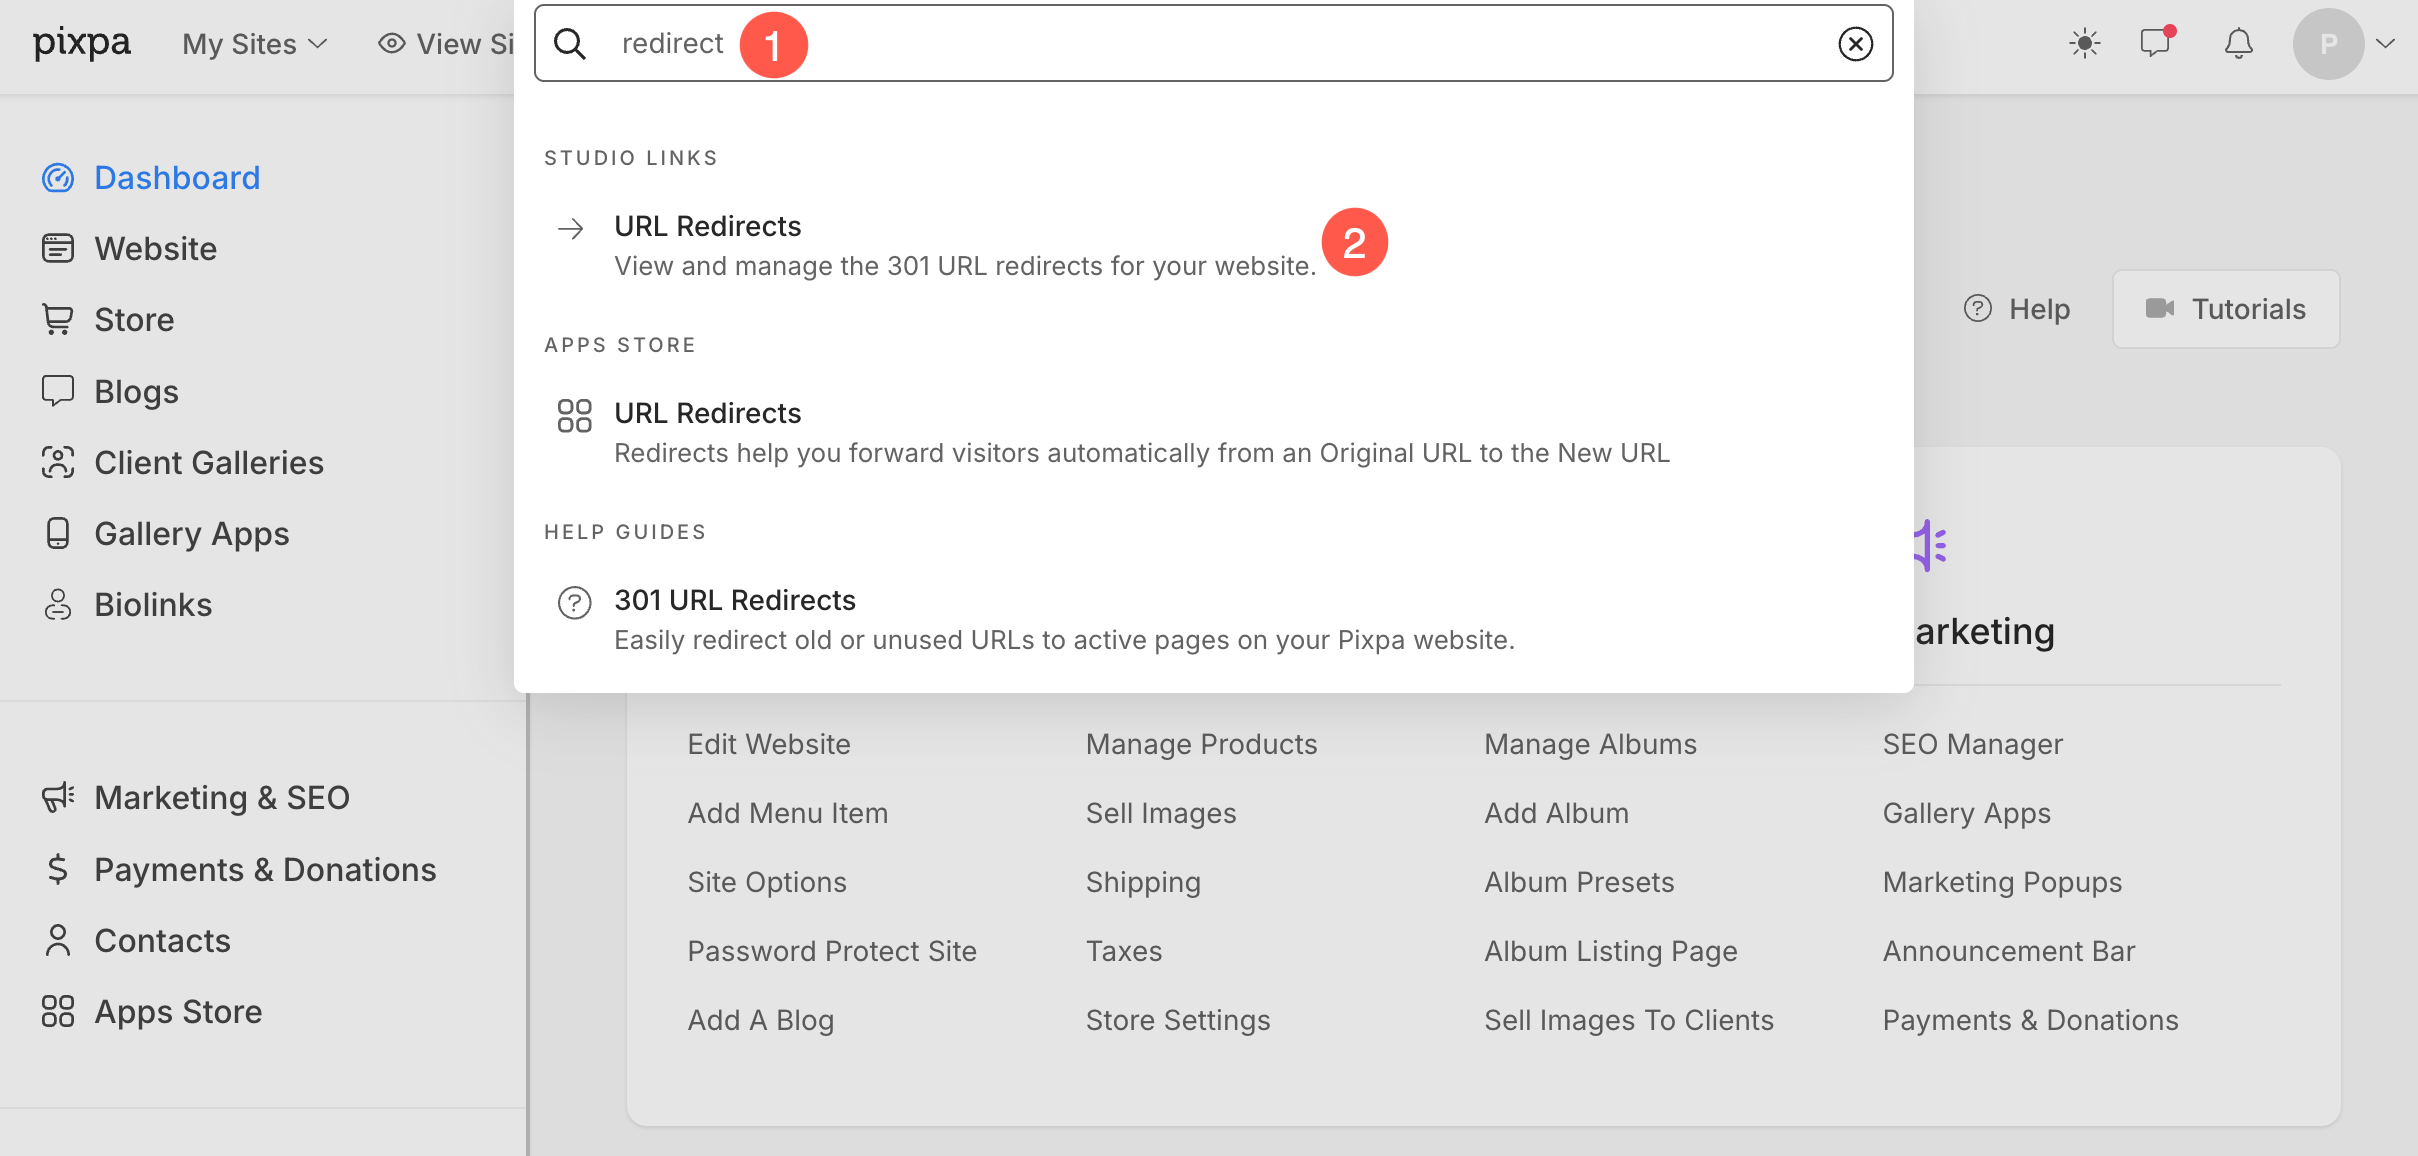
Alternatively, you can use Pixpa’s search option to navigate to the URL redirects section.
- Enter redirects (1) in the Search Bar.
- From the related results, click on the URL Redirects (2) option under Studio Links.
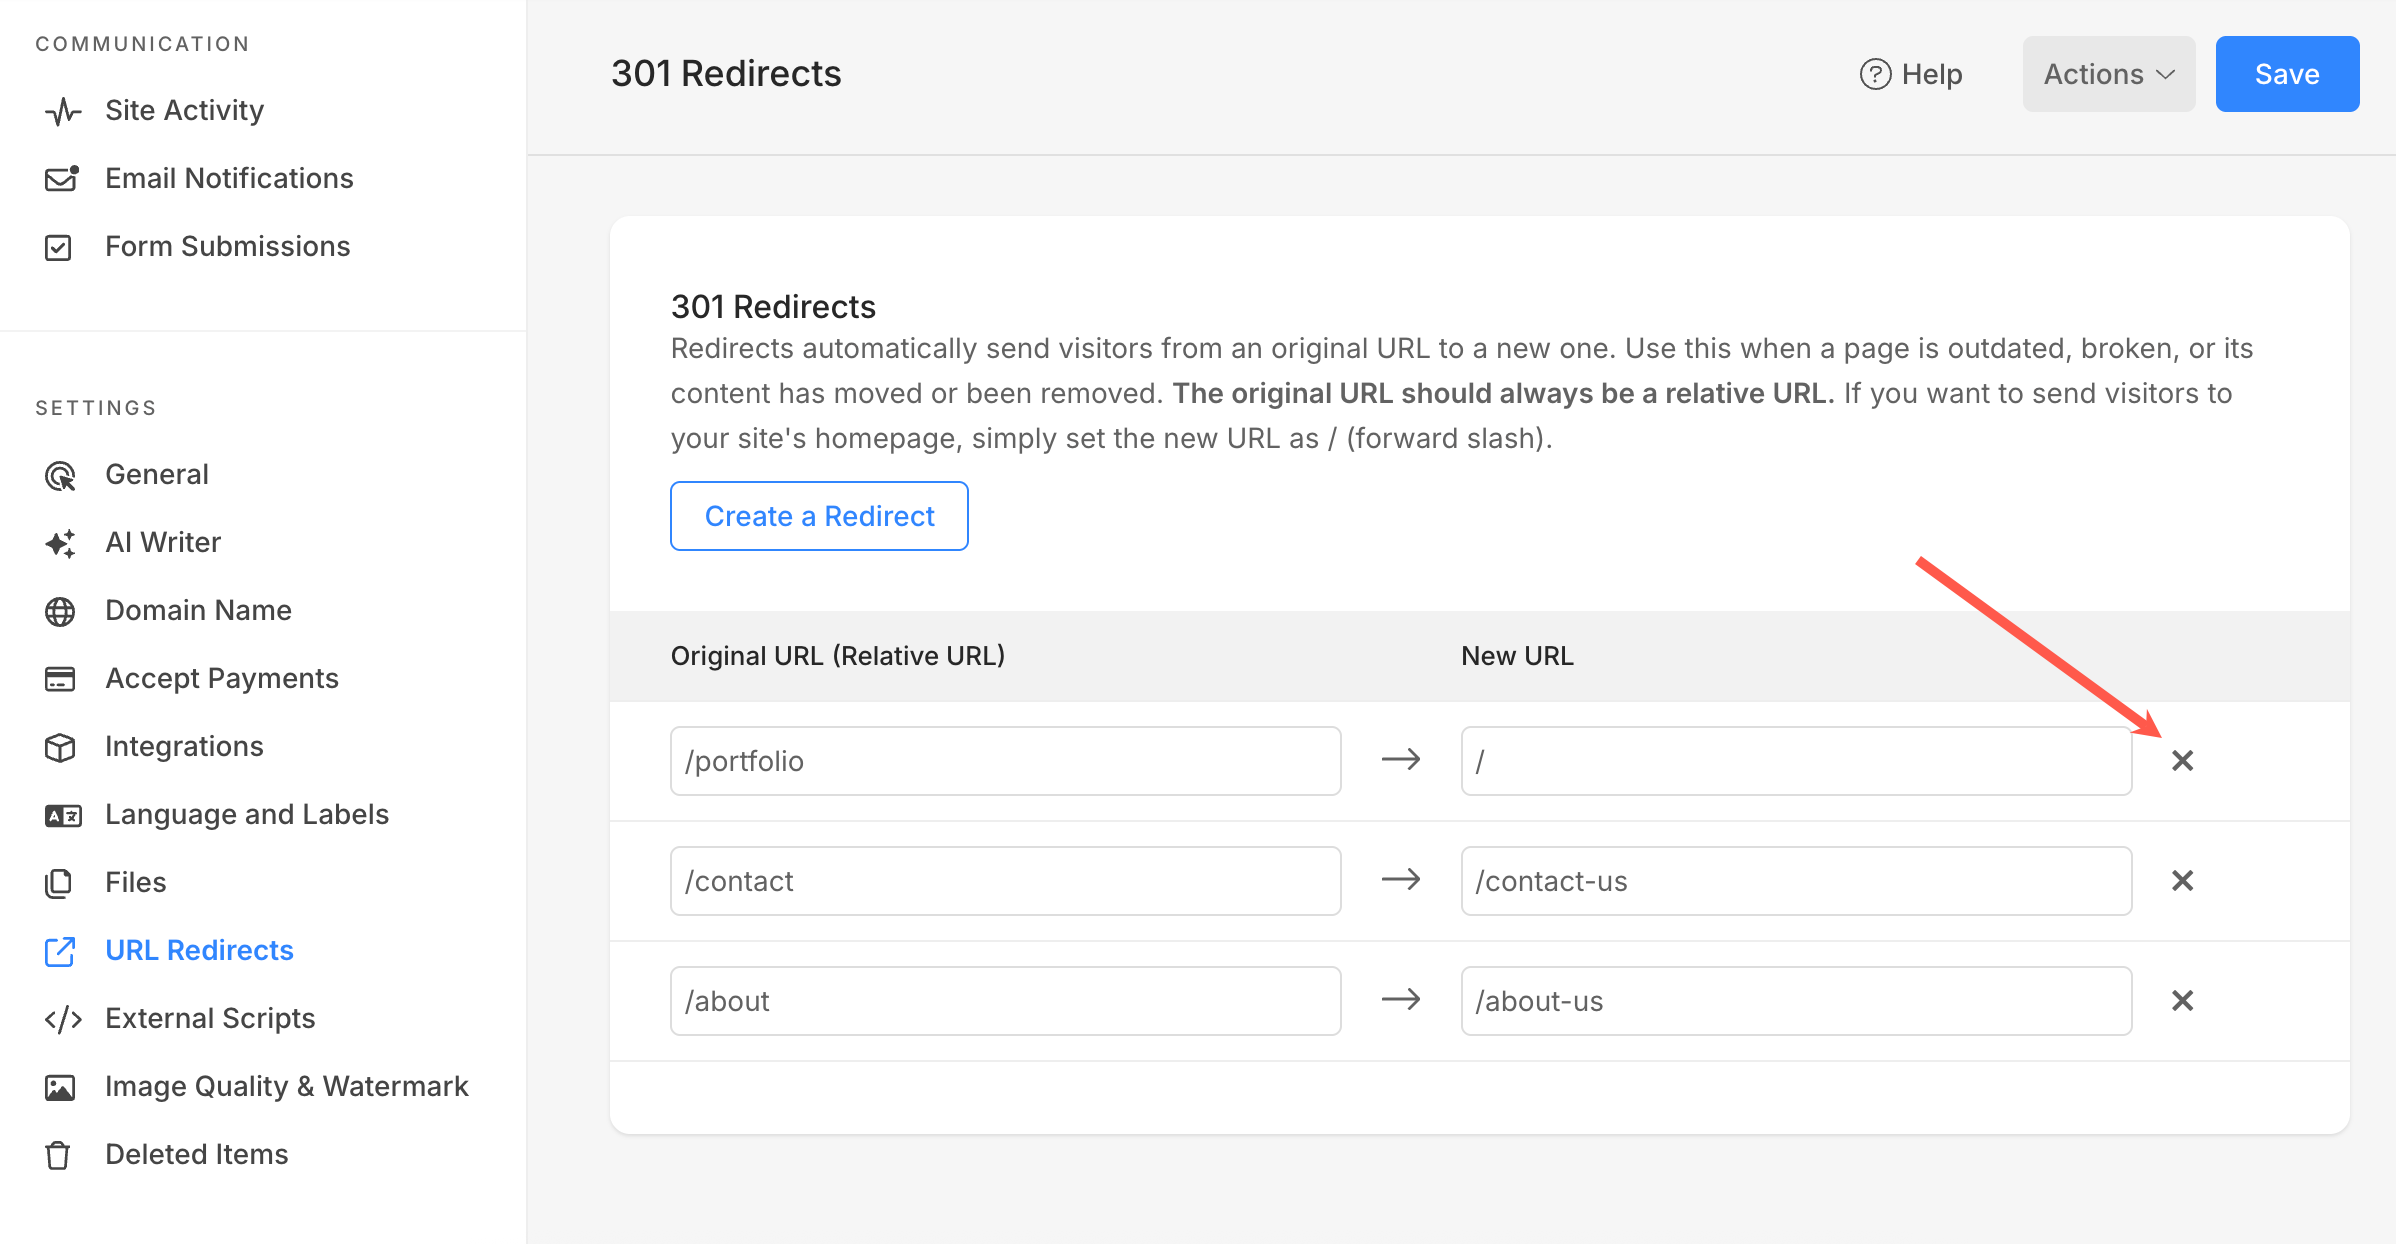
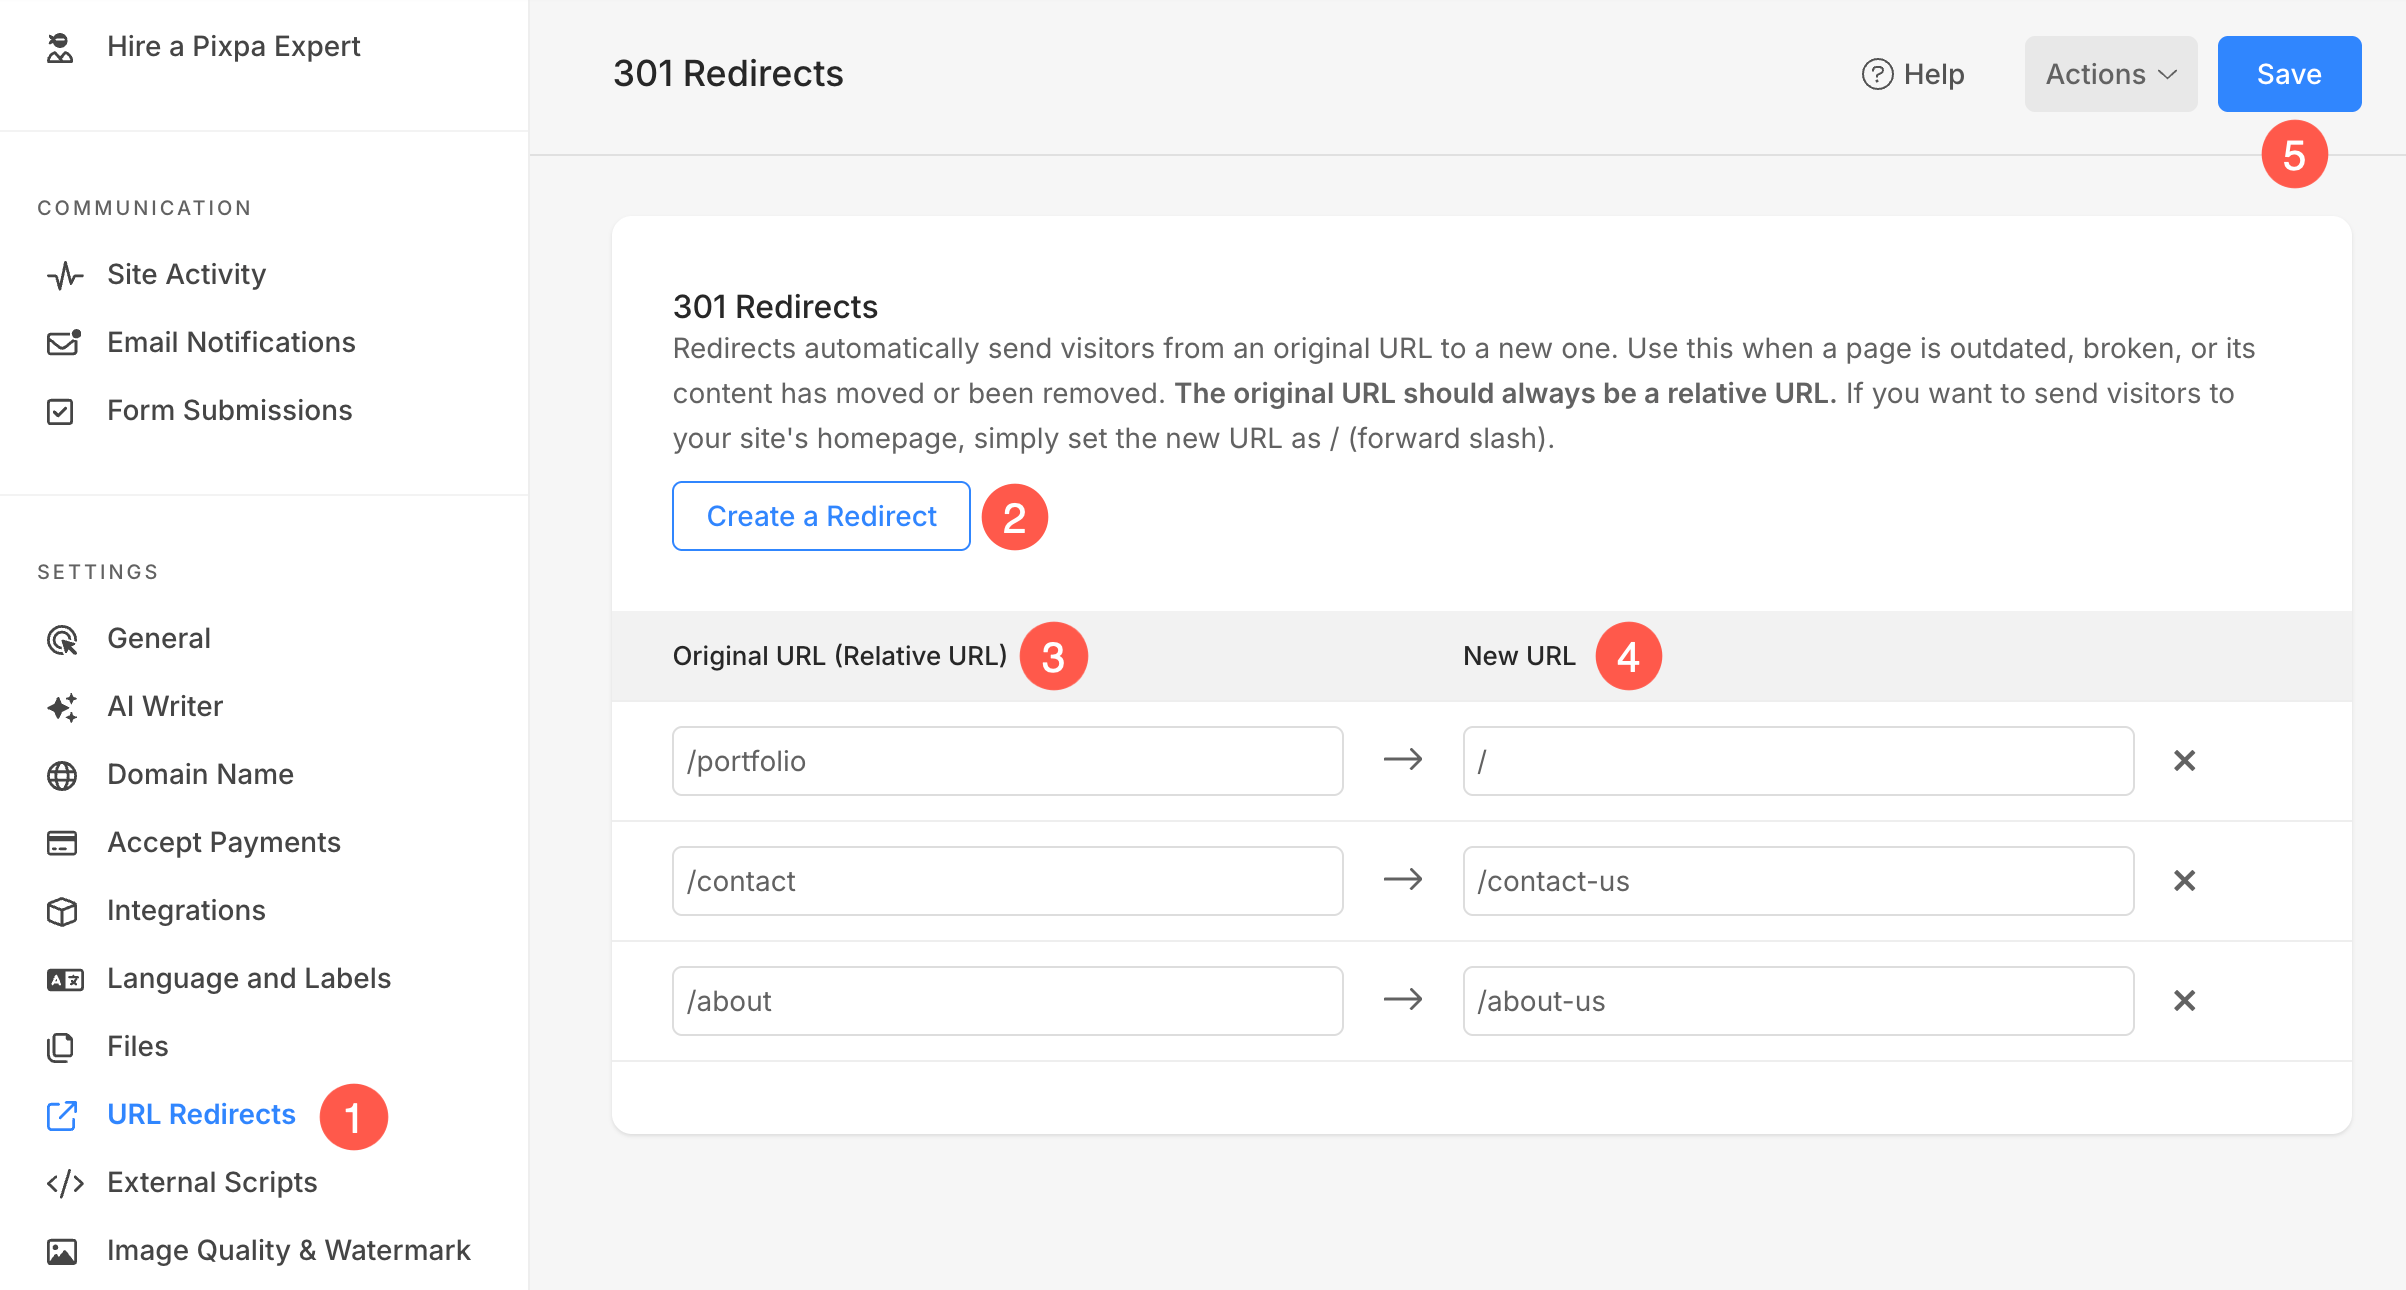
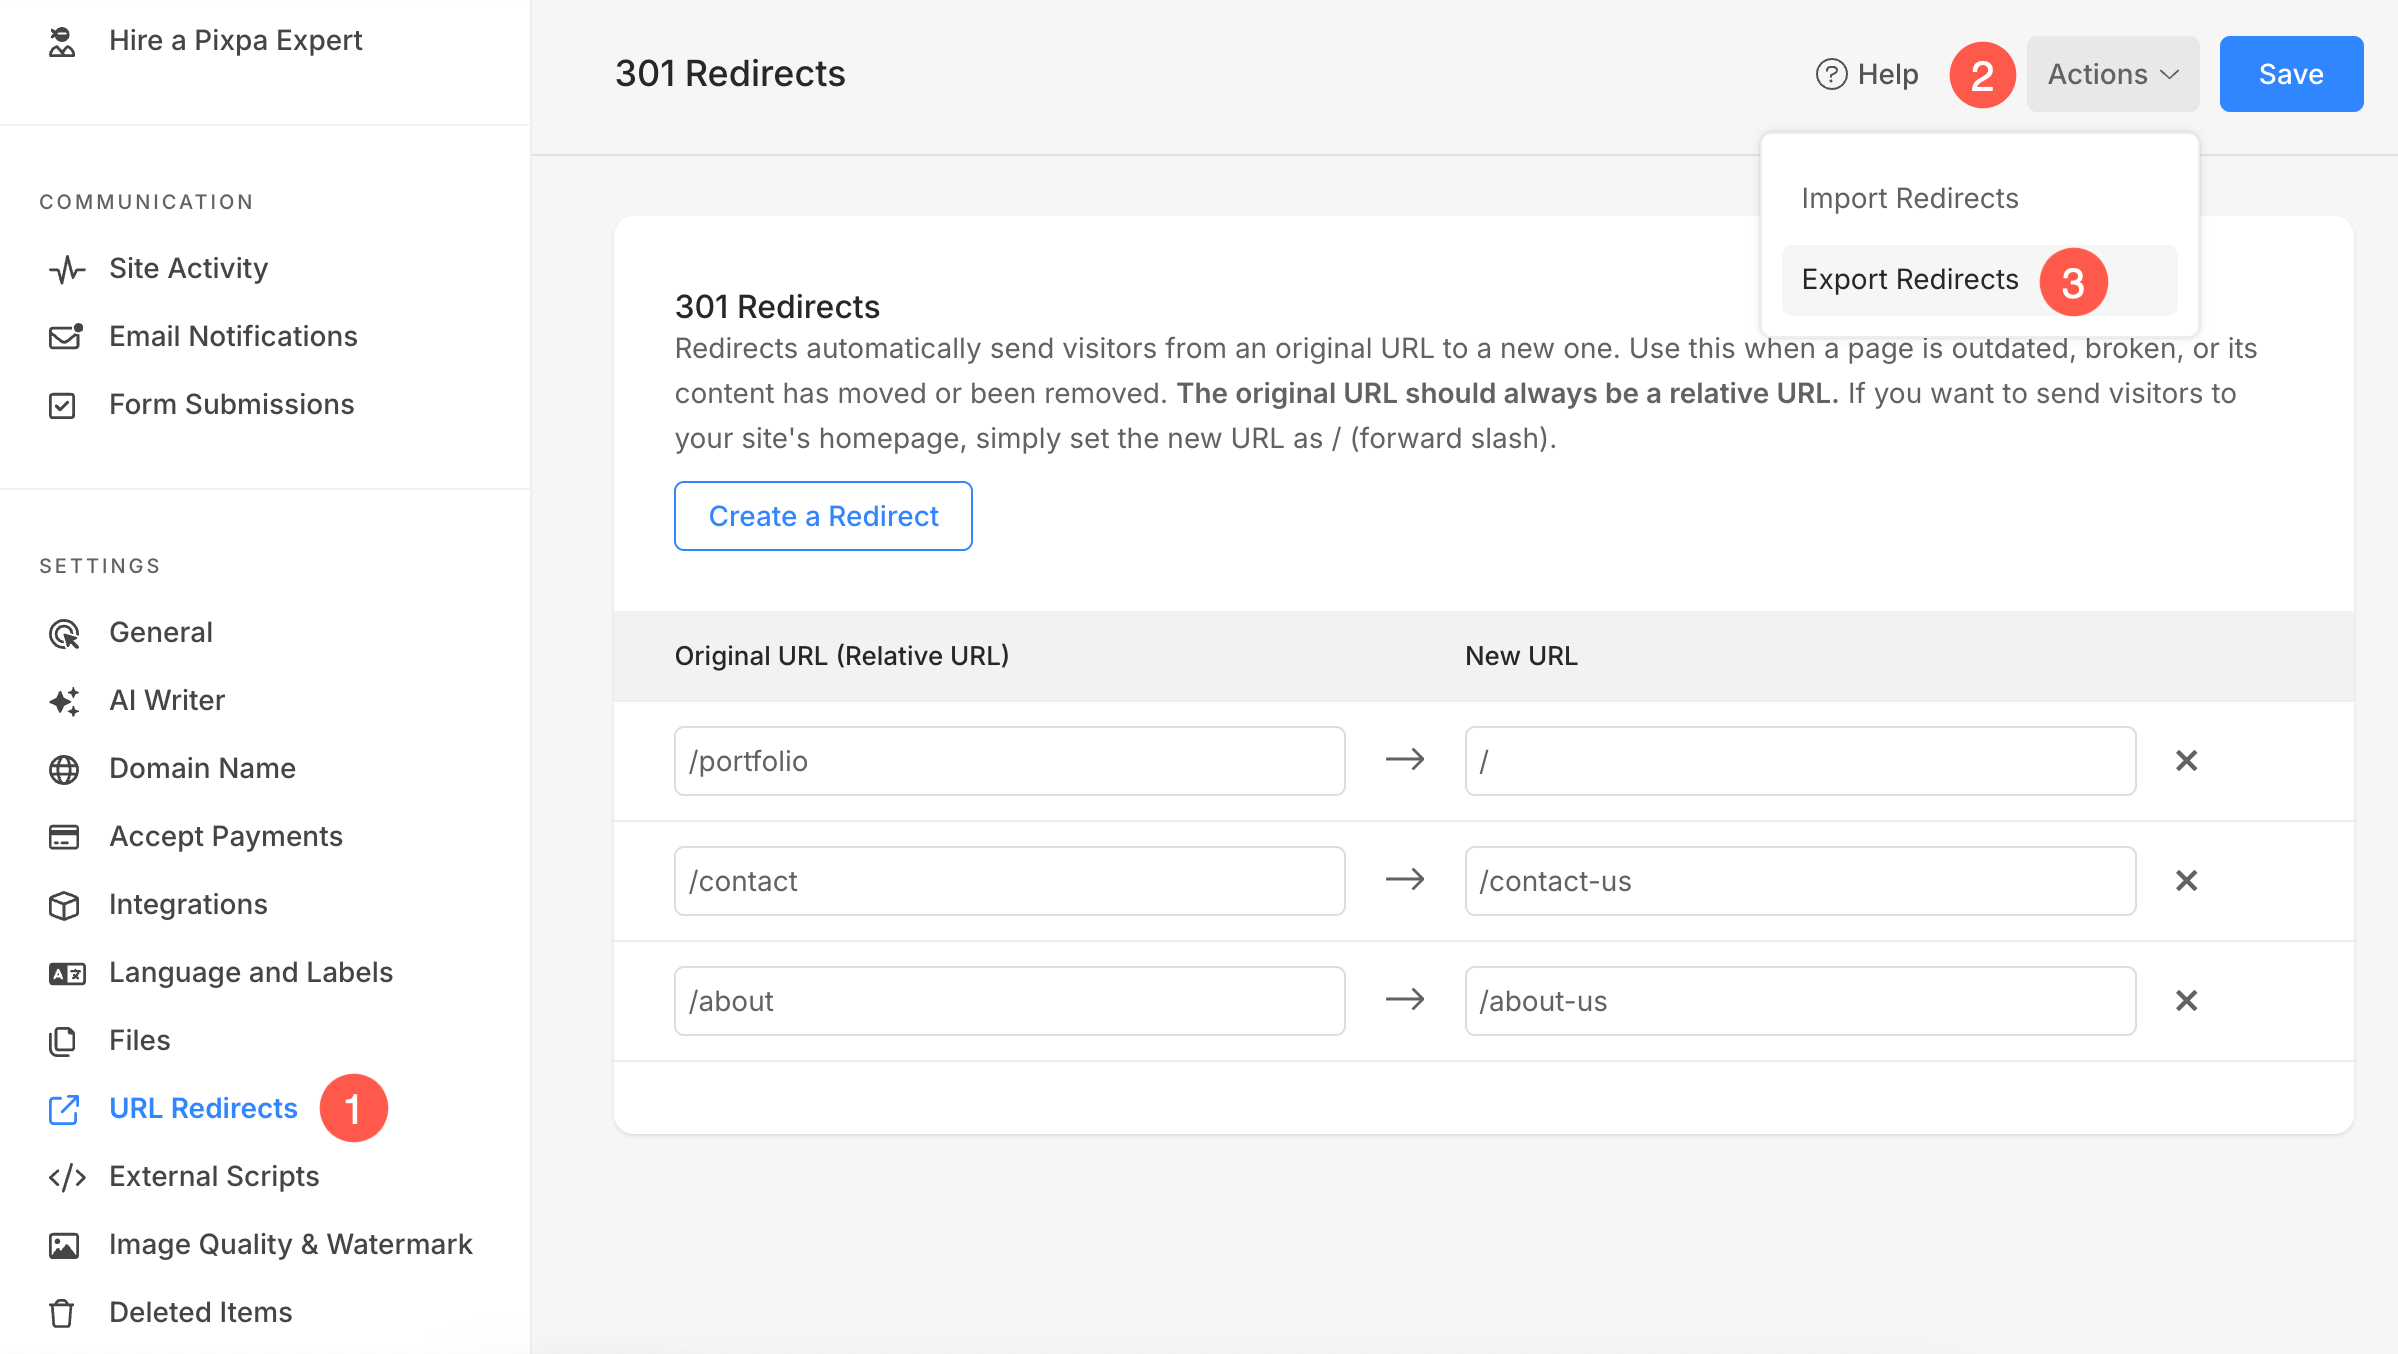
- You will now reach the 301 Redirects (1) page.
- Click on the Create a Redirect (2) button.
- Enter your Original URL (3) and New URL (4) path.
- For example, if your original URL is https://www.abc.com/examples and your new URL is https://www.abc.com/galleries, you need to add /examples in the original URL and /galleries in the new URL.
- Save (5) your changes.
Import redirects
Pixpa also lets you import URL redirects from other platforms or websites, making it easy to migrate existing redirects and ensure all your old links continue to work seamlessly on your Pixpa site.
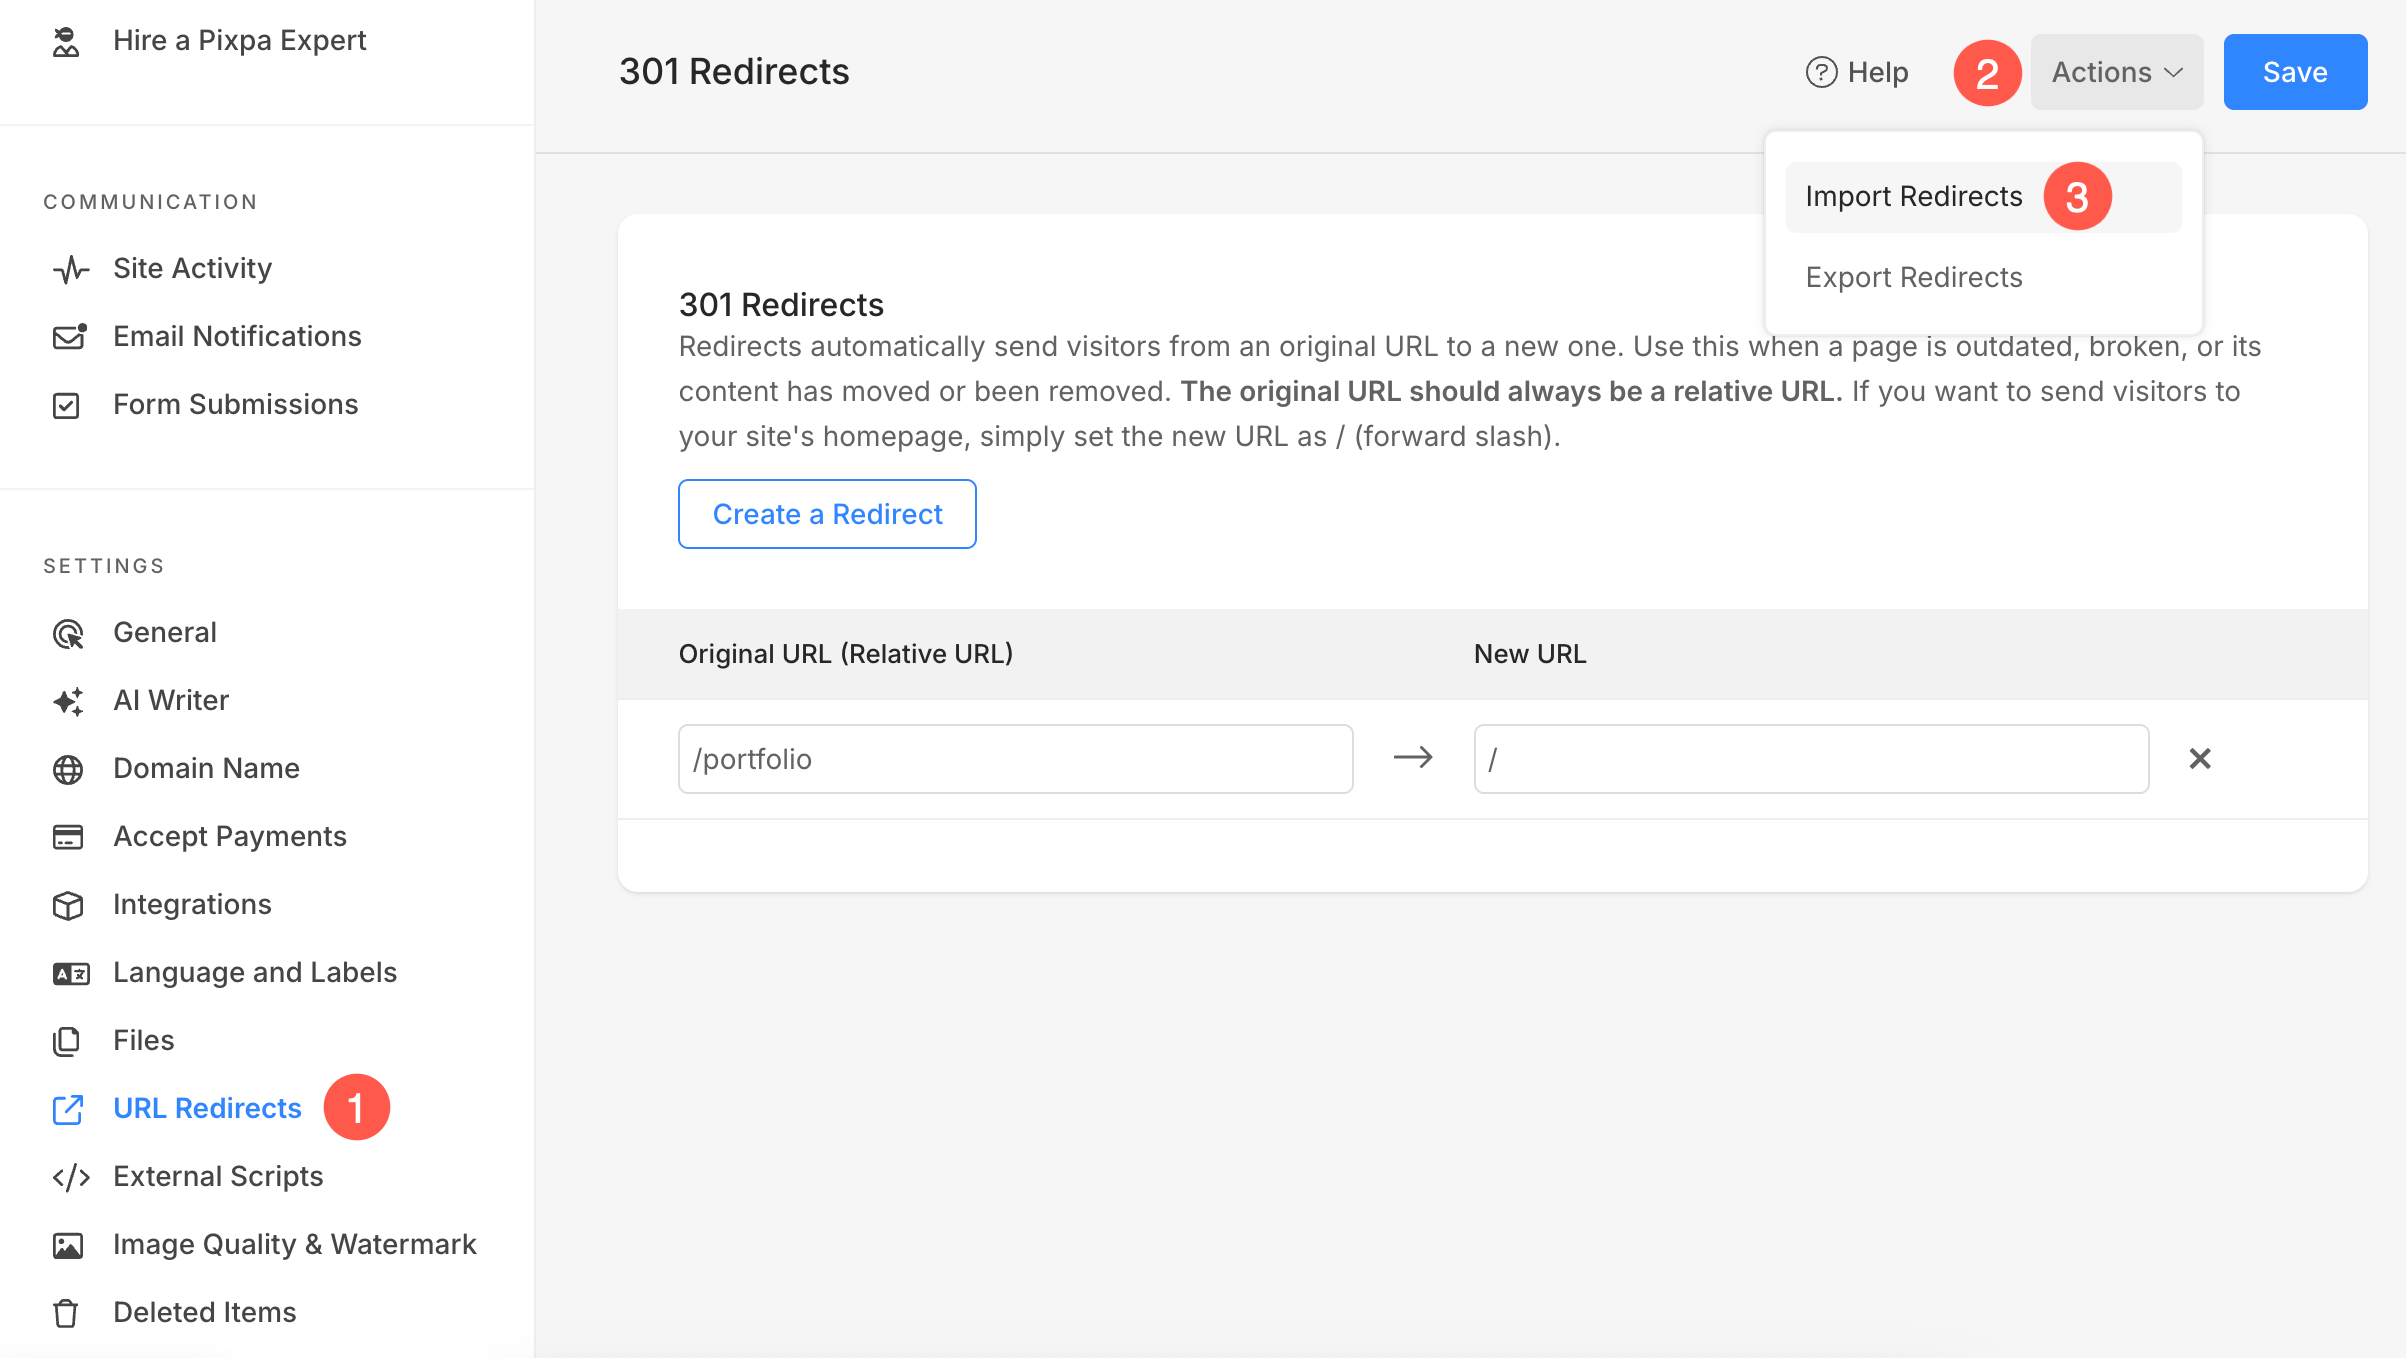
- Go to the URL Redirects (1) page.
- Click on Actions (2) button and from the dropdown, select Import Redirects (3) option.
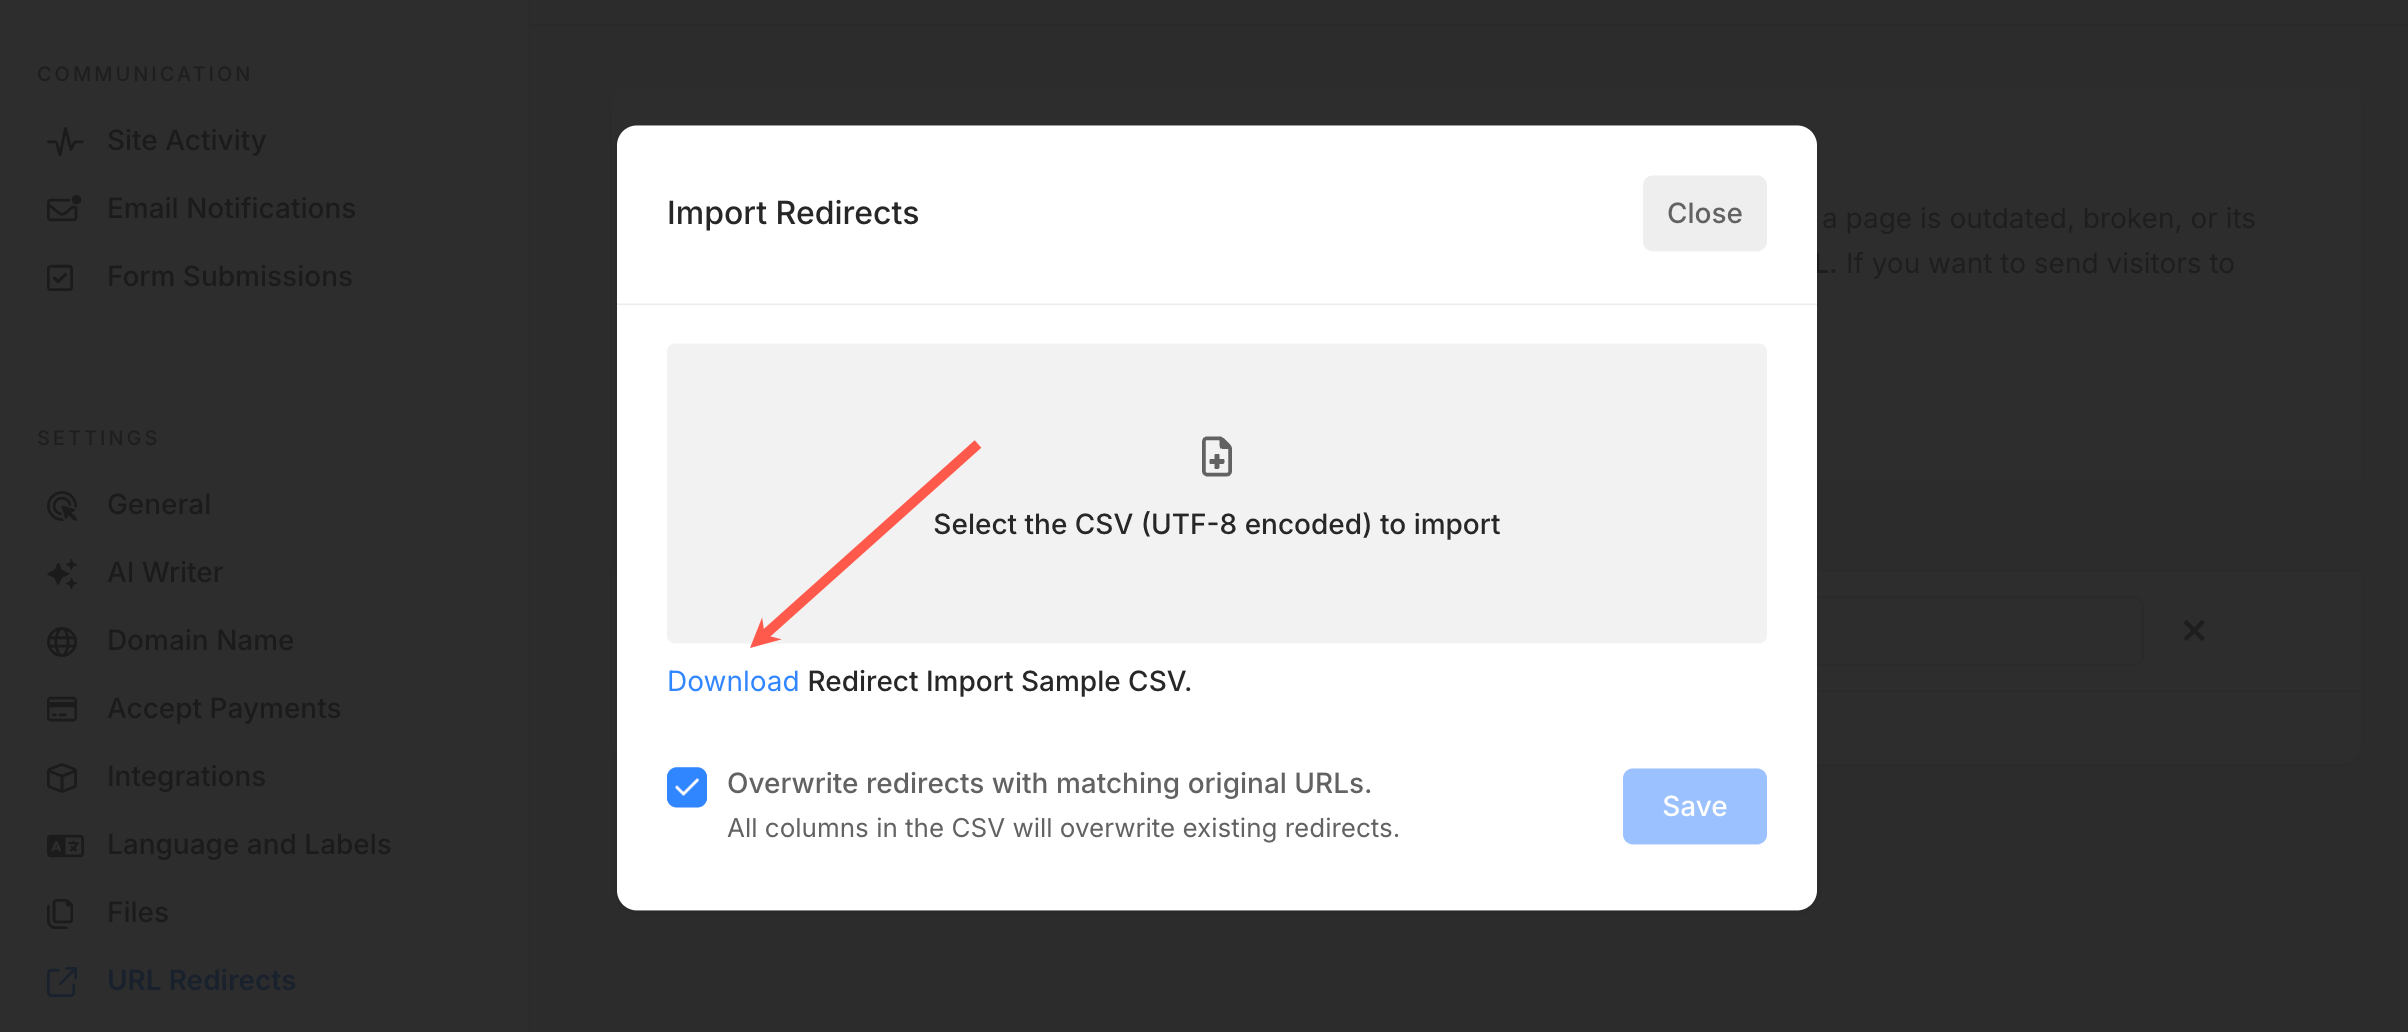
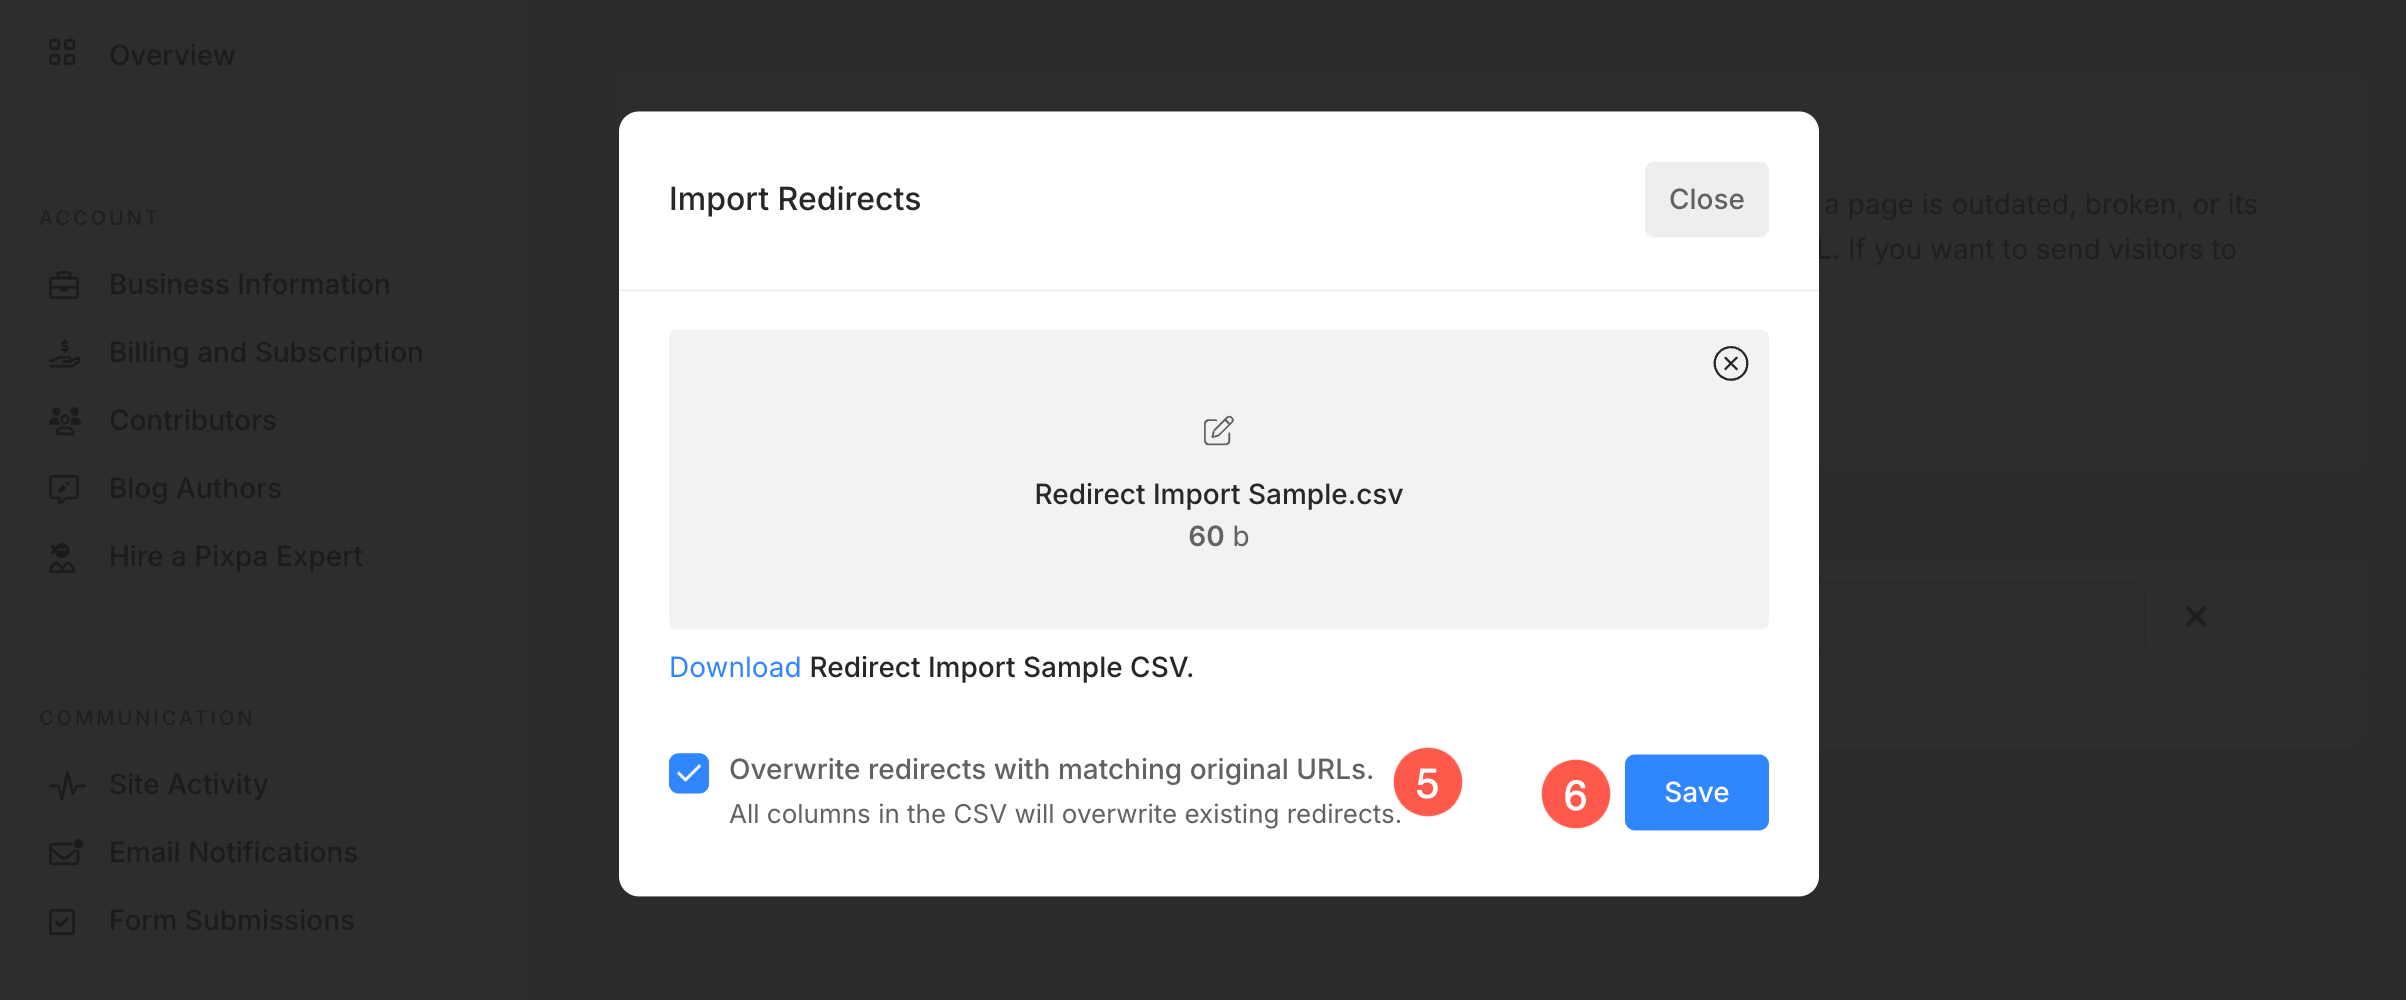
- Upload the CSV file (4) to import the redirects to your Pixpa website.
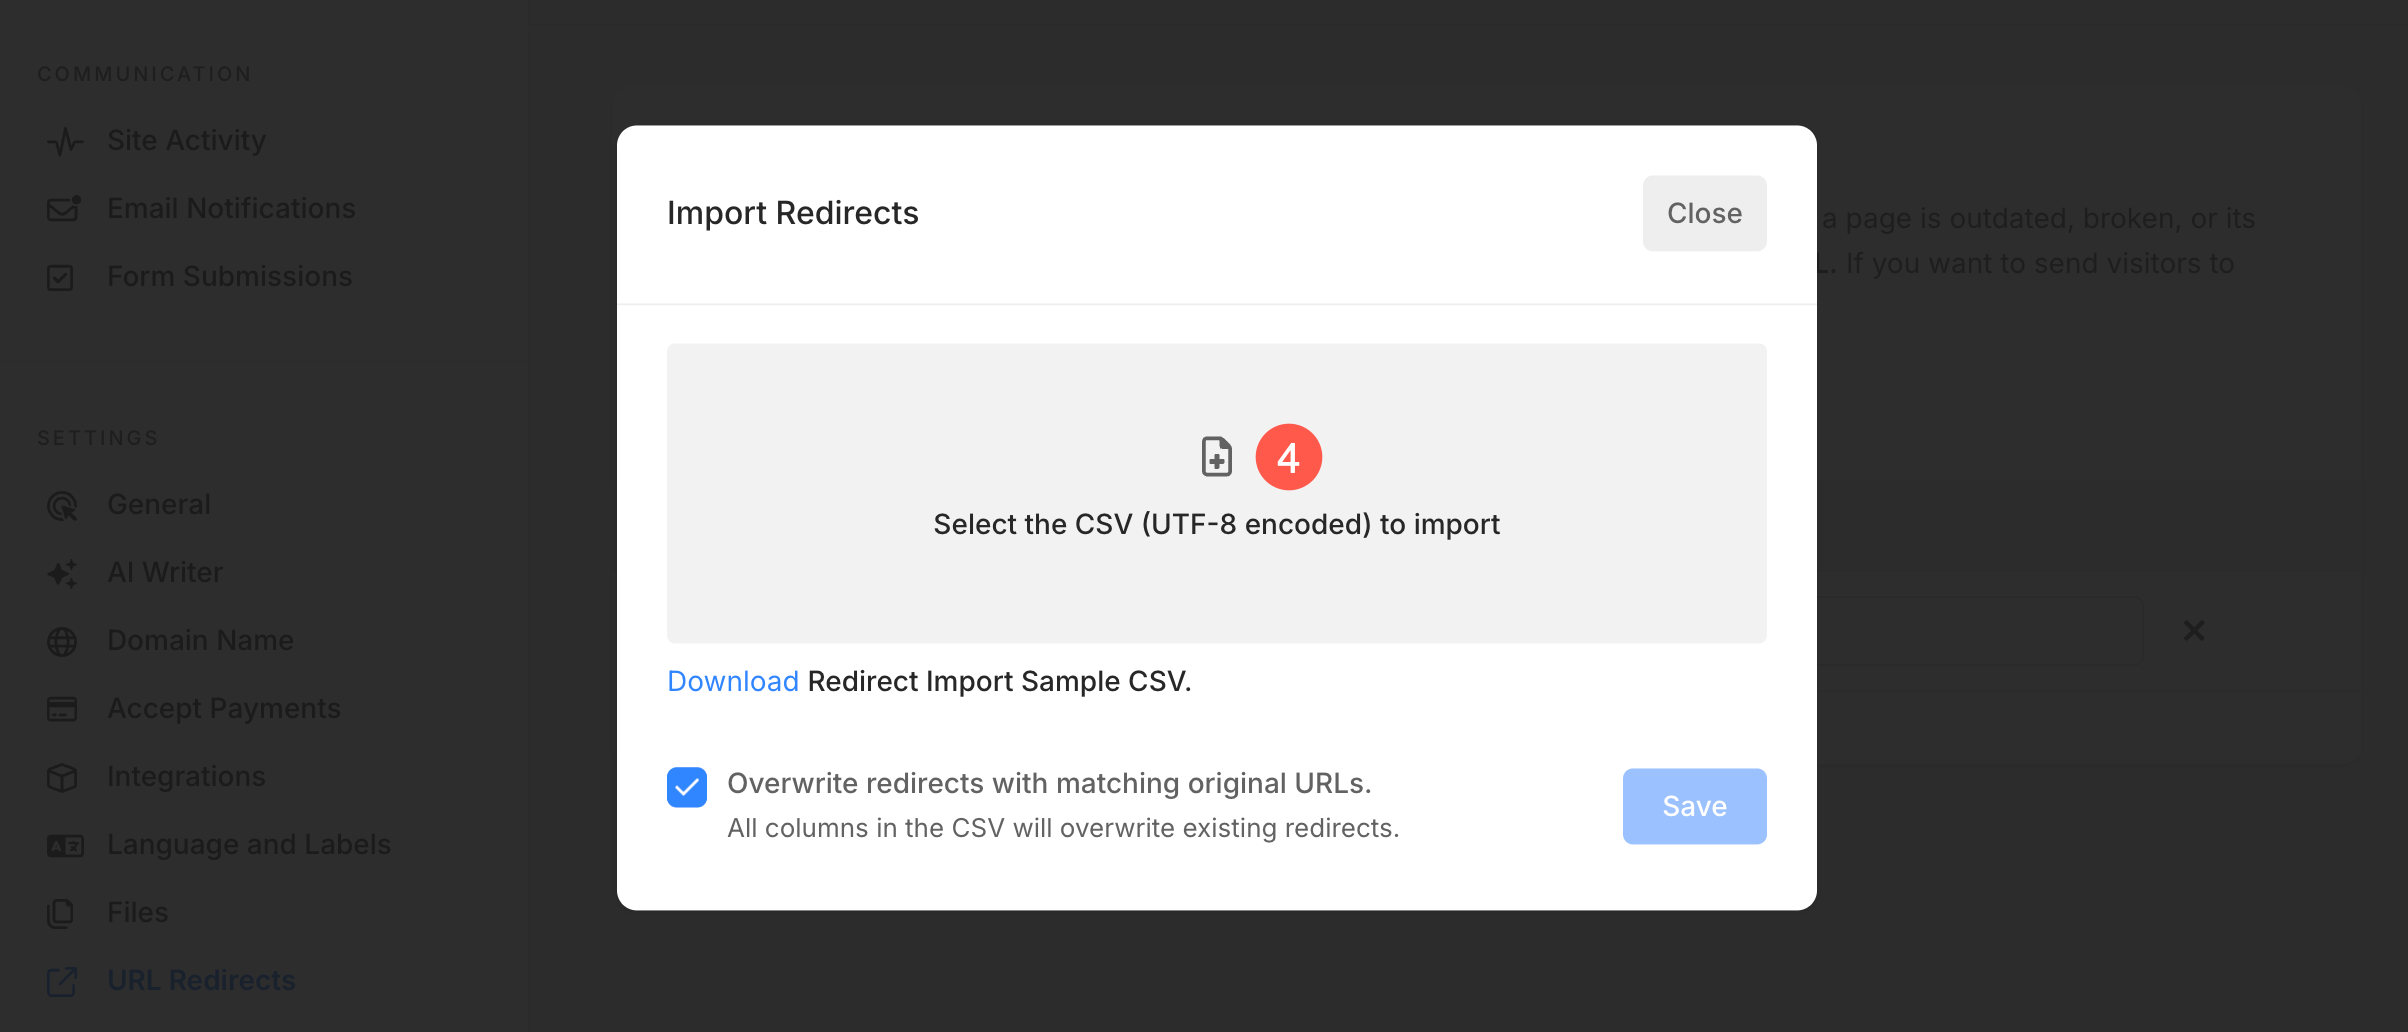
- Tick the checkbox (5) to overwrite redirects with matching Original URLs. This ensures that any redirect in the CSV file with the same source URL will be updated instead of getting duplicated.
- Click Save (6) button to import the redirects.
Export redirects
Exporting URL redirects from Pixpa allows you to download a structured file containing all your redirect rules. This makes it easy to review and manage your redirects, keep a backup, or import them into another Pixpa site or a different platform whenever needed.
- Under the URL Redirects (1) page, click on Actions (2) button.
- From the dropdown, select Export Redirects (3) option. A CSV file containing all your existing URL redirect rules will be downloaded automatically.
Delete a redirect
- You can delete a 301 redirect by clicking on the close icon next to it.