The Slider section in Pixpa lets you add a visually engaging area to your pages while also enhancing SEO. Whether you’re working on a gallery, page, folder, client album, or blog, the banner helps set the tone and highlight important content.
In this article
- What is a Banner
- Add Banner to a Page
- Edit Banner Section
- Banner Content
- Banner Settings
- Banner Layout
What is a Banner
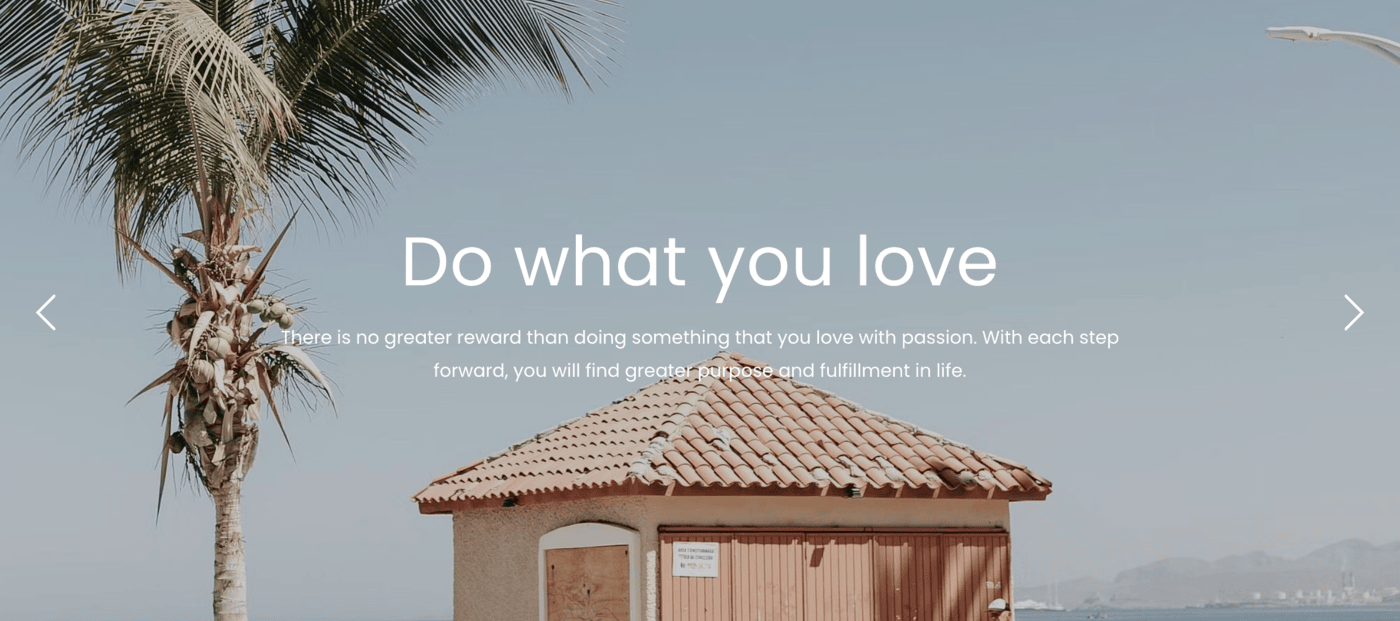
A Banner is used to show a full-width banner image/image slideshow/video at the top/bottom of your content.
Add Banner Section to a Page
- A section can be added to a page. You can either add a section to an already existing page or create a new page within your website.
- On your page, click on the blue + icon to add a New Section to your page.
- You will now see the section categories on the left side.
- Choose the Hero Sections (1) category and click on the Slider tab (2) where you can choose from different layouts of the Banner (3) section.
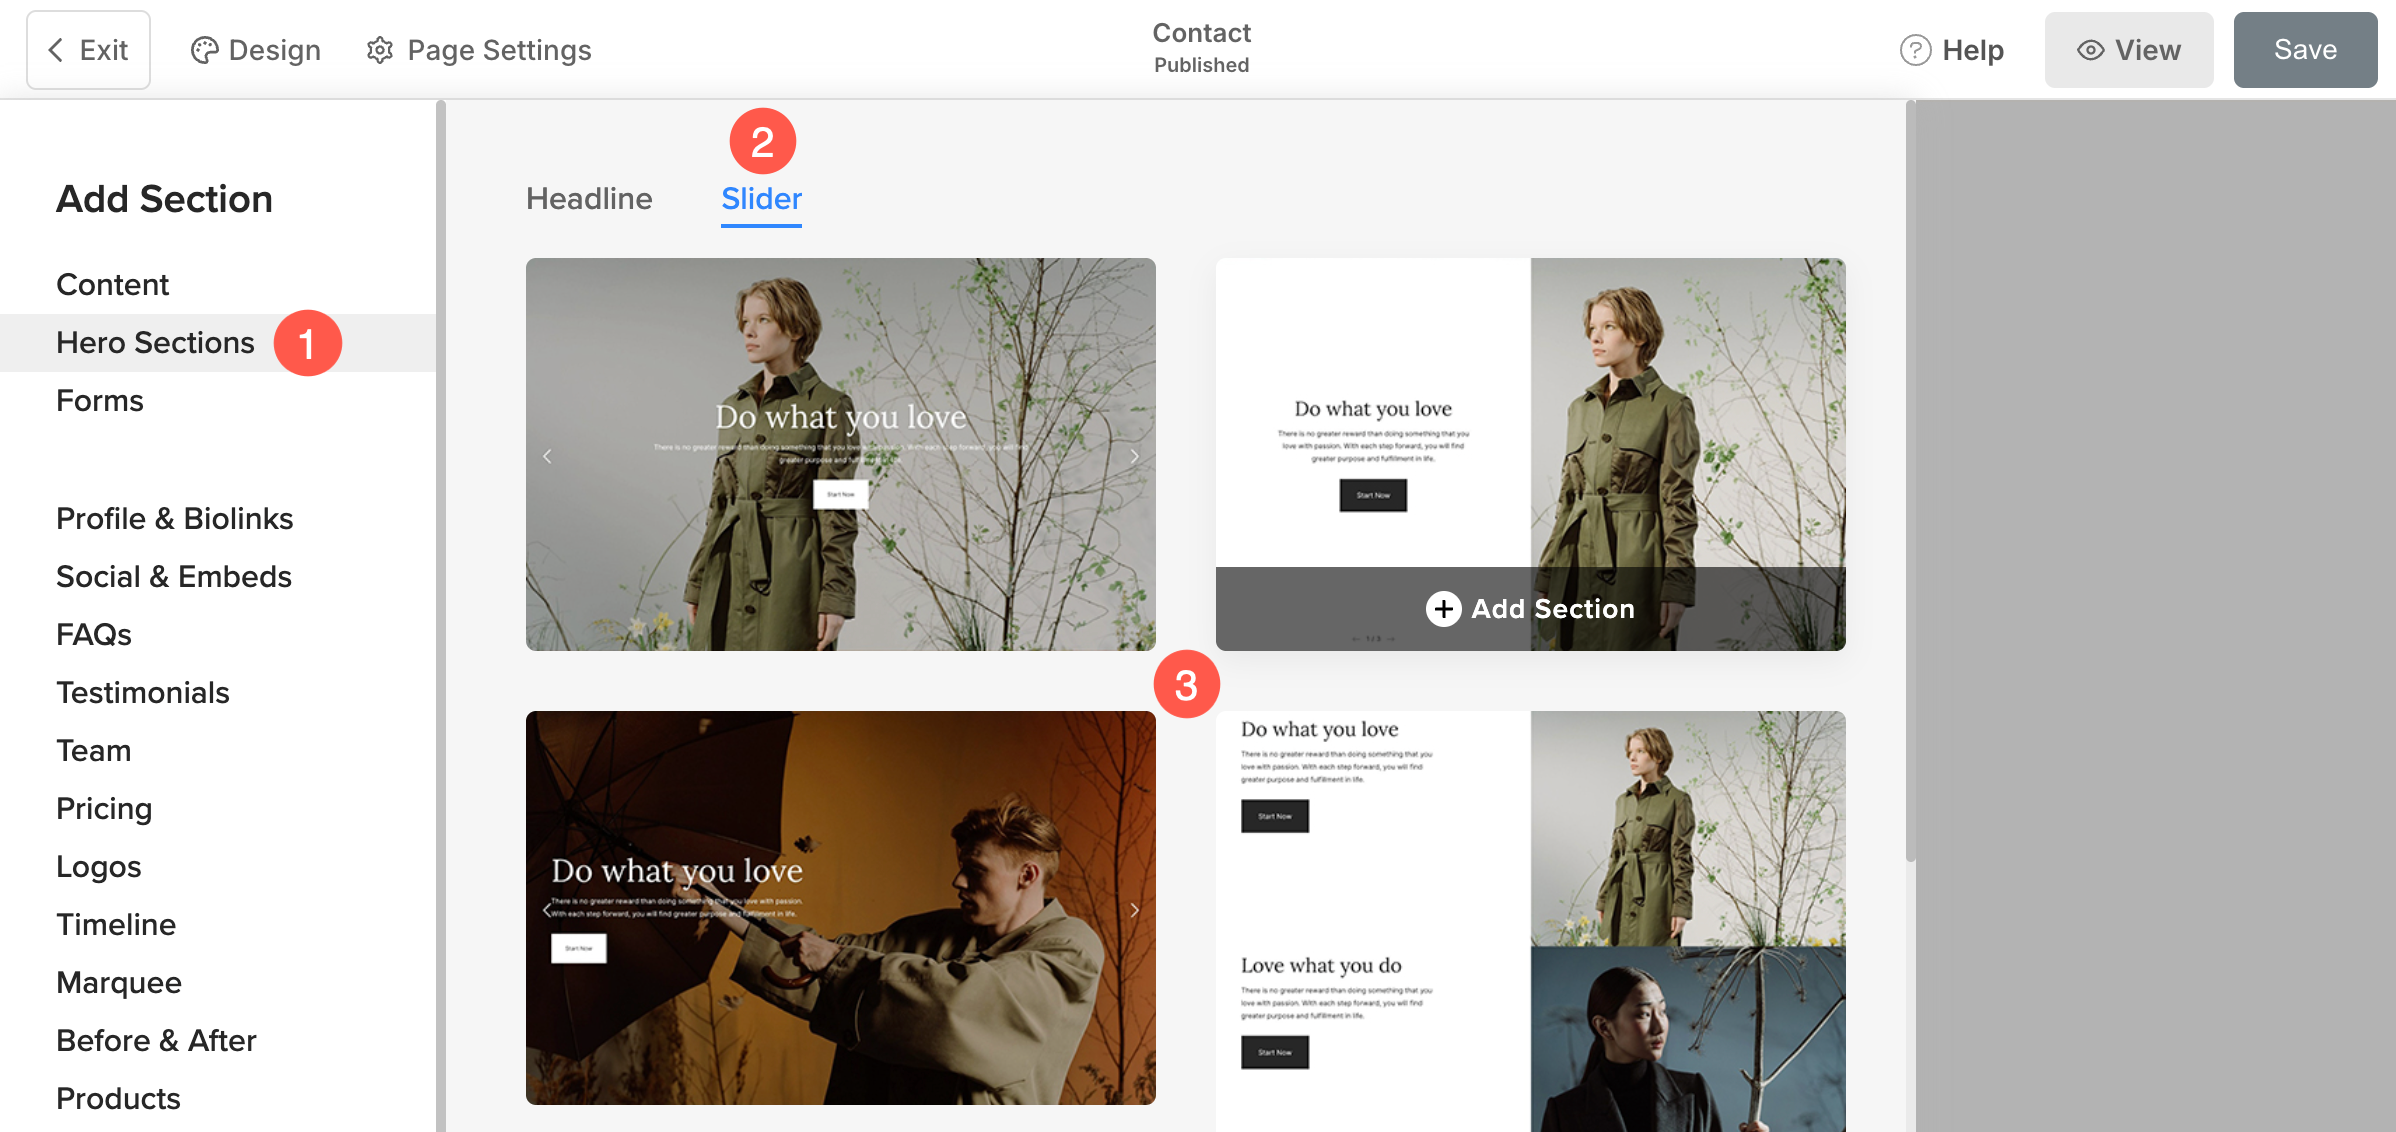
- Choose any section layout and click on it to add it to your page.
Edit Banner Section
If the section is already added to the page, then you can easily edit it.
- Hover the cursor over the section and click on Edit Content (1) button.

- A sidebar will open from where you can Edit (2) the banner section.
- Click Save (3) button after making the changes.
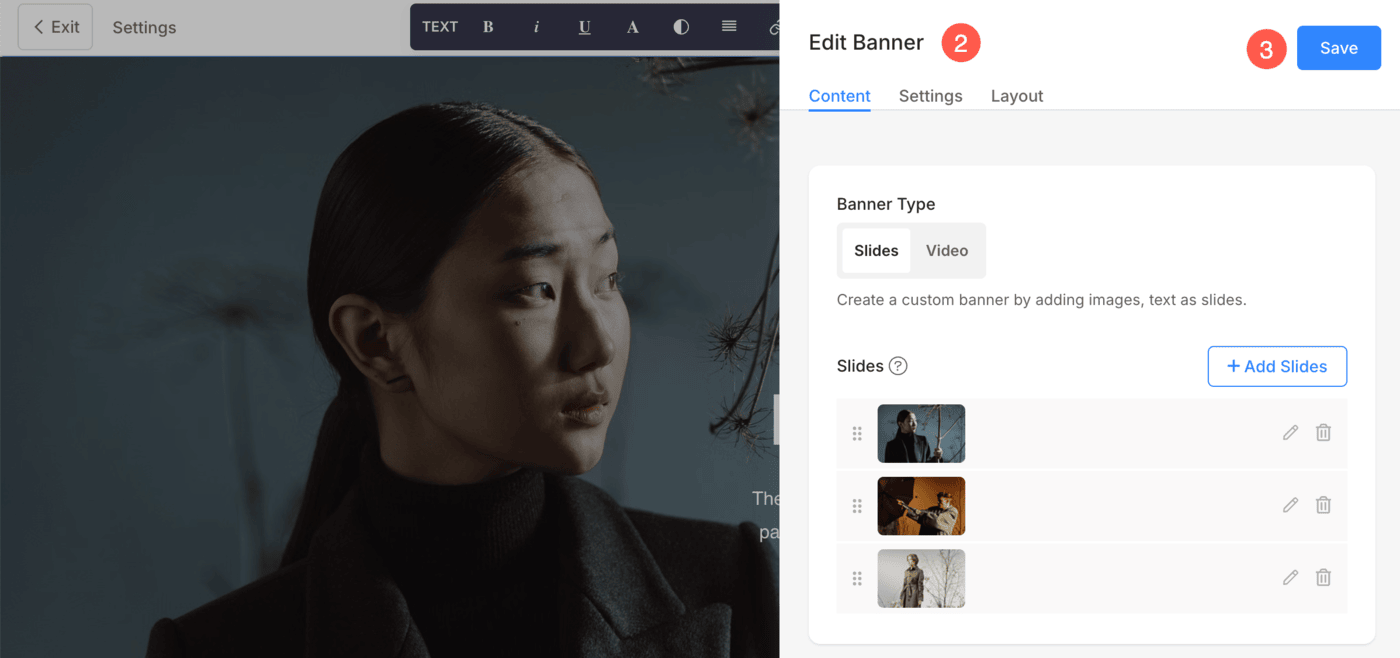
Banner Section Content
The Content tab under the Edit Banner section allows you to add and customize the content of your banner, whether it’s image-based or video-based.
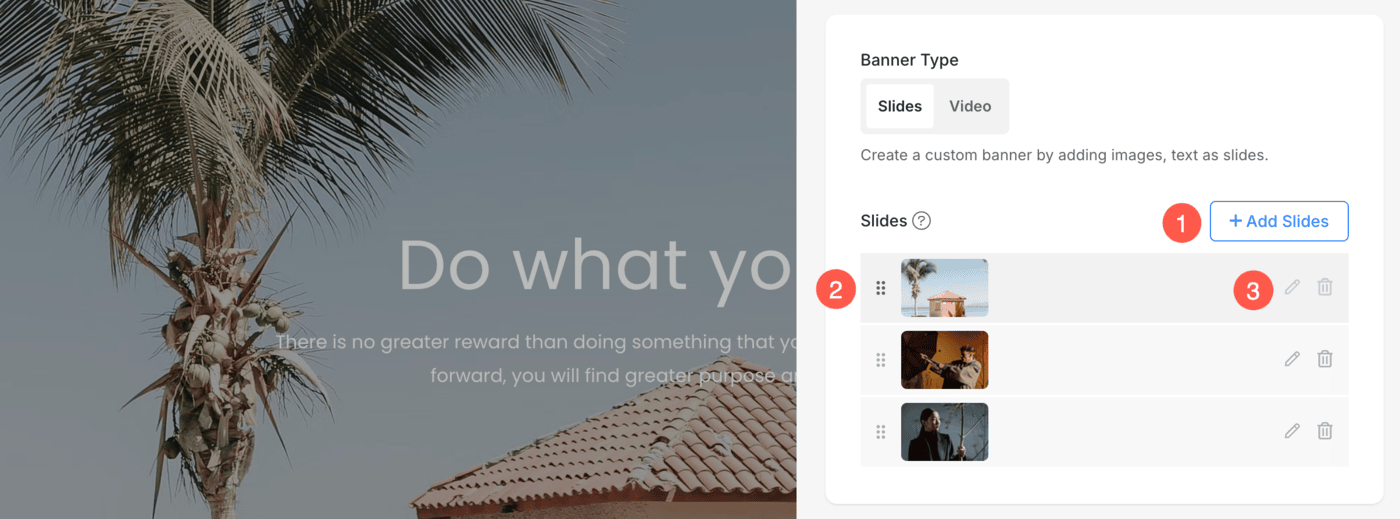
Banner Type
Select the type of banner. You can choose any of the following options:
- Slides – Select Slides option if you want to display images in the banner. You can add multiple image slides under one banner.
- Video – If you want to display videos as banner slides, then select this option. Under each banner, you can add multiple video slides.
Image Slides
When Slides is selected under Banner Type, you can create a slideshow by uploading multiple images as banner slides.
- Add multiple slides by clicking the + Add Slides button.
- Reorder them using the drag handles.
- Edit or delete individual slides using the respective icons.
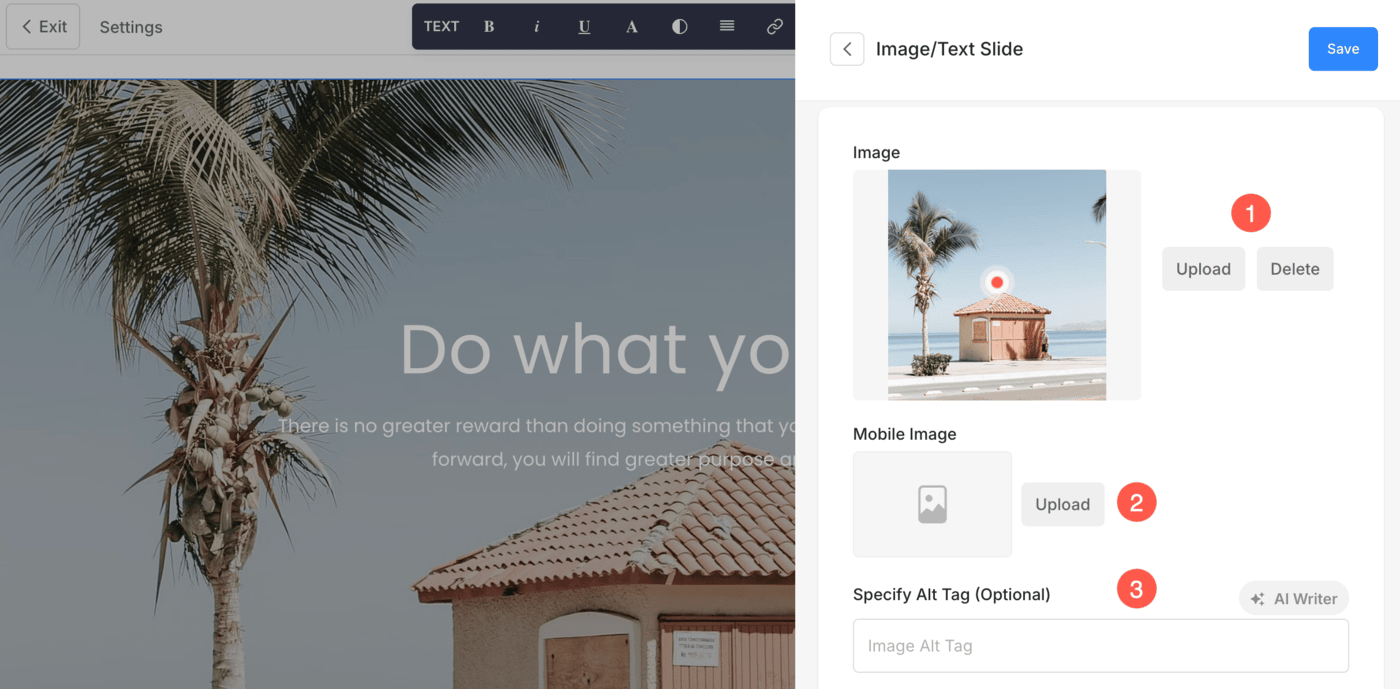
Edit Image/Text Slide
- Image
- Click on the Upload button to change the image/slide. Click on the Delete button to delete the slide.
- Change the focal point of the image just by clicking on the image anywhere.
- Mobile Image – Upload a mobile banner image. We recommend adding portrait images here.
- Specify the Alt Text for the image slide. This helps for SEO purposes.
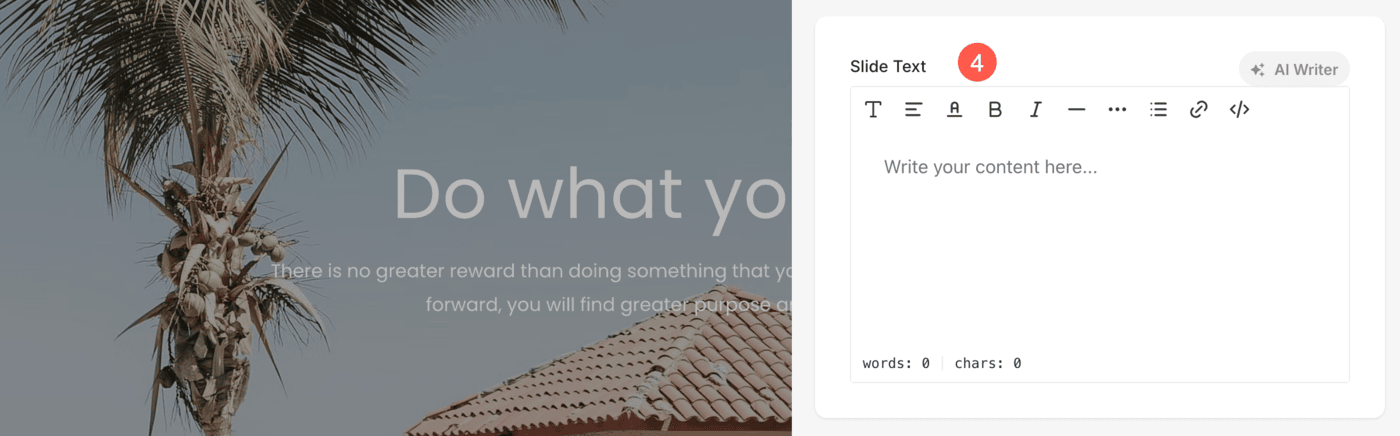
- Slide Text – Enter the slide text which will appear over the slide. You can make the text bold, italic, underlined, link it, and do much more.
Also See: The Pixpa text editor.
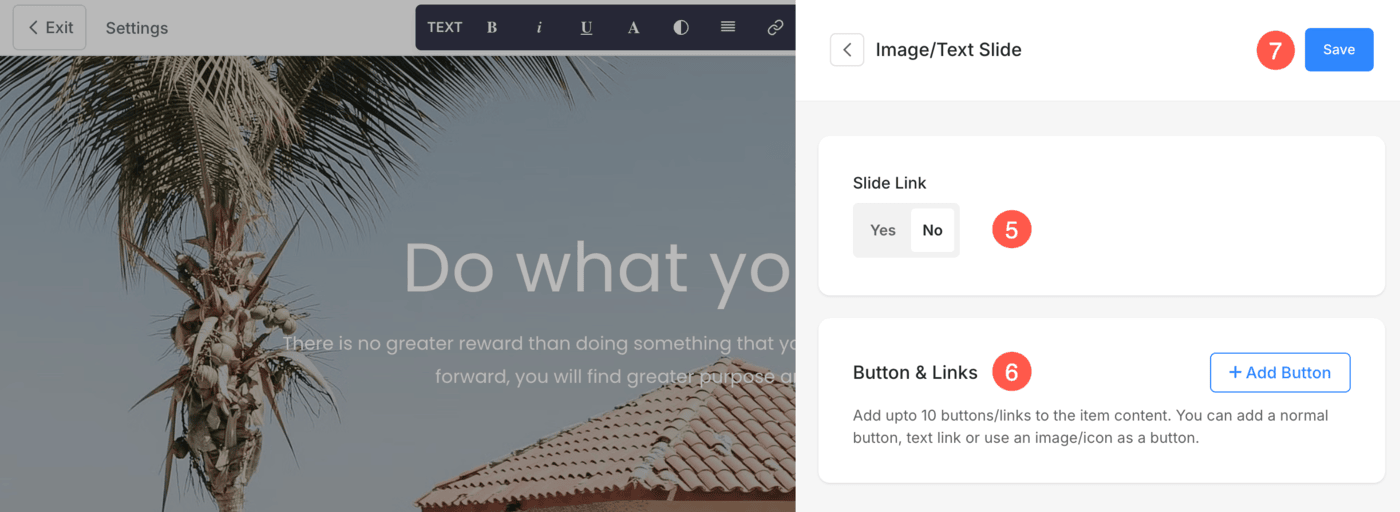
- Slide Link
-
- Click on the settings icon and enter the overlay link for the slide.
- You can specify any page inside/outside your website, your email, or a contact number.
Also check: Linking text/button
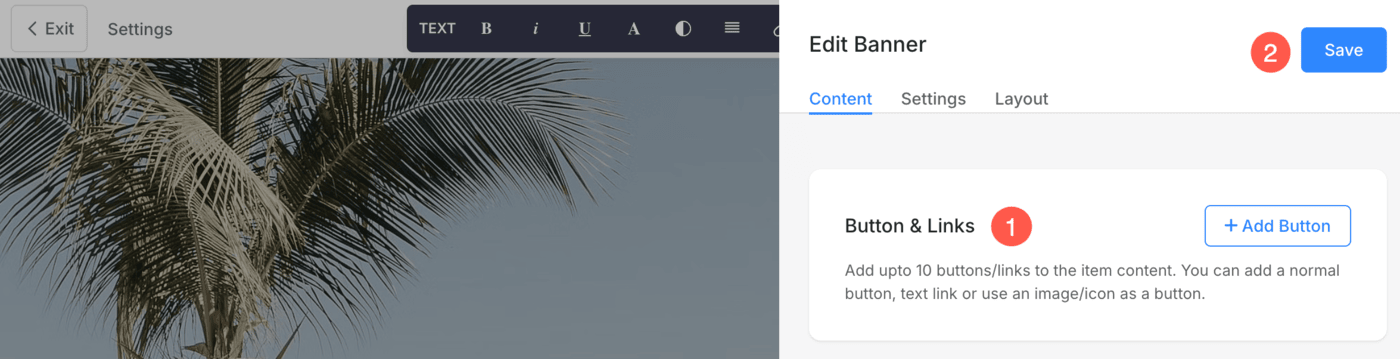
- Button & Links
-
- Add up to 10 buttons/links to the slide content.
- You can add a normal button, text link or use an image/icon as a button.
Also Check: Button & Links
- Hit the Save button to save your changes.
Video Slides
When the Video slide option is selected, you can embed a YouTube or Vimeo video in your banner. The following configuration options are available:
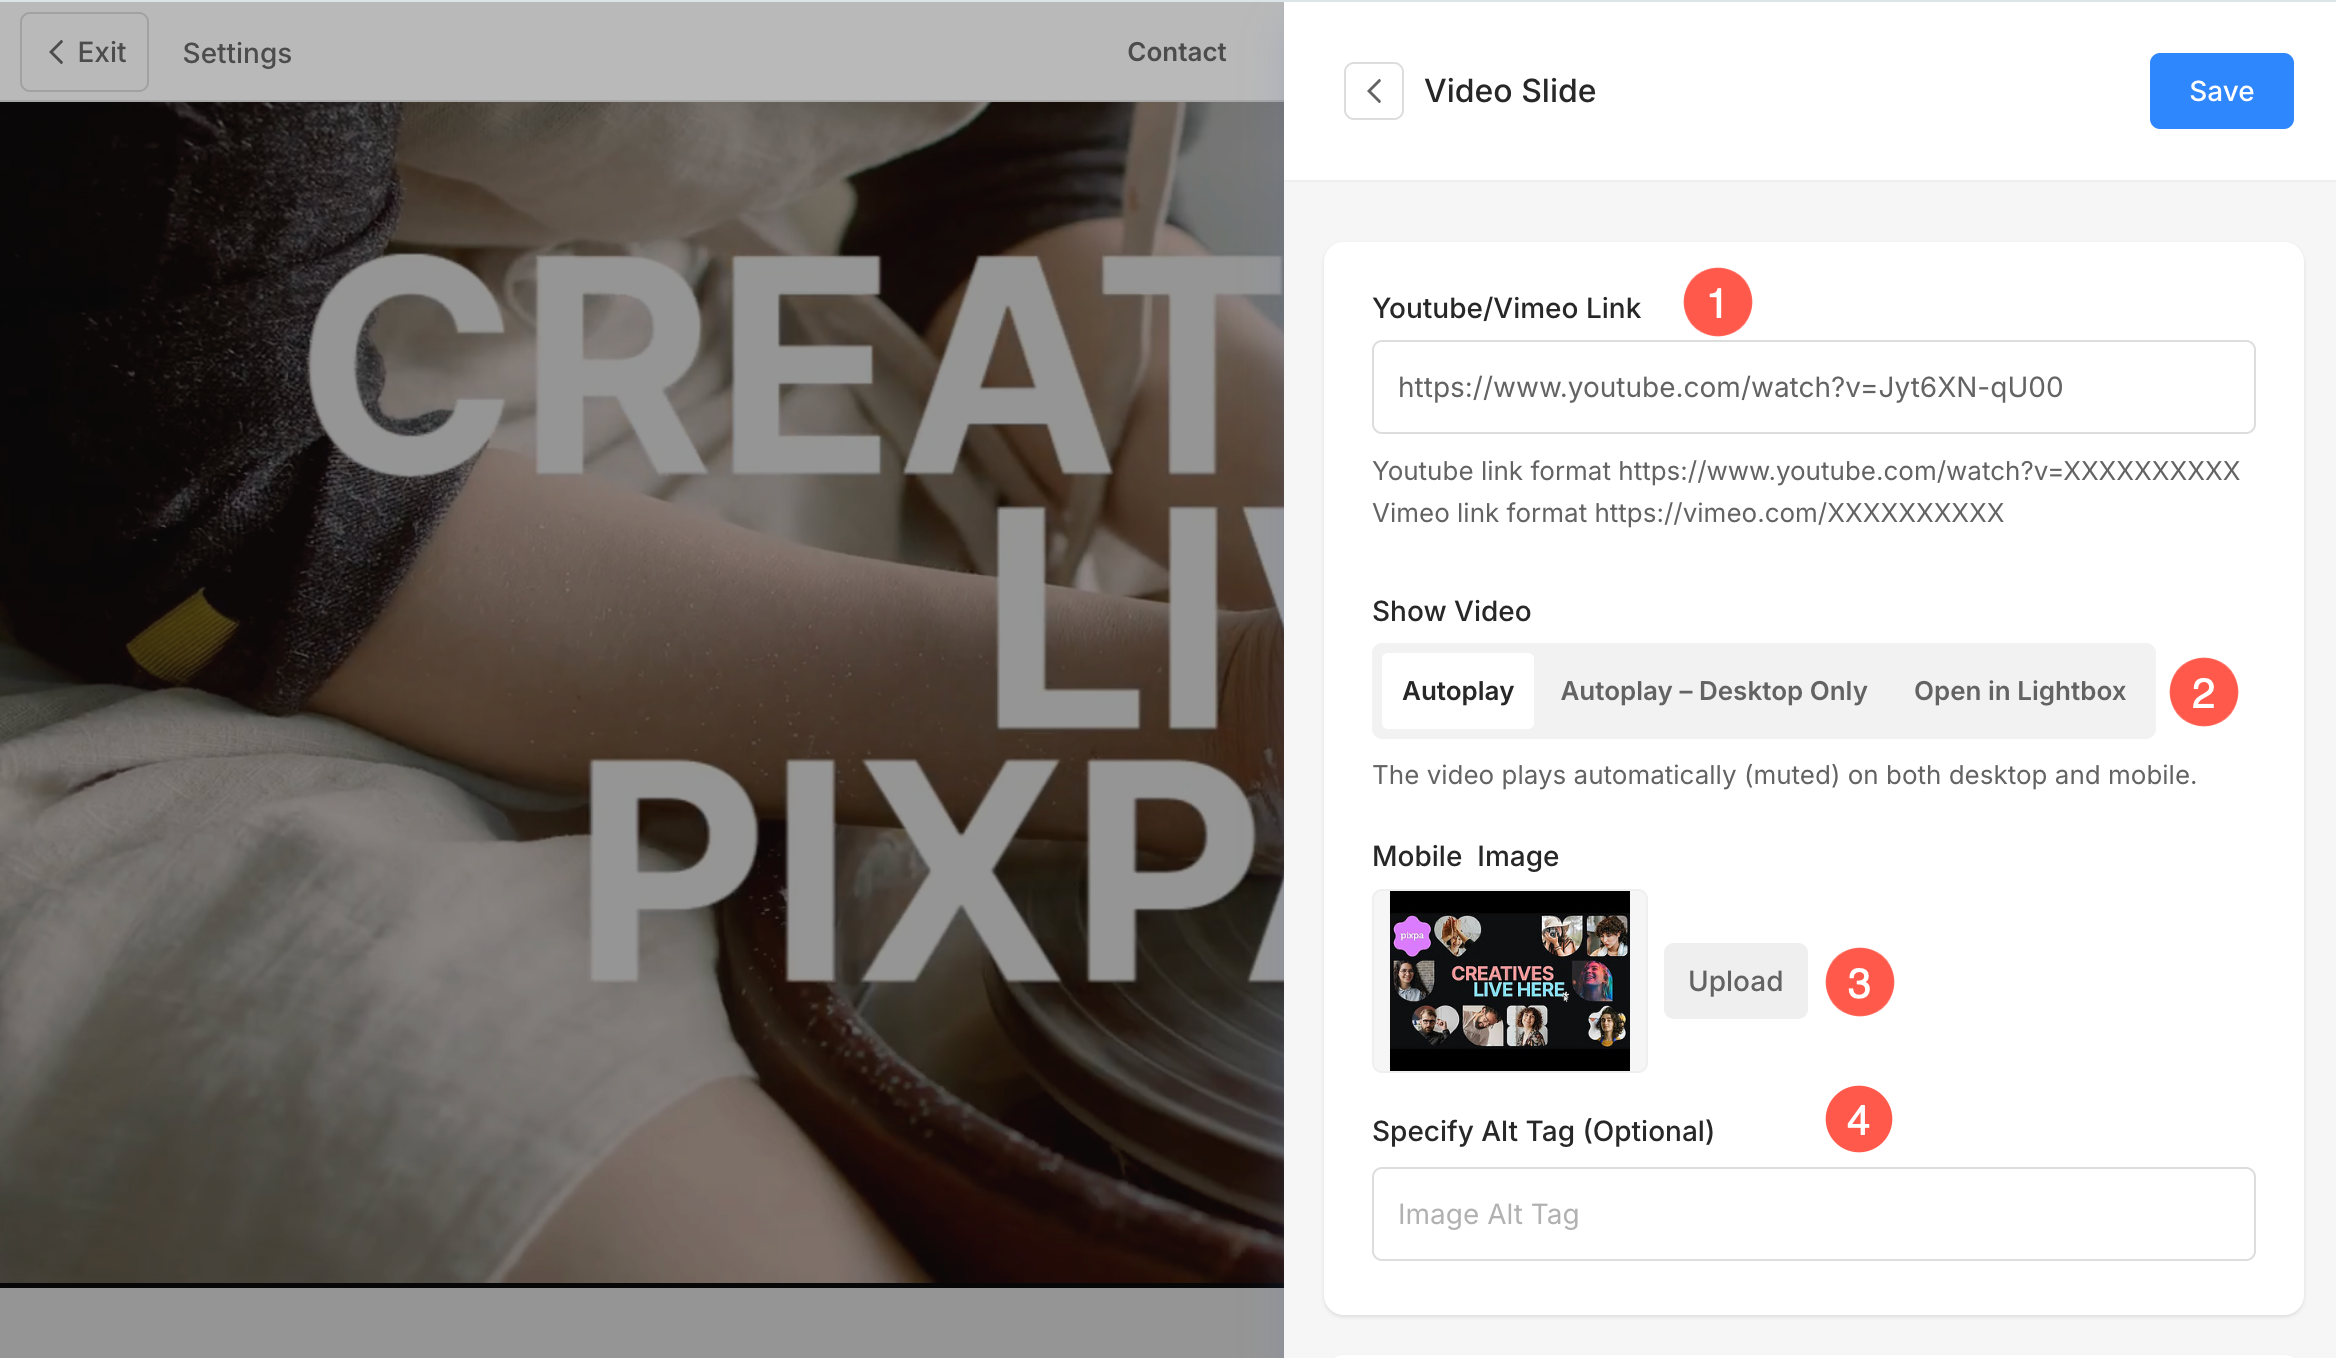
1. YouTube/Vimeo Link – Enter a direct link to your video. Supported formats include:
- YouTube: https://www.youtube.com/watch?v=XXXXXXXXXXX
- Vimeo: https://vimeo.com/XXXXXXXXXXX
2. Show Video – Choose how the video appears on your site:
- Autoplay: Video will be embedded directly and autoplay on all the devices (muted by default).
- Autoplay – Desktop Only: Video will be embedded directly and autoplay on desktop only (muted by default).
- Open in Lightbox: Clicking the video preview will open it in a popup.
3. Mobile Image – Upload a fallback image that will appear on mobile devices where autoplay video may not work or be supported. This ensures your banner remains visually appealing across all screen sizes.
4. Specify Alt Tag (Optional) – Add an alt tag to improve SEO and accessibility. This describes the fallback image for screen readers or in cases where the image cannot be displayed.
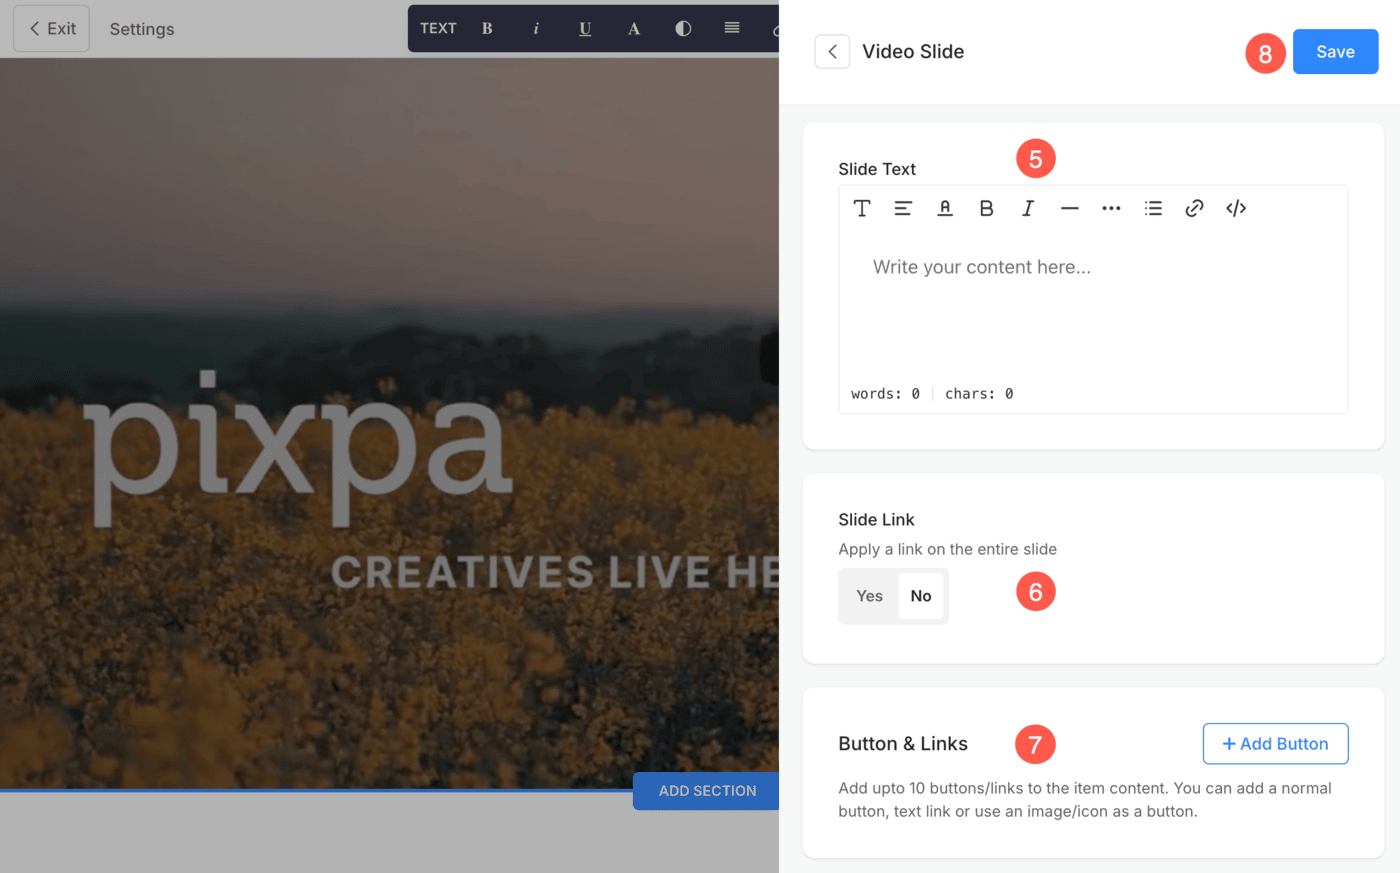
5. Slide Text – Enter the slide text which will appear over the slide. You can make the text bold, italic, underlined, link it, and do much more.
Also See: The Pixpa text editor
6. Slide Link
- Click on the settings icon and enter the overlay link for the slide.
- You can specify any page inside/outside your website, your email, or a contact number.
Also Check: Linking text/button
7. Button & Links
- Add up to 10 buttons/links to the slide content.
- You can add a normal button, text link or use an image/icon as a button.
Also Check: Button & Links
8. Save – Hit the Save button to save your changes
Banner Text and Buttons
- Specify whether the text and the buttons will be the same for all the slides or different for each slide. When you select the Same for all slides option, the Banner Text and Buttons will be used.
- When you have selected the Different for each slide option, the text and buttons specified for a particular slide will be used.

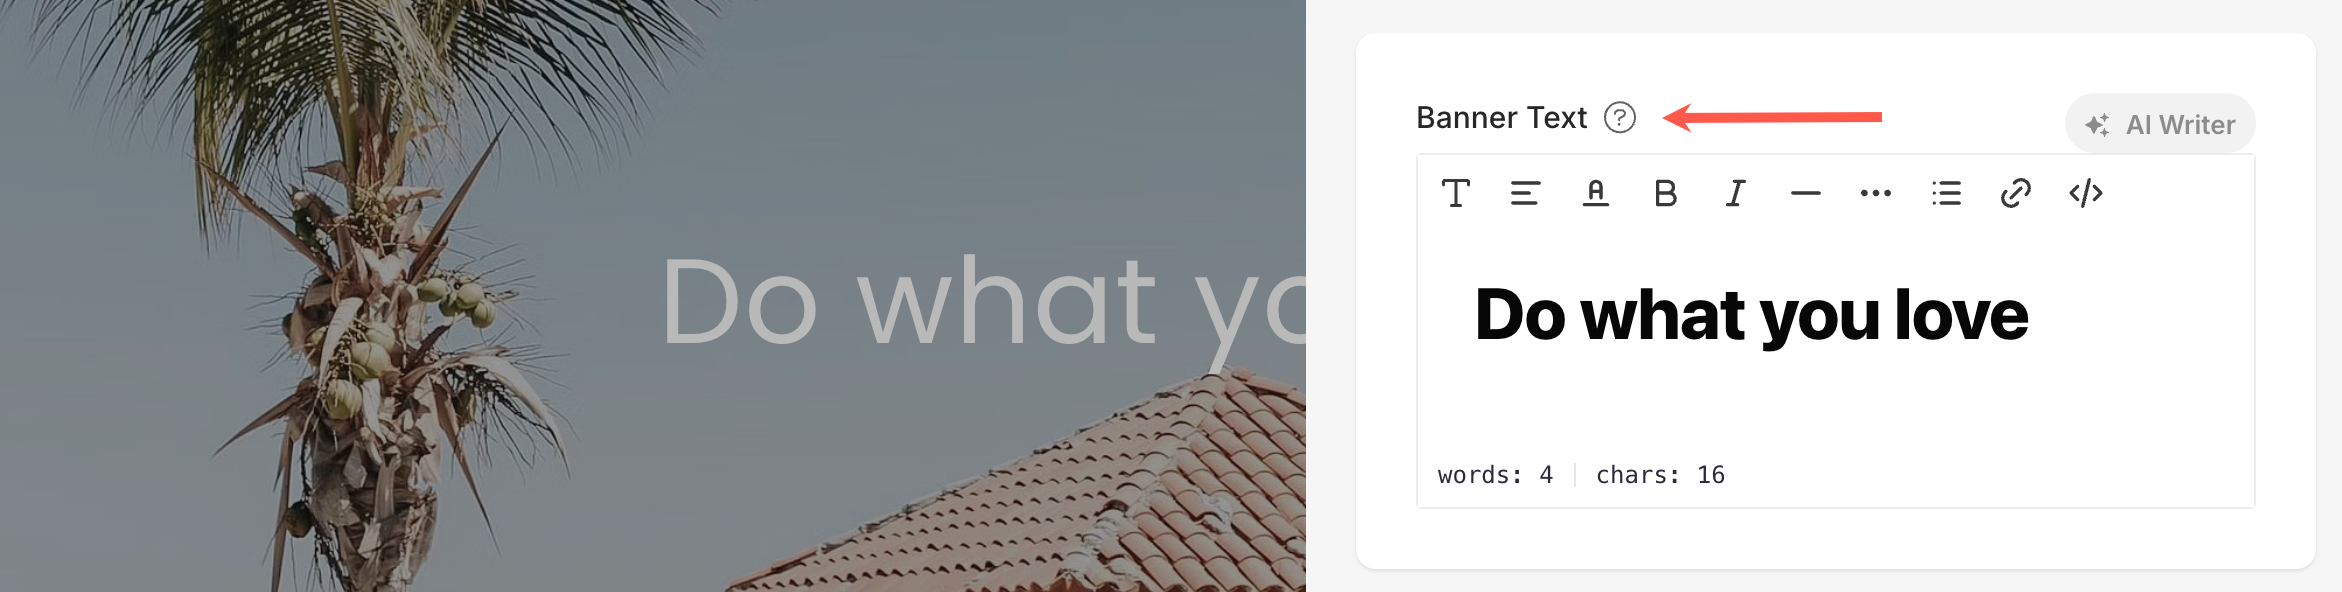
Banner Text
- Enter the banner text which will be common for all the slides.
Also See: The Pixpa text editor
Buttons & Links
- These buttons/links appear over your banner slides (common for all slides).
Also Check: Button & Links - After making your changes, click the Save button on the top right to apply them to your banner.
Banner Settings
Under Banner Settings tab, you get the following options:
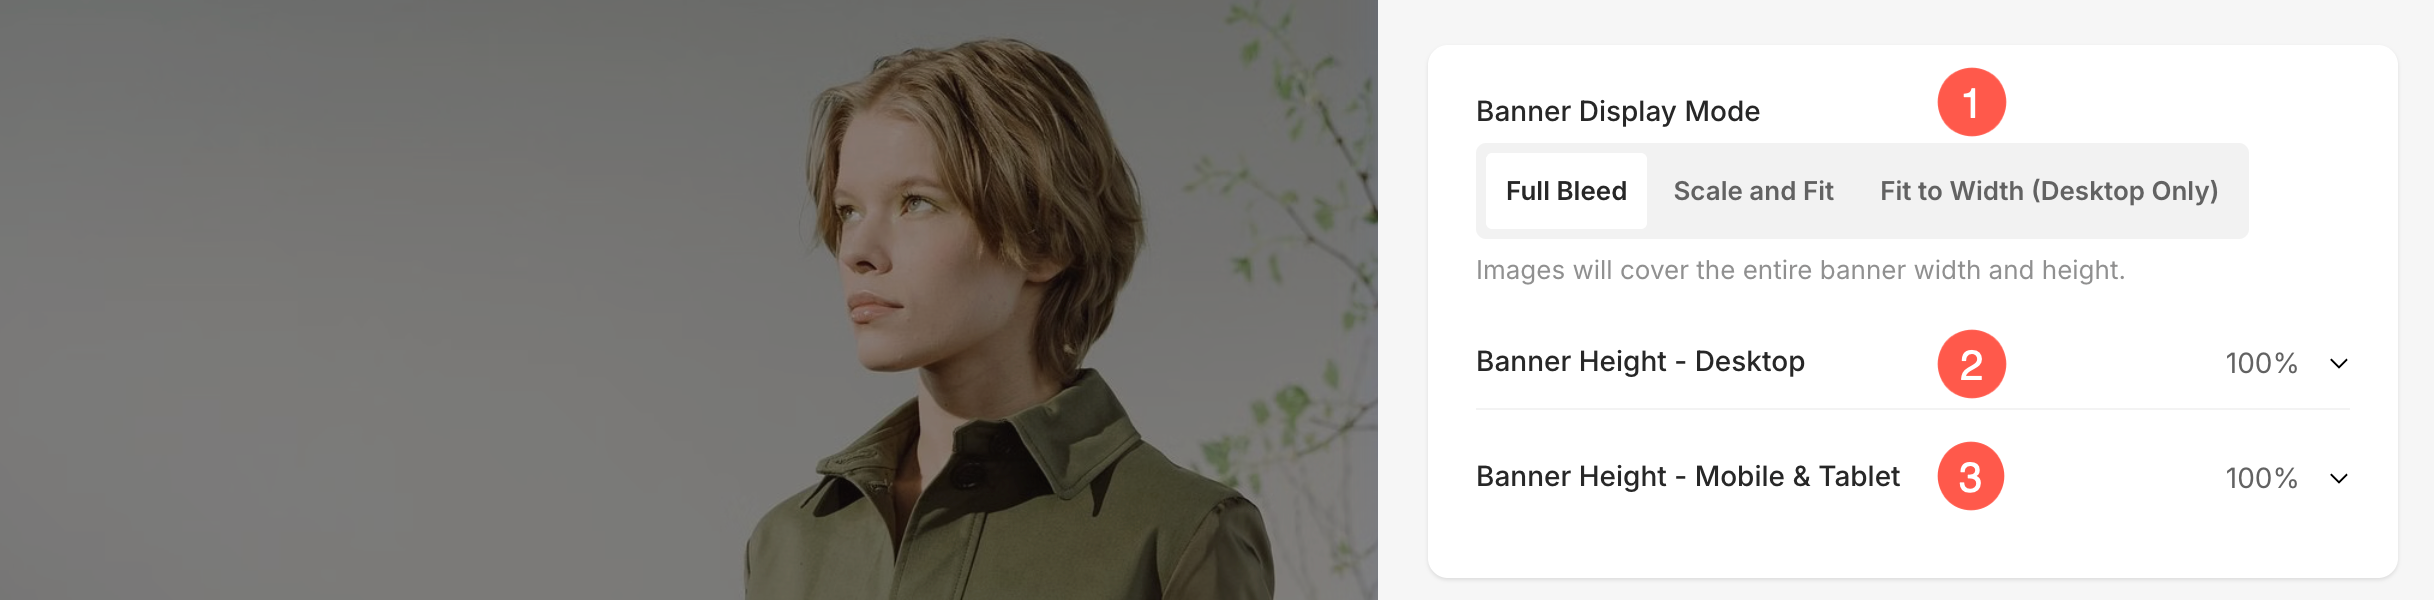
Banner Display Mode
-
- Scale and Fit – Images will fit within the banner width and height.
- Fit to Width (Desktop Only) – Images will be scaled to banner width. Banner height will inherit the image height.
- Banner Desktop Height – Specify the desktop banner height if you have chosen the full bleed or scale and fit option in the Display Mode field.
- Banner Mobile Height – Specify the mobile banner height.
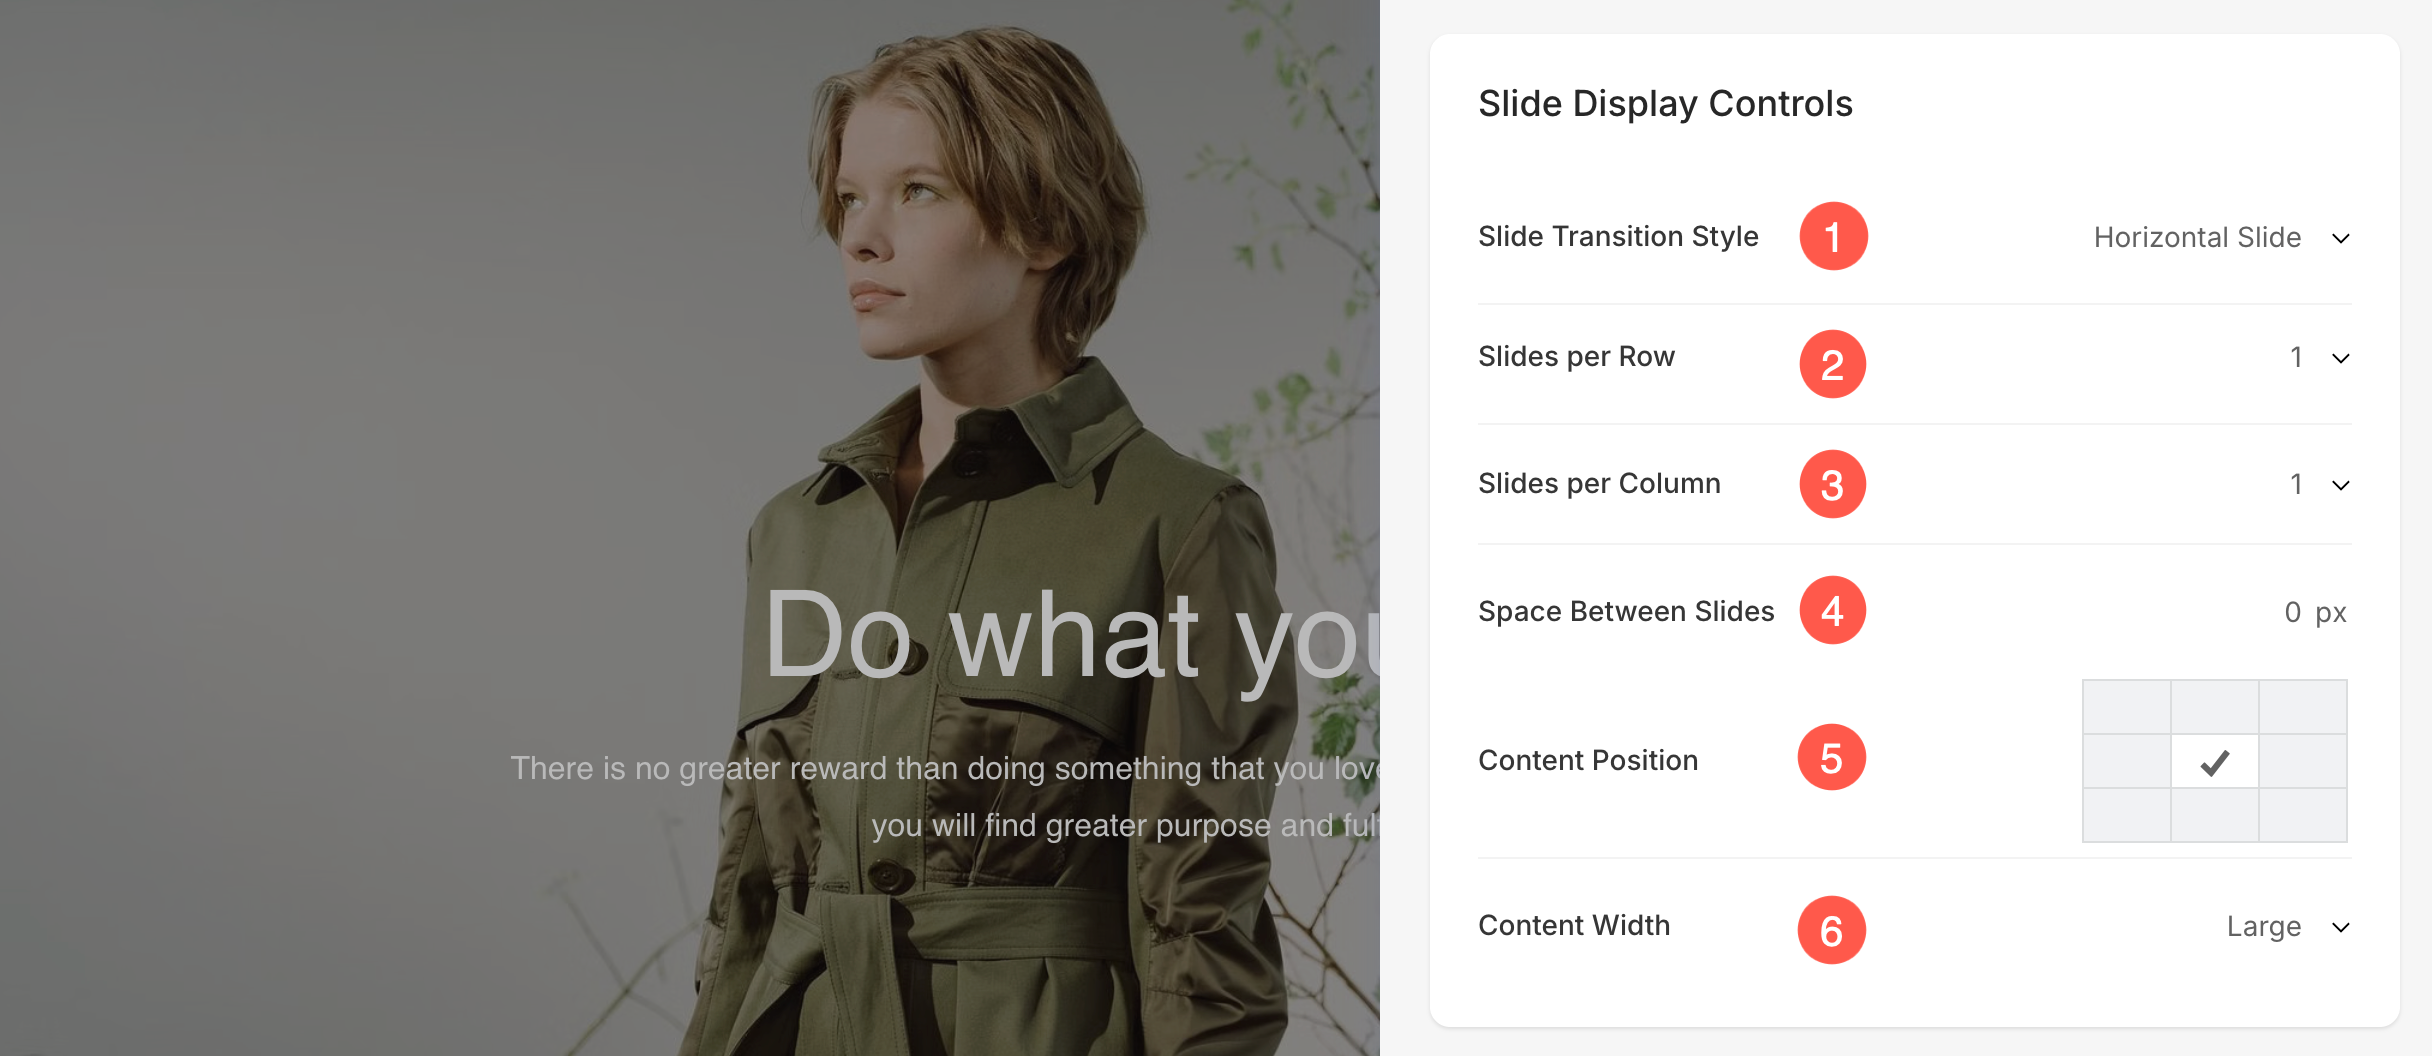
Slide Display Controls
These settings allow customization of how slides appear and transition within the banner section.
-
Slide Transition Style – Choose how the slides should change. You can select options like Fade, Horizontal Slide or Vertical Slide for a smooth transition between slides.
-
Slides per Row – Specify how many rows of slides should be visible at once.
- Slides per Column – Define how many columns of slides should appear. This controls how many slides appear side-by-side in each row.
- Space Between Slides – Adjust the gap between individual slides using this setting. You can increase the spacing in pixels to control the visual separation between slides.
- Content Position – Specify the position of content inside the banner.
- Content Width – Specify the width for the banner content.
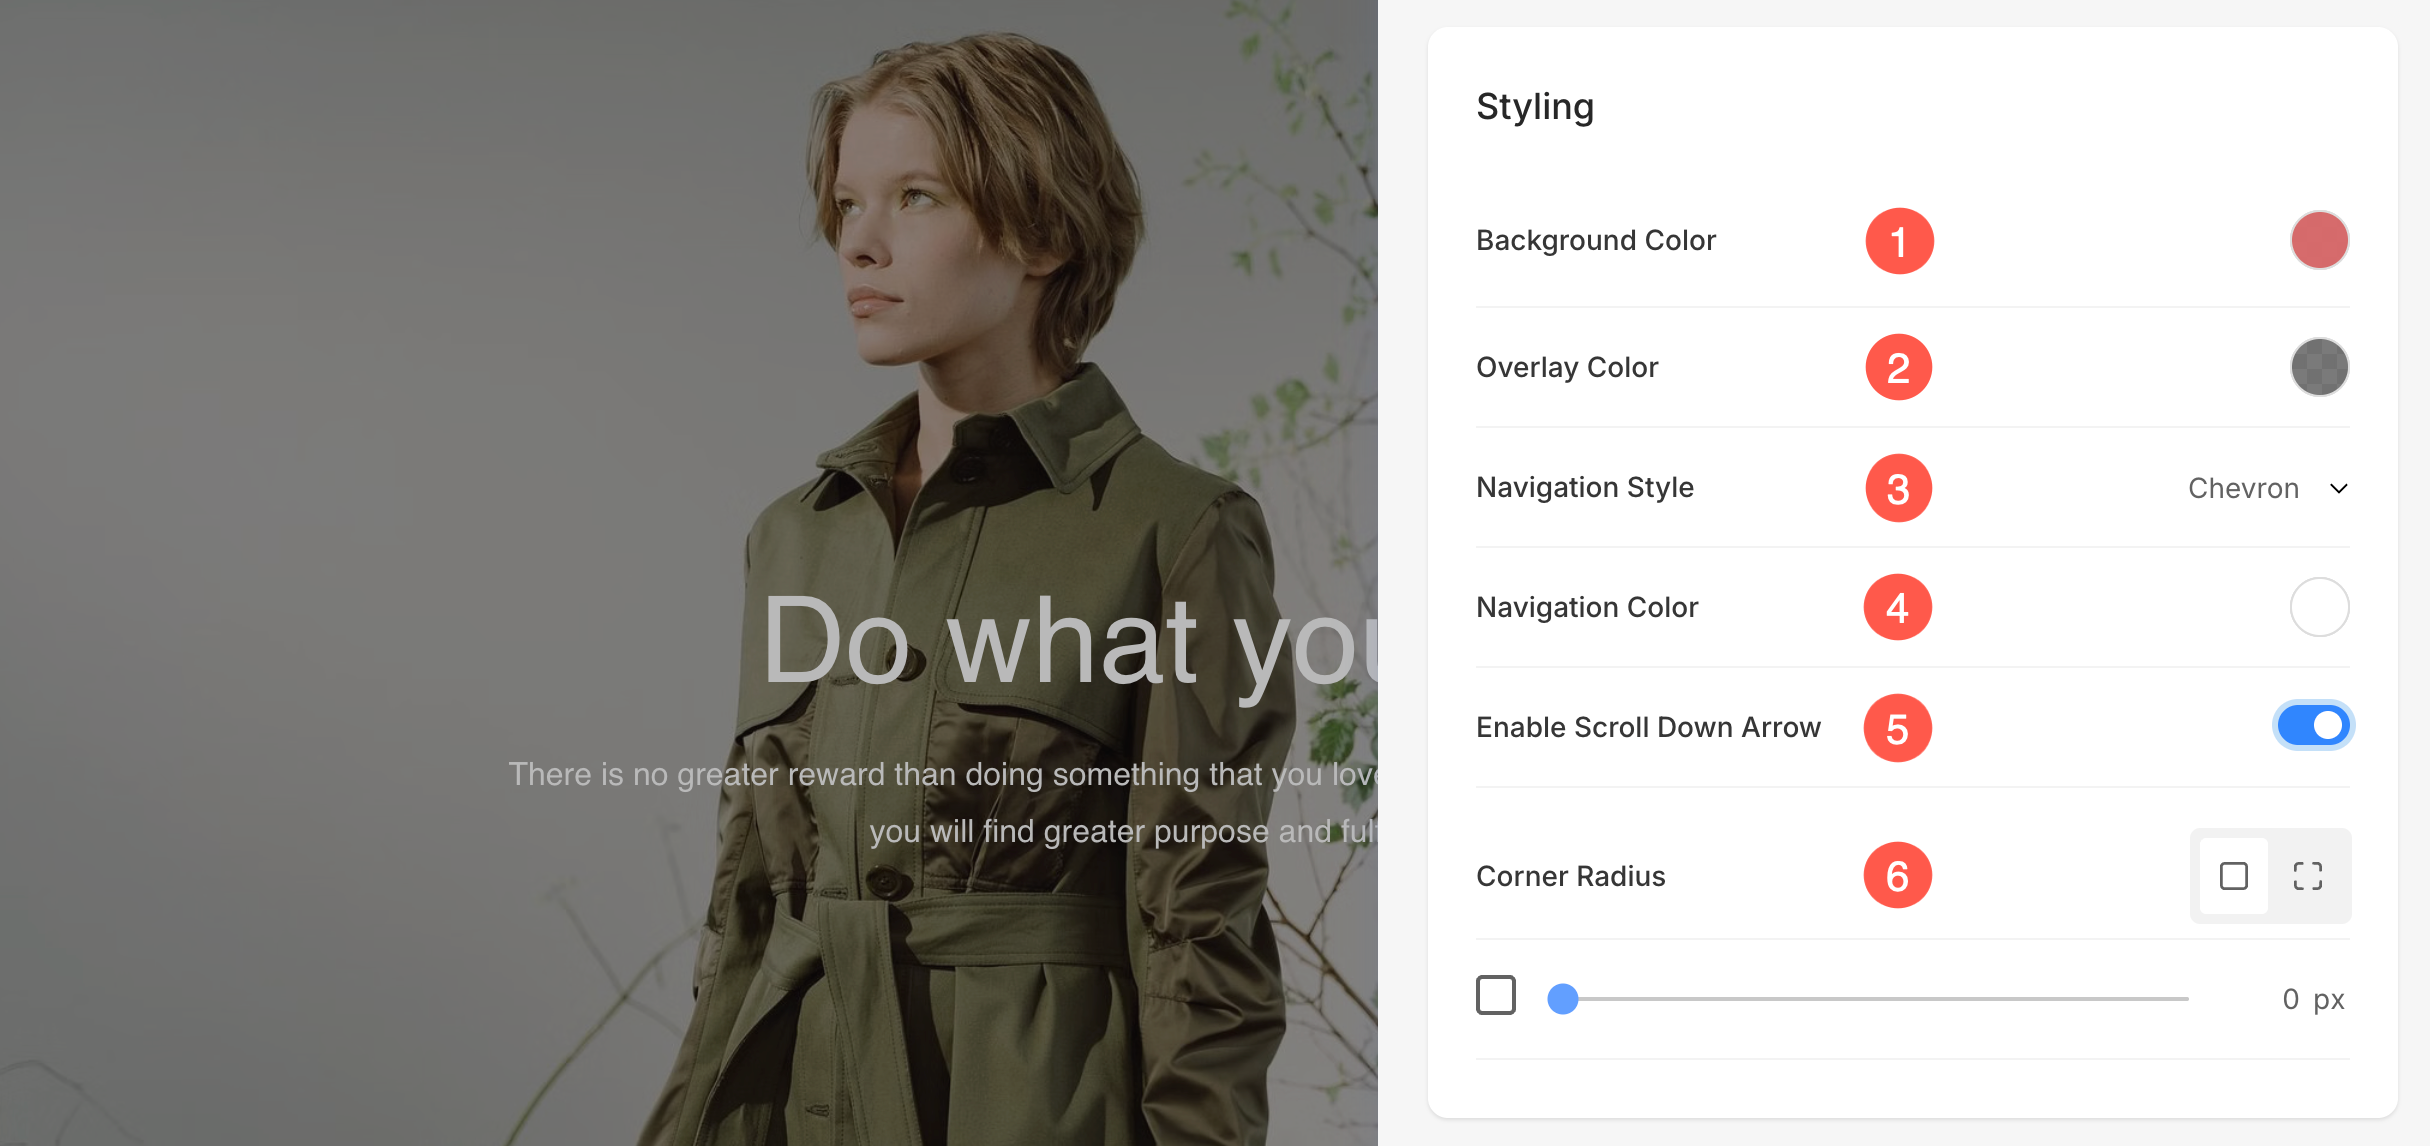
Banner Styling
- Background Color – Set the background color for the banner.
- Overlay Color – Set the overlay color for the banner.
- Navigation Style – Specify the navigation style of the banner. You can select from Chevron, Long Arrows, and Short Arrows. Select None if you want to disable the navigation controls.
- Navigation Color – Specify the color of navigation controls on the banner.
- Enable Scroll-down Arrow – Select this option to show a scroll-down arrow over the banner.
- Corner Radius – Customize the roundness of the banner slide’s corners. You can either apply the same radius to all corners or specify different values for each corner individually.
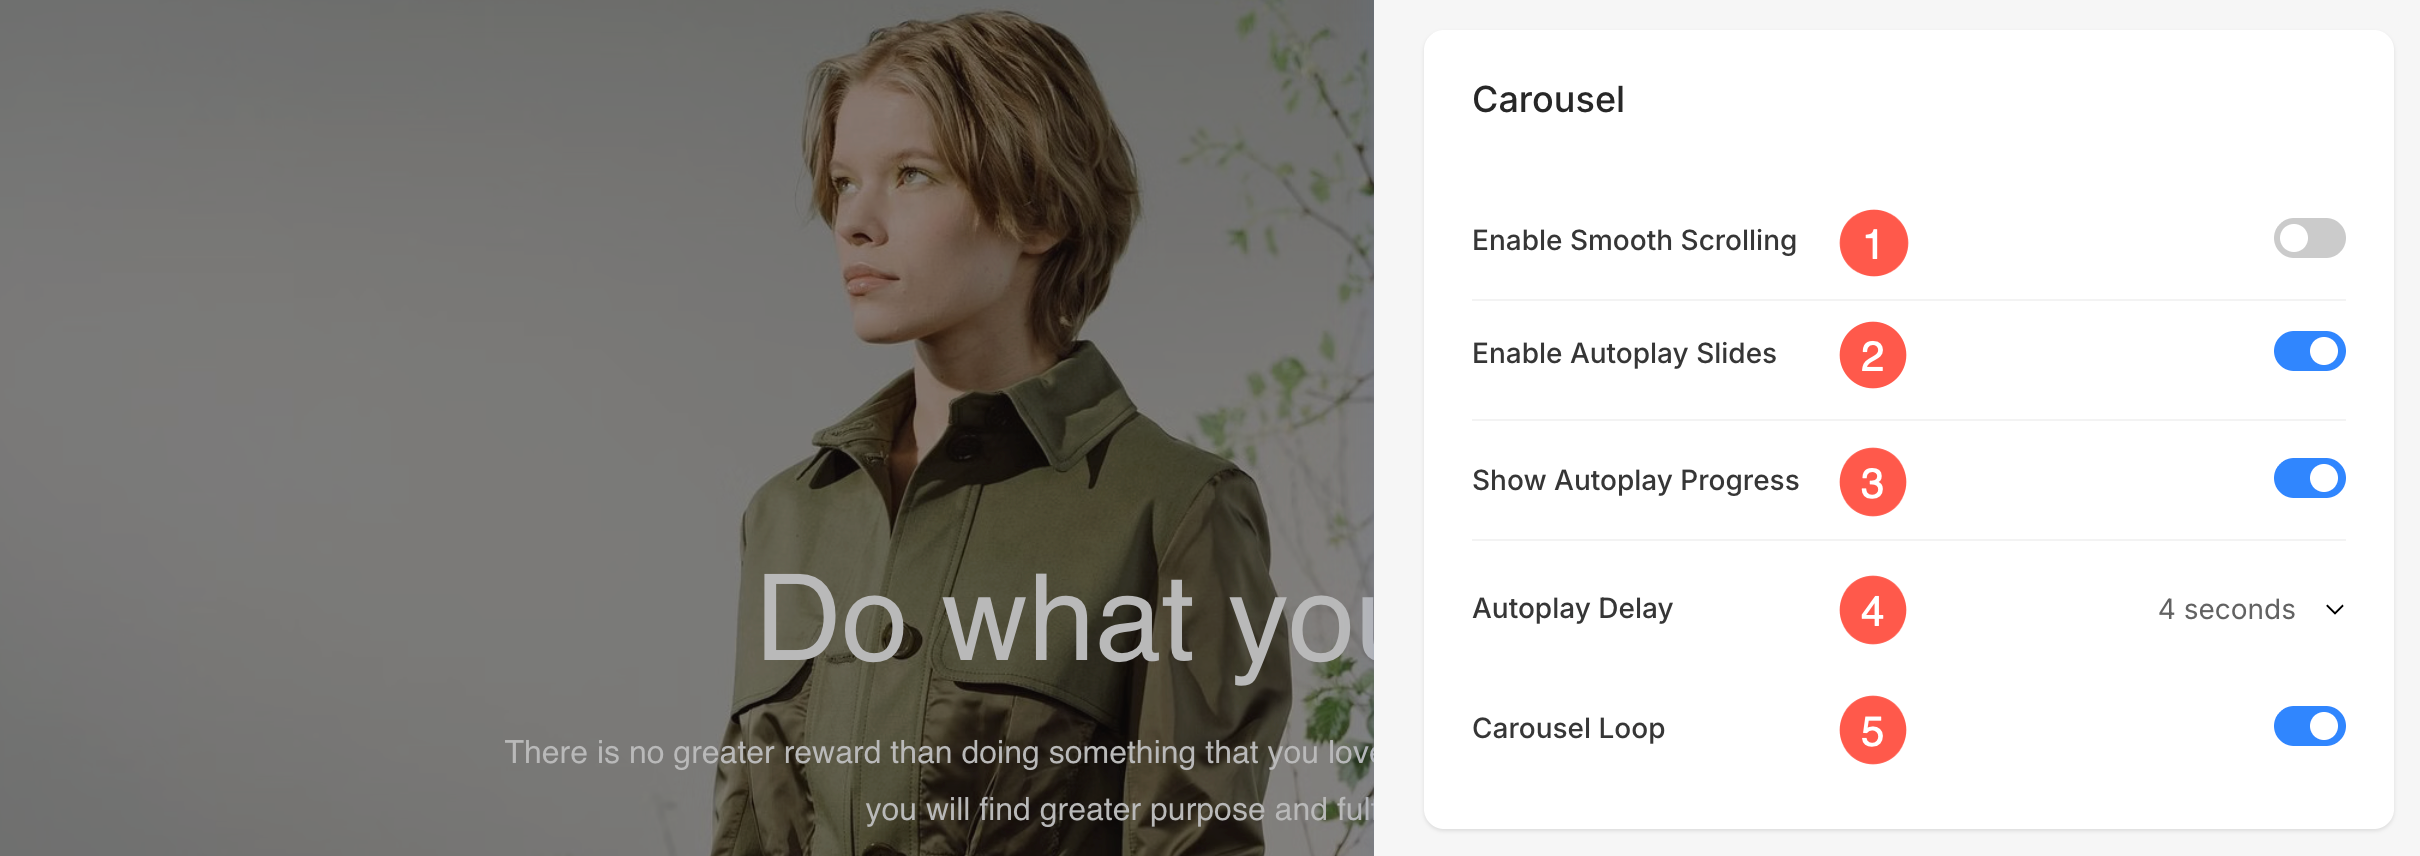
Carousel
These settings define how slides move and behave automatically within the banner or carousel section.
- Enable Smooth Scrolling – Toggle this on to make slide transitions smoother for a seamless scrolling effect.
- Enable Autoplay Slides – When enabled, slides will automatically transition without user interaction.
- Show Autoplay Progress – Displays a visual indicator showing the timing before the next slide transition.
- Autoplay Delay – Set the time interval between automatic slide transitions (e.g., every 4 seconds).
- Carousel Loop – Enable this to make slides continuously cycle back to the first slide after the last one.
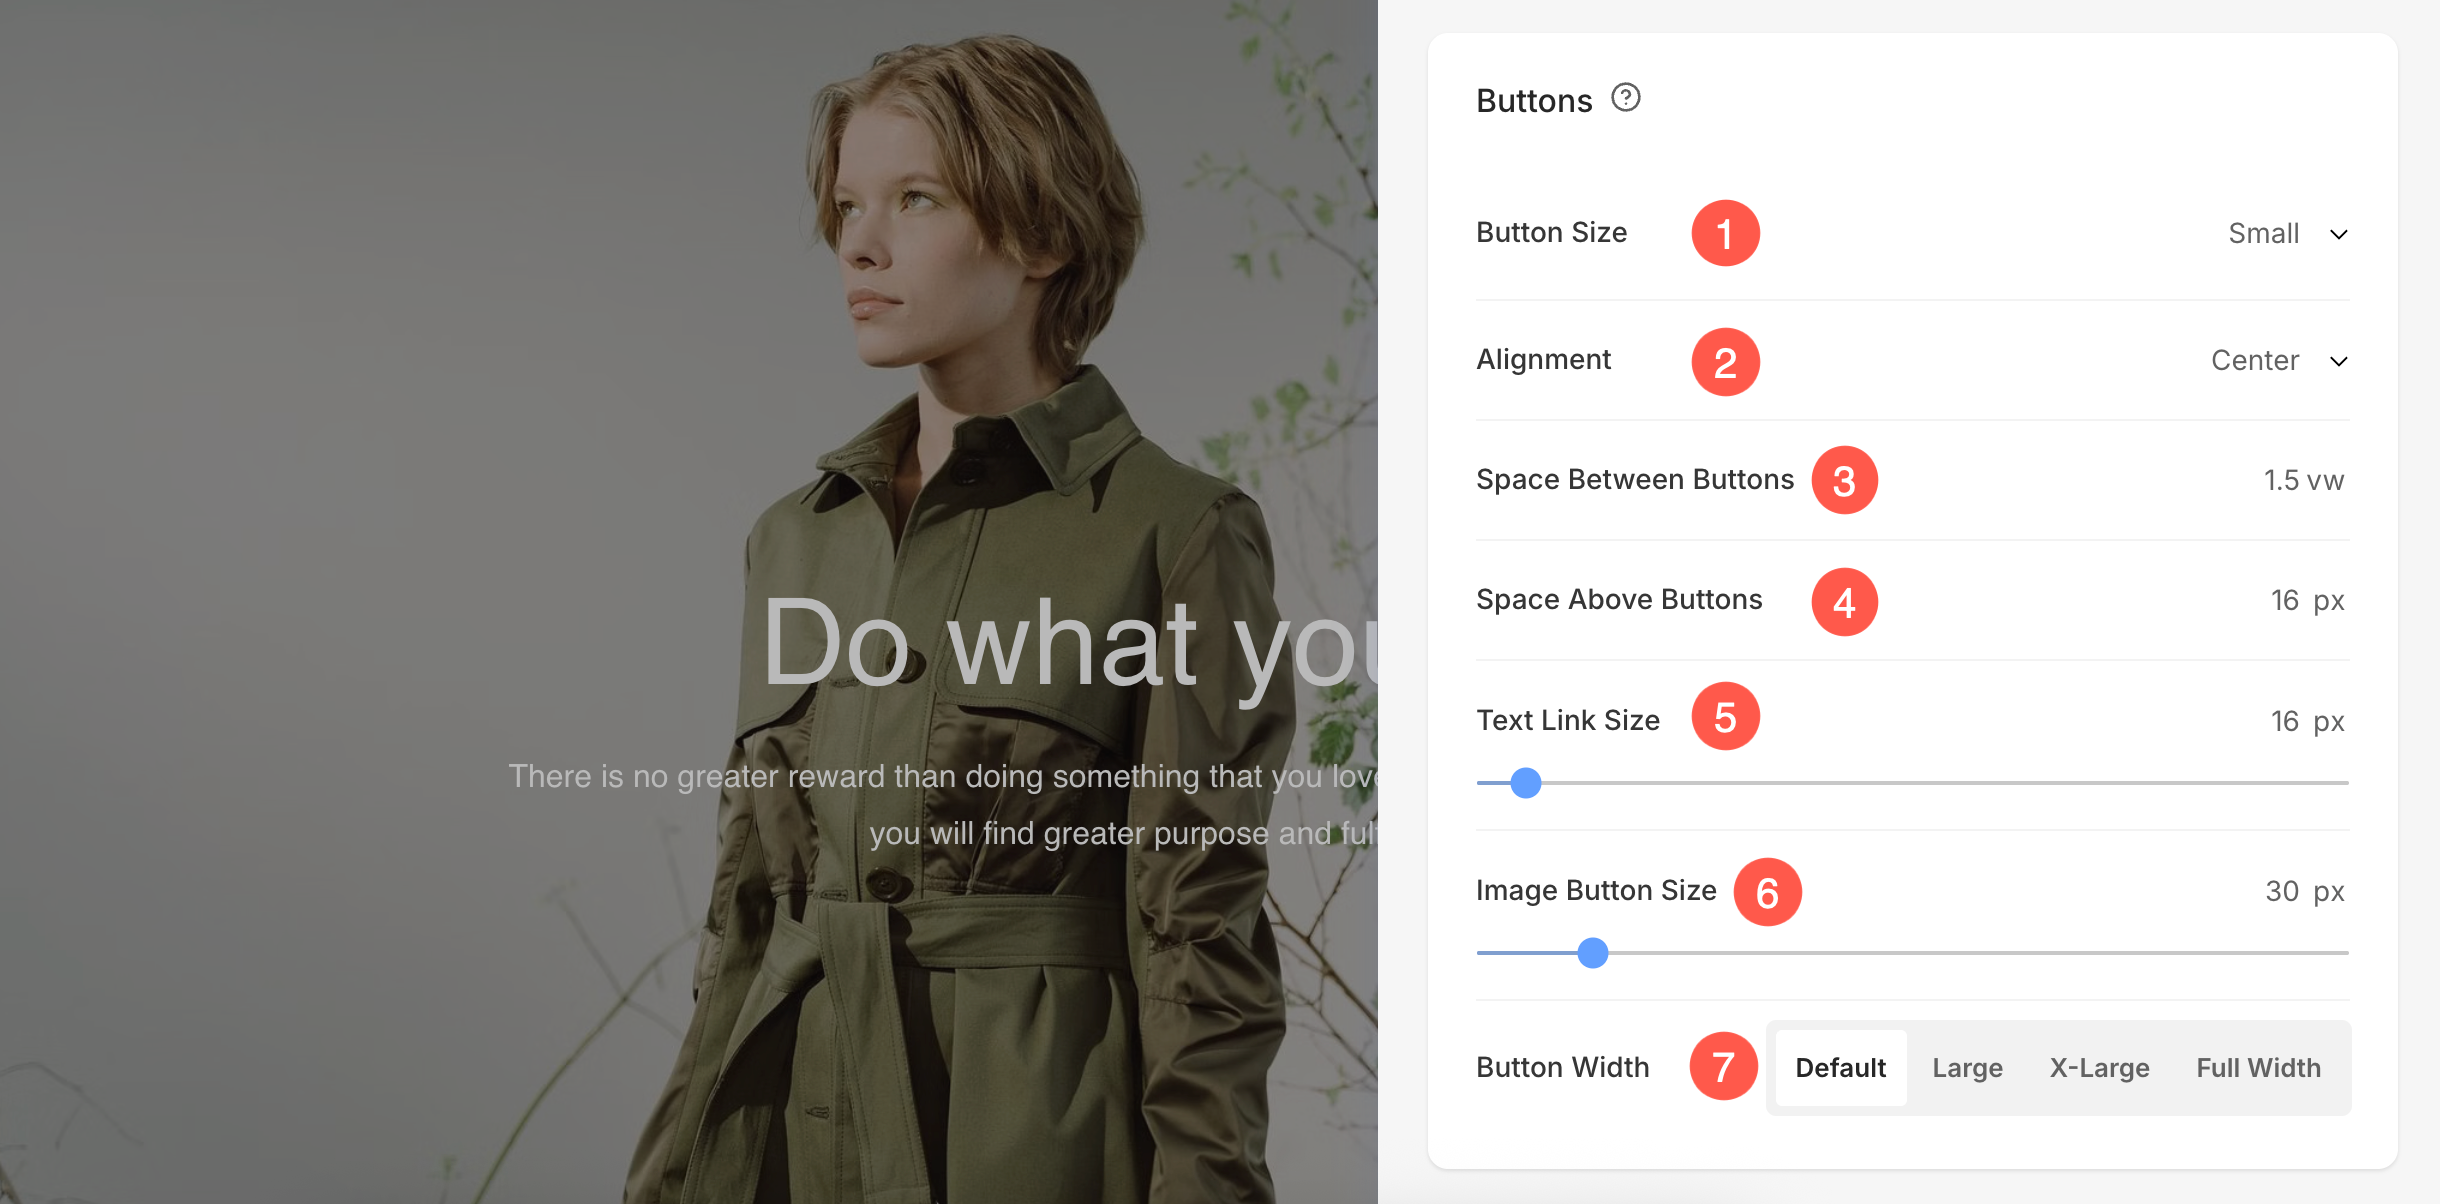
Buttons
These options allow customization of the buttons displayed within the banner
- Button Size – Select the size of the button from available options such as small, medium, or large.
- Alignment – Set the button alignment within the section (left, center, or right).
- Space Between Buttons – Adjust the horizontal spacing between multiple buttons for balanced layout.
- Space Above Buttons – Define the vertical space between the text and the buttons (measured in pixels).
- Text Link Size – Set the font size for any text-based buttons or links.
- Image Button Size – Adjust the size of buttons that include icons or images.
- Button Width – Choose how wide the button appears, with options such as default, large, extra large, or full width.
Learn more about styling buttons and links.
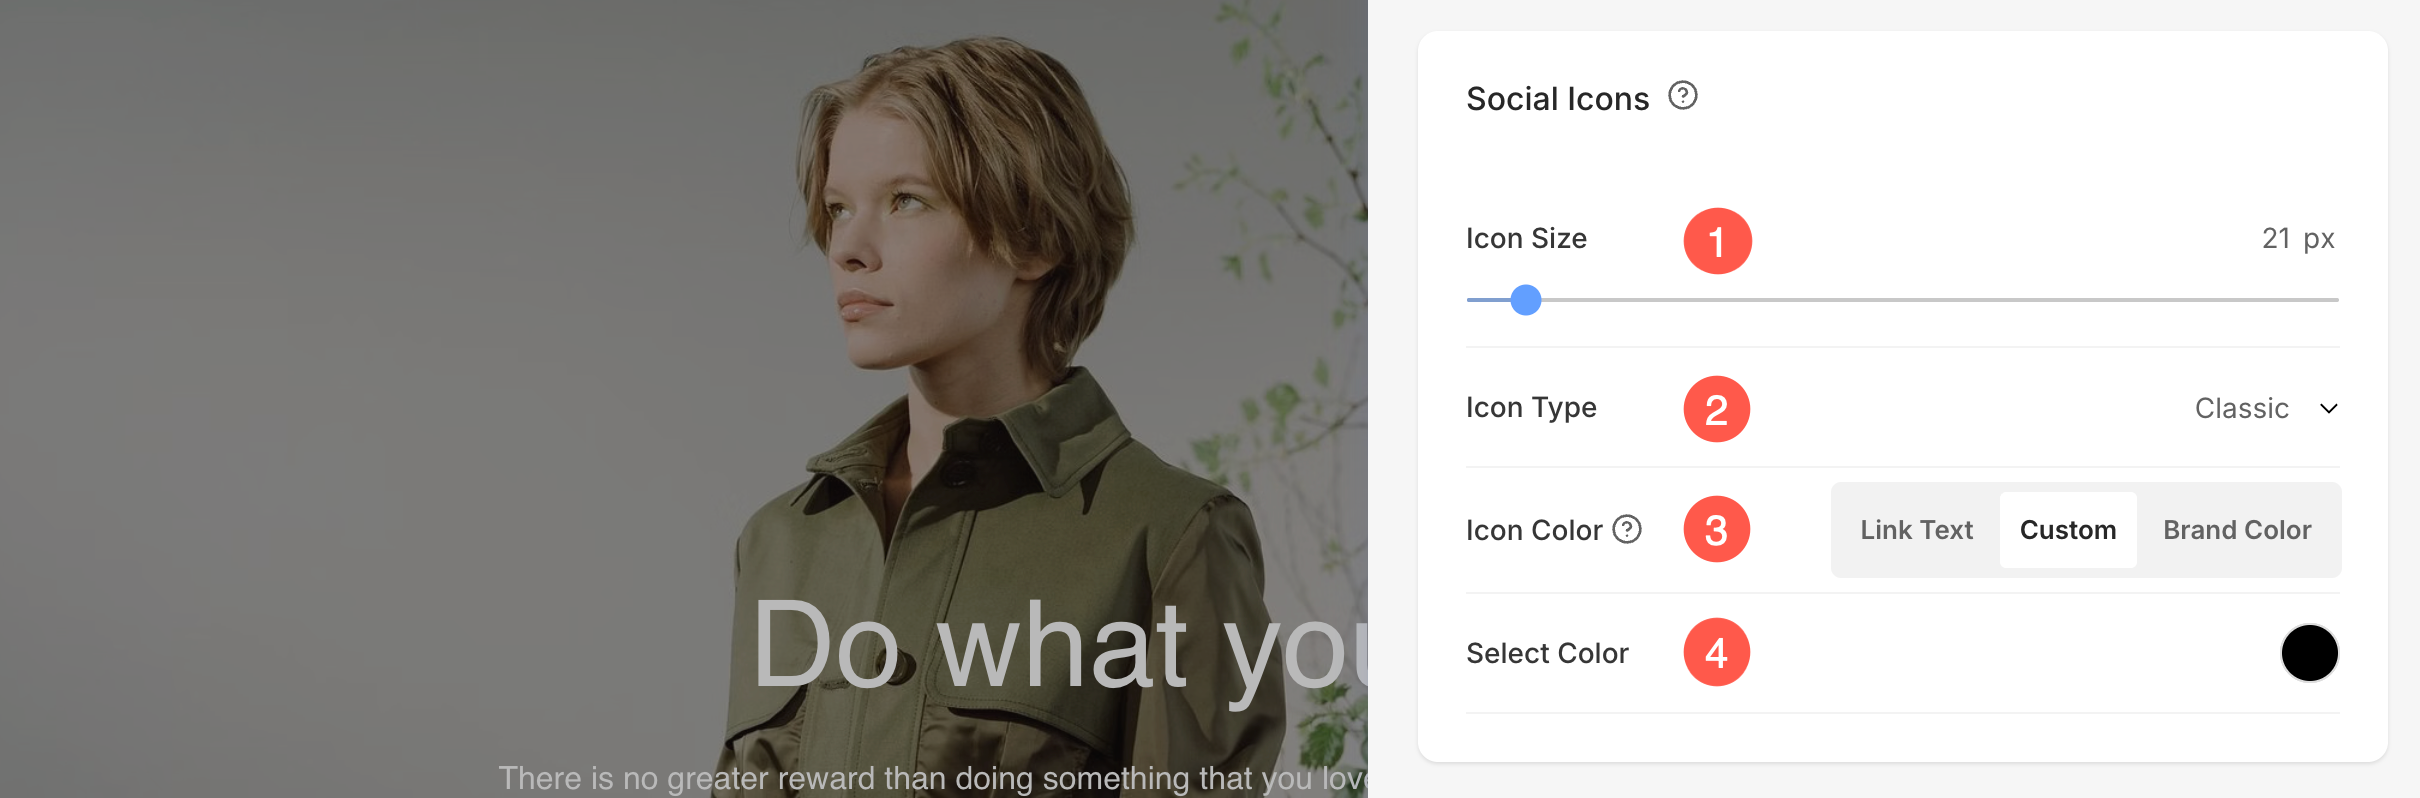
Social Icons
These settings allow customization of the appearance and styling of social media icons displayed within the banner section.
- Icon Size – Adjust the size of the social media icons (in pixels) to fit the overall design of the banner.
- Icon Type – Choose the icon style (for example, Classic, Outline, or Solid) to match the theme of the banner.
- Icon Color – Select how the icon color is defined. Options include:
- Link Text – Uses the same color as the section’s link text.
- Custom – Allows manual selection of a custom color.
- Brand Color – Applies each platform’s official brand color (for example, blue for Facebook).
- Select Color – When Custom is selected, this option allows choosing a specific color for the icons.
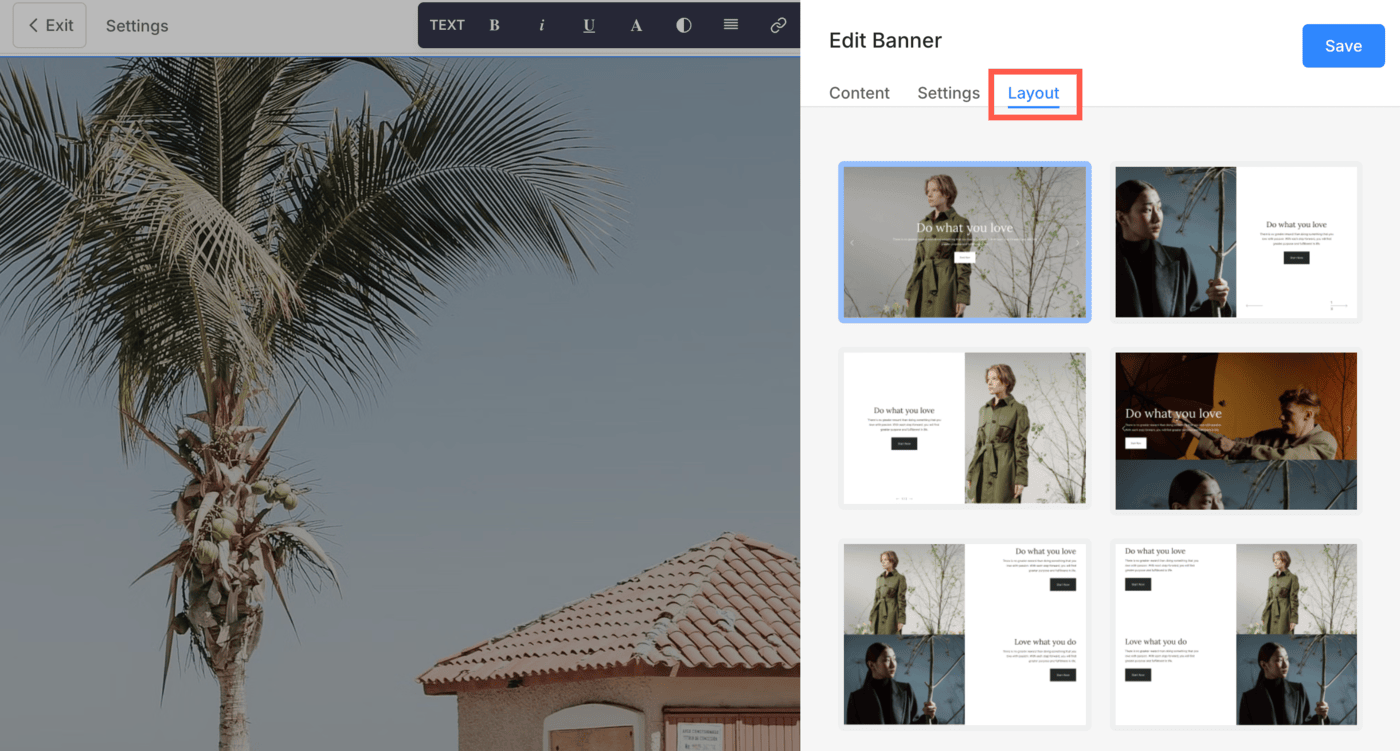
Banner Layout
You can easily change the layout of a Banner. Know more about the banner layouts.