Pixpa provides a tool for comparing images within client galleries.
This allows your clients to effortlessly select two images and compare them, enabling them to mark their favorites or share them with friends and family.
In this Article:
Compare Images Tool
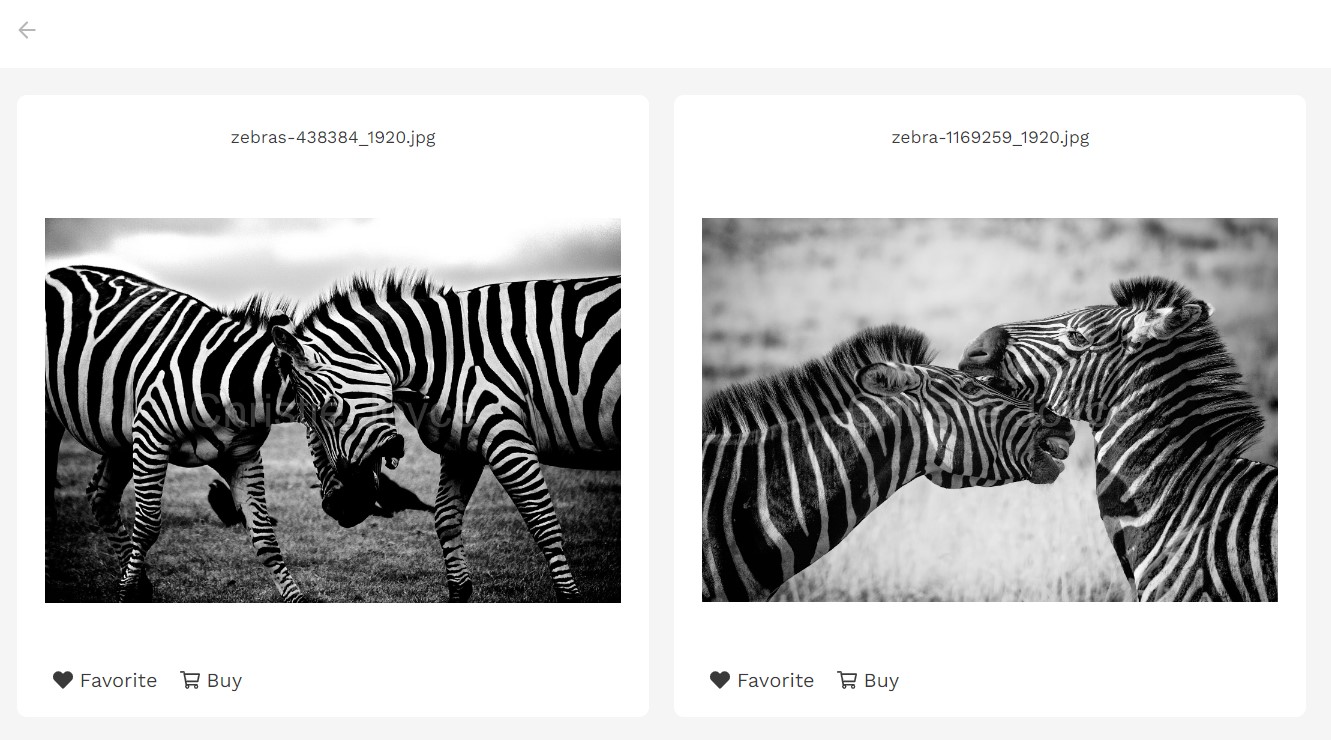
This tool offers an enlarged side-by-side view of images, facilitating clients in easily discerning differences and aiding them in the image selection process.
This is what the comparison window looks like:
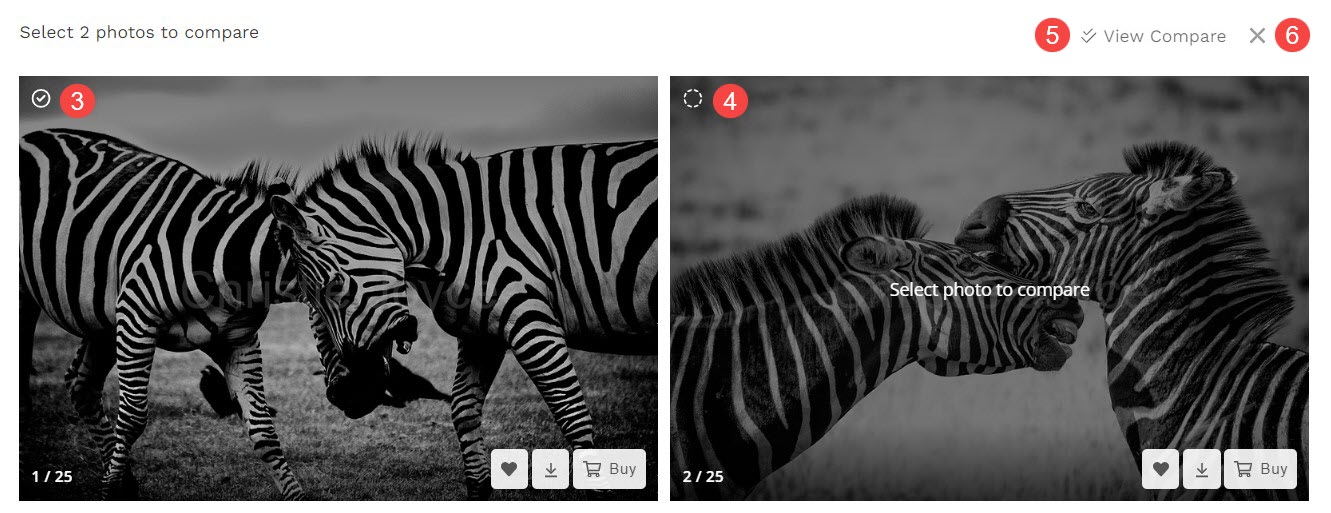
Following are the steps involved in order to compare the images:
- Clients need to log in to their album.
- Inside the gallery (1), click on Compare Images (2) tab.

- Select the First (3) and Second (4) image.
- Click on View Compare (5) to open the comparison window.
- Click on ✖ (6) icon to close the image selection window without comparing the images.
Enable Compare Images
You can enable compare images in two ways:
Album Presets
- From the Client Gallery (1) page, click on Album Presets (2) section.
- Check Enable Compare Images (3) option.

When the Compare Images option is activated in Album Presets, it will automatically appear in all albums utilizing preset settings as their defaults.
Individual Albums
You can choose to enable Compare Images option for selected albums.
- From the Albums (1) page, open the album (2) in which you want to enable the user guide.
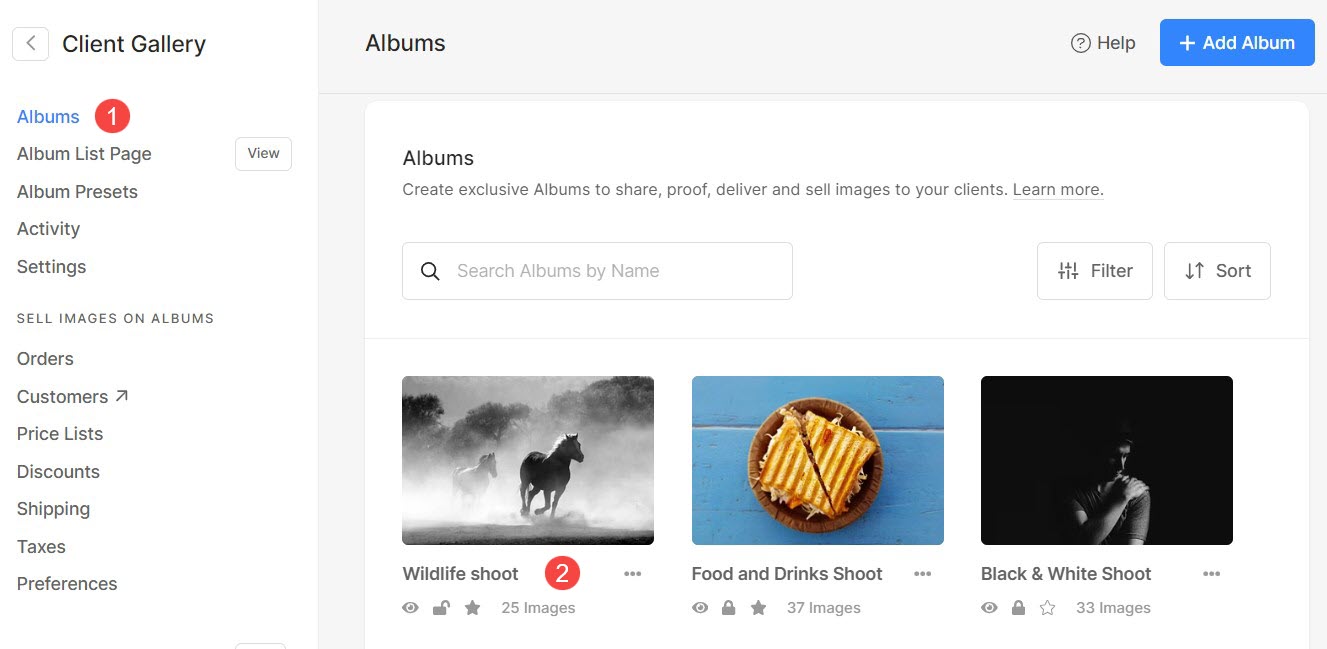
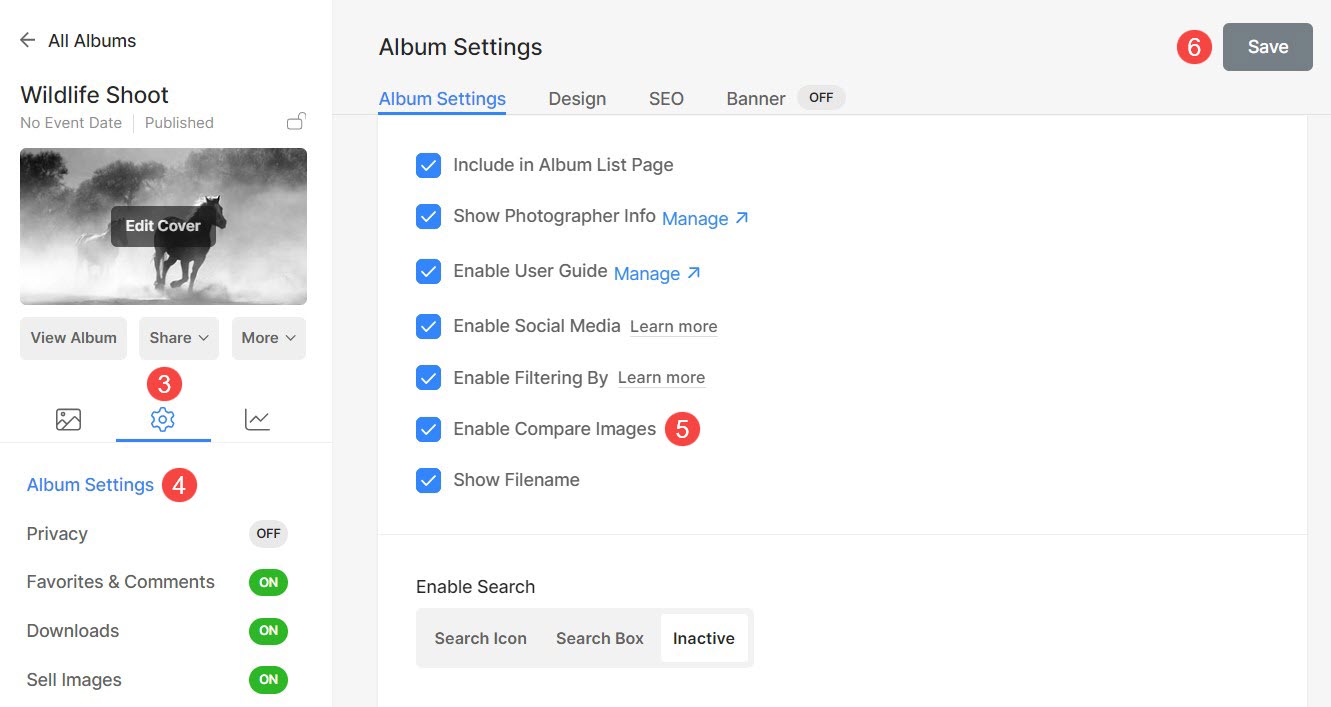
- Click on the Settings (3) icon, and then Album Settings (4).
- Under Album Settings, you will see the option to Enable Compare Images (5).
- Check this option and Save (6) the changes.
The Compare Images option will be enabled for that particular album.