Using Pixpa, simplify the process of accepting online payments with Stripe and PayPal through Payment Forms. Seamlessly collect payments and donations in just minutes.
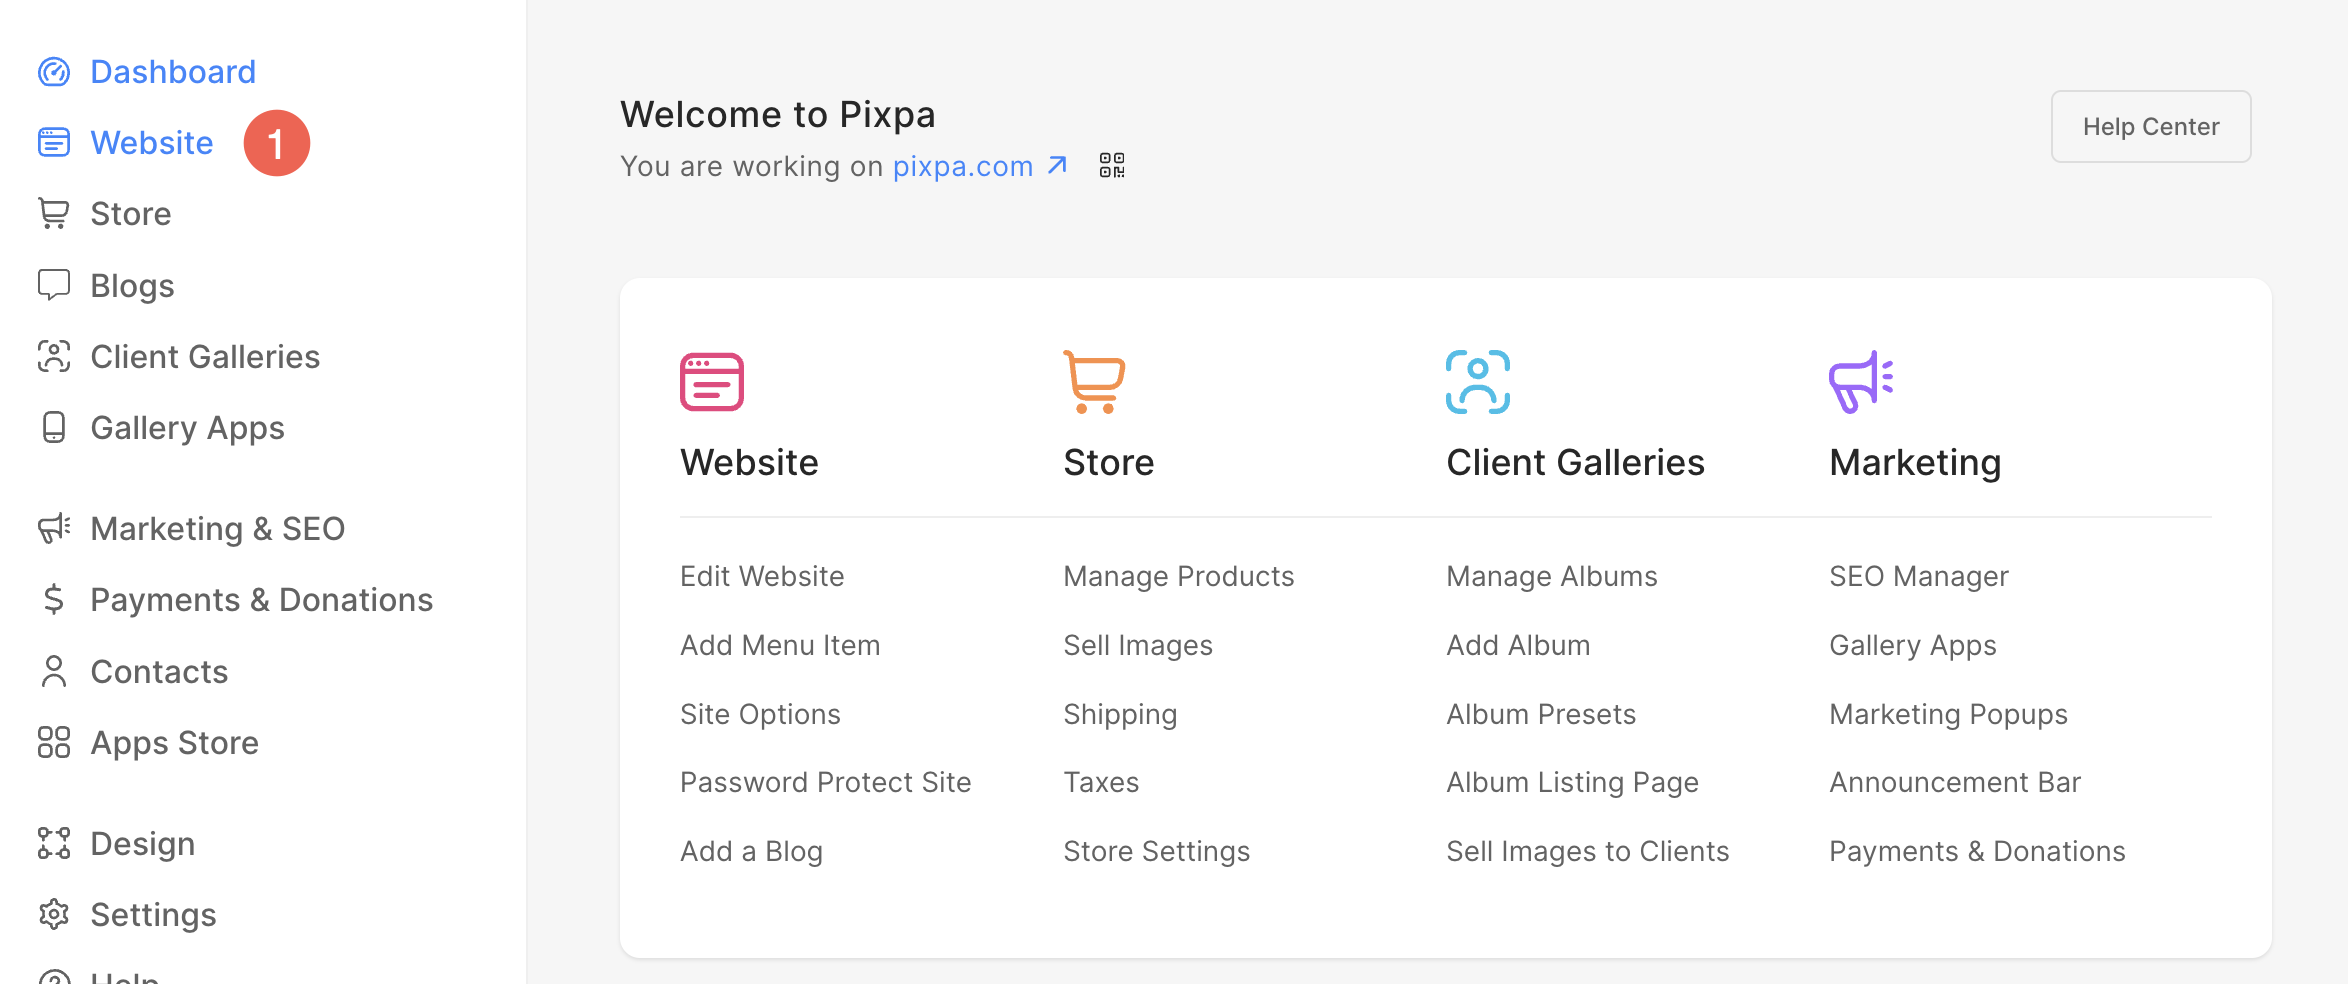
Whether you’re selling products, services, or online courses, Pixpa allows you to effortlessly create payment or donation pages on your website. Easily set up pages for one-time payments or donations with the Payment & Donation section.
Plus, you can conveniently track all your received payments and donations from one centralized location.
In this article
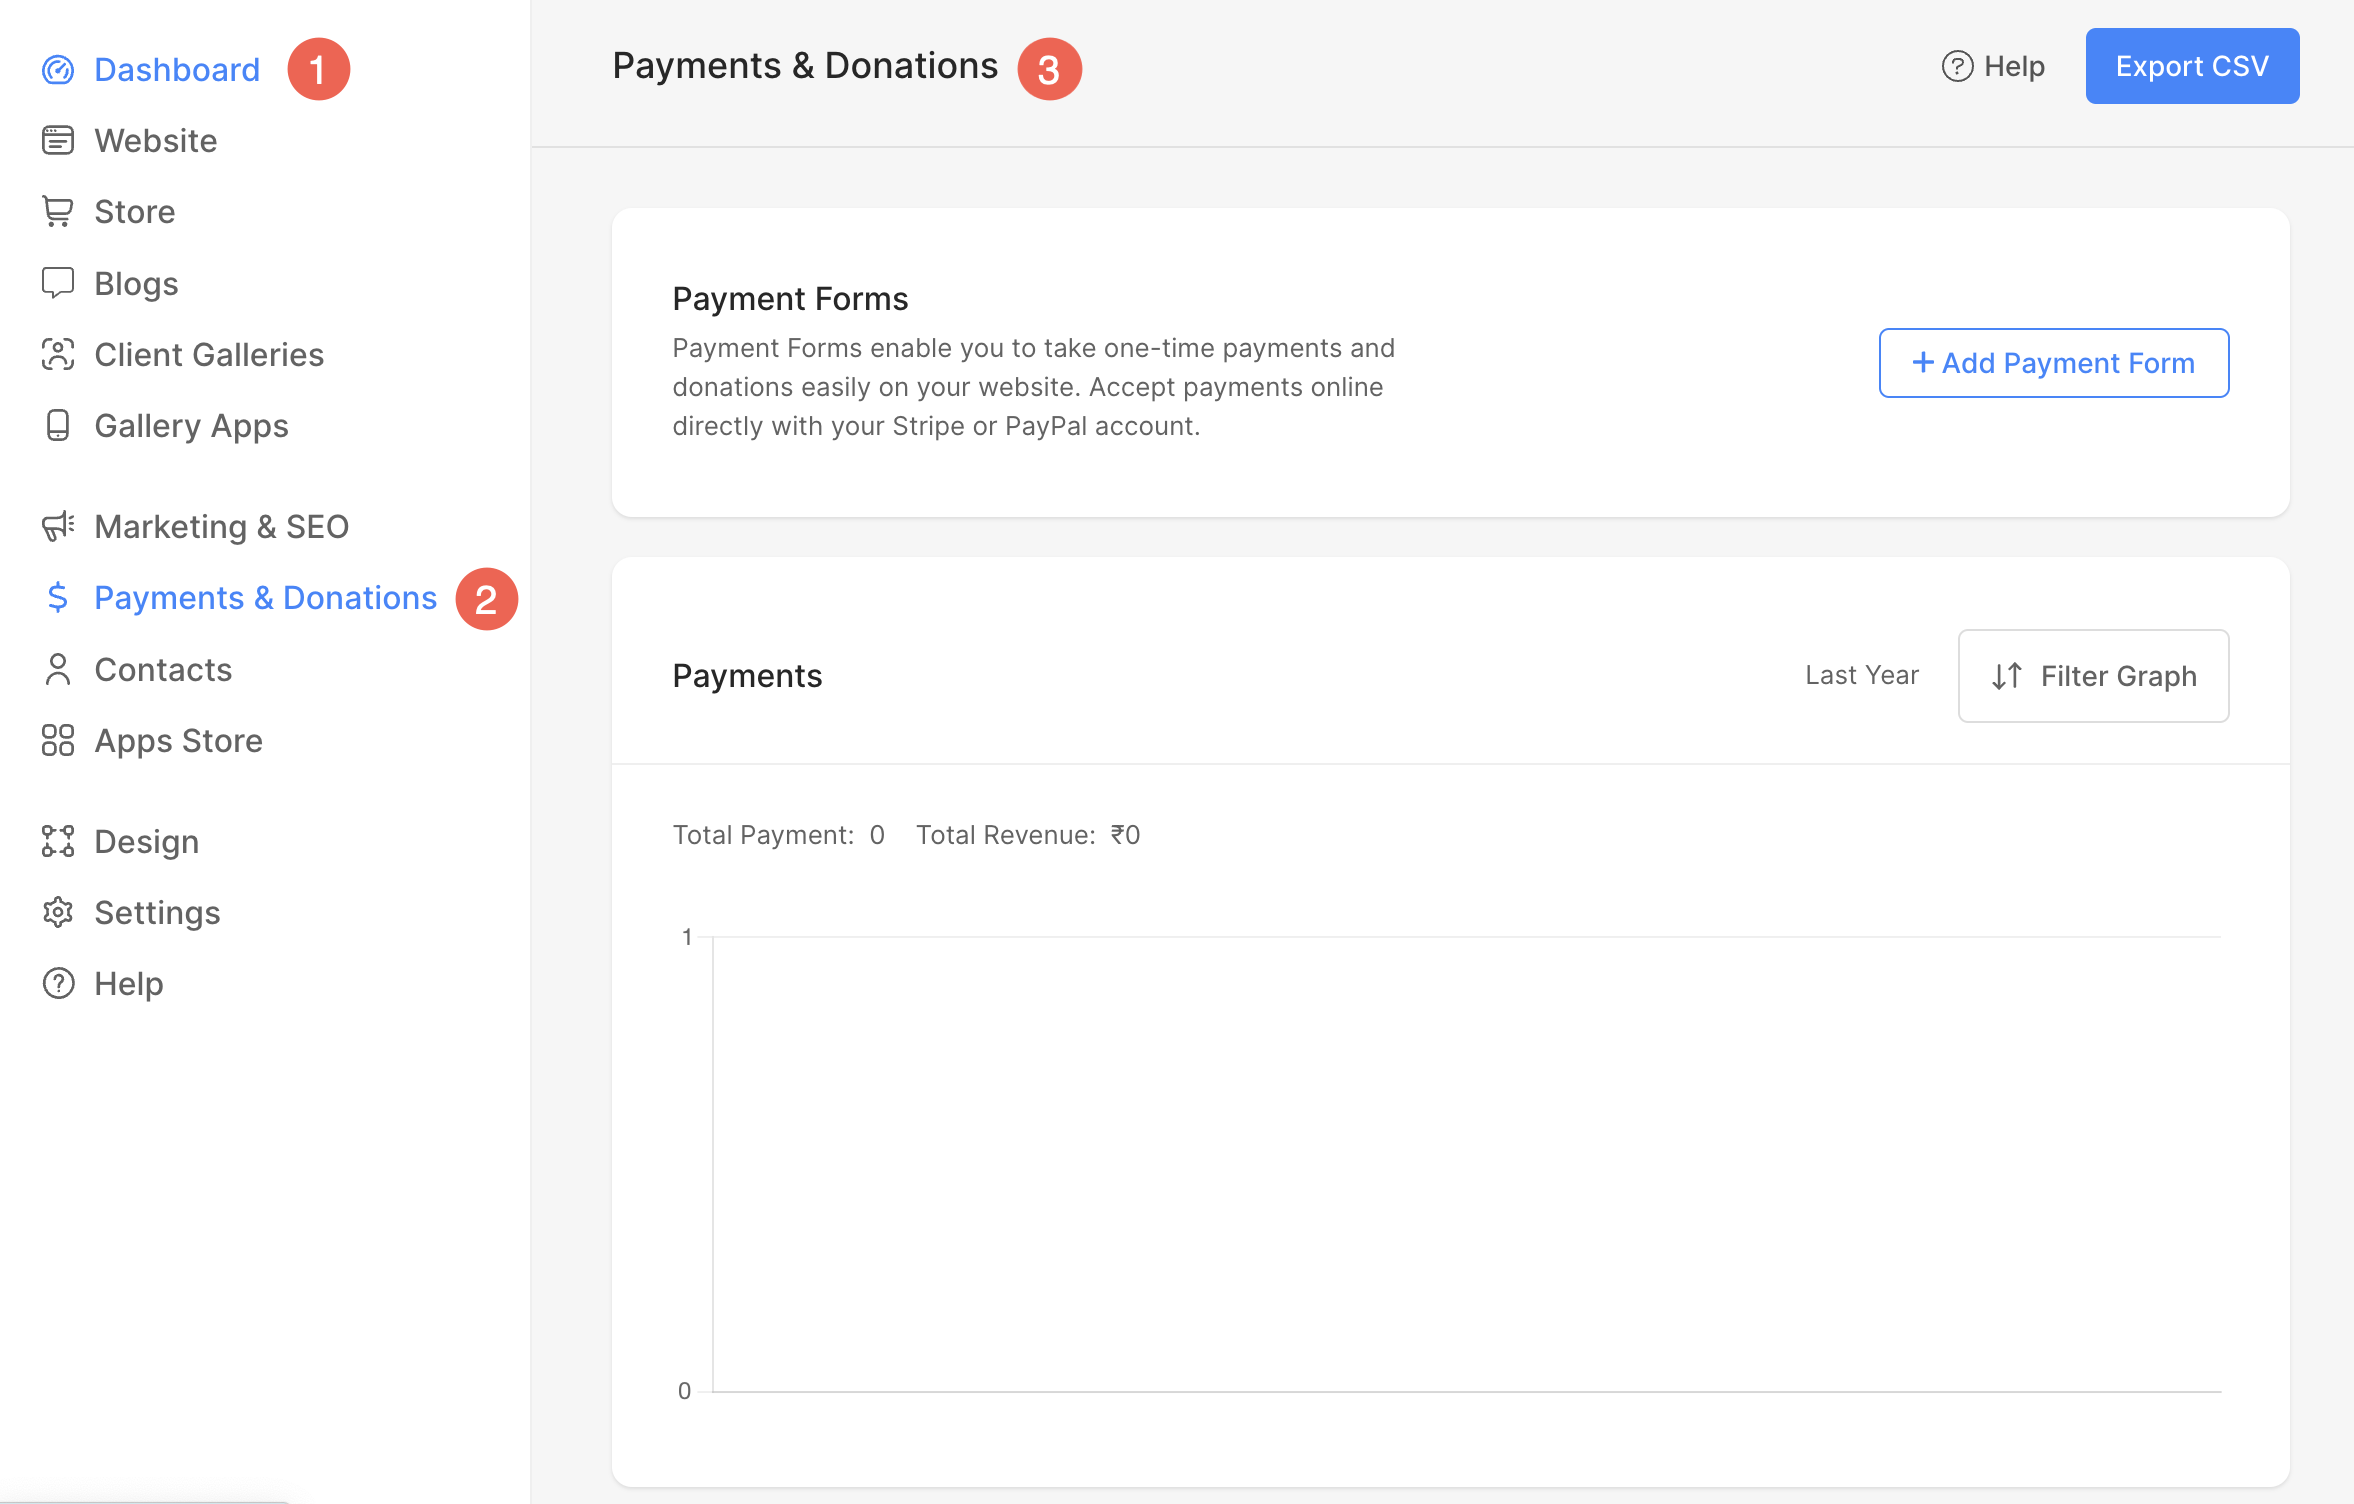
From the Dashboard (1) of the studio, click on Payment & Donations (2) tab to check the overview (3).
Add Payment Page to your Website
The payments page can be added in two ways:
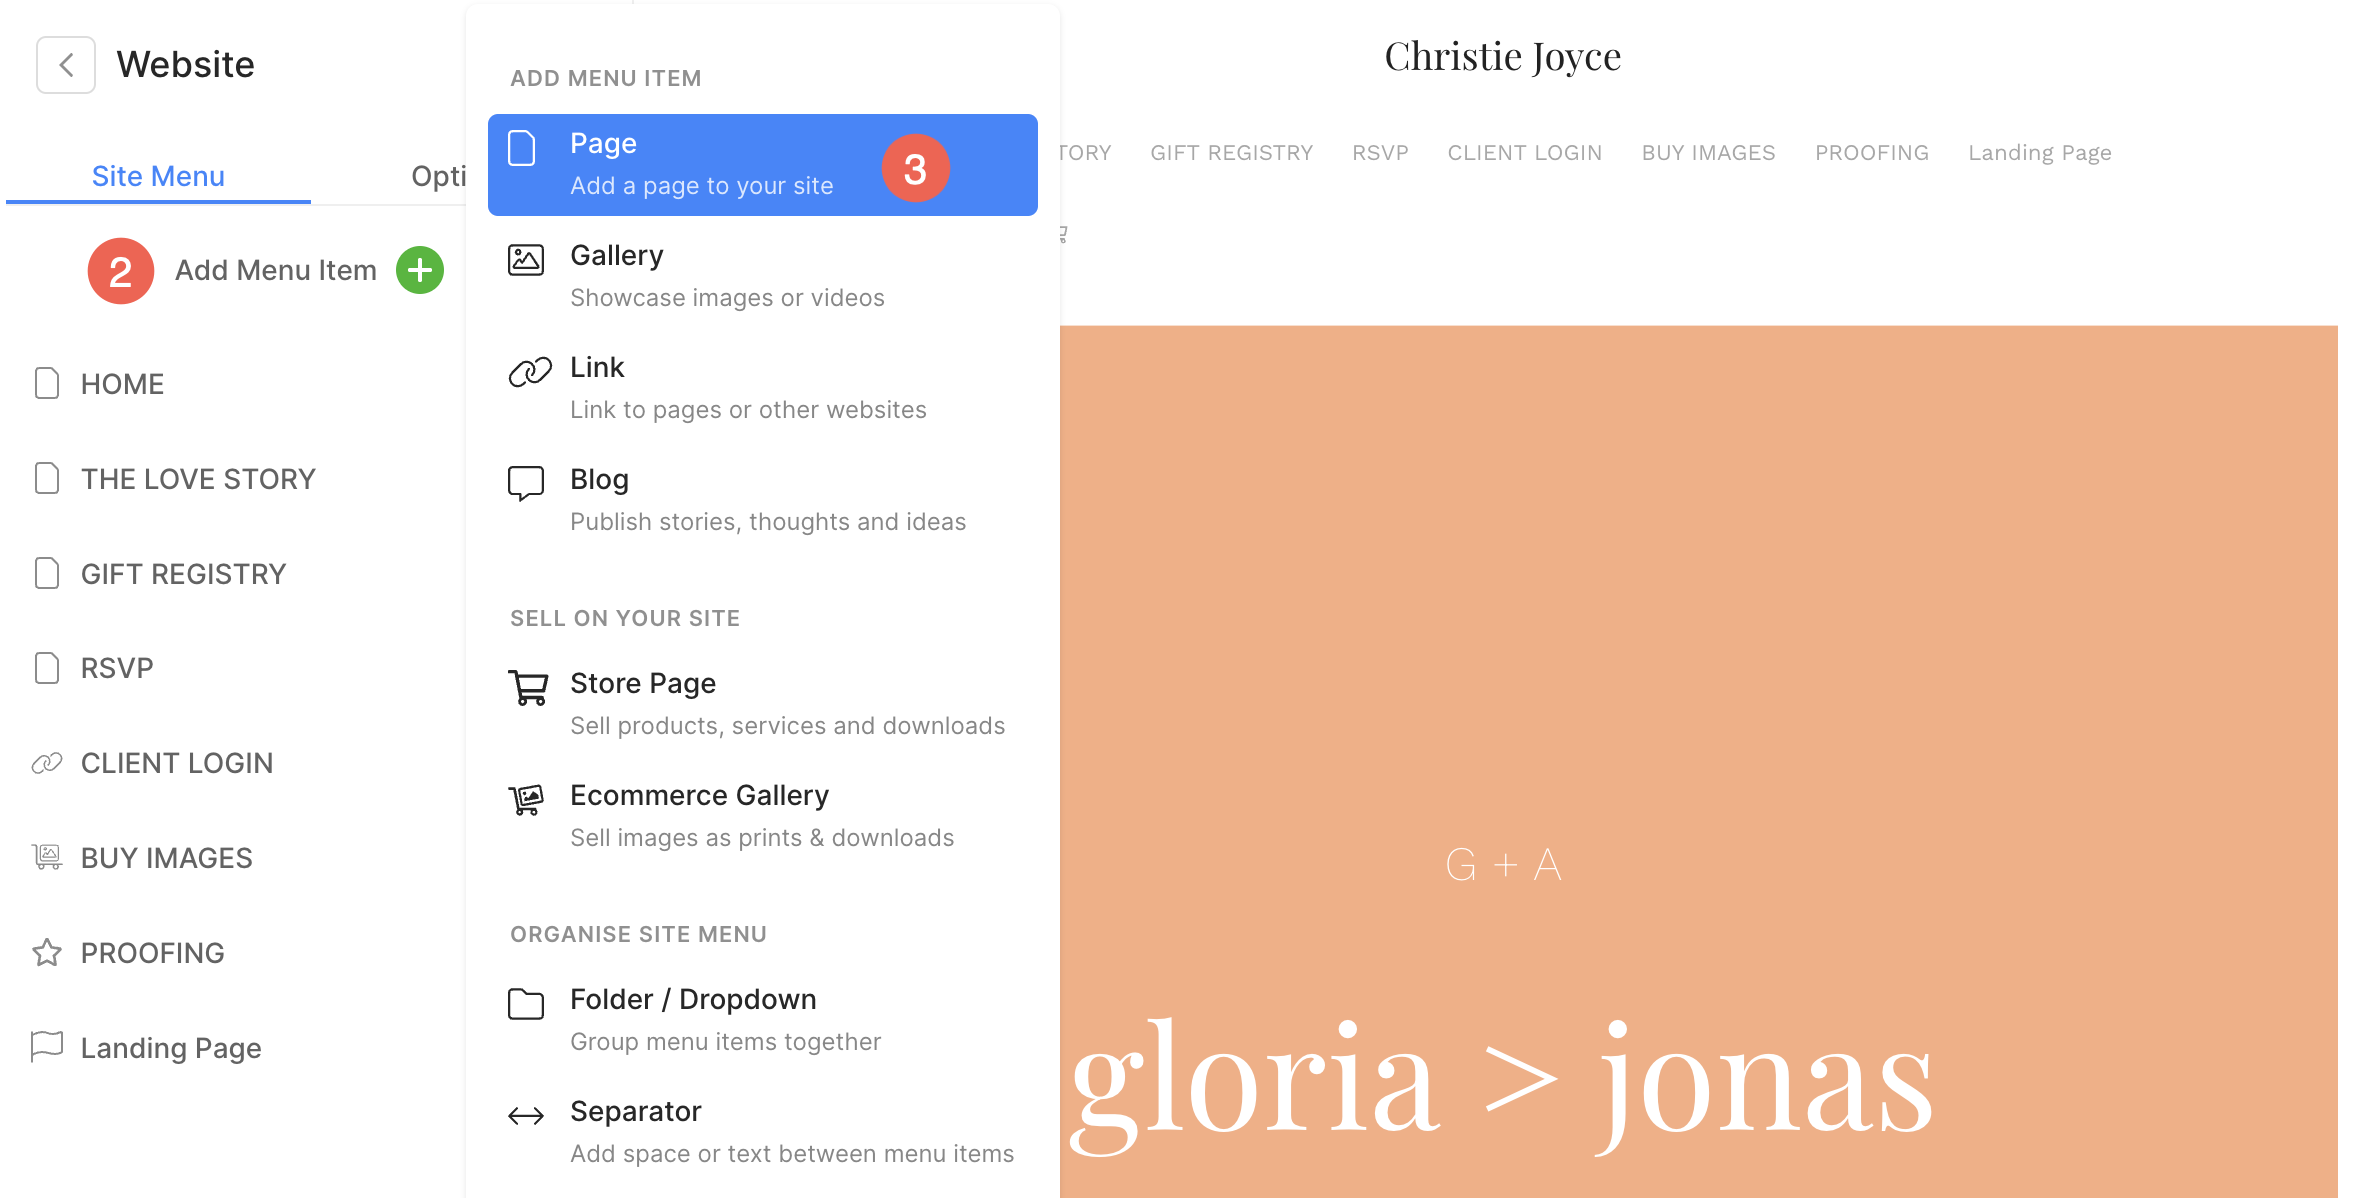
Add Payments Page using Page Builder
- Click on Add Menu Item (2). A sidebar will open from where you can add a new Page (3).
- Click on Page and specify the Page Title.
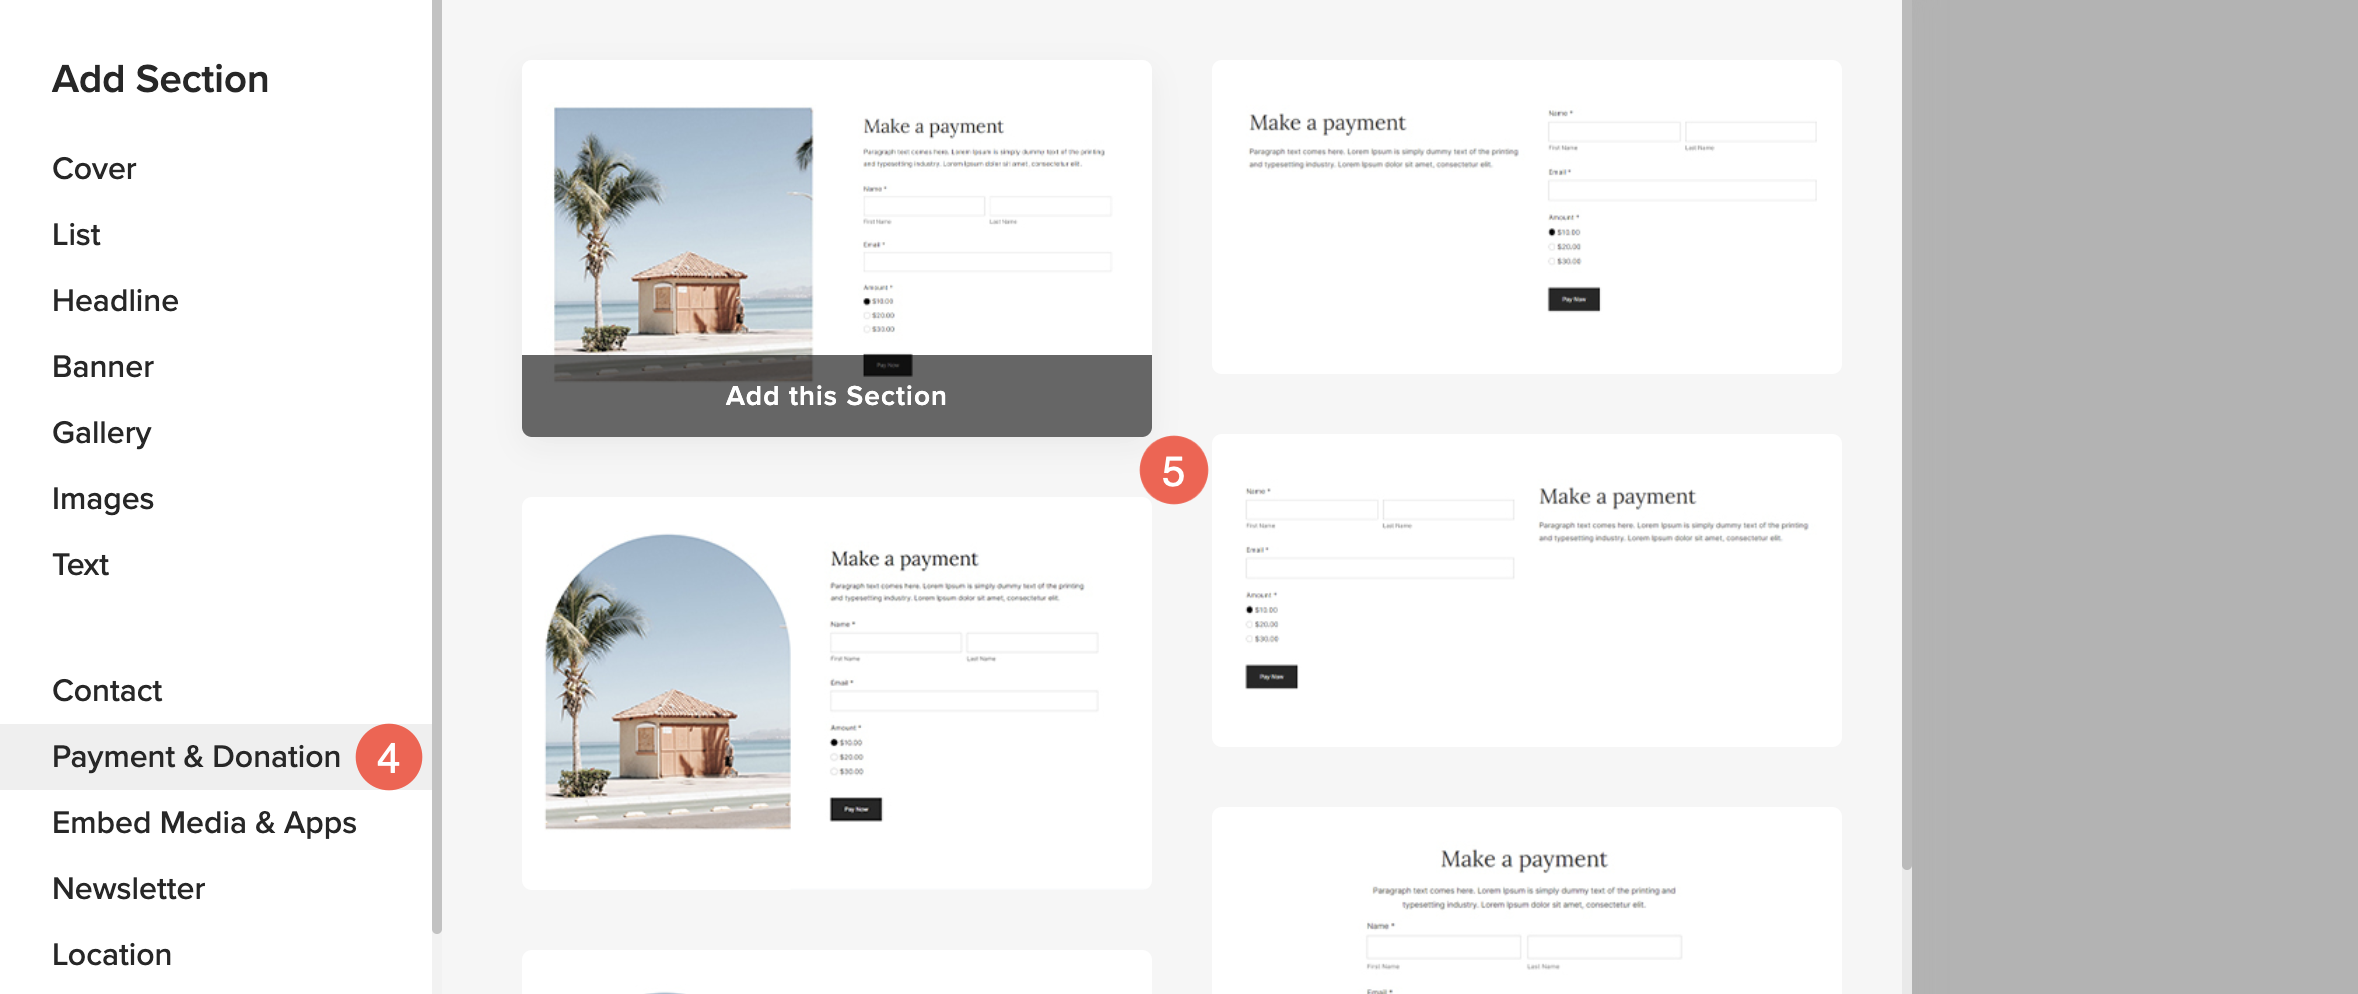
- Now, the page builder will open. Click on the Plus icon.

- From the sidebar, click on Payment & Donation (4) tab.
- Select (5) your preferred layout. This will add a new Payments section to the page.
To learn more about customizing the Payment & Donation section, click here.
Add via Payments & Donations Section
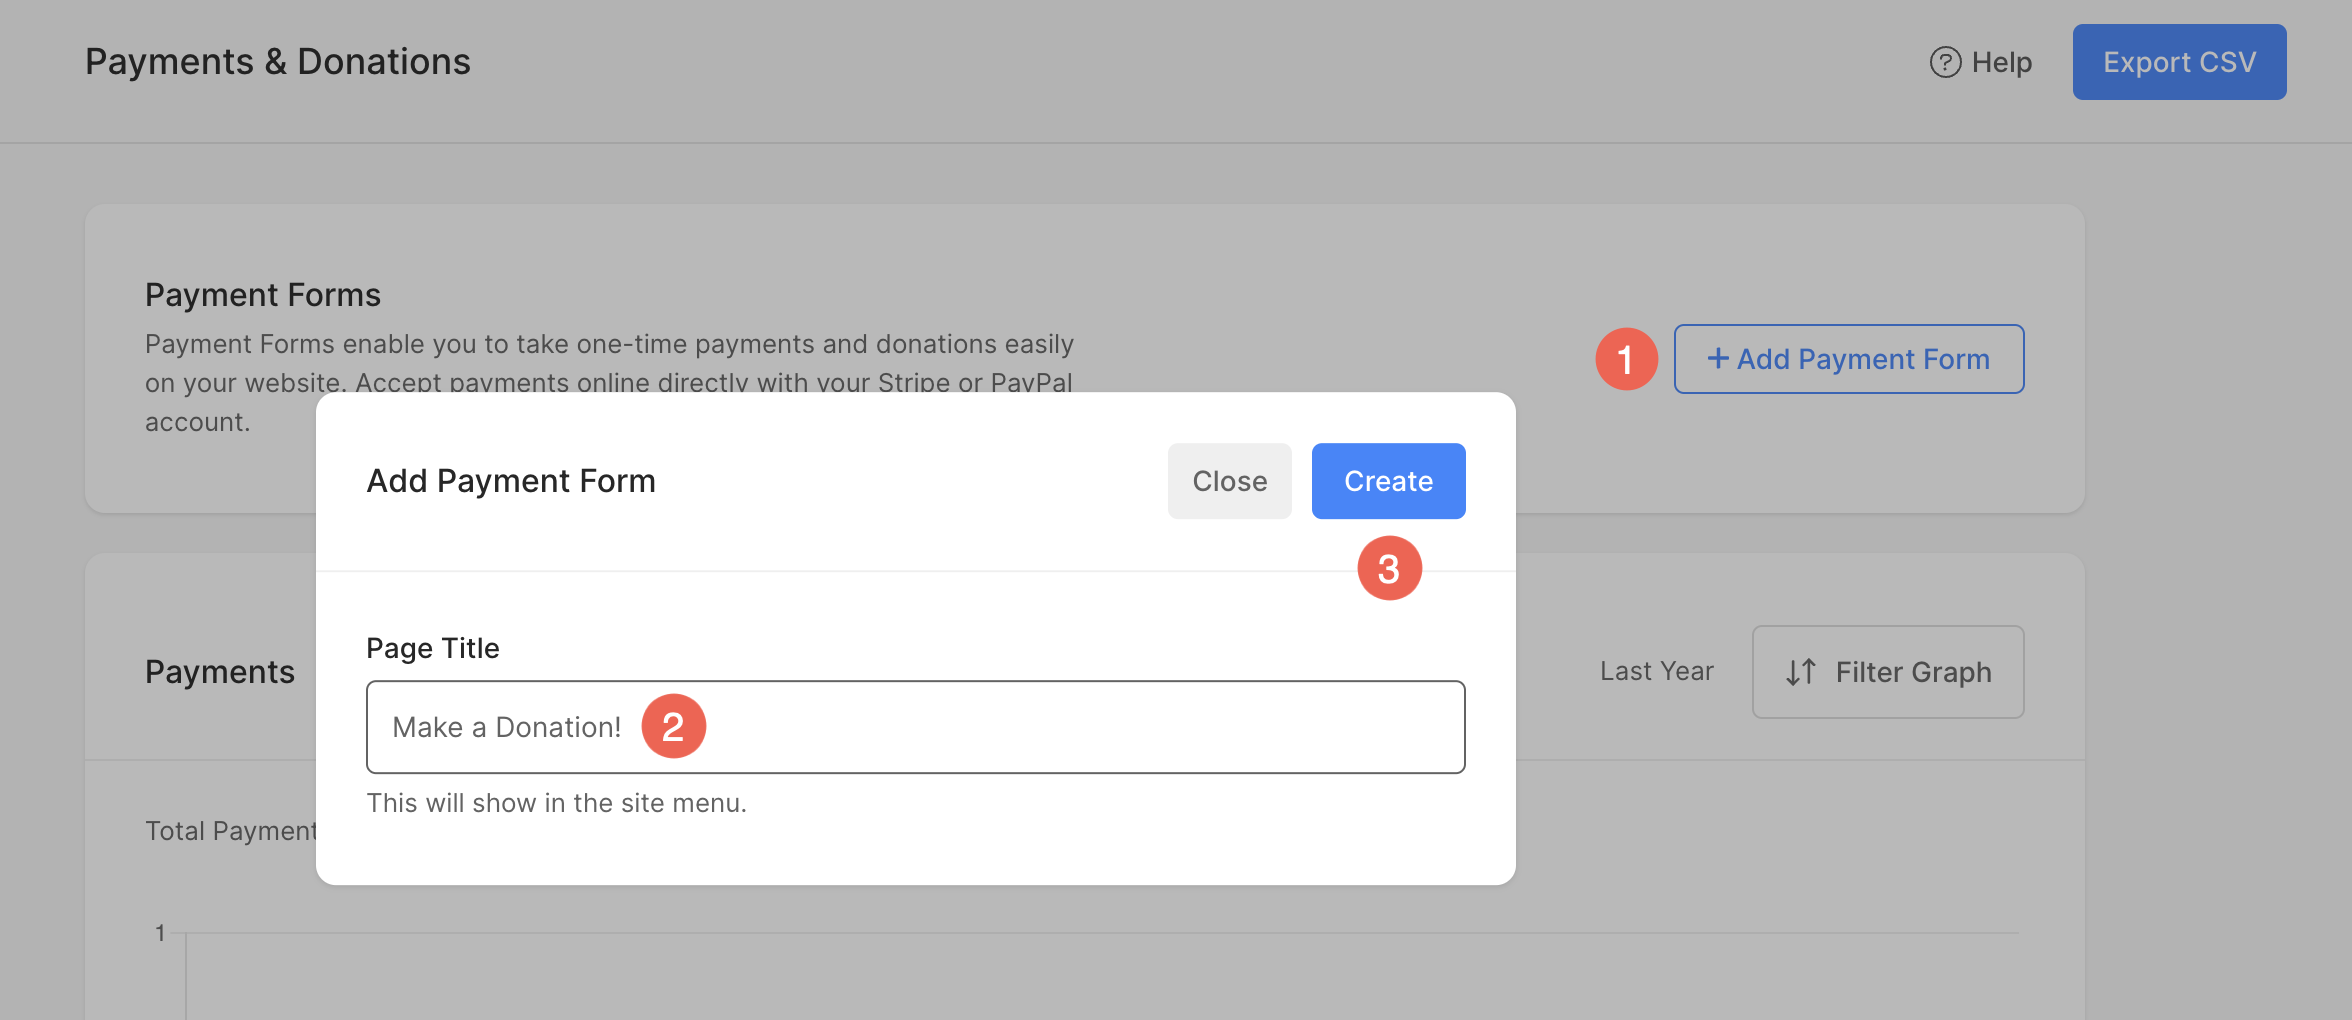
From here, you can create a Payments and Donations page in just a few clicks.
- Click on the + Add Payment Form (1) button.
- A pop-up will appear allowing you to enter the Page Title (2).
- Click on Create (3) button.
A new page will be created and Payments & Donations Section will be added to it automatically. Now you can easily customize the section according to your preferences. Learn more.
Payments Graph
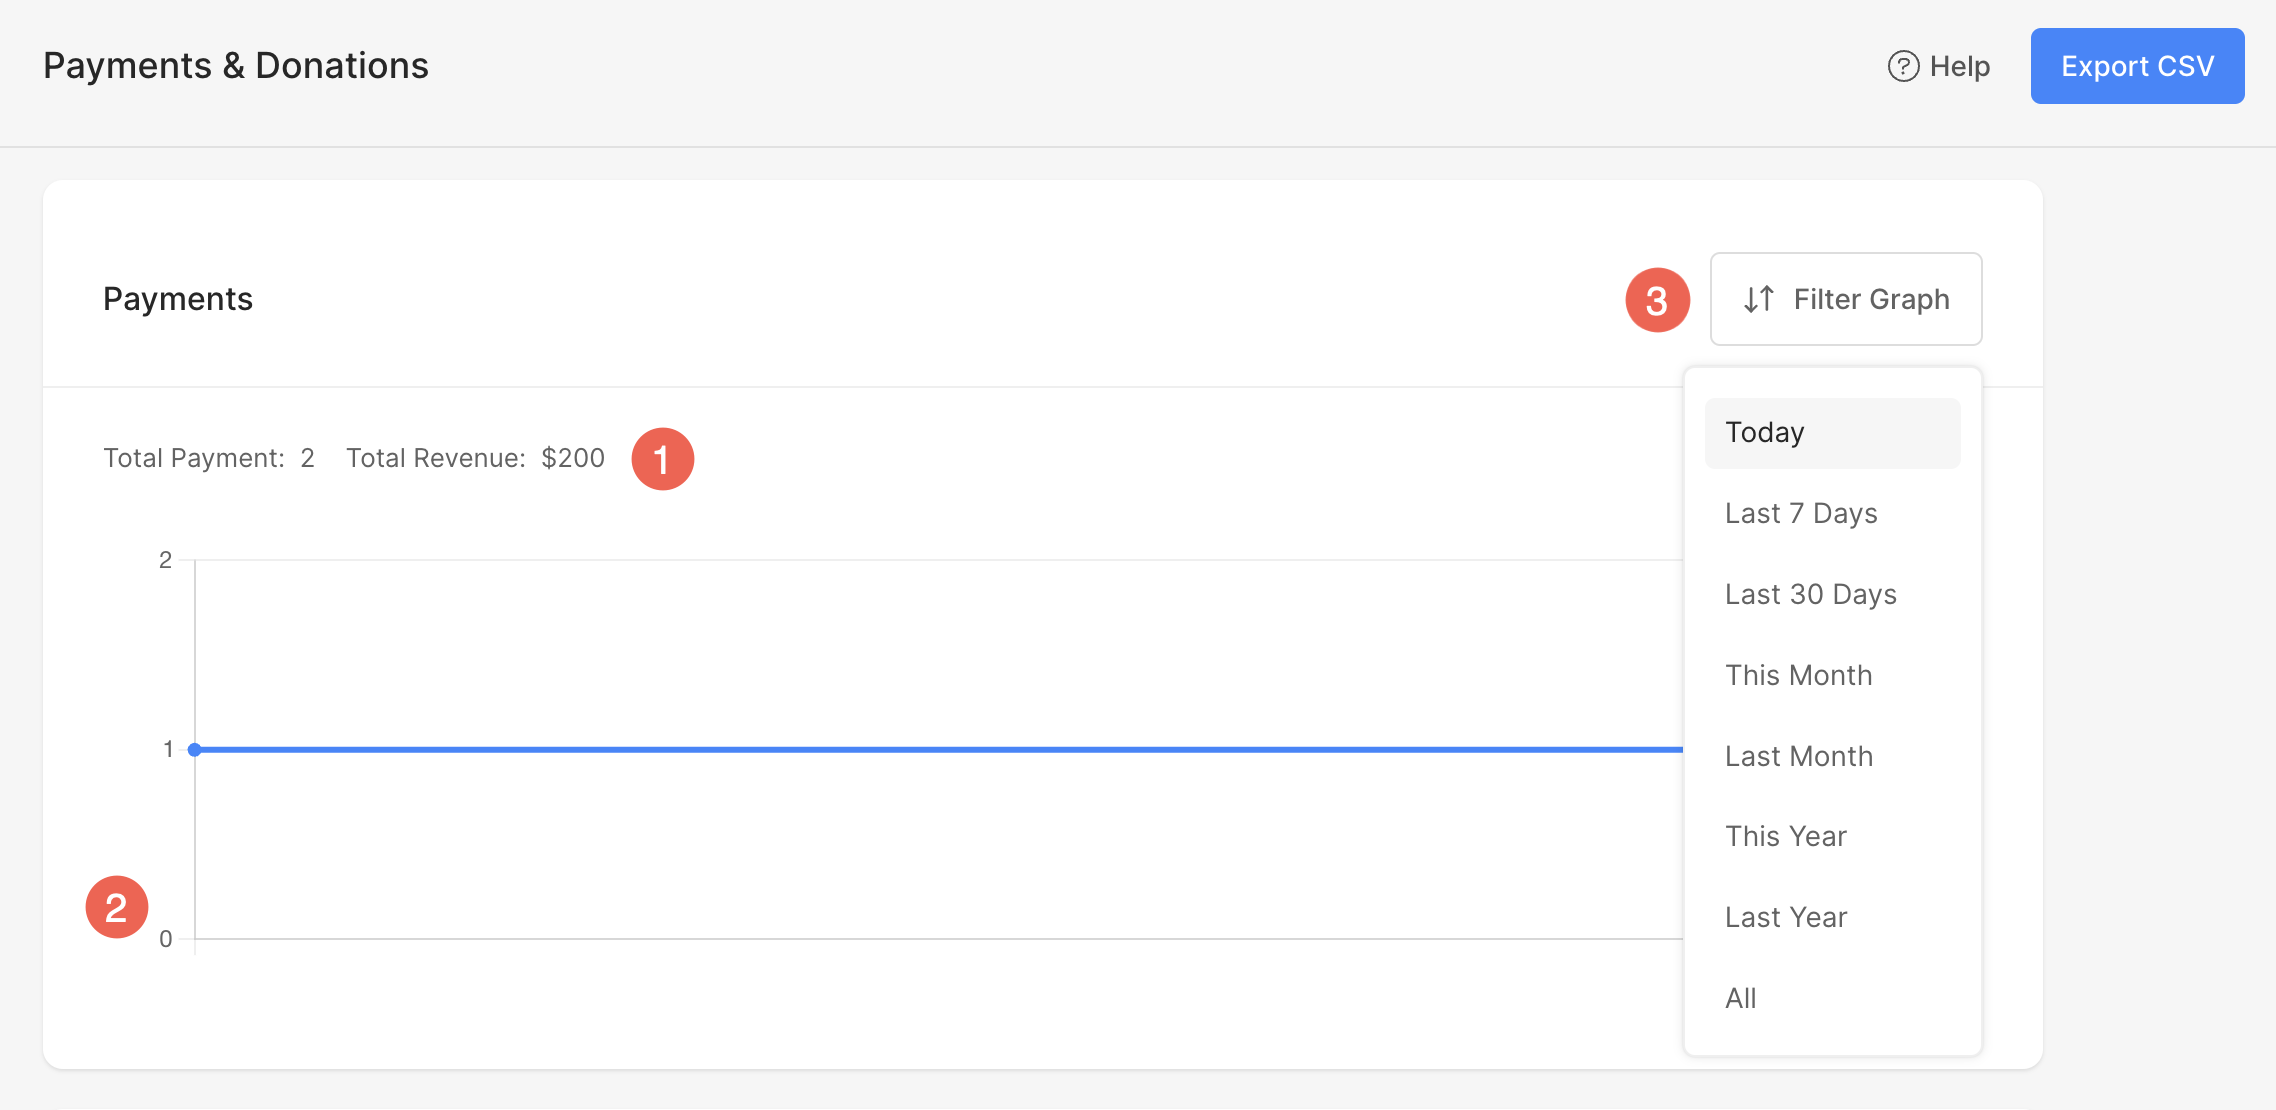
The payment graph offers a comprehensive overview of all payments received through Payments & Donation form on your website.
This visual tool provides valuable insights into your financial transactions, allowing you to track and analyze your revenue streams effortlessly.
- You can check the total number of transactions along with the total revenue collected within a selected time frame.
- This is the graphical interface of the transactions.
- Filter the payments graph for various available time frames.
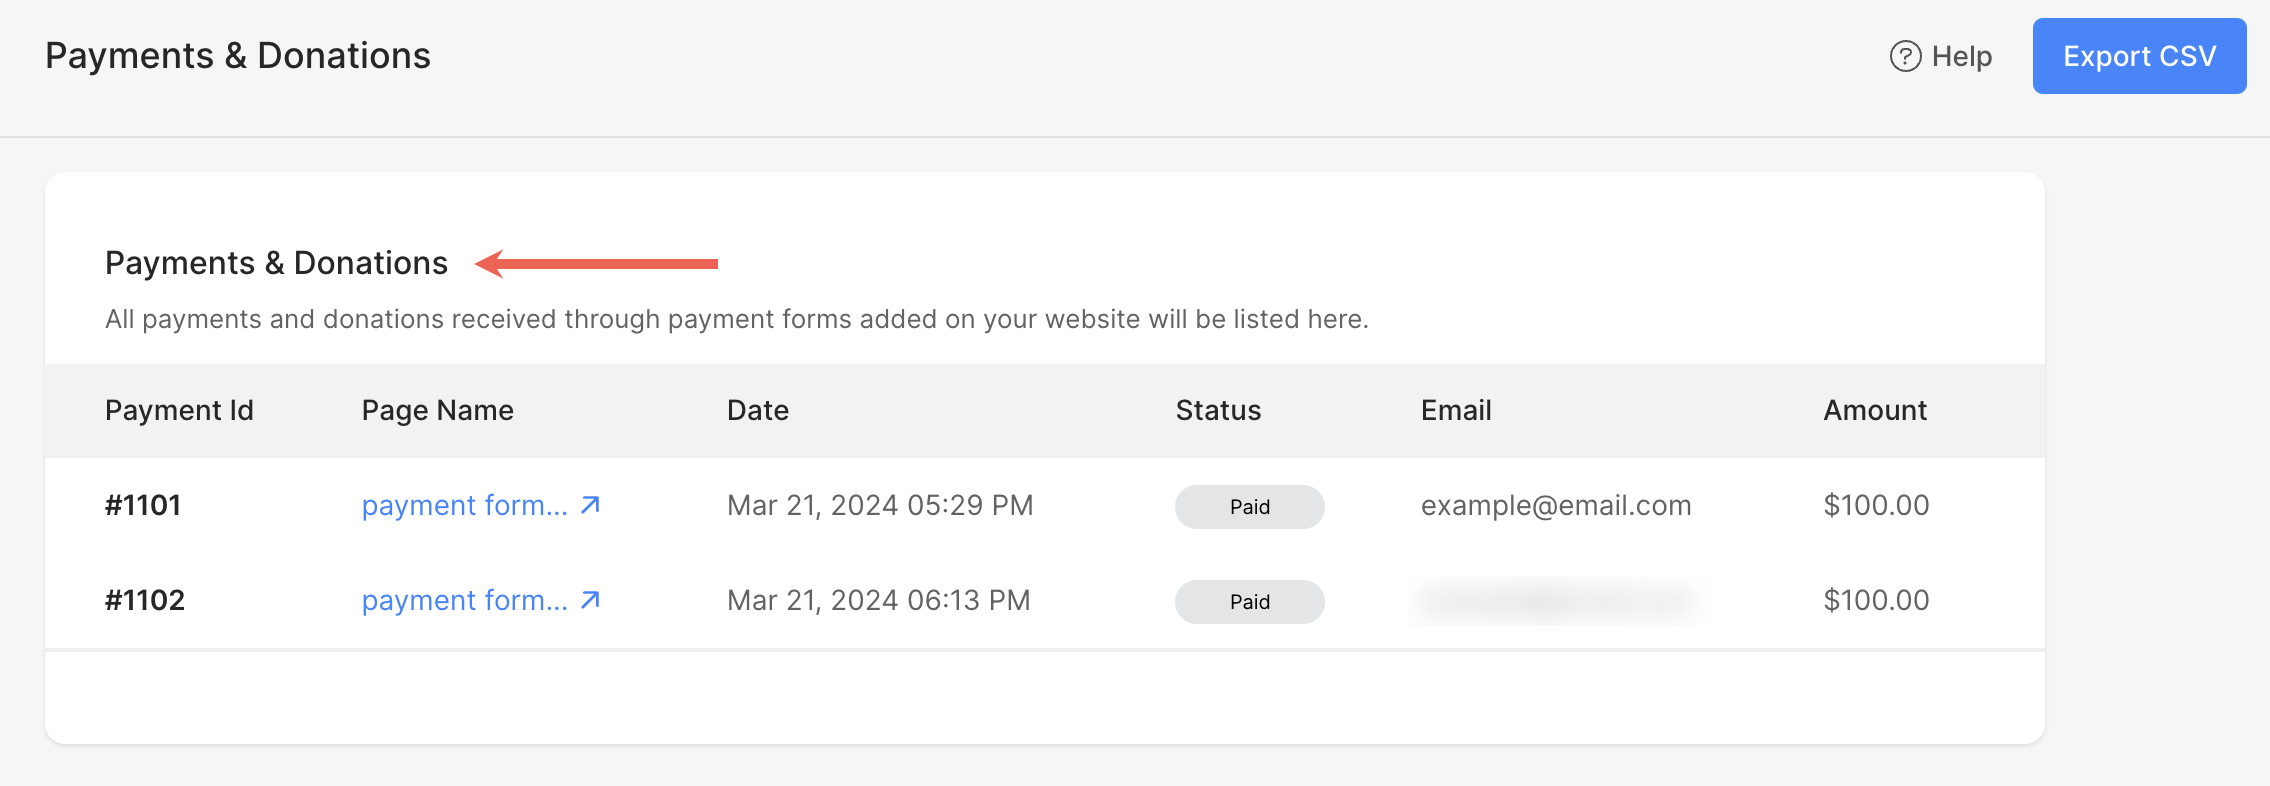
Transaction Details
Here, you will find a comprehensive list of transactions, each accompanied by detailed information.
Explore individual transaction details, including the specific payment form utilized for each payment, all conveniently accessible within your Pixpa account.
Export Payments Data
You can easily export payment form transactions into a CSV file from here. To do so, simply follow the steps mentioned below:
- Click on the Export CSV (1) button.
- A pop-up will appear. From the dropdown, select a Payment Form (2).
- Click on Export (3) button. A CSV file will be automatically downloaded to your computer.
