Learn how to create essential legal documents – Terms of Use and Privacy Policy – for your website.
In this guide, we will walk you through simple steps to setup these documents, ensuring clarity and compliance with Pixpa’s user-friendly tools. Let’s establish trust and protection for you and your visitors in just a few clicks!
In this article:
Create a Page
To add a new page, follow the steps mentioned below:

- Click on Add Menu Item (3) button. A sidebar will pop up allowing you to choose from different menu items.
- Click on Page (4) item.

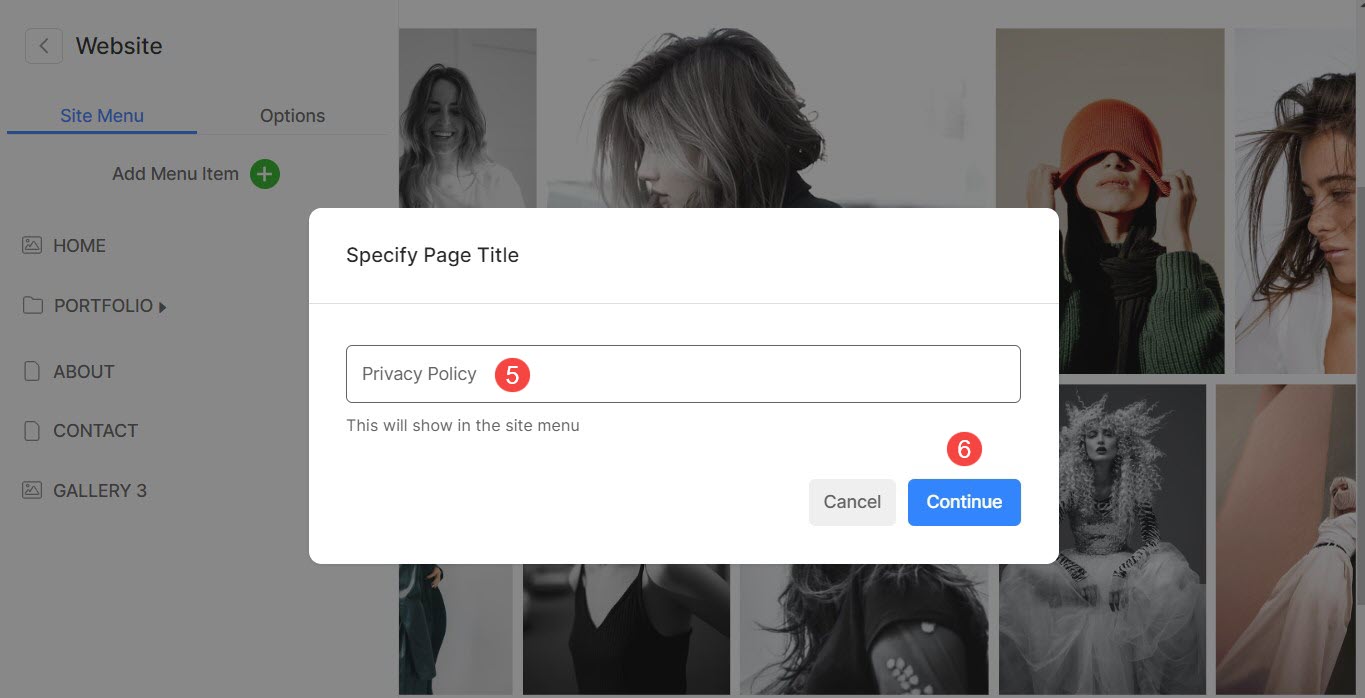
- A popup will appear asking you for the Page Title (5). Provide a relevant title and click on Continue (6).
- Now you will see different page presets. Click on Privacy Policy (7) tab from where you can select a preset (8) specially designed for privacy page.

Congratulations! You have added a Privacy Policy page to your website.
Edit Terms of Use and Privacy Policy Page
You have the option to effortlessly modify the sections automatically included by the preset or add multiple sections of your preference and personalize the page.
Have a look at this screencast on how to add / remove sections and edit them:
Click here to explore more about the various sections available for customizing the page.
Hide the Page from Site Menu
To conceal the page from appearing in the website menu, you have to option to hide it. Follow the steps mentioned below to hide the page.
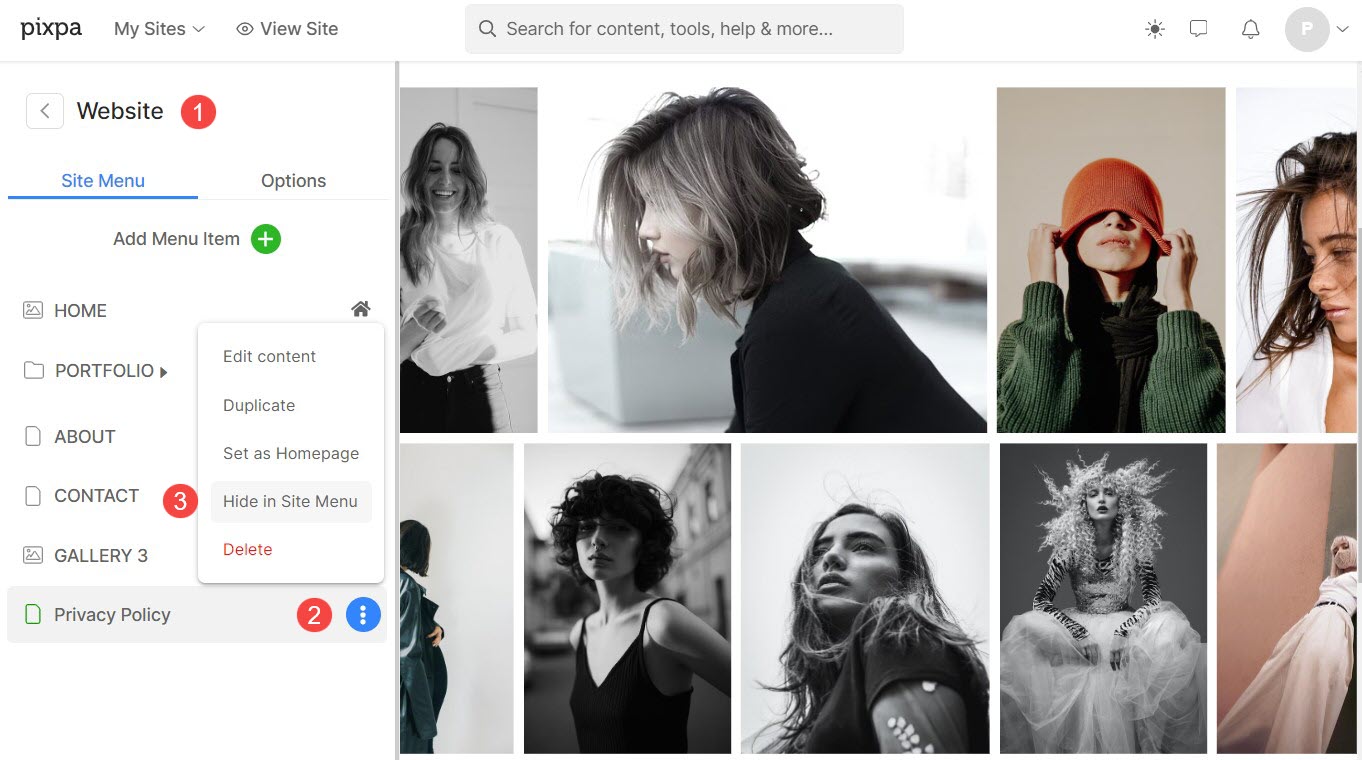
- Go to the Website (1) section of the studio.
- Hover the cursor over the page you’ve created, and you’ll notice a blue three-dot (2) icon. Click on it.
- You will see the option Hide in Site Menu (3). Click on it.
Now, the page will not appear in the website menu.
Add Page Link in Footer
You can add the link to the Terms of Use and Privacy Policies page in your website’s footer section.
Follow the steps mentioned below:
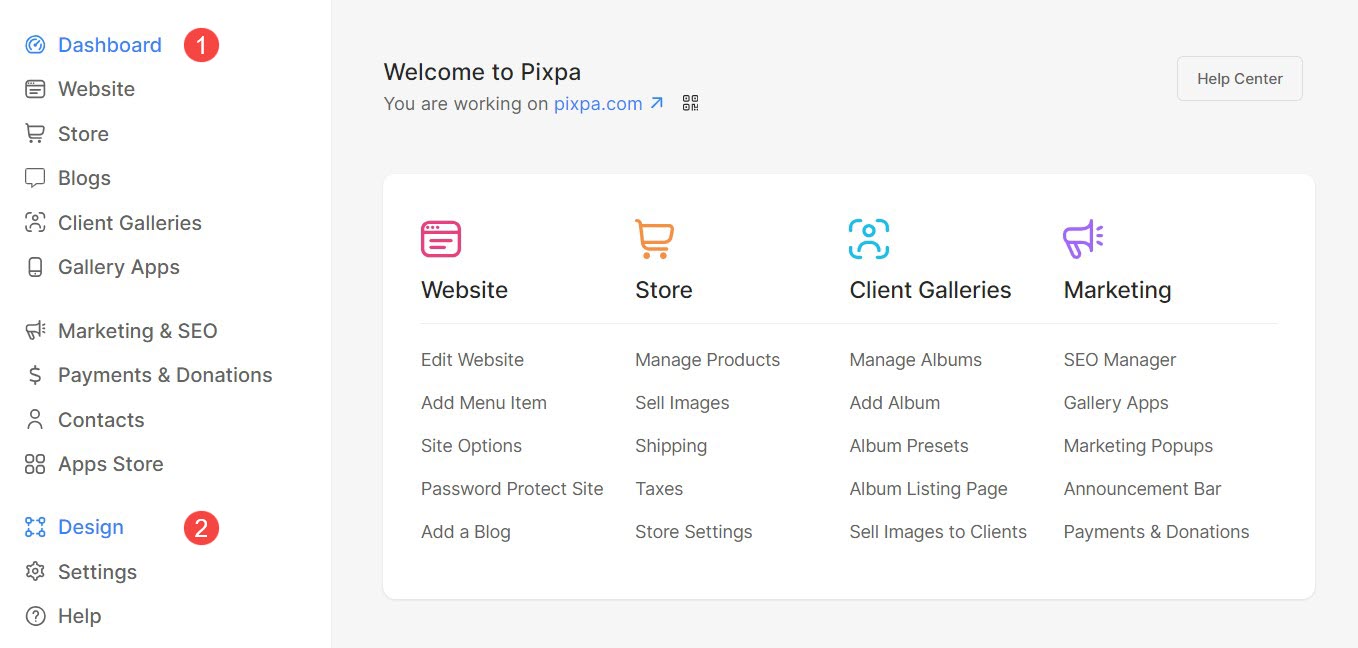
- Under the Design section, you will see the Footer (3) option. Click on it.

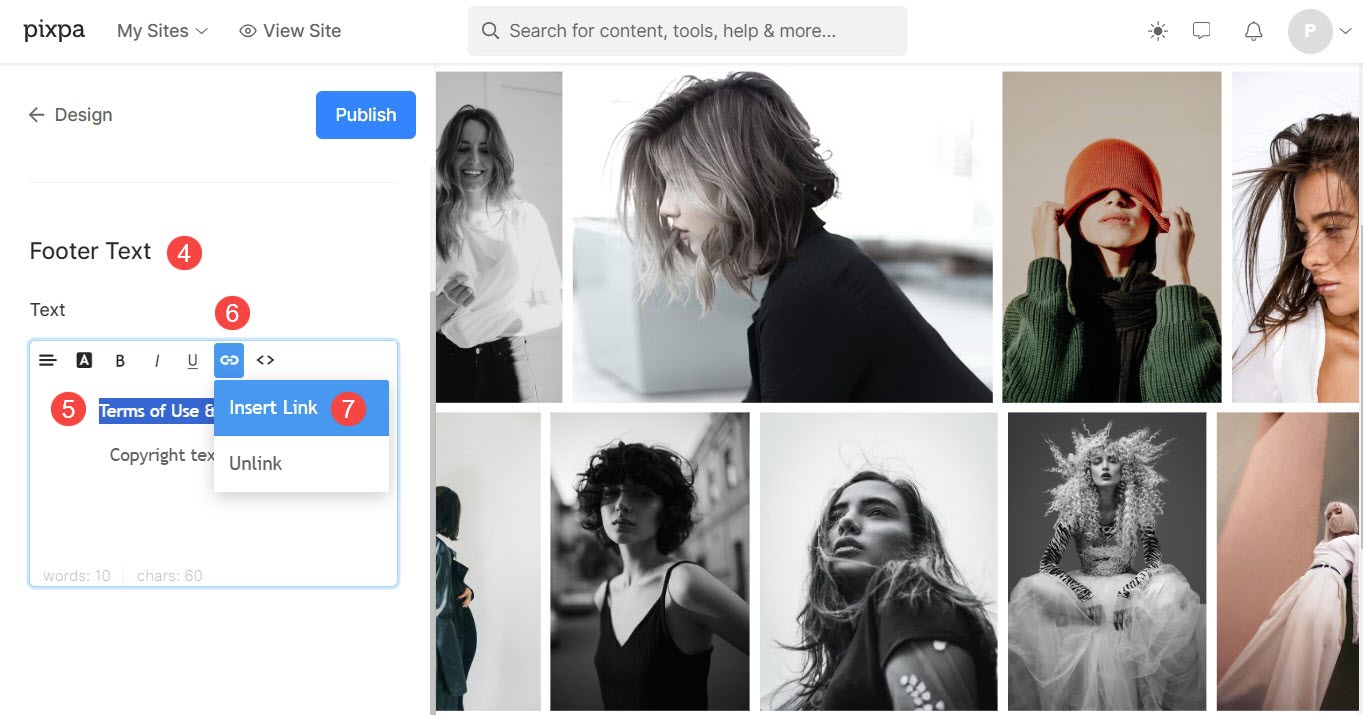
- Here, you will see options regarding Footer Text (4). Specify the text that you want to display for your Terms of Use and Privacy Policy page and select the text (5).
- Click on the Link (6) icon and then, Insert Link (7) option.
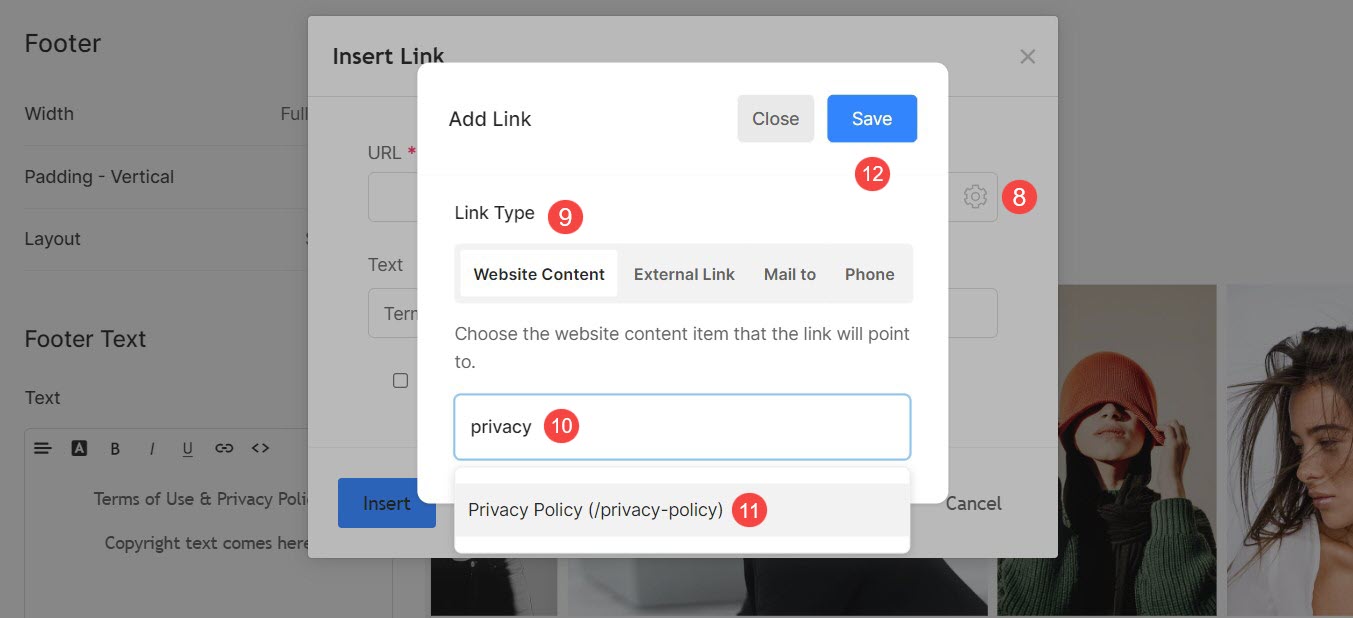
- A new Link builder window will open up. Click on the Settings (8) icon.
- Under the Website Content (9) tab, type name of the page (10).
- A dropdown menu will appear listing all content with a similar name. Select the page (11) you created and Save (12) the changes.
Your privacy text is now linked to the page!
Alternatively, you can use Pre-footer section to link the Terms of Use and Privacy Policy page.
- From the Website (1) section of the studio, click on Options (2) tab and then the Pre-footer (3) option.

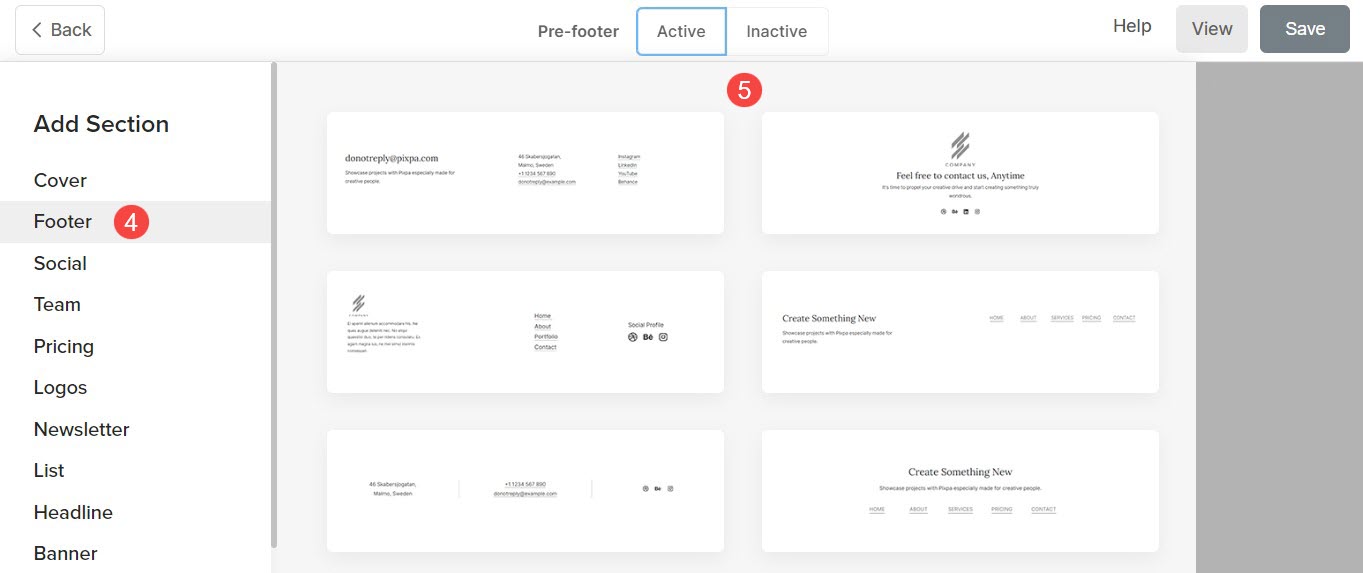
- The Pre-footer editing page will open up. Click on Add Section (+) button. A sidebar will appear from where you can select a section.
- Click on the Footer (4) section and select a preferred Layout (5).
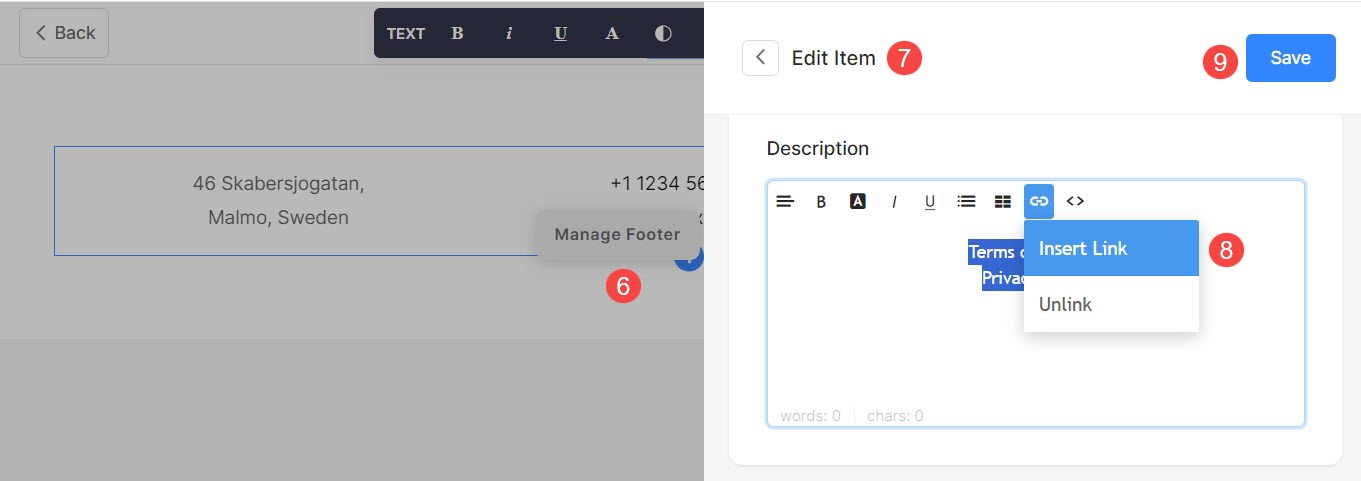
- Click on Manage Footer (6) button from where you can edit and customize the items (7) of the Footer section.
- Link the text (8) using the Link builder and Save (8) the changes.
Click here to learn more about Pre-Footer section.