Once you have uploaded images, Pixpa enables you to specify the image-specific information like keywords.
The image info section allows you to edit Image filename, Image accent color (used in some theme templates), Image captions/titles, Image description, and Image keywords.
This way, you can specify any textual information for each of your images.
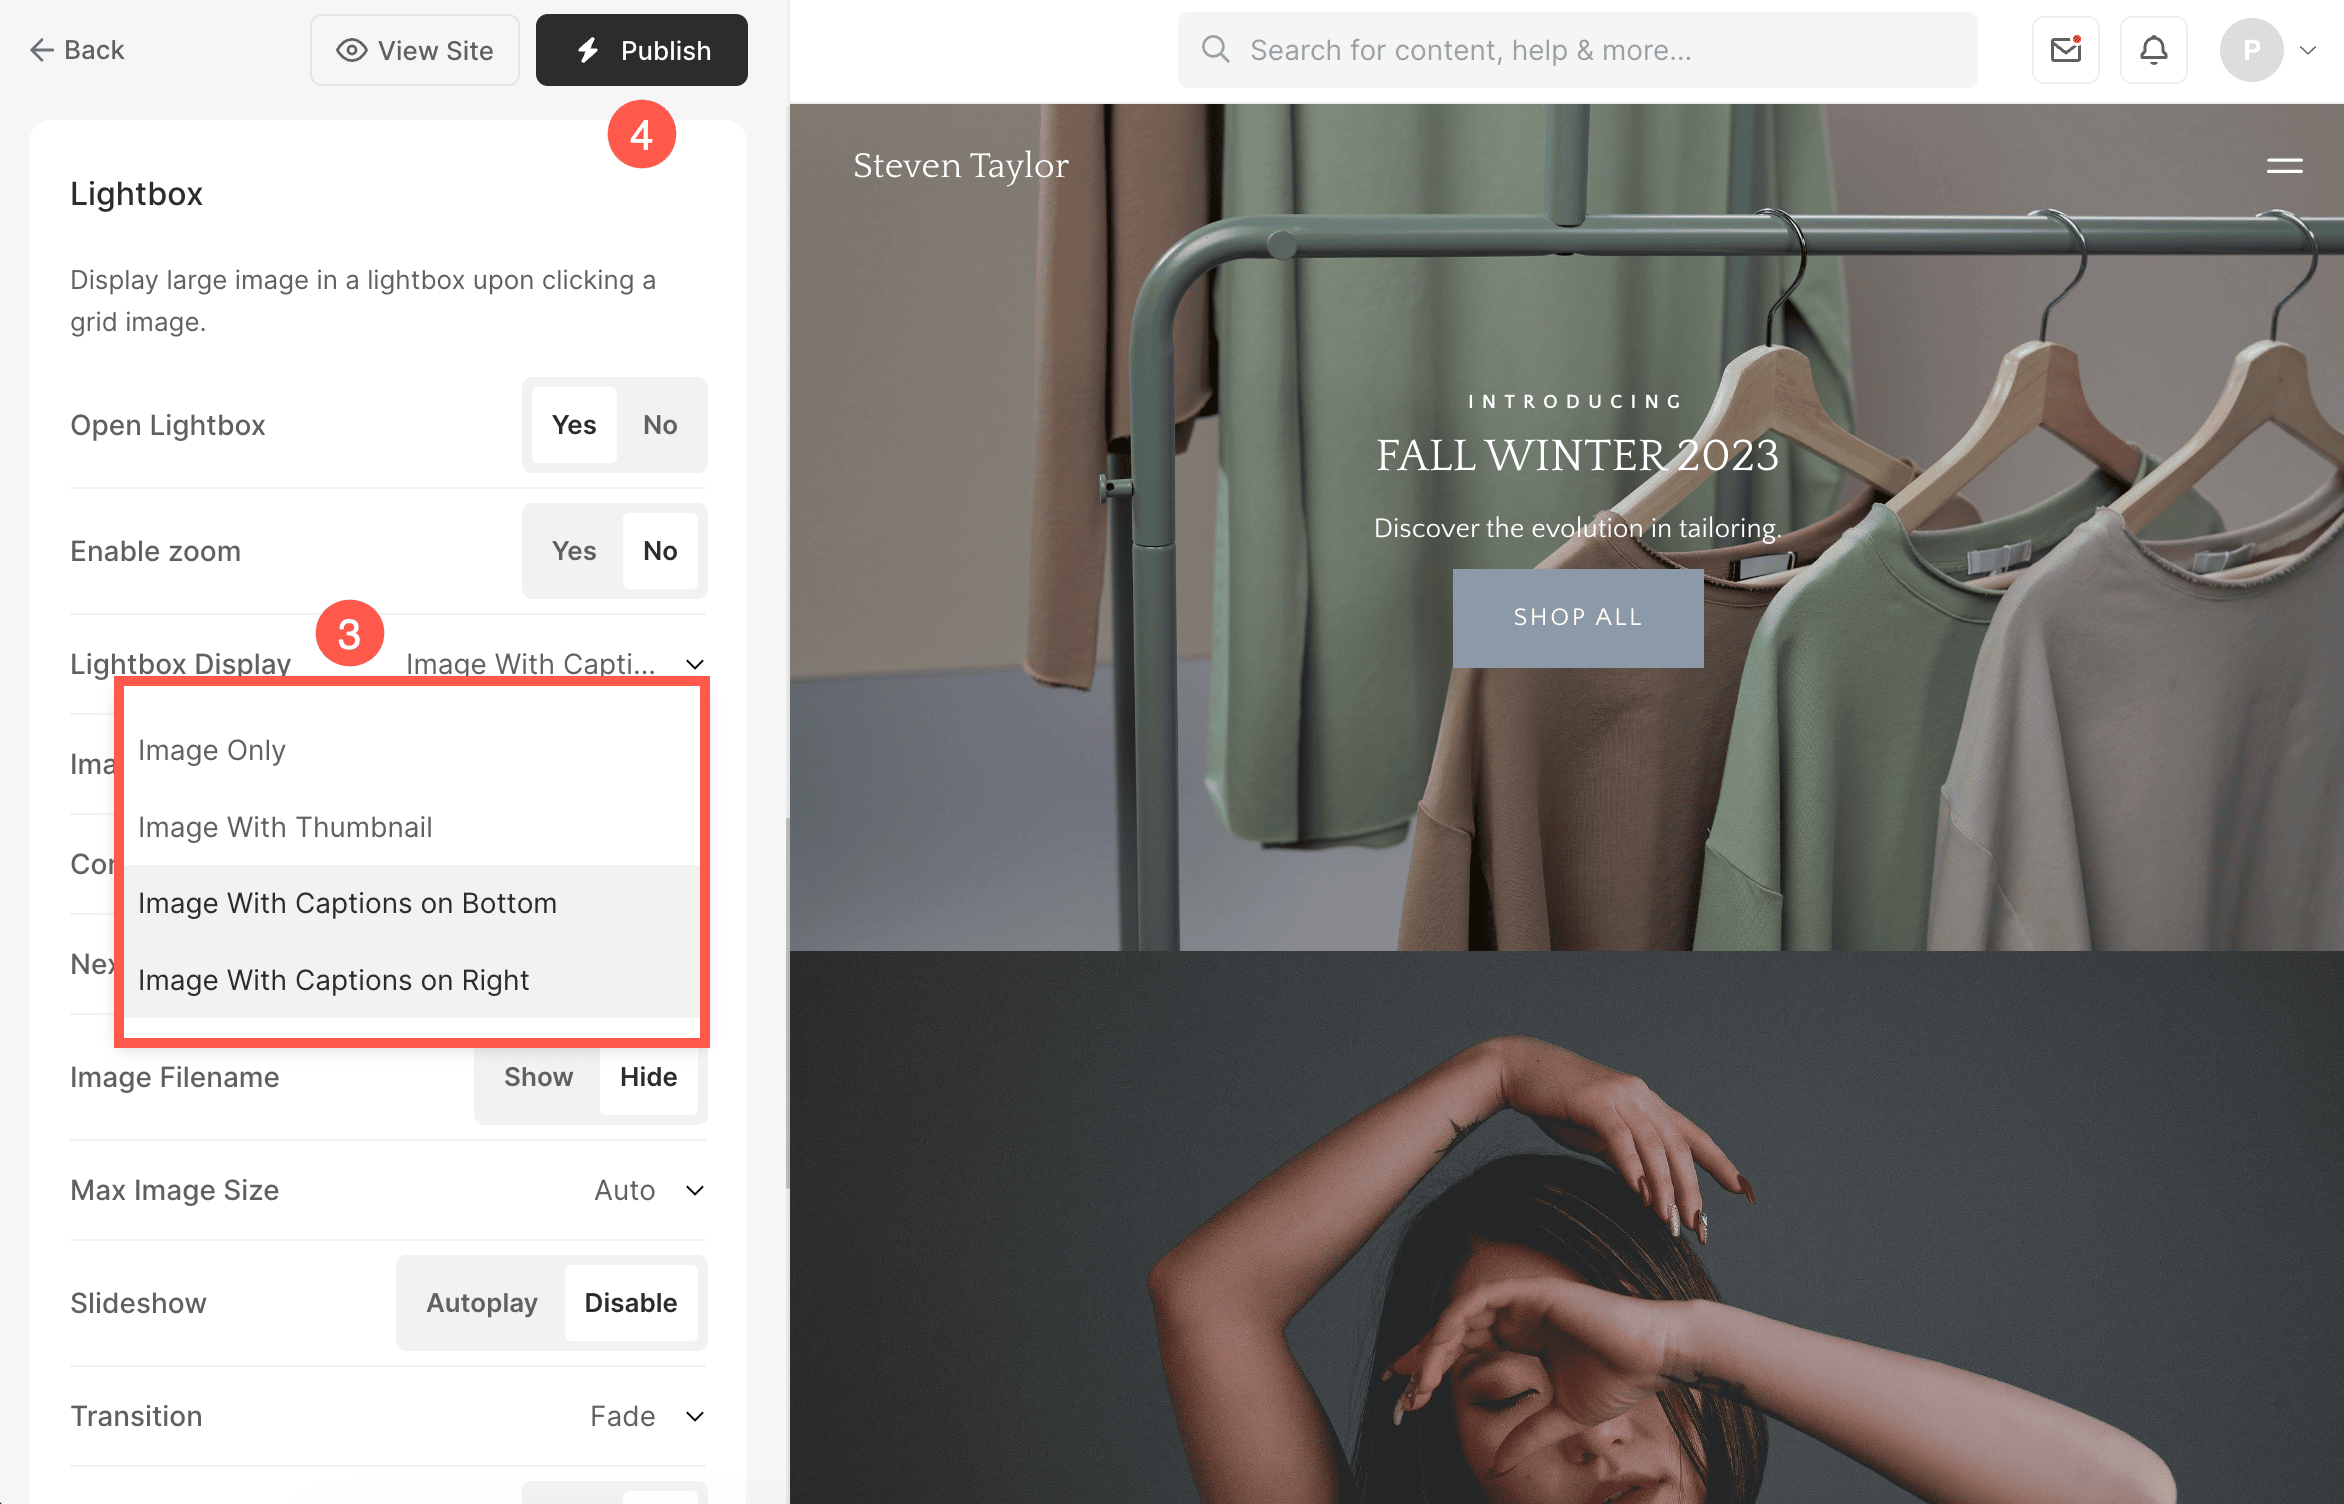
As you specify these for your images, you can choose to show them in lightbox mode against your images (fullscreen mode). The captions can be shown on the right side or bottom of the images.
In this article:
Add Captions to your Images
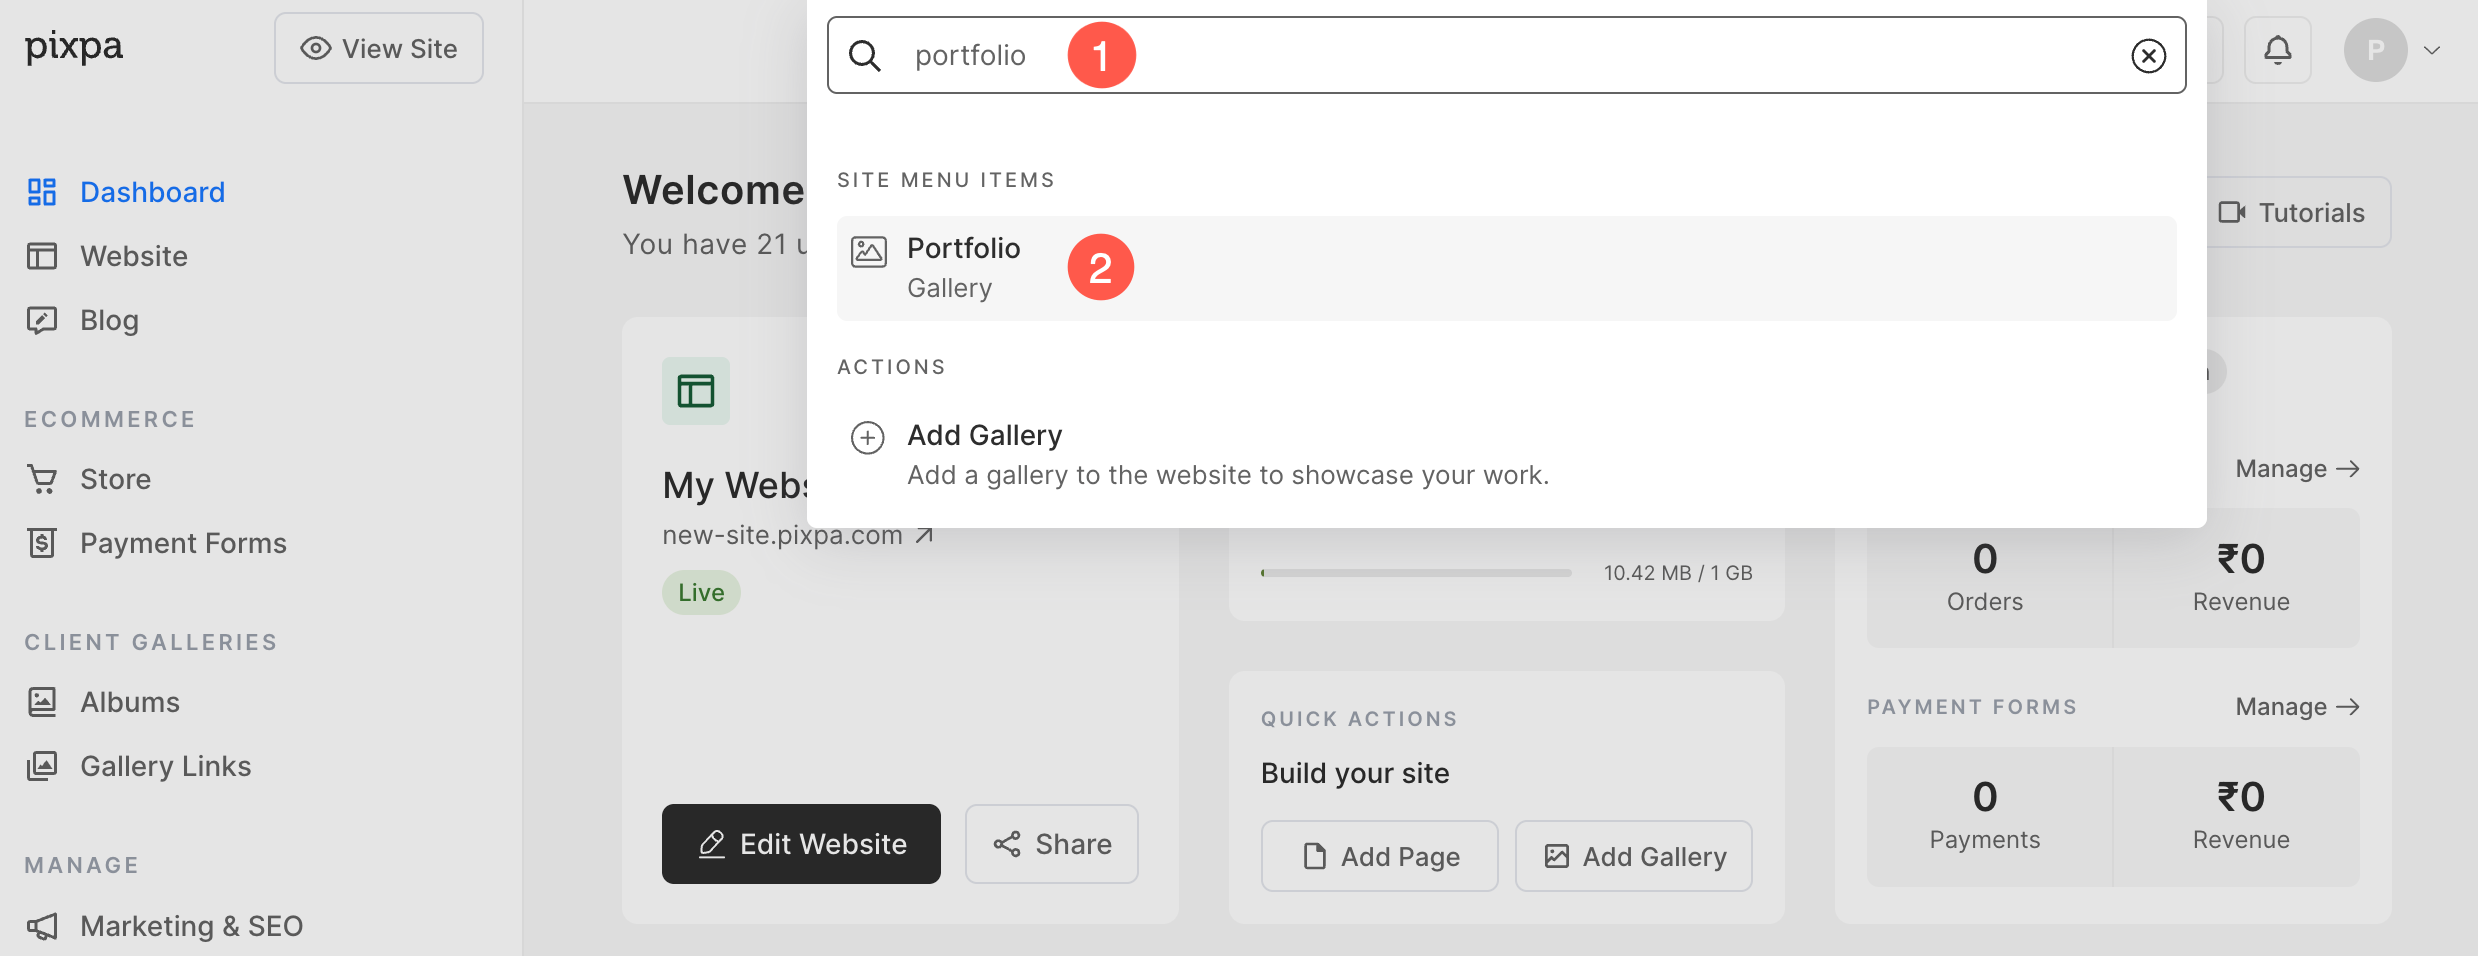
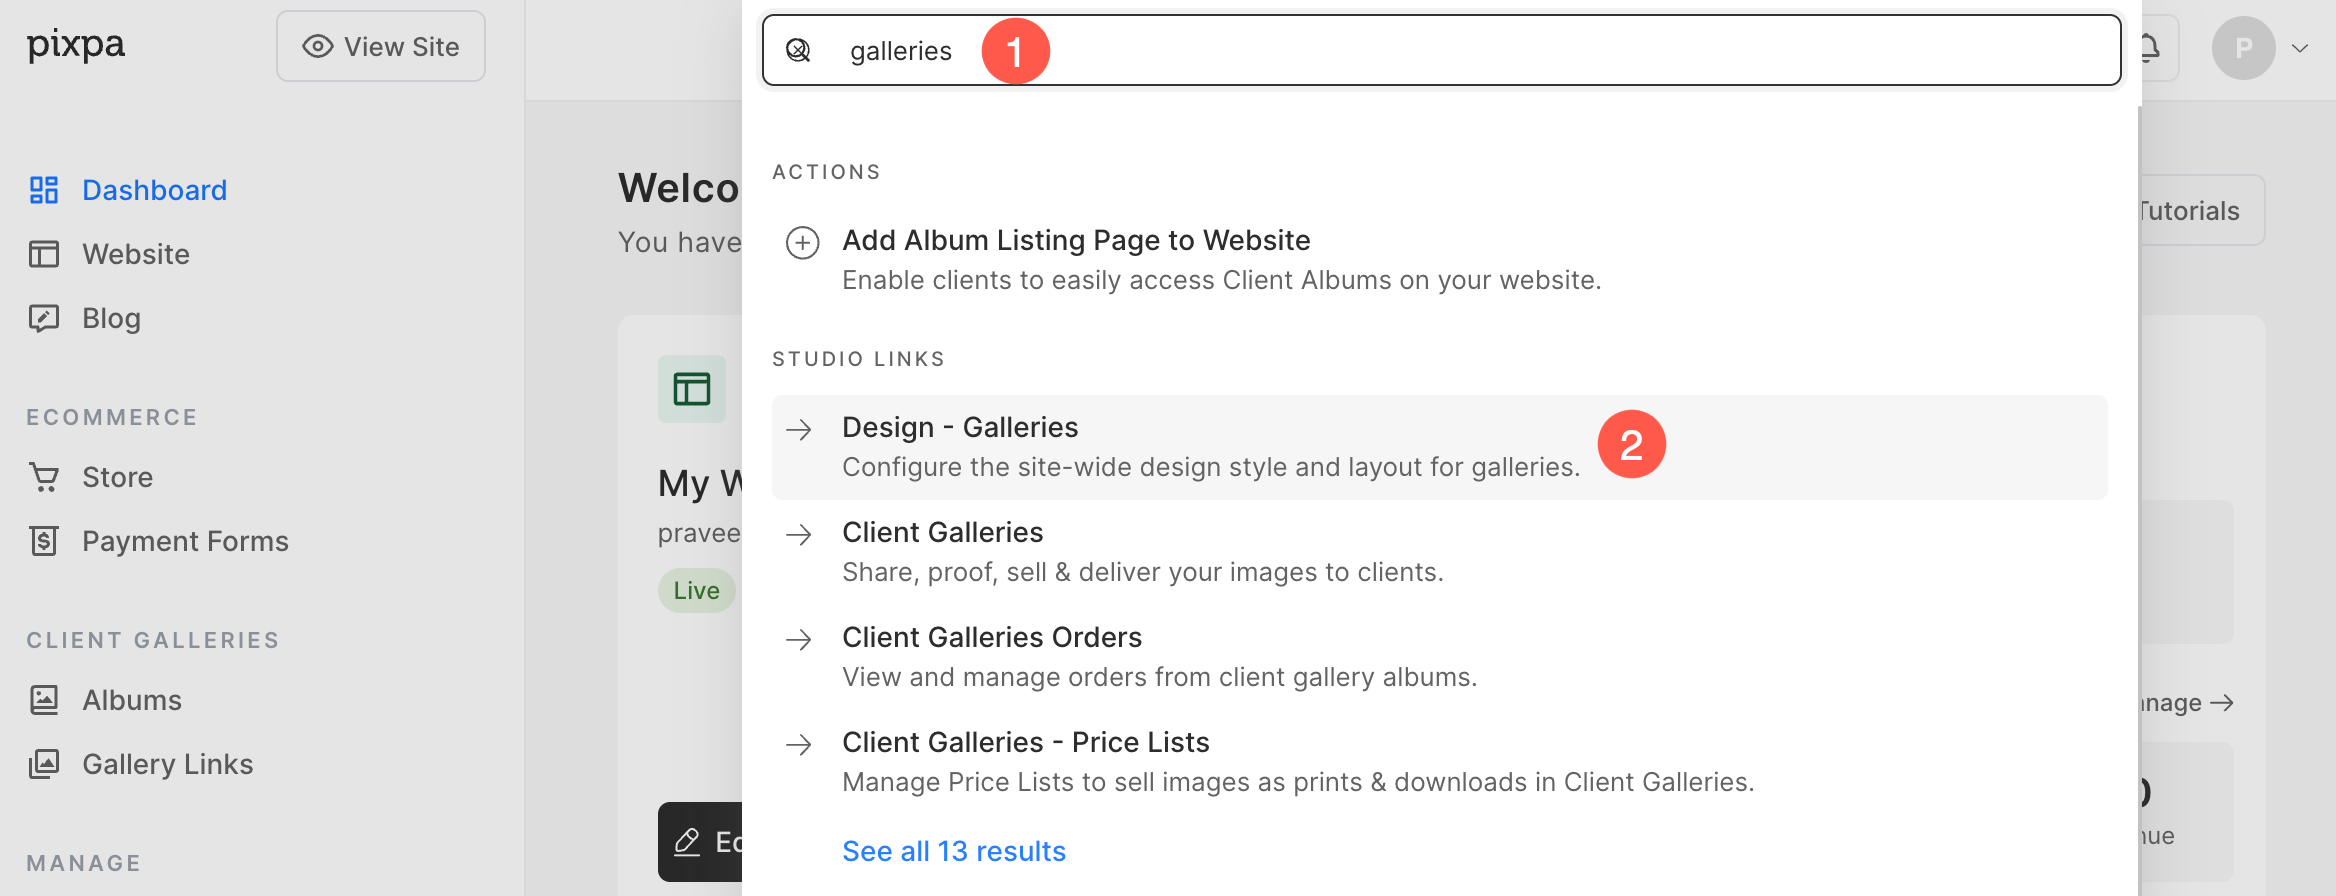
- Enter the gallery title (1) (that you want to work on) in the Search Bar.
- From the results, find the gallery (under Site Menu Items) that you want to work on and click on it (2).
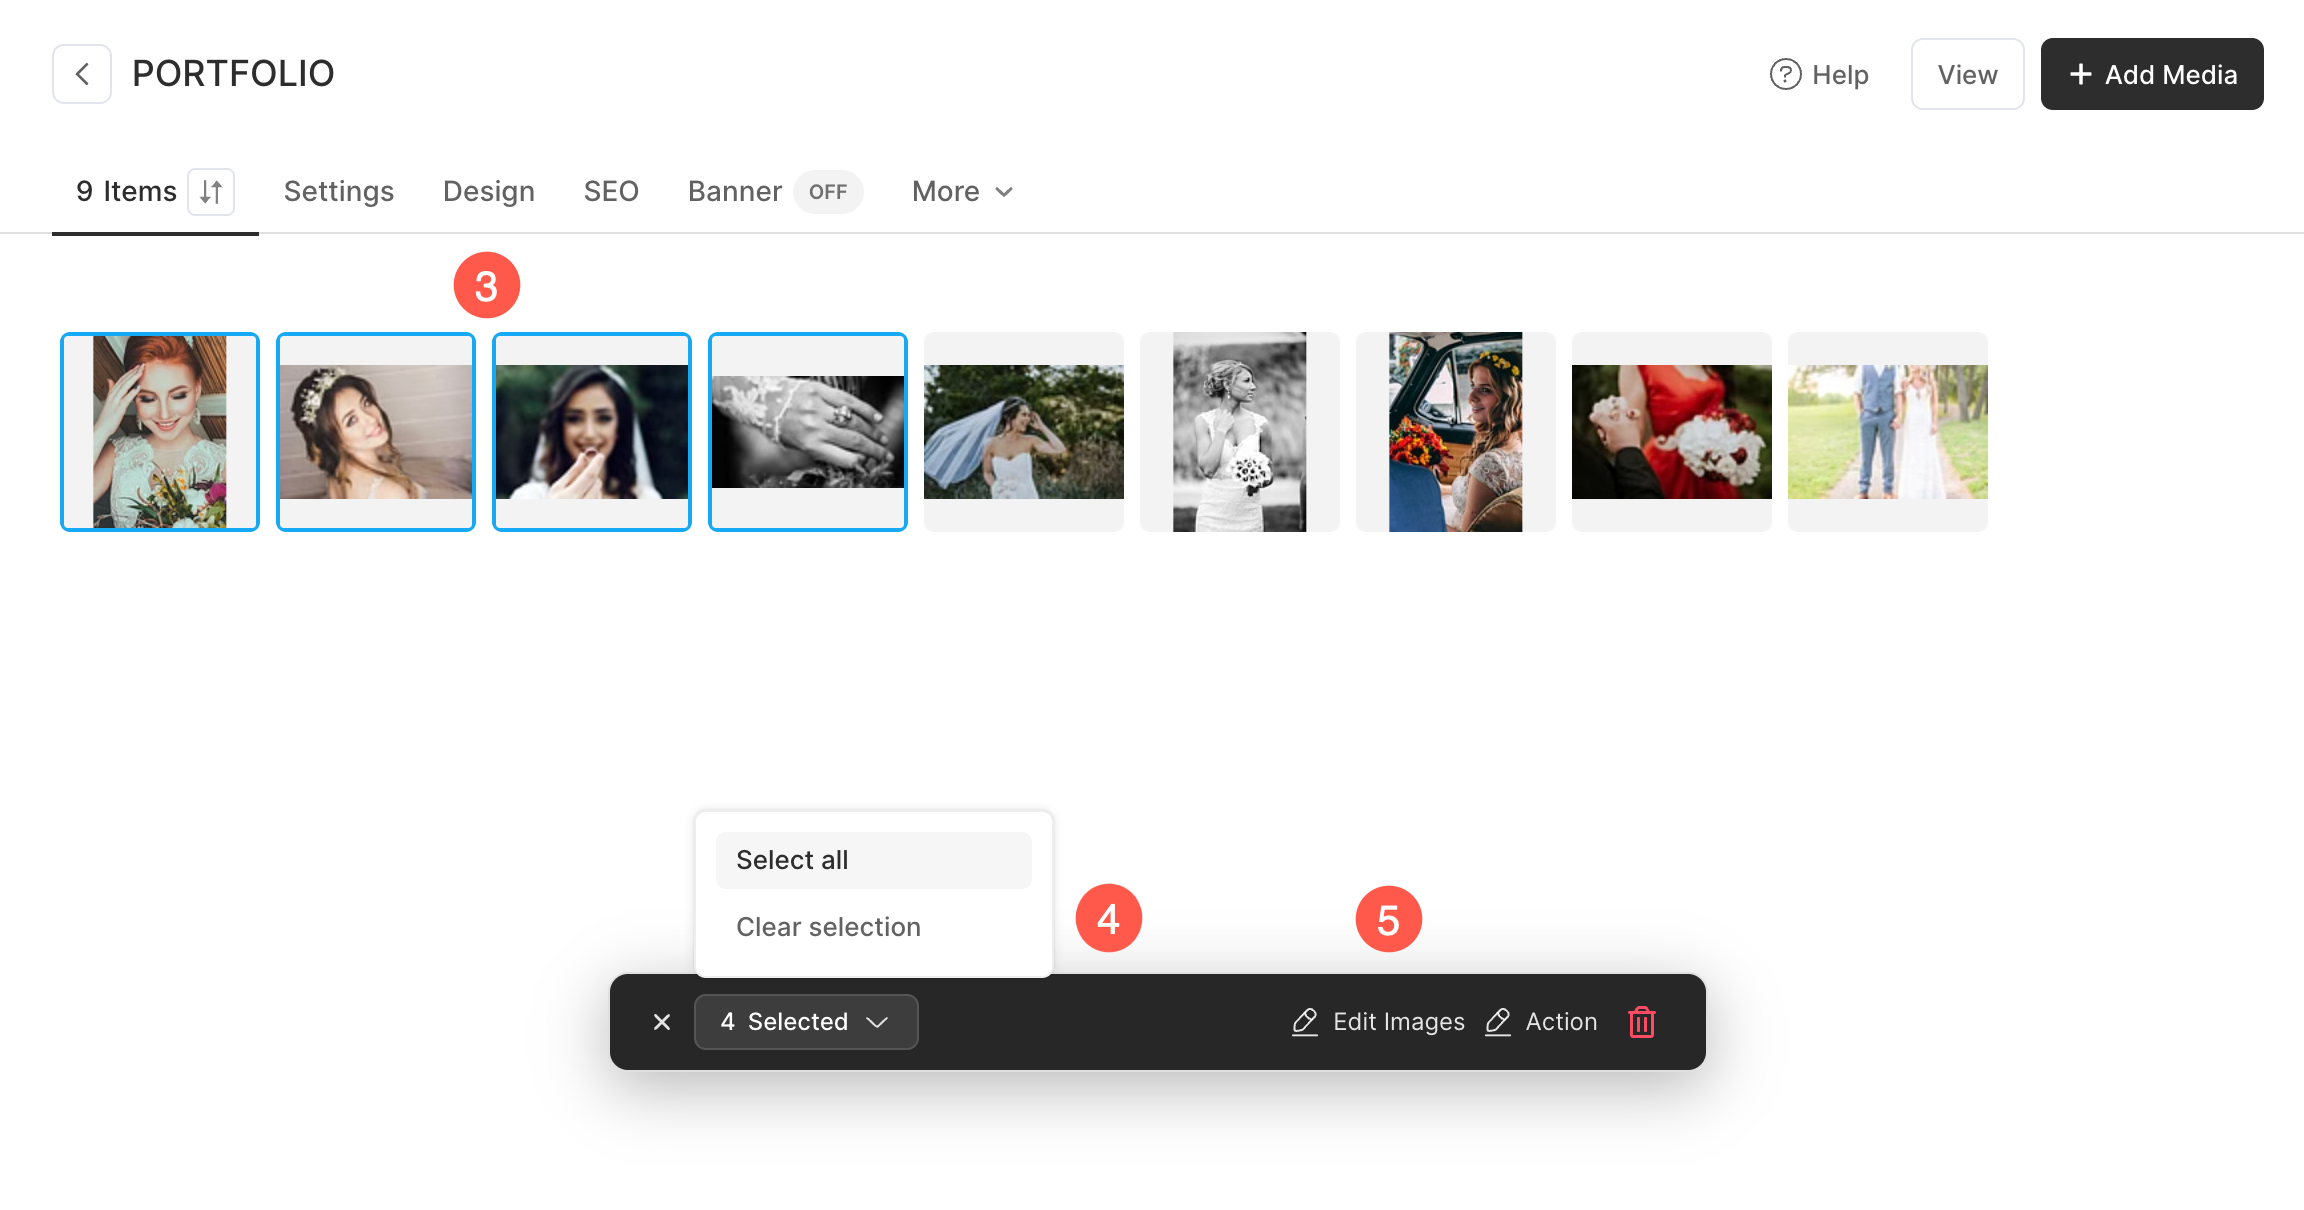
- This will bring you to the Gallery which lists all the images.
- Select the images (3) to which you want to add captions. You can also use the Selected dropdown to Select all or Clear selection (4).
- Click the Edit Images (5) button to edit the selected images.
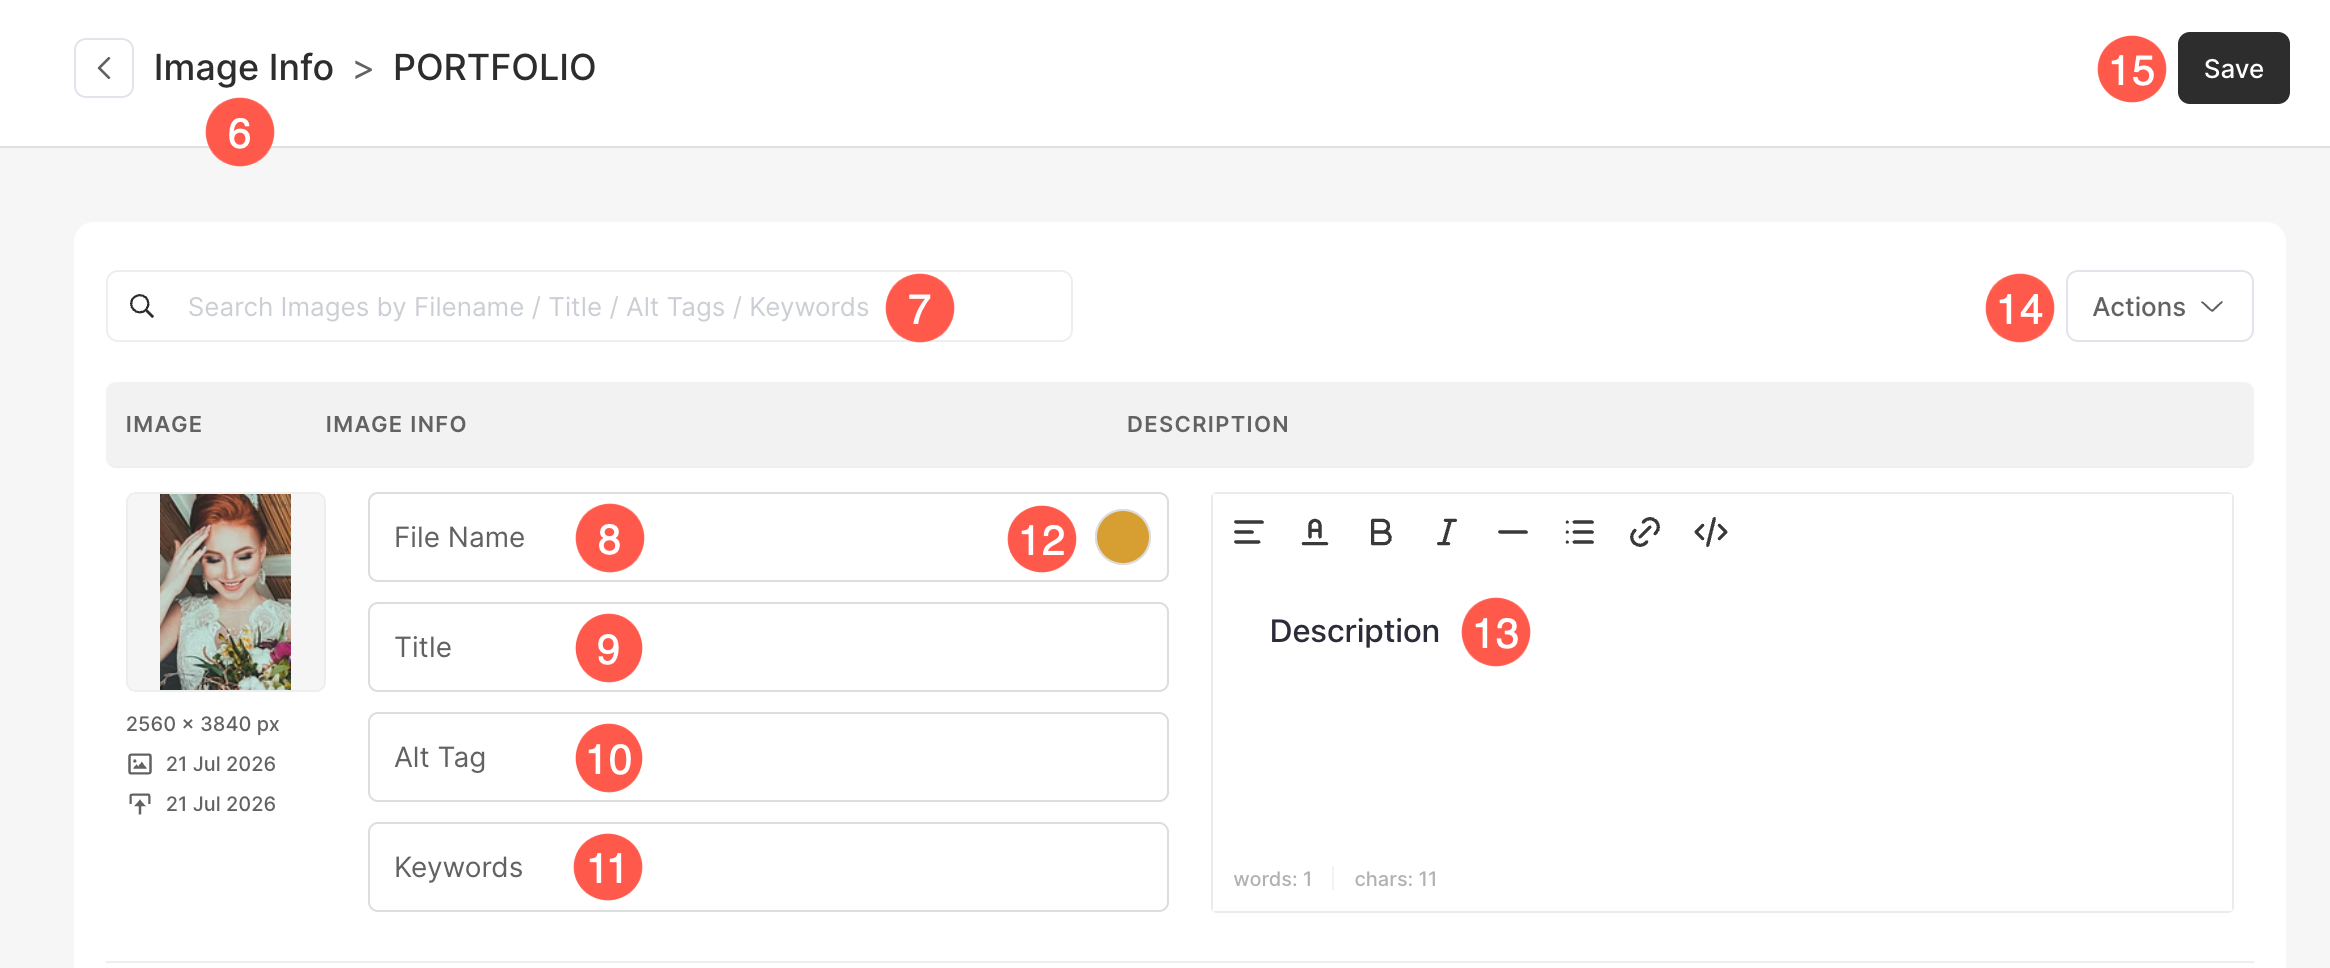
The Edit Images panel (6) will open from where, you can manage the following options:
- Search the images using Filename / Title / Alt Tags / Keywords within the gallery.
- Specify a File Name for the image.
- Specify the Title of the image.
- Specify Alt Tag. It is a descriptive text attribute that provides alternative information for an image on a webpage, aiding accessibility and SEO.
- Specify image Keywords for your Pixpa website search.
- Select an Accent Color. This is the base color of the selected image, used in some theme templates.
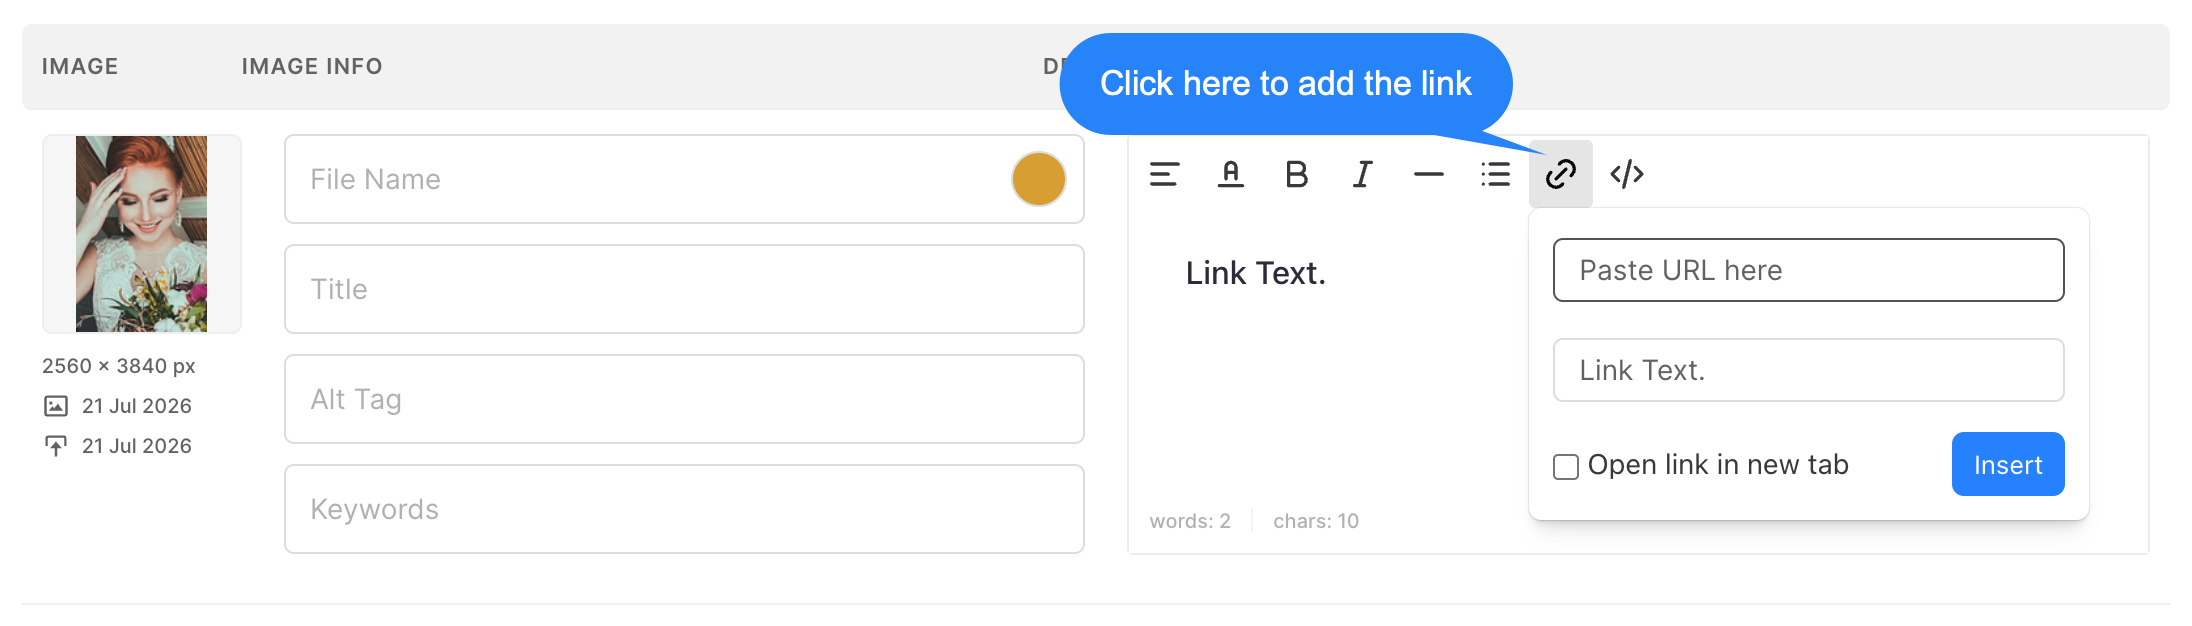
- Specify image Description/Caption here to explain the story behind the image.
- Perform Bulk Actions for images inside the gallery. Learn more.
- Save the changes.
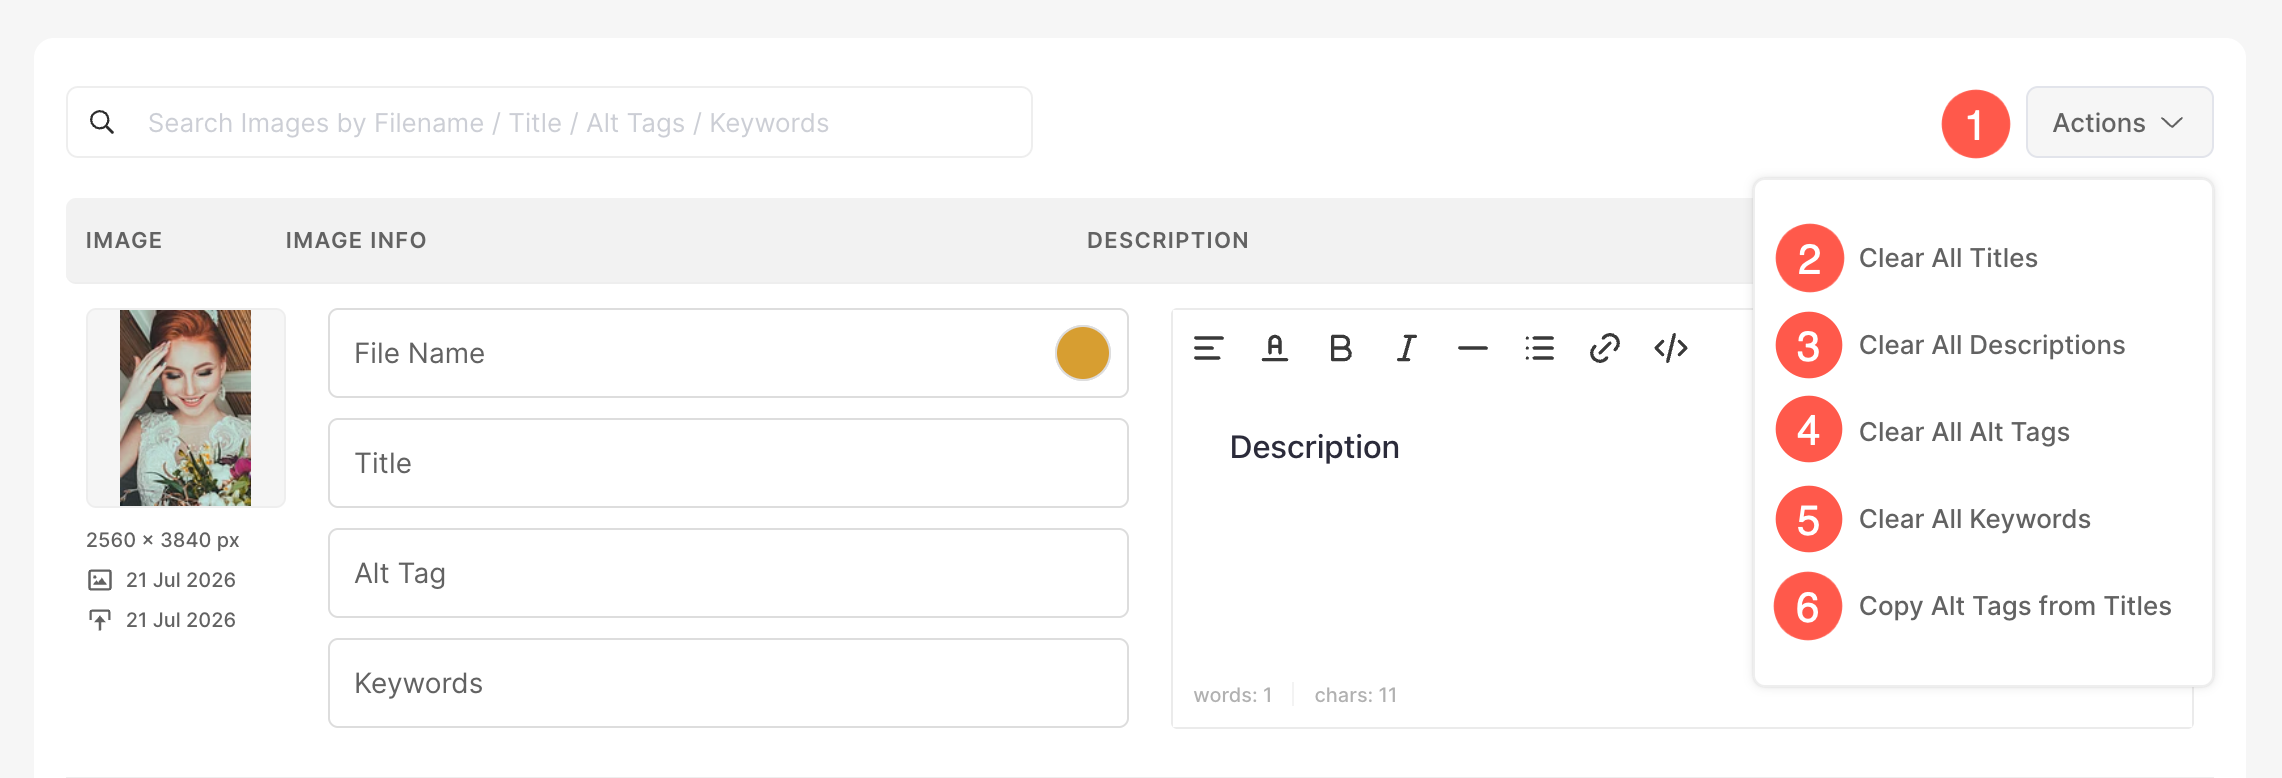
By clicking the Actions button (1), you can perform the following bulk actions: Also see:
Actions Button
Add Link in the Image Description
Show Captions along with Images
Related Articles: