The Share Widget allows visitors to easily share your website content across various social media platforms and communication channels.
Once enabled, the widget will appear in your website, making it easier for visitors to share pages, blog posts, products, and gallery content with others.
In this article:
- Accessing Share Widget Settings
- Enable or Disable Share Widget
- Share Widget Position on Website
- Social Platforms
- Share Widget Appearance
Accessing Share Widget Settings
- From the Dashboard (1) of studio, click on Website (2) section.
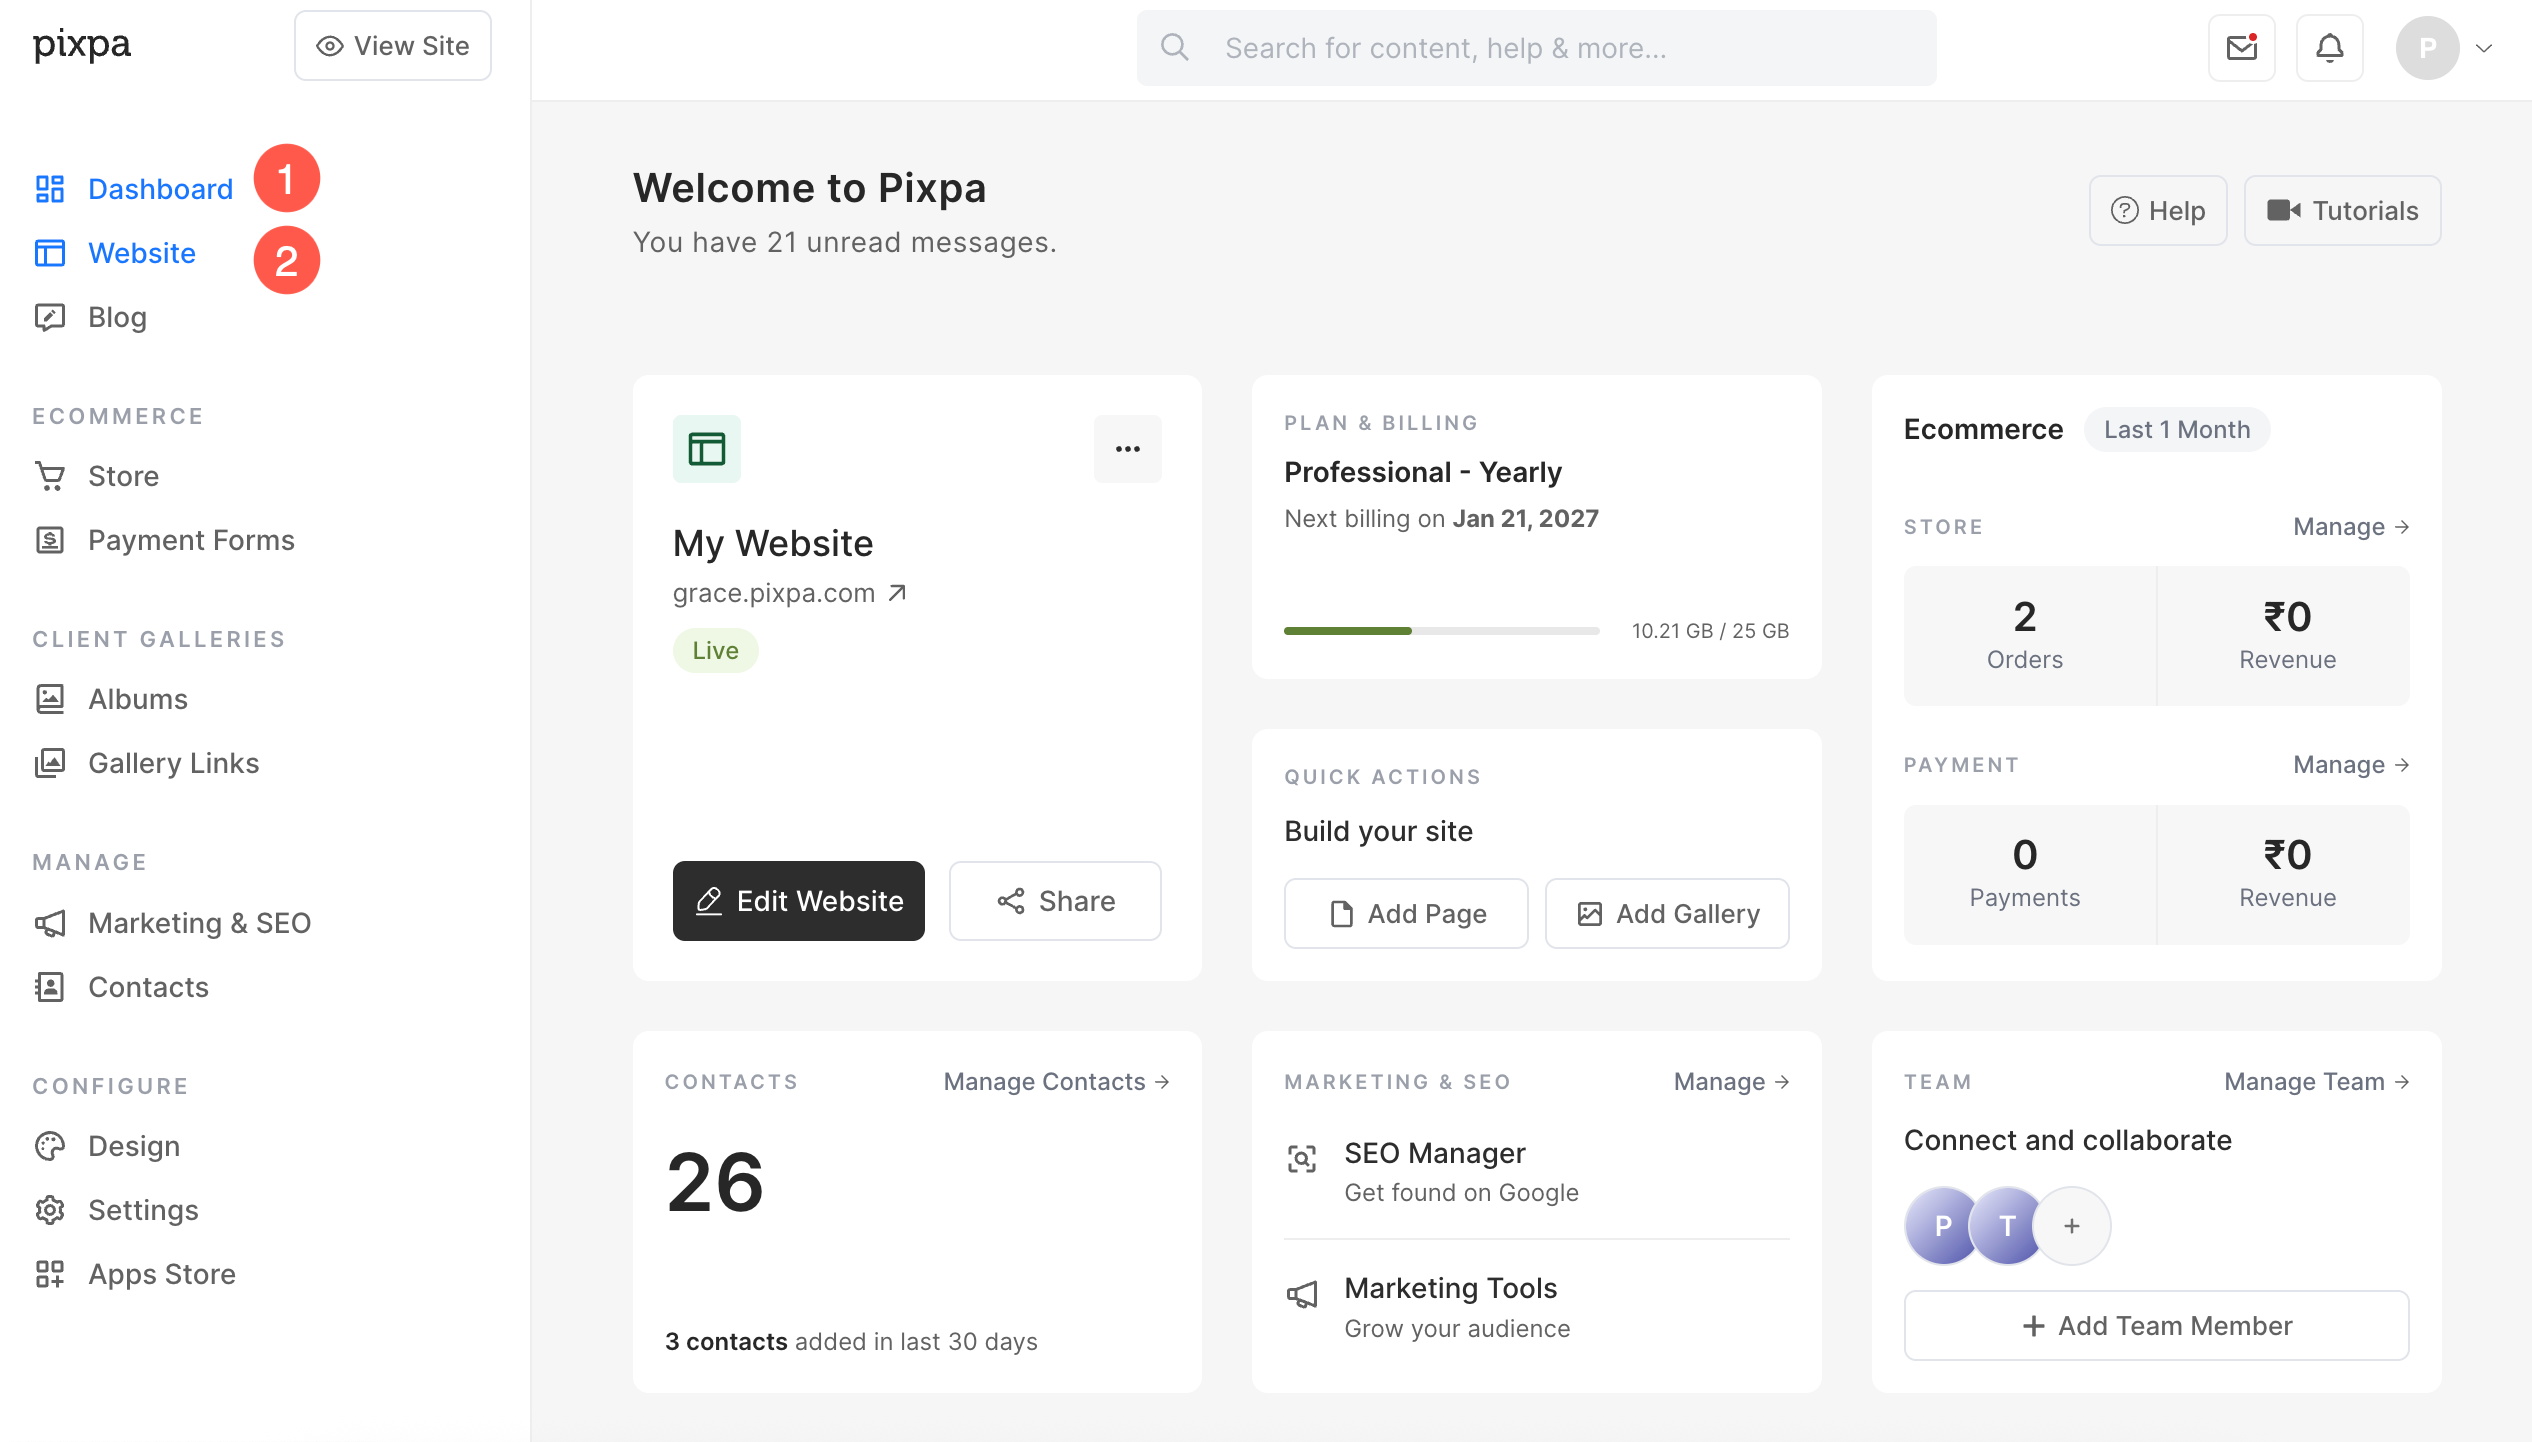
- Under the Options (3) tab, click on the Share Widget (4) option under the Header & Footer section.
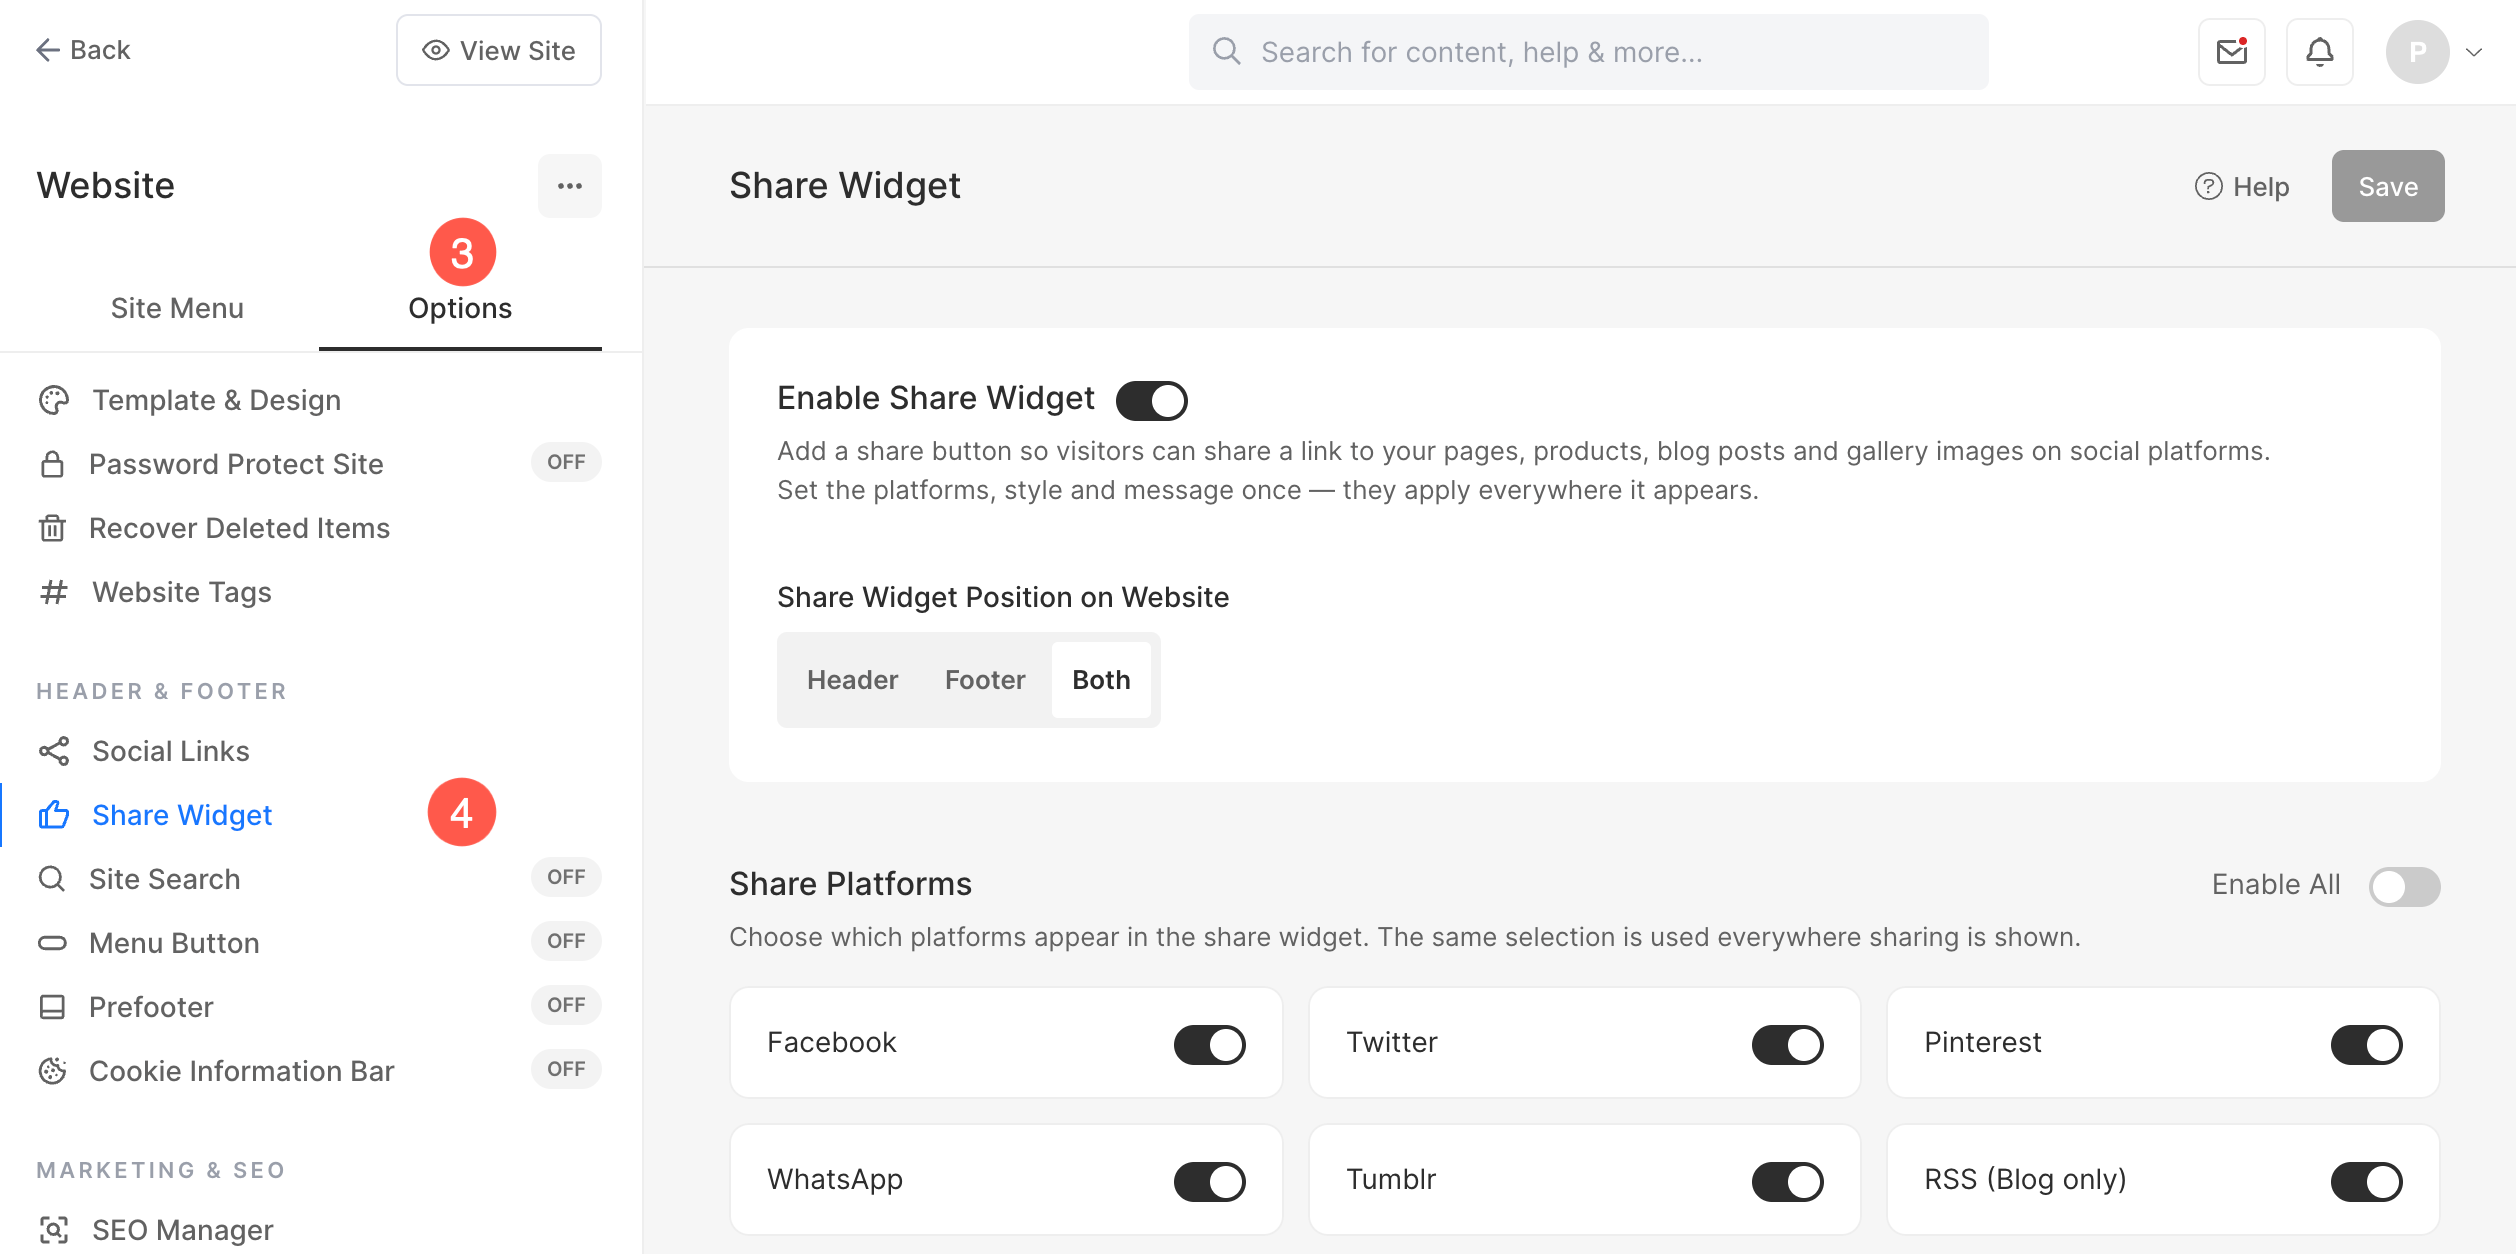
Enable or Disable Share Widget
The Share Widget can be enabled or disabled across your website.
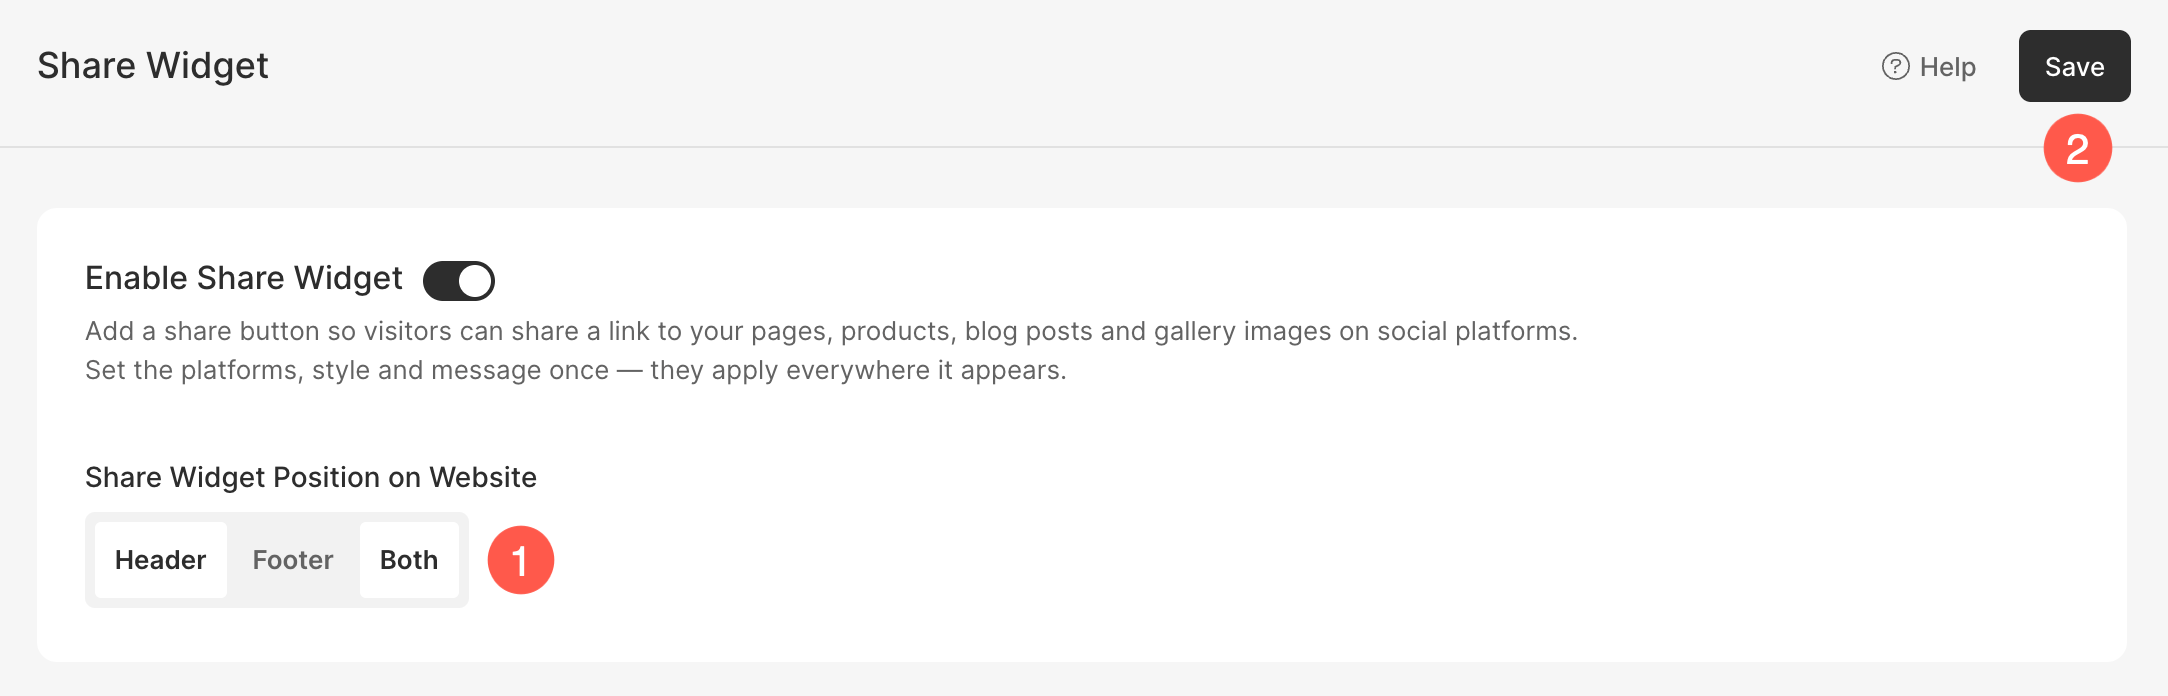
- Turn on the toggle to Enable Share Widget (1) on your website. Turn it off to disable the widget.
- Click Save (2) to apply the changes.
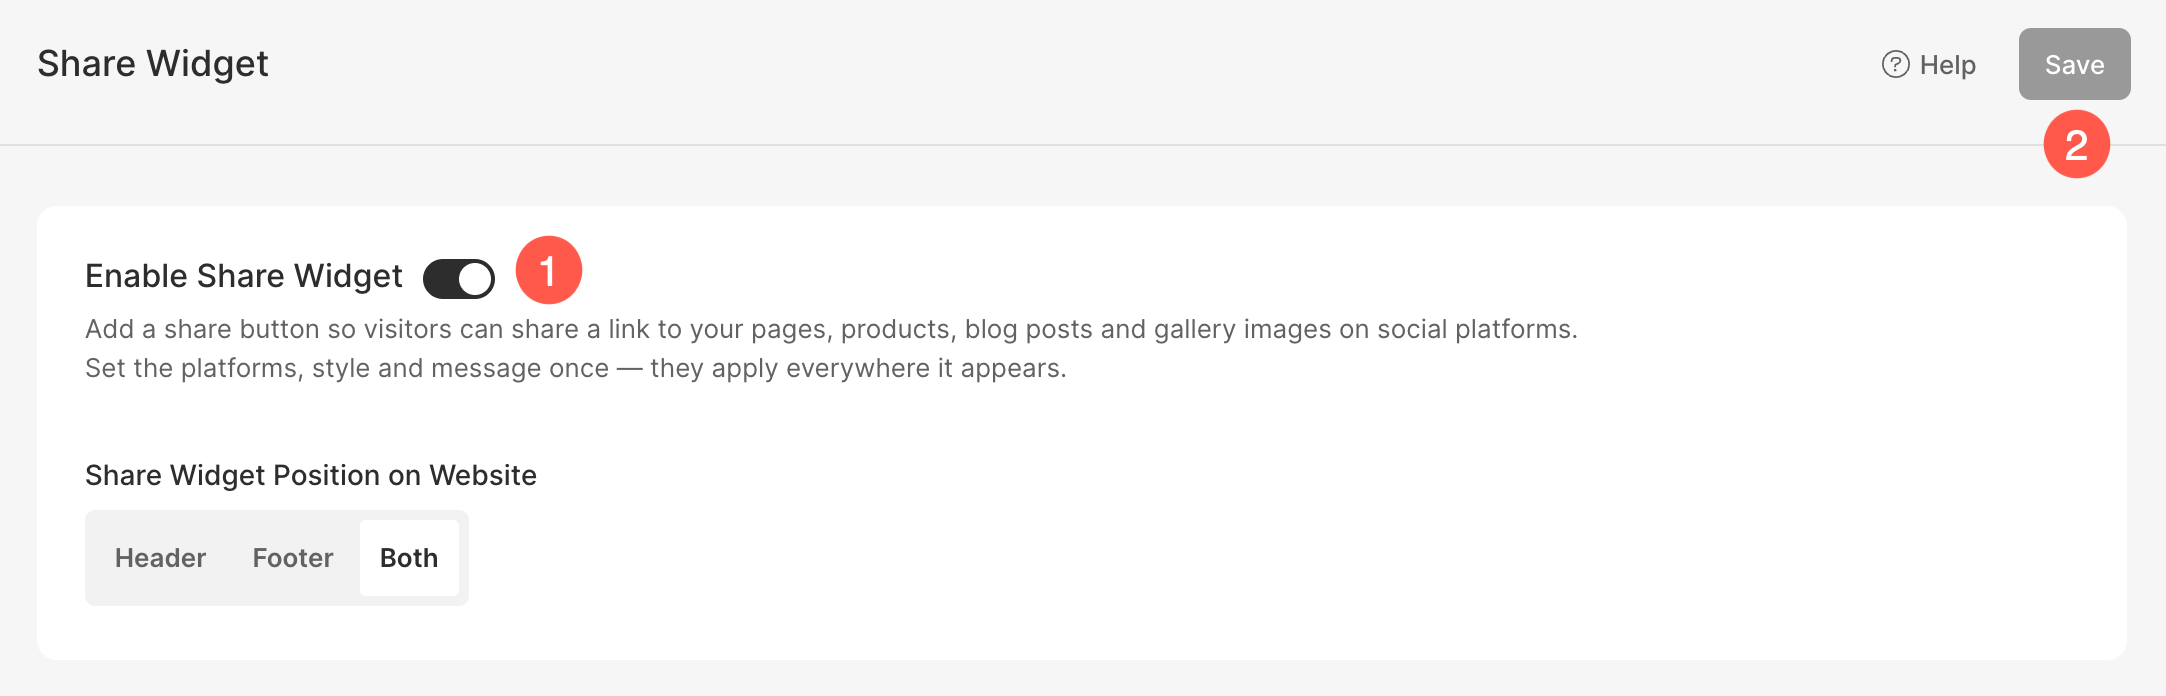
Share Widget Position on Website
- Under Share Widget Position on Website, choose where the Share Widget should appear on your website:
- Header – Display the Share Widget in the website header.
- Footer – Display the Share Widget in the website footer.
- Both – Display the Share Widget in both the header and footer.
- Click Save to apply your changes.
Social Platforms
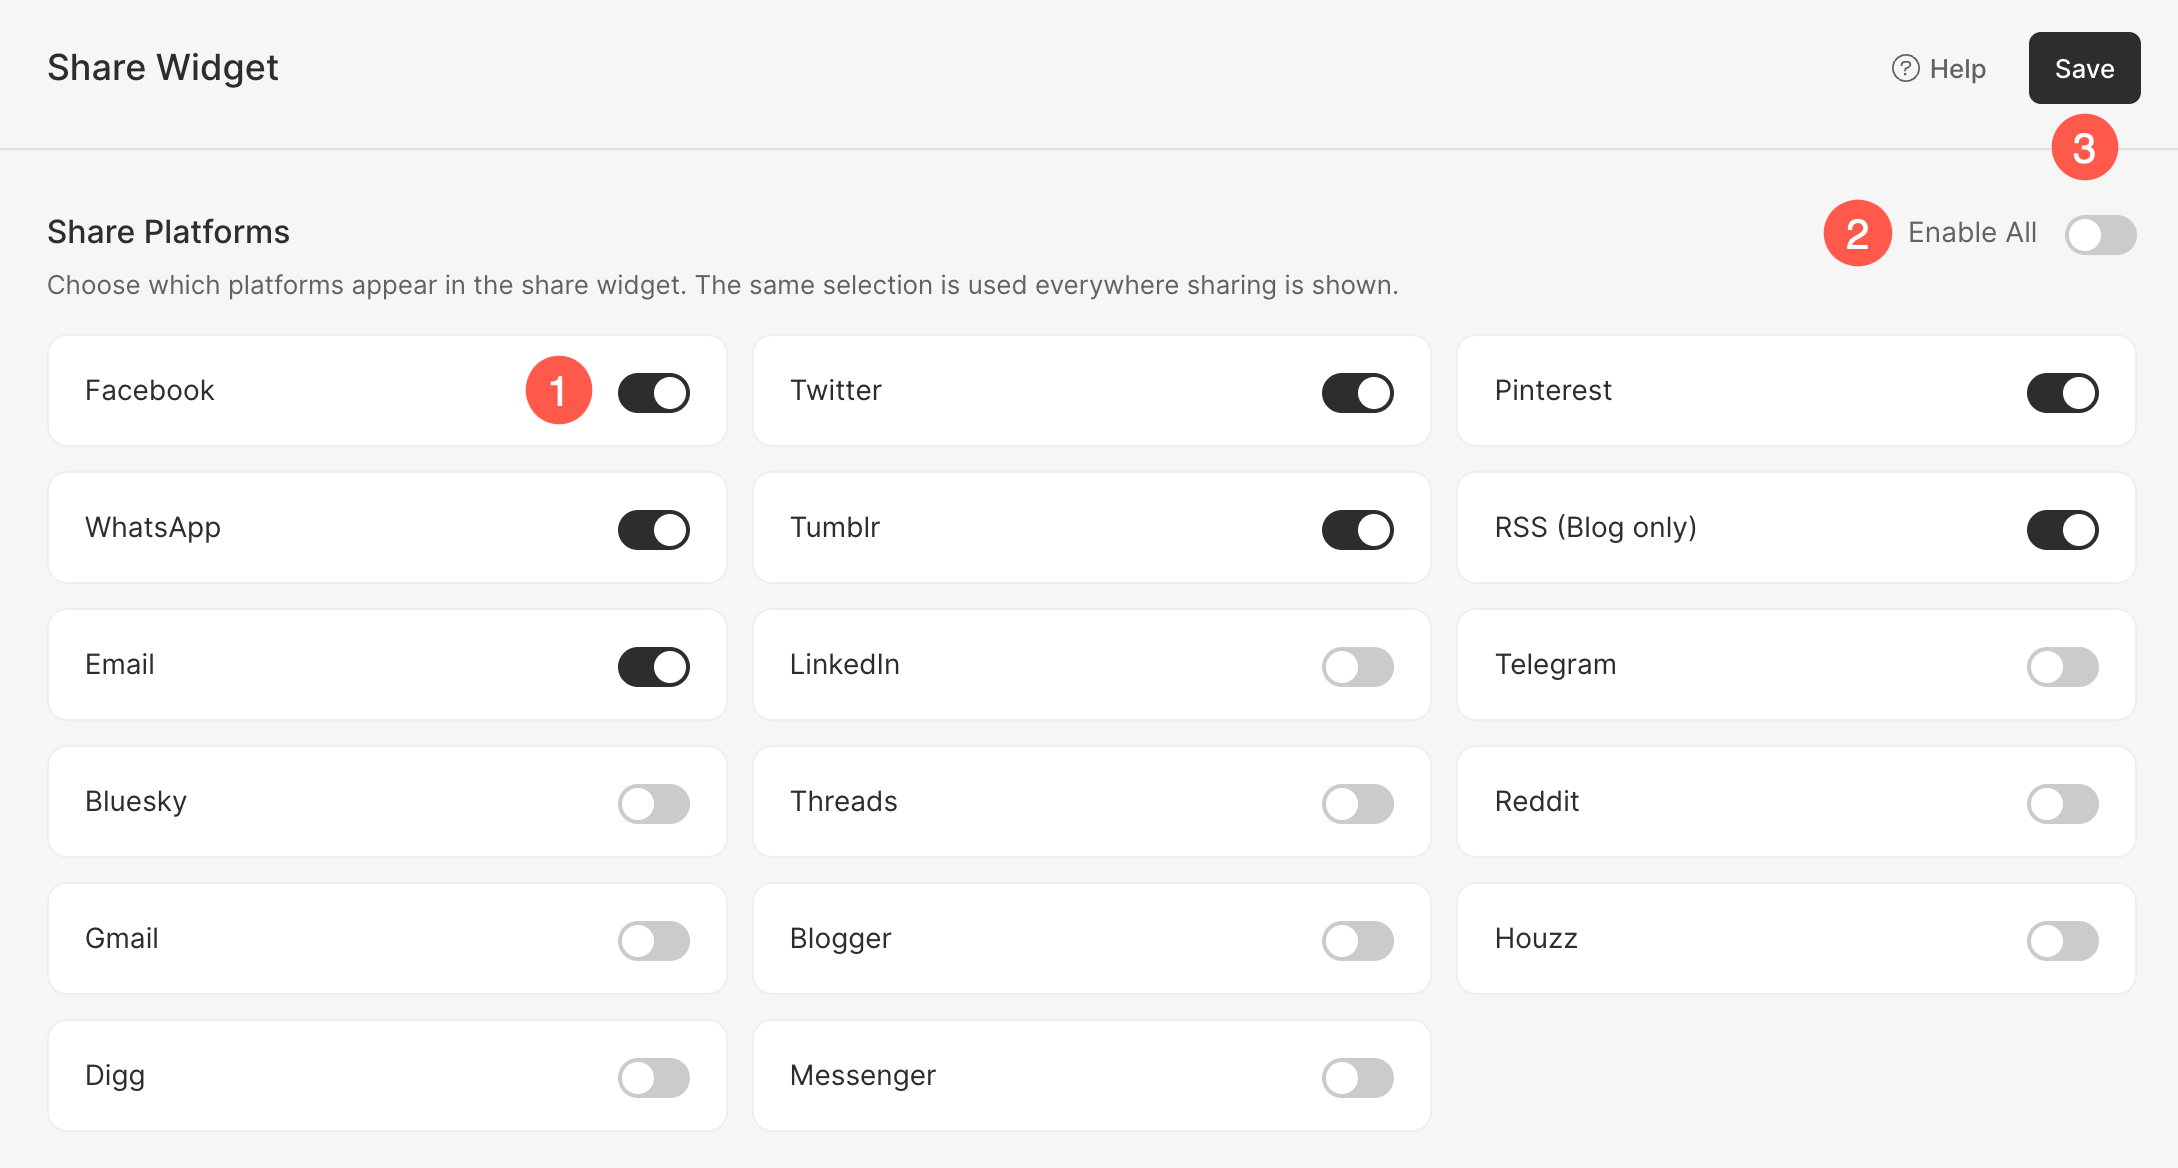
The Share Platforms section allows you to control which platforms are available when visitors use the Share Widget.
- Use the toggle next to each platform to enable or disable it.
- Use the Enable All toggle to quickly enable all available sharing platforms.
- Click Save to apply your changes.
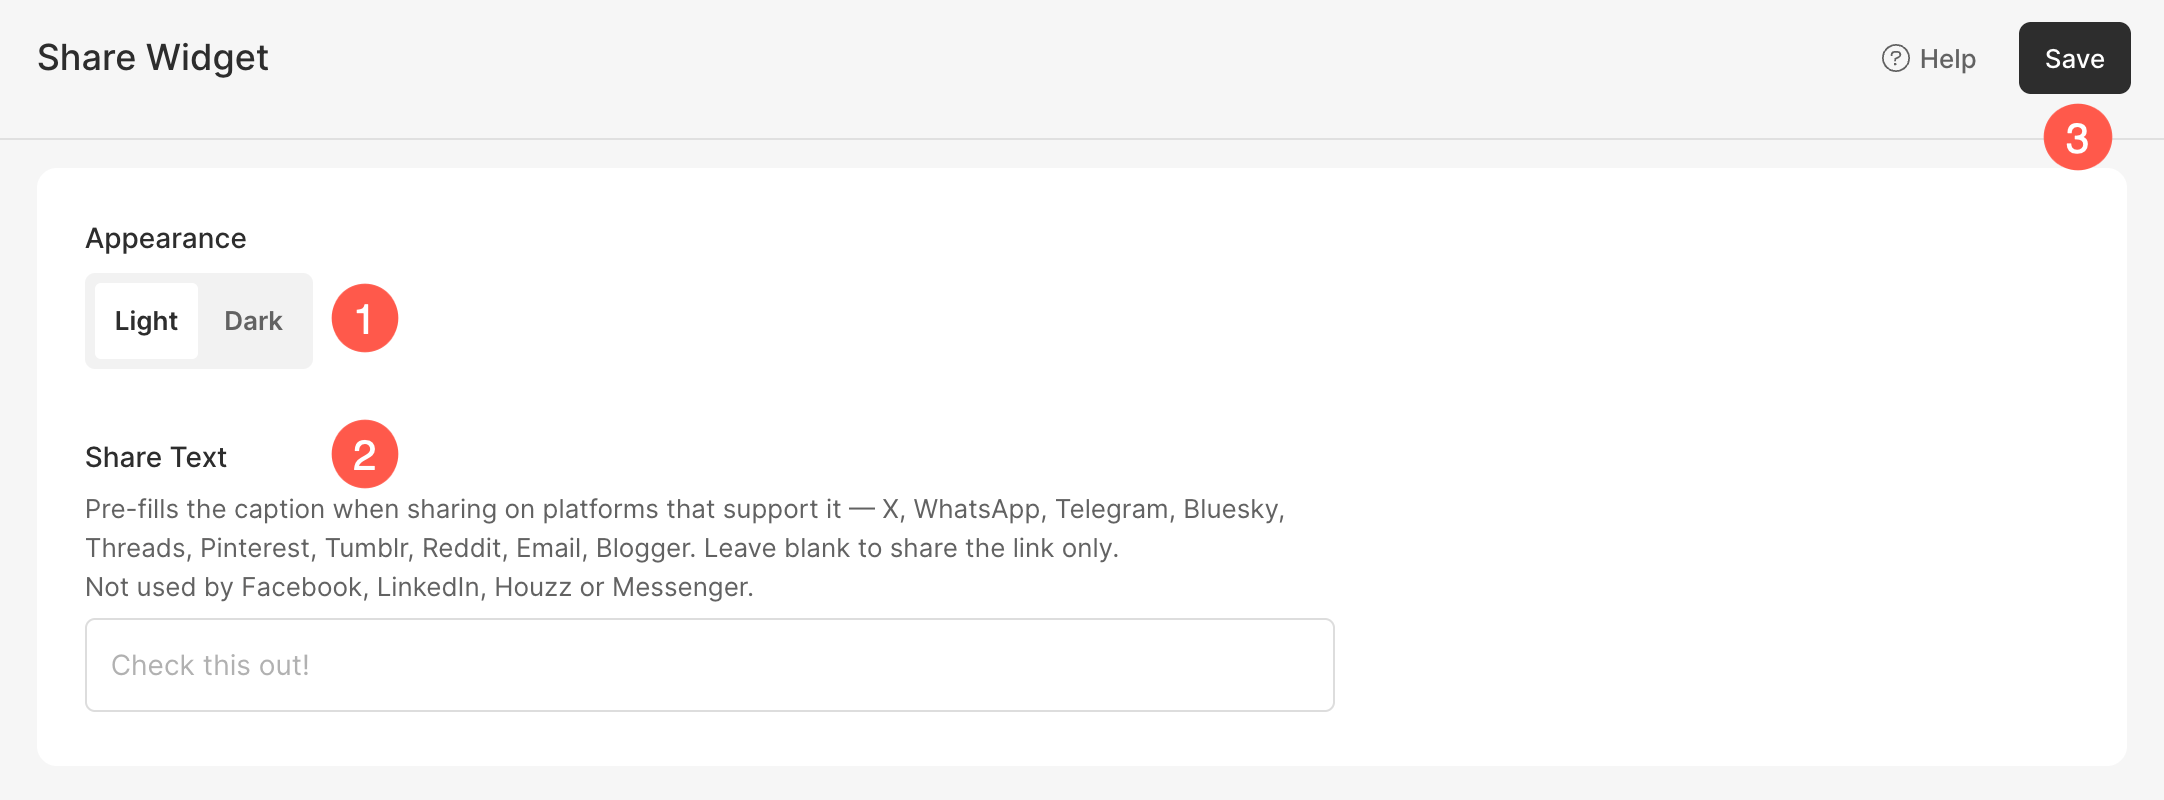
Share Widget Appearance
The Appearance section allows you to choose how the Share Widget is displayed.
- Appearance Options:
- Light – Displays the Share Widget using a light color scheme.
- Dark – Displays the Share Widget using a dark color scheme.
- Share Text – The Share Text field allows you to define a default message that will be included when visitors share content using supported platforms.
- The text is automatically added as the share caption on platforms that support custom share messages.
- Leave this field blank if you want visitors to share only the URL without any predefined message.
- Save – After configuring the Share Widget settings, review your platform selections and appearance settings. Finally, click Save to apply the changes to your website.