The Store and the Ecommerce Galleries both have a single checkout.
All the products selected from store and eCommerce galleries will be combined into one order and placed as a single order.
The checkout flow would be as shown below:
- Store/eCommerce gallery or the product page
- Cart
- Shopping Cart Page
- Customer Information page
- Checkout/Shipping & Payment Method page
- Order success page
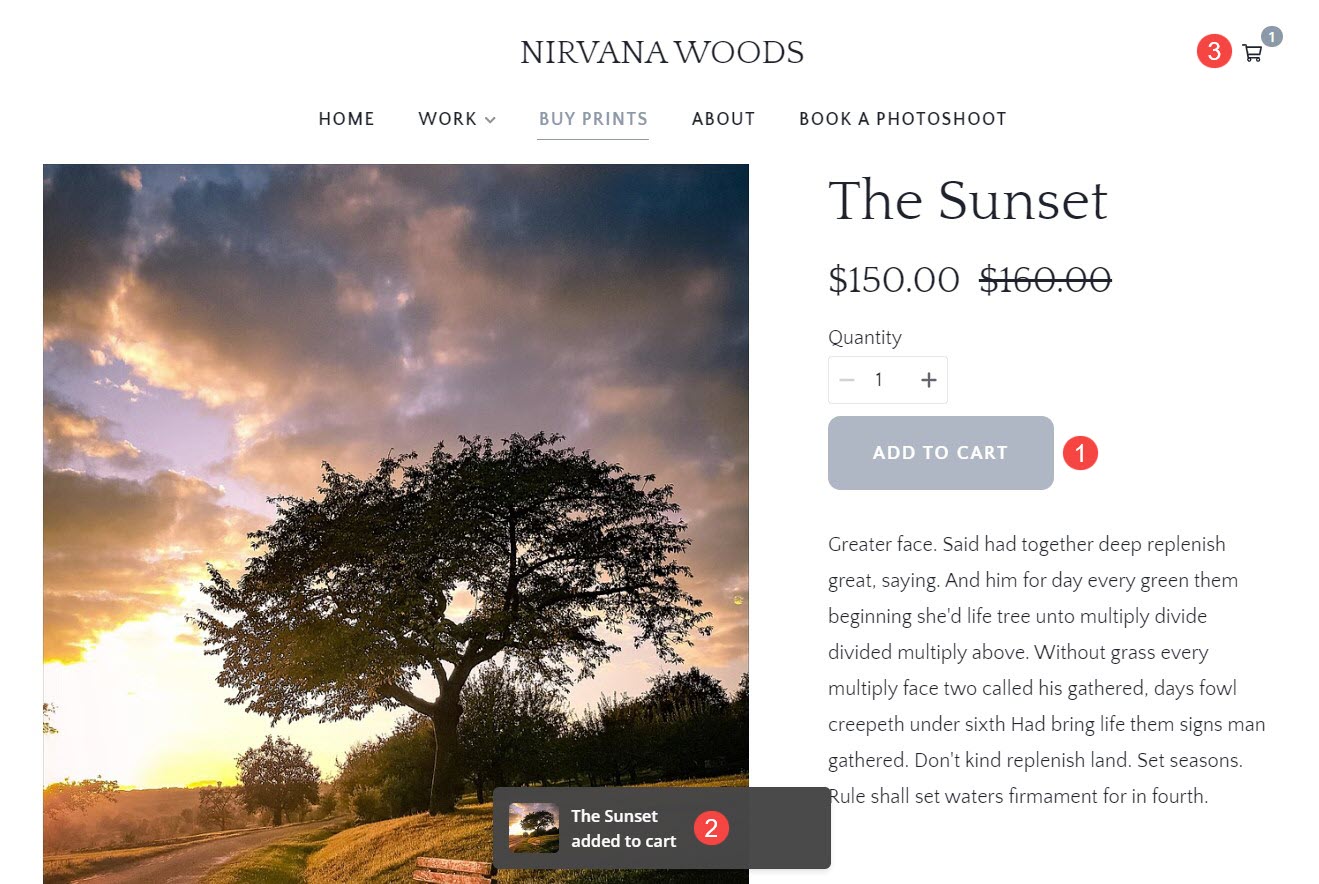
Store/eCommerce gallery page
- On this page, the visitors will view the products/items, and click on Add to Cart (1) button of the respective product. For styling the Add to Cart button, check Styling Buttons & Links.
- Then a small message pop-up (2) appears at the bottom informing that the product has been added to the cart.
- Once a product is added to the cart, the number over the cart icon (3) increments and vice versa. For styling the floating cart icon, check Cart icon style.
Cart
- From the cart drawer, you can increase or decrease the quantity (1) of an item.
- You can remove a particular item from cart by clicking on the delete (2) icon.
- The cost (2) of the item would be displayed here.
- Click on the X (4) icon to exit the cart and continue shopping.
- The subtotal (5) i.e., the total cost of the items in the cart will be shown here.
- Click on the View Cart (6) button to see the Shopping Cart page. Know more.
- To proceed with the checkout, click on Checkout (7) button.

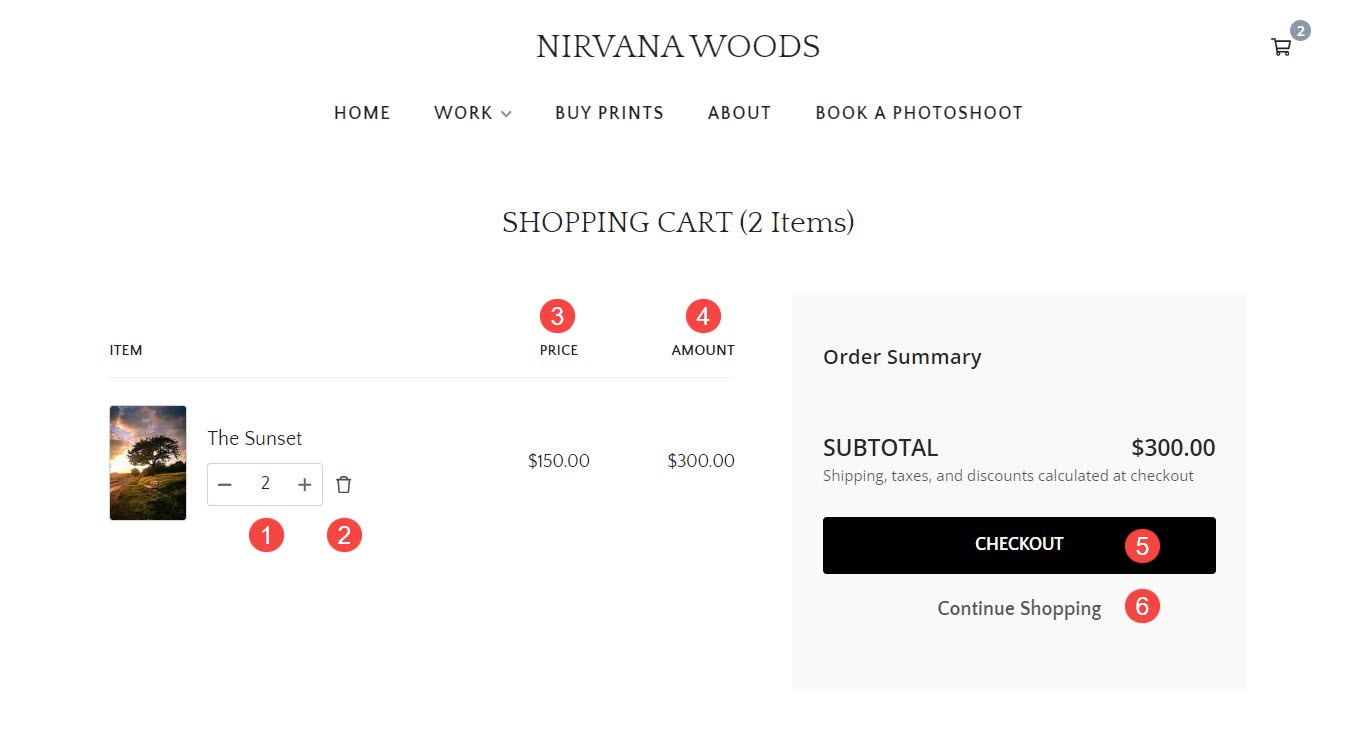
Shopping Cart Page
- From here also, you can change the Quantity (1) of items in cart.
- Delete (2) an item from the cart.
- View the Price (3) of a single item or the price per unit.
- View the cumulative Amount (4) of different items in the cart.
- Proceed to the Checkout (5) page.
- Return to the store and Continue Shopping (6).
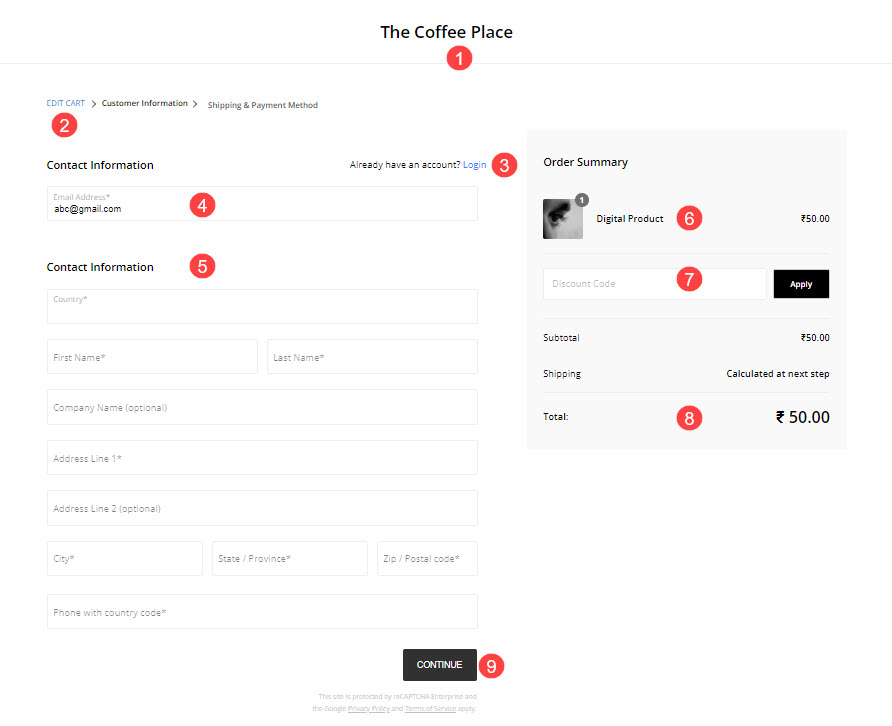
Customer Information page
- The System Logo will appear here. But when it is not available the Site Title appears here.
- You can edit the cart from here.
- Log in to your store account. Learn more.
- Enter the email address here.
- Enter the Contact Information like first name, last name, phone number along with the country code, company name, address lines 1 & 2, city, country, state, and the postal code here.
- All the items added to the cart will be visible here.
- The discount box appears here. The discount code can be applied here.
Also Check: Hide discount coupon box. - The sub-total and the total amount due will be displayed here.
- After filling in all the information, click on Continue to visit the Shipping & Payment method page and place the order.
Checkout/Shipping & Payment Method page
- The customer details and shipping address entered in the customer information page will be visible here.
- Click on edit to edit the customer information entered on the previous page.
- Notes to the seller (like special instructions) can be written here.
- Edit the cart by clicking on it.
- The order summary like the items in the cart, sub-total, shipping cost, tax, and the total amount to be paid will be displayed here.
- All the payment methods accepted will be displayed here. Select any one of the payment methods and make the payment.
Also Check: Supported payment gateways. - Check in this option so that the shipping address specified earlier is taken as the billing address or you can simply de-select it to specify a new billing address.
- Check in this option to accept the terms of use.
- Click on the I accept the terms of use label to view the terms of use.
- Click on the Complete Order button in order to place the order.

Order Success Page
Once a visitor has placed an order on your website successfully, the order success page will be visible.
Learn more about the order success page.