Social Media / Featured Images are used to represent a menu item (gallery, folder, page, blog, etc) in these scenarios:
- Whenever the menu item is part of a folder and is listed on the folder page. See an example here.
- Whenever the menu item is shared on social media.
- Featured Images for Blog Posts are used on the blog listing page. See the example here.
You can add the Social Media Image to any menu item from the settings section of a particular menu item.
In this article:
- Add Social Media Image to a Folder
- Add Social Media Image for Gallery
- Add Social Media Image for Blog Post
- Social Media Image for any other menu item
- Editing/Deleting the Social Media image
Add Social Media Image to a Folder
- From the Dashboard (1) of the studio, go to the Website (2) section.
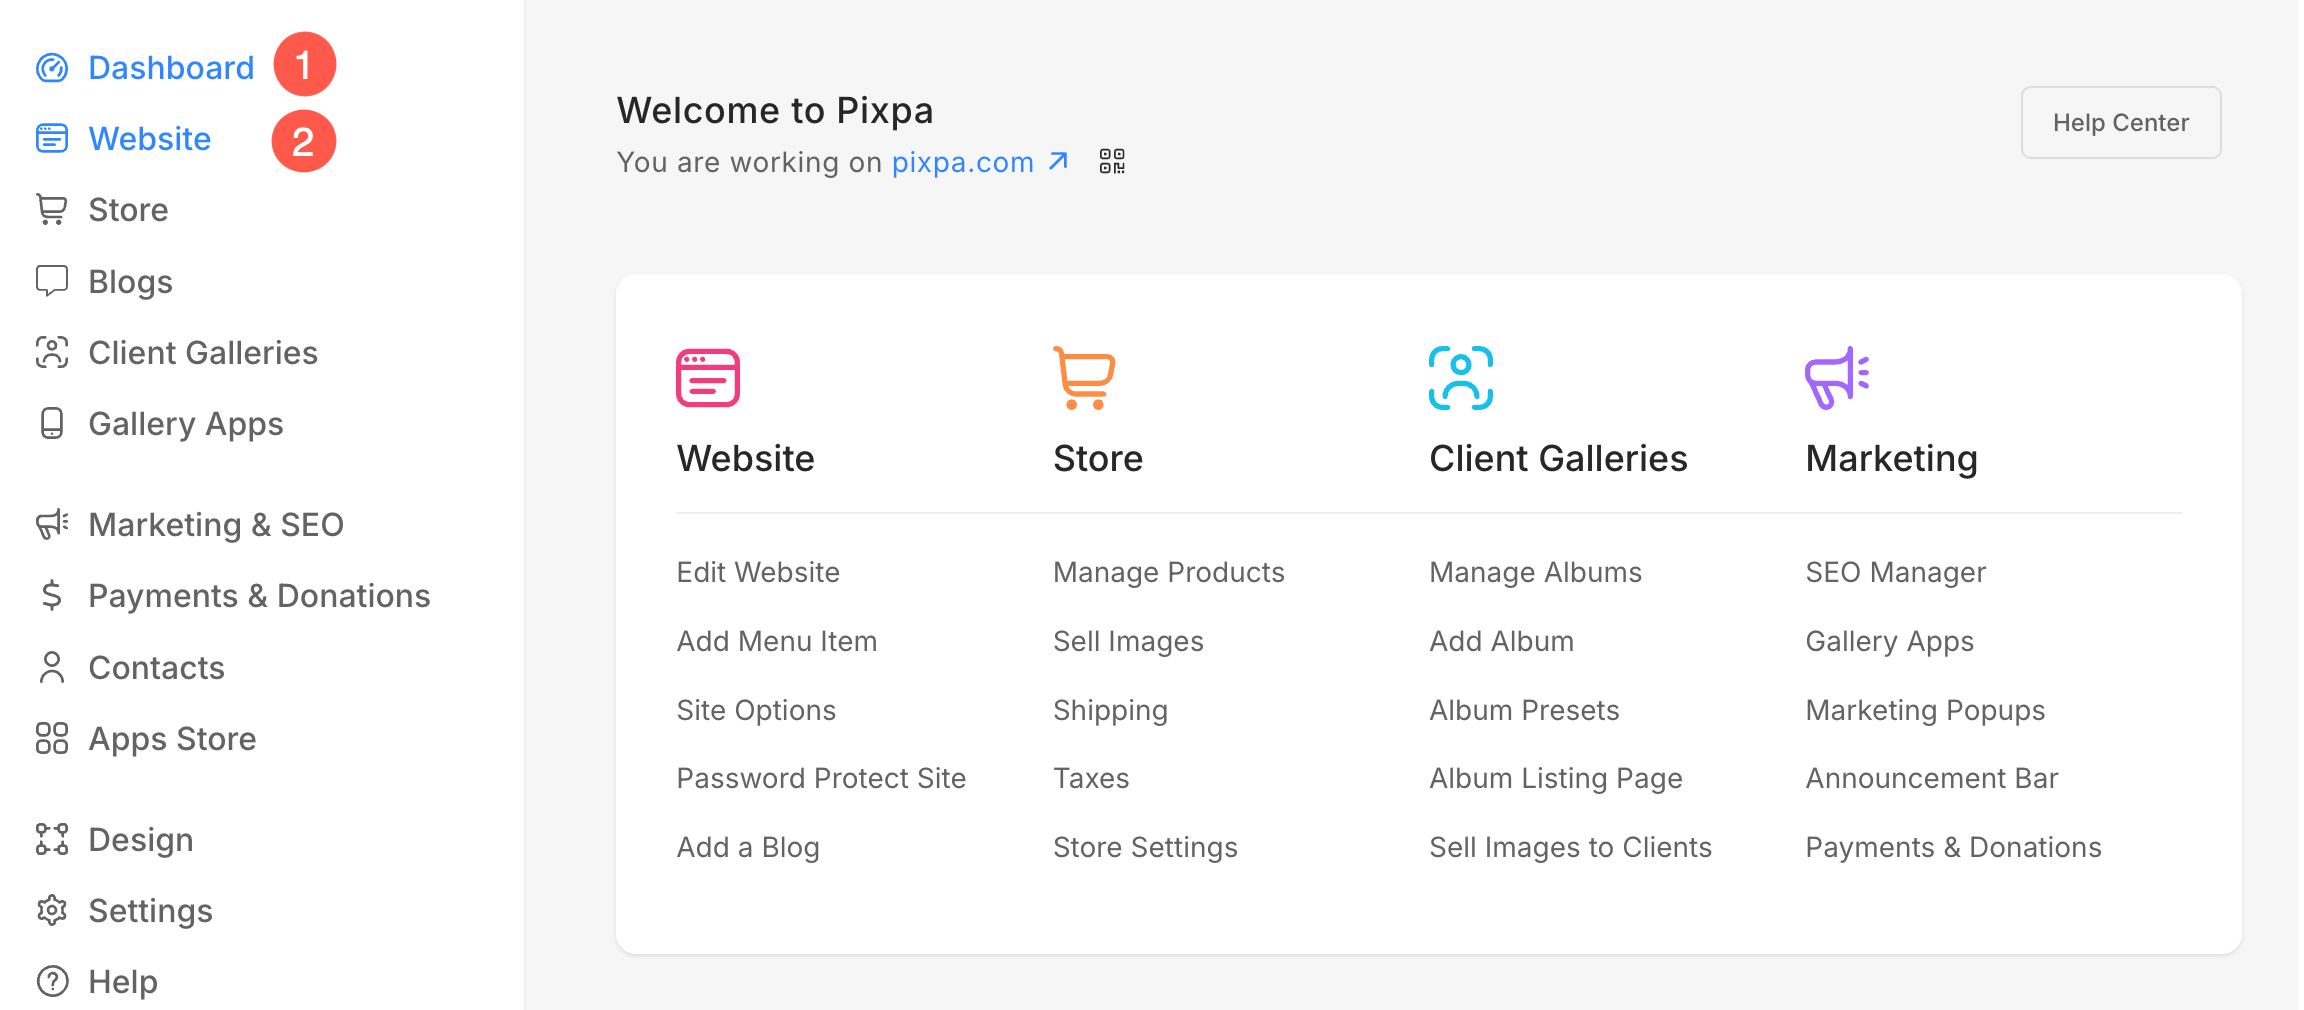
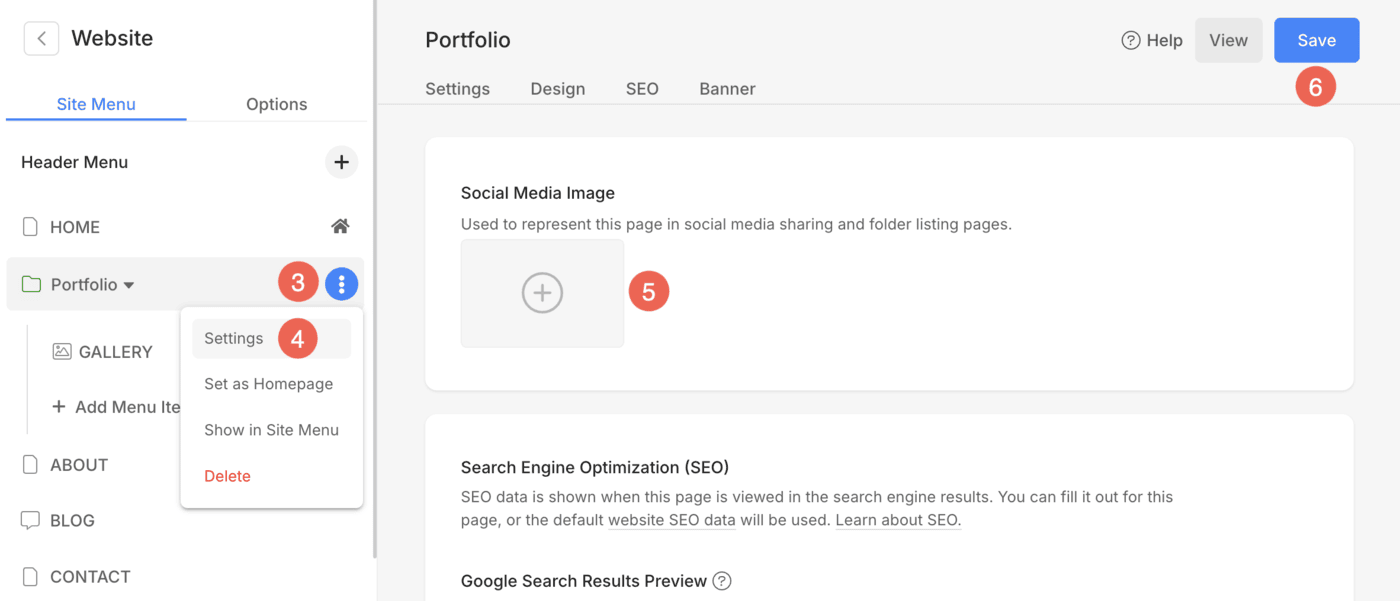
- From the Site Menu, find the particular folder, move your cursor to it, and click on the three dots icon (3) next to the folder name.
- Then, click on the Settings (4) option in the dropdown.
- You will see the Social Media Image box (4) on the right side as shown in the image below.
- Upload the image and click on the Save (5) button.
Social Media Image for Gallery
- Go to the Gallery Settings (1) page.
- Find the Social Media Image field (2) on the right side as shown in the screenshot below.
- Upload the image and hit the Save (3) button.

Social Media Image for Blog Post
- Go to the Blog Posts page (1) of the blog (that you want to work on).
- You can see all the posts there. Click on the Edit (2) button of a blog post where you want to add the Social Media image.
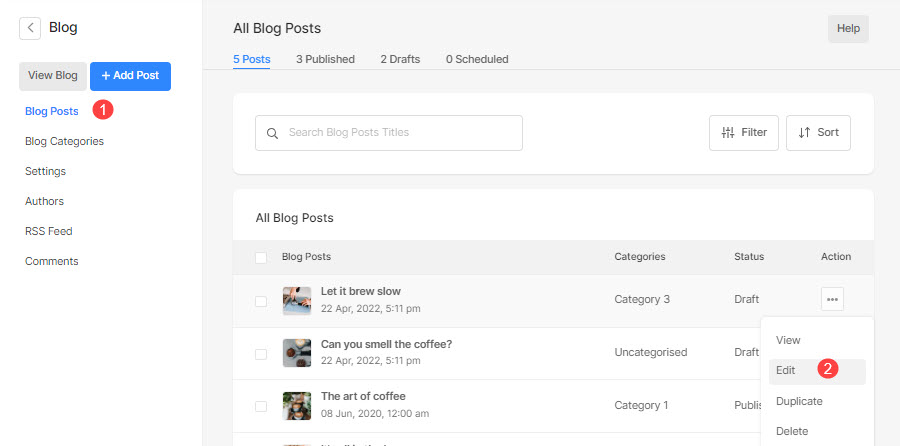
- Once you are on the edit blog post page, click on the Settings (3) tab.
- A sidebar will open from where, you can upload the Social Media Image (4). Upload the image and hit the Save (5) button.

Social Media Image for any other menu item
You can add a Social Media image for any other menu item like your Pages, Forms, Link, etc.
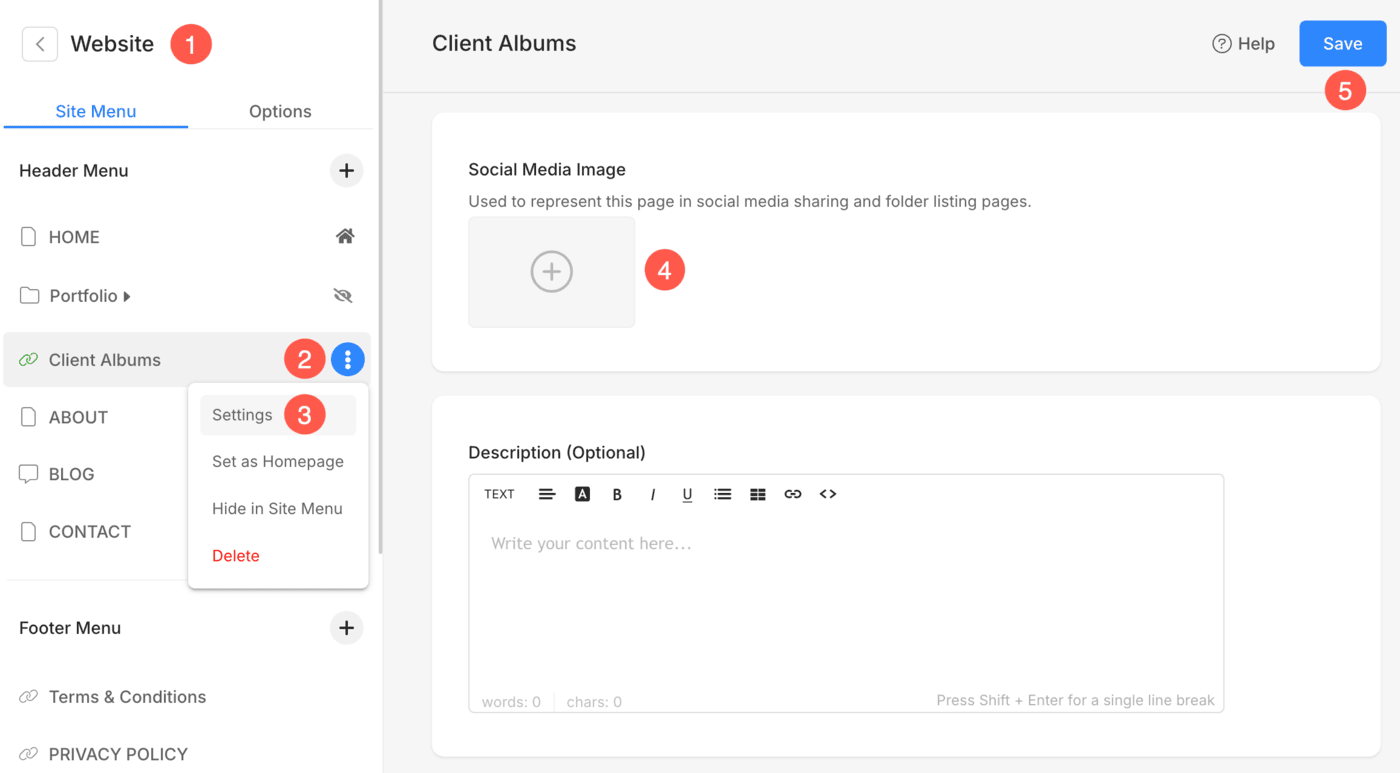
- From the Website section (1), find the particular menu item, move your cursor to it, and click on the three dots icon (2) next to its name.
- Click on the Settings (3) option in the dropdown.
- Under the settings page, scroll down the screen to see the Social Media image (4) section on the right side as shown in the image below.
- Upload the image and hit the Save (5) button.
Editing/Deleting the Social Media image
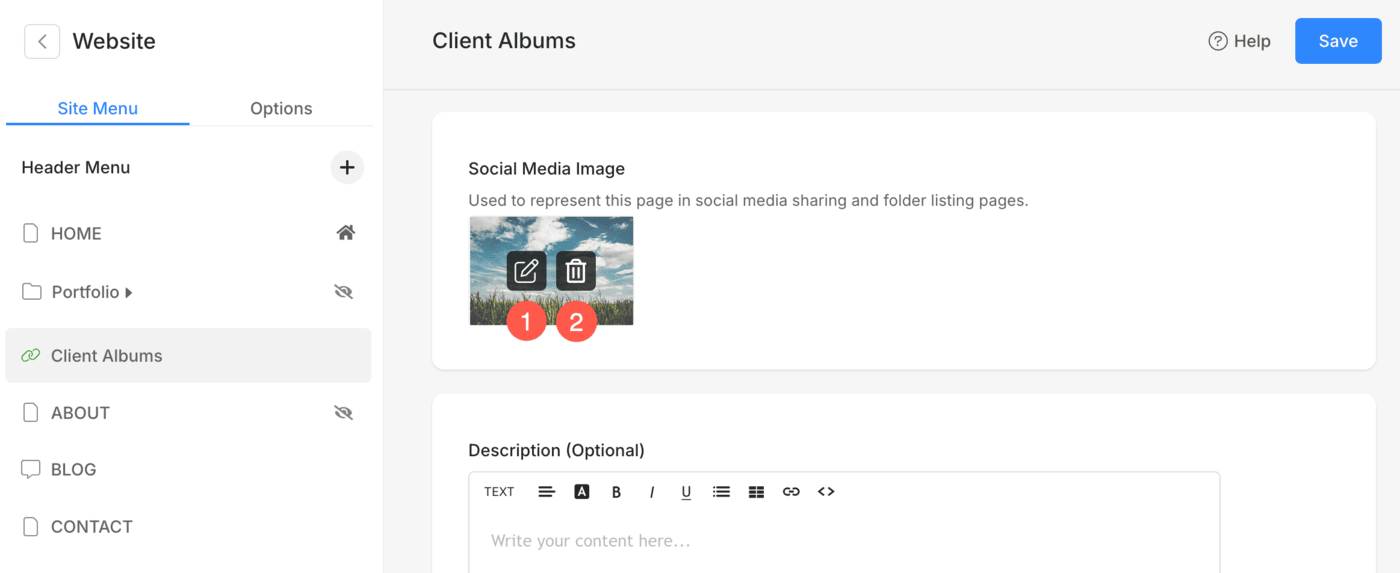
- Once you have uploaded the Social Media image, you can hover over the image to find the Edit icon (1).
- Click on the Delete button (2) to delete the image.
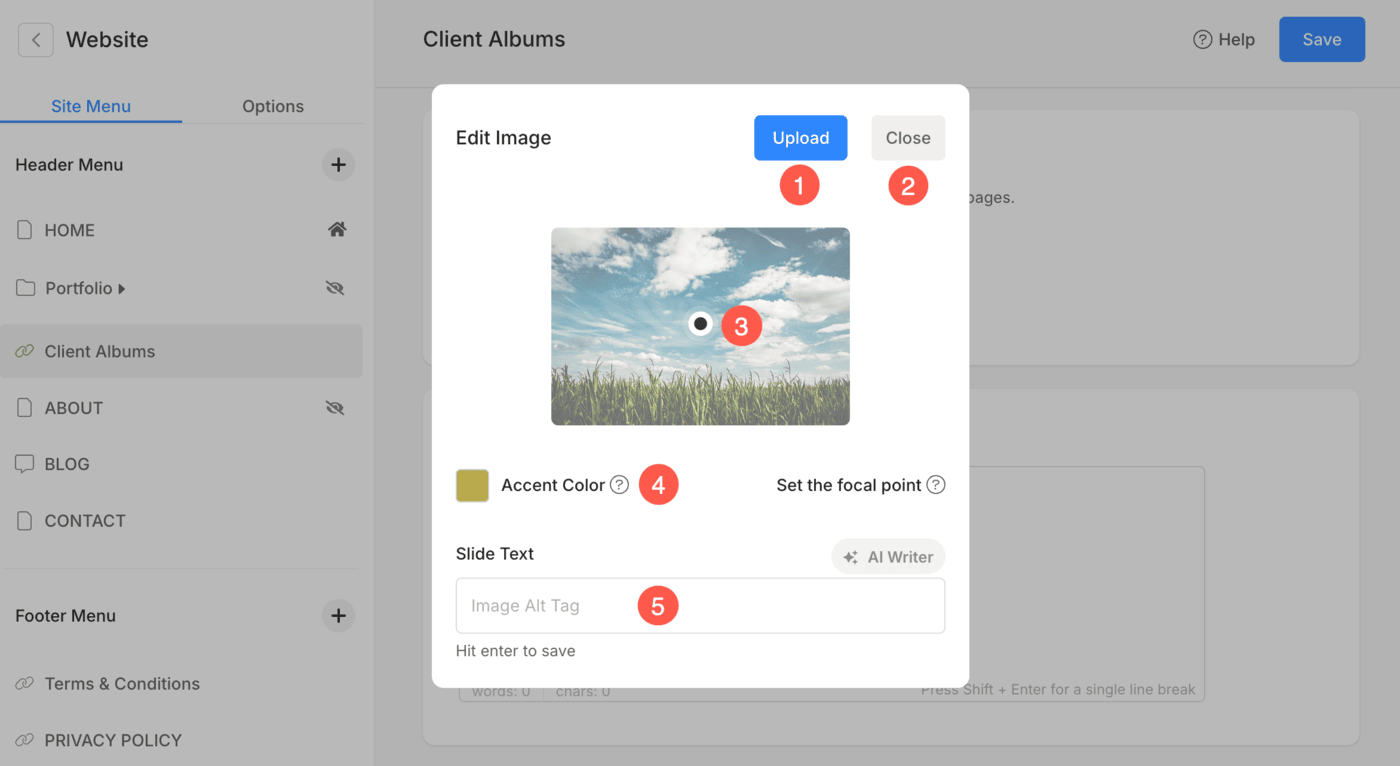
- As you click on the Edit button, you will see a popup as shown below:
- The options available in the popup are:
-
- Replace the Social Media image.
- Close the popup.
- Click anywhere on the image and move the black circle to set the new focal point.
- Set the Image Accent Color.
- Specify the image alt tag, if any. Then, hit the Enter button to save.
