Discover the magic of client galleries, where the simplicity of image tools transforms viewing into an interactive experience.
Tailor the user guides from here to facilitate easy navigation for clients to access their images, mark them as favorites, download and share images with their friends and family.
In this Article:
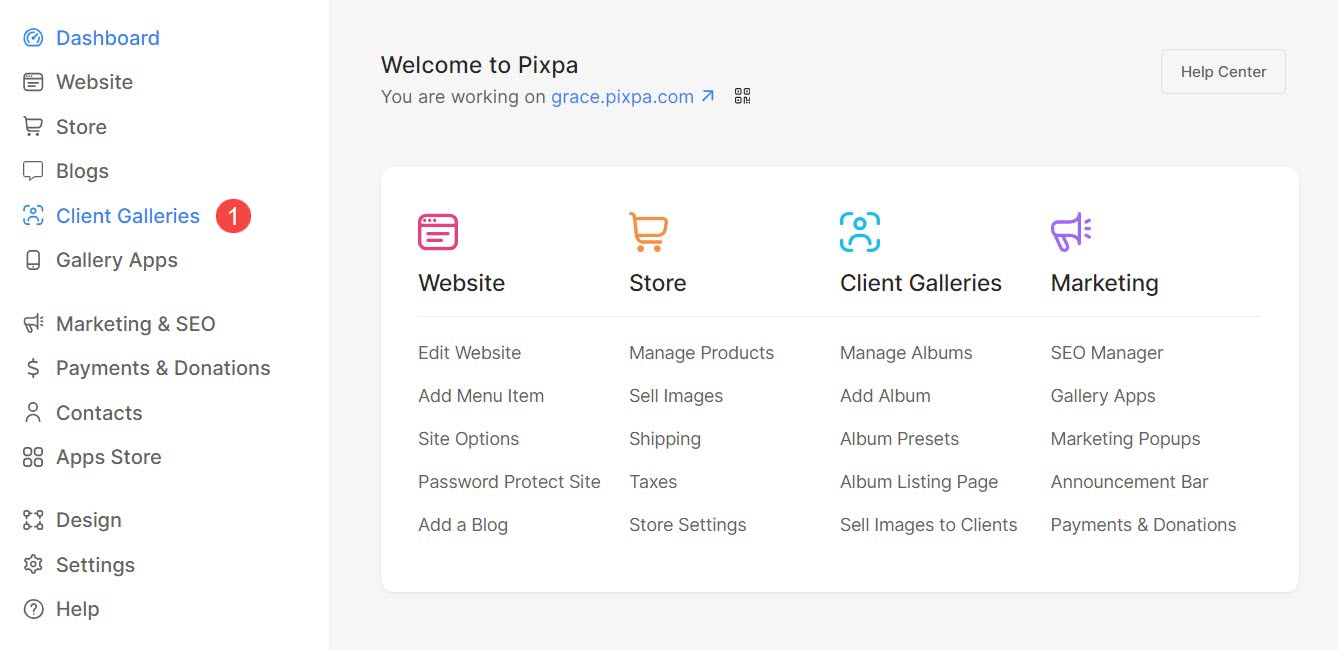
From the Dashboard of studio, click on Client Galleries (1) section.
Click on the Settings (2) tab. Now you will see the options to customize Image tools, User guides, and Email templates.
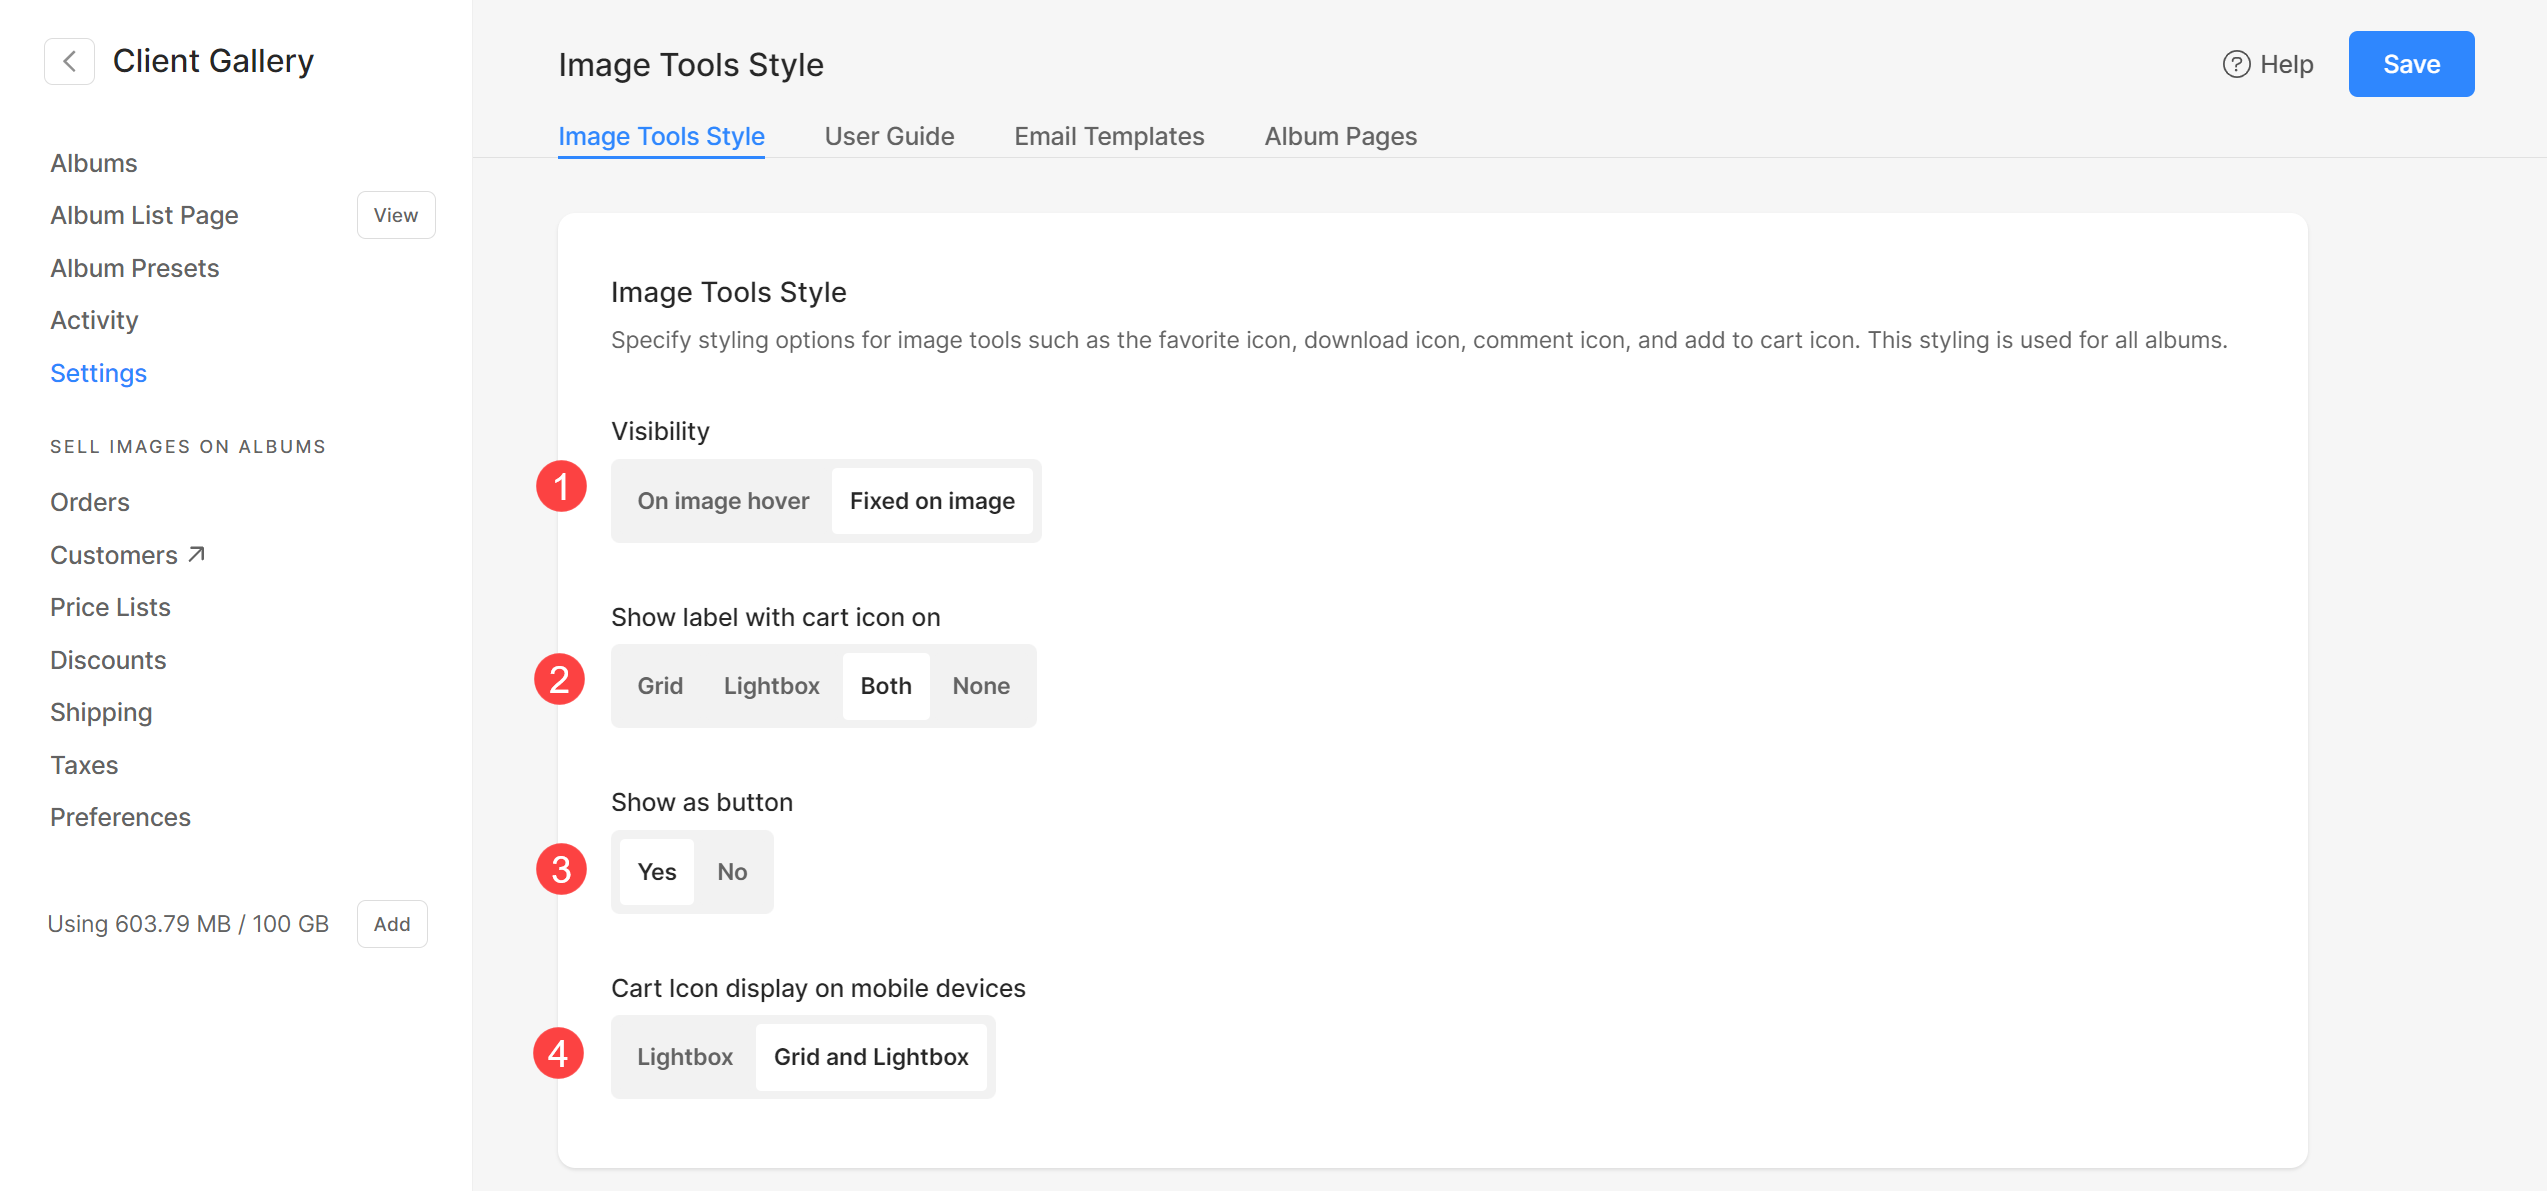
Image Tools Style
- Visibility – Set the visibility of the icons from here.
- Show label with cart icon on – Choose whether the label appears along with the cart icon.
- Show as button – Choose whether these icons appear as buttons.
- Cart Icon display on mobile devices – Choose where the cart icon displays on mobile devices.
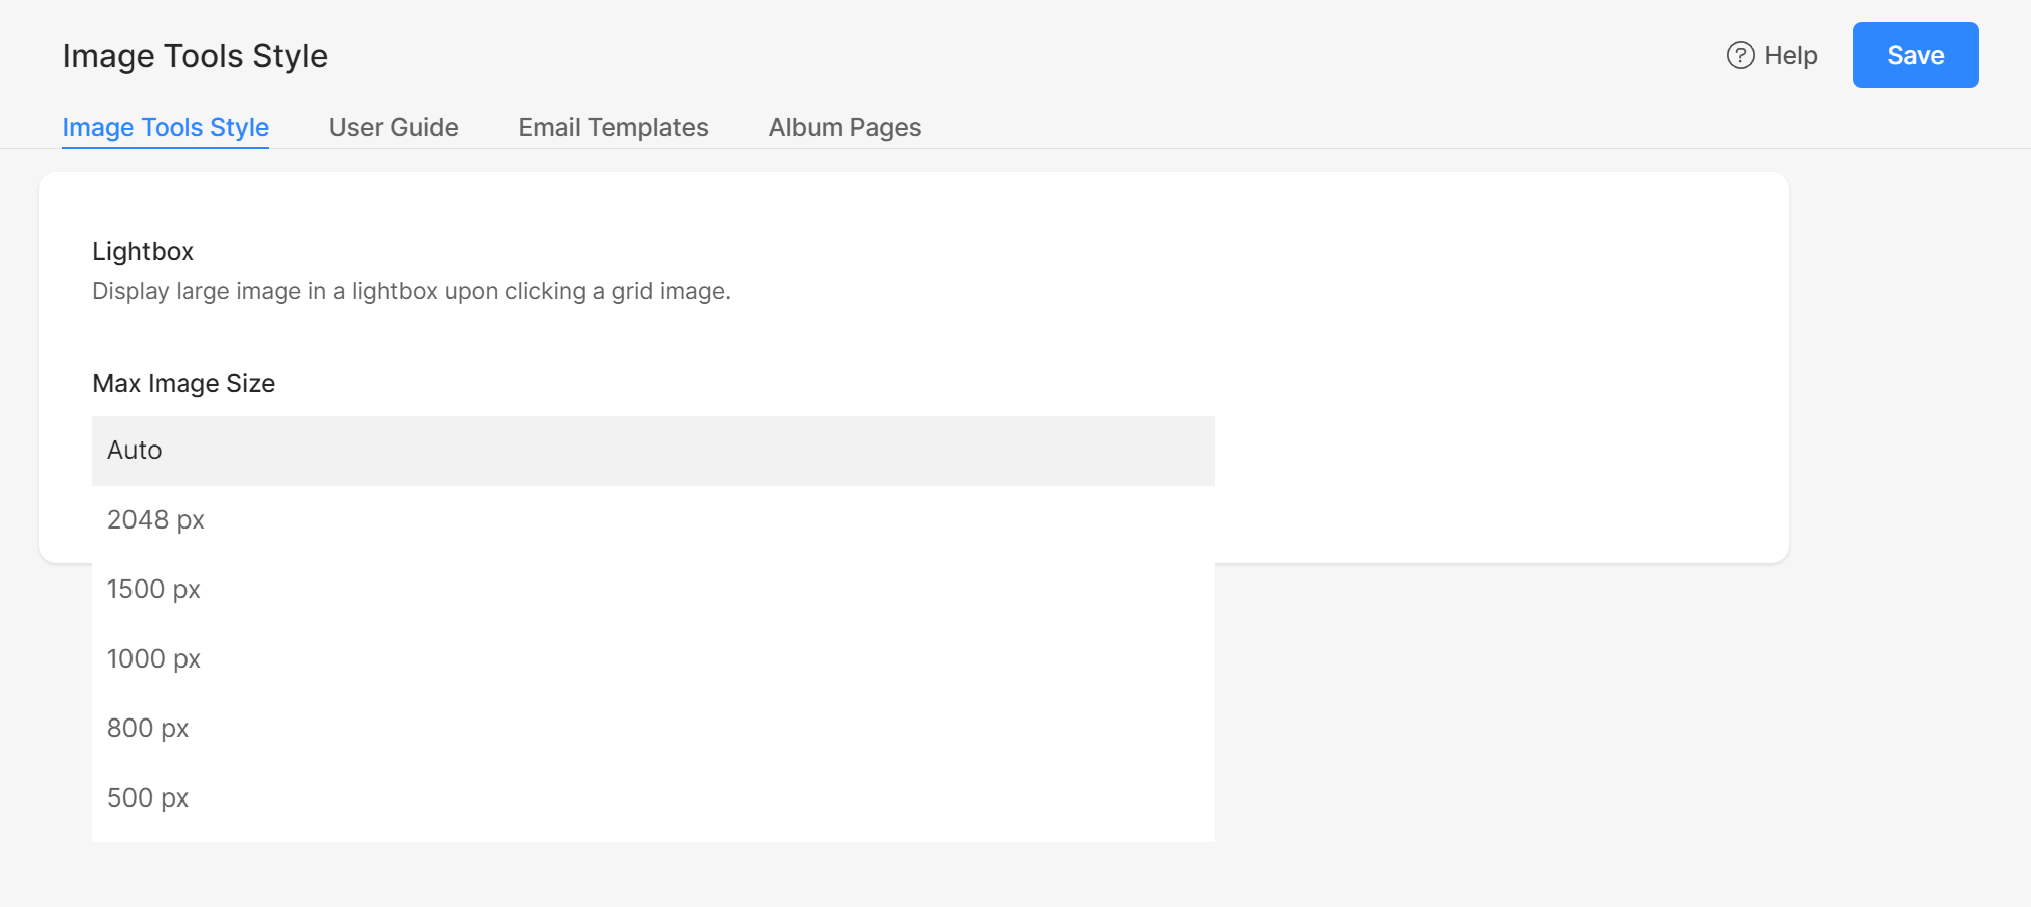
Lightbox
Specify the image size that you want to display in the lightbox mode while viewing the galleries.
- You have the option to choose from 6 different sizes for your lightbox display.
- By default Auto will be applied where the image size depends on the available browser width and on the device you view the image (in lightbox mode).
- You can also select from 2048px, 1500px, 1000px, 800px or 500px to render fixed-size images irrespective of the device you use.
User Guide
Display a pop-up walkthrough to assist new album visitors on using features such as Favorites, Downloads, Store, & Social Sharing.
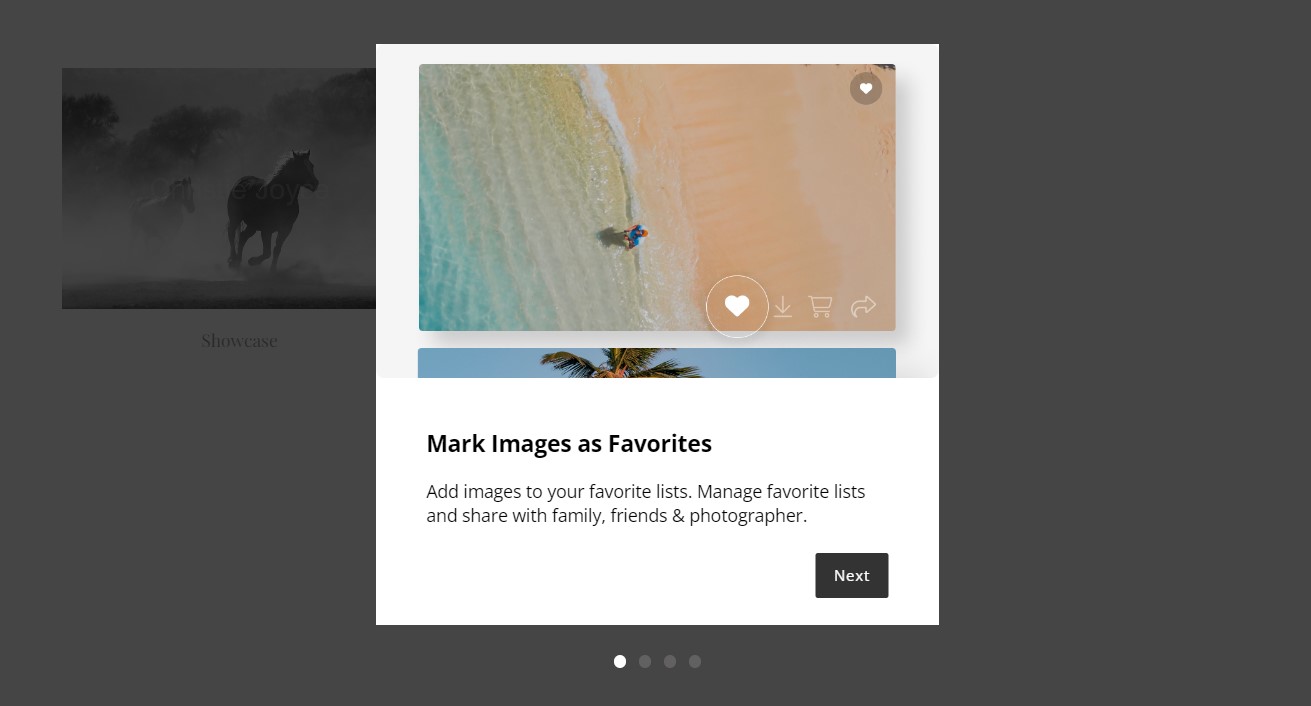
You can customize the content for each slide.
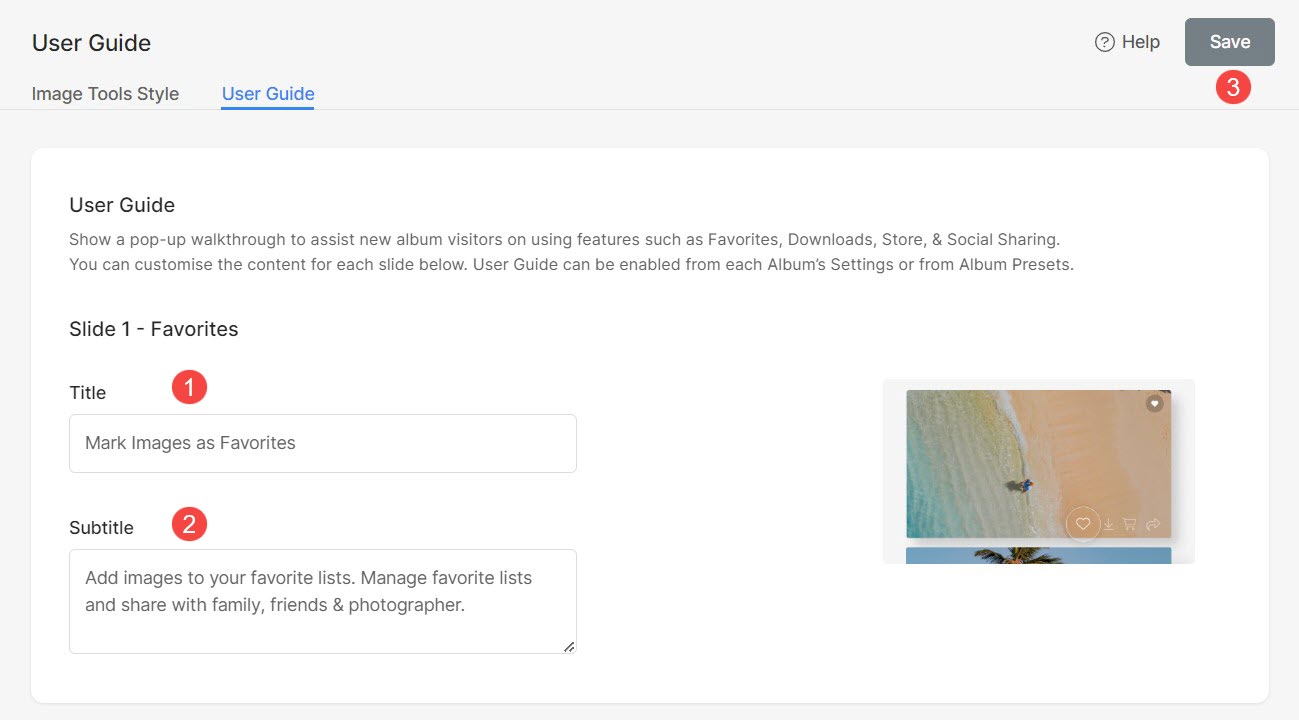
Slide 1 – Favorites
- Specify the Title (1) for Slide 1.
- Enter the Subtitle (2) or a brief description for the same slide.
Likewise, you have the ability to personalize the title and subtitle for:
- Slide 2 – Downloads
- Slide 3 – Buy Images
- Slide 4 – Social Sharing
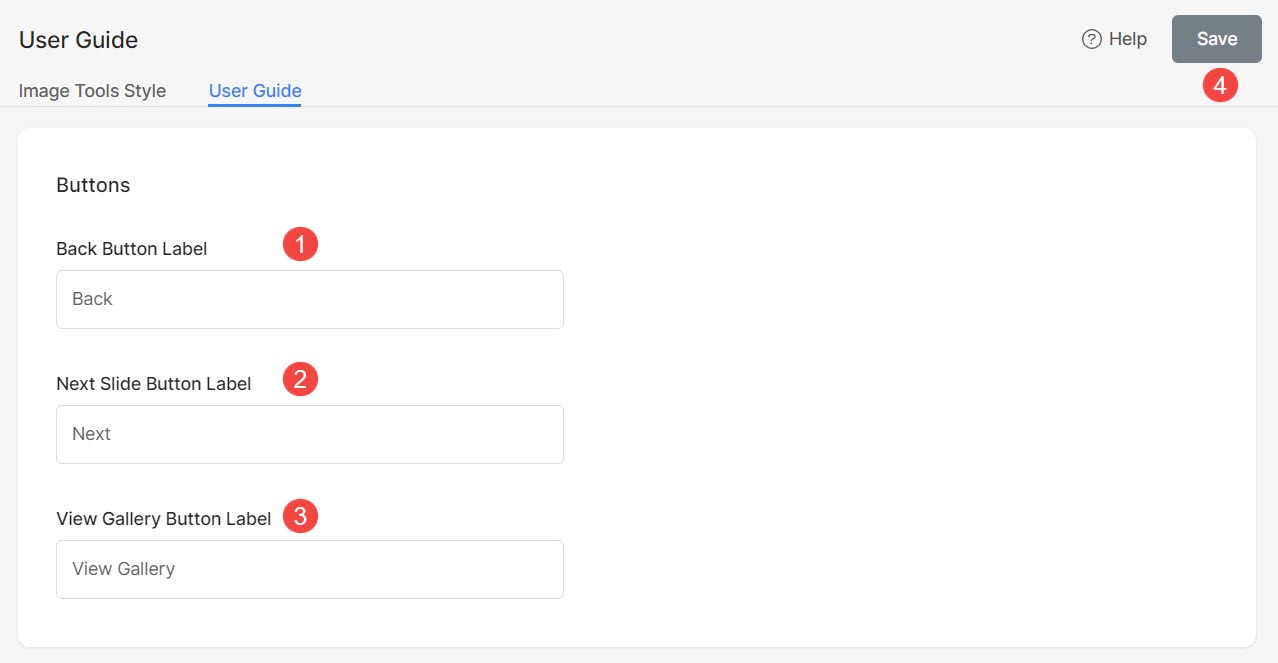
Button Labels
Customize the labels of buttons appearing in the user guide popup as per your preferences.
- Specify Back Button (1) label.
- Specify Next Slide Button (2) label.
- Specify View Gallery Button (3) label.
- Save (4) the changes.
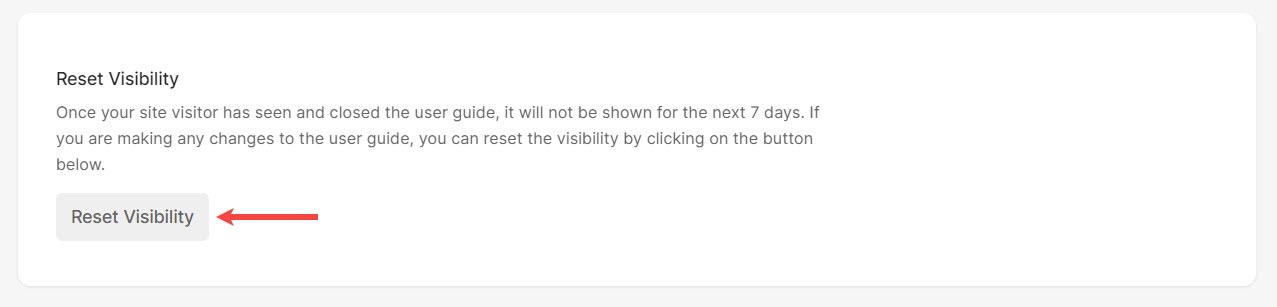
Reset Visibility
The user guide popup is set to appear for clients every 7 days. Should you make any adjustments, to the user guides, you have the option to instantly display the popup as clients log into the album.
You just have to reset the popup’s visibility by clicking on Reset Visibility button.
Enable User Guide
You can enable User Guide in two ways:
Album Presets
- From the Client Gallery (1) page, click on Album Presets (2) section.
- Check the Enable User Guide (3) option.
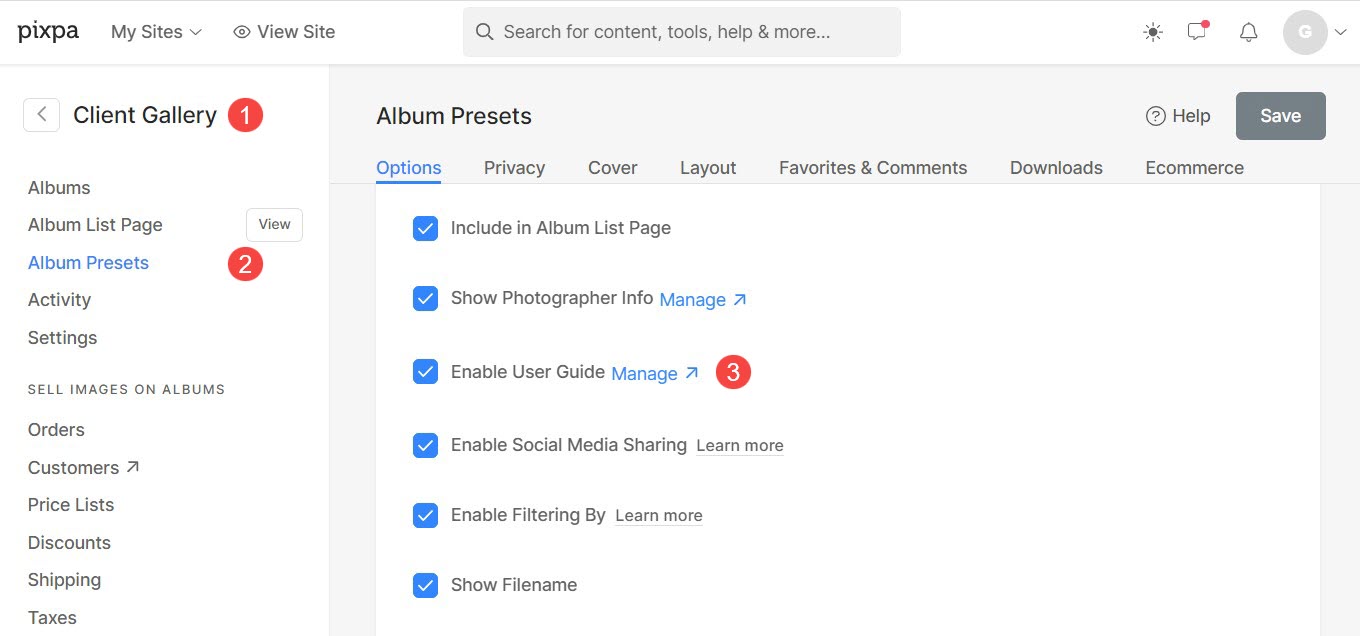
When the User Guide option is activated in Album Presets, it will automatically appear in all albums utilizing preset settings as their defaults.
Individual Albums
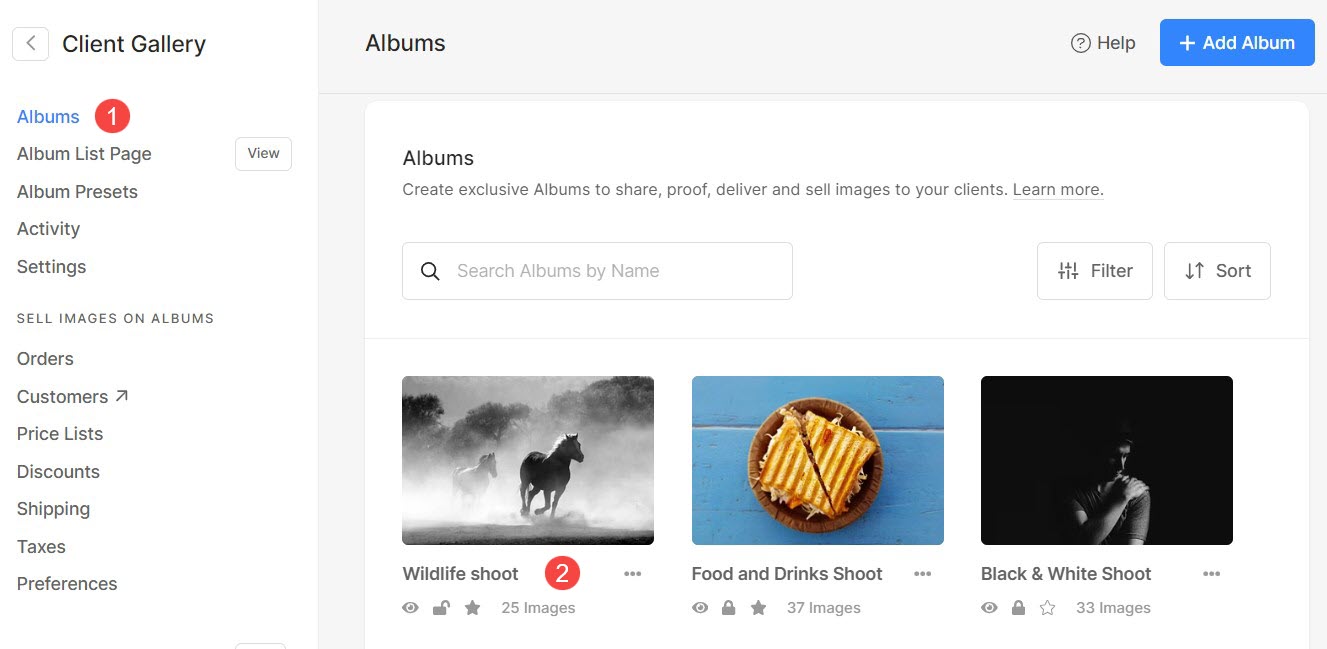
You can choose to enable user guide for selected albums.
- From the Albums (1) page, open the album (2) in which you want to enable the user guide.
- Click on the Settings (3) icon, and then Album Settings (4).
- Under Album Settings, you will see the option to Enable User Guide (5).
- Enable it and Save (6) the changes.
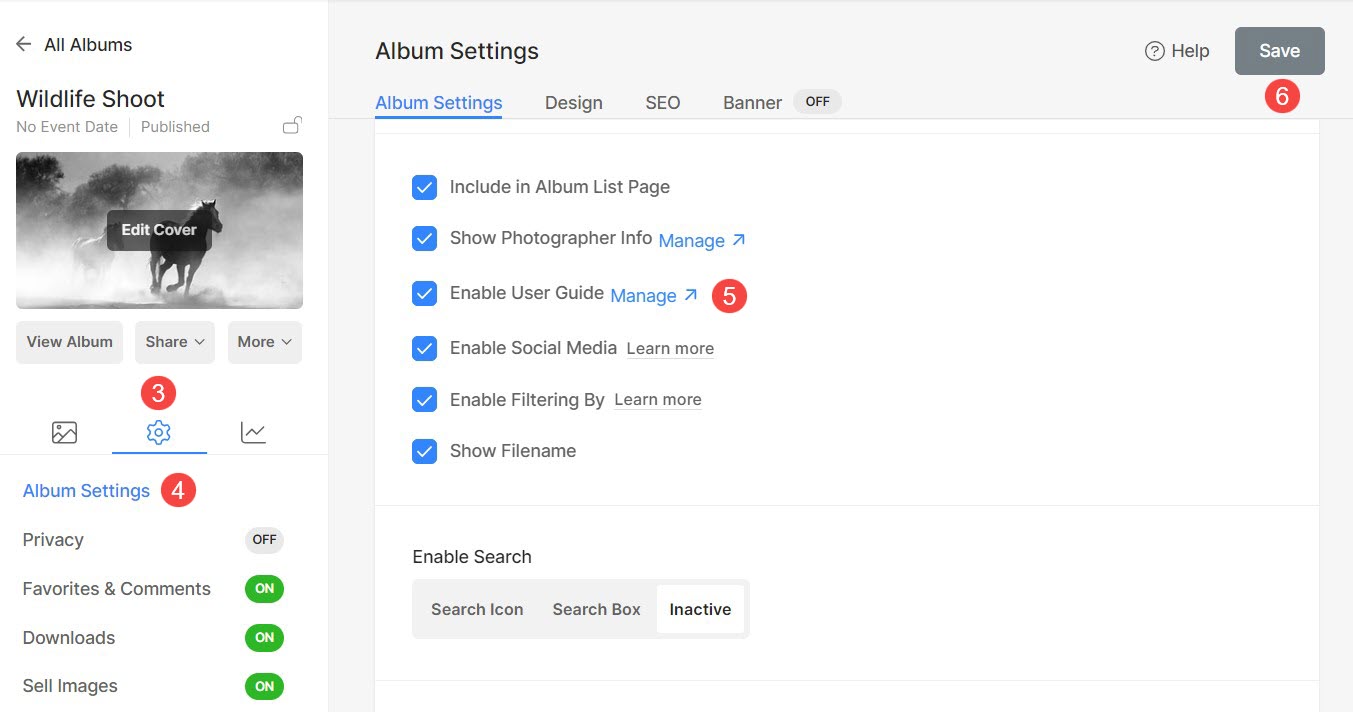
User guide will now be displayed for that particular album.
Email Templates
The E-mail templates feature allows you to create preset templates, simplifying the process of sharing invites with clients or notifying them about album expiry reminders.
This enhancement streamlines communication by providing a convenient and customizable way to convey information consistently.
Add Email Templates
You can add multiple email templates and use them according to the albums and use case. To add a new template, follow the steps mentioned below:
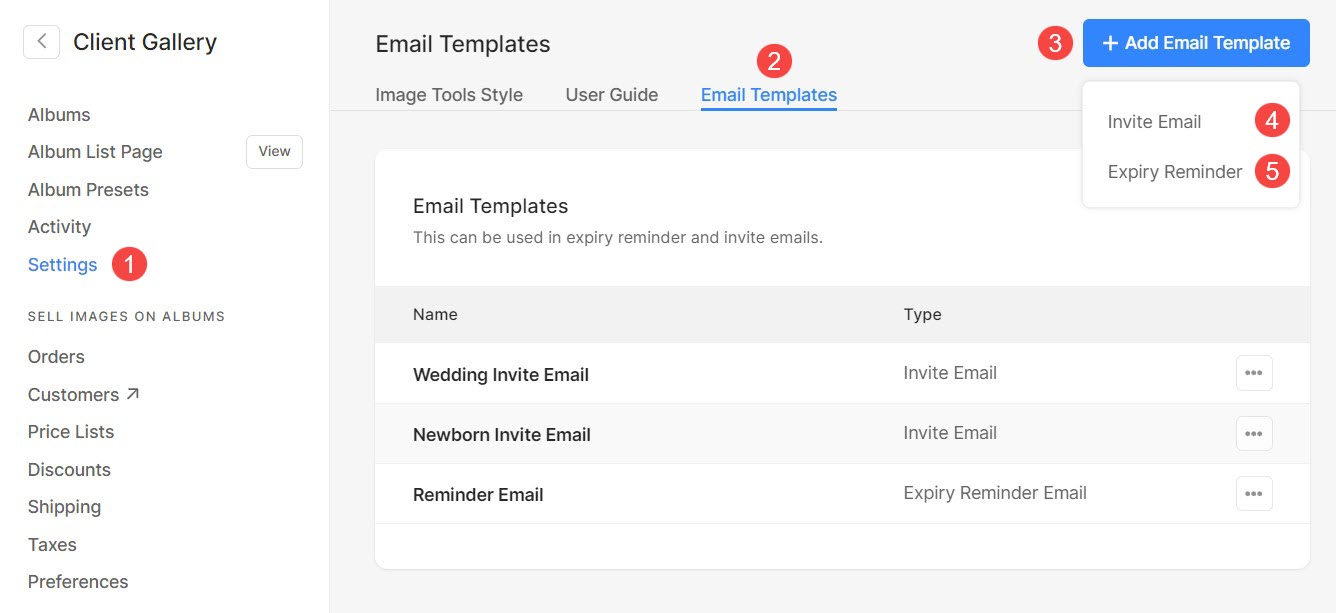
- From the Client Gallery section, click on Settings (1) and Email Templates (2) tab.
- From here, click on + Add Email Template (3) button.
- You will see the option to add an Invite Email (4) template and Expiry Reminder (5) template.
Add Invite Email or Reminder Email Template
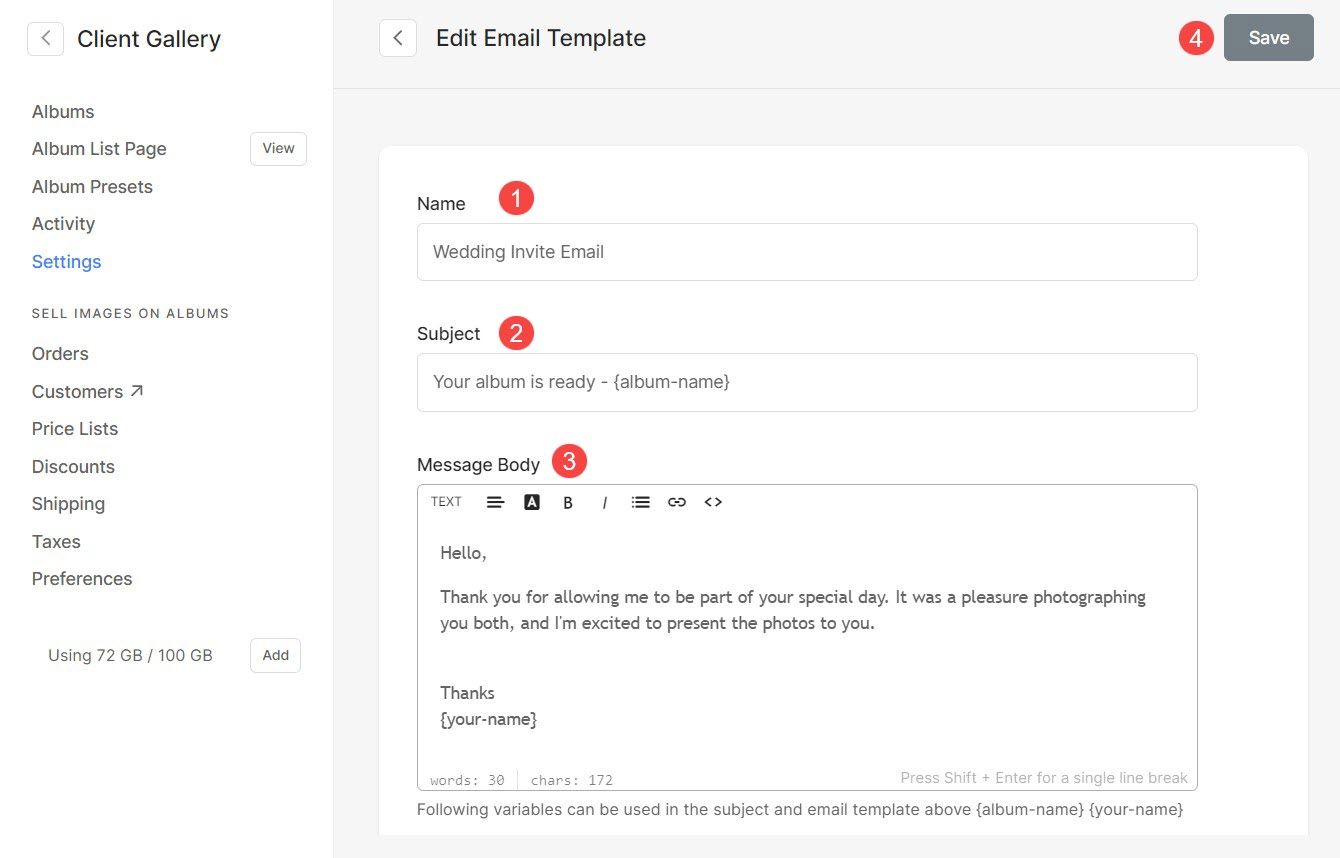
- Enter the Name (1) and Subject (2) of the template.
- Enter the Message Body (3), i.e., the content of the template. Click here to learn more about how to use Pixpa text editor.
- Save (4) the changes.
Edit Invite Email or Reminder Email Template
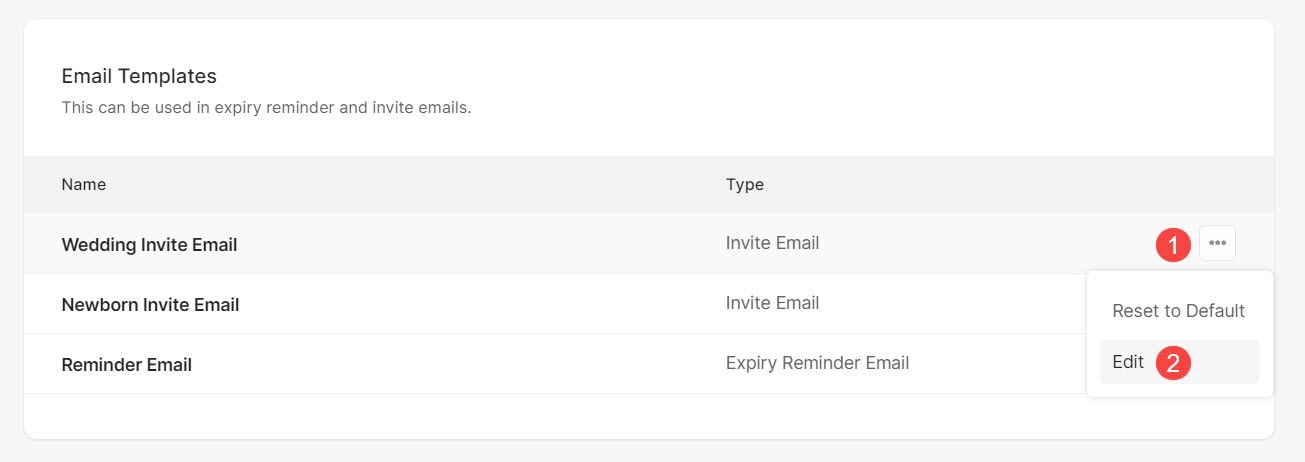
- To edit an already existing template, simply click on three dots (1) icon and then Edit (2) option.
- Now, you will see the editing screen from where you can make the changes into the template.
Template Variables
Variables are placeholders that store and represent data. These variables enable automatic retrieval of associated data.
Following are the variables that you can use while creating / editing email templates.
- {album-name} – When sending an email, it will automatically retrieve the album’s name.
- {your-name} – This will automatically fetch your name.
- {reminder-days} – This will fetch the days that are left before the album expires.
- {expiry-date} – This will fetch the date of the album expiry.
Delete a Template
You will see three templates created by the system. These templates cannot be deleted. However, if you have made any changes into them, you can restore the changes by clicking on the three-dot (1) icon and Reset to Default (2) option.
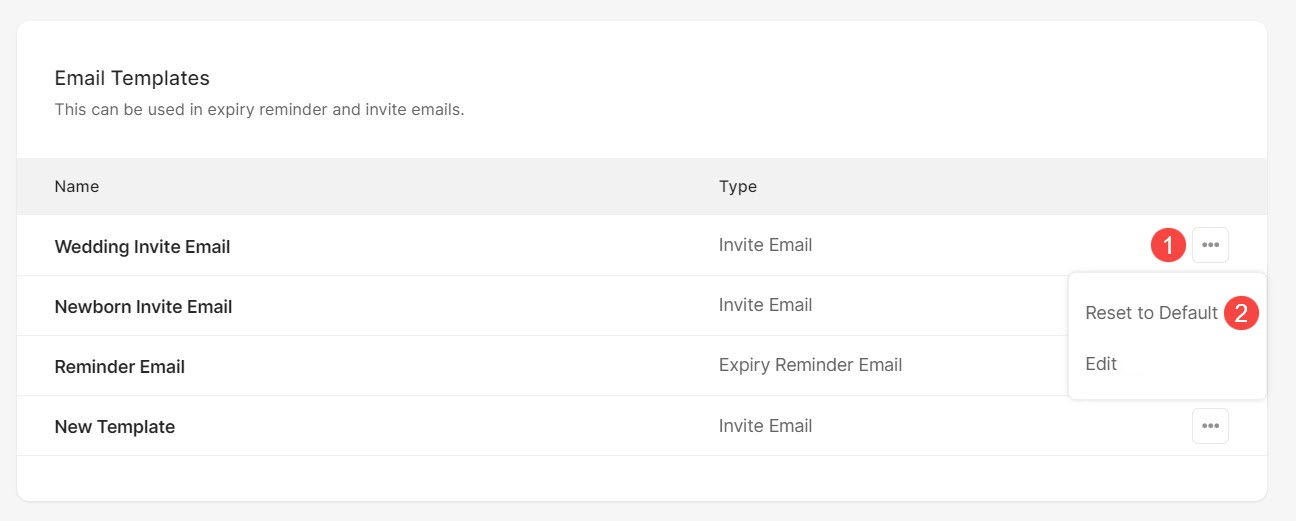
All the templates that you have created can be deleted by clicking on the three-dot (1) icon and Delete (2) option.

Use Email Templates in Albums
Use an Email template while sharing the album:
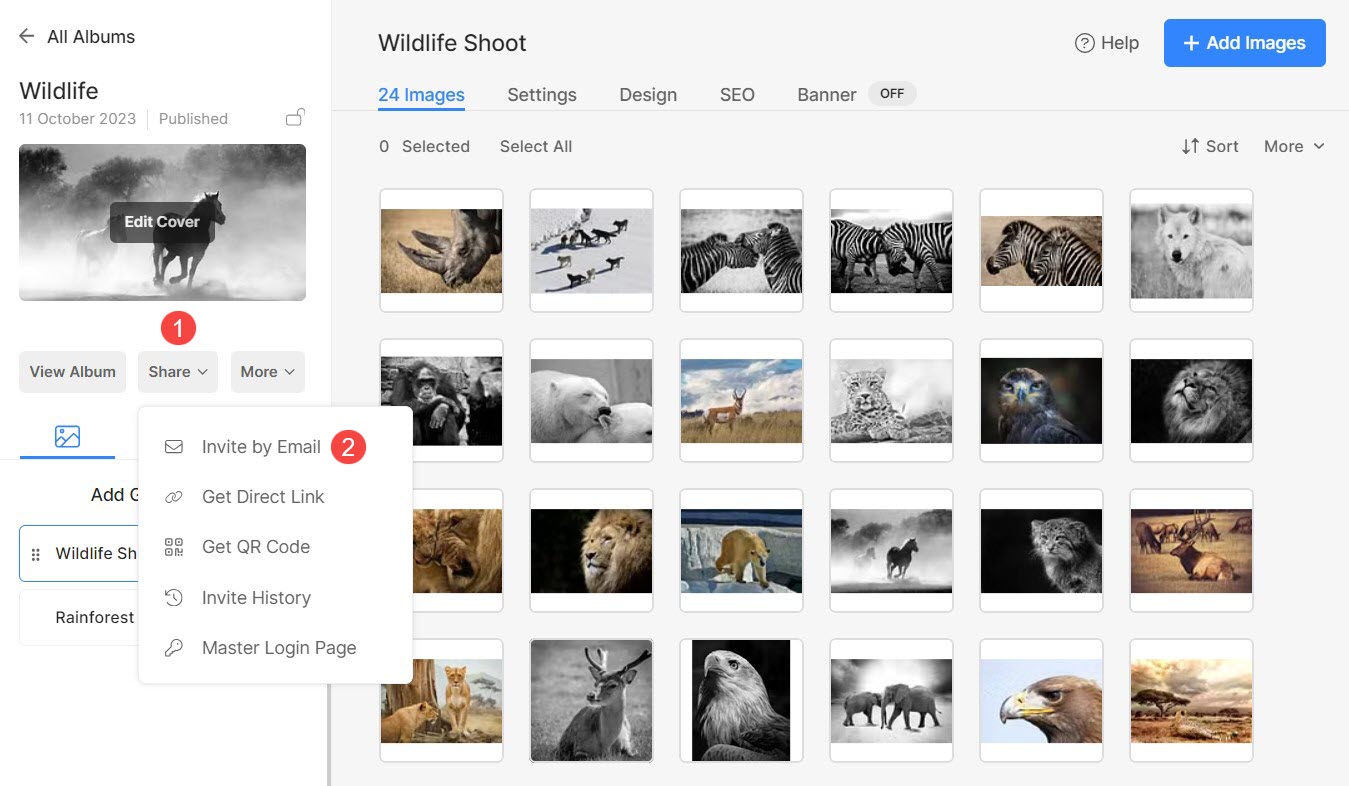
- Open the Album that you want to share with your client and click on Share (1) button.
- A dropdown will appear. From here click on Invite by Email (2) option.
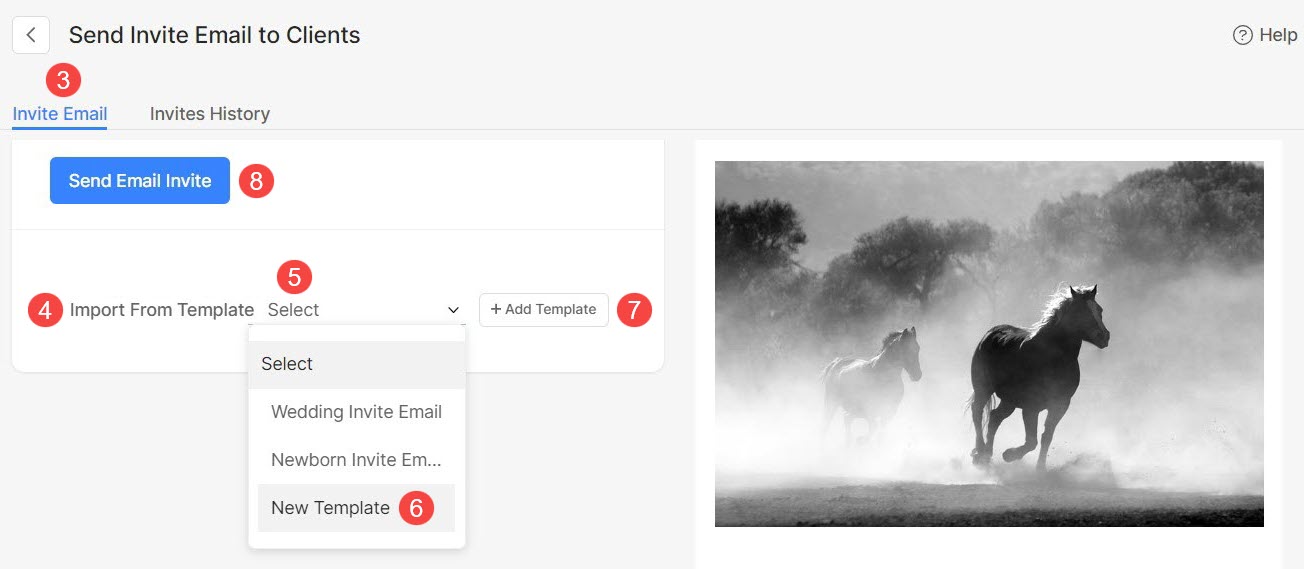
- You will see the Invite Email (3) page now. Scroll at the bottom of the page.
- Here, you will find the option Import From Template (4). Click on the Select (5) tab and select a template (6) from the list of all Invite Email templates.
- Click on +Add Template (7) button to add new templates. This will land you on the Email templates page.
- Finally, hit Send Email Invite (8) button to send the email.
Use an Email template for album expiry reminders:
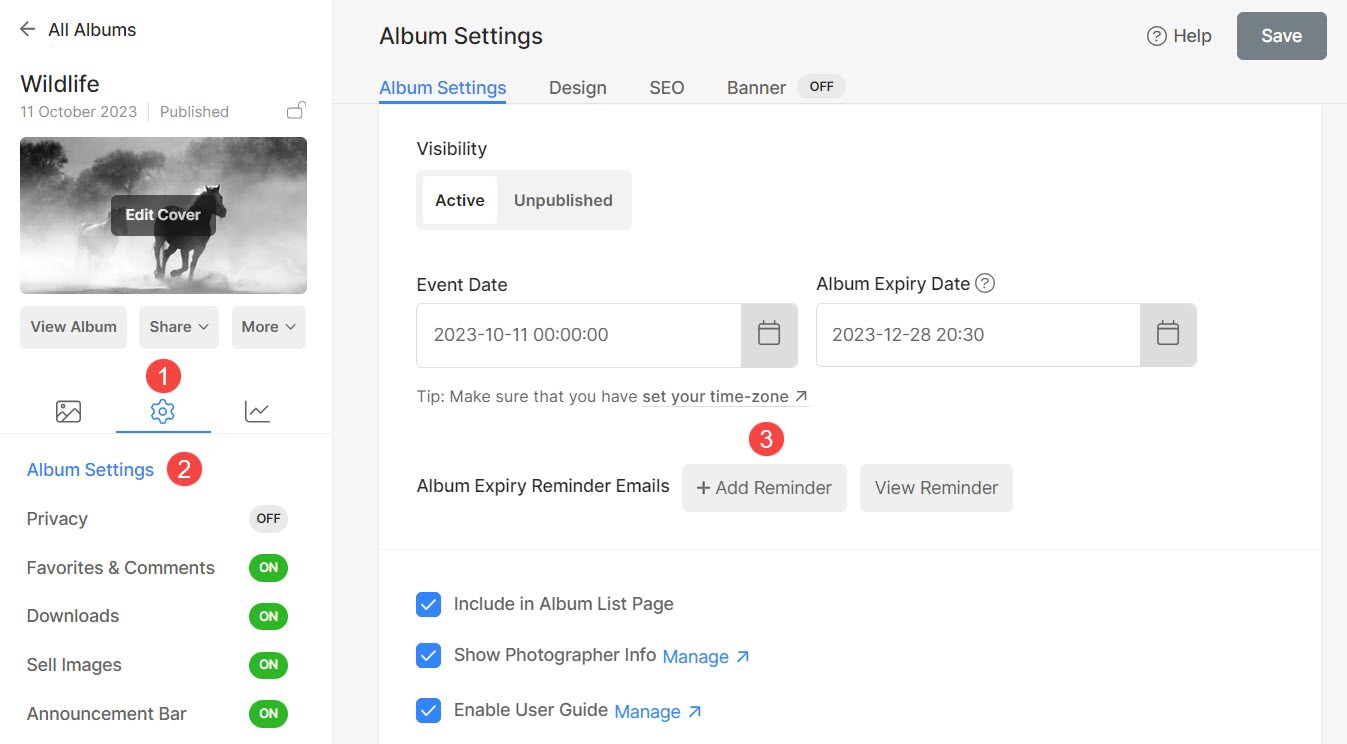
- Open the relevant album and click on the Settings (1) icon and then, Album Settings (2) option.
- From the album settings page, click on +Add Reminder (3) button.
- Click on Content (4) tab or Next > Review Content (5) button.
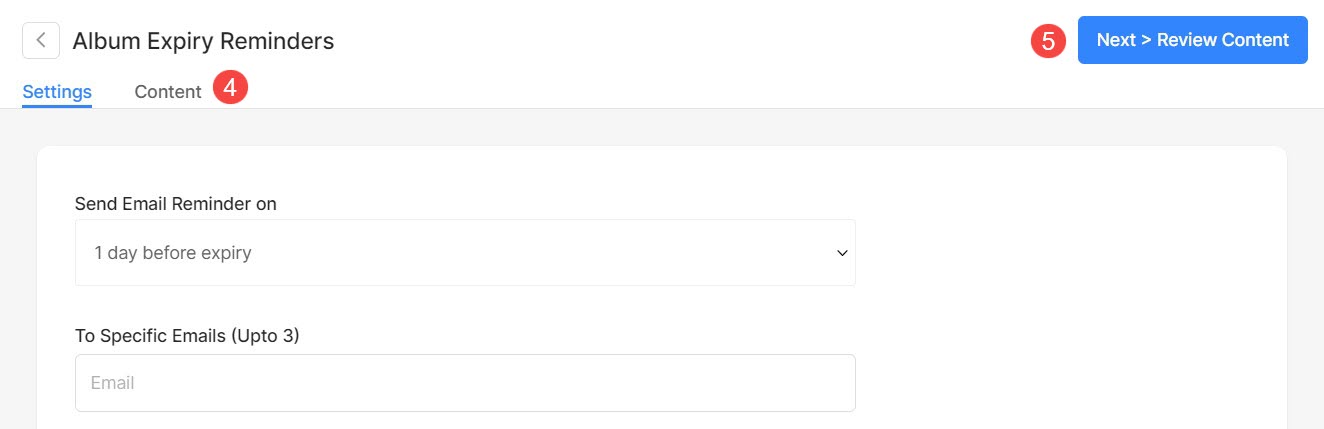
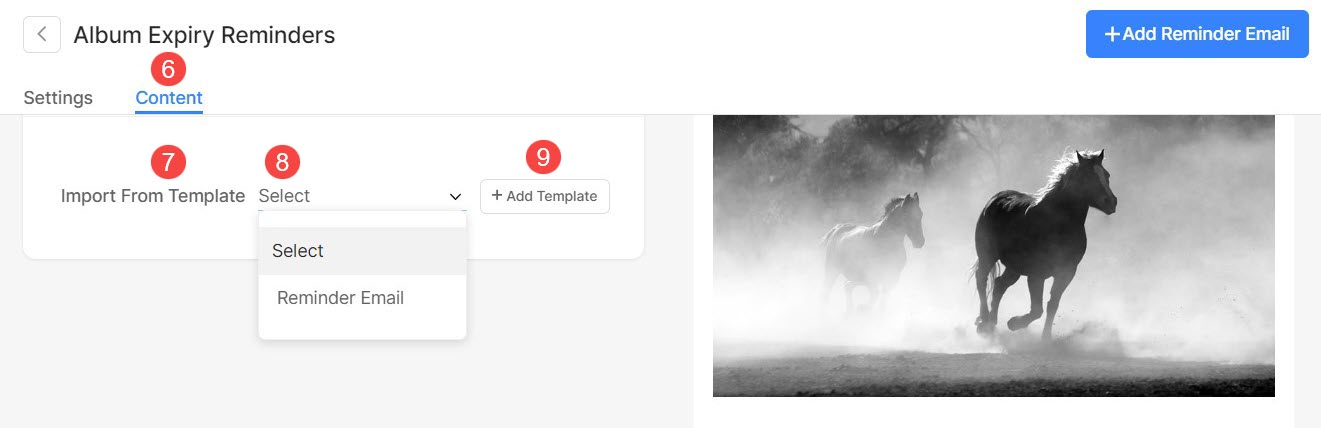
- You will reach on the Content (6) page. Scroll to the bottom of the page.
- You will find Import From Templates (7) option. Click on Select (8) to choose from the list of Reminder Email Templates.
- Click on +Add Template (7) button to add new templates. This will land you on the Email templates page.