Pixpa allows to upload the files that you want to make available for download (for example – your resume or any tear sheets) only within your Pixpa website. You can upload, copy and use the link, and delete the file.
In this article:
Add your files:
- Enter Files (1) in the Search Bar.
- From the related results, click on the Files option (2) under Studio Links.

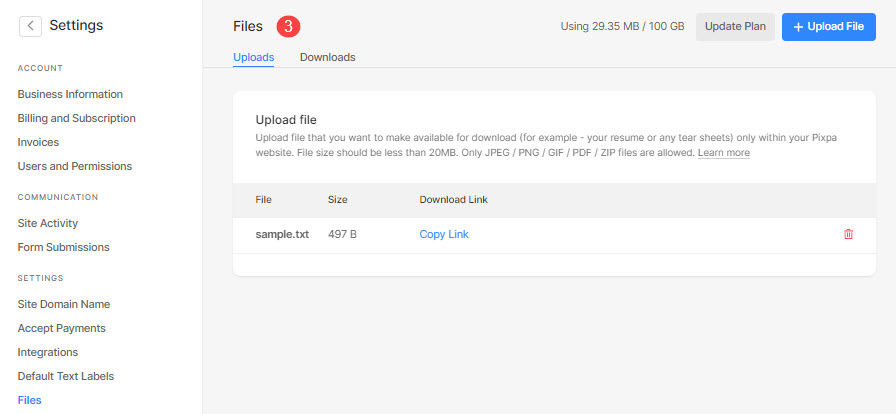
- You will now reach the Files page (3).
From the files page:
- Click on the Upload File (1) button to add your file.
- All the uploaded files will be shown in the Uploads (2) tab.
- Once the upload completes, you would see the copy link text link (3) of a particular file.
- Click on it to copy the link.
- Now, you can use this link anywhere on the Pixpa website.
- Delete (4) the uploaded file. A deleted file cannot be recovered.
- Check the used/available original space in your account and click on the Update Plan (5) to upgrade or add an add-on.

Files on a live website
Once you have added the link and someone hits the file link, the file opens in their browser. The name of the file appears in the browser tab.
See how files work in action:
Adding links
Pixpa offers several ways to add your links:
- Text link in a page.
- Text link in a Pixpa text editor (available in any menu other than a page).
- Buttons on a page.
- Buttons on a banner.
- Menu Link.
- Menu button.
- Link Images using an image list section.
- Link Images using the images section.
To embed any PDF file into a page, check: