You can easily track all the activities regarding favorites and comments on a particular album from here.
You can check the Client’s Name, Email address, Favorite List Name, Updated date, Number of Images inside the favorite lists, Number of comments on images marked as favorites, Settings to export the favorite list, view as a gallery, and do much more. You also have the option to edit the favorites lists.
In this Article:
- Navigate to the Section
- Favorites & Comments Activity Overview
- Add / Edit a Favorite List
- Favorites & Comments Options
- Move / Copy Images
- Compare Favorited Images
Navigate to Favorites & Comments Activity
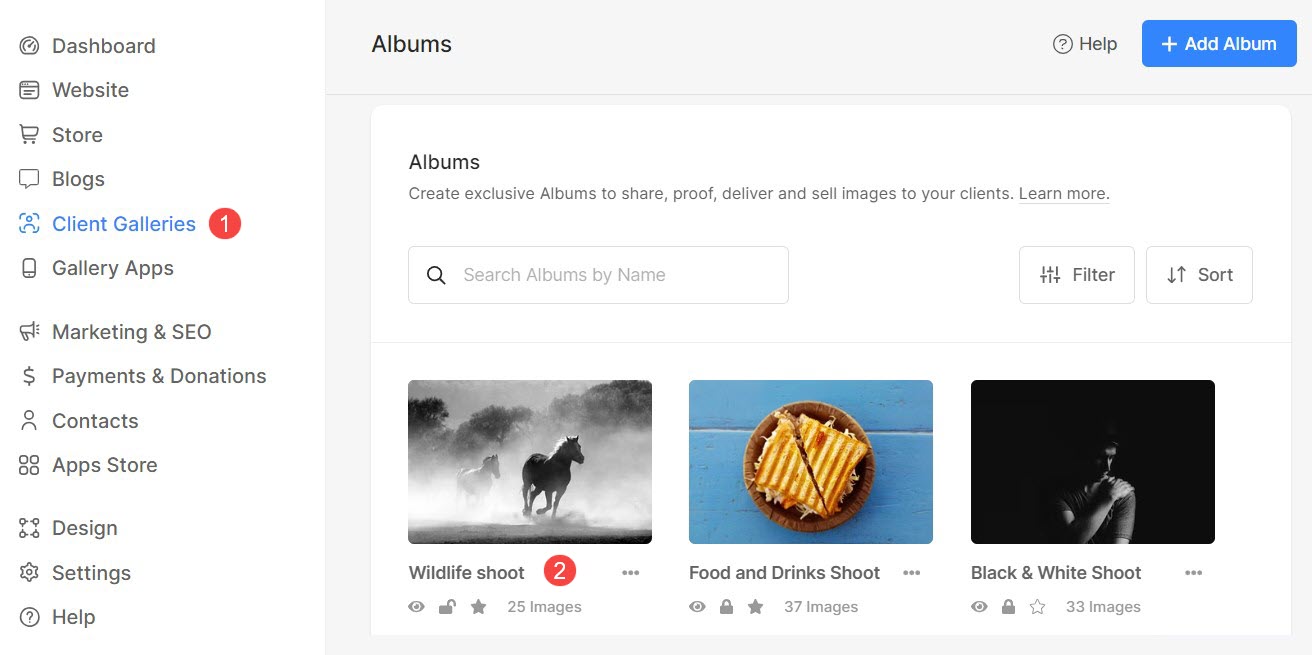
From the Dashboard of studio, click on Client Galleries (1) section and open the Album (2) that you want to edit.
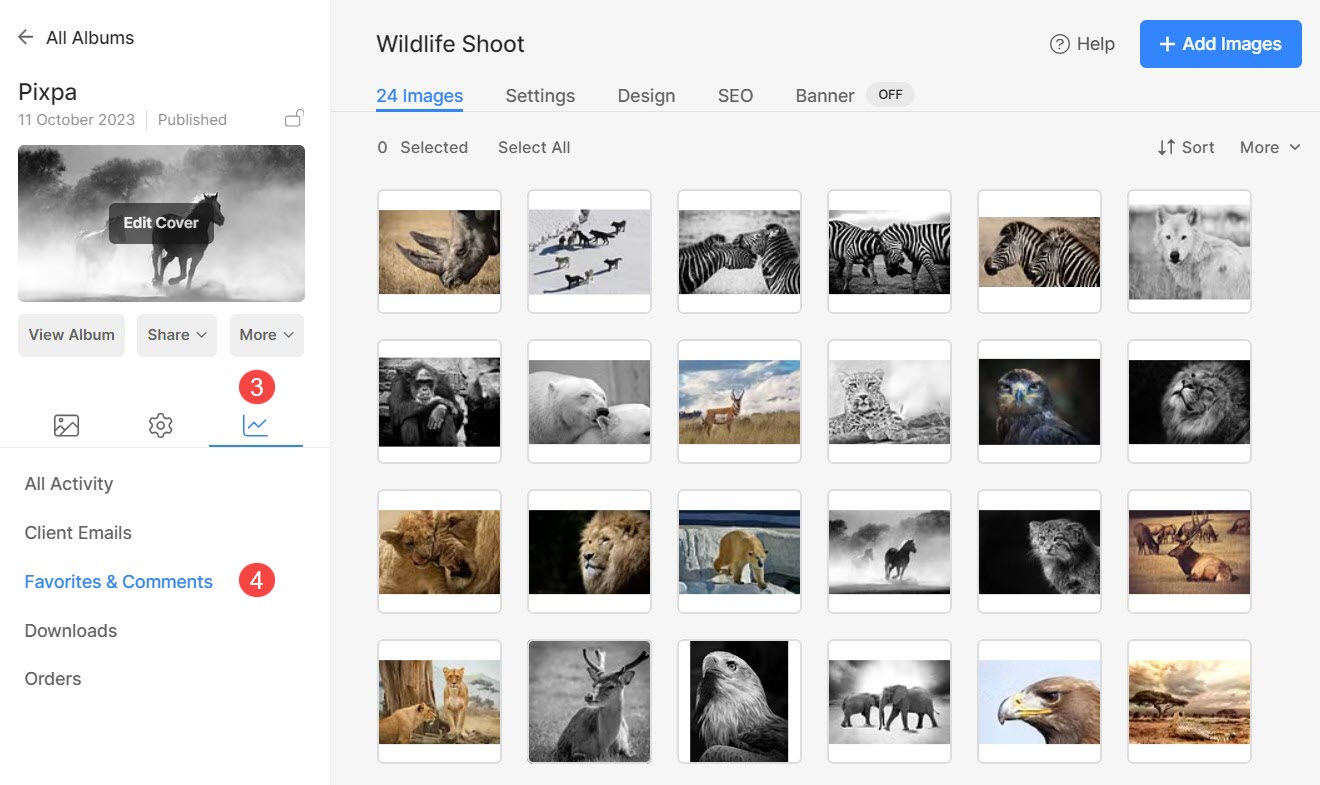
Click on the Activity (3) icon and Favorites & Comments (4) tab.
Alternatively, you can use studio’s search function to navigate to Favorites & Comments settings.
- Enter Album title (1) in the Search Bar.
- From the related results, click on the Album that you are searching for (2) under Client Galleries.

- You will now reach the Album page.
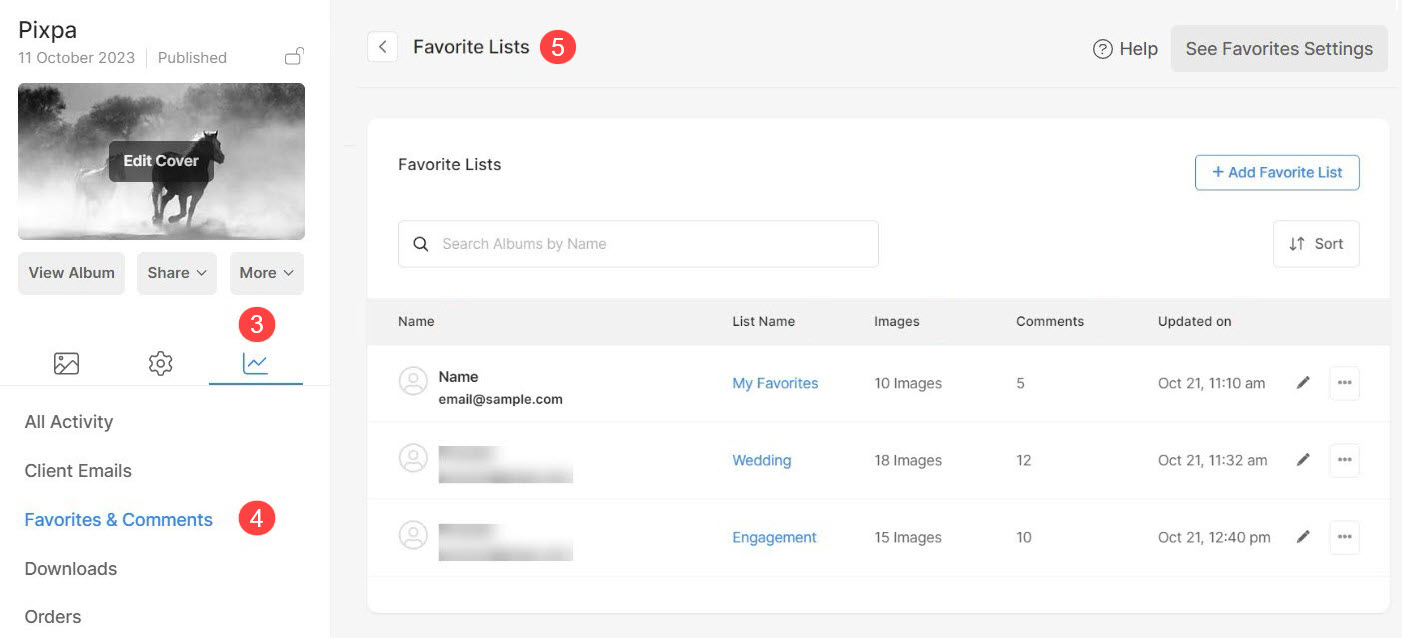
- Click on the Activity (3) icon on the left panel, and then click on the Favorites & Comments (4) tab to view the Favorite Lists (5) page.
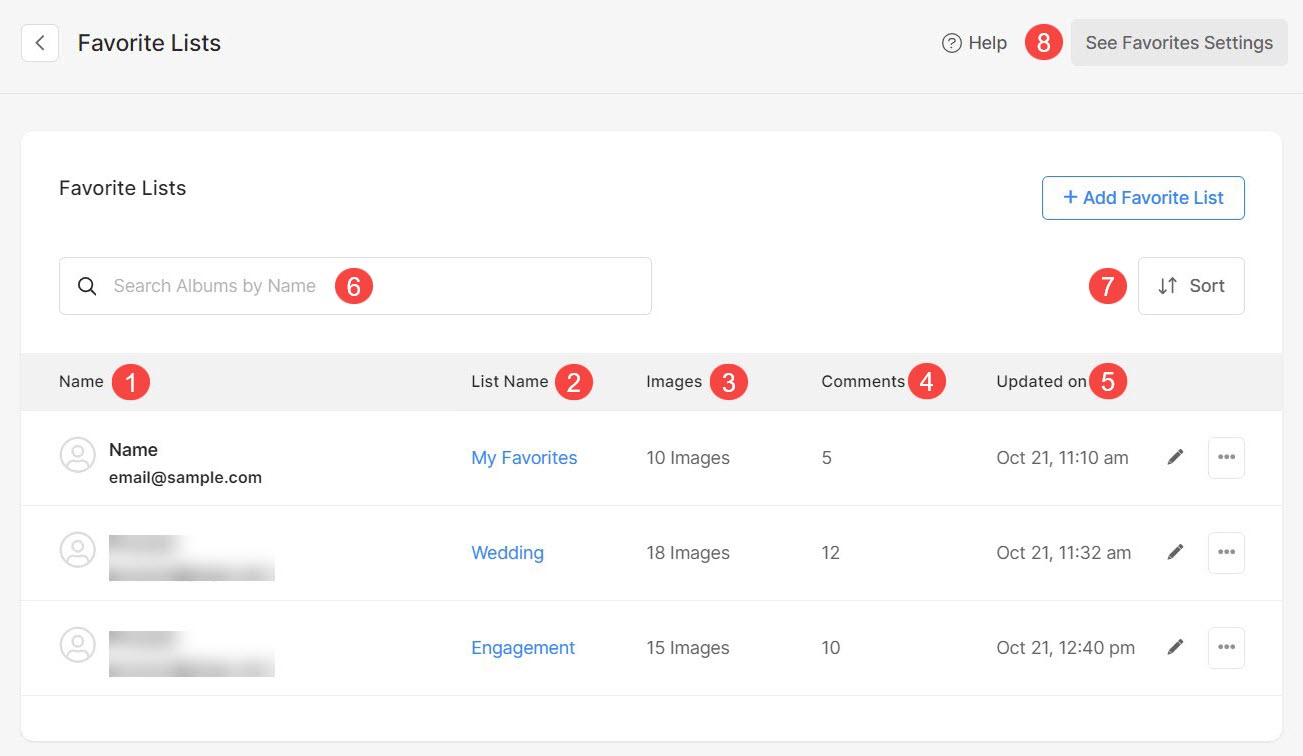
Favorites & Comments Activity Overview
- Name: Name of the clients who have created the favorite list along with the email ID used at the time of login.
- List Name: Name of the favorites list created.
- Images: The number of images marked as favorites / the number of favorited images in a list.
- Comments: The count of comments generated by clients on favorited images.
- Updated on: Last client visit when client logged in to the album and marked favorites or made comments.
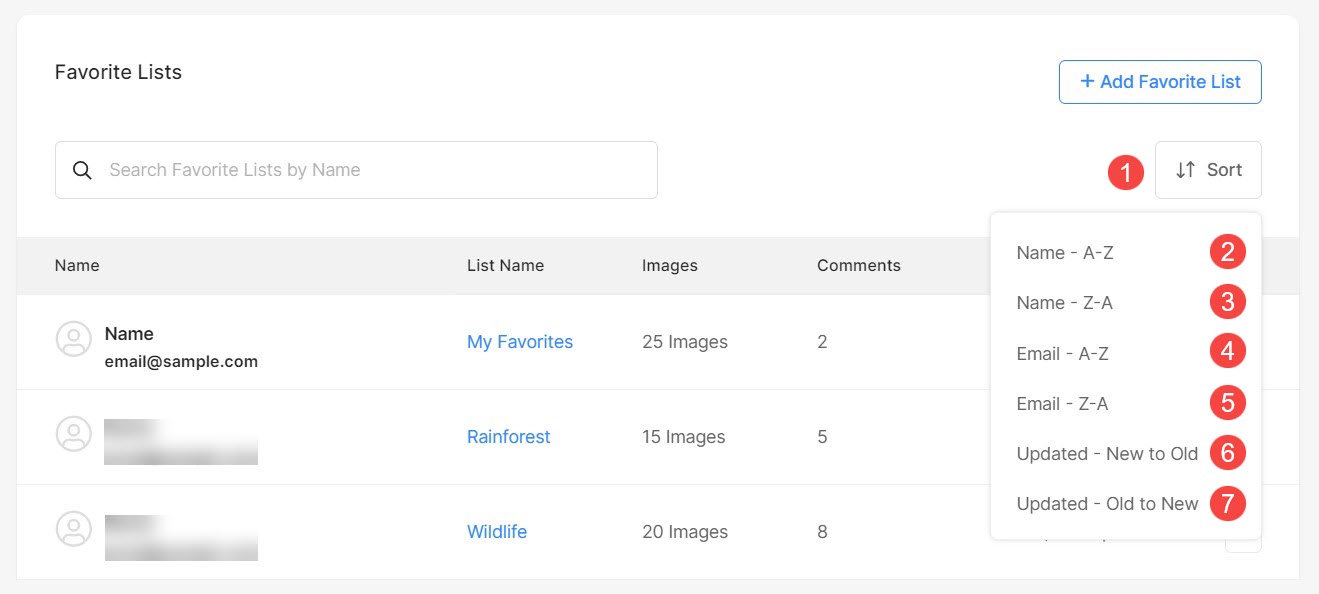
- Search: Type in the name of favorite list to search for it among all the lists.
- Sort: Utilize the sorting options to arrange the list items according to your preference.
- Favorite Settings: Manage the Favorite and Comments settings from here. Know more.
Sorting Options
- Click on the Sort button to view different sorting options.
- Sort the Lists by their name in alphabetical order.
- Sort the Lists by their name in reverse alphabetical order.
- Sort the Lists by email address used to create the favorite list in alphabetical order.
- Sort the Lists by email address used to create the favorite list in reverse alphabetical order.
- Sort the lists by their most recent updates first.
- Sort the lists by their update from old to new.
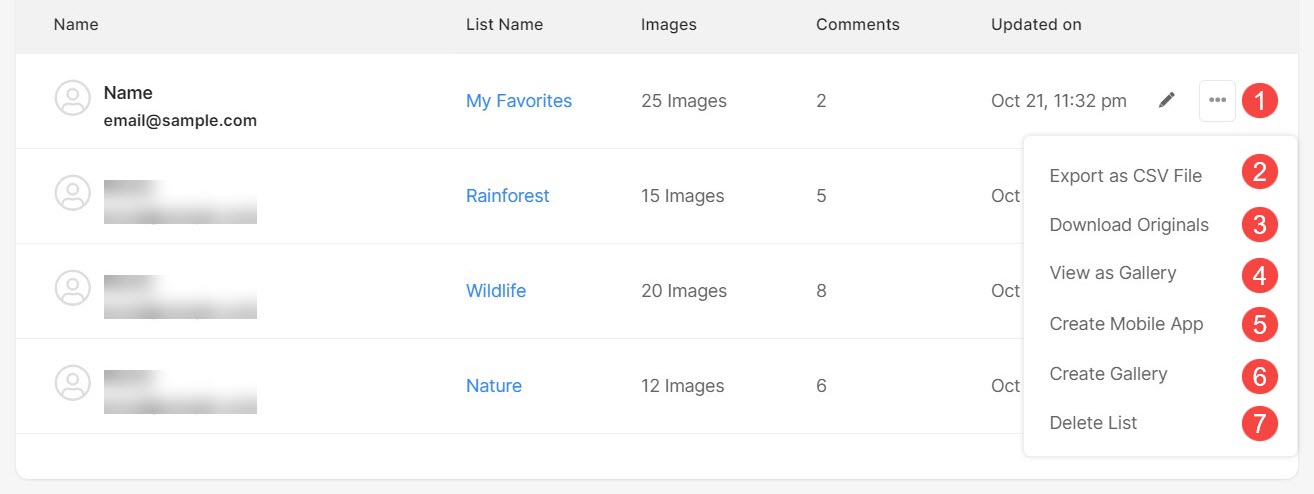
Quick Links for Favorite List
- Click on the three dots to Edit the Favorite List.
- Export filenames as CSV file option under the settings icon on the top right. You can export the filenames of the images in the list as a CSV file.
- Download Original images of the favorited images in this particular list.
- View as Gallery – View all the favorite marked images in this particular list as a gallery.
- Create a Mobile App gallery using your favorite images.
- Create an image gallery of your favorite images.
- Delete this particular favorite list.
Add / Edit a Favorite List
- Add Favorite List: You can easily add a new favorite list for your clients.
- Edit Favorite List: Individual Favorite lists that are already created can also be edited by clicking on the pencil icon.

Add a Favorite List
- Client Email: Enter the Email address of the client for whom you are creating the favorite list.
- Favorite List Name: Specify a name for the favorite list.
- Max Selection: Enter the maximum number of images that can be added to the favorite list. Set as 0 (zero) for unlimited additions.
- Description: Specify a description of the favorite list.

Finally, Save (5) the changes. A new favorite list will be created.
Edit a Favorite List
- Client Email: While editing a favorite list, you cannot change the Email ID.
- Favorite List Name: Specify a name for the favorite list.
- Max Selection: Enter the maximum number of images that can be added to the favorite list. Set as 0 (zero) for unlimited additions.
- Description: Specify a description of the favorite list.
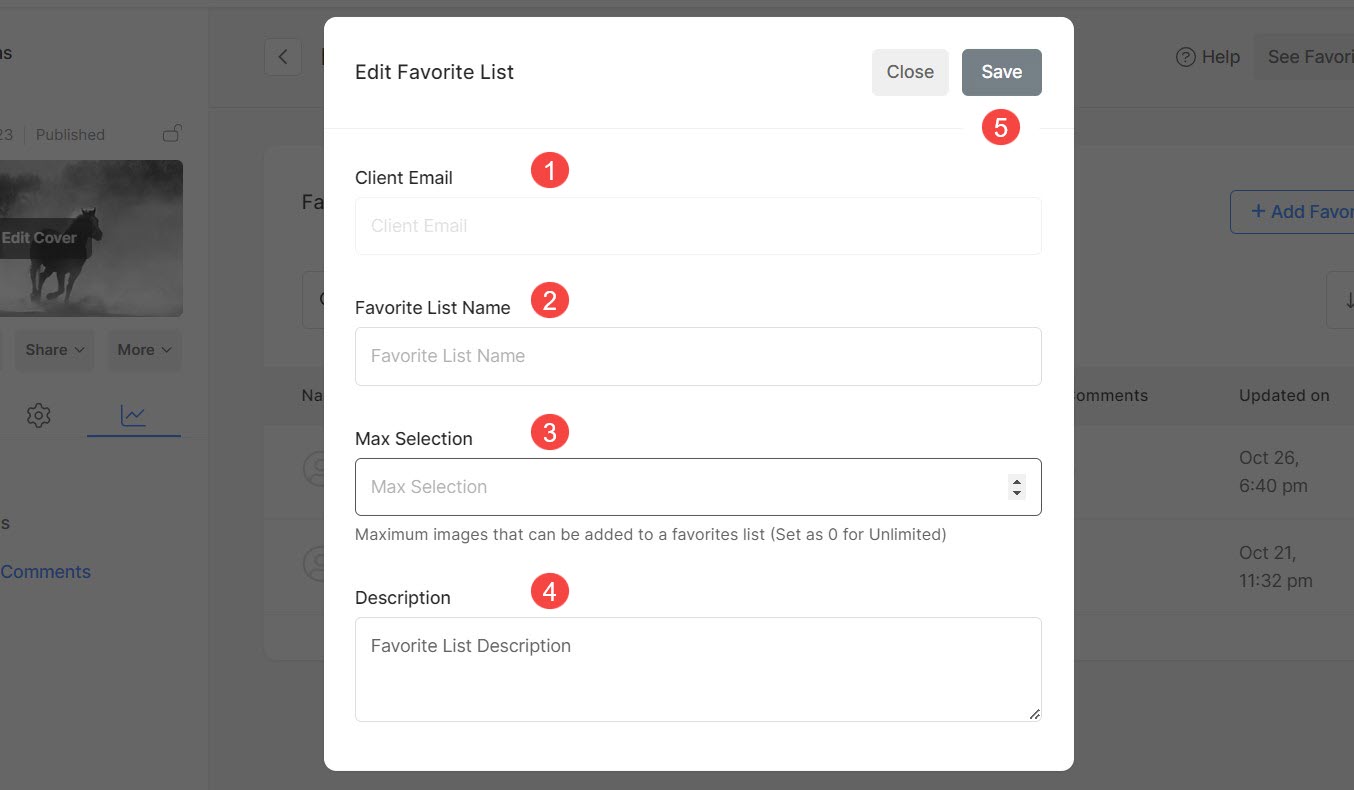
Save (5) the changes.
Favorites & Comments Options
- The list name with images count.
- Client name and email ID who have created this particular list along with list creation and last updated date.
- All the photos with the file name and the favorited on date.
- Edit the Favorite List.
- Export filenames as CSV file option under the settings icon on the top right. You can export the filenames of the images in the list as a CSV file.
- Download Original images of the favorited images in this particular list.
- View as Gallery – View all the favorite marked images in this particular list as a gallery.
- Create a Mobile App gallery using your favorite images.
- Create an image gallery of your favorite images.
- Copy the file names of the favorite images to use in the Lightroom for an easy search of images in order to edit.
- Delete the entire favorite list.
- Delete an image from the favorite list.
- Back to Favorite Lists page option to go back.

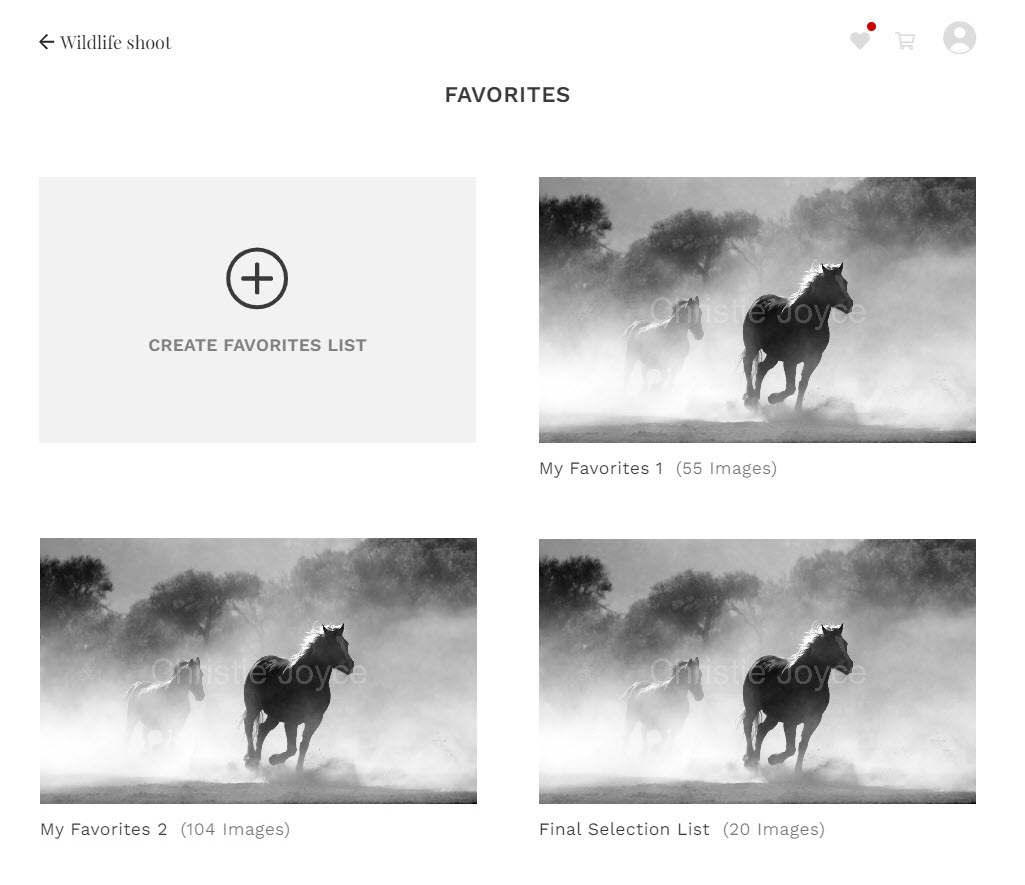
Move / Copy Images between Favorite Lists
Your clients can easily move or copy images between different favorite lists they have created. Clients can also create a new favorite list while Moving / Copying images.
This functionality enables users to refine their selection. For instance, if a user marks 100 images across multiple galleries simultaneously, they can curate a final selection list, choosing, for example, 40 images from the initially selected favorites.
In order to move or copy images to a different favorite list, clients need to follow the steps mentioned below:
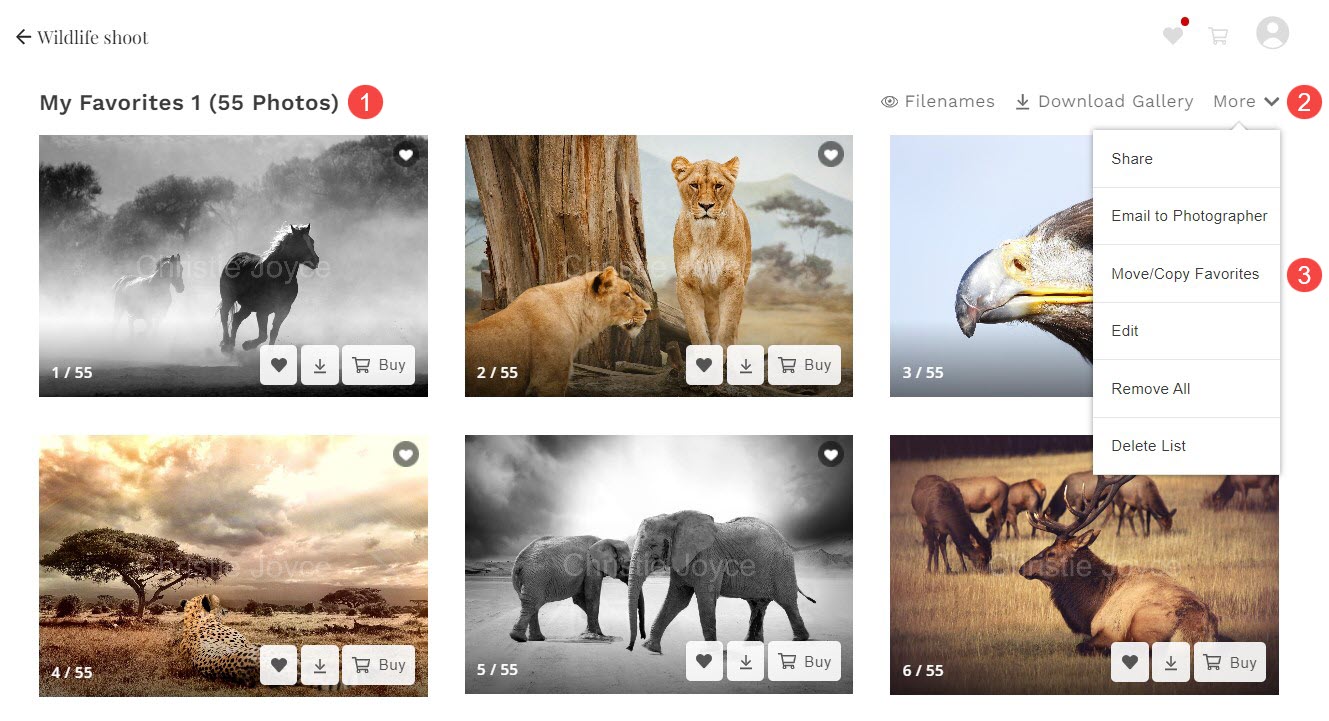
- Open the Favorite List (1) from where the images need to be transferred.
- Click on More (2) tab and then click Move / Copy Favorites (3)
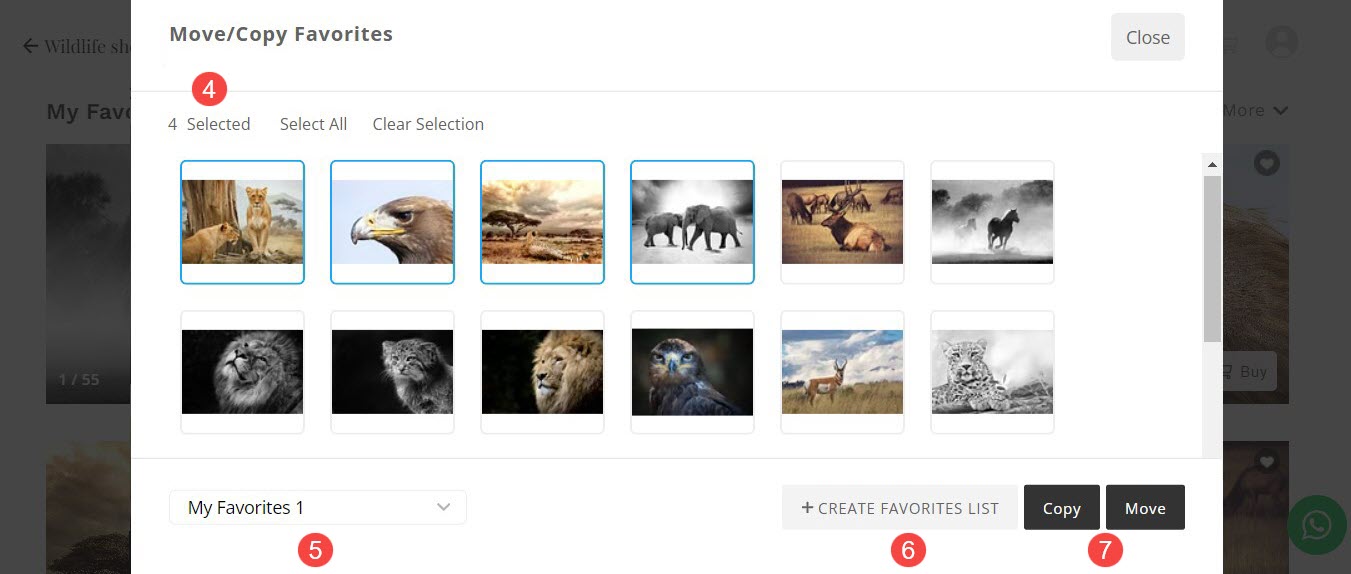
- Select the images (4) and the the favorite list (5) wherein, images will be transferred.
- Clients can also Create Favorite List (6) from here.
- Click on Copy / Move (7) button. Images will now be moved / copied.
Click here to learn how to navigate to the favorite lists that clients have created.
Compare Favorited Images
This allows your clients to effortlessly compare images that they have marked favorites.
This tool offers an enlarged side-by-side view of images, facilitating clients in easily discerning differences and aiding them in the image selection process.
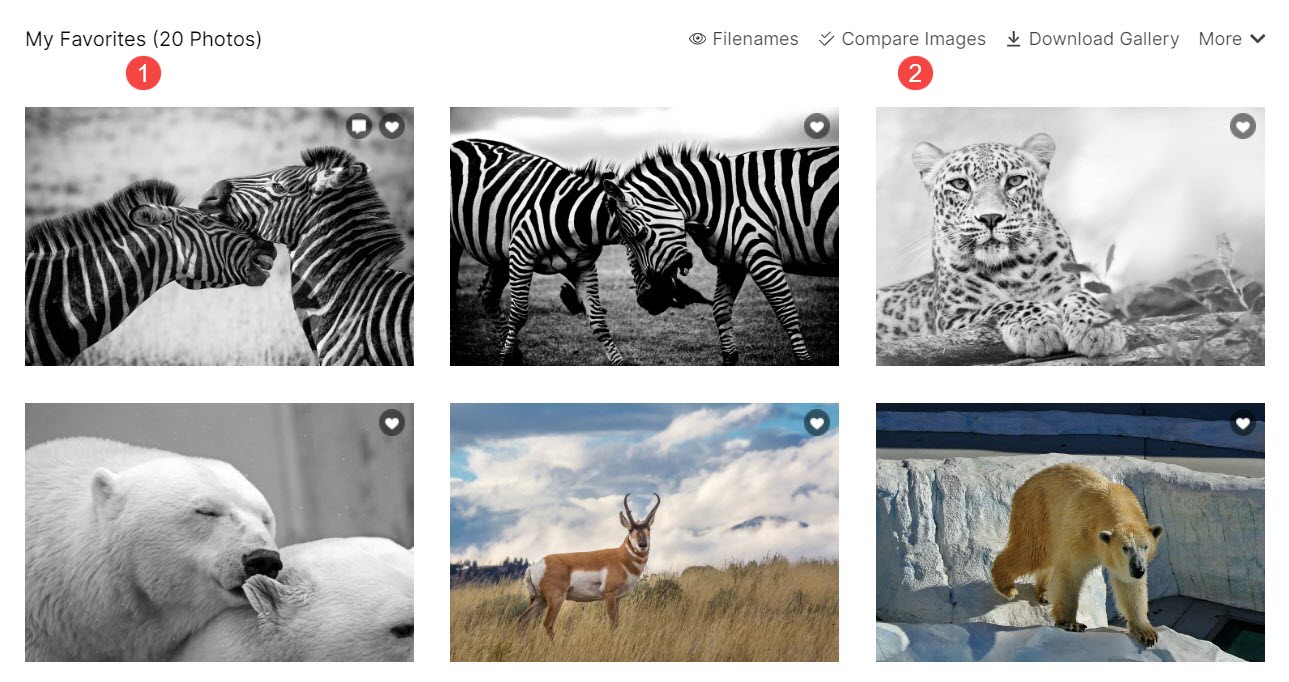
This is what the comparison window looks like:

In order to compare favorited images, clients need to follow the steps mentioned below:
- Open the Favorite List (1) where clients wish to compare the images.
- Click on the Compare Images (2) tab to select images.
- Select the First (3) and Second (4) image.
- Click on View Compare (5) to open the comparison window.
- Click on ✖ (6) icon to close the image selection window without comparing the images.
