Pixpa allows you to streamline your workflow by creating Album Presets for your Client Galleries. Album Presets help you save time by applying predefined design and settings configurations to new albums, ensuring visual consistency and reducing repetitive work.
With Pixpa, you can now create up to 5 different Album Presets, each with its own unique style and settings. These presets can be selected at the time of creating a new album, allowing you to easily apply the right style depending on the client or project type.
If you want to override any of the settings specified here for a specific album, you can do it from the Album Settings.
In this article:
Manage the Album Presets:
- Enter Album Presets (1) in the Search Bar.
- From the related results, click on the Album Presets (2) under Studio Links.
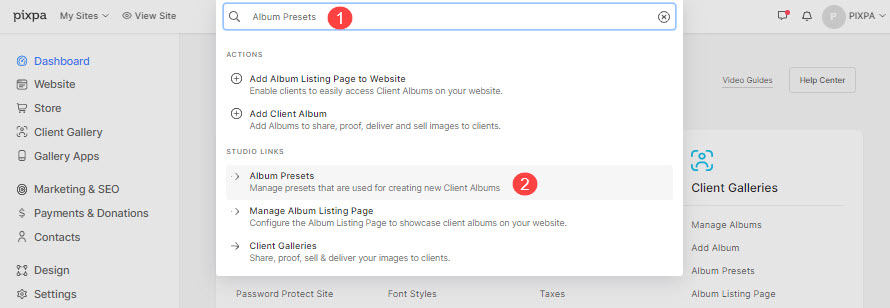
- You will now reach the Album Presets page.
Create different Album Presets
- Add Album Presets – Click the + Add Album Presets button to create a new preset. You can create up to 5 presets with different styles and settings based on your needs.
- View all Presets – This section displays all your existing album presets. You can name them based on the type of albums you create. These presets will appear as selectable options when creating a new album.
- Edit a Preset – Click on the three-dot menu next to any preset and select Edit to update its design and settings.
- Duplicate – Use the Duplicate option to quickly create a new preset based on an existing one.
- Delete – You can remove any user-created preset using the Delete option from the menu.

Edit an Album Preset
The available settings on Album Preset edit page are categorized as:
Options
The settings here are:
- Visibility – Set the visibility of the upcoming albums as active (visible to everyone) or unpublished(visible to only you).
- Include in Album List Page – Select this option to include the upcoming albums in the Album List Page.
- Show Photographer Info to your clients. You can specify this information on the My Account page.
- Enable User Guide option for newly created albums.
- Enable Social Media Sharing of the upcoming albums.
- Enable Filtering by Tags in the upcoming albums.
- Enable Compare Images option.
- Show Filename – Check in this option to show the filename under the image in the lightbox mode.

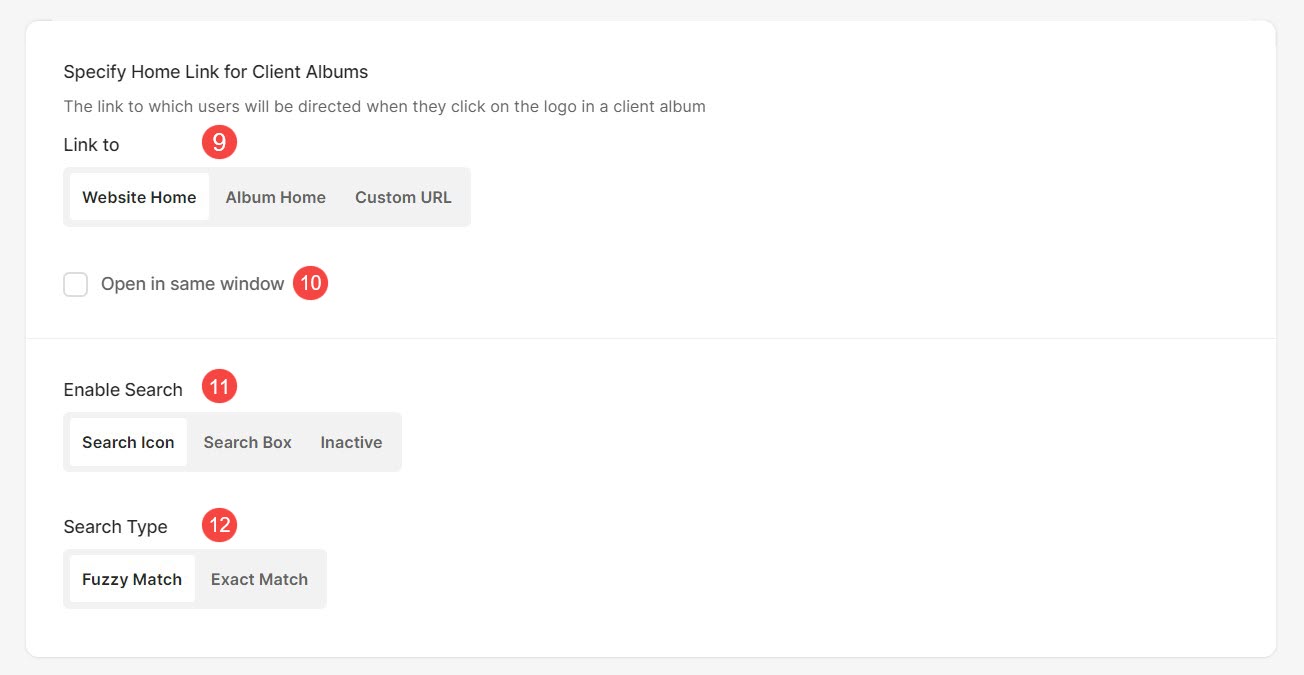
- Specify if the link should be opened in the same window or not.
- Enable the image search option for the upcoming albums. The image filenames or keywords can be used for searching.
- Choose the Search Type (3) as a fuzzy/similar match or an exact match.
- In case you have chosen a Fuzzy match and are searching for Brown Shirt (for instance), the search result will contain all the results which have Brown, Shirt, and Brown Shirt terms in them.
- In case you have chosen an exact match and are searching for Brown Shirt (for instance), the search result will contain all the results which have only Brown Shirt term in them.
Privacy
- Choose the Public Album (1) option to make the upcoming albums public, which means that anyone with the album link can access the album.
- Choose the Password-protected Album (2) option to make the album password-protected. Visitors will need to submit the password you specify here to access the album.
Album Landing Page
- You can bypass the landing page in case of a public album, which means that anyone with the album link would directly land on the gallery images instead of the login page.
- Request name and email address from visitors (4) – You can enable this option to request name and email on the landing page which will make everyone submit their name and email to access the album. This way, you can collect the details of everyone seeing the album and export the email IDs later.

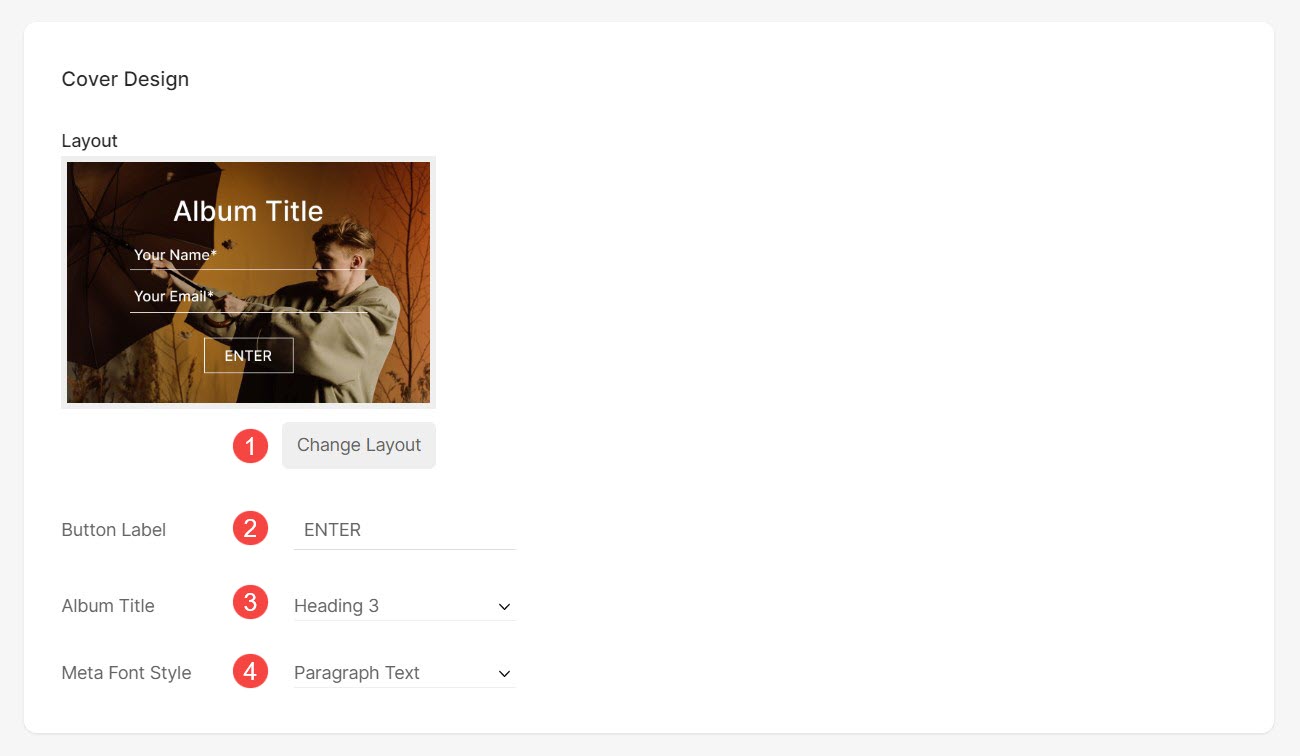
Cover
- Change the Layout of Album cover page. You can choose to display an image or link a video that will play in the background. Learn more.
- Specify the Button Label for button on album cover page.
- Set the default Album Title font style for newly created albums.
- Meta Font is used to display the event date of the album on Album Cover page. Select the text style for Meta font.
Layout
Here are the default design settings for the upcoming albums:
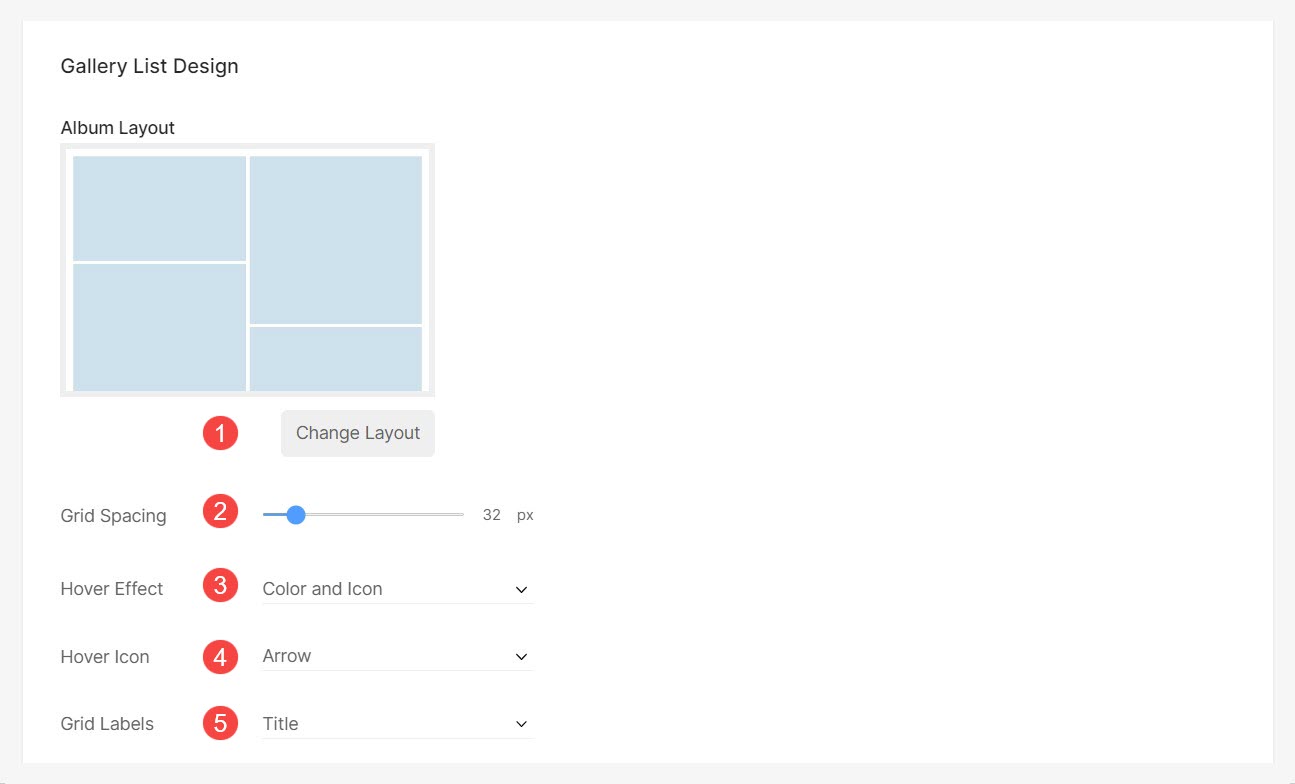
- Album Layout – Choose a layout that will be applied to the upcoming albums. You can choose from 13 layouts to show the galleries of the album.
- Grid Spacing – Specify space between the galleries in the grid layout. (0- 250 pixels).
- Hover Effect – The hover effect will be used only in a grid layout. You can show the following options on hover in grid mode.
- No Effect – There will be no effect on hover.
- Color – The hover color gets displayed on hover.
- Color and Title – The hover color and title get displayed on hover. You can set the overlay color and sub-item title text color/font/size/weight from the Design section.
- Color and Icon – The hover color and icon get displayed on hover.
- Color, Title, and Icon – The hover color, title, and icon get displayed on hover. You can choose any icon like plus, arrow, cross, and eye from the below option.
- Hover Icon – You can add a hover icon to your galleries. The available options are – plus, arrow, cross, and eye.
Note: Only applicable if an icon is selected in point 3. - Grid Labels – You can show gallery titles under the grid images with titles/titles and tags.
Default design settings for the upcoming galleries inside albums:
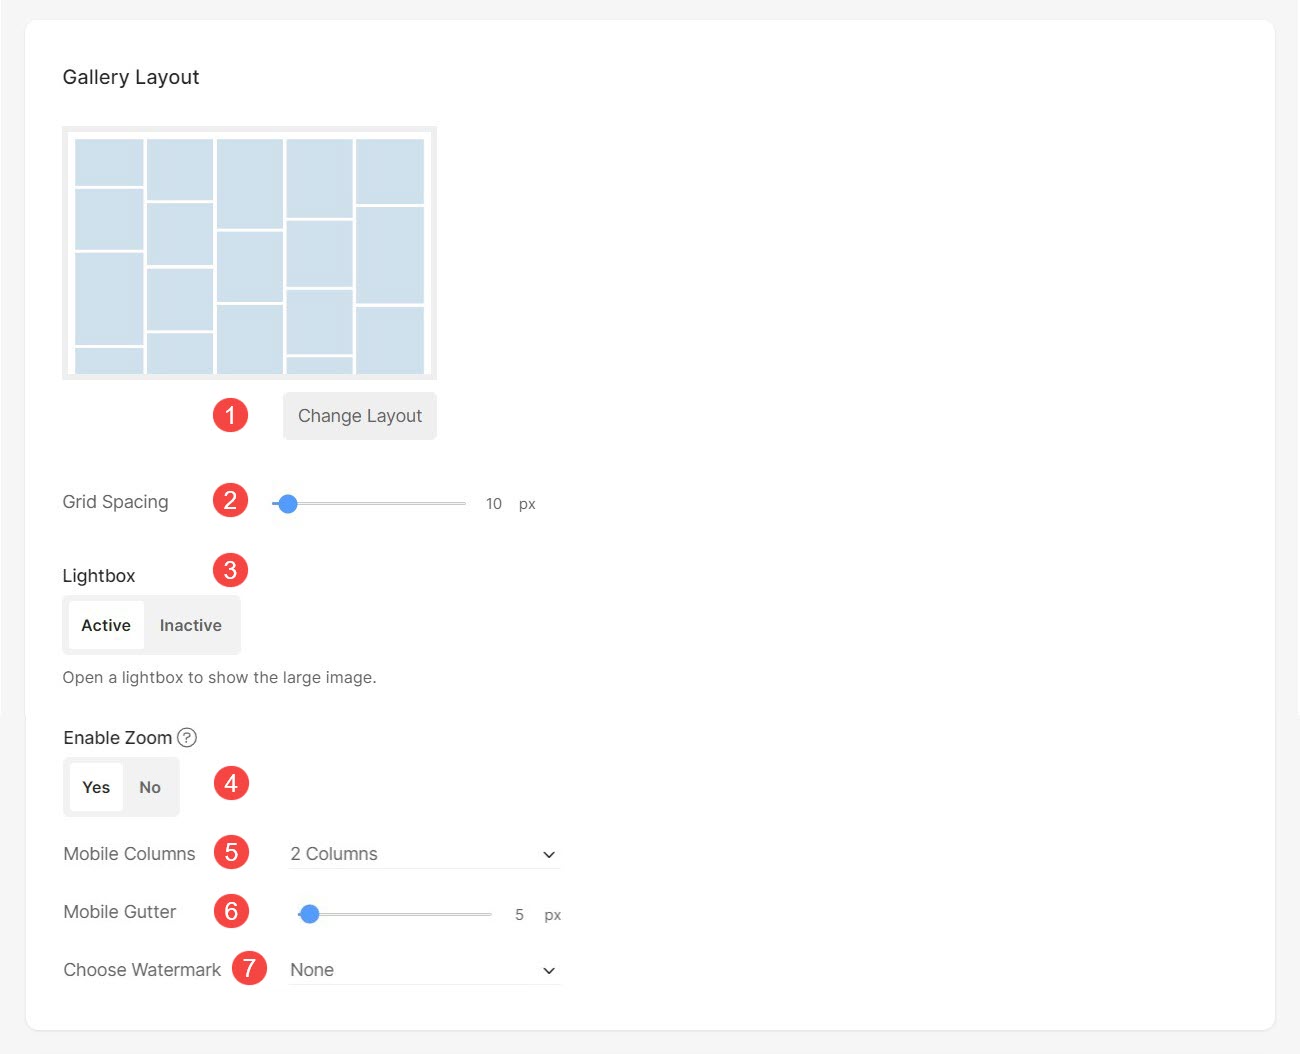
- Gallery Layout: Choose a layout that will be applied to all the upcoming galleries.
- Grid Spacing: Specify space between the galleries in the grid layout. (0- 250 pixels).
- Lightbox: When images are displayed in a grid, clicking on an image opens it in Lightbox mode (full-image display).
- Enable Zoom: Enable/Disable zoom over images in Lightbox mode.
- Mobile Columns: Choose from 1, 2, or 3 column view for grid display in mobile view.
- MobileGutter: Set the spacing between images in mobile view.
- Choose Watermark: Select a watermark to be applied on images from the dropdown.
Also Check: Album design and layout.
Favorites & Comments
Favorites
- Allow clients to mark images as favorites – Choose if clients can mark images as favorites or not.
- Allow Customer to create new favorite list – Choose if clients can create a new favorite list or not.
Also Check: Manage favorites and comments options.

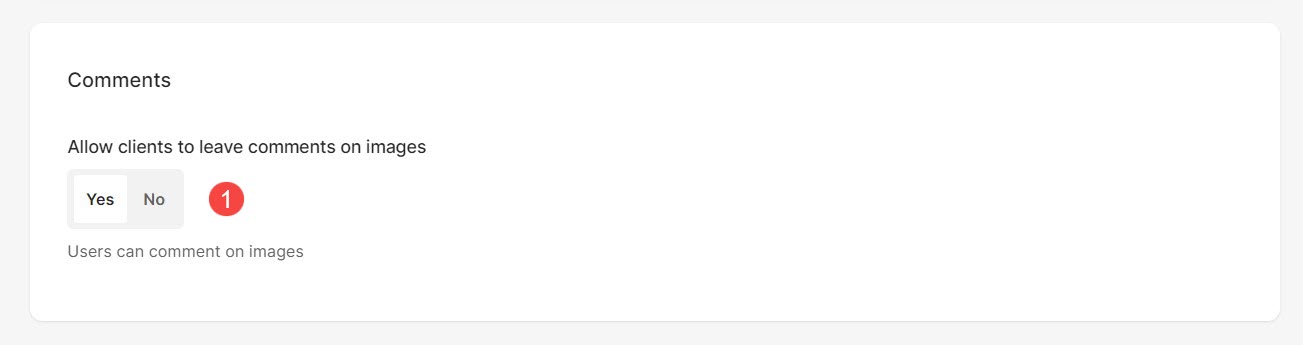
Comments
- Allow clients to leave comments on images – Users can comment on the images that they have marked as favorites. Only one comment can be made per image.
Also Check: Manage favorites and comments options.
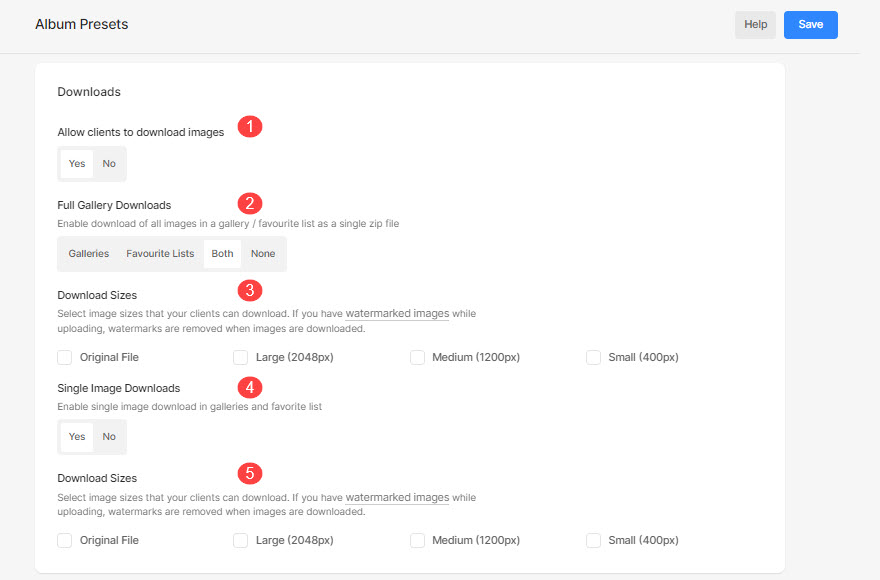
Downloads
- Allow clients to download images – Downloads can be enabled for both public or private albums.
- Download sizes – Specify the image sizes available for download. Pixpa makes 4 sizes available for download. You can enable download for any or all of these image sizes (Original file, Large 2048px, Medium 1200px, and Small 400px).
Also Check: Manage album download settings.
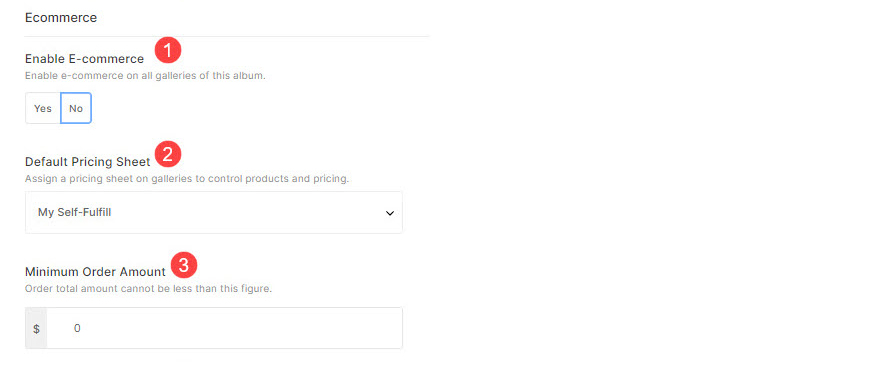
Ecommerce
- Enable Ecommerce – Enable/Disable the eCommerce on the upcoming albums.
- Default Pricing Sheet – Select the default pricing sheet for the upcoming album.
Also See: Album Ecommerce Settings.
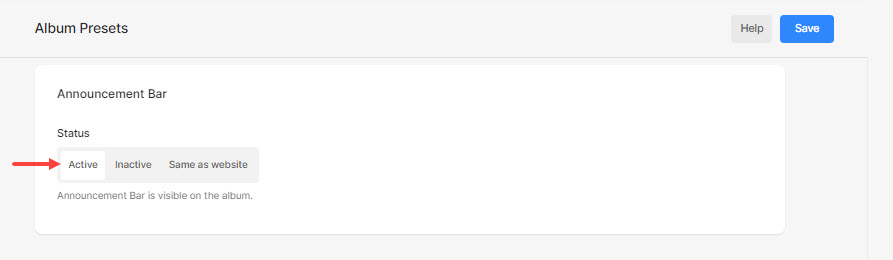
Announcement Bar
Status – You can set the status of the bar as:
- Active – Choose this option to enable the bar.
- Inactive – Choose this option to disable the bar.
- Same as website – Choose this option to enable the website bar on the album page too. Status and content of the Website Announcement Bar will be used.