An Album is a group of galleries that you can share with anyone publicly or privately.
For example, if you have shot a wedding for a client, you can create an album for that client and include multiple galleries in it to cover all the events that you shot.
In this article:
Add an Album:
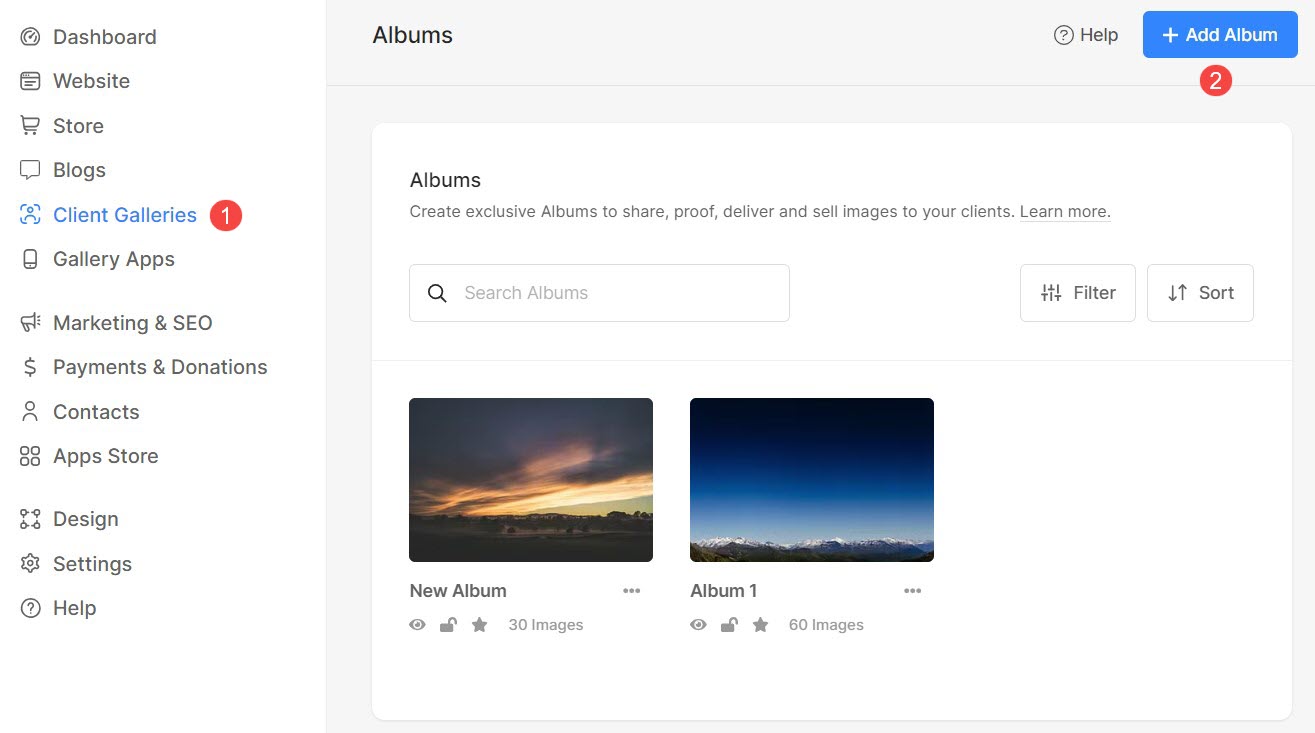
From the Dashboard of studio, click on Client Galleries (1) and Add Album (2).
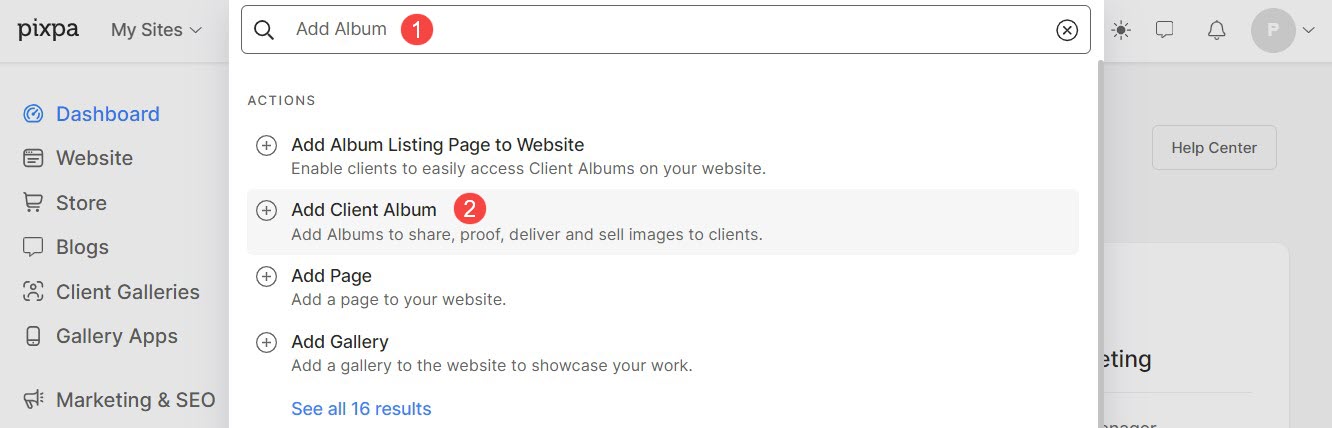
Alternatively, you can also use the studio’s search option.
- Enter Add Album (1) in the Search Bar.
- From the related results, select Add Client Album (2) option.
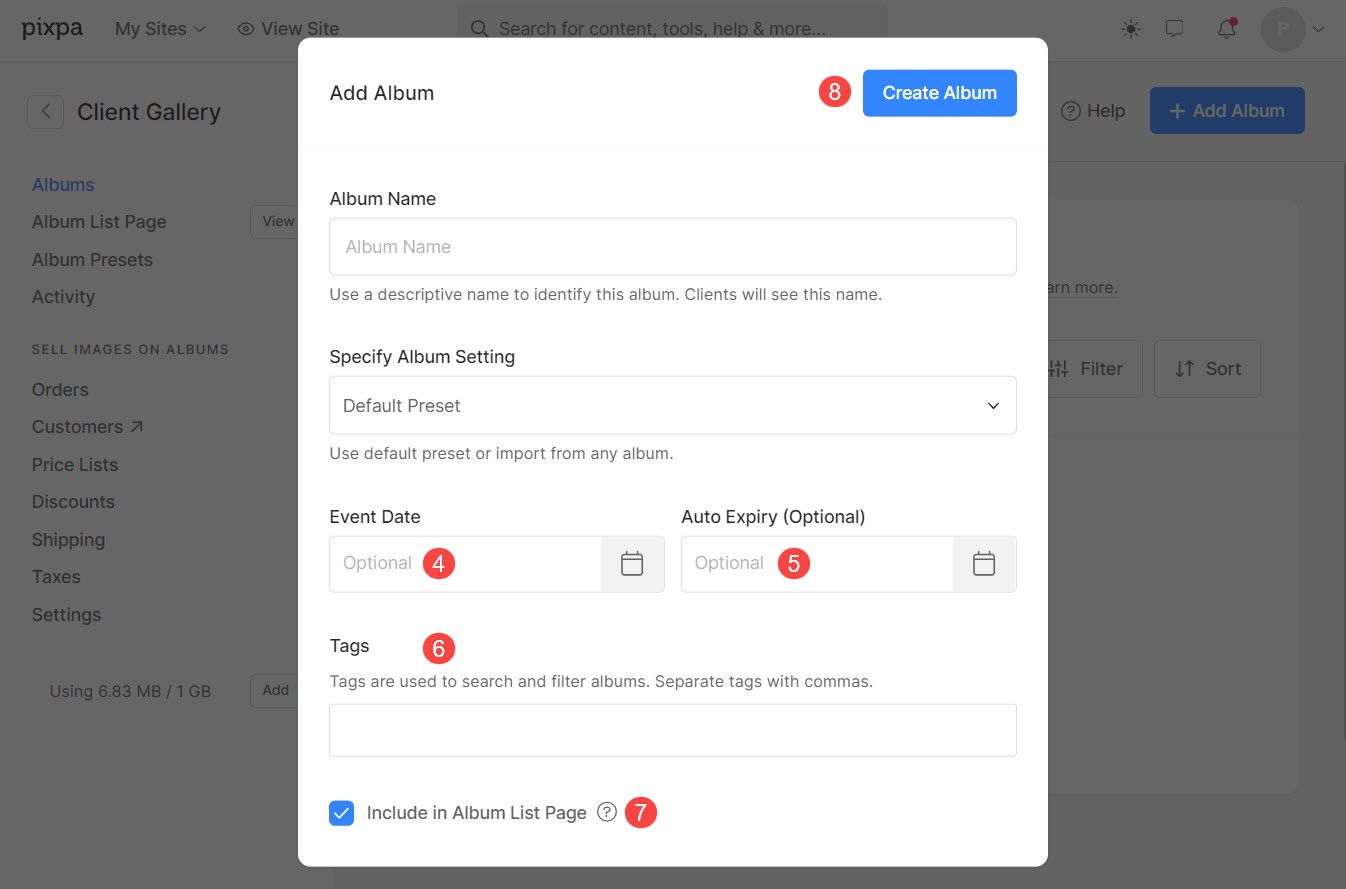
- You will now see a window where you can specify your Album Name (1) and choose Album Settings (2).
- Click on Advanced Settings (3) to view more options.

Under Advance Settings, you will see following options:
- Specify the Event Date (4).
- Set the Expiry Date (5) of the album.
- Add Tags (6) that are used to search and filter the albums.
- Check Include in Album List Page (7) to display the album on proofing page.
- Click on Create Album (8) button to add the album.
That’s it! Your album has been added.
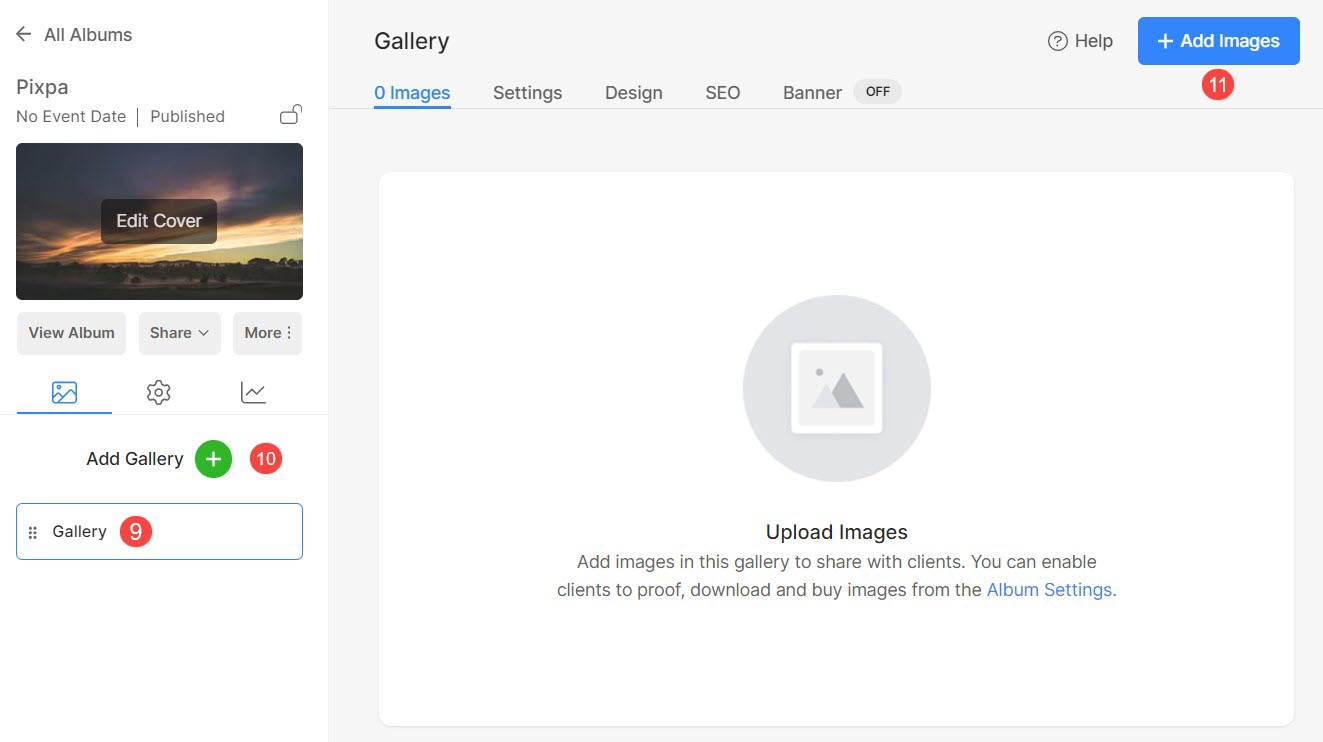
- By default, a Gallery (9) will be added inside the album.
- You can add multiple galleries by clicking on Add Gallery (10) link.
- Now you can start to upload your images by clicking on Add Images (11) button.
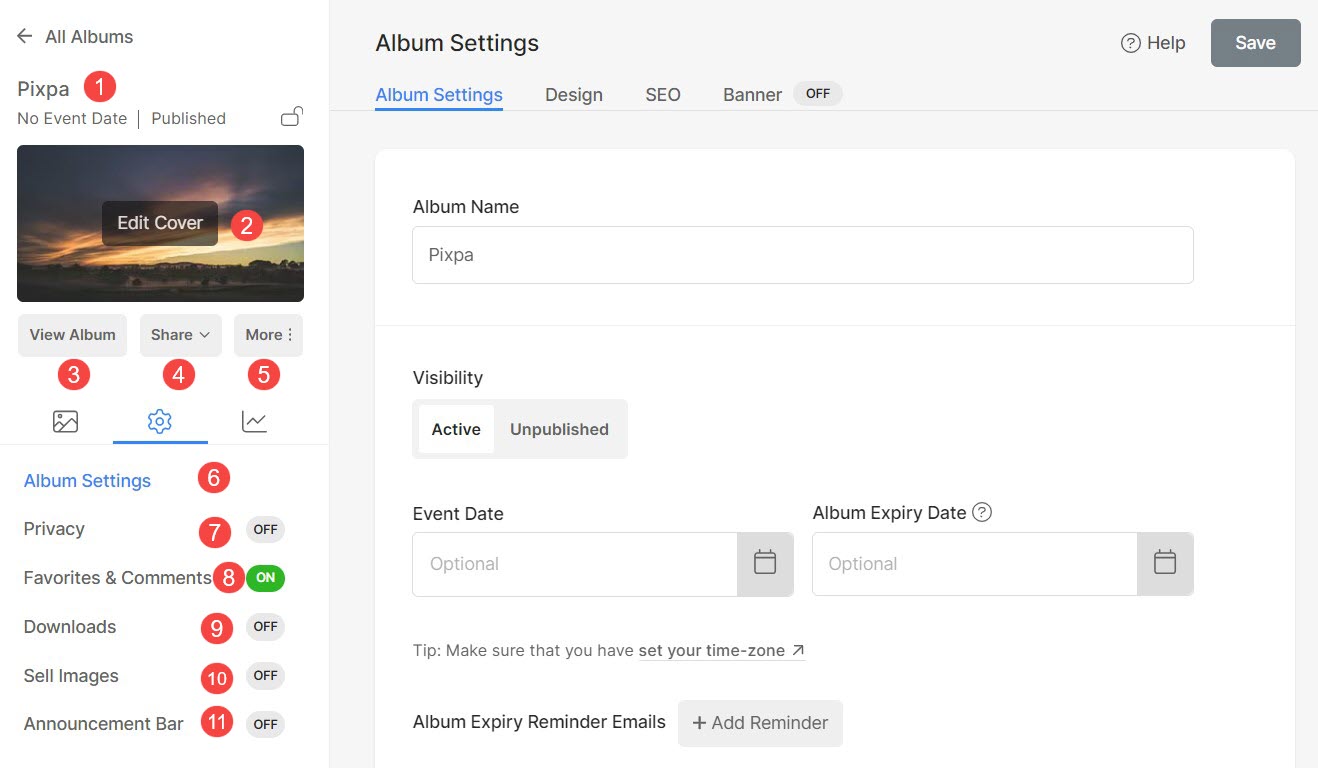
Manage Album settings
You can manage the settings like Album Settings, Privacy, Favorites & Comments, Downloads, eCommerce, and Announcement Bar from the Settings tab.
- View the Active Album name that you are currently managing.
- Add or replace the Cover Image fir the album.
- View Album to check the look.
- Share – Share your Album via Email with your client. You can get the Album ID from here. See how to use it.
- View more options such as Edit Album, View Activity and Delete Album.
- Album settings – Manage the Album name, Design, and Banner.
- Privacy – Manage the Privacy settings of the Album.
- Favorites & Comments – Enable/Disable favorites & comments for the Album and Galleries.
- Downloads – Enable/Disable downloads for the Album and Galleries.
- Sell Images – Enable/Disable store for the particular Album.
- Announcement Bar – Manage the announcement bar of the Album.
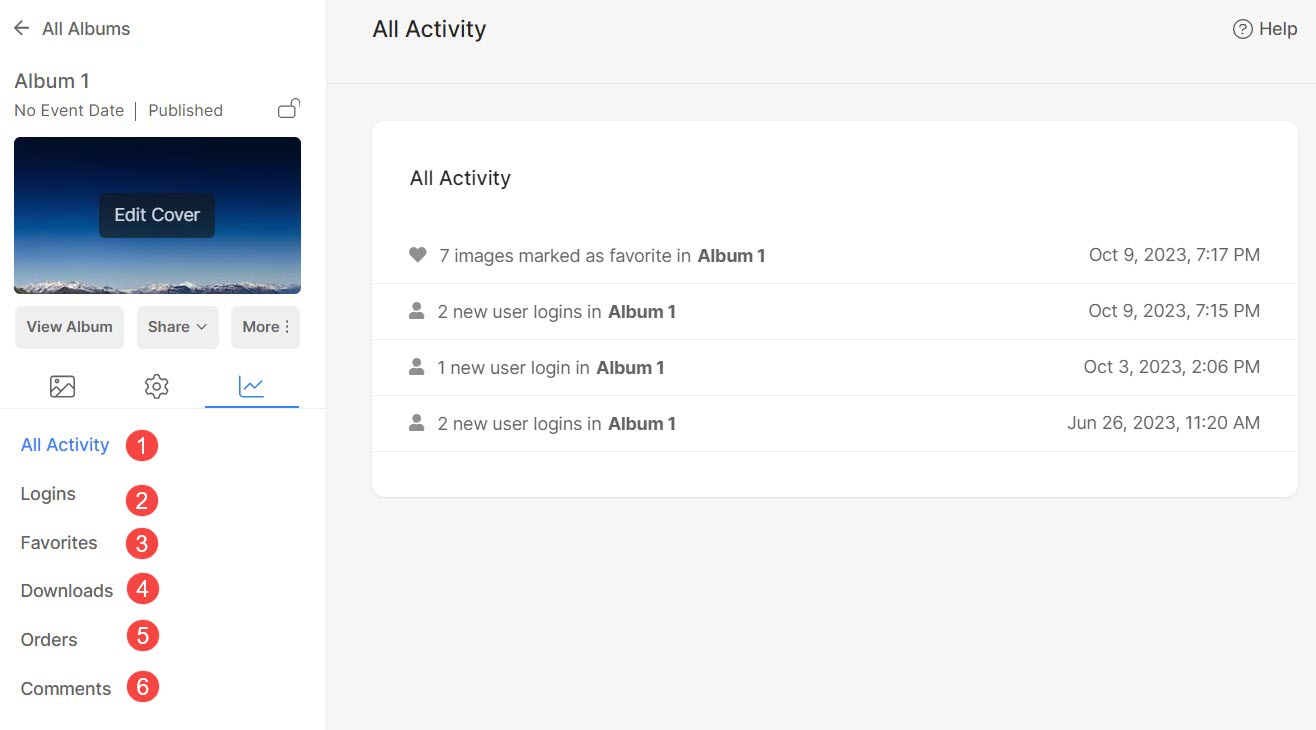
Manage Album Activity
Track your customer’s activity like favorites, downloads, logins, etc. of a particular Album.
- All Activity – Check all the notifications related to an Album.
- Logins – View your client’s login activity on an Album.
- Favorites – View your client’s favorite activity on an Album.
- Downloads – View your client’s download activity on an Album. You can view the full gallery, single photo, and favorite-marked downloads.
- Orders – View any orders/eCommerce activity on an Album.
- Comments – View and manage the comments on an Album.