Pixpa allows you to change the layout of the product listing page and product detailed page. Do check out the below links to see the difference between them:
Apart from the layout, you can manage the product title/metadata font, related products, and breadcrumb navigation.
In this article:
Customize the Product Detail page design:
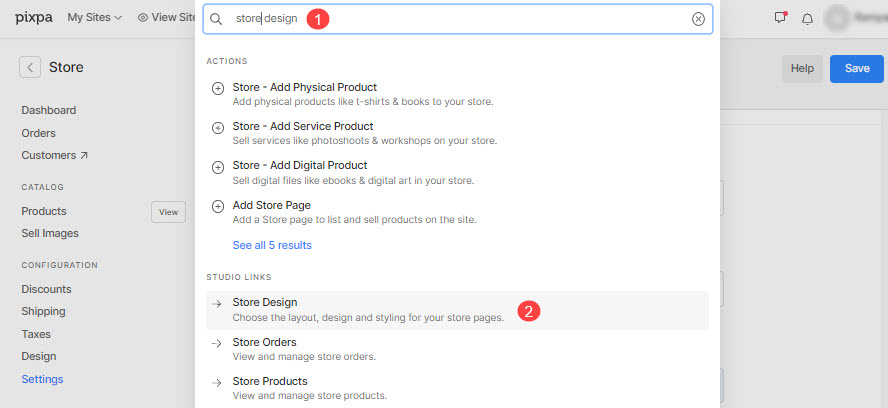
- Enter store design (1) in the Search Bar.
- From the related results, click on the Store Design option (2) under Studio Links.
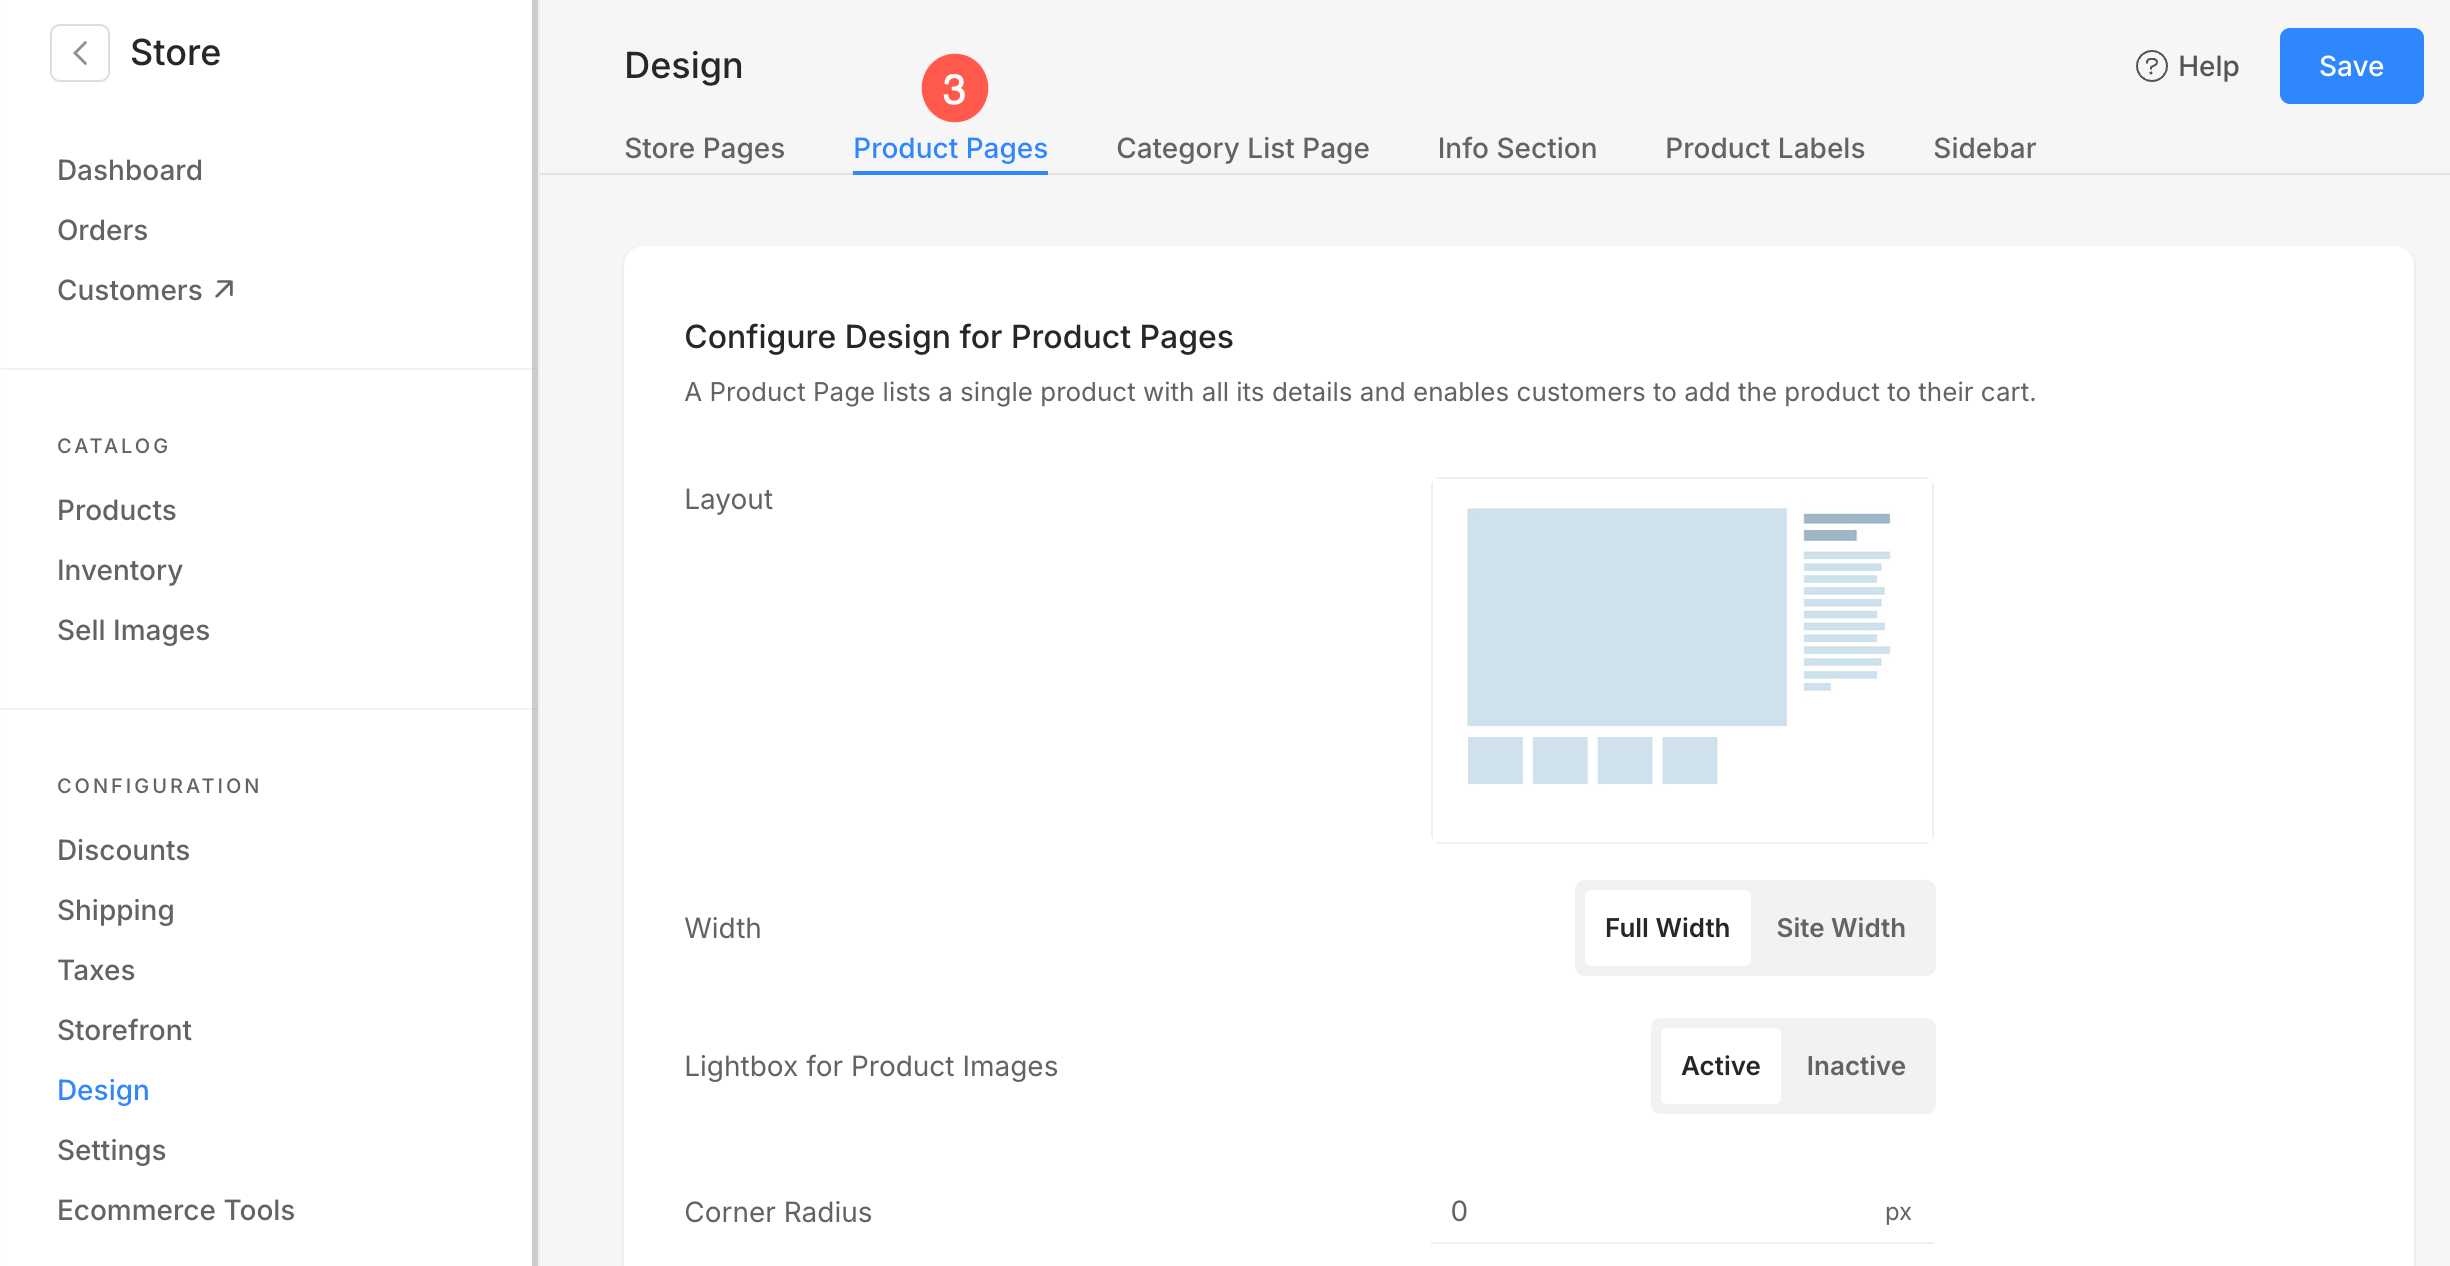
- Now, from the Product Pages (3) tab, you would see the design options for the product page.
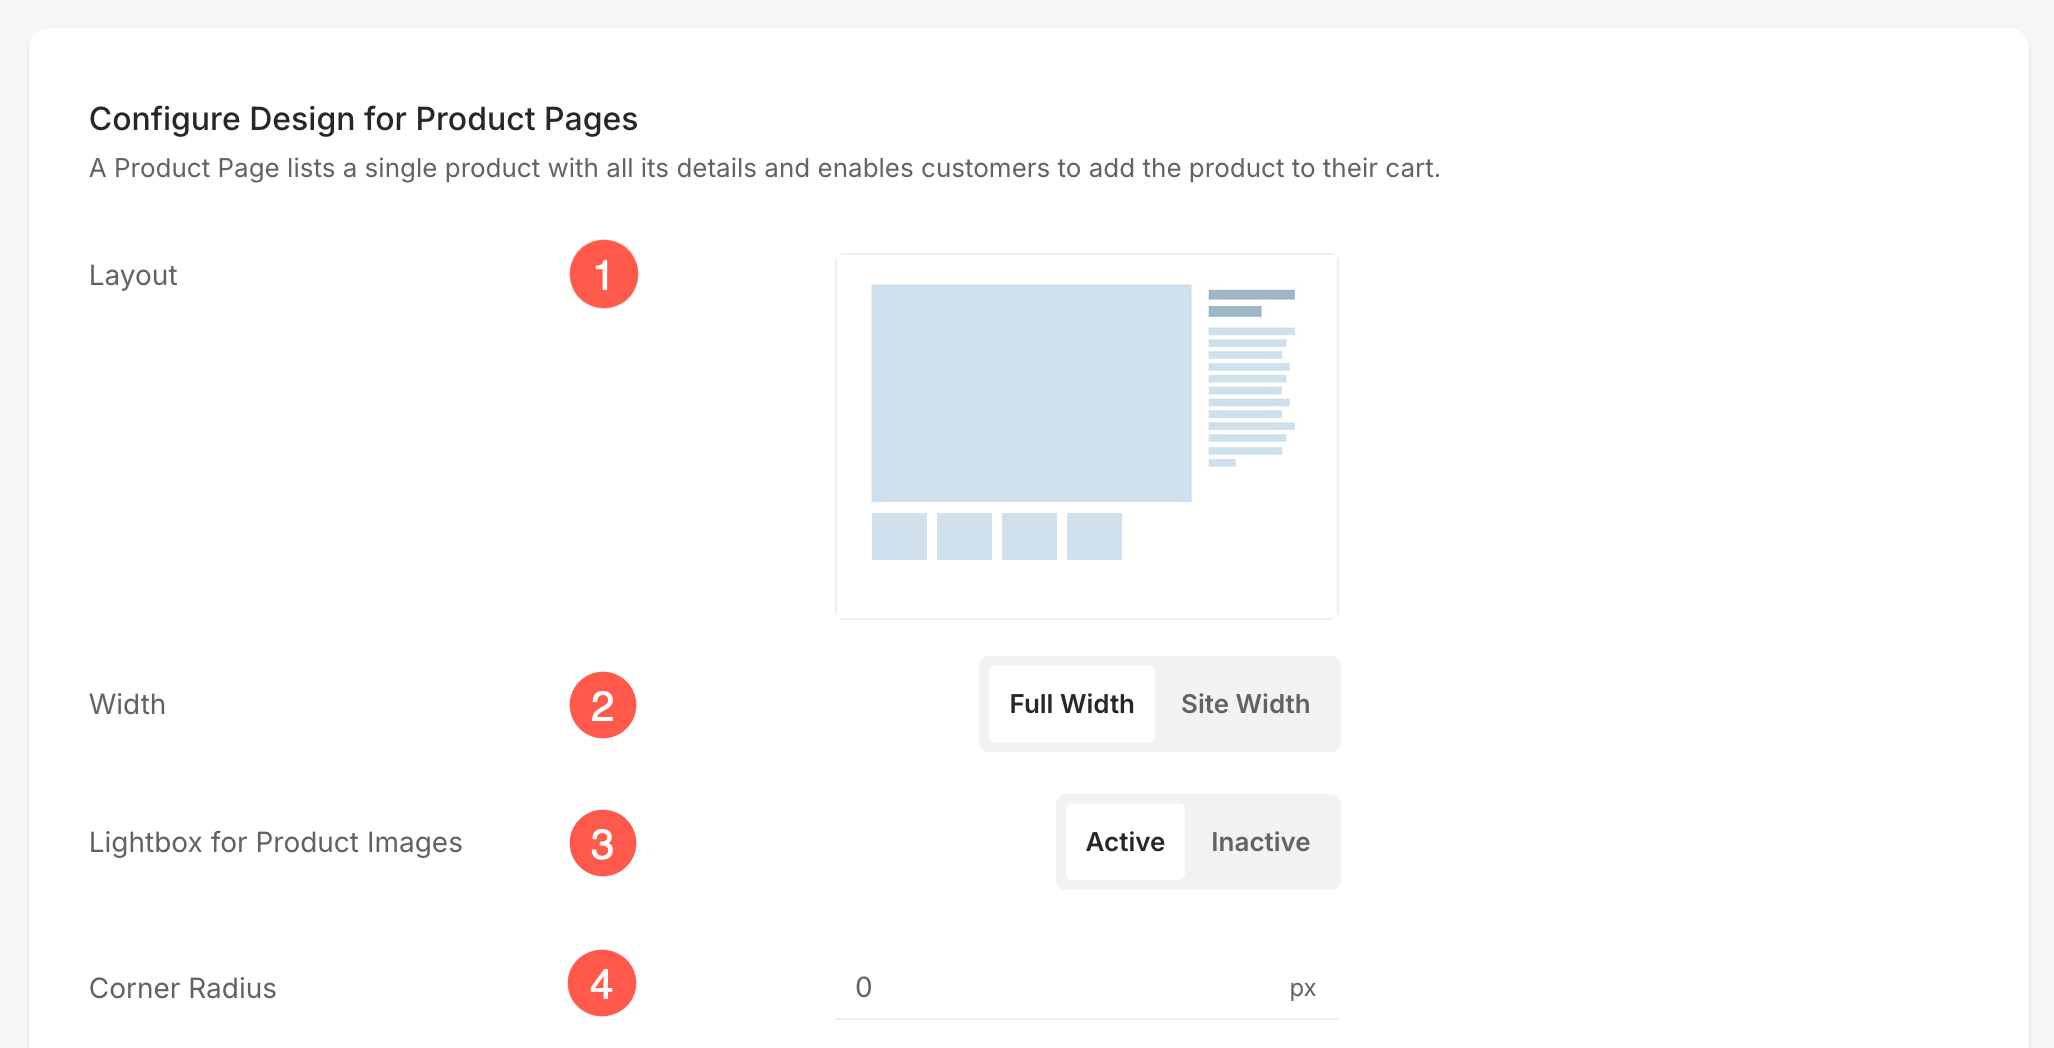
This would take you to the layout page, from where you can choose the layout for your product page.
Layout
- Layout – Choose the layout for the product detail page.
- Width – Select the width for the product detail page.
- Full width‘ will display the product page while covering the entire width without leaving any margin.
- ‘Site width‘ can be specified in the Design section. You can specify a fixed width there.
It will display the product page by adhering to the fixed-width specified.
- Lightbox for Product Images – Turn it on to allow lightbox mode for product images.
- Corner Radius – Customize the corners of images on product page by adjusting the corner radius to make them rounded or square. This includes product images, thumbnail images, and images of related products.
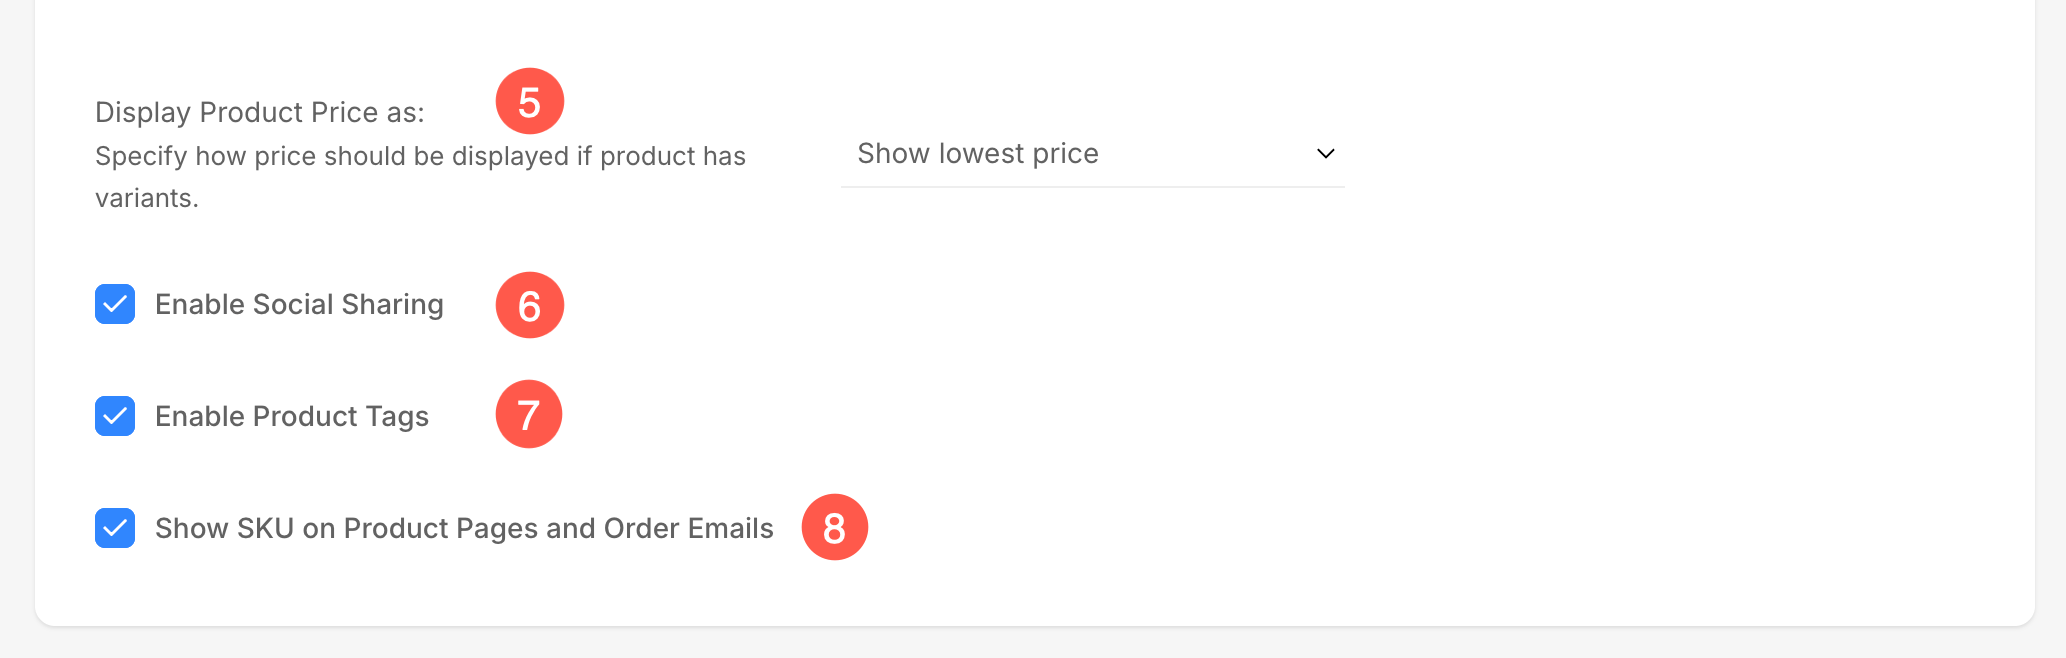
- Enable Social Sharing – Check in this option to display social icons for sharing on the product detail page.
- Enable Product Tags – Check in this option to display tags that have been added to the product on the product detail page.
- Show SKU on Product Pages and Order Emails – Enable this option to display the SKU (Stock Keeping Unit) on product detail pages and in order emails. The SKU will appear on the store’s product pages in real time for both old and new products. For order emails, the SKU will only be included in emails sent after the option has been enabled. This helps in better inventory tracking, product identification, and smoother order management for both the store owner and customers.
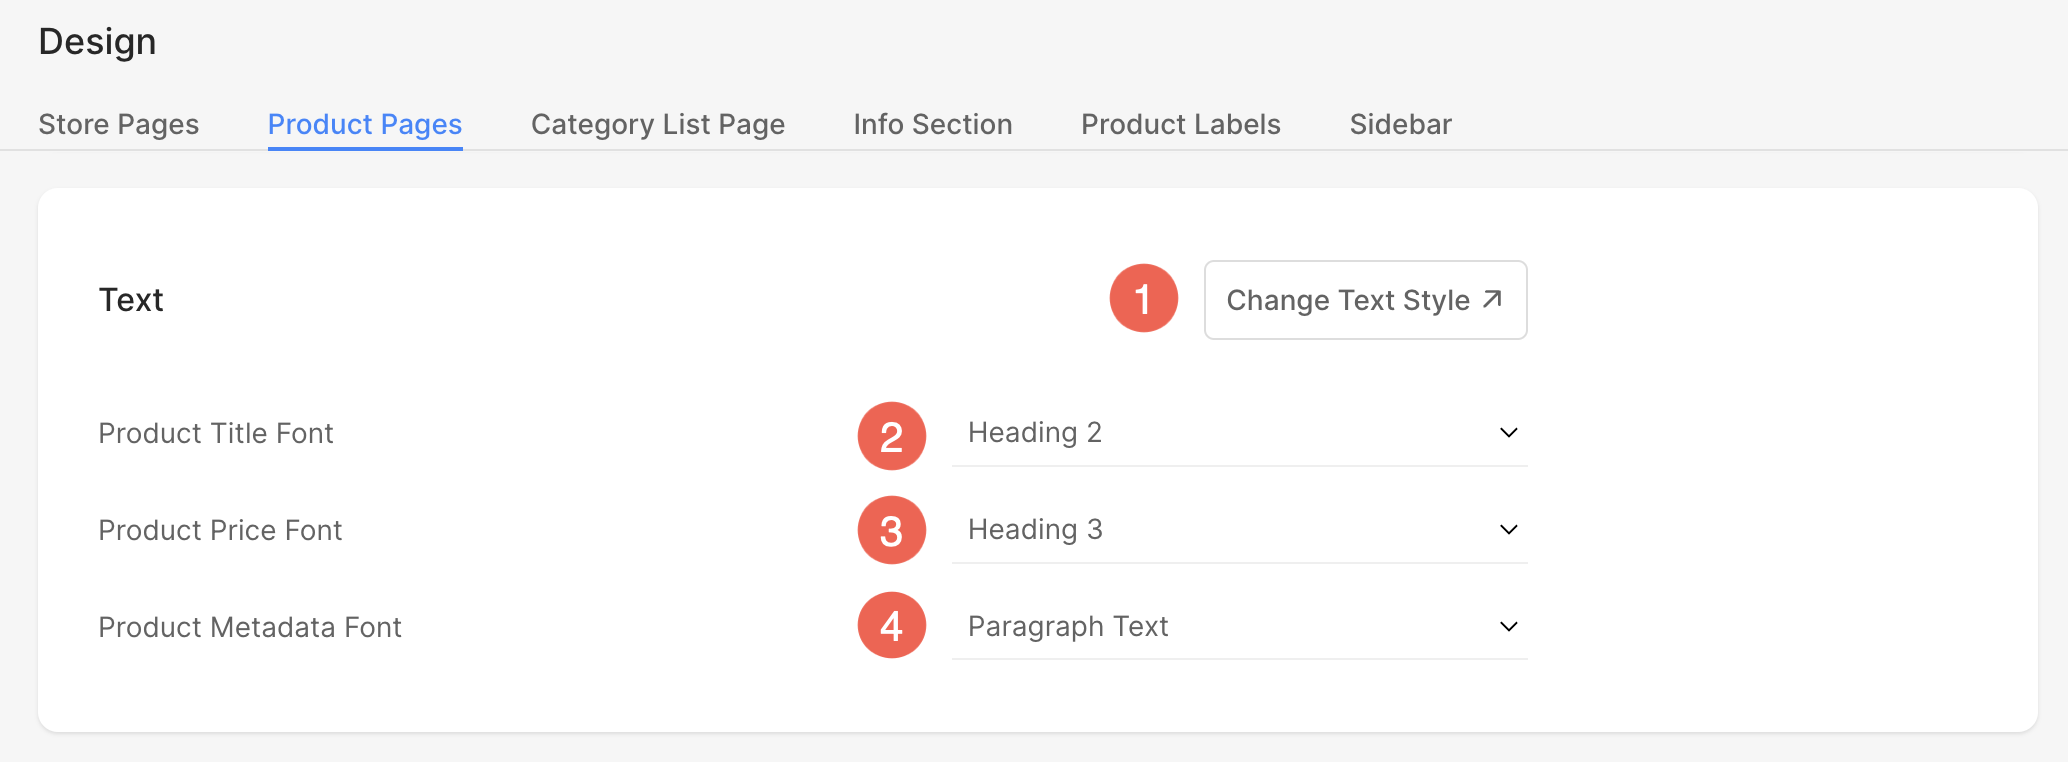
Text
- Change Text Style – Click on this button to customize the fonts used on your website.
- Product Title Font – Choose the font for the product title.
- Product Price Font – Choose the font for the product price.
- Product Metadata Font – Choose the font for the text other than the product title & product price on the product detail page.
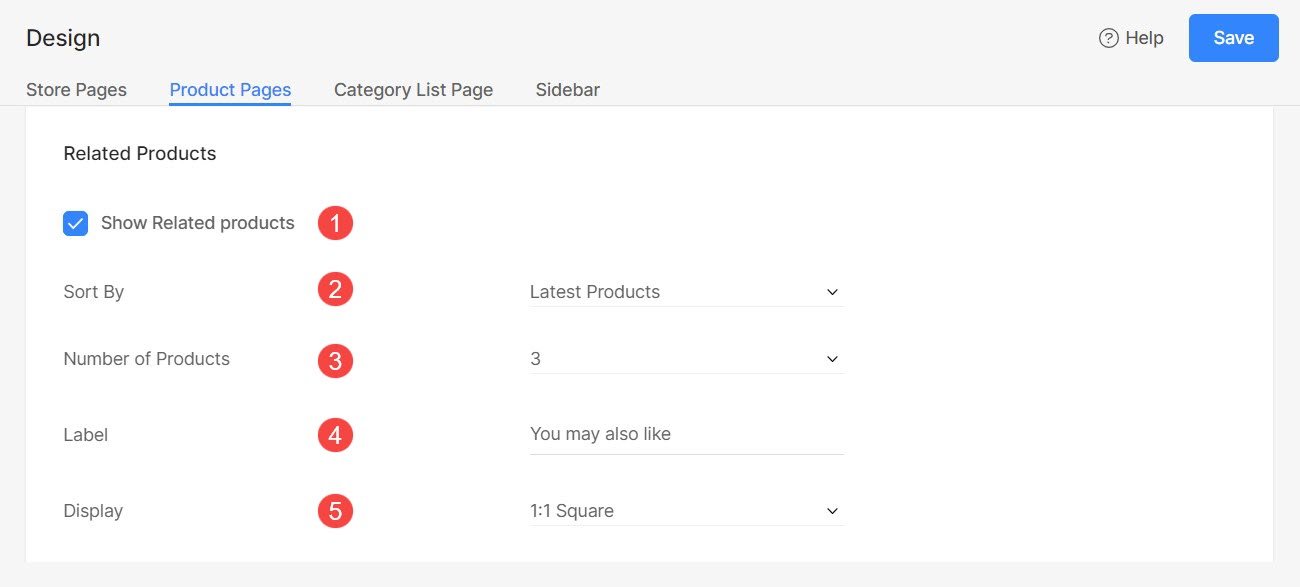
Related Products
This is the section that typically displays items that are complementary or similar to the product a customer is currently viewing, encouraging additional purchases and enhancing the shopping experience.
- Show Related Products – Check this option to display related products on the product detail page.
- Sort By – Choose how to sort the related products on the product pages. You can choose from four different options:
- Latest Products – As you add products to the Store, they will be sorted, with most recent product appearing first in the related products section.
- Most Selling – The related products will be arranged based on the sales performance, with most selling product appearing first.
- Highest Inventory – The products will be organized according to the remaining inventory, with the product having most inventory displayed first.
- Random – The related products will be sorted randomly.
- Number of Products – Choose how many products should appear in the related products section.
- Label – Specify the label of the related products section.
- Display – Choose the style in which products will be displayed inside the related products section. You can select from options like Square, Horizontal, Vertical, and Dynamic.
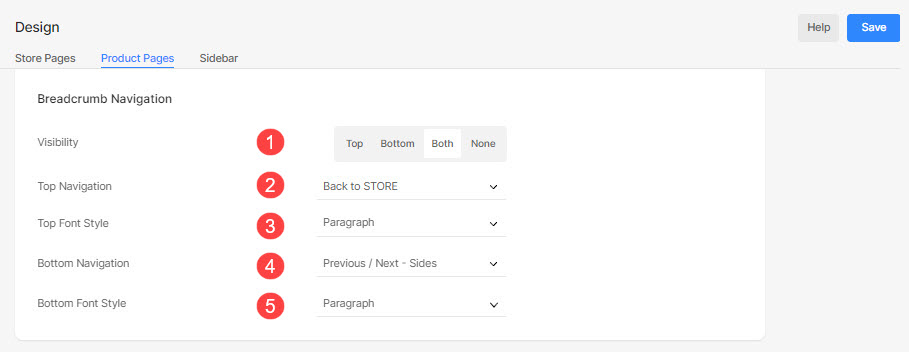
Breadcrumb Navigation
- Visibility – Specify the visibility/position of the breadcrumb navigation in the product detail page.
- Top Navigation – Choose the top breadcrumb navigation for the product detail page. You can choose from Breadcrumbs – Left / Right, Breadcrumbs with Category Name, Breadcrumbs with Previous / Next, Previous / Next – Center or Sides, Content Titles, and Back to Store options.
- Top Font Style – Choose the font for the top breadcrumb navigation.
- Bottom Navigation – Choose the bottom breadcrumb navigation for the product detail page. You can choose from Previous/Next – Center or Sides, and Content Titles options.
- Bottom Font Style – Choose the font for the bottom breadcrumb navigation.
Also Check: Folder navigation options.
Have a look at the product page breadcrumbs wherein the Breadcrumbs – Left option is selected as the Top Navigation:
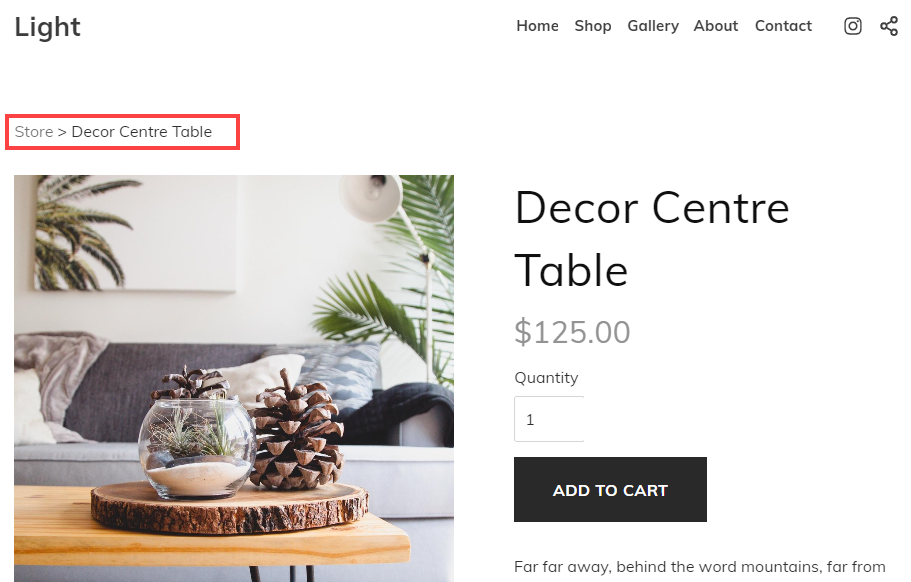
Here’s an example of the breadcrumb navigation in action.
Finally, hit the Save button to save all your changes.
That’s it. Your chosen style will be applied to your store’s product pages.