You can manage many aspects of your gallery from the gallery settings. Once you have created a gallery, the first step would be to dive into the gallery settings.
Manage the gallery settings:
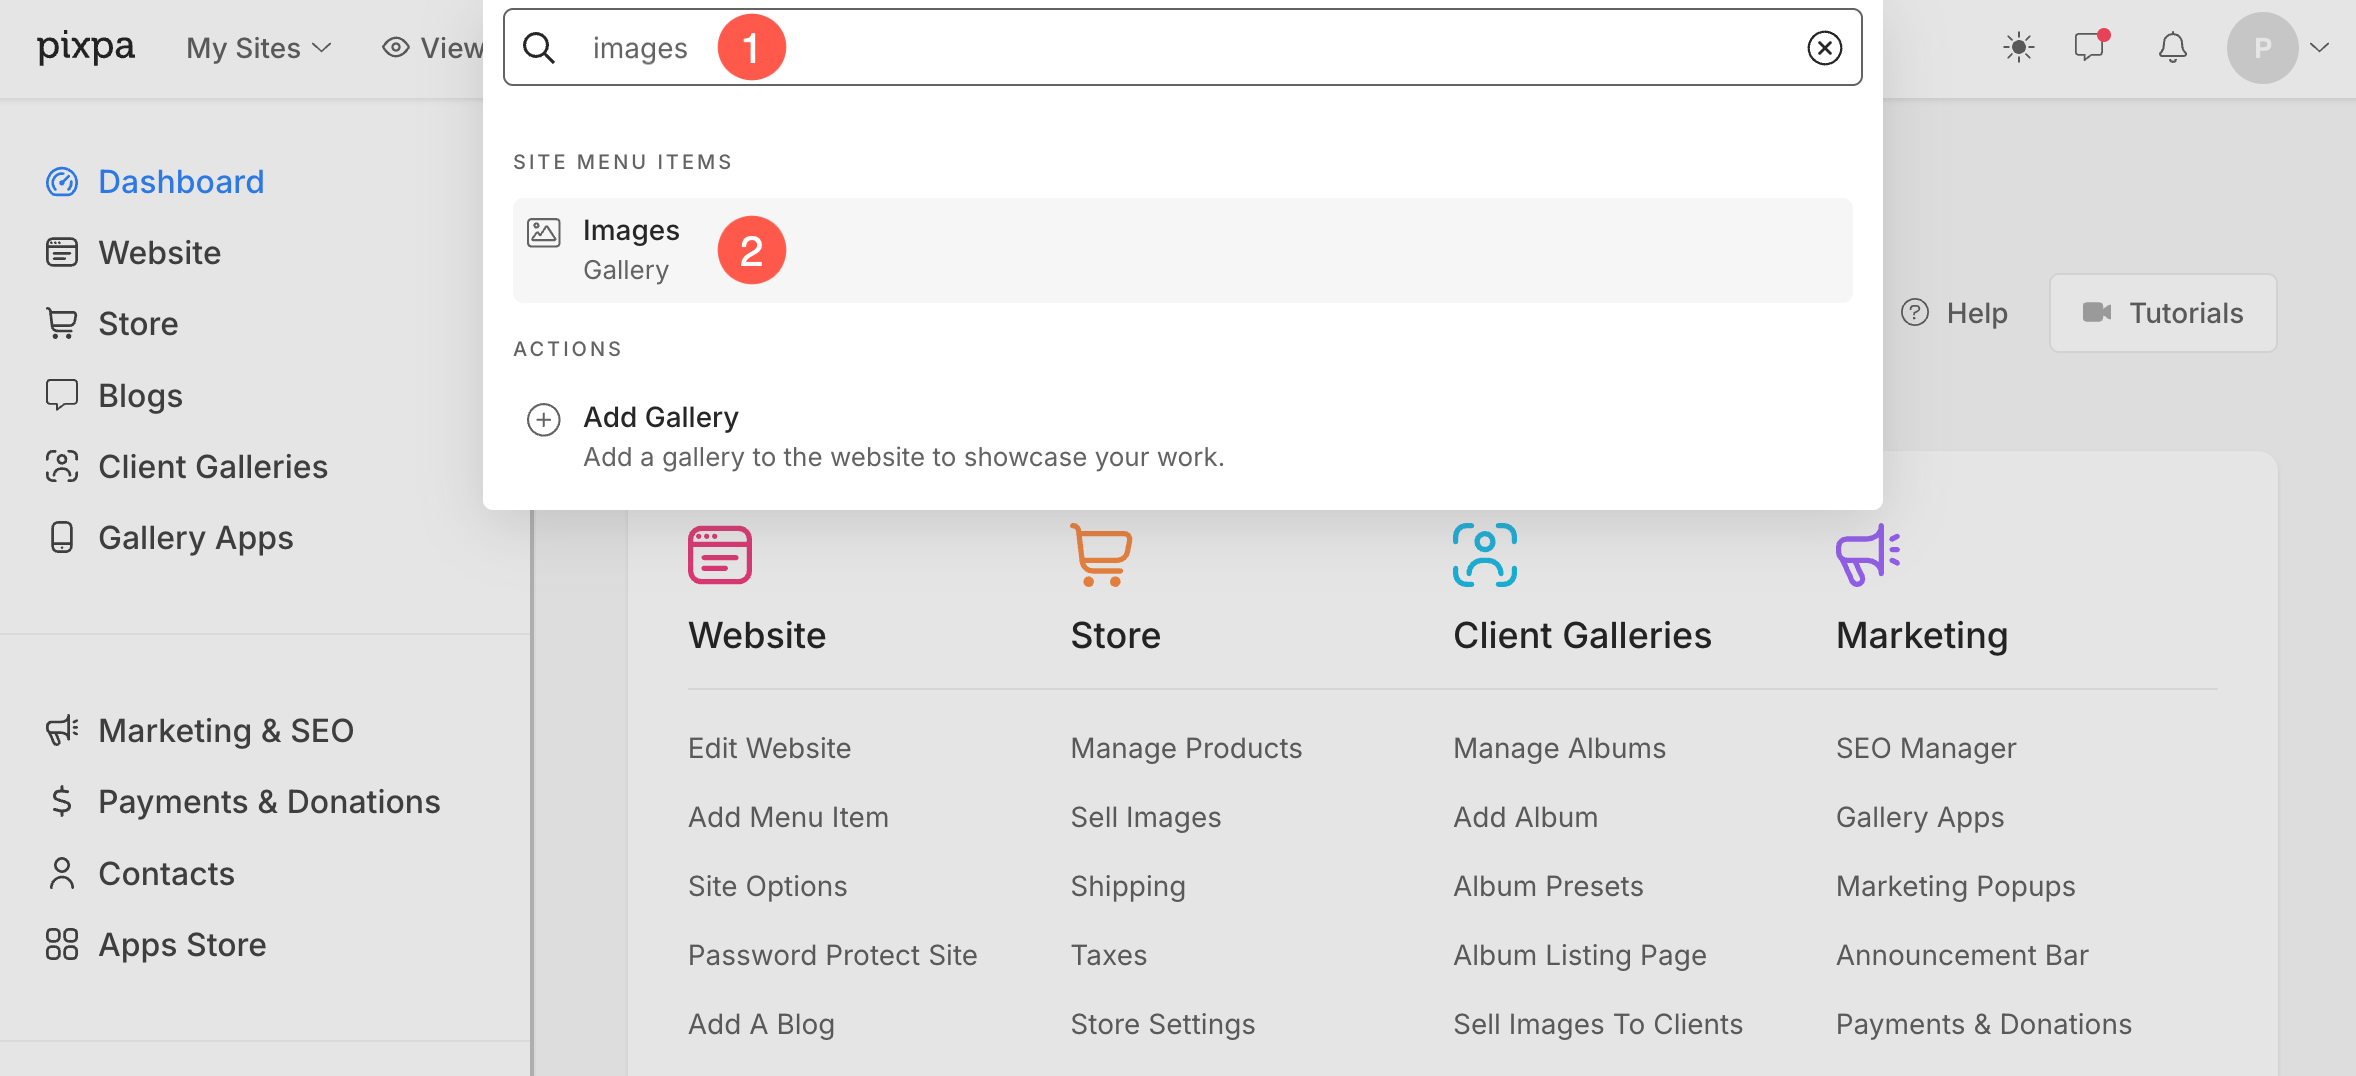
- Enter the gallery title (1) in the Search Bar.
- From the results, find the gallery (under Site Menu Items) that you want to work on and click on it (2).
- Next up, click on the Settings (1) tab. You would see all the settings of this particular gallery (2) on the right side.

In this article:
- Title & Visibility Settings
- Header Settings
- Watermark Settings
- Privacy, Pre-footer, and Fotomoto
- Tags
- Social Media / Folder Listing Image
- Additional Information
- Search Engine Optimization
- Page Code Injection and Other Settings
Title & Visibility Settings
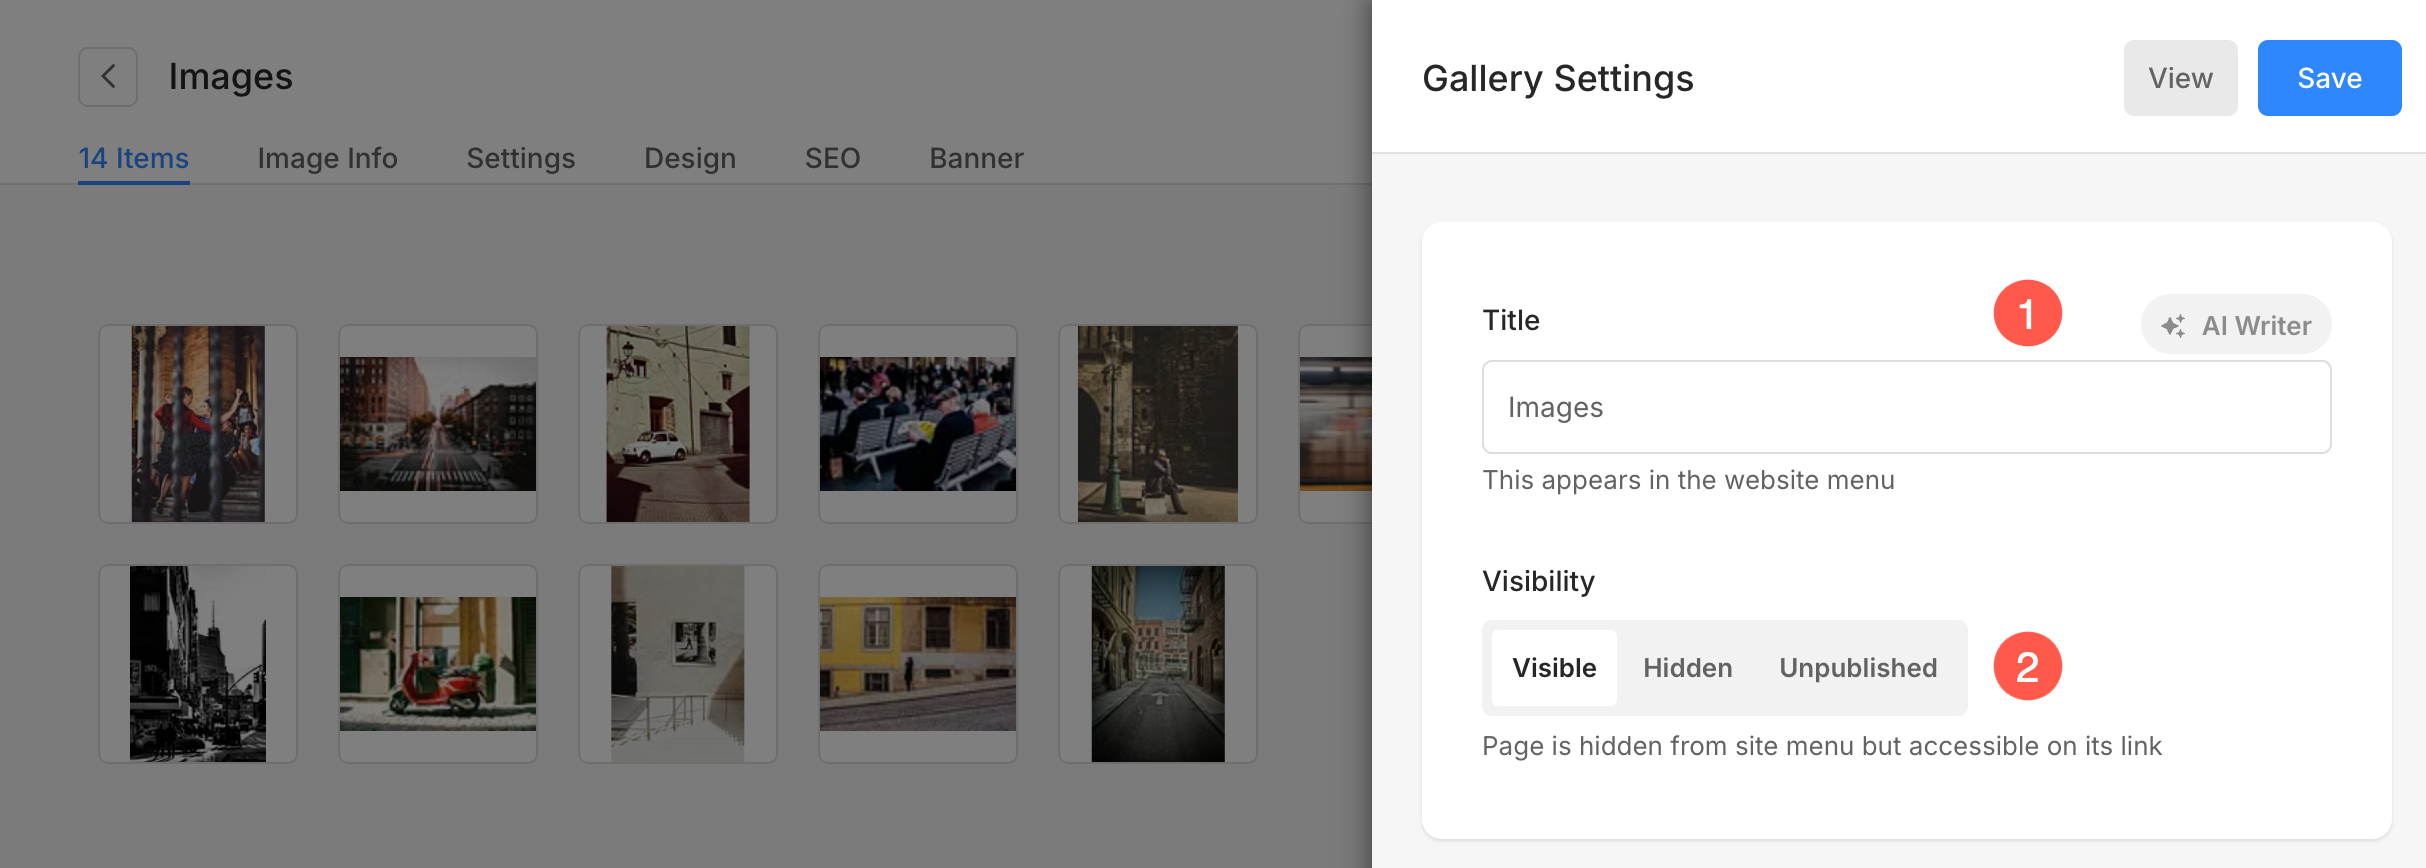
- Title – Enter the gallery title, it appears in your website’s navigation.
- Visibility – Make it Visible to show this gallery in your website navigation, and click on Hidden to hide it from the website menu or click on Unpublished to unpublish the same, this way it will only show up in your studio and cannot be reached using URL too.
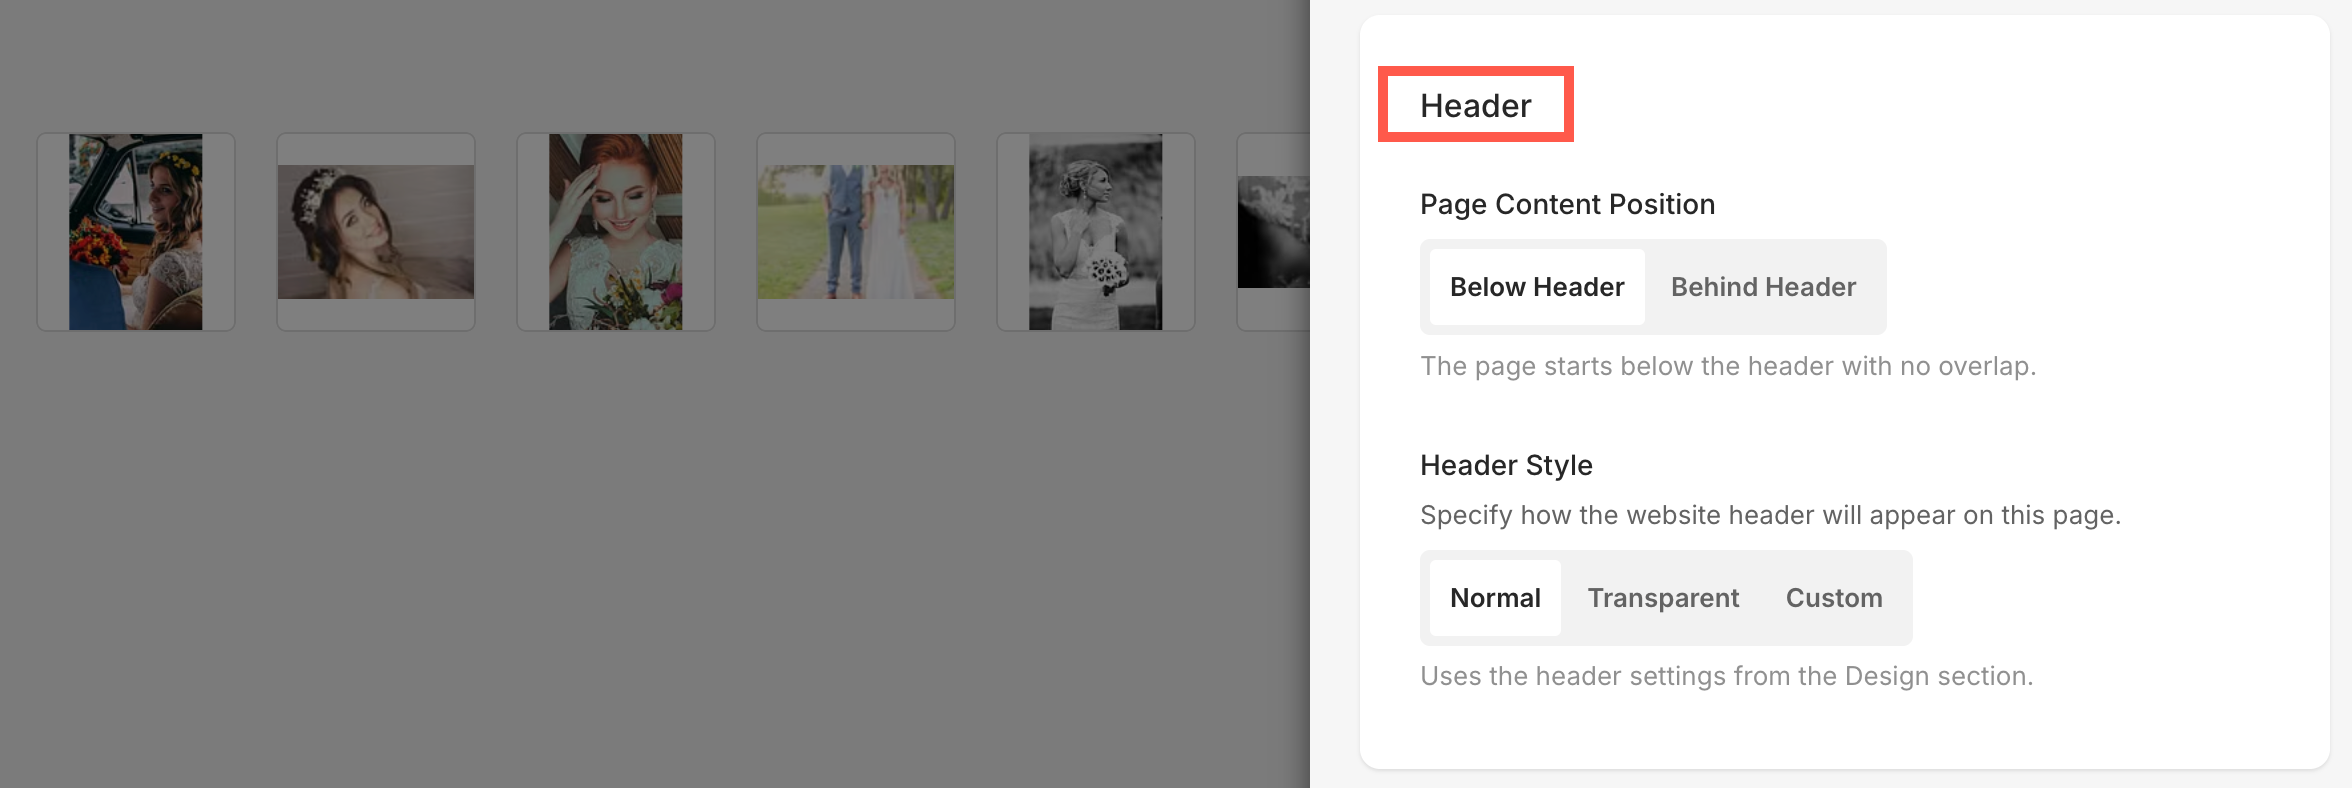
Header Settings
You can customize how the header appears on each page by adjusting its position, style, and color settings. Learn more about Header settings.
Watermark Settings
- Select a watermark that you want to apply to the images in this particular gallery. Learn more about watermarks.

Privacy, Pre-footer, and Fotomoto
- Password protect this page – Protect your gallery with a password.
- Show Pre-footer below this page – Enable it to add the pre-footer section on this gallery.
- Sell images with Fotomoto – Enable this option to sell images in this gallery with Fotomoto. Learn more.

Tags
Tags are used for your website’s internal search (when enabled) and to filter galleries within a folder.

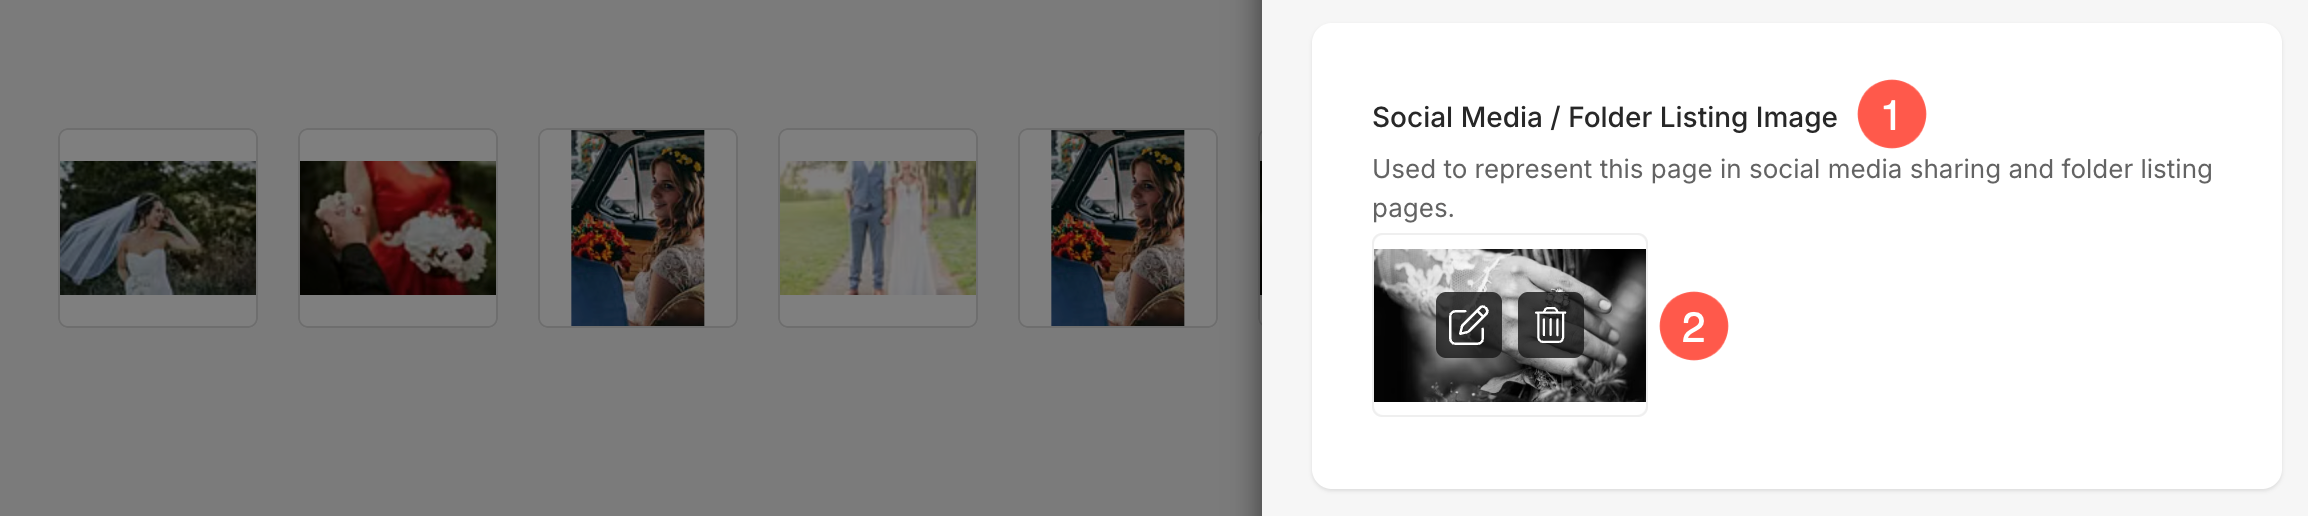
Social Media / Folder Listing Image
- Used to represent this gallery in folders and in social media. Also Check: Add a Featured Image for any menu item.
- From here, you can edit the focal point of image, manage Accent Color, specify Alt Tag and remove the image.
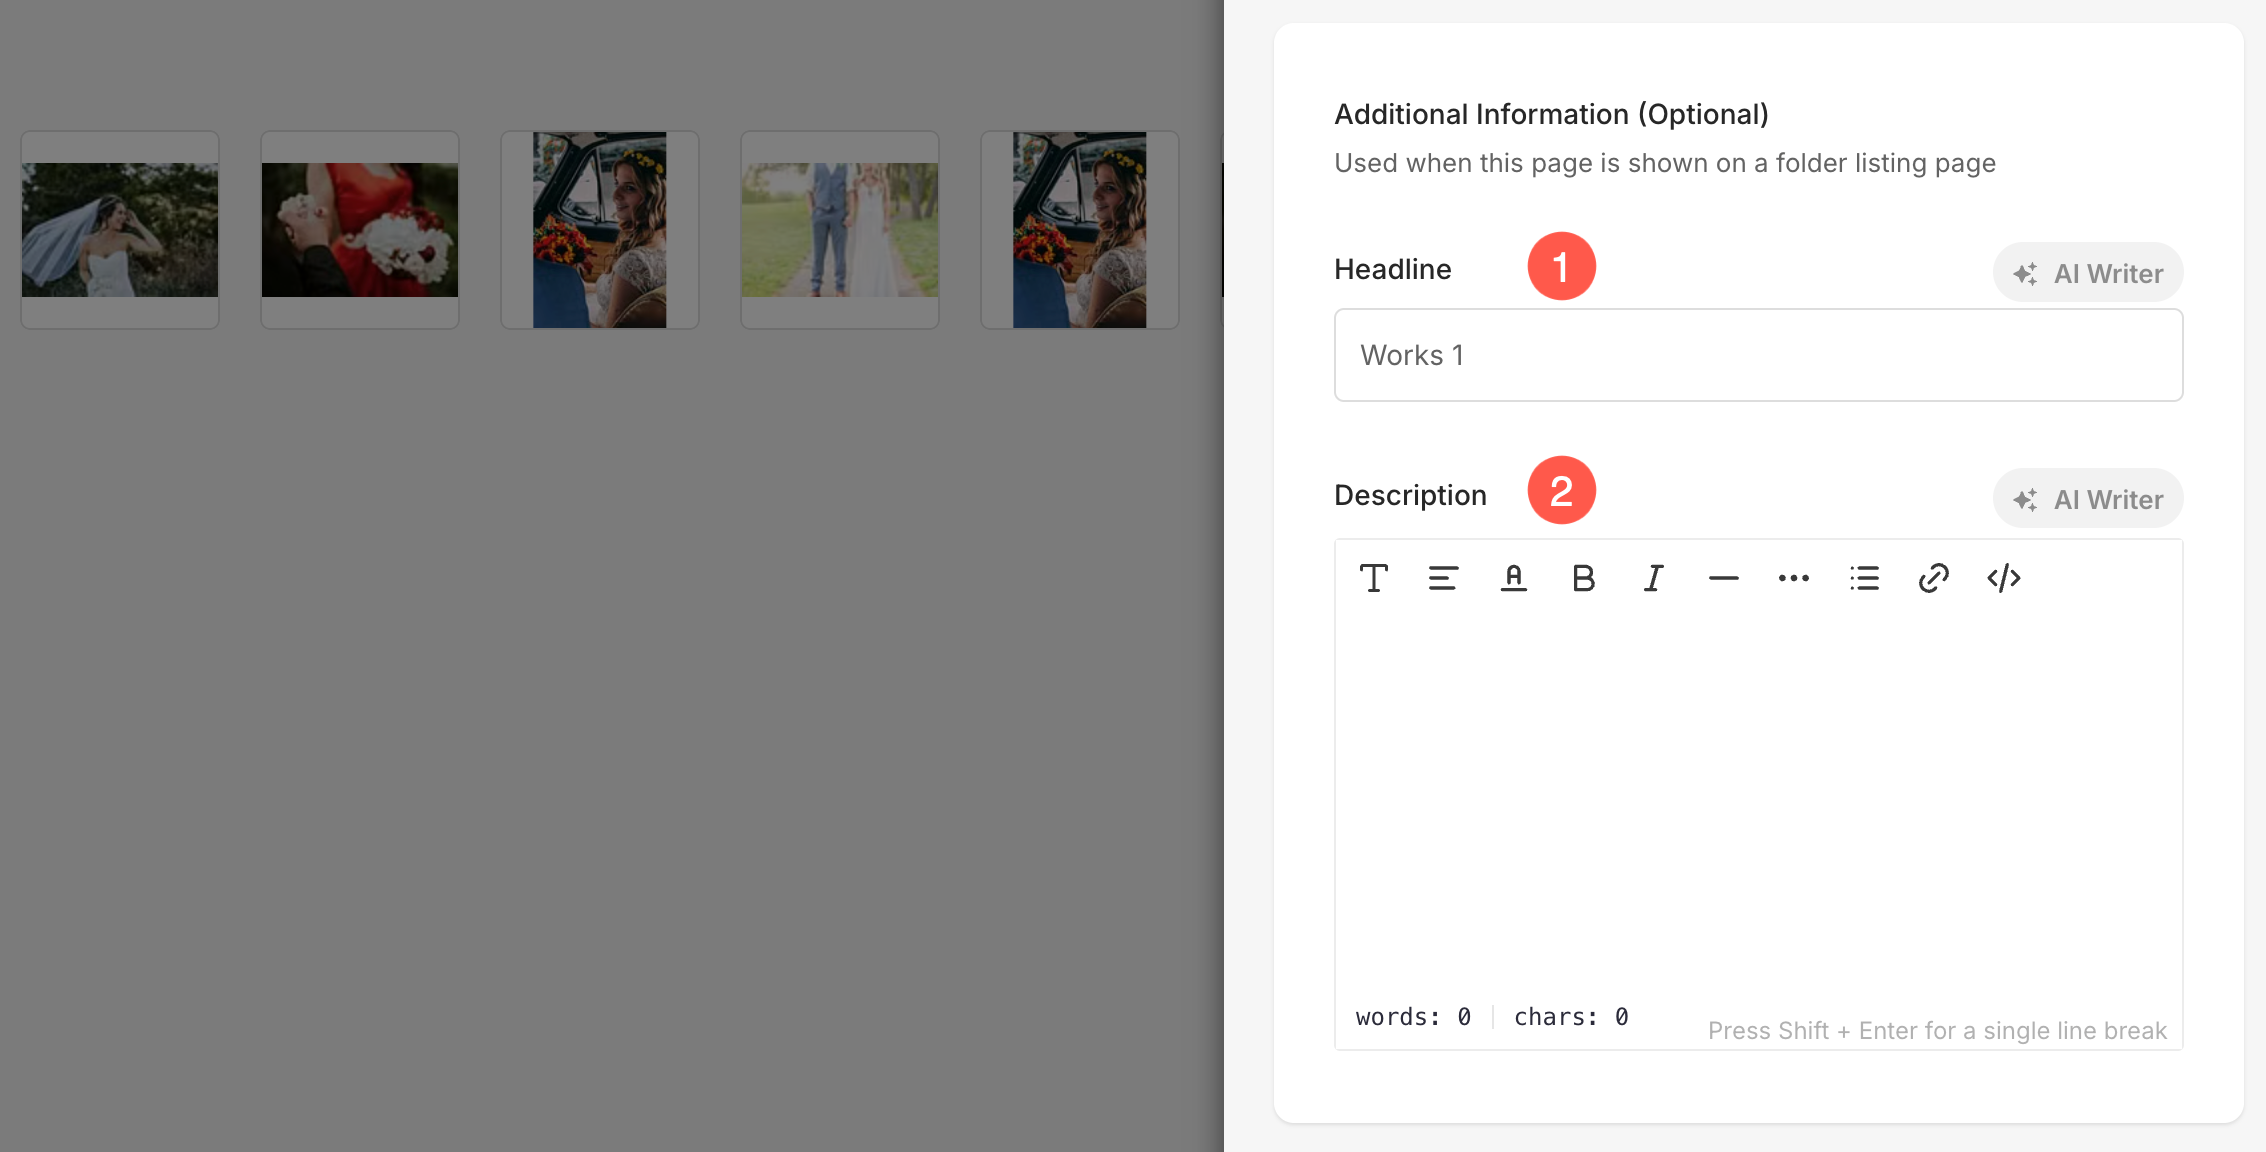
Additional Information
- Headline (Optional) – Used to represent this gallery in a folder (in a few folder templates only).
- Description (Optional) – Used to represent this gallery in a folder and selected gallery layouts (in a few folder templates only).
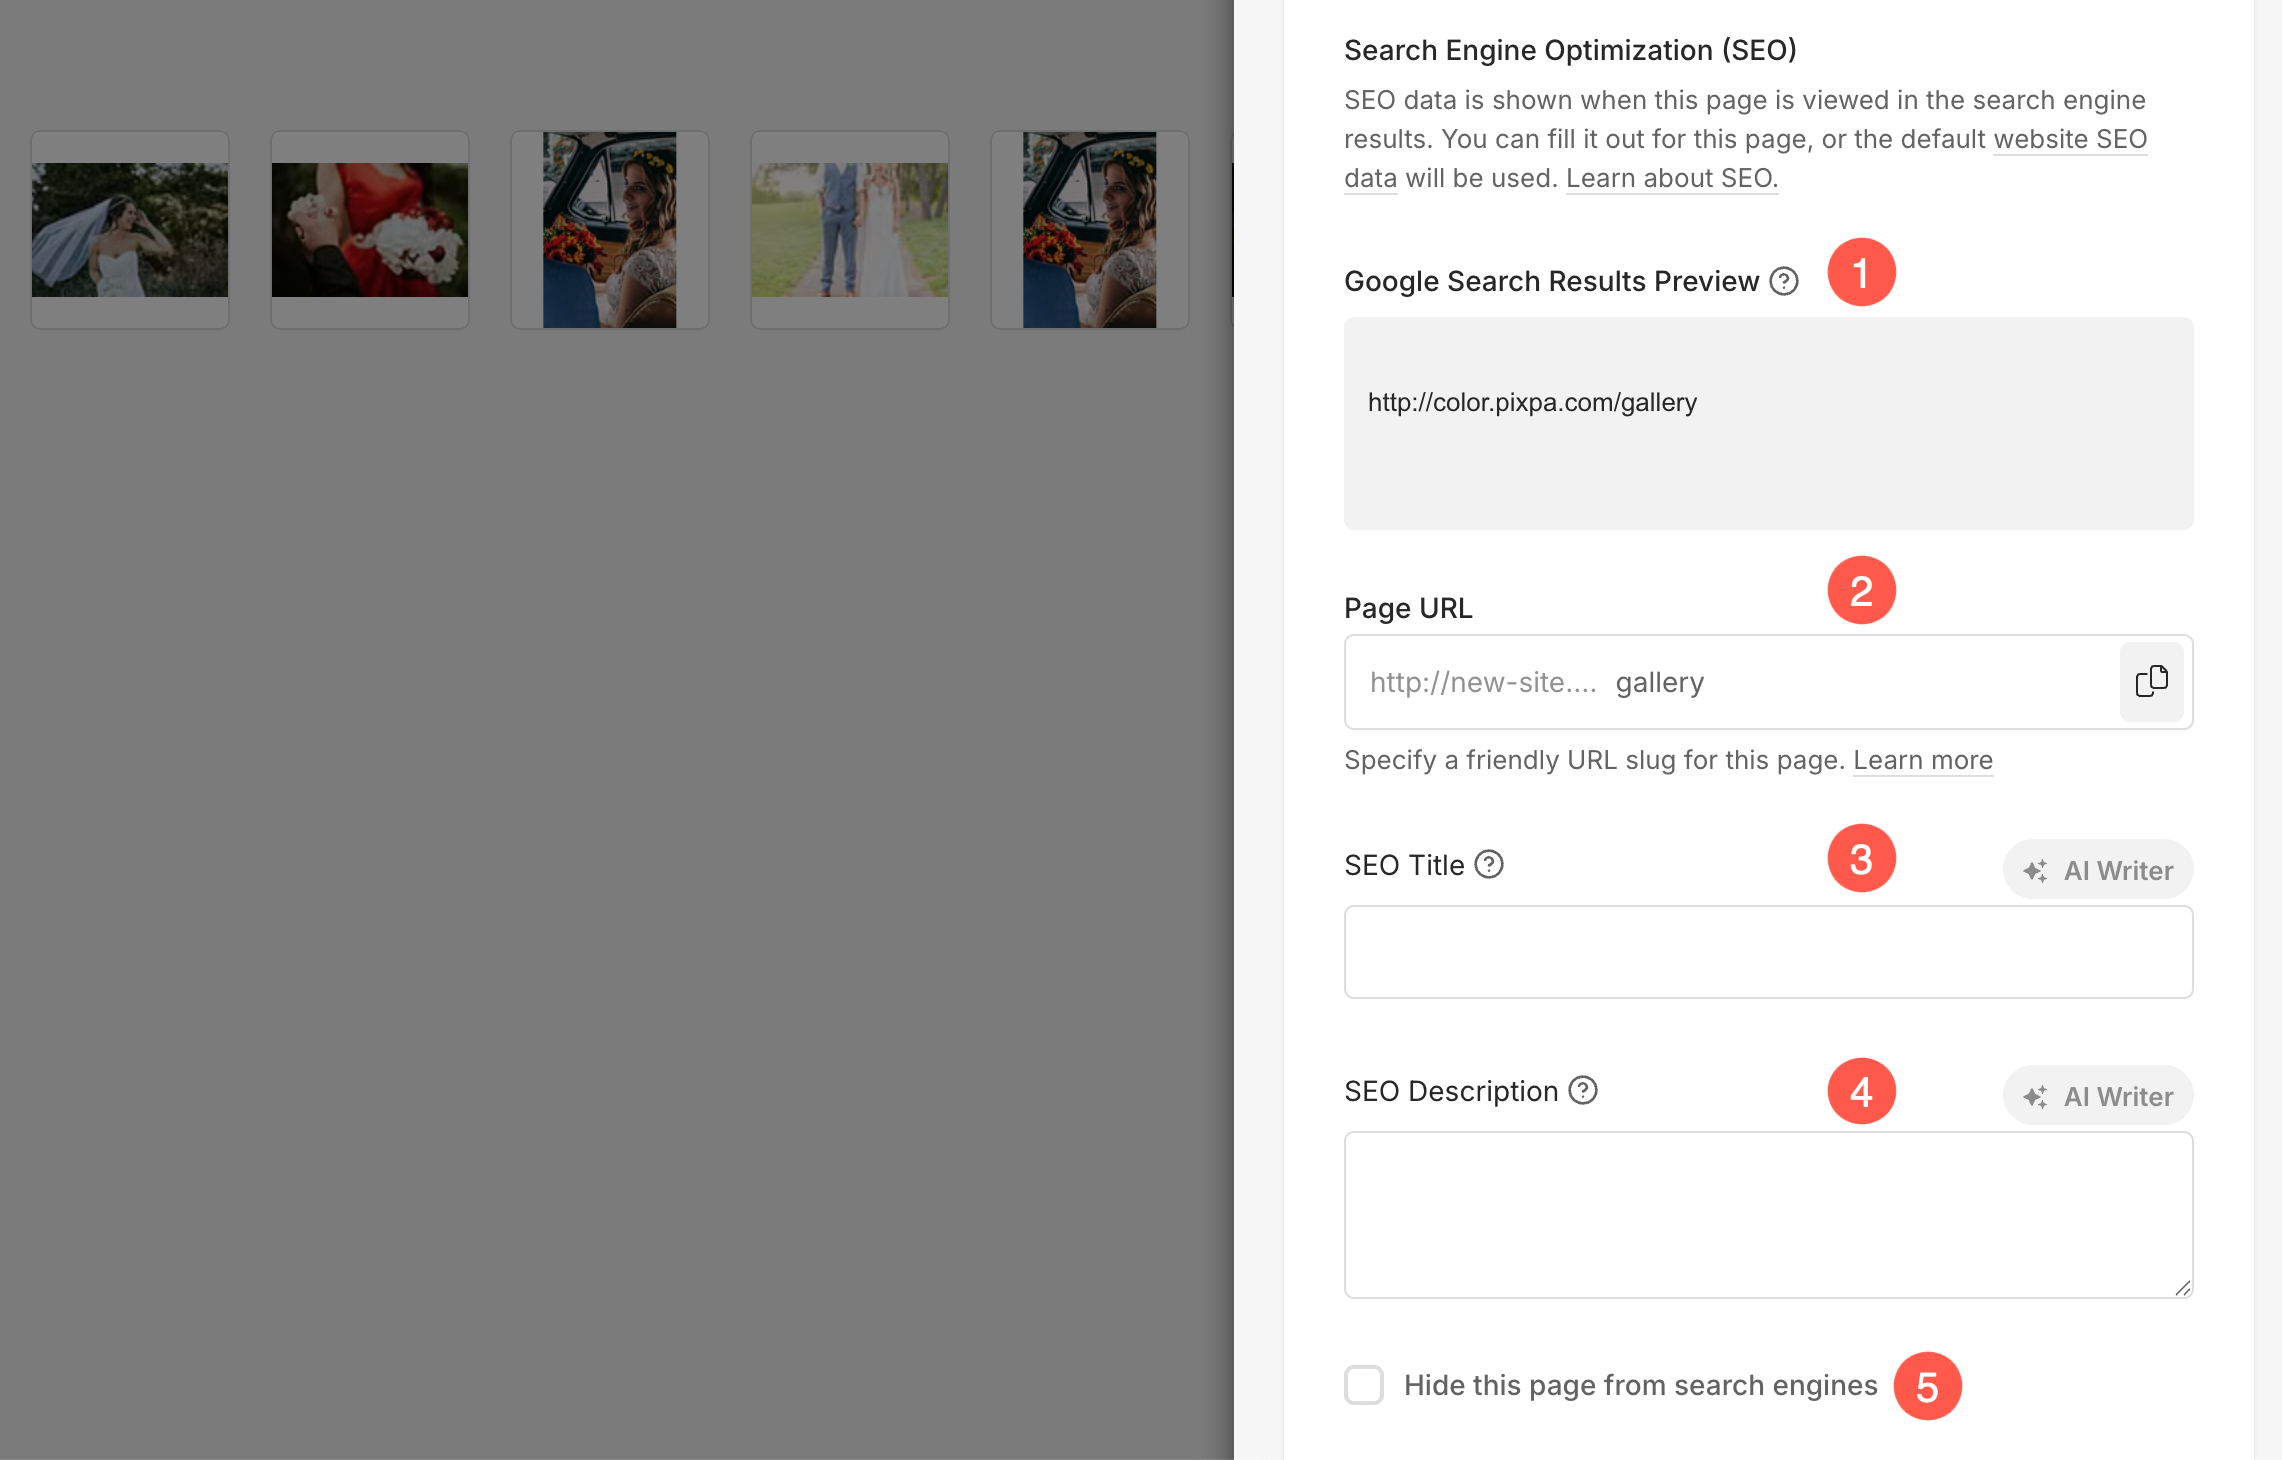
Search Engine Optimization
Specify SEO metadata for this gallery. It will override the site’s main SEO data.
Also Check: Add SEO metadata for your website, gallery, and page.
- Google Search Results Preview – Displays a preview of how your page URL will appear in Google search results. This helps you understand how users will see your page before clicking.
- Page URL – Specify a clean, user-friendly URL slug for your page. A shorter, descriptive URL improves both user experience and SEO.
- SEO Title – Enter a unique title for the page that will appear in search engine results and browser tabs. This should be concise, descriptive, and include relevant keywords and can be around 60 characters long.
- SEO Description – Add a short description of the page’s content. This description appears in search results under the title and helps improve click-through rates.
- Hide this page from Search Engines – Enable this option if you do not want the page to be indexed by search engines.
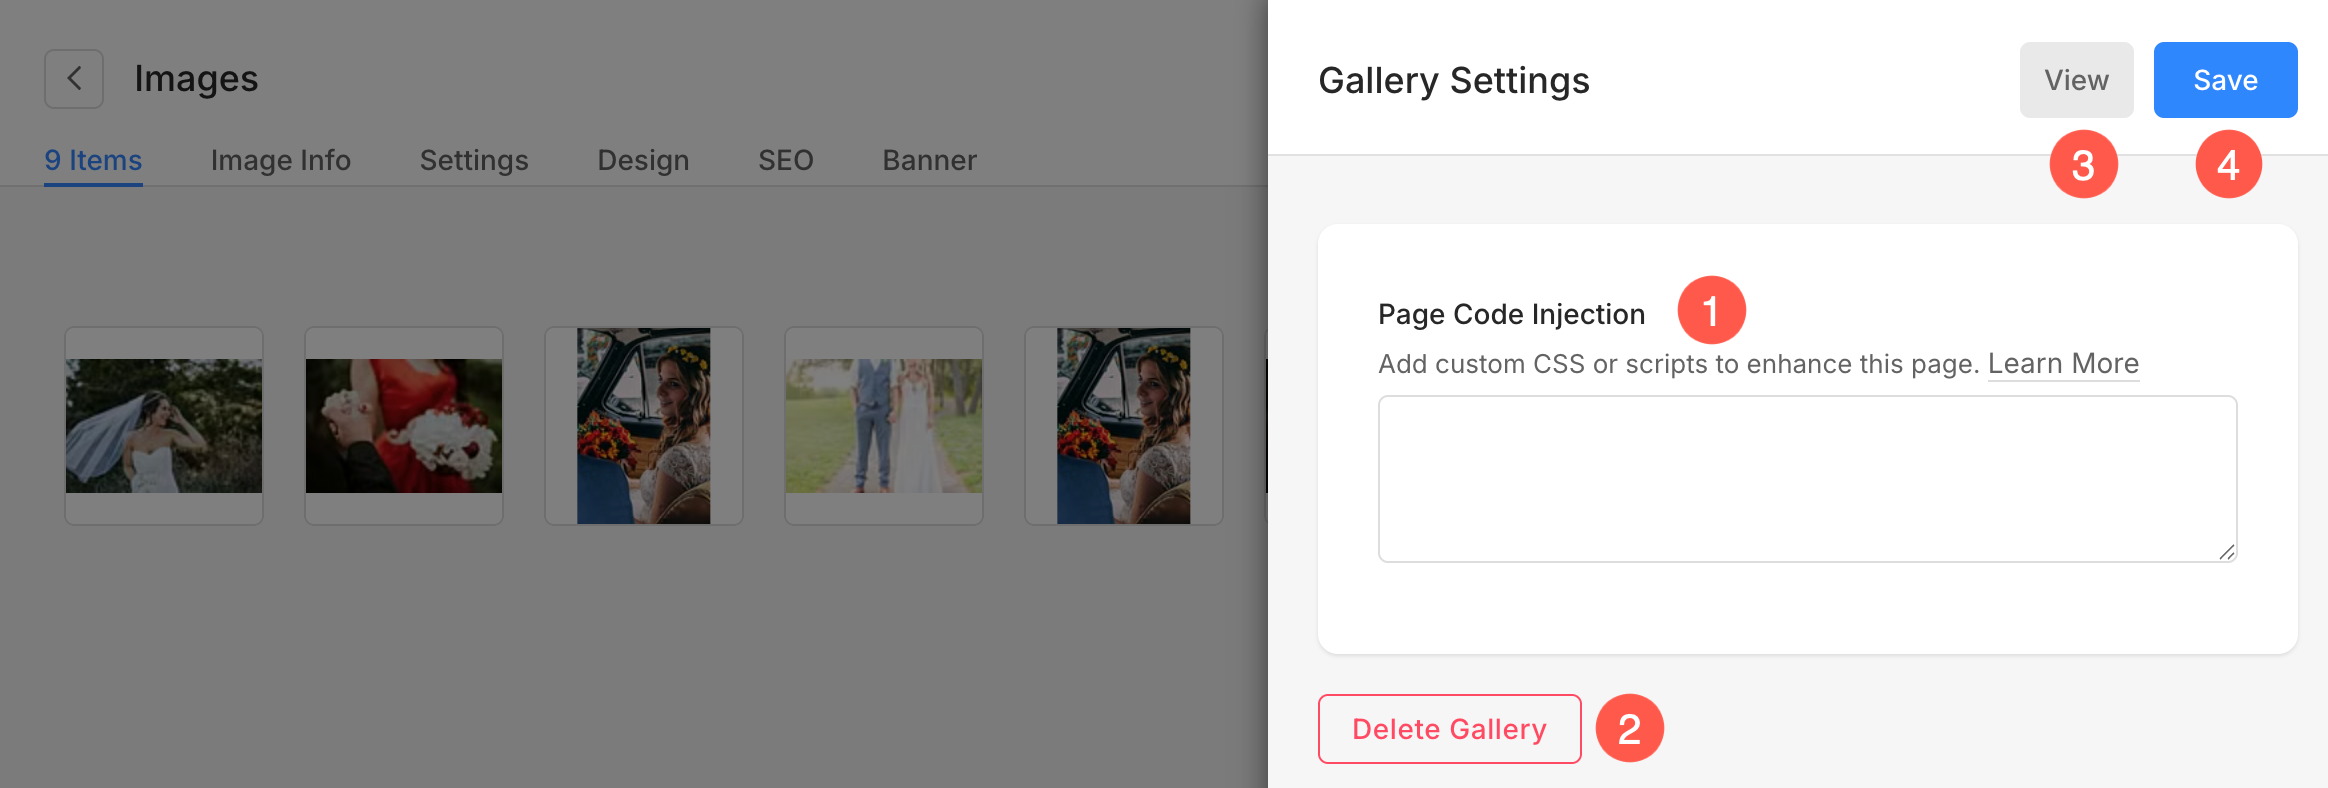
Page Code Injection and Other Settings
- Page Code Injection – Add any specific customization to this particular gallery. Enter any background script which runs when anyone visits this gallery. You can also add a CSS script that will be applied to this particular gallery only.
- Delete the gallery.
- View the gallery
- Save the settings.