Occasionally, Pixpa Support may require extra details regarding the network requests generated in your browser. A team member may request you to create a HAR file, which is a log containing information about browser network requests during the occurrence of the issue.
In this article:
To generate a HAR file in Chrome
- Open Chrome and go to the page where the issue is occurring.
- Look for the vertical ellipsis button and select More Tools > Developer Tools.
- From the panel that appears, select the Network tab.
- Look for a round record button in the upper left corner of the tab, and make sure it is red. If it is grey, click the button once to start recording.
- Check the box Preserve log and Disable Cache.
- Click the clear button to clear any existing logs from the network tab.
- Reproduce the issue while the network requests are recorded.
- Click the download button, Export HAR, to download, and save the file to your computer.
- Upload the HAR file to studio chat window by clicking on attachment pin.

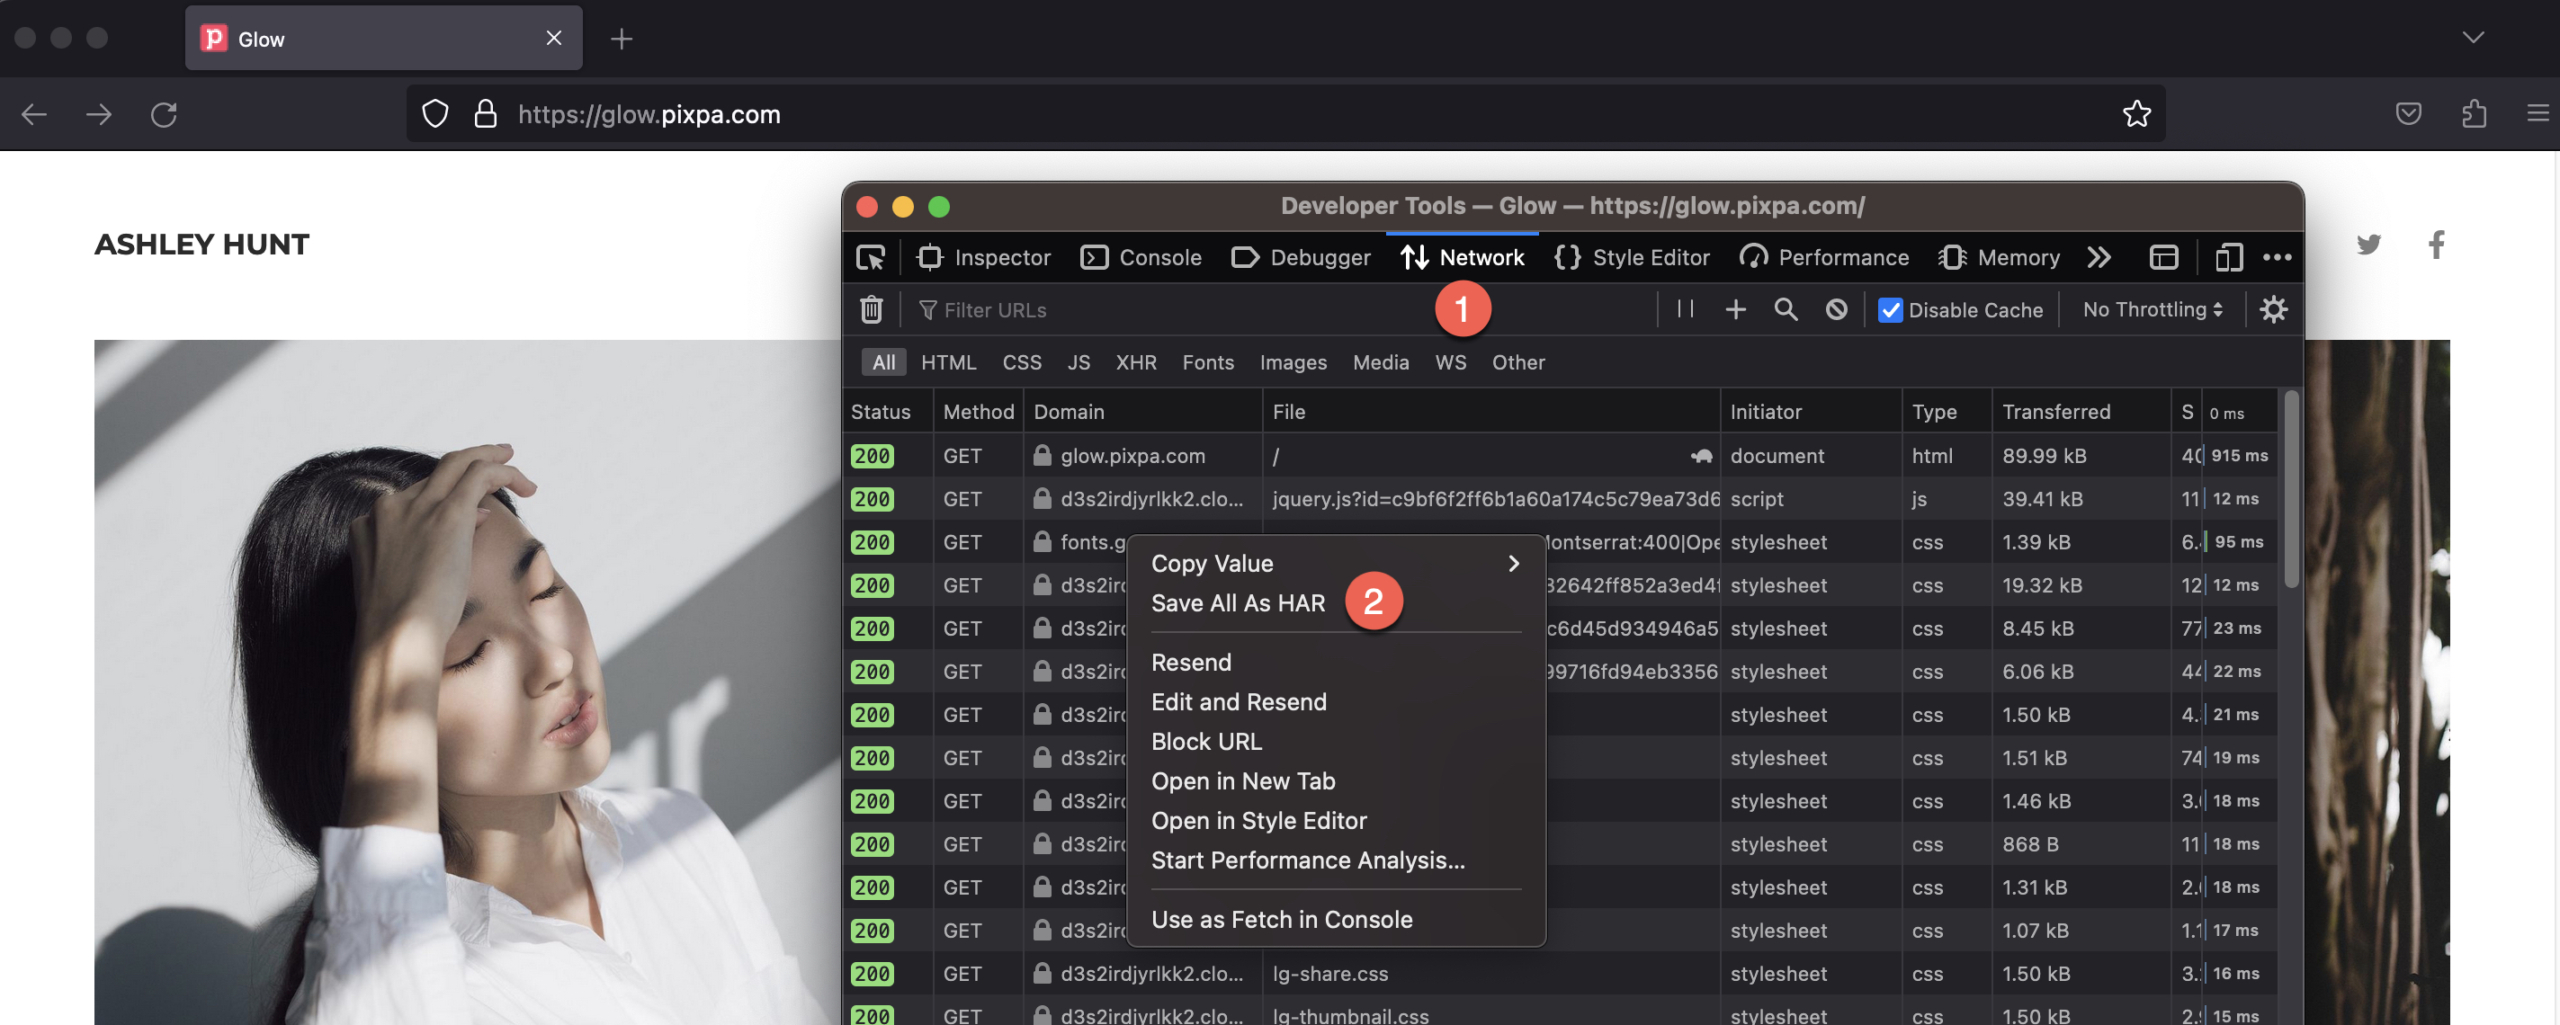
To generate a HAR file in Firefox
- Open Firefox and go to the page where the issue is occurring.
- Open the Network Monitor.
- Reproduce the issue while the network requests are recorded.
- Right-click anywhere under the File column and click Save All As HAR and save the file to your computer.
- Upload the HAR file to studio chat window by clicking on attachment pin.
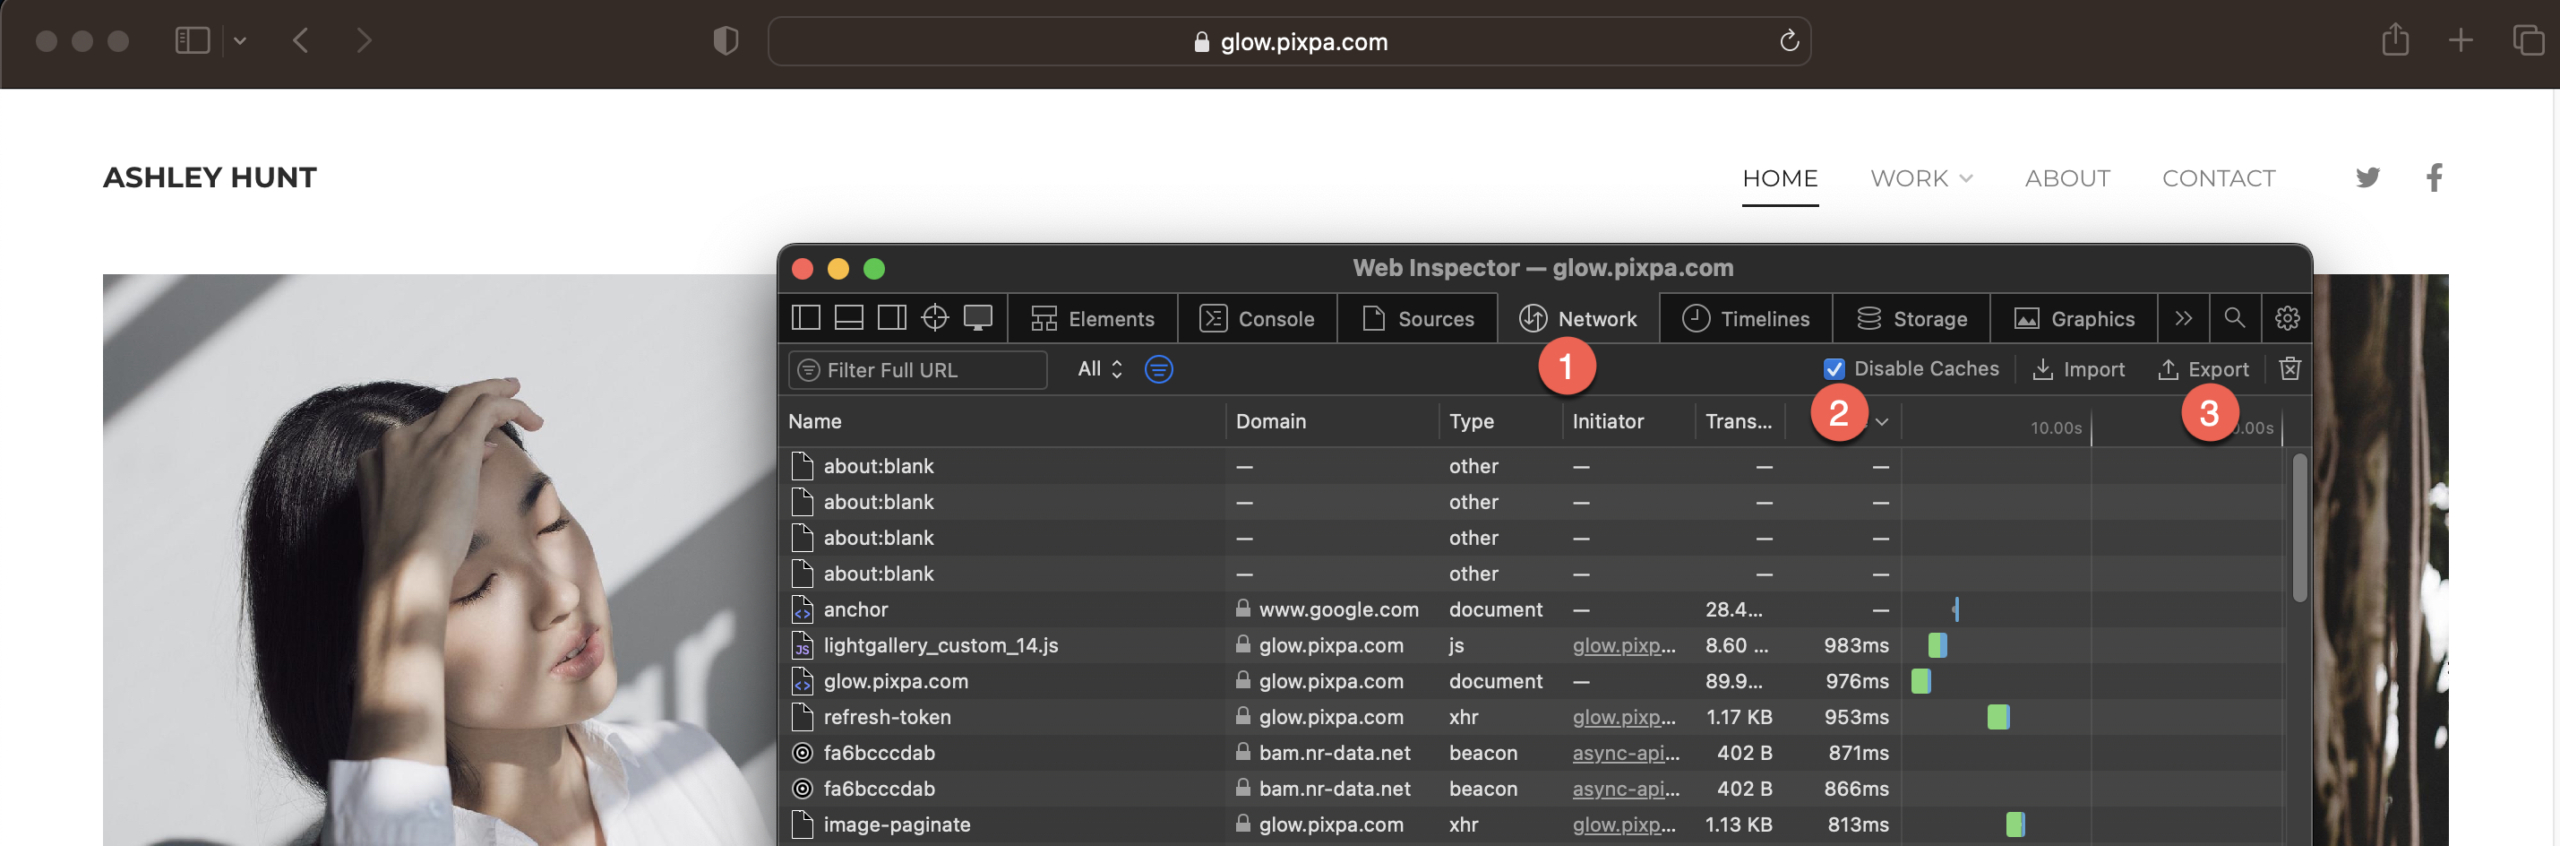
To generate a HAR file in Safari
- Open Safari and go to the Develop menu.
- Select Show Web Inspector and click the Network tab.
- Reproduce the issue while the network requests are recorded.
- Click the Export icon and save the HAR file to your computer.
- Upload the HAR file to studio chat window by clicking on attachment pin.