Many times, you might want to add a link on your site’s navigation that simply is a link to another web page.
- You might want to link to a separate website, an online project, your social media channels, an external blog, an e-commerce shop link, files, or any other URL.
- You might also want to link to a page within your own website.
You can accomplish any of the above by adding a Link menu item to your site’s navigation.
In this article:
- Add a link menu item
- Link menu item settings
- Link internal menu items like galleries, folders, etc
- Link external web pages/URLs
- Link to a specific section of a page
Add a link to your website navigation
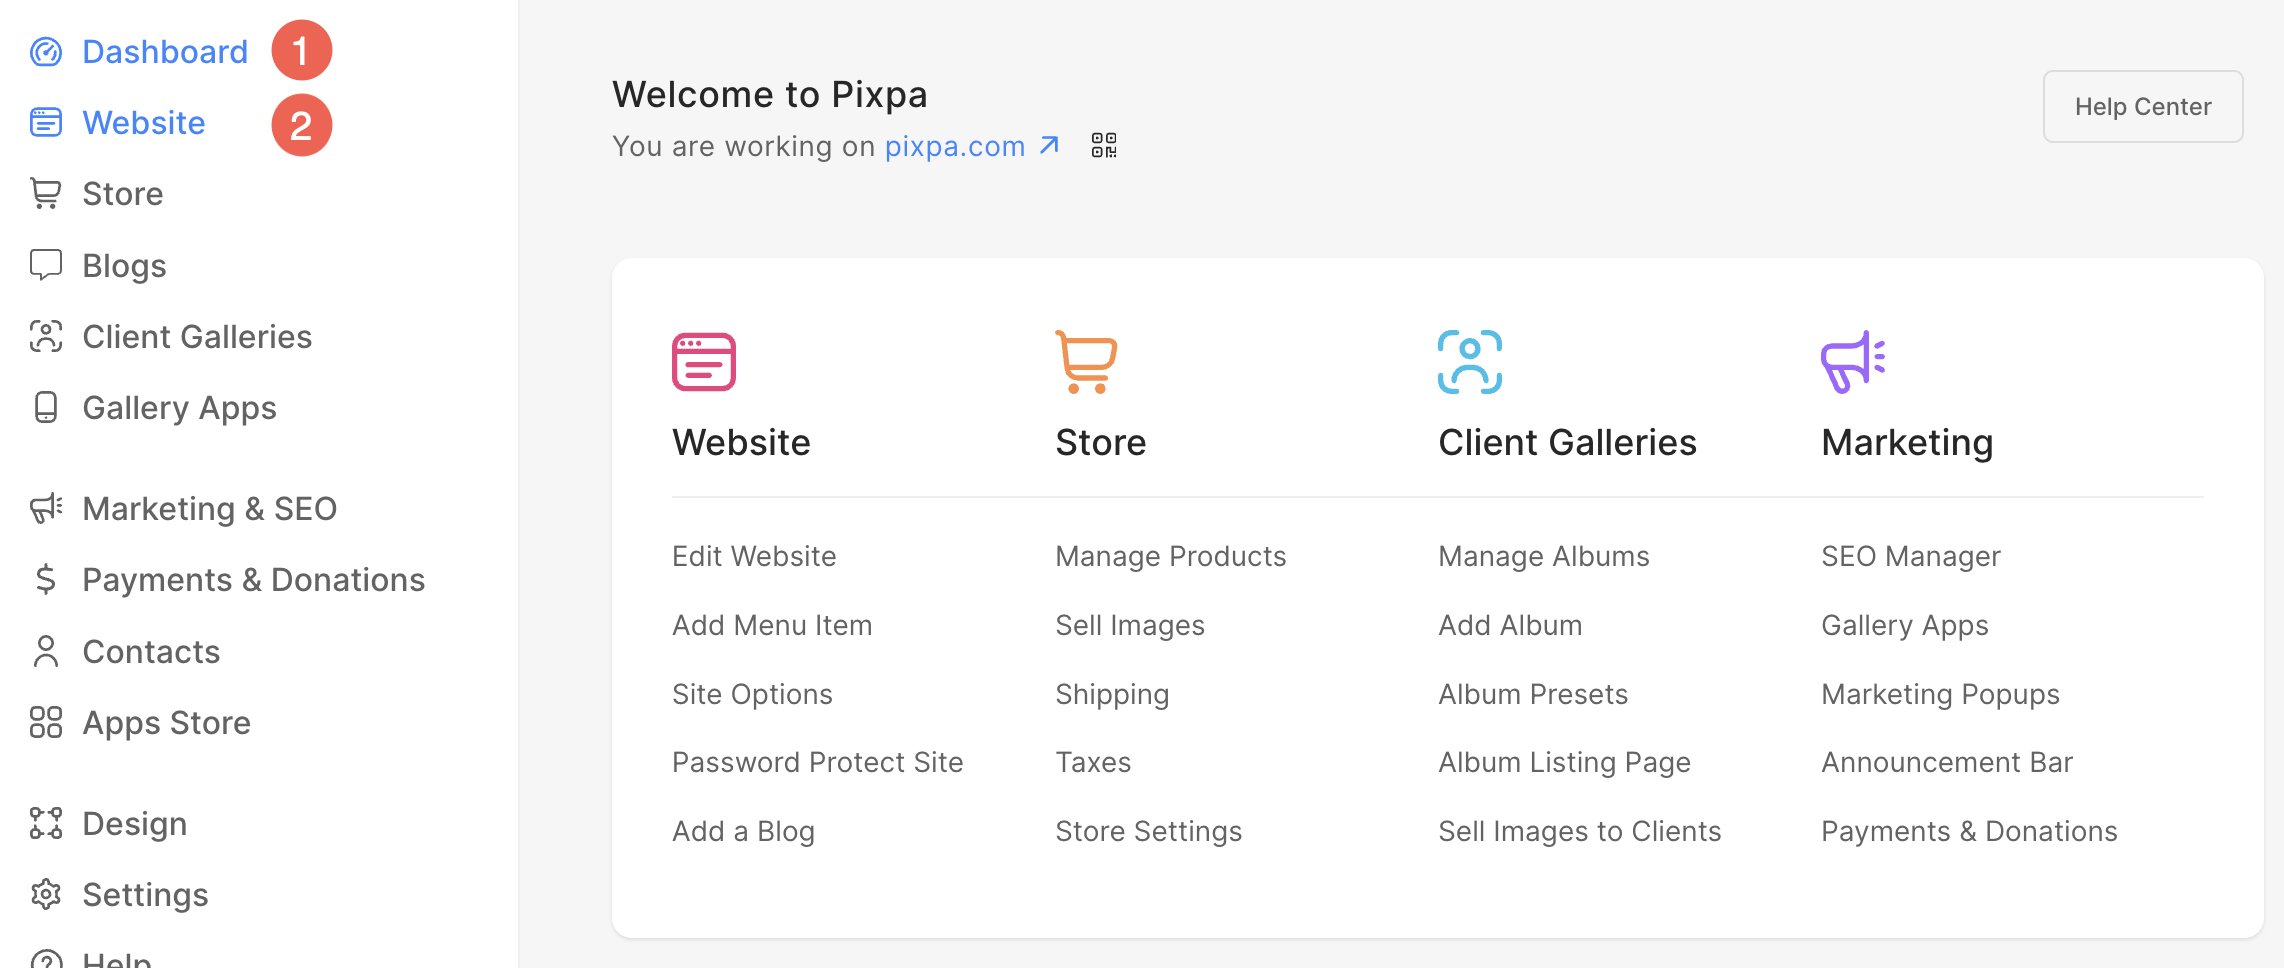
- Here, you will see a + Plus (3) icon next to the Header Menu heading. If you want to add a link inside the footer, click on + Plus icon next to the Footer Menu heading.
- Clicking on it will open a Sidebar from where you can add a Link Menu (4) item.
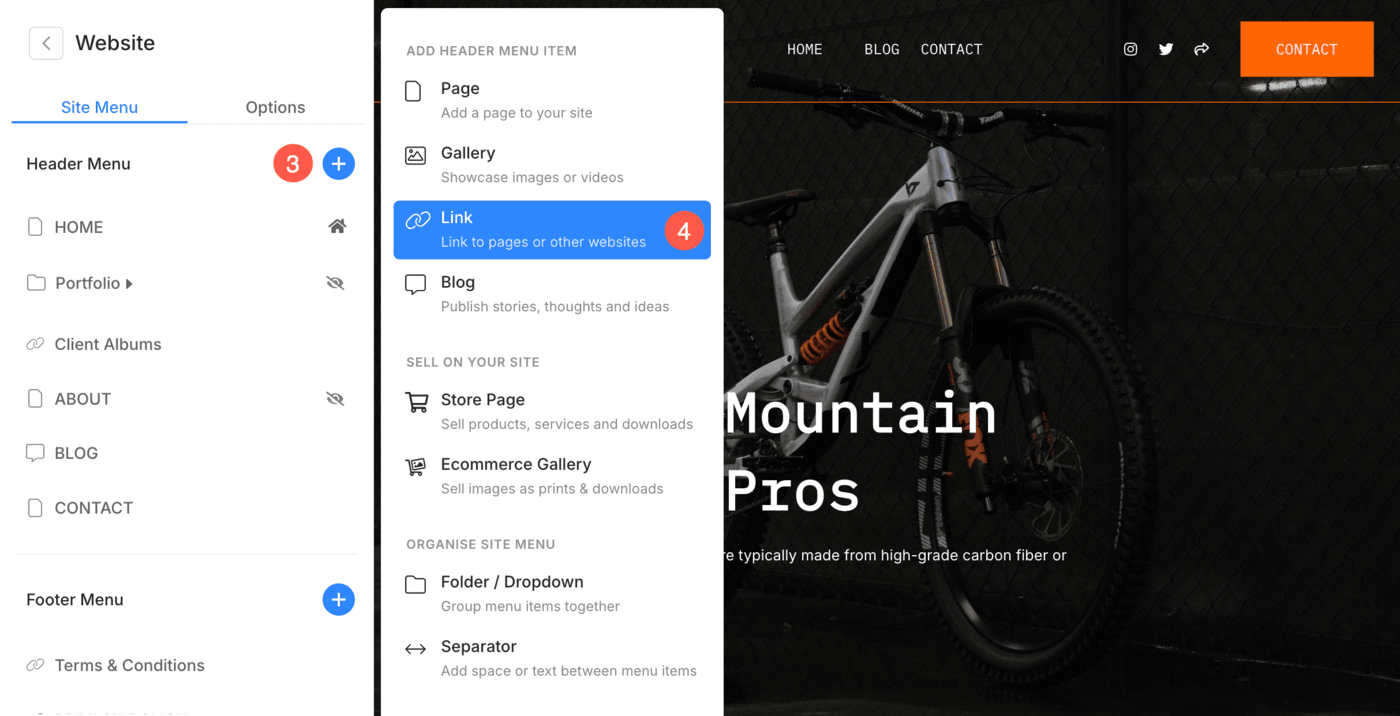
Alternatively, you can use Pixpa’s search option to add a link menu item.
- Enter add link (1) in the Search Bar.
- You will see the related results.
- Click on the Add Link option (2) under Actions.

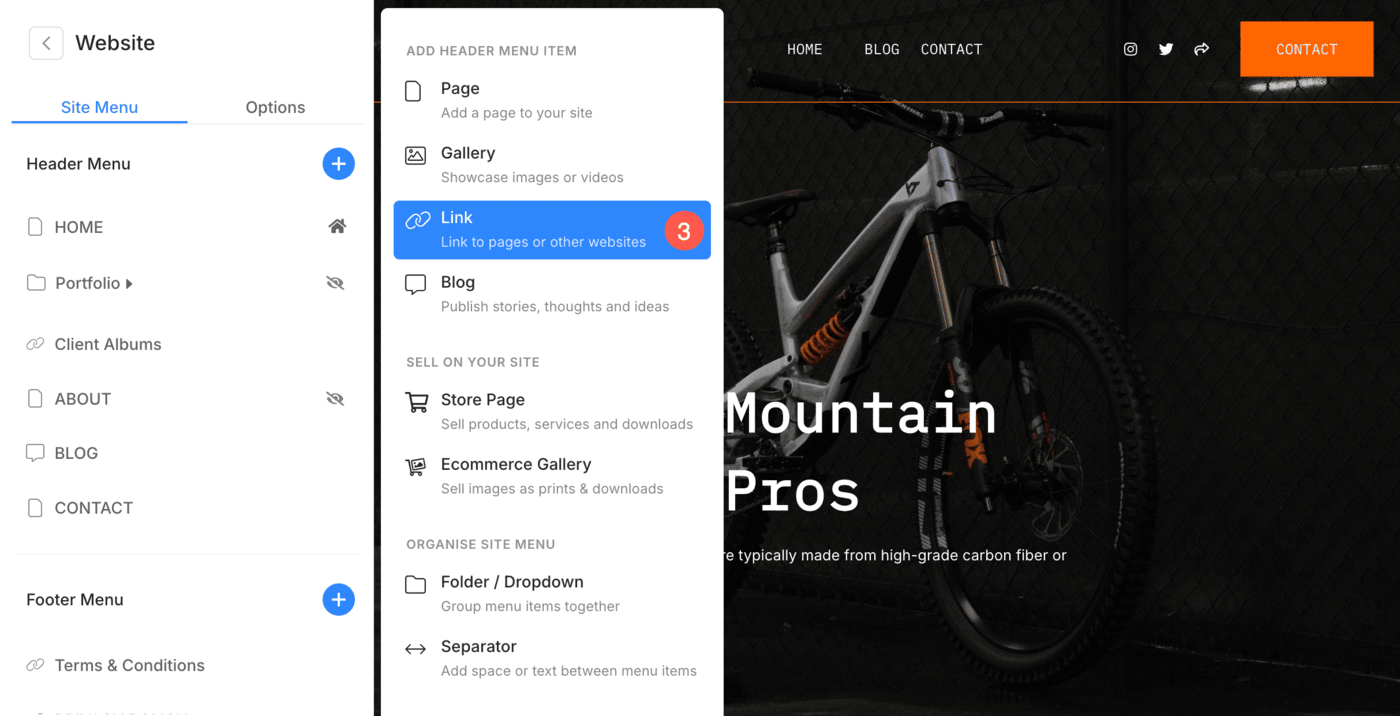
- This will open up a popup window that lets you choose the different types of pages that you can add to your website.
- Choose the Link (3) option to add a link.
- Specify a name for your link.
That’s it! The link is added now.
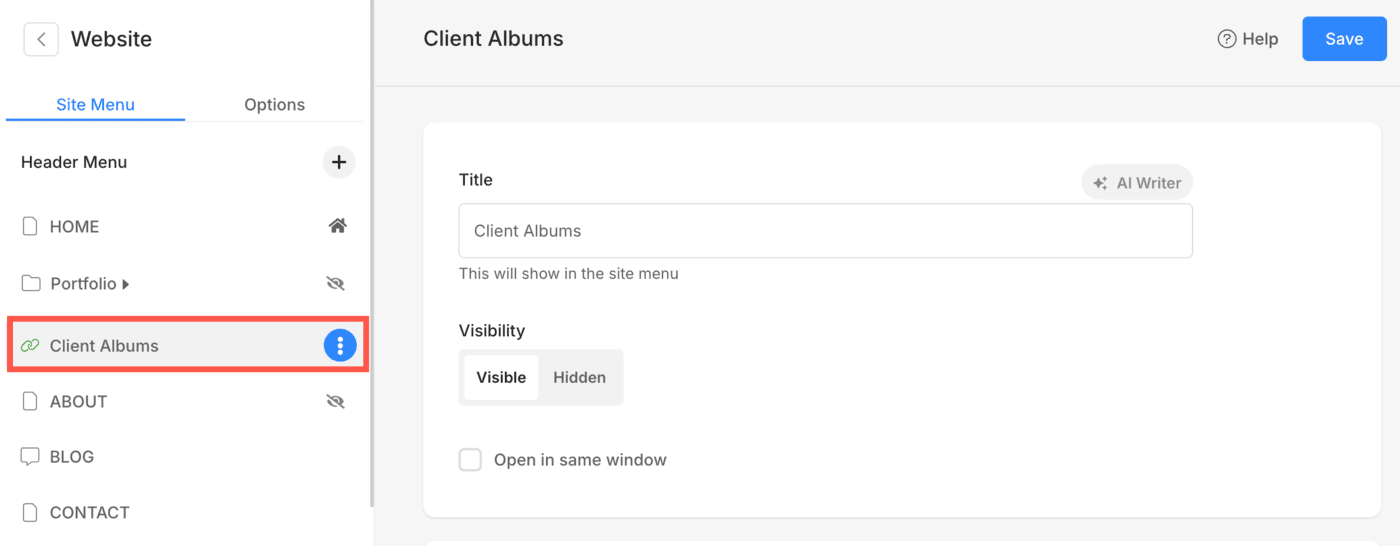
You will see this in your website navigation in the last. You can drag and drop the newly added weblink to its correct position in the site navigation.
Link menu item settings
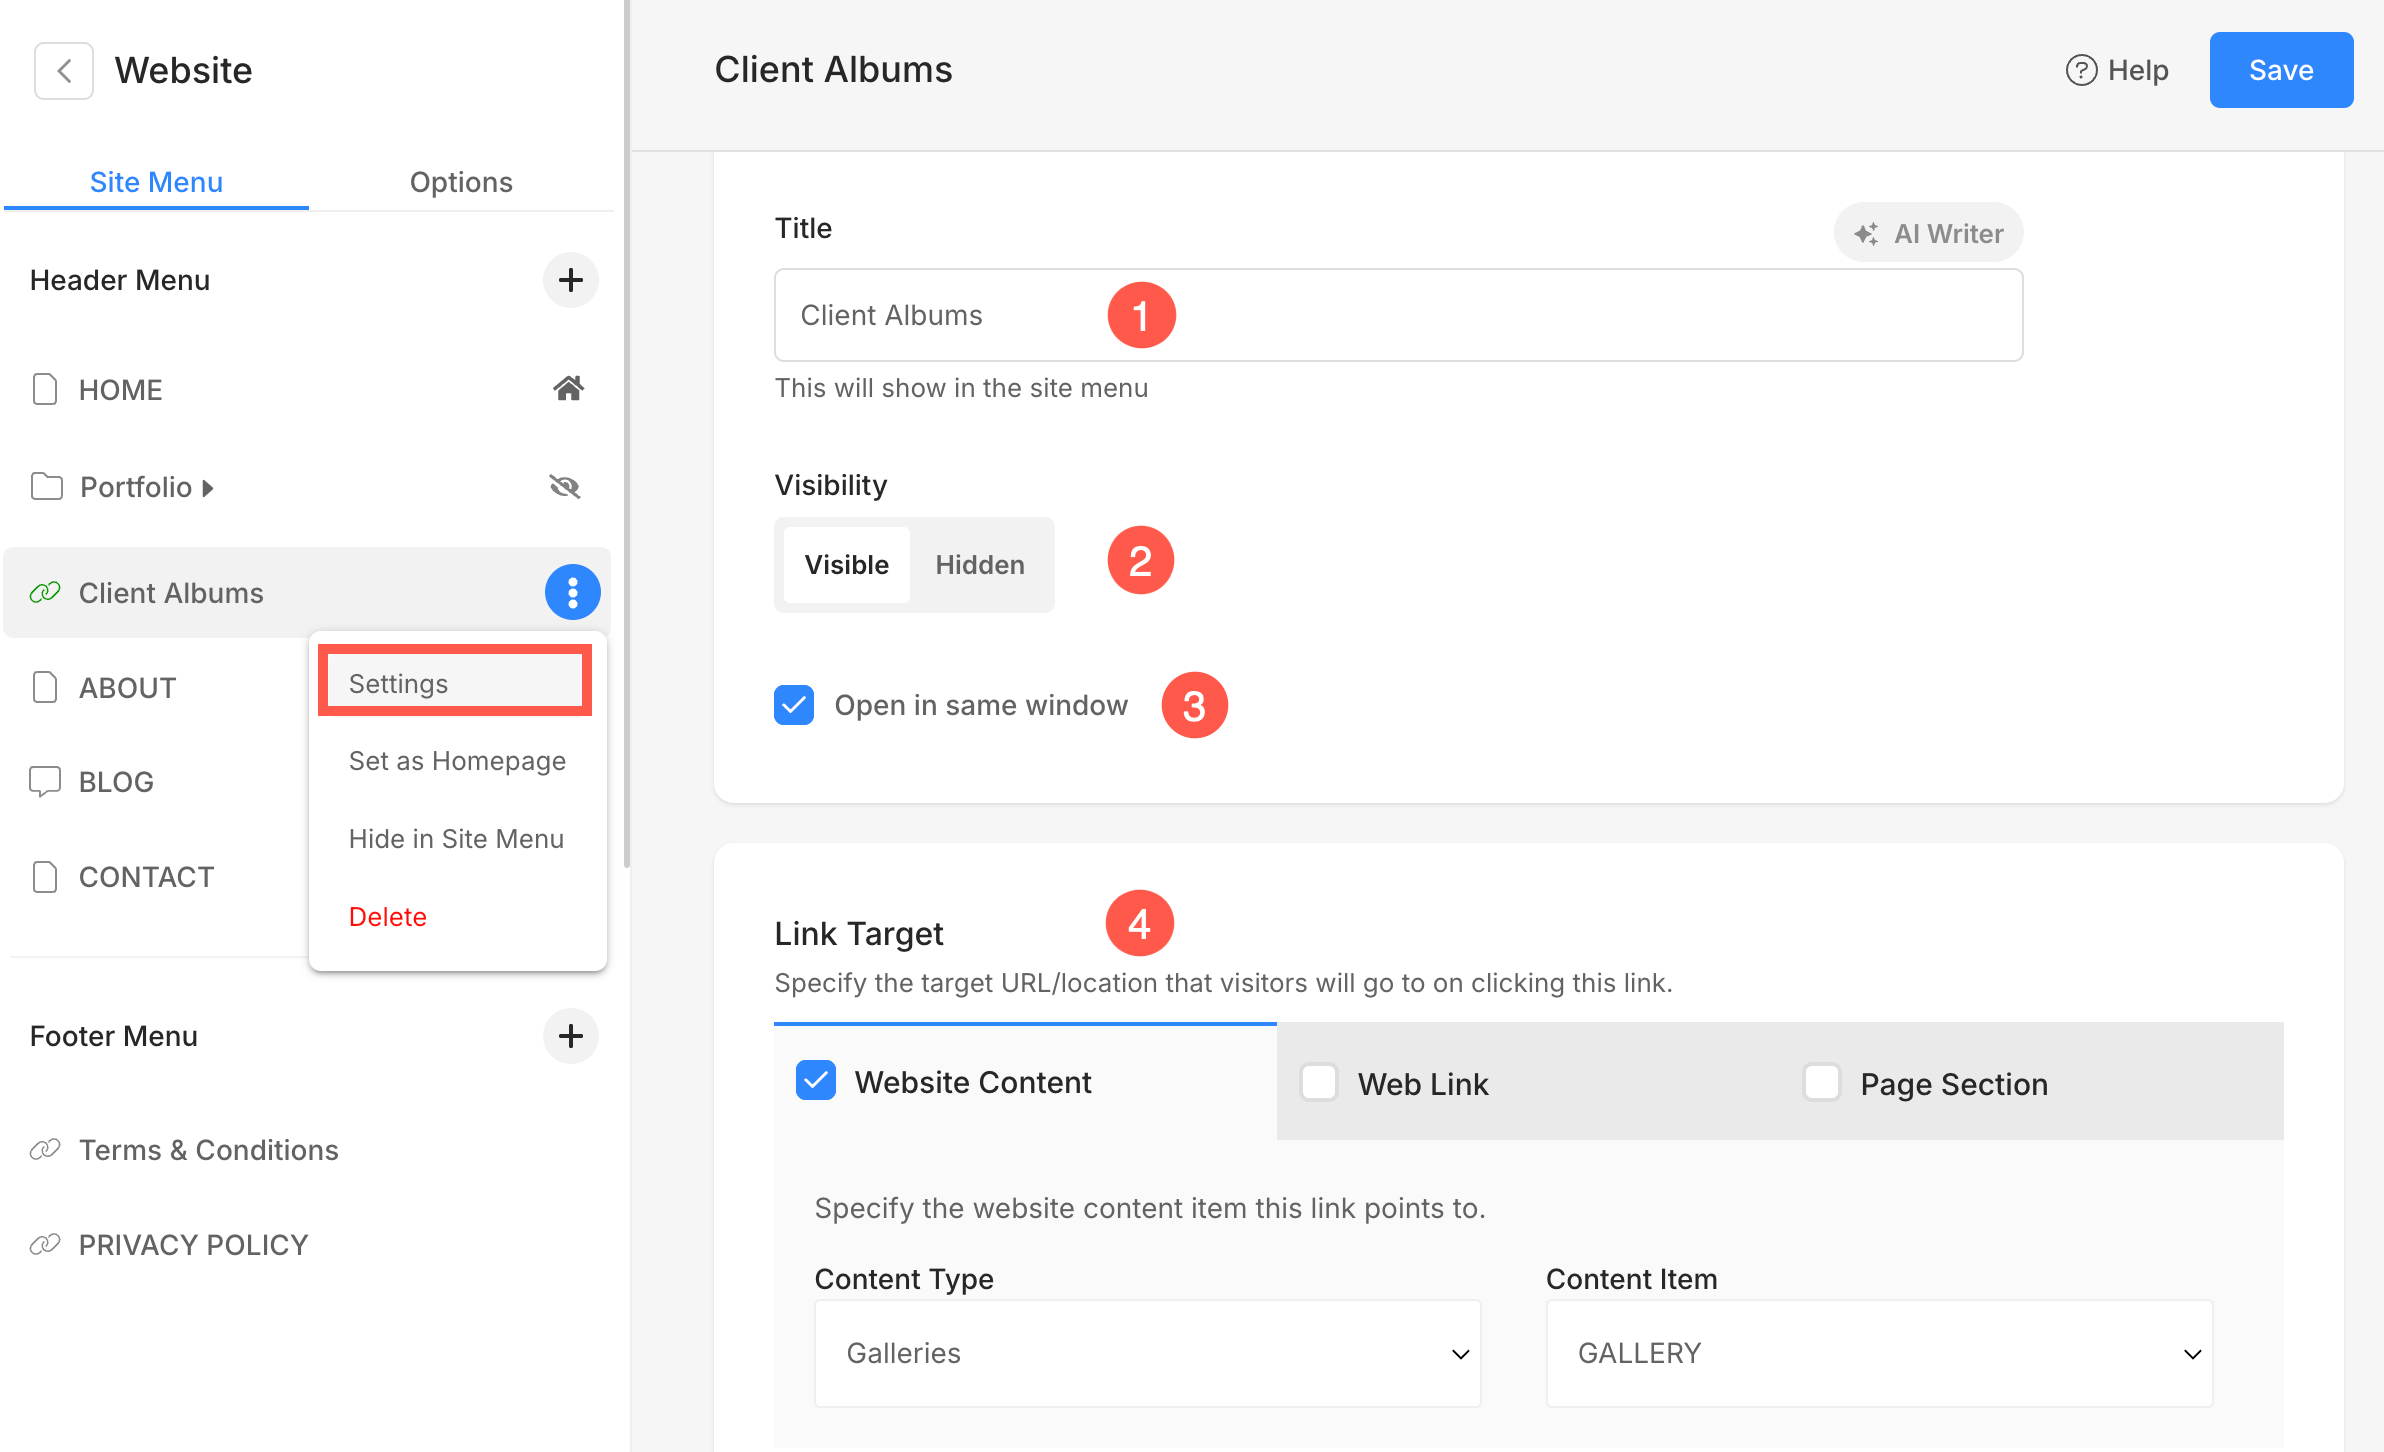
Now, you can specify the settings of the link that you have just created. See details below:
- Title – Enter the link title, it appears in your website’s navigation.
- Visibility – Select the Visible button to show this link in website navigation and the Hidden button to hide it from the website menu.
- Open in same window – Enable it to open the link in the same browser window/tab. Disable to open in a new window/tab.
- Link Target – You can connect this link with any existing website page/gallery or any outside URL. Know more.
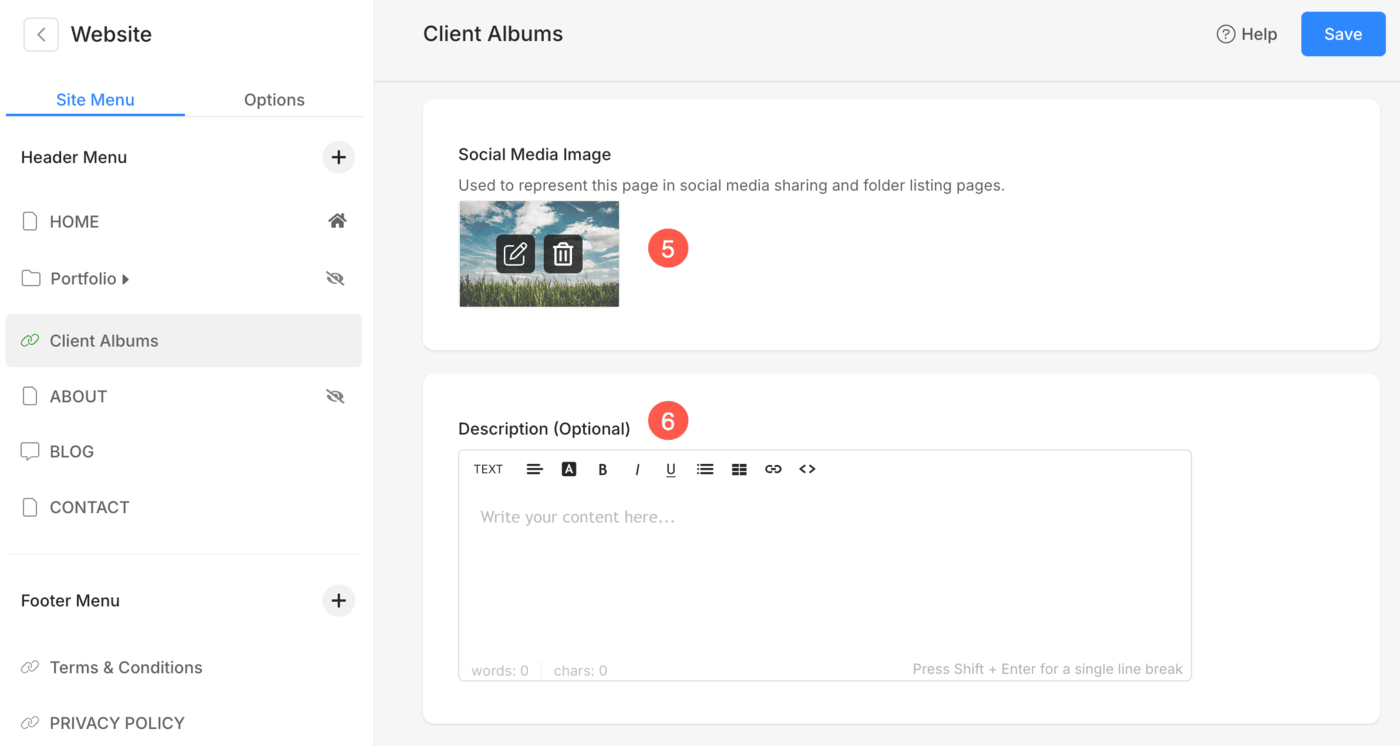
- Social Media Image – Used to represent this link in a folder and (when shared) on social media. Know more.
- Description (Optional) – Used to represent this link in a folder. Used in a few folder layouts.
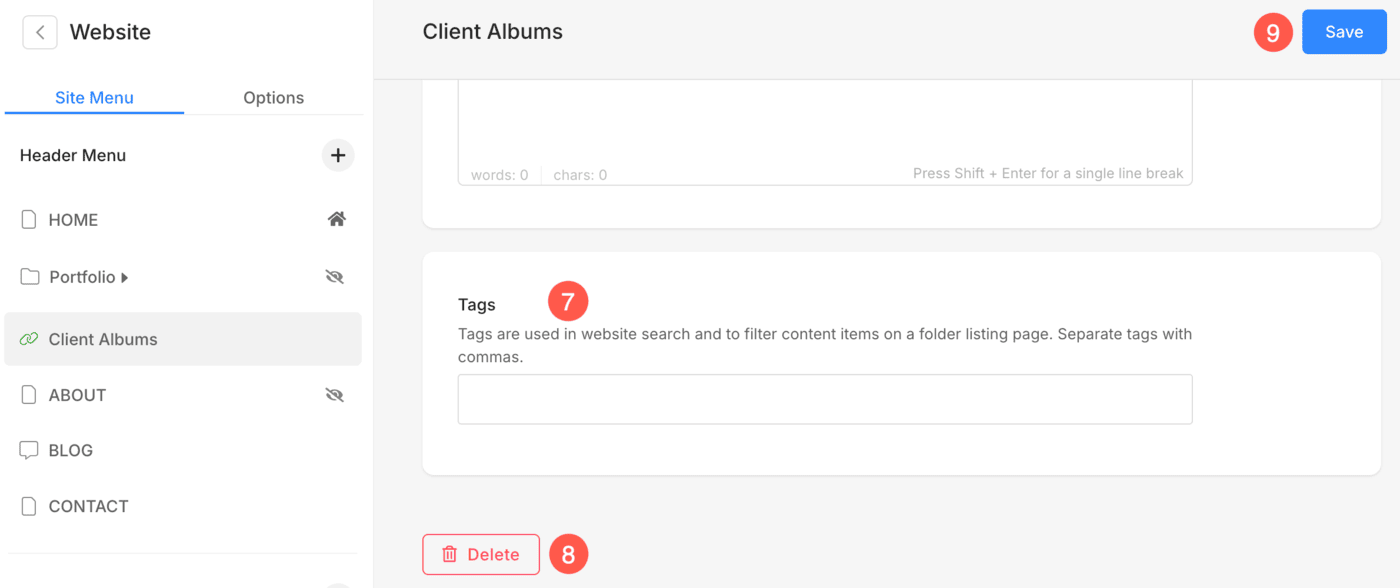
- Tags – Used in website search and to filter this link on a folder listing page. Know more
- Delete this link menu item.
- Save the changes.
Link to any existing gallery/page
You can link any internal menu items like Galleries, Pages, Folders, and other Links using this link.
Once you add a menu item to your website, it automatically appears in your website menu. You do not have to create a link and then, connect it to your menu item. If any menu item is not appearing in your website menu, visit its settings and set the visibility.
Go to a particular link item and follow the steps:
- Go to the Link Target section and select the Website Content (1) tab
- Select Content Type (2) like Galleries, Folders/Pages, etc.
- Select the particular Content Item (3) that you want to link. You would see all the website menu items depending on your selected type as shown in the image below.

Link external web pages or URLs
You can connect any external web pages or URLs by adding their absolute link.
Go to a particular link and follow the steps:
- Go to the Link Target section and select the Web Link (1) tab
- Specify your complete external URL ( including https:// ) (2) that the link will point to.

Link to a specific section of a page
You can link any section of a page using this link provided that you have specified the Section ID for the section (in a page).
Also check: Section settings.
Go to a particular link item and follow the steps:
- Go to the Link Target section and select the Page Section (1) tab
- Specify the Section ID (2) that the link will point to.


