Once you have enabled the store, you can add products to it.
In this article:
- Add a Service Product
- Overview
- Pricing
- Info Section
- Related Product
- Store Listing
- Inventory
- Product Options
- SEO Options
Add a Service Product
- Enter Store products (1) in the Search Bar.
- From the related results, click on the Store products option (2) under Studio Links.
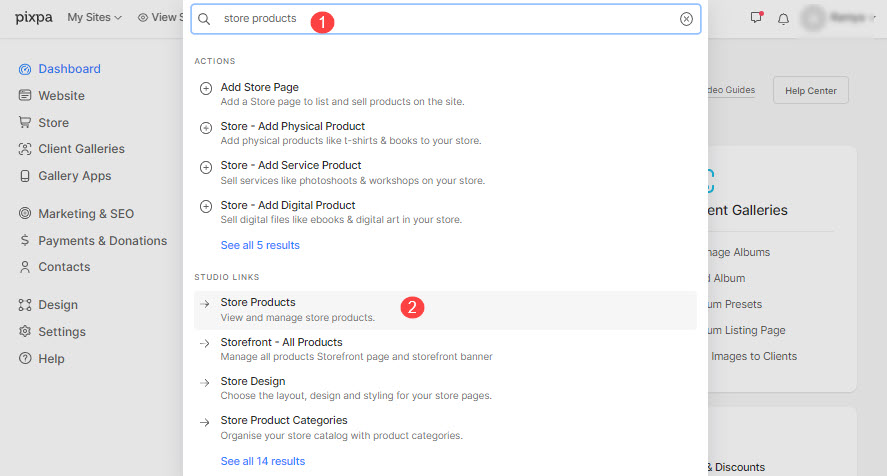
- You will now reach the Products page.
- Click on the + Add Product (3) button. This opens a dropdown that lets you choose the product type that you want to add.
- Click on the Service (4) option.

This will take you to the product creation/edit page. See the screenshots and directions below:
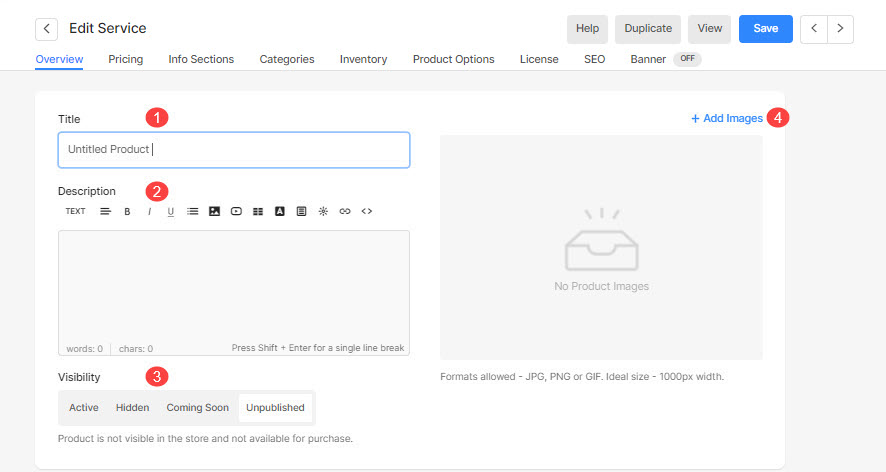
- Title: The name of your product.
- Description: The product description supports rich text and HTML so you can embed a product video in the description if you want to.
- Visibility: Products can have 4 states (Active/Hidden/Coming Soon/Unpublished).
Also Check: Set store product status. - Add Images: Add up to 200 images for your product. You can drag and drop images, sequence them after you have added the images, and save the product.
The first image in the sequence is taken as the default image for the product.
Also Check: How many images can I add to a product?
Preparing your images – Image size
Ideally, images should be JPEGs and around 1000 pixels in width.
Pricing
- Product price: The default price of the base variant of your product. It is shown on the products listing page.
- Compare at price: Optional value to put your products on sale. Compare at price is the un-discounted price of the product and should always be more than the product price.
- This product is Tax-exempt: Check-in this option to exempt tax on a particular product.

Info Sections
Info sections are useful to show more content in addition to the product description that can be applied to multiple products at once. Learn more about Info sections.
Related Products
This is the section that typically displays items that are complementary or similar to the product a customer is currently viewing, encouraging additional purchases and enhancing the shopping experience.
While adding / editing a product, you can customize the products that will be displayed as its related product.
- Show Products: From here, you can select one of the following four options:
- All Products: With this option, all the products of store that are published will be listed as related products.
- Based on Category: Using this option, you can display the related products based on a Category.
- Based on Tag: Using this option, you can display the related products based on a tag.
- None: This will disable the “Related Products” section for the particular product that is currently being added / edited.
- Select Category / Tag: This option will be displayed according to the selection made in the previous step. If you have selected “Based on Category”, you can select a particular category or all categories. Similarly, if “Based on Tag” option is selected, you can choose a particular tag or all the tags.

Store Listing
- Categories: Select the category from the list to add this product to that particular category.
- Tags: Add tags to a product to assign them to a category. Tags can also be used to filter products.
Also See: What are Tags? How to use tags in products and categories?

- Track Stock for this product: Manage the quantity of a particular service product that is available for sale in your Pixpa store.
Also See: Manage inventory for store products. - SKU: Add the stock-keeping unit here, if any.
Inventory

- Enable product options: Enable this to create product variants.
For example, a shoot session can have product variants based on durations (2 hours, 4 hours, 8 hours) or packages (small, medium, extended).
Also See: Create store product options.
Product Options

- License/Usages instructions: Include the license/usage instructions for this particular product here.

Search Engine Optimization
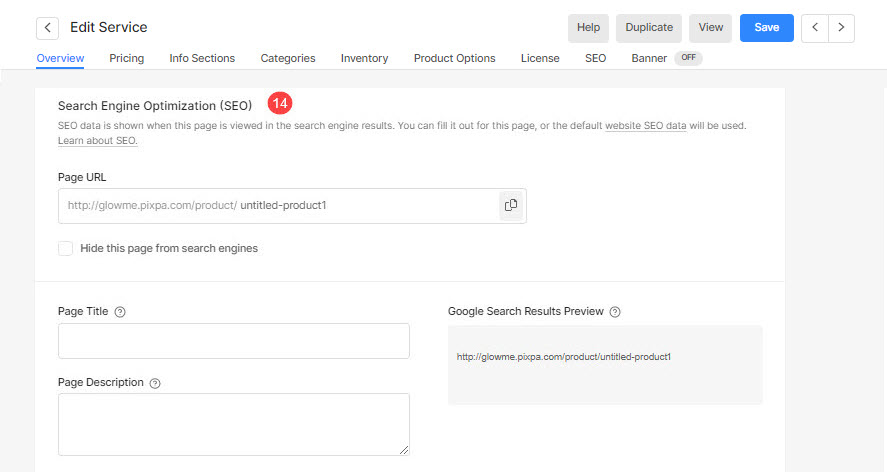
- SEO data – Specify SEO metadata for this particular product. It will override the website’s main SEO data.
Also Check: Add SEO metadata for your website, gallery, and page- Page URL – Manage the URL for this product. The URL slug is automatically generated using your product title. But you can customize it as well.
- Page Title –
- Page Description –
- Hide this page from search engines – Hide this product from the search engine by selecting this option.
- Google Search Results Preview (5) shows you the SEO data as visible in case of search results.
- Page Code Injection: Insert any external code which will be added to the body section of a product page.
- Delete Product: Used to delete this product.
- Duplicate the existing product.
- After saving, click on the View button to check the live product on your website.
- Click on the Save button to save the product.
