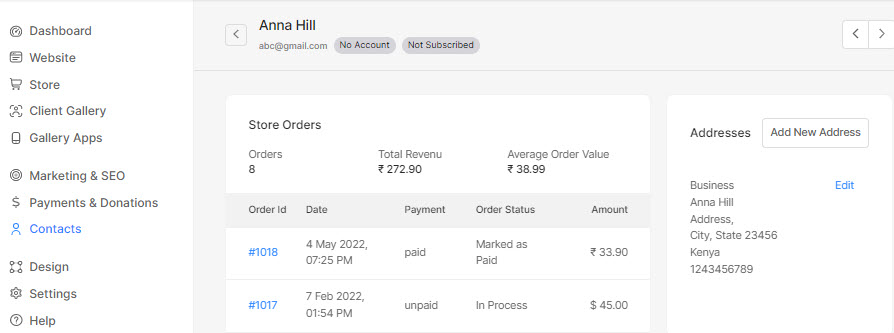
Your Contacts section contains the information of all your website submissions. When you click on the contact the contact information page opens wherein you can find all the information of that customer such as orders placed, forms submitted, and addresses. You can also add tags, and notes which can be viewed/used by you.
The information received from the customer will be shown as it is but you can add more addresses or tags (used for filtering) or notes (to save customer-specific information).
This is useful to view the entire history (interactions done with your website) of your customers and to update any user information (like addresses).
View/Update information of any Contact
- Enter the contact name (1) in the Search Bar.
- From the related results, click on the particular contact name (2) that you are searching for.

- You will now reach the contact details page.

- From this page, you can:
- View all the activities of the customer done on your website.
- View/Edit/Add the addresses of the customer. Know more.
- Go to the previous/next customer page.
- View/Add the tags to the customer (tags will be used for filtering on the contacts page). Know more.
- View/Add notes specifically to the customer. You can enter the notes and click on the Save button to save your note.

All Addresses
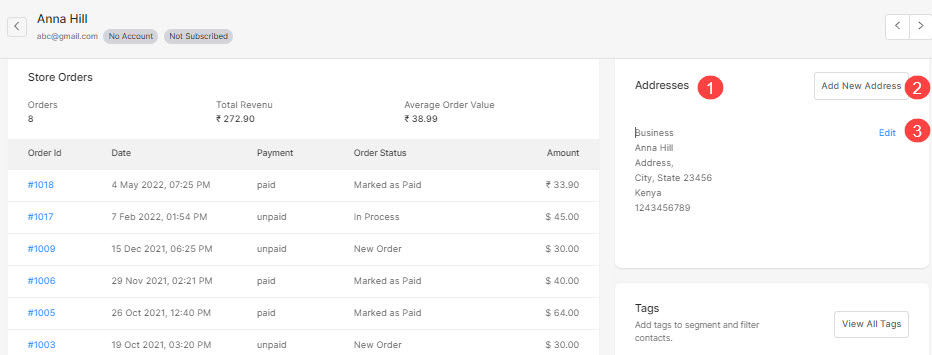
- From the All Addresses section (1), you can view all the addresses of the customer.
- Click on the Add New Address text link (2) to add a new address. Know more.
- Click on the Edit text link (3) to edit a particular address. Know more.

Adding new Address
- Once you have clicked on the Add New Address text link, you will see a popup.
- Enter the details like name, address, etc (1).
- Finally, hit the Save button (2).

Editing the existing Address
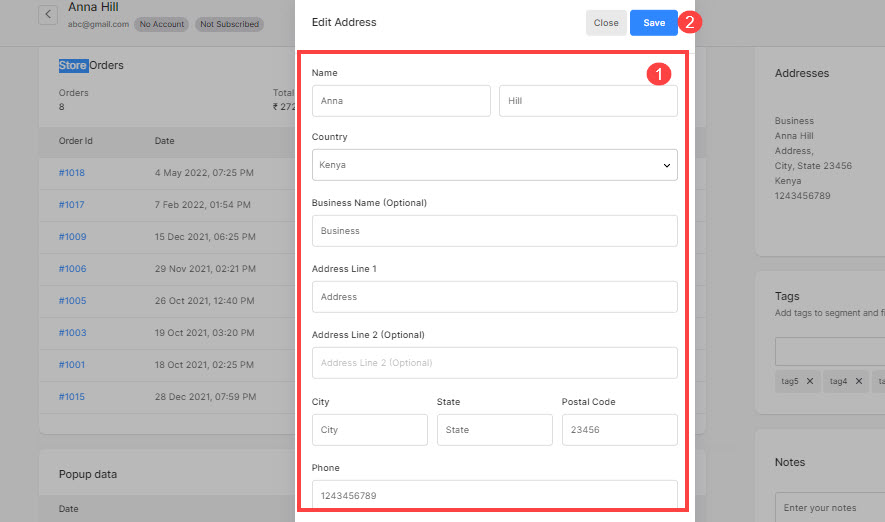
- Once you have clicked on the Edit text link, you will see a popup.
- Update the existing information (1).
- Finally, hit the Save button (2).

Tags
- From the Tags section, you can view/add the tags to the customer.
- Enter the tag name in the text box (1) provided and press the Enter button to add the tag.
- View the tags (2) applied to a customer.
- Click on the View All Tags text link (3) to view all the tags you have created across all your contacts. Know more.

View All Tags
- Once you have clicked on the View All Tags text link, a new popup appears wherein you can view the tags applied to a customer and all the tags that you have created across all your contacts.
- Click on any of the tags from the All Tags to add the particular tag to the customer.

