Pixpa’s integration with Weglot provides you with everything you need to translate, display and manage your multilingual website, with full editing control.
No complexity: Connect your Pixpa website with your Weglot account for a fully translated and displayed website in minutes.
Automated Translation: Weglot automatically scans and detects the text, images, and SEO metadata of your Pixpa site and continuously translates any new content or page as you go.
Reach new audiences: Benefit from Multilingual SEO with language subdomains or subdirectories, hreflang tag implementation, and translated metadata to rank your translated pages on search engines.
In this article:
- Setup Weglot account and copy Weglot JS code
- Embed JS code to Pixpa Studio
- Translate Dynamic Site Elements
- Default Weglot Language Switcher
- Pixpa Language Switcher
- Add Translation Exclusions
- Using sub-domains for language websites
To copy the Weglot code snippet, follow these steps:
- Sign up for the Weglot account.
- You should receive a validation email in the account with which you signed up. After validating your email, you will arrive on the Weglot setup page.
- Create a new project and select “Other” as your “Website Technology.”
- In the next step, Scroll down to the box and click on “Use Javascript integration”, as shown below.
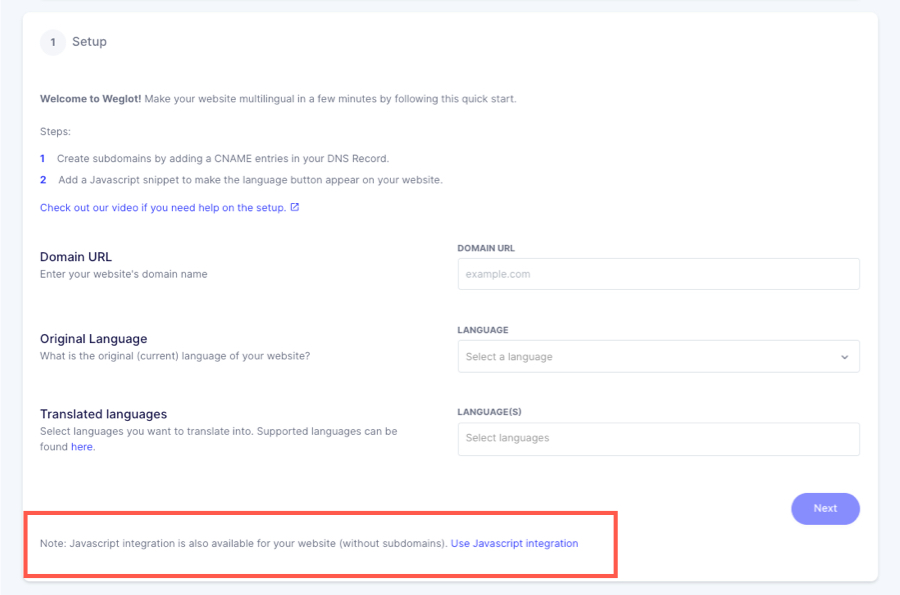
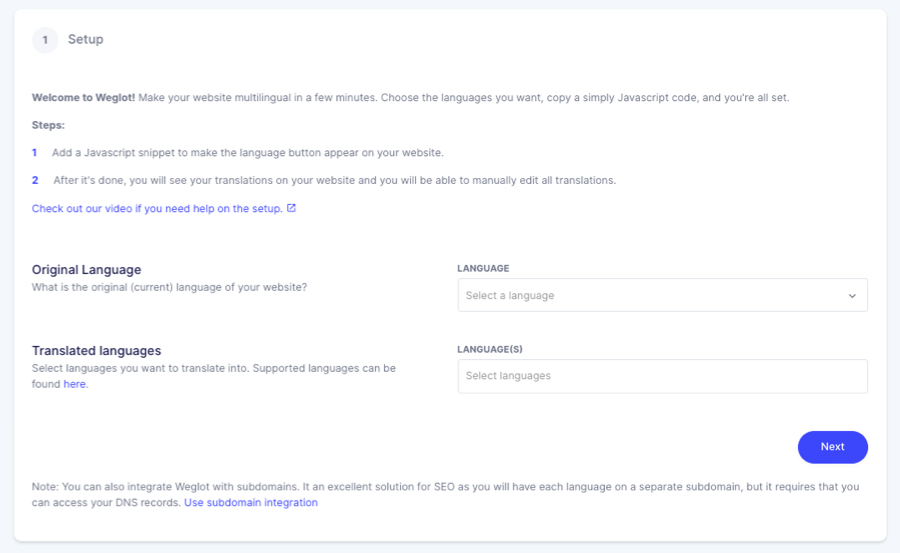
- You’ll then be prompted to enter the original language of your Pixpa website and the new language(s) you want to translate and display your site into.
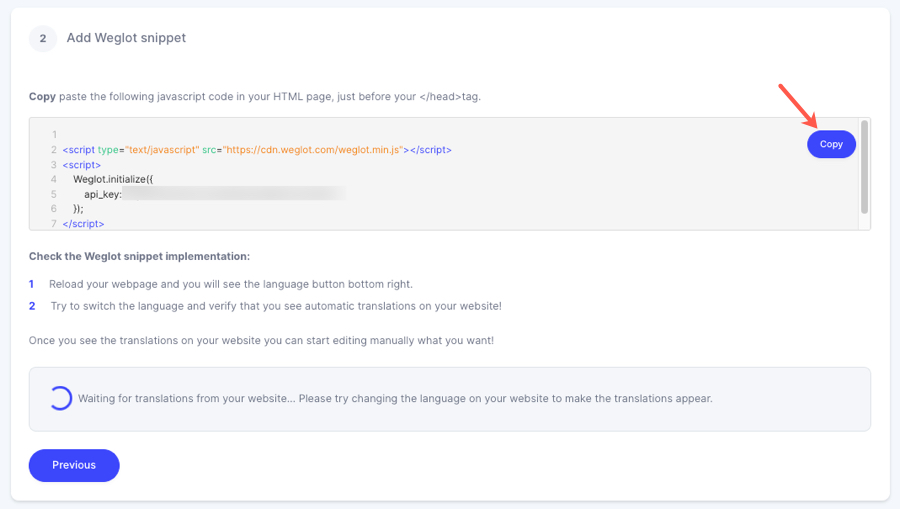
- In the next step, Copy the code shown on your screen and paste in Pixpa Studio. That’s it.
Embed the copied JS code in Pixpa Studio
- Go to Settings (1) and clcik on Language and Labels (2) on the left sidebar.
- Enable the Weglot toggle (3) and paste the copied Weglot JS code (4).
- Click on the Save button. That’s it.

Your Pixpa website is now translated!
You’ve now successfully translated your website using Weglot. Go to your website and you’ll see a language switcher at the bottom right of your site (it might take a few minutes to appear).
Log in to your Weglot account and then go to “ Translations” to find all your translations and edit them.
Translate Dynamic Site Elements
Weglot might not translate dynamic content (i.e. List item sections, Headline sections etc) by default. To fix this, Go to your Weglot account and then go to App Settings.
- Click on Add Dynamic button
- As shown below, copy and paste the CSS selector and hit save. Do not forget the dot prefix.
.is-wrapper, .overlay-container, .dynamic-component, .gallery-slider-desc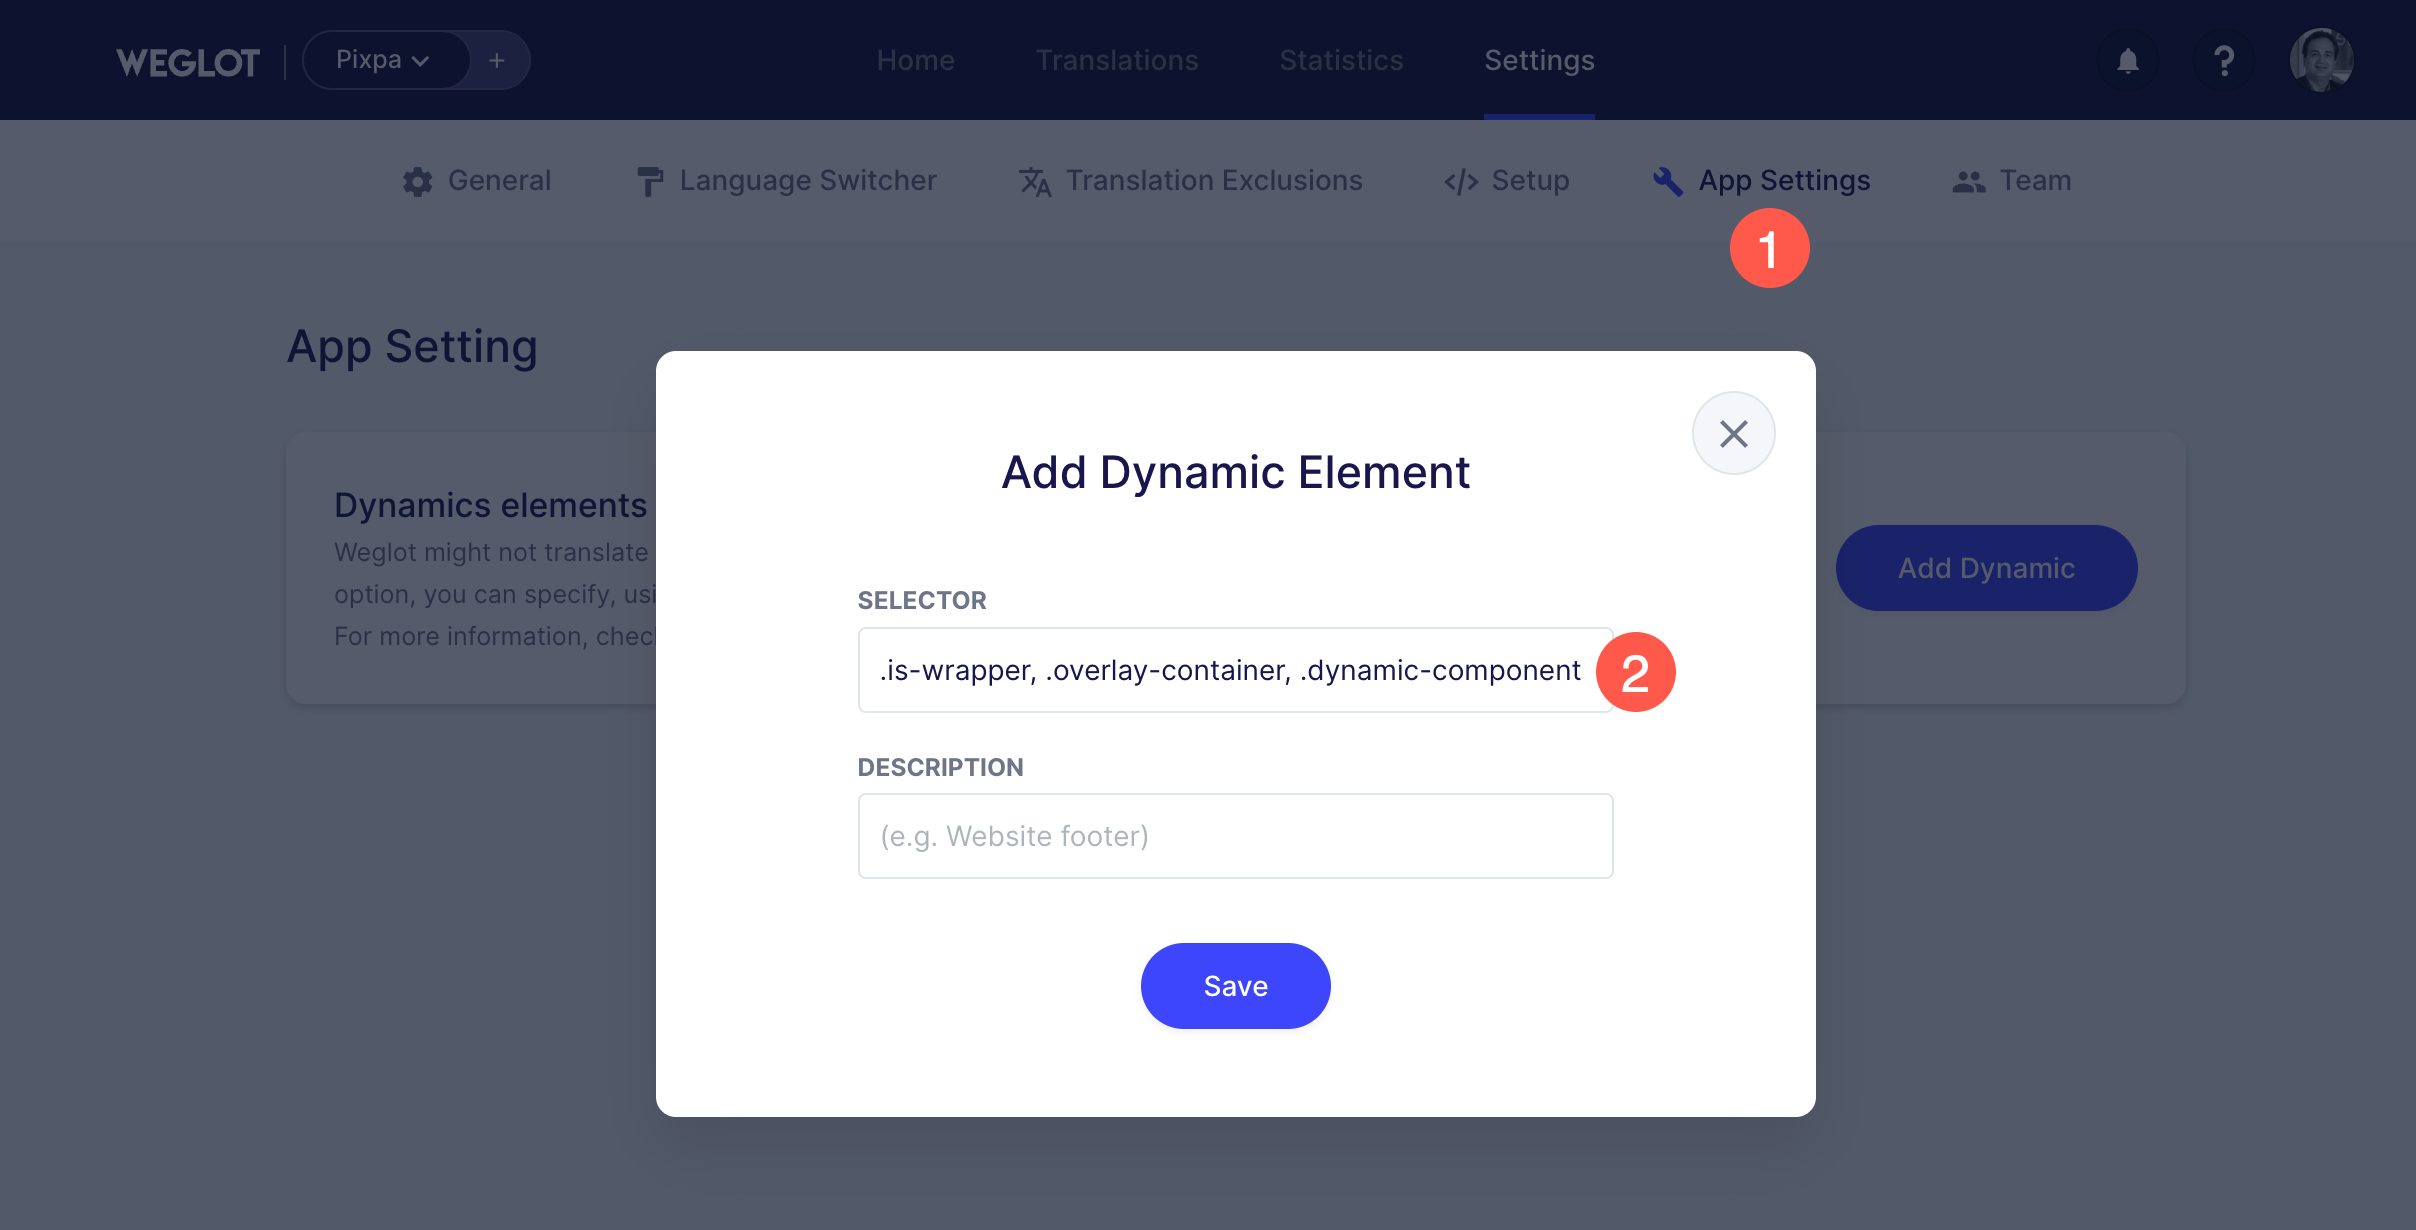
- That’s it. Reload your Pixpa site now.
- The changes should be visible 30 seconds later, don’t hesitate to Hard-Refresh* your website’s page and check back in an incognito window if you don’t notice the changes.
*Hard-Refresh:
Mac: cmd shift R (lowercase)
PC: ctrl F5
Style Language Switcher
You can choose between the default Weglot and Pixpa language switcher.
Weglot Default Language Switcher
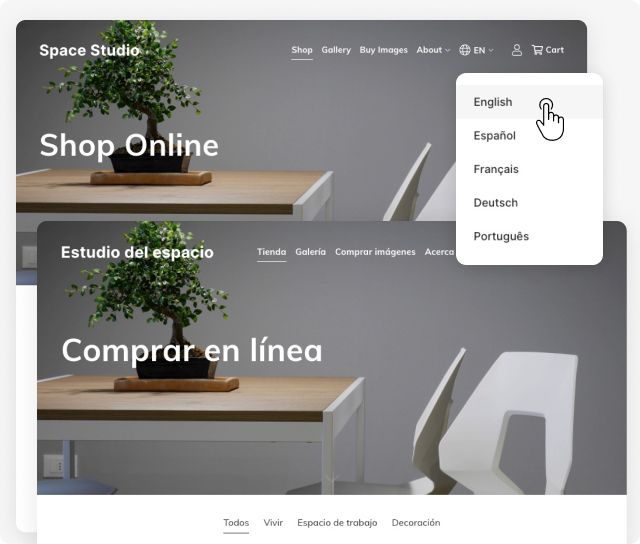
The language switcher provided by Weglot is a small box, located in the bottom right corner of the site. This is what it looks like:
The basic settings related to Weglot’s switcher (1) can be found in your Weglot dashboard > Settings > Language Switcher. This is what they look like:
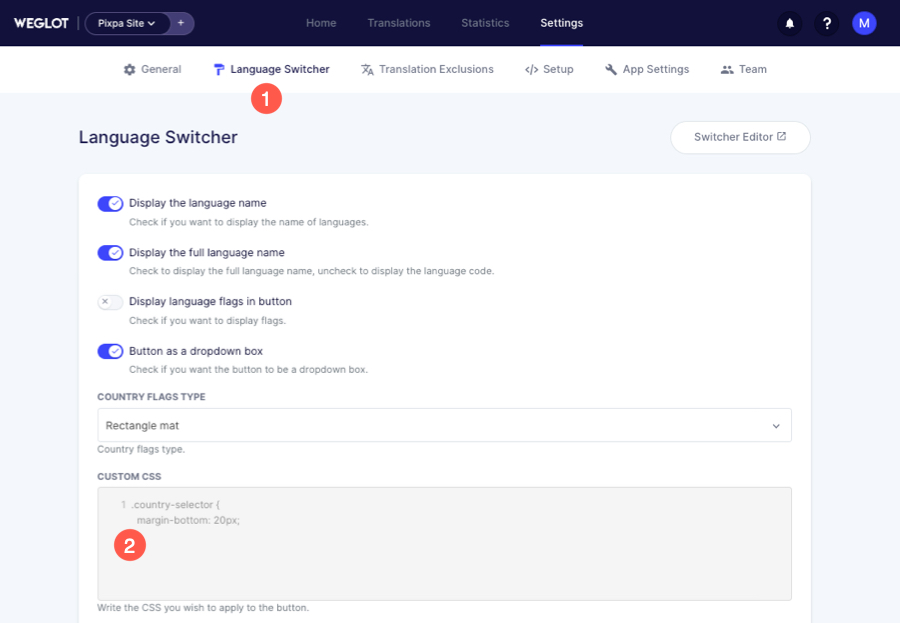
You can also add some custom CSS (2) here to customise the switcher design or change the default position on website.
e.g. Weglot switcher default position is bottom right. To change the position to the left, add the following CSS code in your Weglot account.
.wg-default, .wg-default .country-selector  {
    left: 40px!important;
    right: auto!important;
}
Click here to see few more customisation of default switcher.
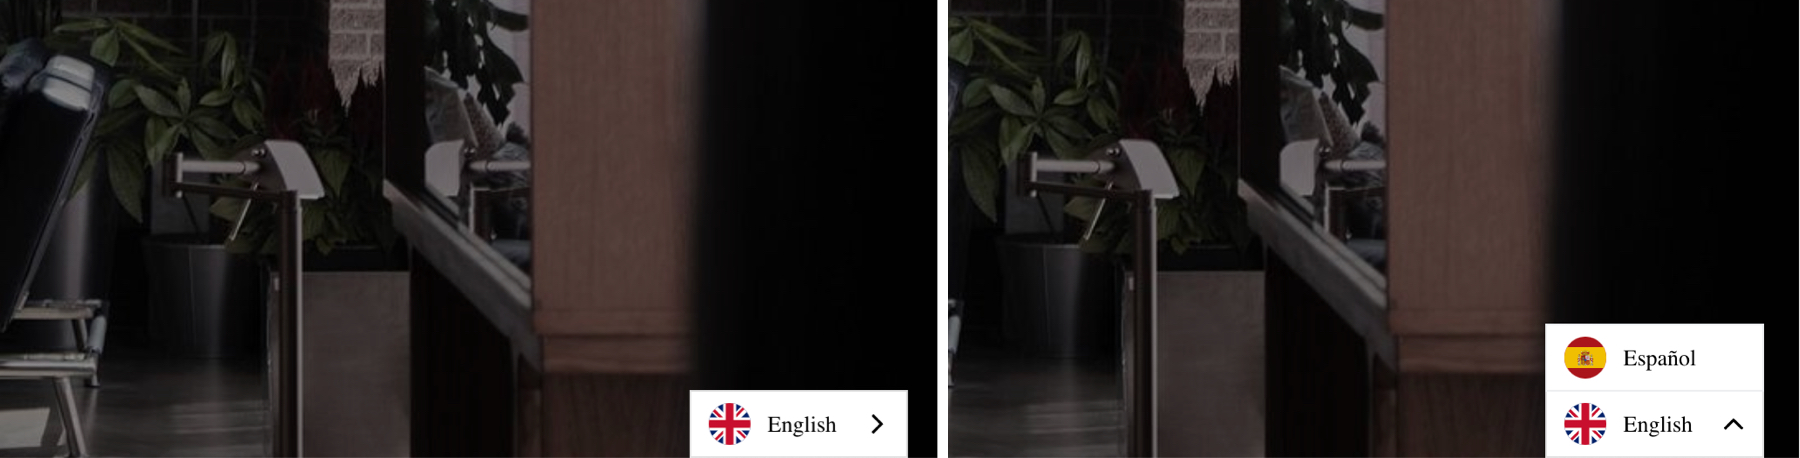
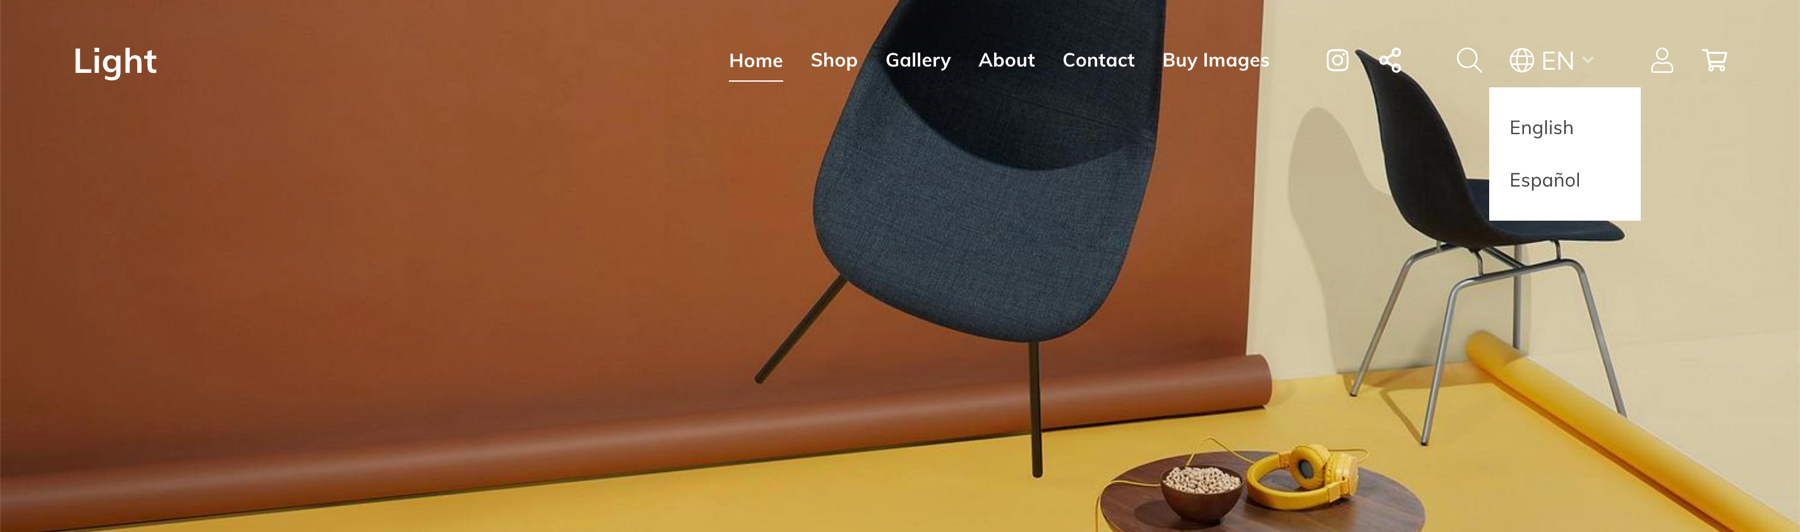
Pixpa Language Switcher
Uses style properties from Pixpa website. Switcher will be part of website main menu.
Click here to see in action – light.pixpa.com
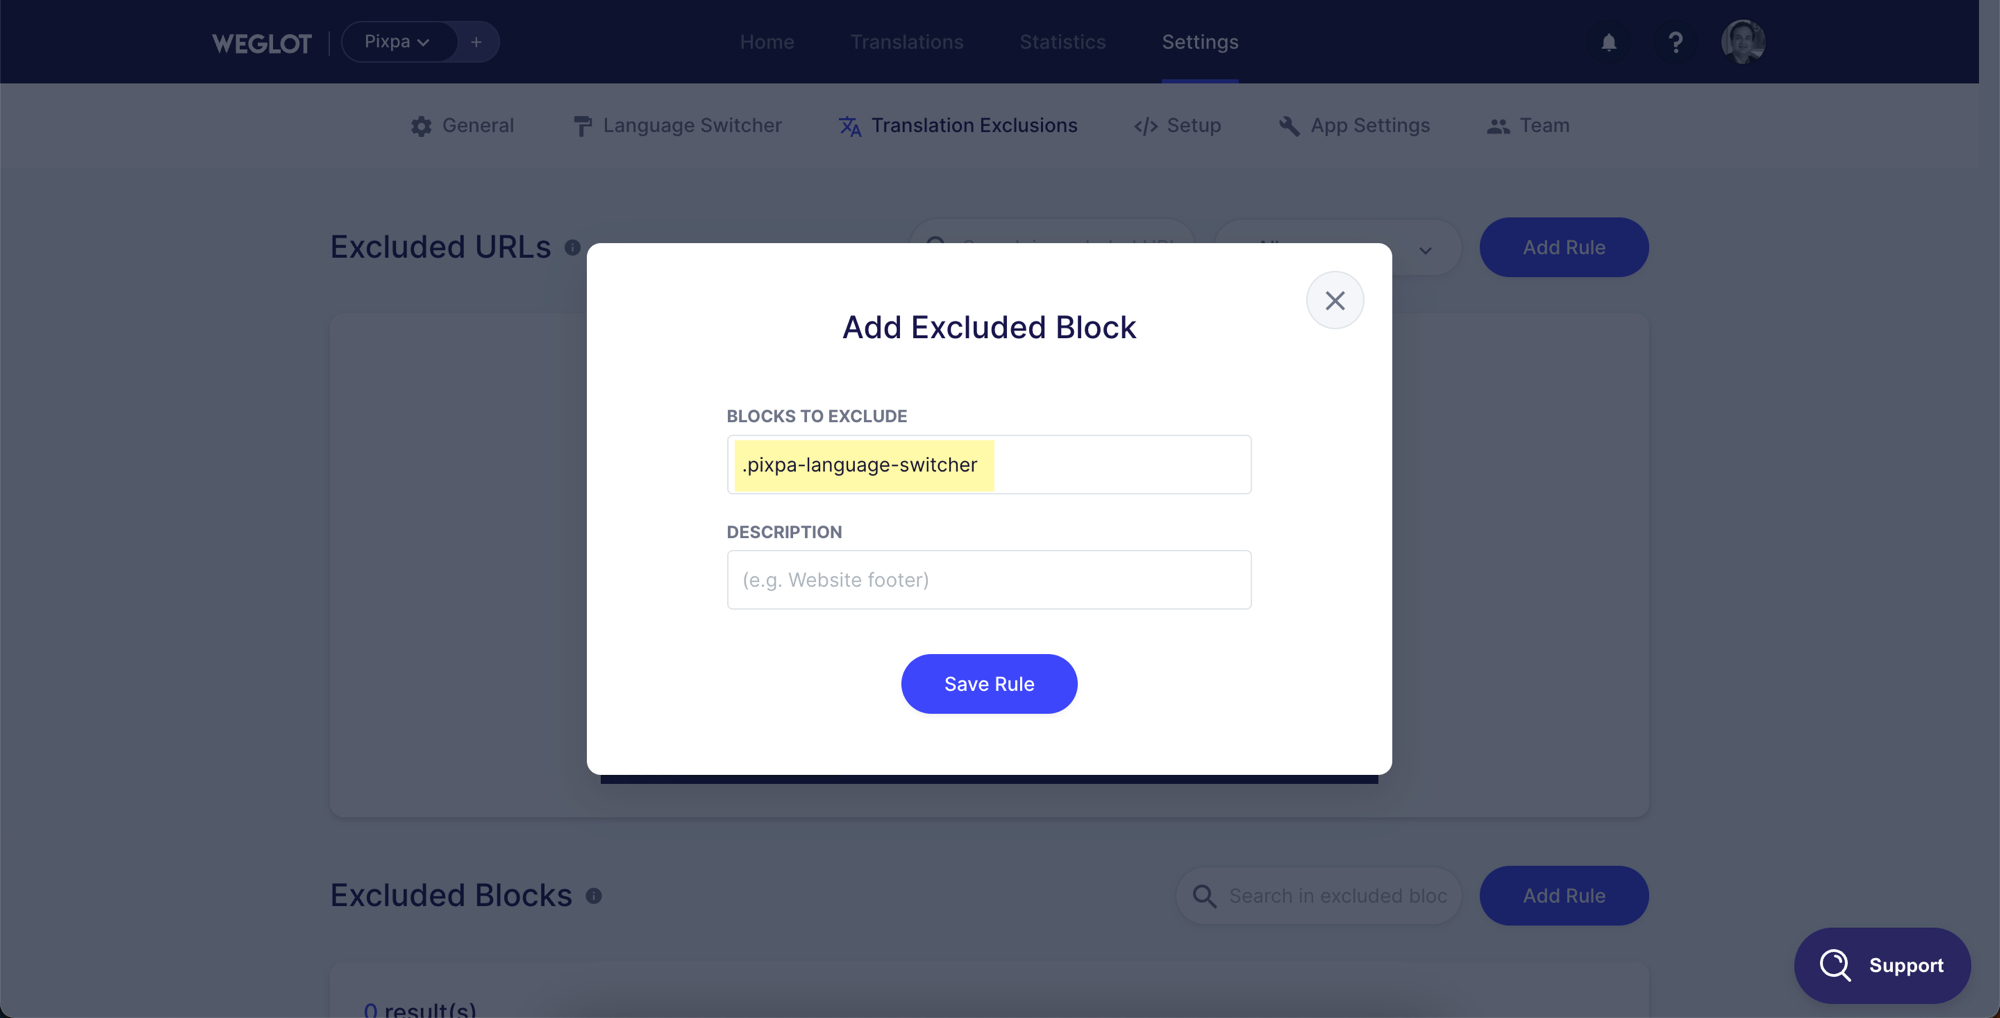
Add Translation Exclusions
Weglot might translate the language switcher dropdown by default. To restrict the same, Go to your Weglot account and then go to Translation Exclusion
- Click on Add Rule under excluded block section
- As shown below, copy and paste the CSS selector and hit save. Do not forget the dot prefix.
.pixpa-language-switcher
Using sub-domains for language websites
With Weglot, you can set up subdomains for each language version of your website. For example:
- en.yourwebsite.com for English
- fr.yourwebsite.com for French
- es.yourwebsite.com for Spanish
This approach is SEO-friendly and allows search engines to index each language version separately.
Steps to set up subdomain translation in Weglot
- Log in to your Weglot account – Go to weglot.com and log in. If you do not have an account, you can create one.
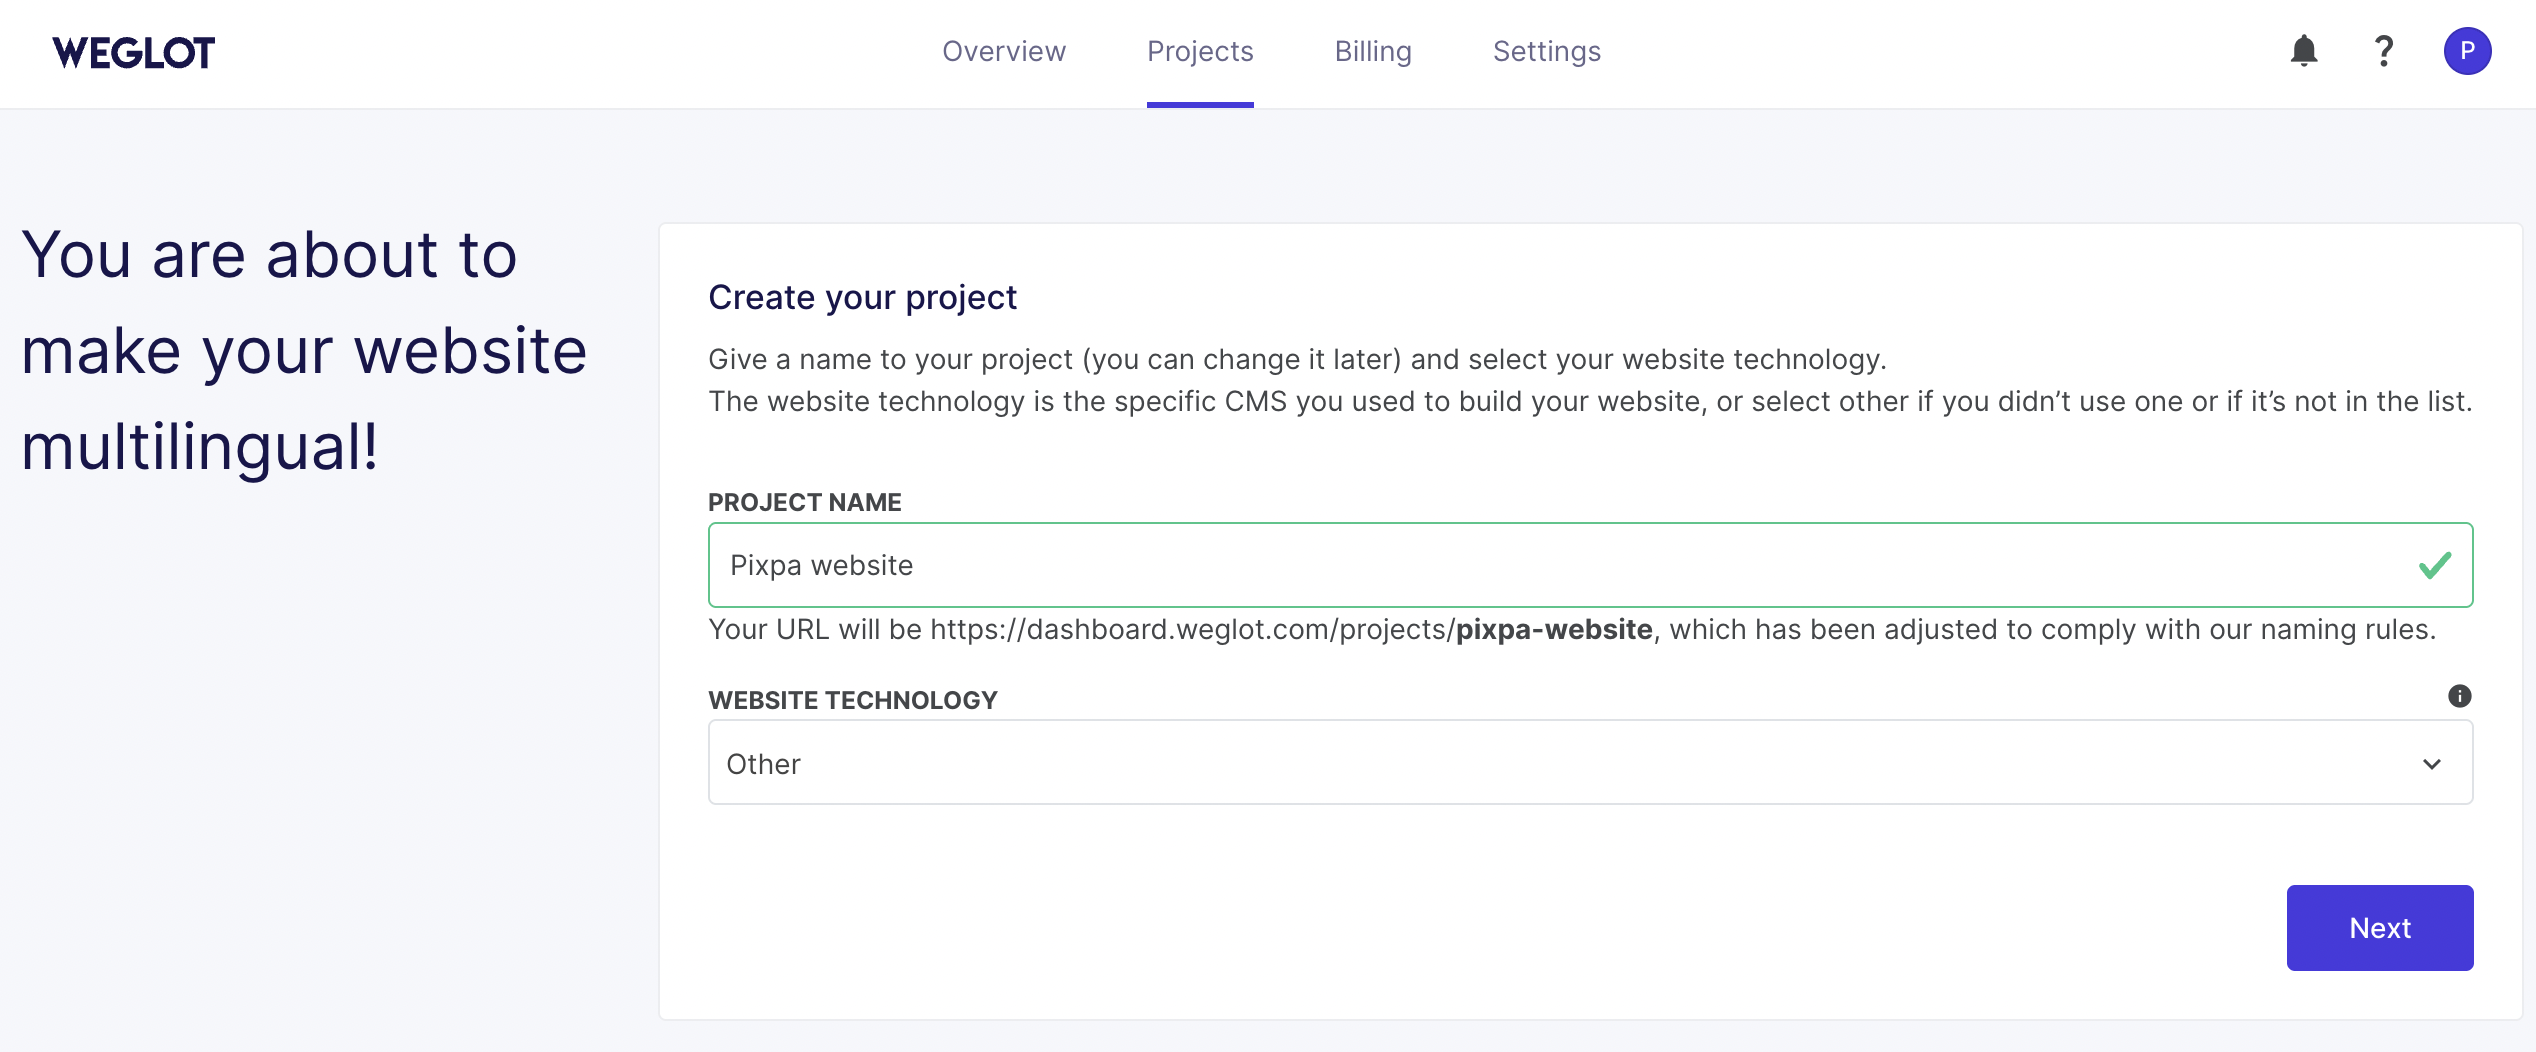
- Create a new project for your Pixpa website –
- Specify a Project Name and select Other as Website Technology
- Click Next button.
- Choose your website’s Original Language and the languages you want to add (Translated languages) and click Next.

- Add your website details
- Domain URL – Enter your website’s domain name in the provided field. Make sure that it is verified.
- Publish Destination – Select Connect my live website option.
- URL Type – Select Subdomains option from the dropdown.
- Next – Click the Next button to proceed to the subdomain configuration steps.

- Setup DNS Manually – Select the option to manually configure your DNS records.
- Copy DNS Records – Copy the provided CNAME record details (Name, Type, and Value) and add them to your domain’s DNS settings via your domain registrar.
- Check DNS – Once the DNS record is added, wait a few minutes for propagation and then click Check DNS to verify the connection.

- Add Weglot script to Pixpa – Copy the JavaScript integration snippet provided by Weglot and paste it into the Weglot JS Code field located under the Language & Labels section in your Pixpa Studio.

- Test your multilingual subdomains – Visit each subdomain (e.g., fr.yourwebsite.com) to confirm that your site is showing the correct translated version. The Weglot language switcher will also allow visitors to toggle between languages.