A Contact page on your website helps you connect with potential customers. When your customer has any queries and wishes to contact you directly, they visit the Contact page.
To create a contact page for your site, add the Contact section to a page or create a contact page directly as suggested below. The Contact section contains the text block, a contact form, and a location map.
In this article:
- Create a contact page using a template
- Elements of the Contact section
- Extra information to be added
- Reorganize the blocks
- Exhibit your Contact info
The Contact page template
To create a contact page using a template, follow these steps:
- From the Dashboard (1) of the studio, click on Website (2) section.
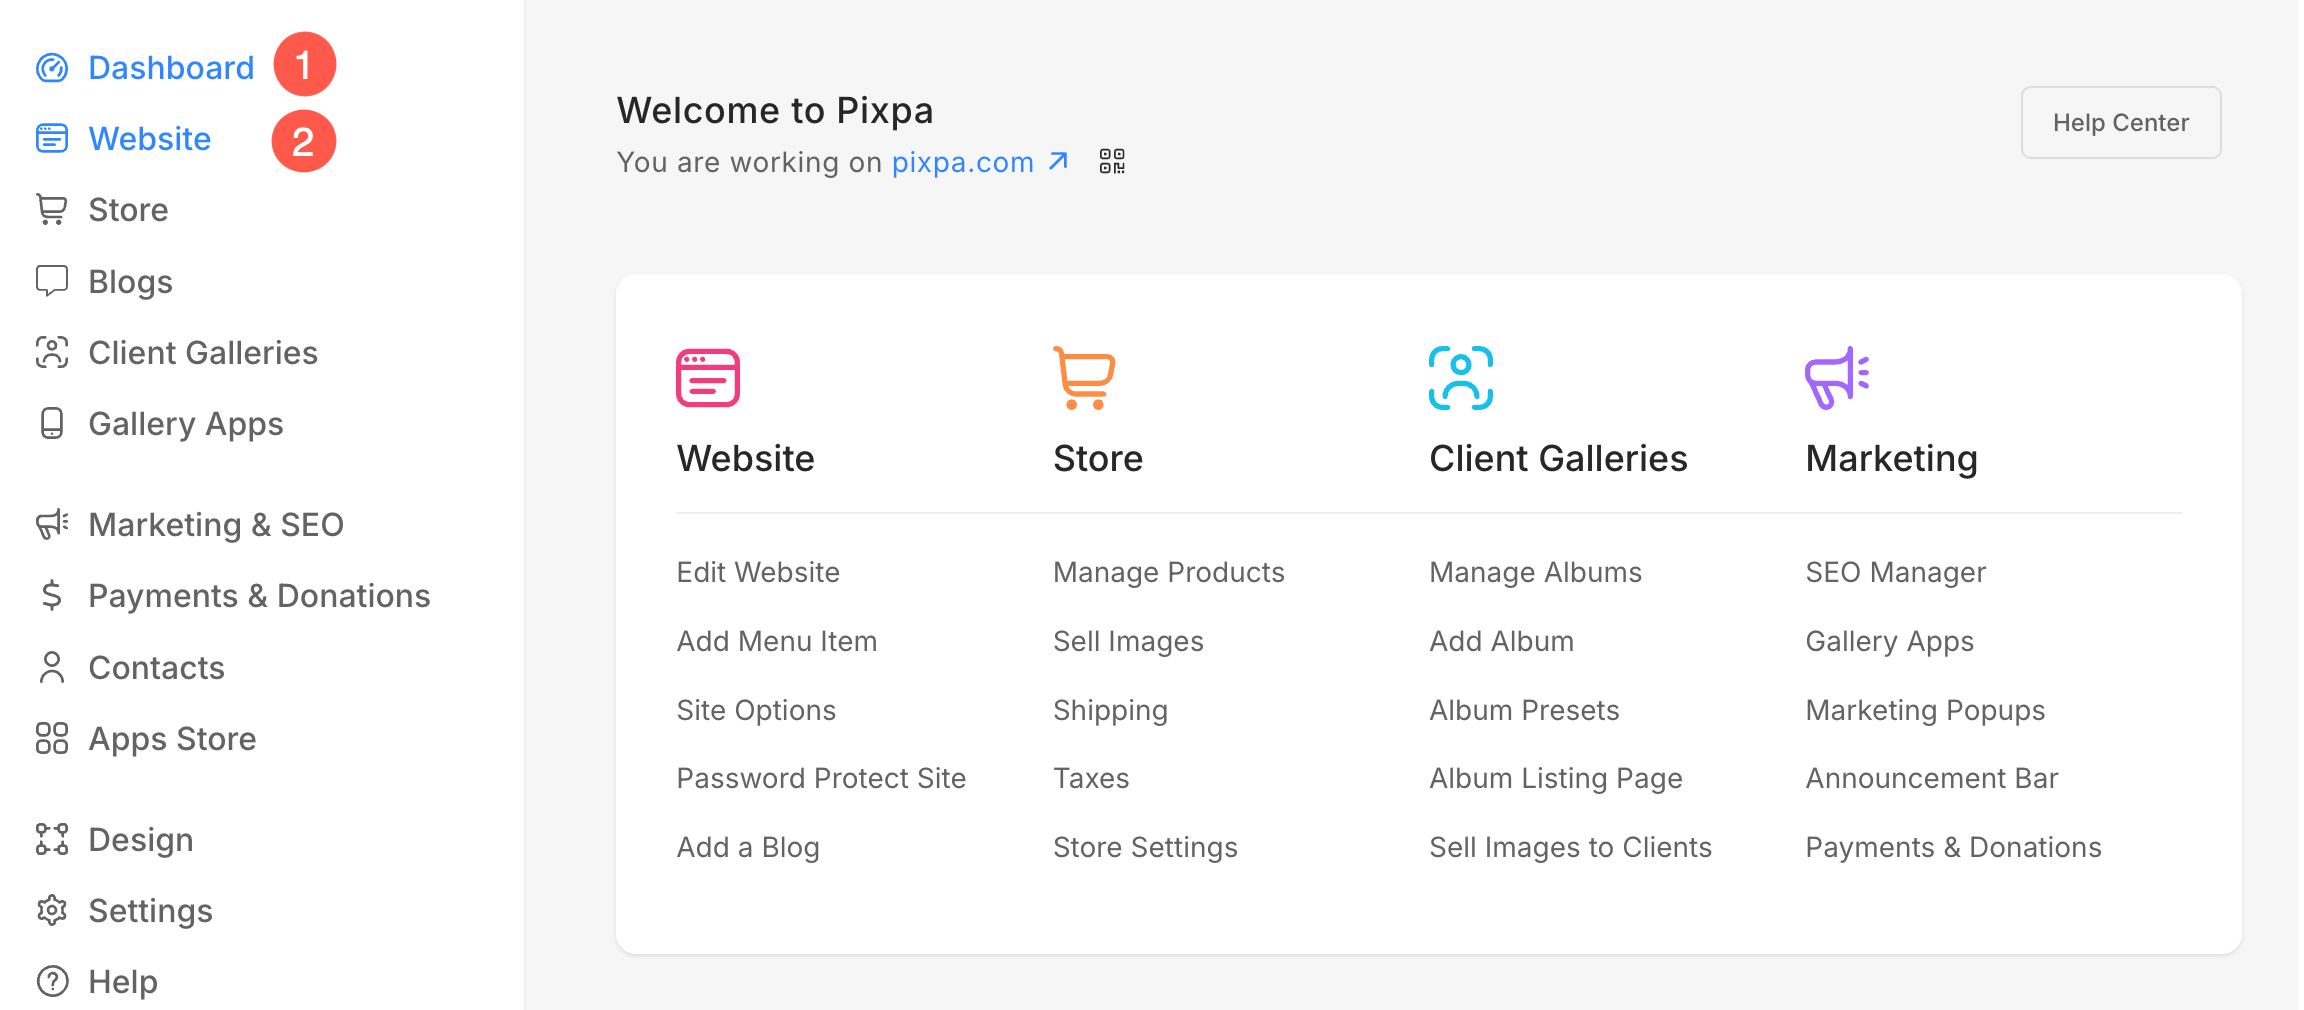
- Inside the Website section, you will see Plus + (3) icon. Click on it.
- A pop-up will show up allowing you to add a new Page (4) to your website.

Alternatively, you can use the search option to add a new page.
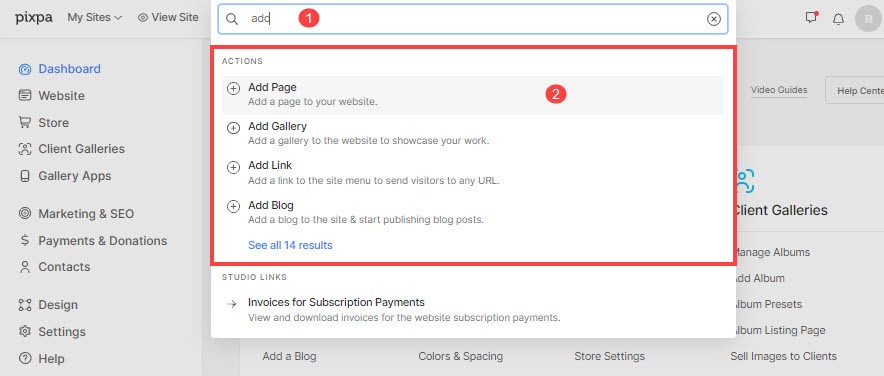
- Enter add page (1) in the Search Bar. You will see the related results.
- Click on the Add Page option (2) under Actions.
- Specify the page name.
- Then, select any layout from the Contact category.
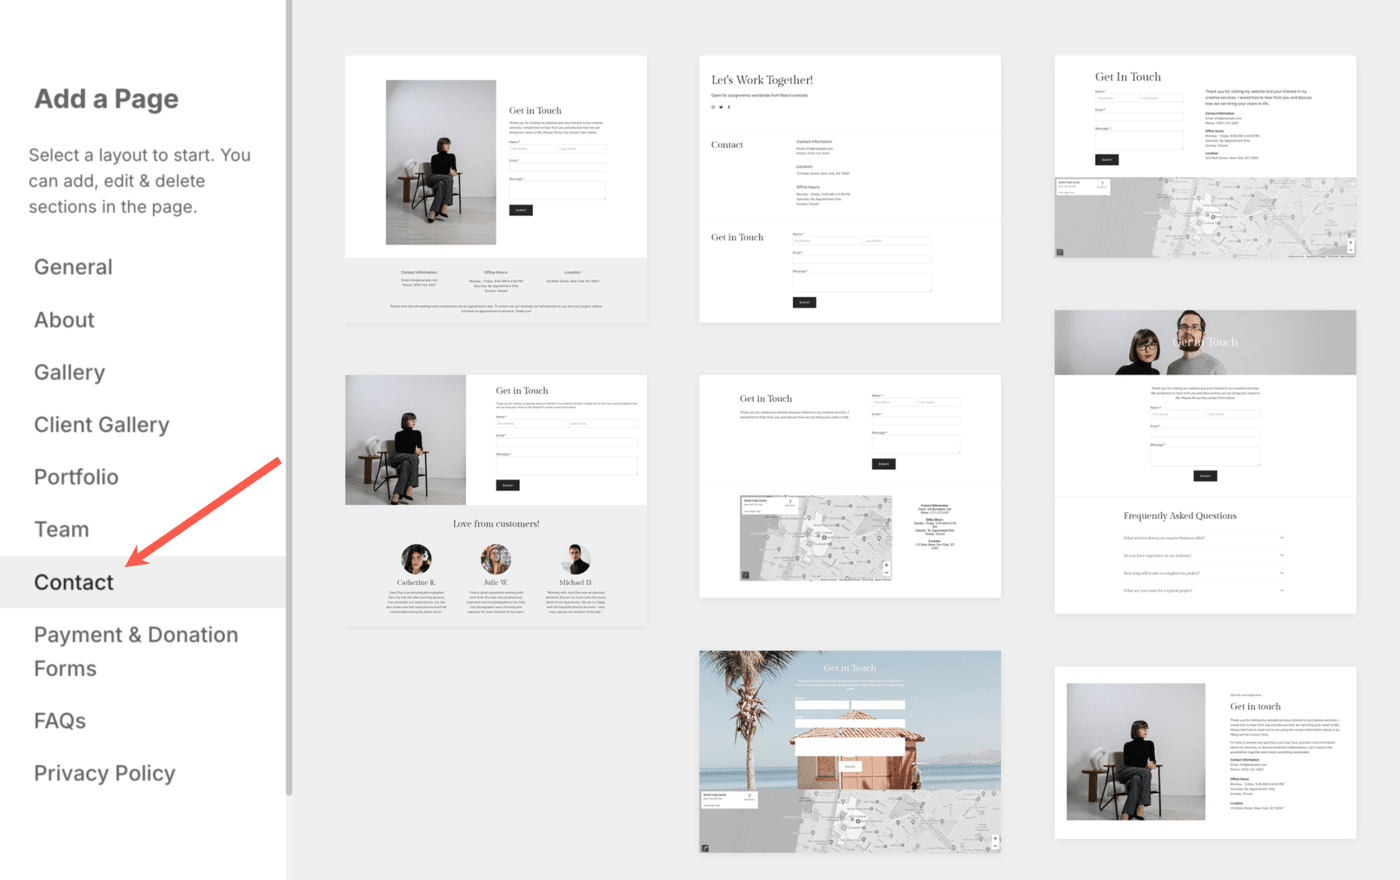
- Now, customize the contact page and hit the Save button.
Also Check: Contact Section.
Elements of the Contact section
The Contact section consists of:
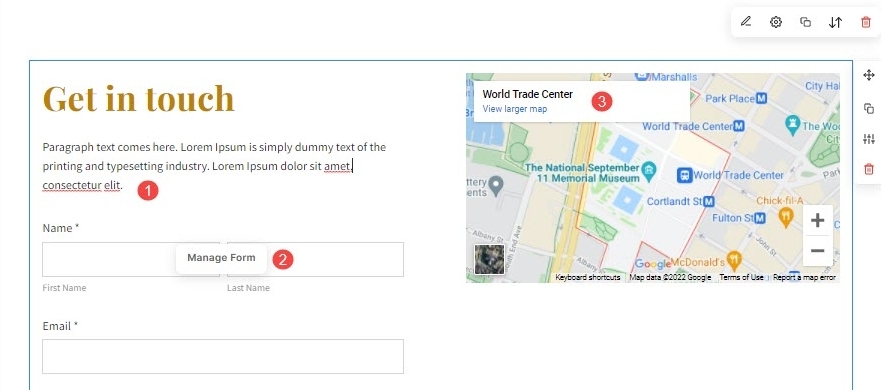
The Text section
- Add any text that informs your site visitors about your Business, availability (working days/hours), your Business Address, or anything that you feel must be included.
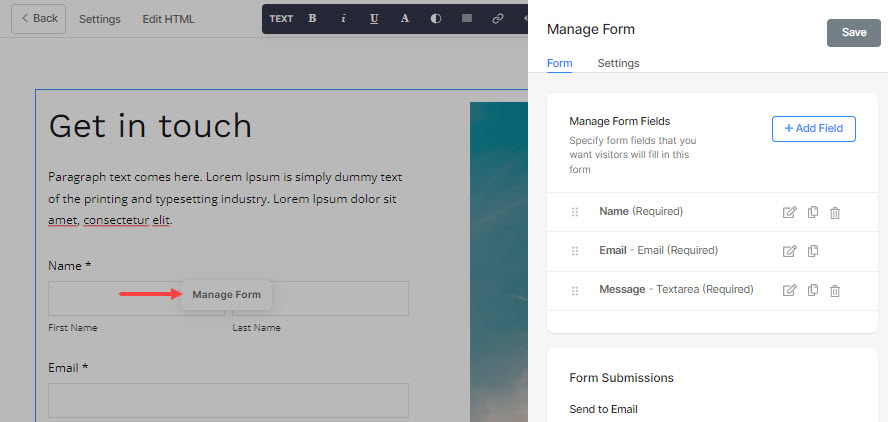
The Contact form
- The contact form lets your site visitors drop their details like name, email, message, etc. You can edit the contact form and add/remove the fields from the form.
- Once the visitors have filled and submitted the form, you will be notified at the specified email address. Your account email address is taken as the default when you add the form. But, you can add up to 3 email addresses.
- You can also check the form submissions in the Inbox. Learn more.
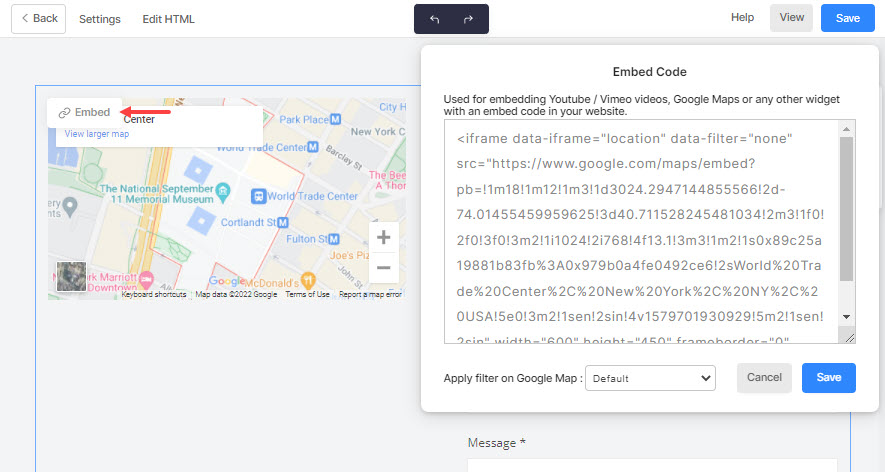
The Location Map
- The Map allows you to exhibit your address.
- You can edit it and add your location.
- Once your visitor clicks on the View larger map text, it will redirect to the location specified in the Google map.
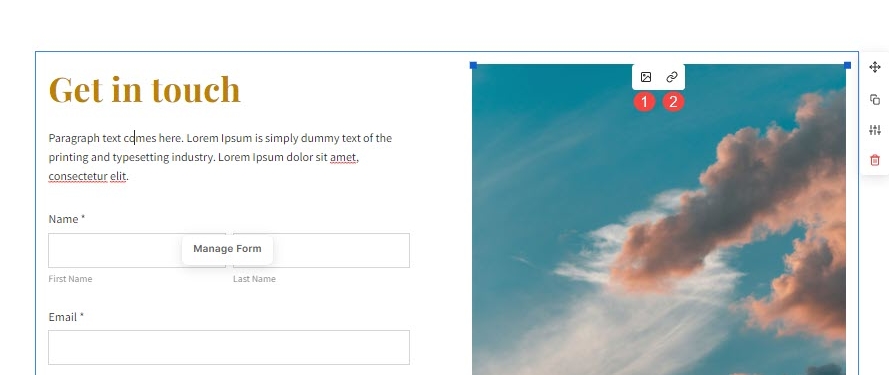
Image
Some of the contact section layouts have an Image Snippet instead of the Map. With the image snippet, you can:
- Change and upload your desired image,
- Link the image to any internal/external page, email, or phone number. The image when clicked on would then redirect to the specified page.
Extra information to be added
Provide your Email Address or Contact Number
- Add your Business Email Address that opens the email page wherein the recipient address is set to your email address.
- Add your Business Contact Number which when clicked on will dial your number from the visitor’s device (mobile)
Put on a newsletter subscription section
Build your subscriber base with the help of the Newsletter Subscription section which can be added to any page of your website.
Put on your social media profiles
Show your Instagram feed or the social icons that redirect to your social profiles using the social section.
Reorganize the blocks
- Once you have added all the blocks to the Contact page, you can then sequence the blocks or snippets to restructure your page.
- Finally, hit the Save button on the top right to save all your changes.
Exhibit your Contact info
- Use your website footer to provide your contact information.
- Use a Mobile Information Bar which stays at the bottom of your mobile website. It can have up to 4 calls-to-action items giving visitors quick access to important information such as your phone number, email address, location, store URL, and much more as per your need.
