You can customize how the header appears on each page by adjusting its position, style, and color settings. Choose whether the page content starts below or behind the header, set the header style to normal, transparent, or apply a custom color, and modify the color of header elements such as the title, menu, and icons. These options allow for greater flexibility in designing unique and visually appealing page layouts.
Before setting the header to transparent, ensure the first section of the page includes a full-bleed image or banner to maintain a clean and professional look.
In this article

Header Style Settings
You can configure header styles from various places in the Pixpa Studio, depending on the type of menu item and the specific page you’re working on. Whether it’s a standalone page, a folder, or a product/gallery section, the location of the header settings may vary to give you greater flexibility and control over your site’s appearance.
Page Header

- Hover the cursor over the page that you want to edit. Click on the three dots (3) icon.
- From the dropdown, click on Edit Content (4) option.

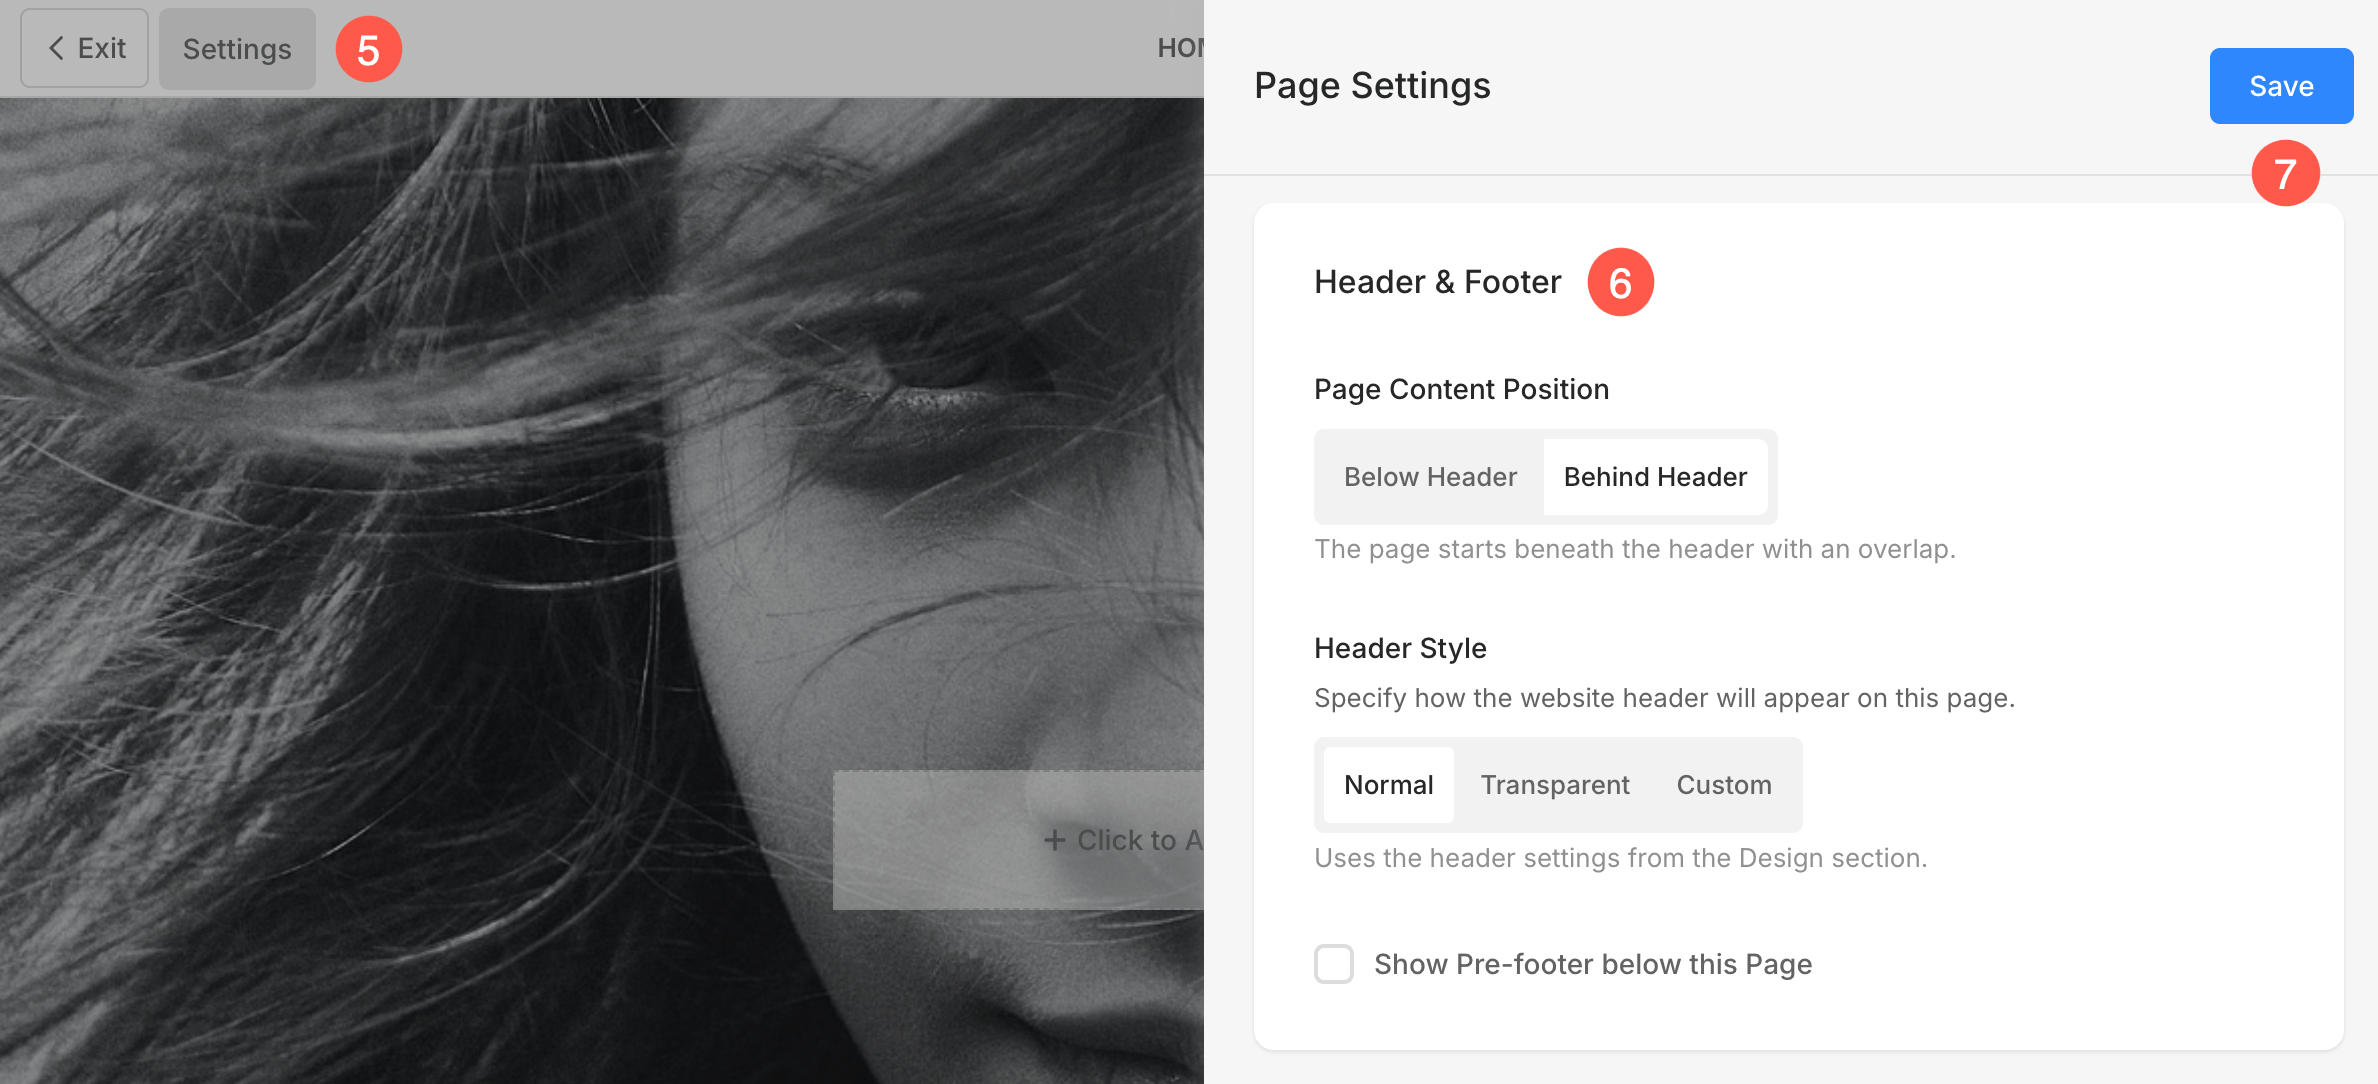
- The page editor will open up. Click on the Settings (5) button.
- From the sidebar, you can manage the Header (6) options.
- After making customizations, Save (7) the changes.
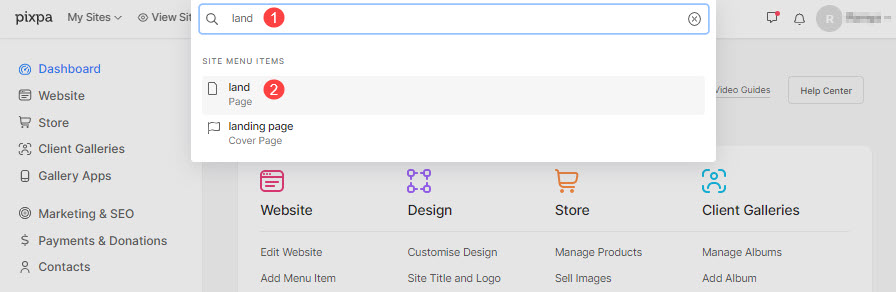
Alternatively, you can use the studio search option also in order to navigate to the page that you want to edit.
- Enter the page title (1) (that you want to edit) in the Search Bar.
- Click on page (2) under Site Menu Items.
Folder Header
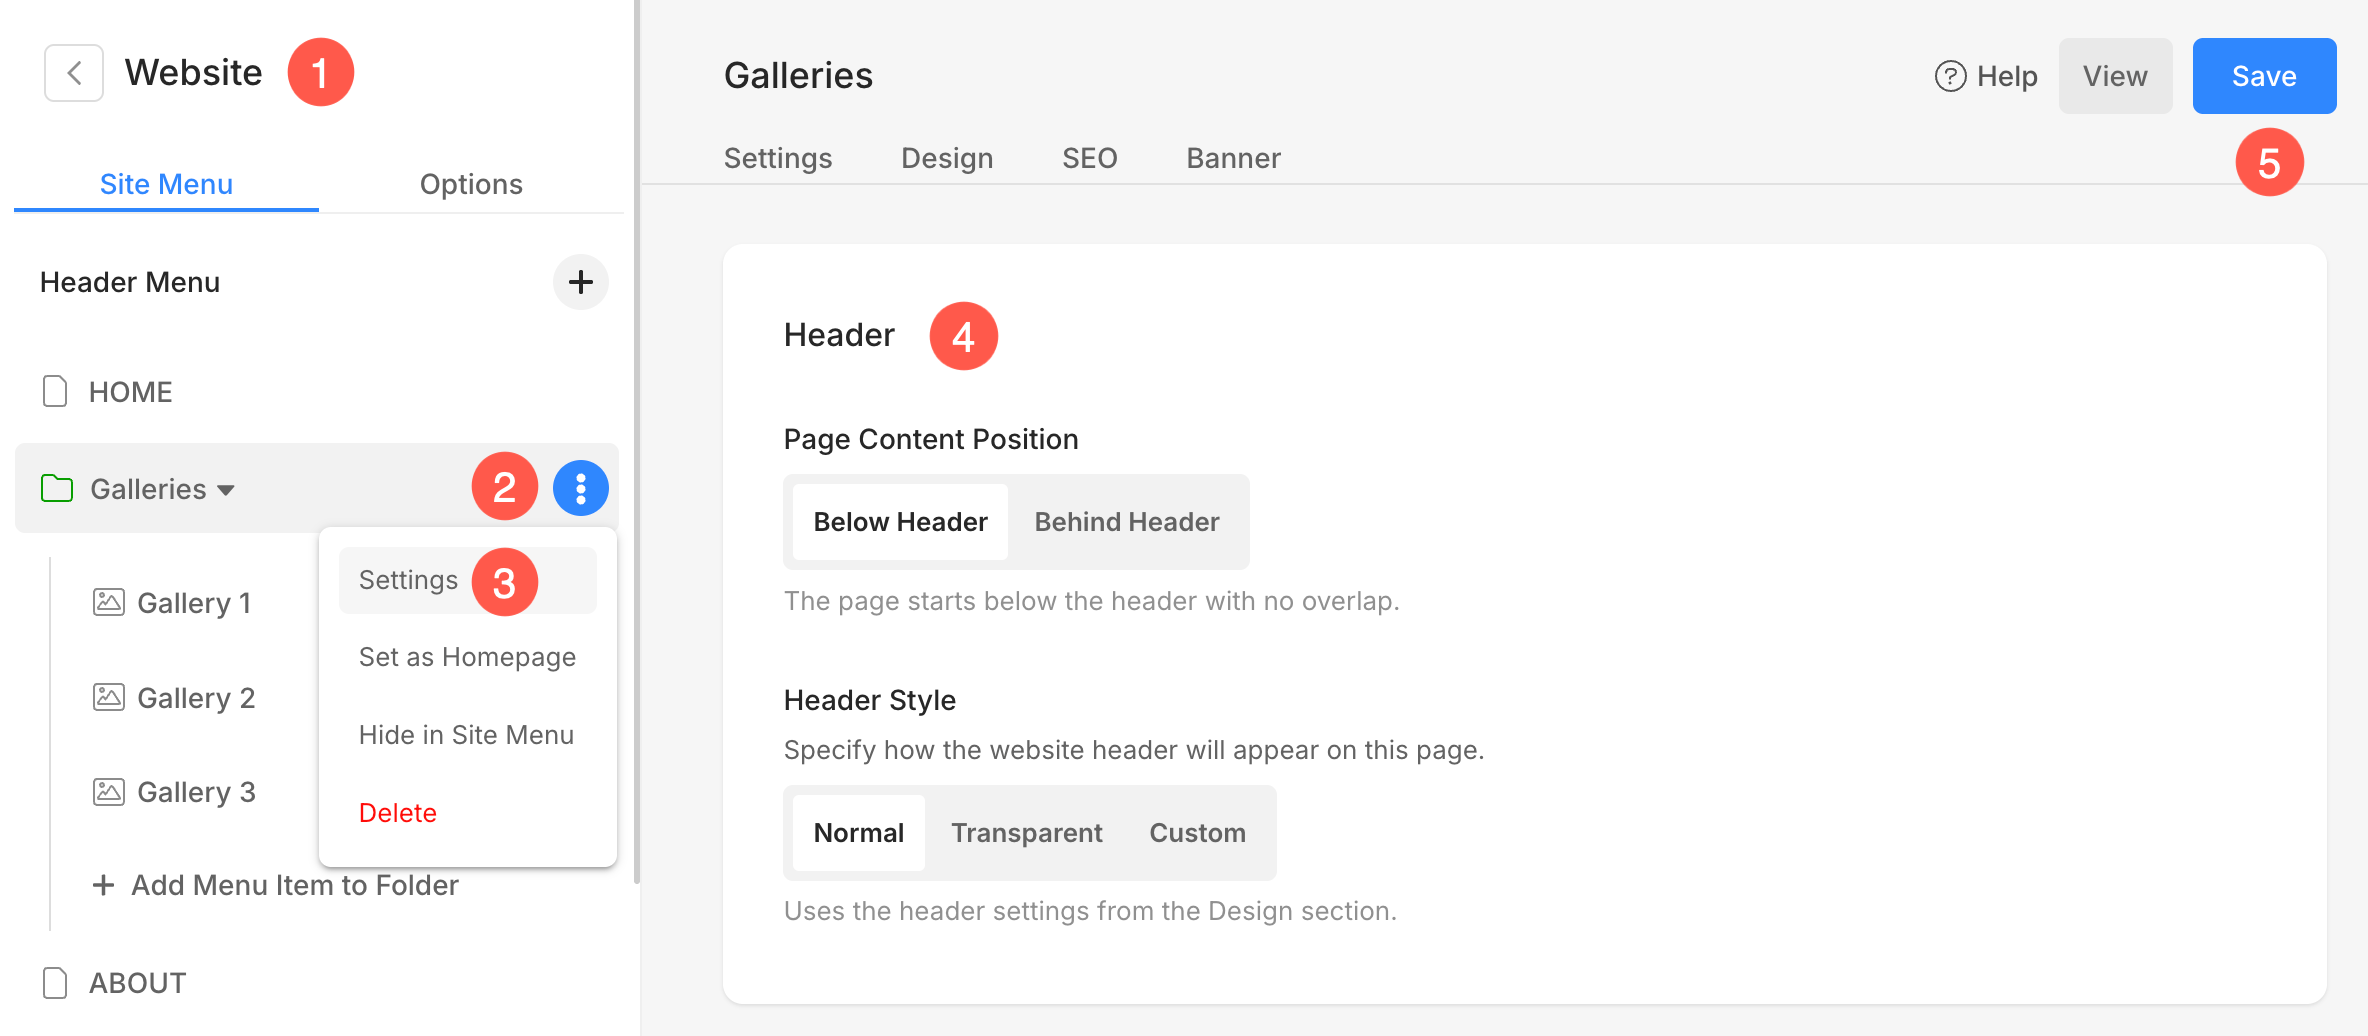
- Under the Website (1) section, hover the cursor over the folder. Click on the Three Vertical Icon (2) that will appear while hovering the cursor.
- From the menu, click on Settings (3) option.
- You will see the option to customize the Header (4) under folder settings page.
- After making the changes, click on Save (5) button.
Banner
On some pages like Product Categories, Edit Product Pages, etc. the Header Style options are available under the Banner settings panel.
- Click on the Banner (1) tab.
- From the sidebar, open Settings (2).
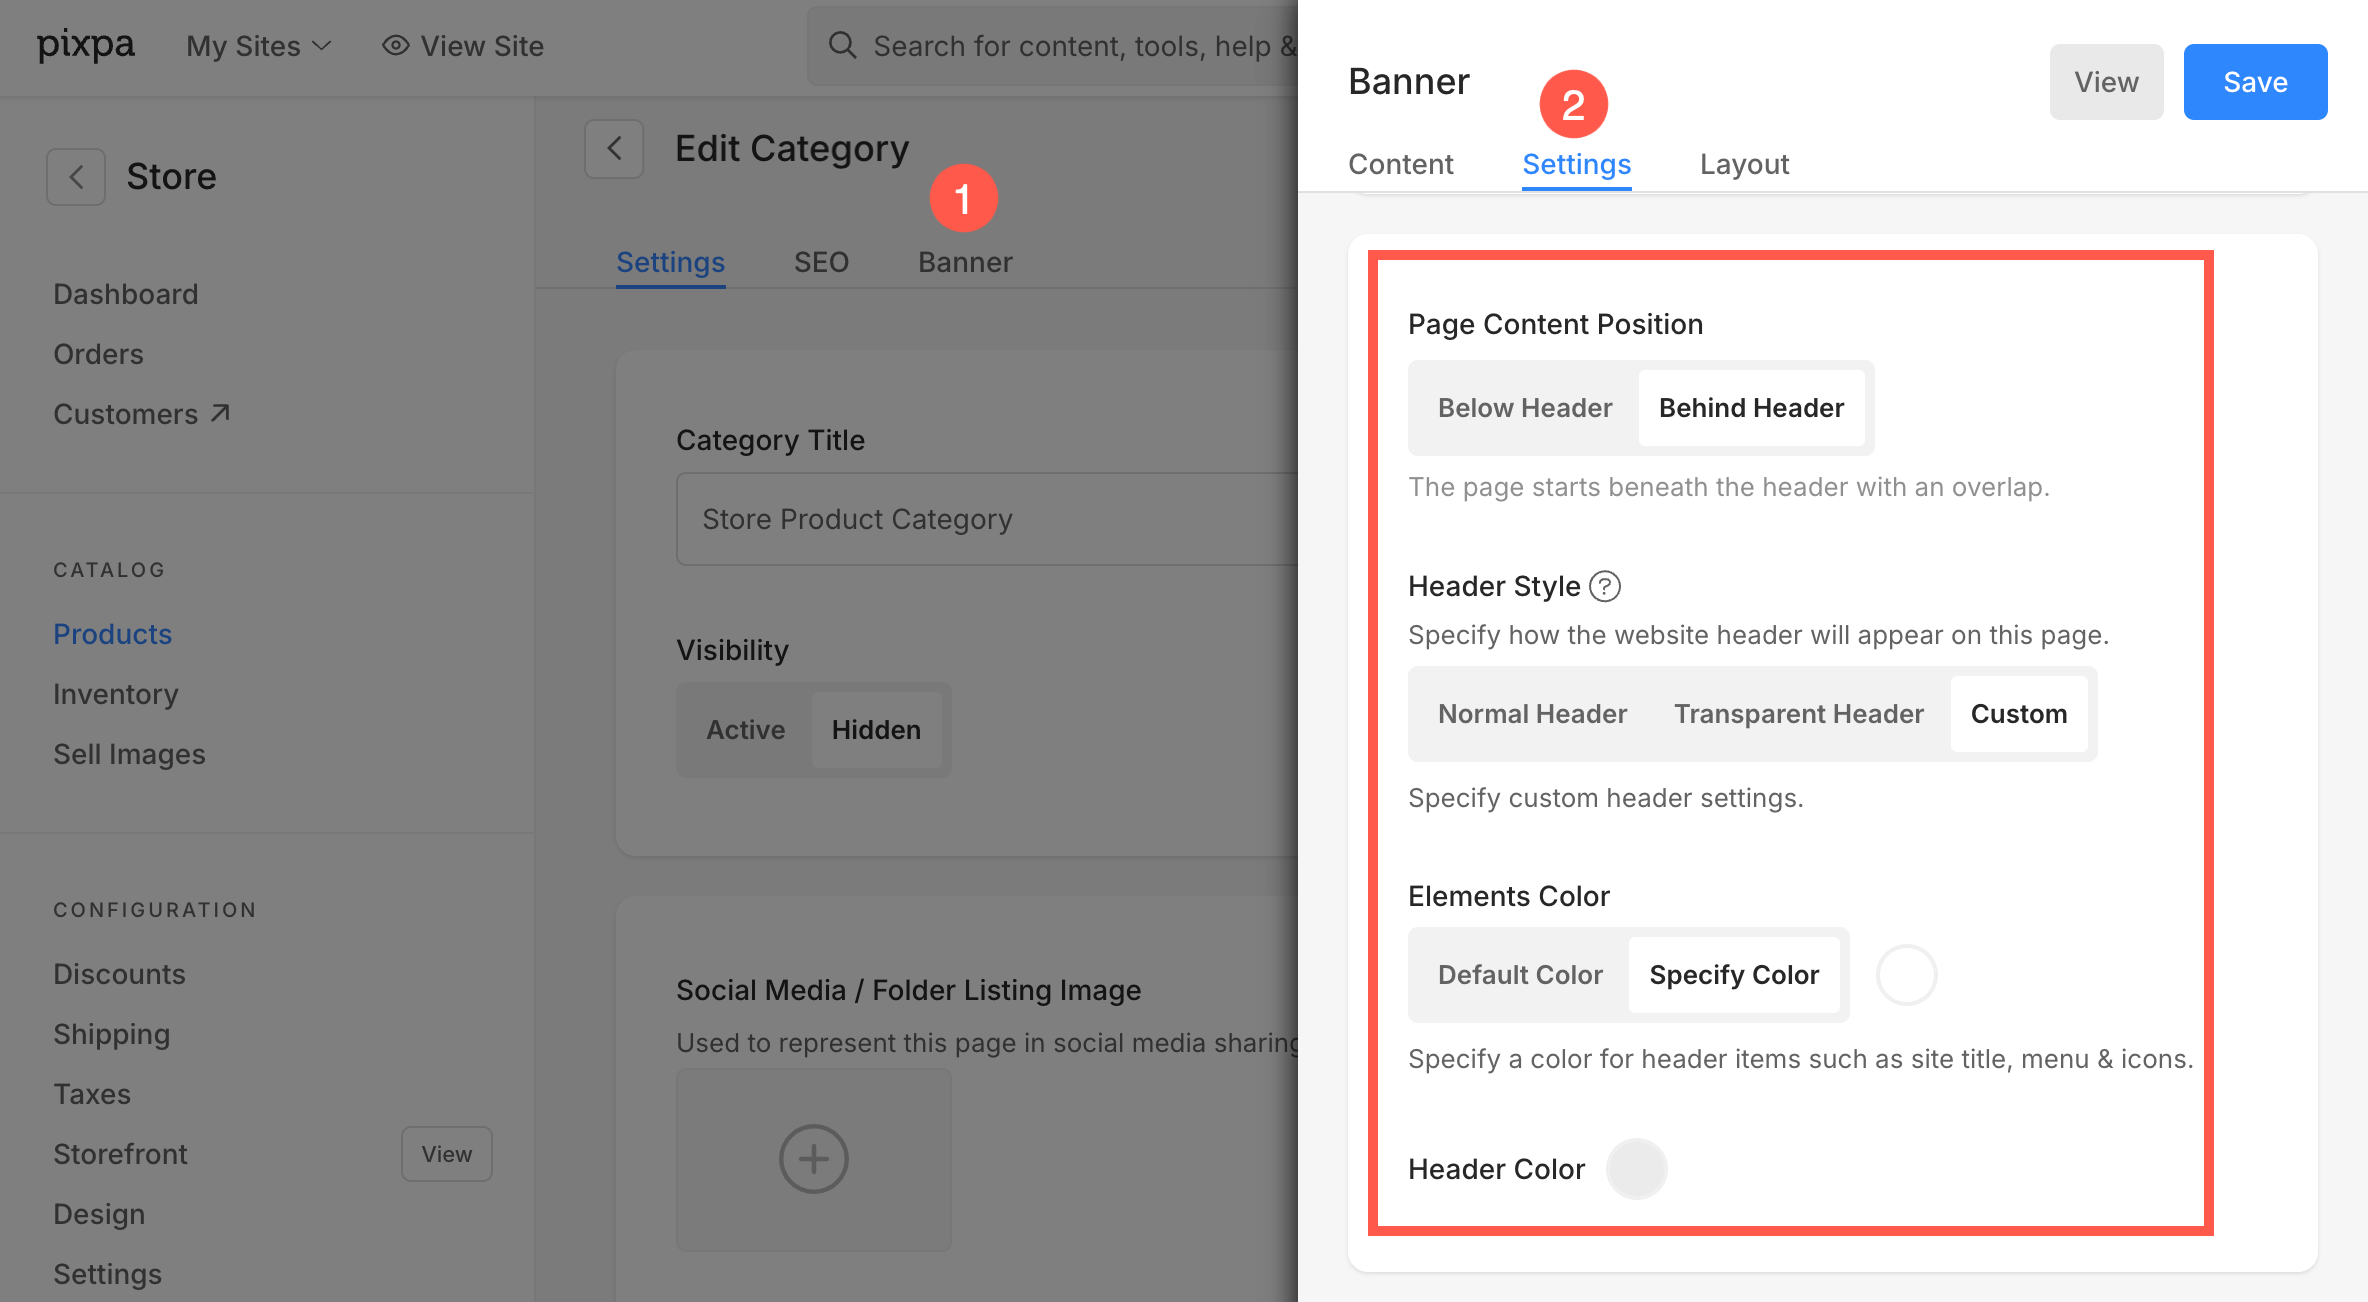
You can configure the header style (Normal, Transparent, or Custom), adjust element and header colors, and set the content position from here.
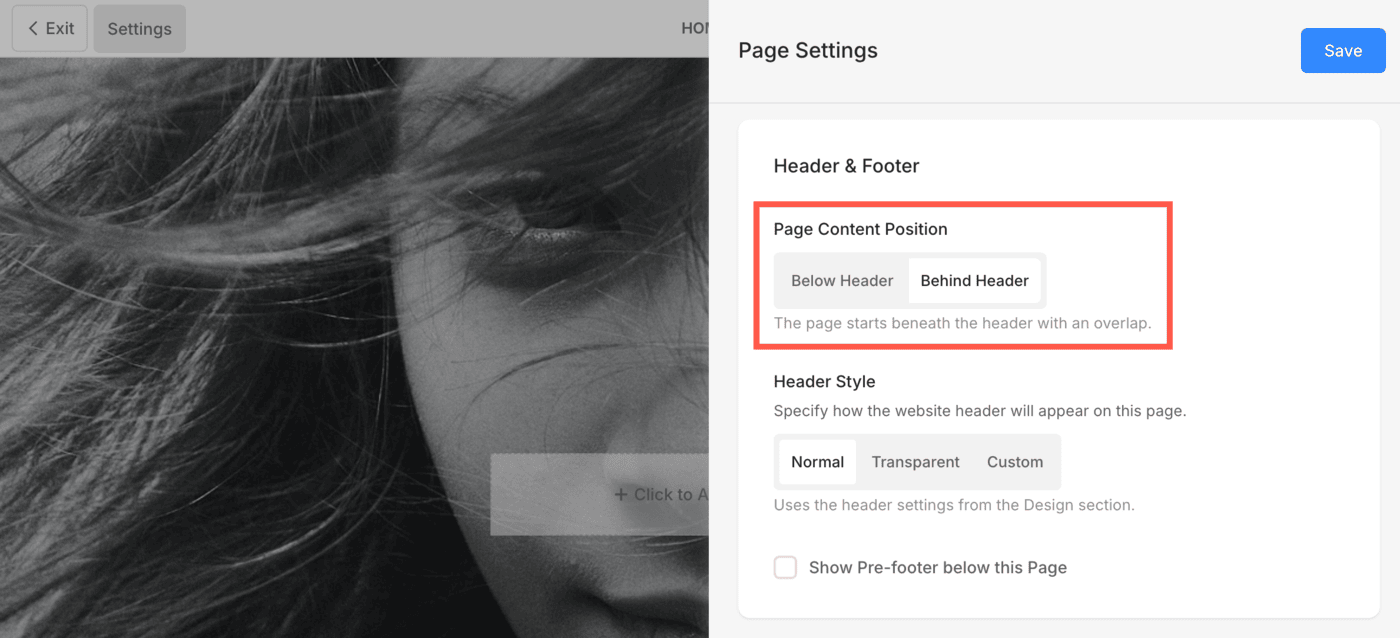
Page Content Position
You can choose how the page content aligns with the header:
- Below Header: Content starts below the header.
- Behind Header: Content overlaps with the header, typically used with transparent headers.
Header Style
Choose how the header should appear on this page:
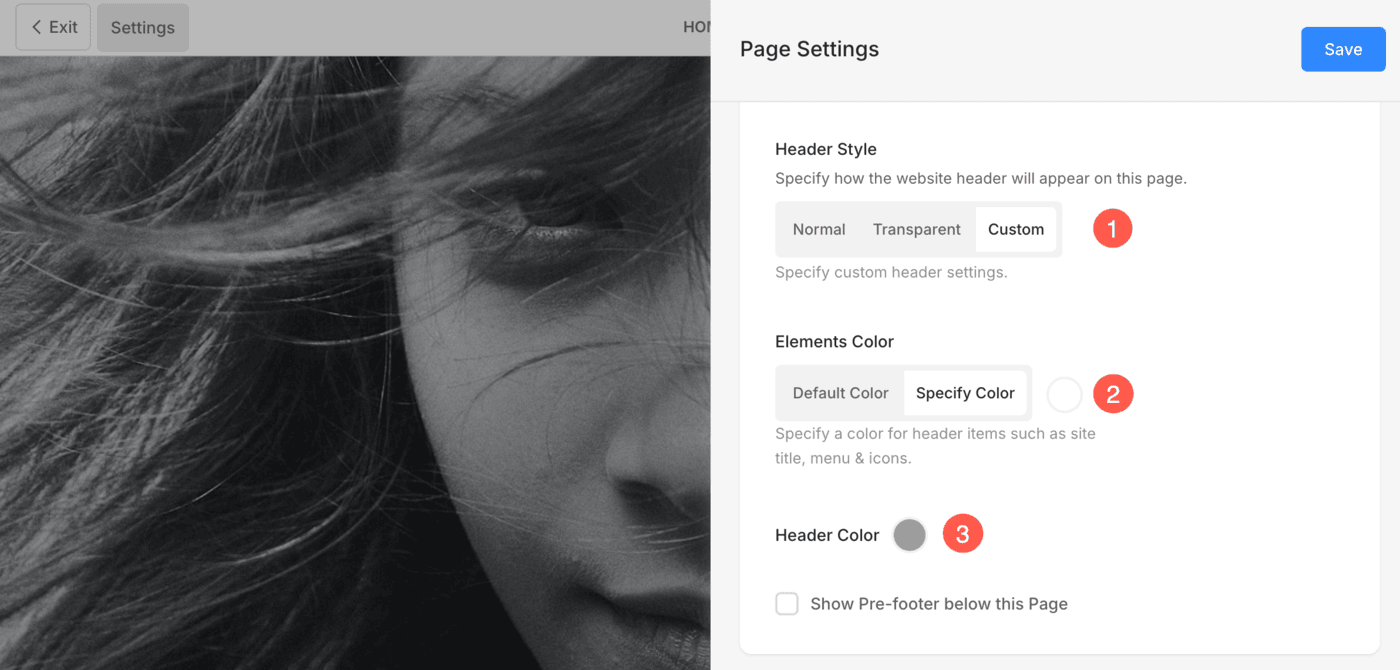
1. Header Style
- Normal: Default solid background header. You can define this from Design section. Learn more.
- Transparent: Makes the header background transparent so that content behind it is visible.
- Custom: Lets you define custom colors for the header and its elements.
Choosing Transparent or Custom enables the ability to customize element colors for better visibility.
2. Elements Color (Visible only with Transparent or Custom style)
When you select Transparent or Custom, you’ll see the Elements Color option:
- Choose between Default Color or Specify Color.
This lets you change the color of header elements such as the site title, menu, and icons for optimal visibility over background images or videos.
3. Header Color (Visible only with Custom style)
When Custom header style is selected, an additional option appears:
- Header Color: Pick a custom background color for the header itself.
This gives you complete control over both the header’s appearance and its elements, making sure they match the visual tone of each page.
Header Examples
- Here is an example of a page with Normal Header

- Here is an example of a page with a Transparent Header.

See a live page with the header set as transparent.