Pixpa offers a robust way to control your website’s accessibility through password protection and maintenance mode.
Whether you’re preparing for a launch, performing updates, or want to restrict access to specific users, these features allow you to manage your website’s visibility efficiently.
Password protection ensures only authorized users can access your site, while maintenance mode displays a custom message to inform visitors that your site is temporarily unavailable. Here’s a comprehensive guide to help you enable and customize these settings:
In this article:
When you are still building your website or want to keep it private (allowing few visitors), you can use password protection. There will be a global password and all the visitors need to enter the same to access the website.
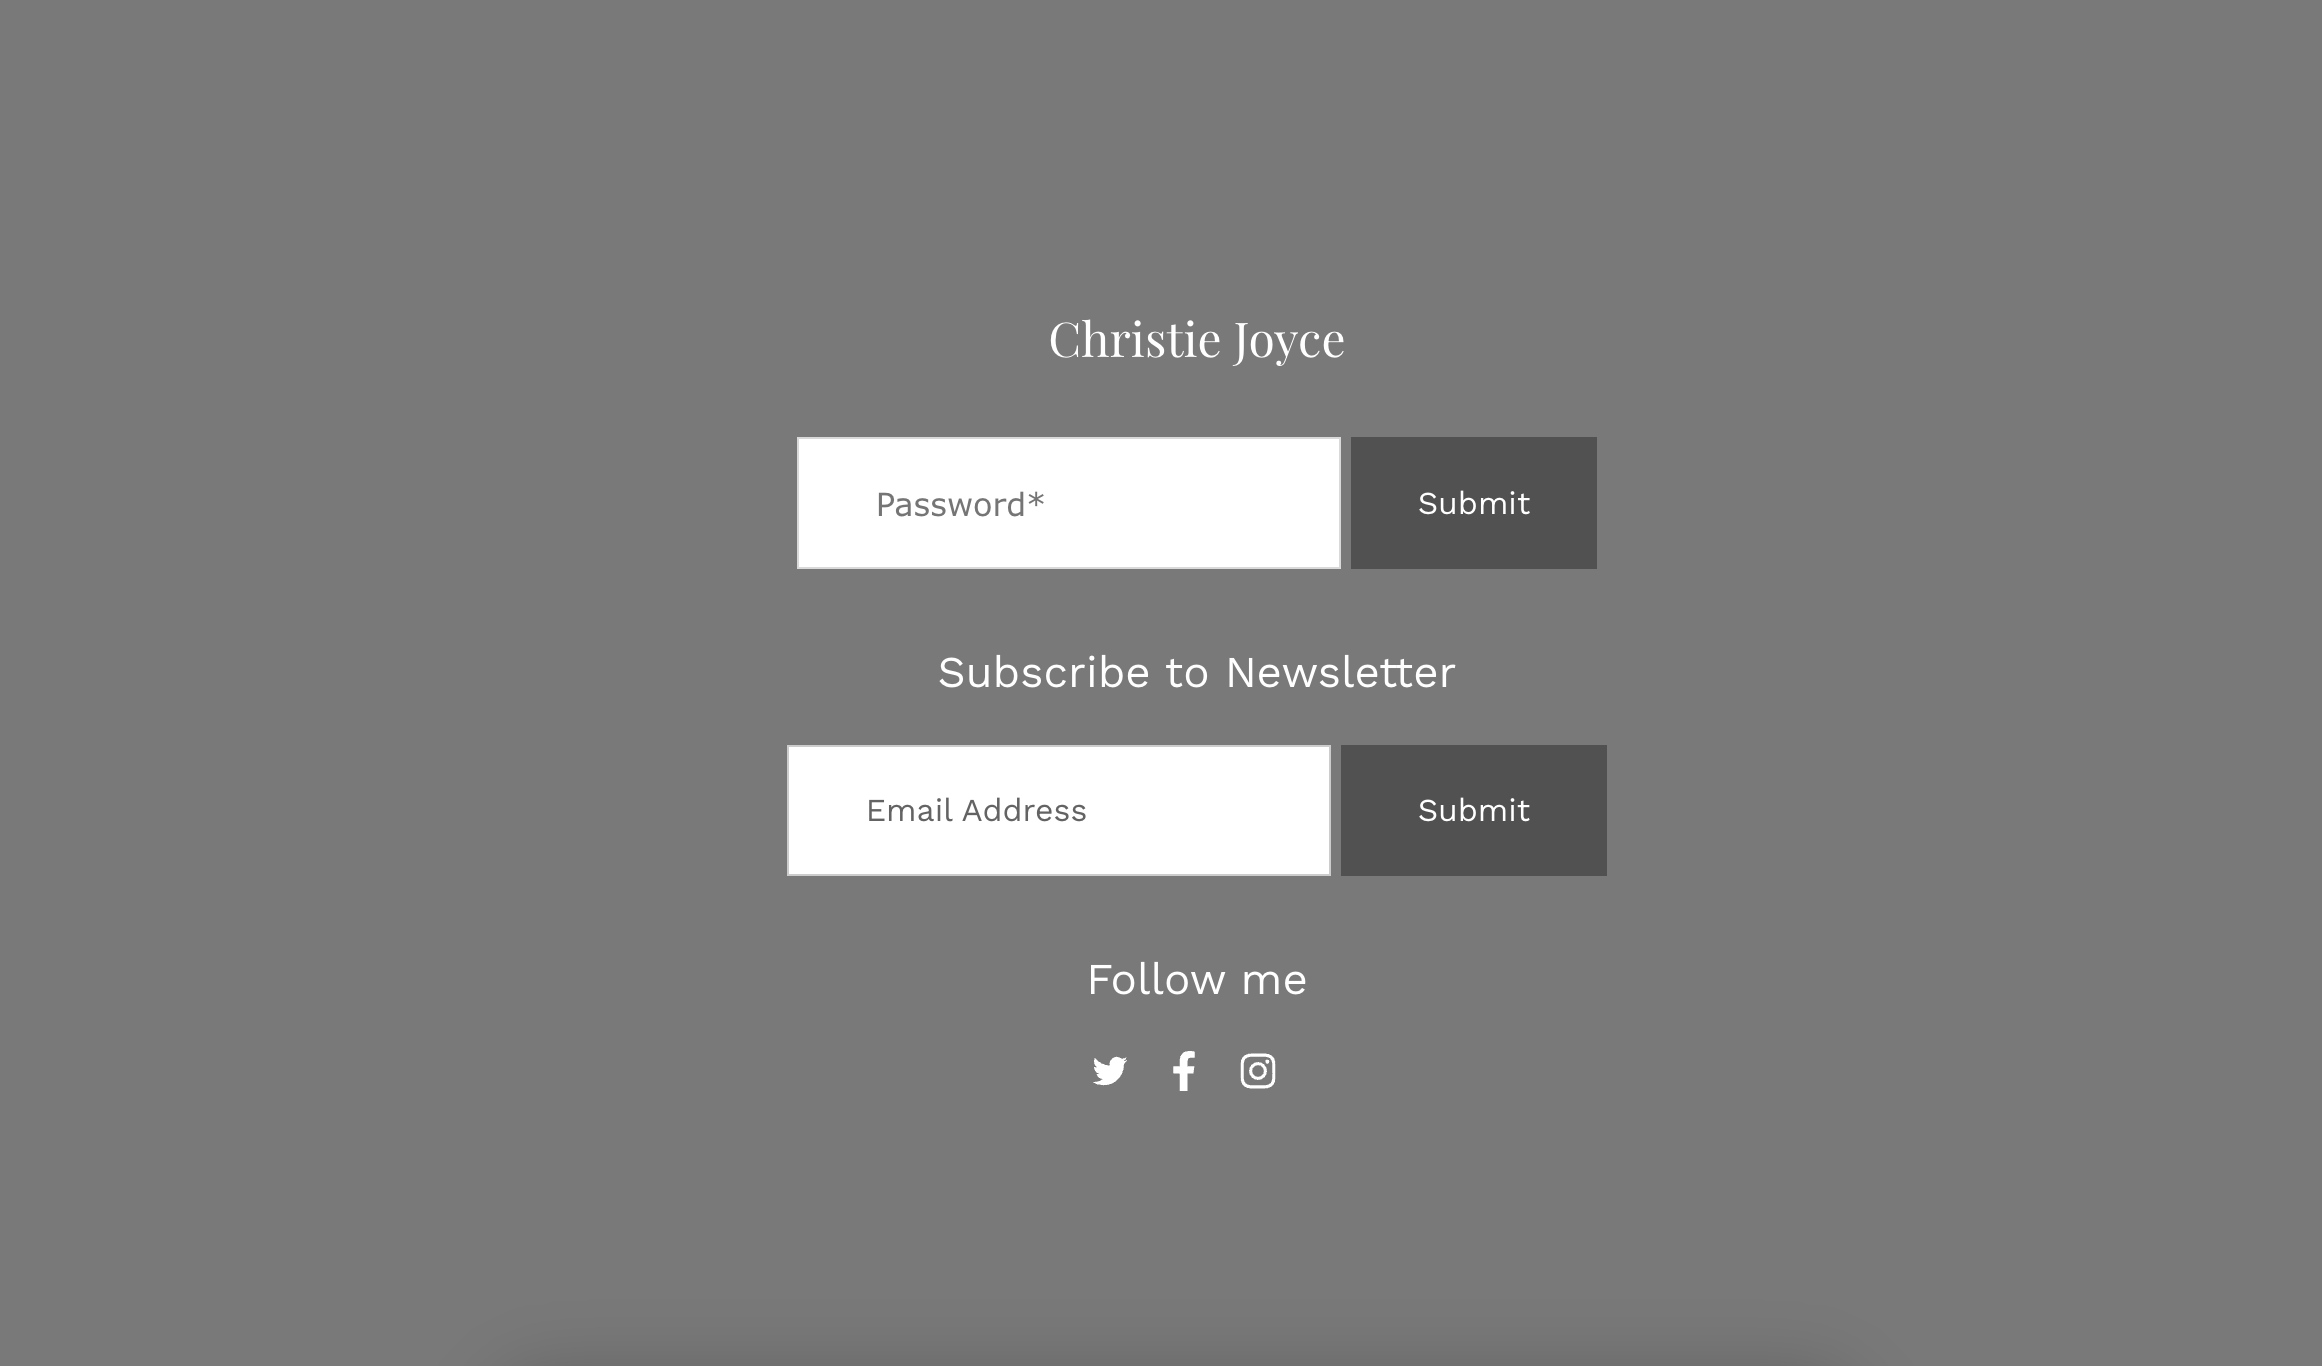
This is how a website looks while password protection is activated.
Points to remember:
- The website passwords are case-sensitive.
- Do not use your Pixpa account password as the website password.
- You can easily add a password to any of your pages so only those people who have access to the password will be able to see the page.
Manage Site Visibility
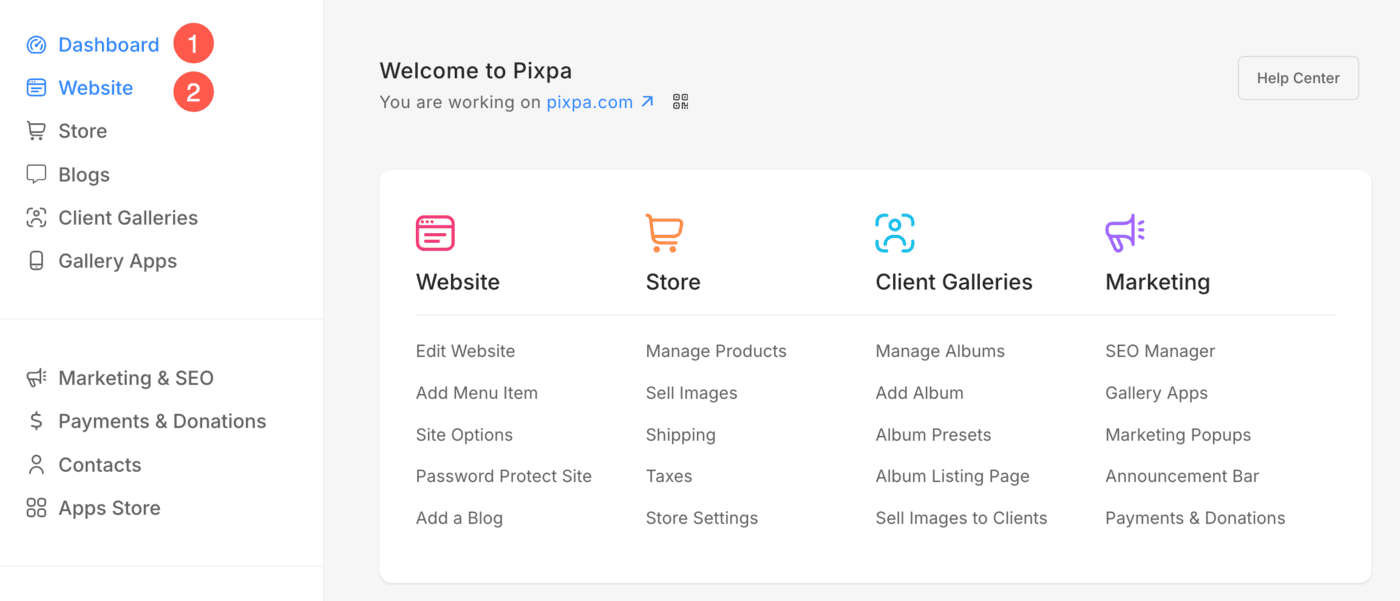
- In the left sidebar, select the Options (3) tab.
- Click on the Password Protect Site (4) option.
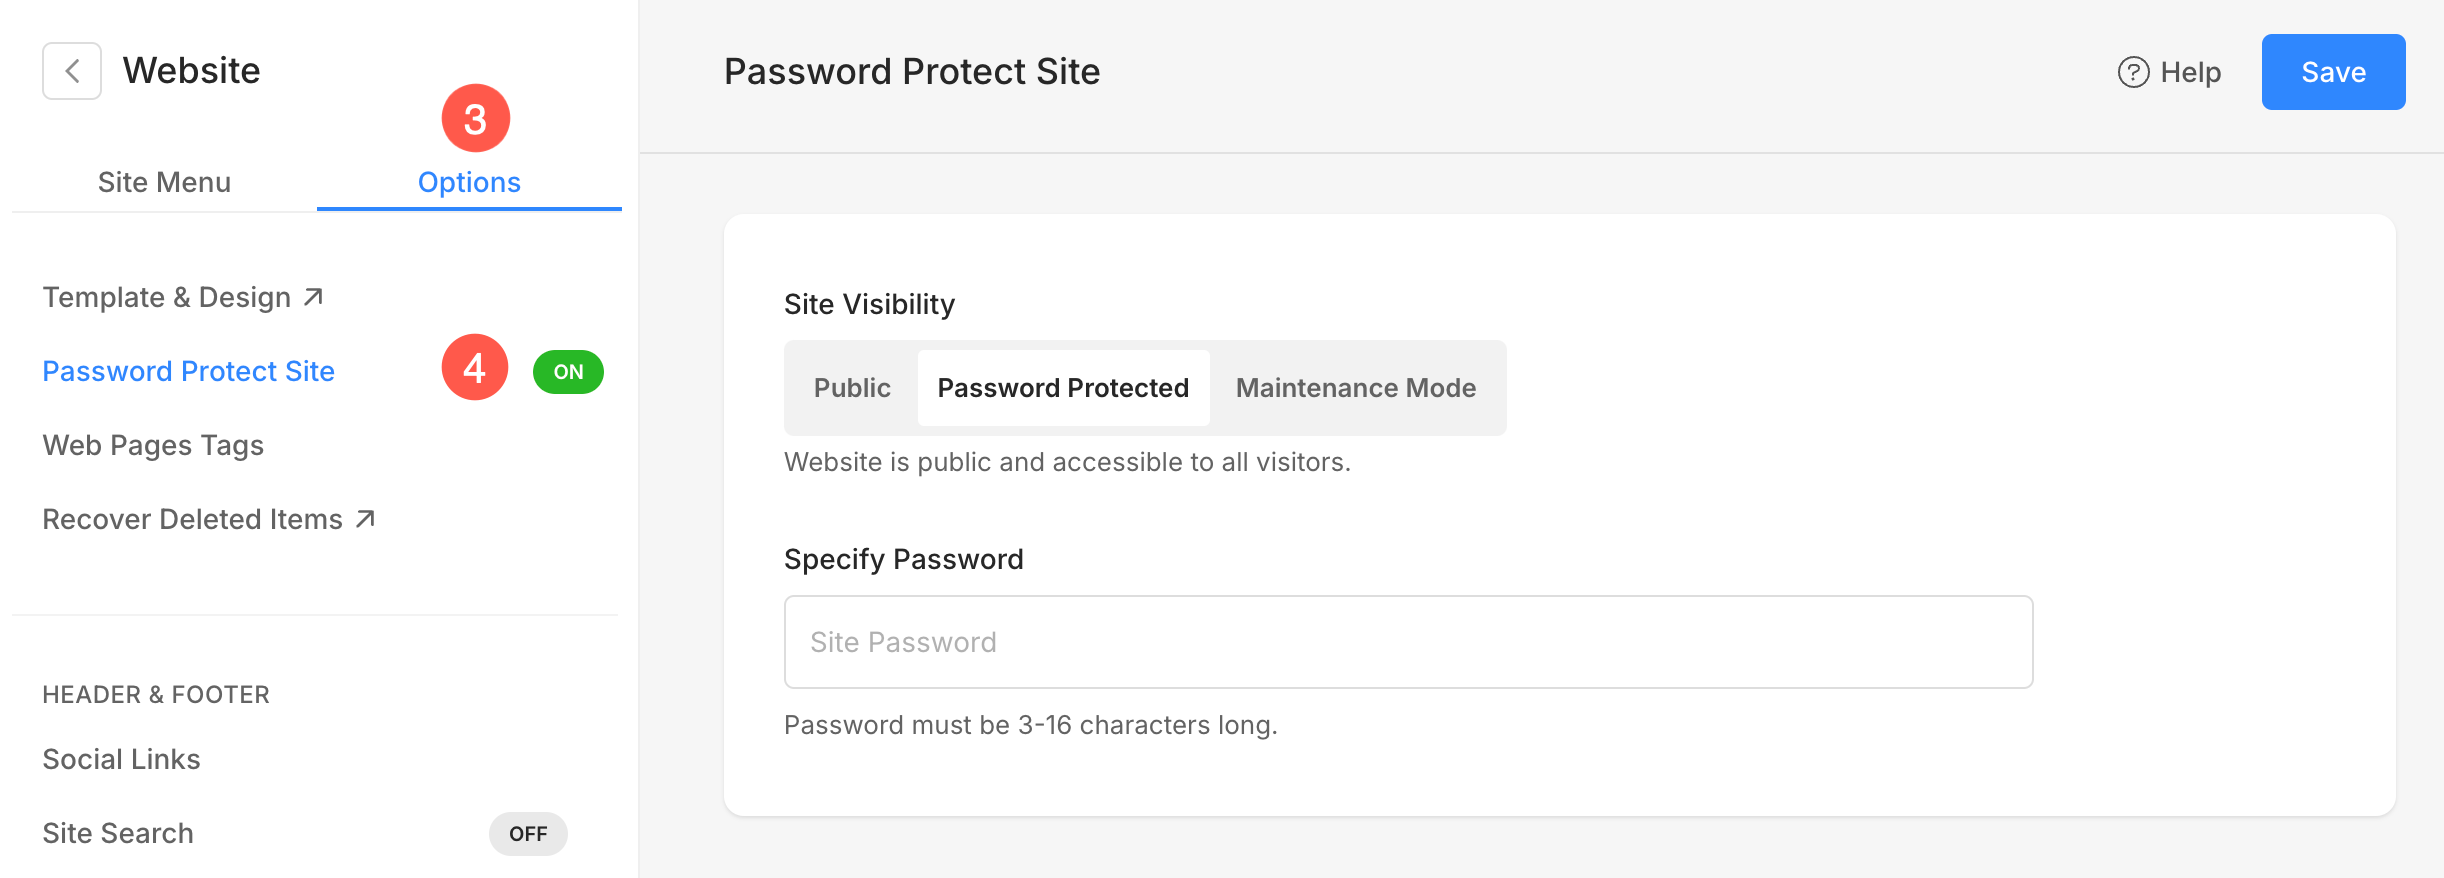
Alternatively, you can use Pixpa’s search option in order to navigate to the Password Protect Site page.
- Enter the password protect site (1) in the Search Bar.
- Click on it (2) under the Studio Links.

- You will now reach the Password Protect Site page.
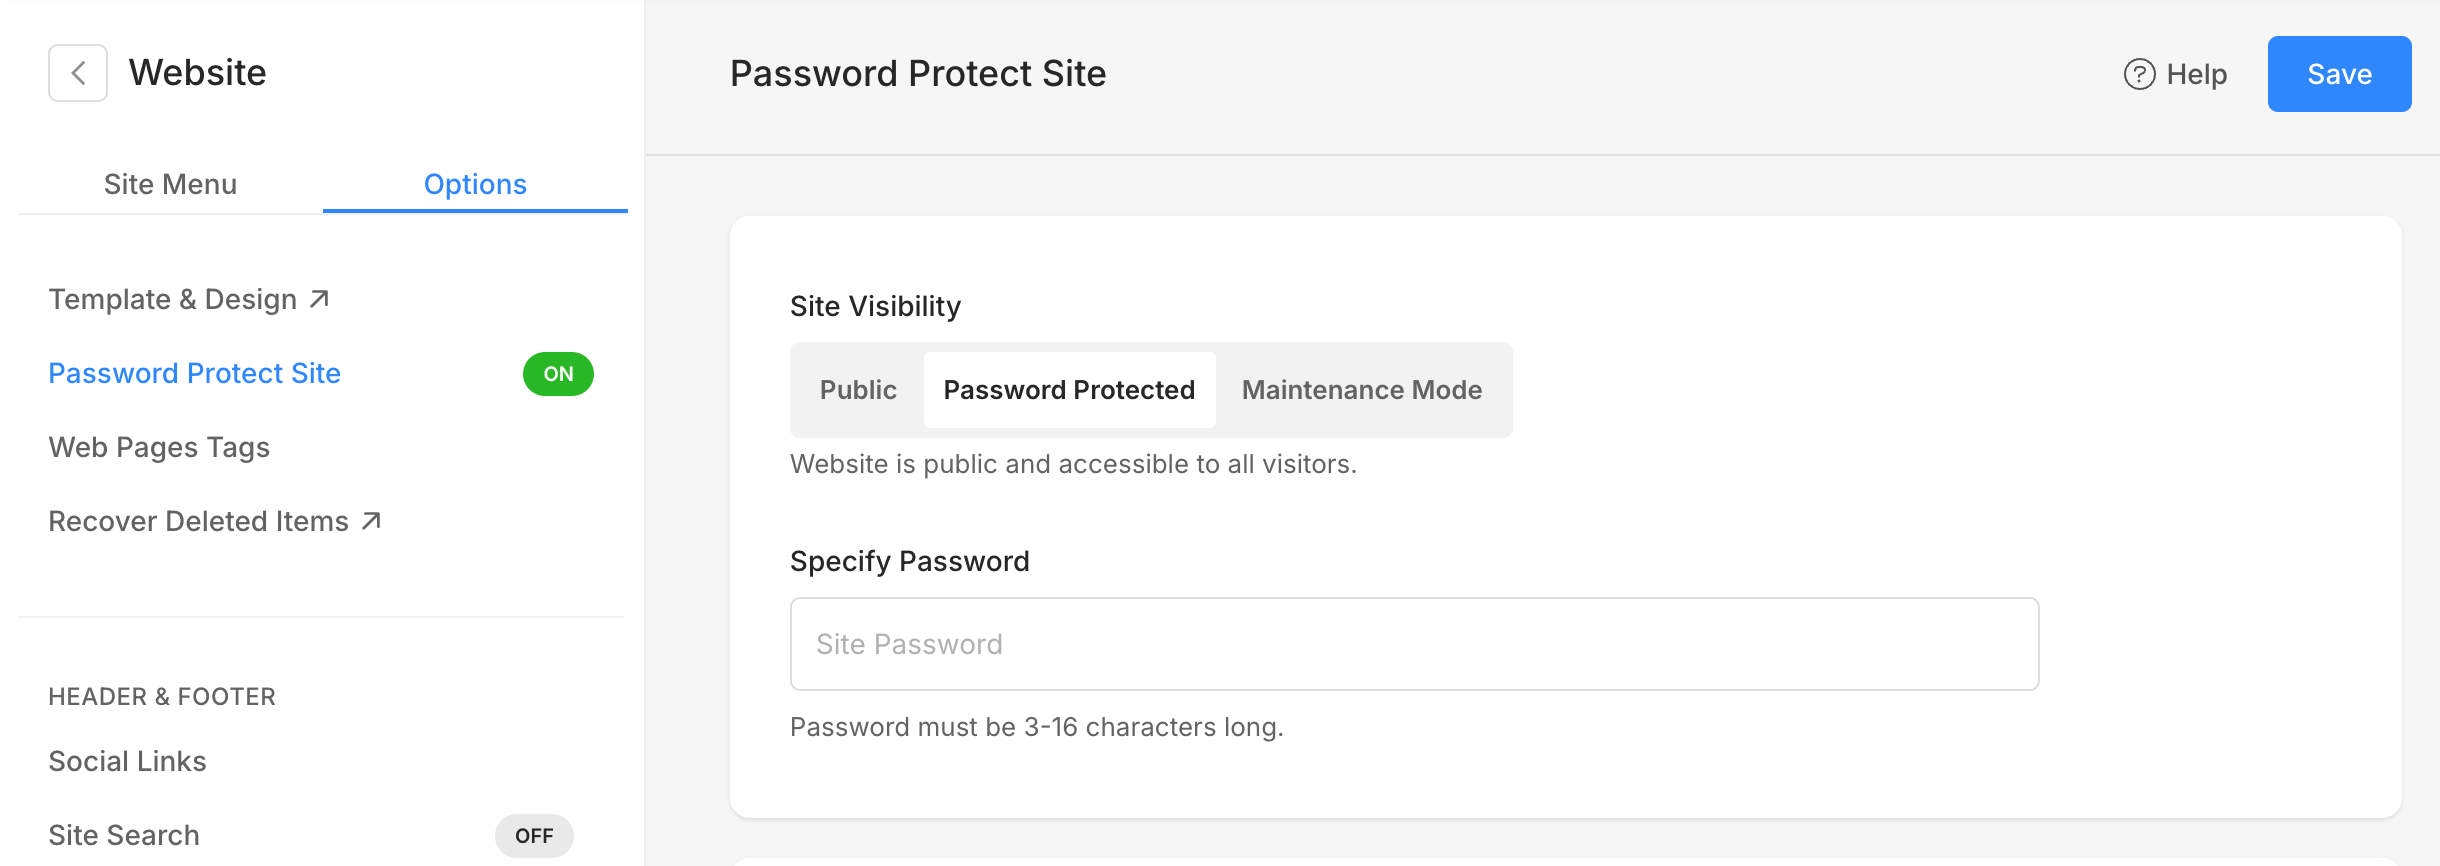
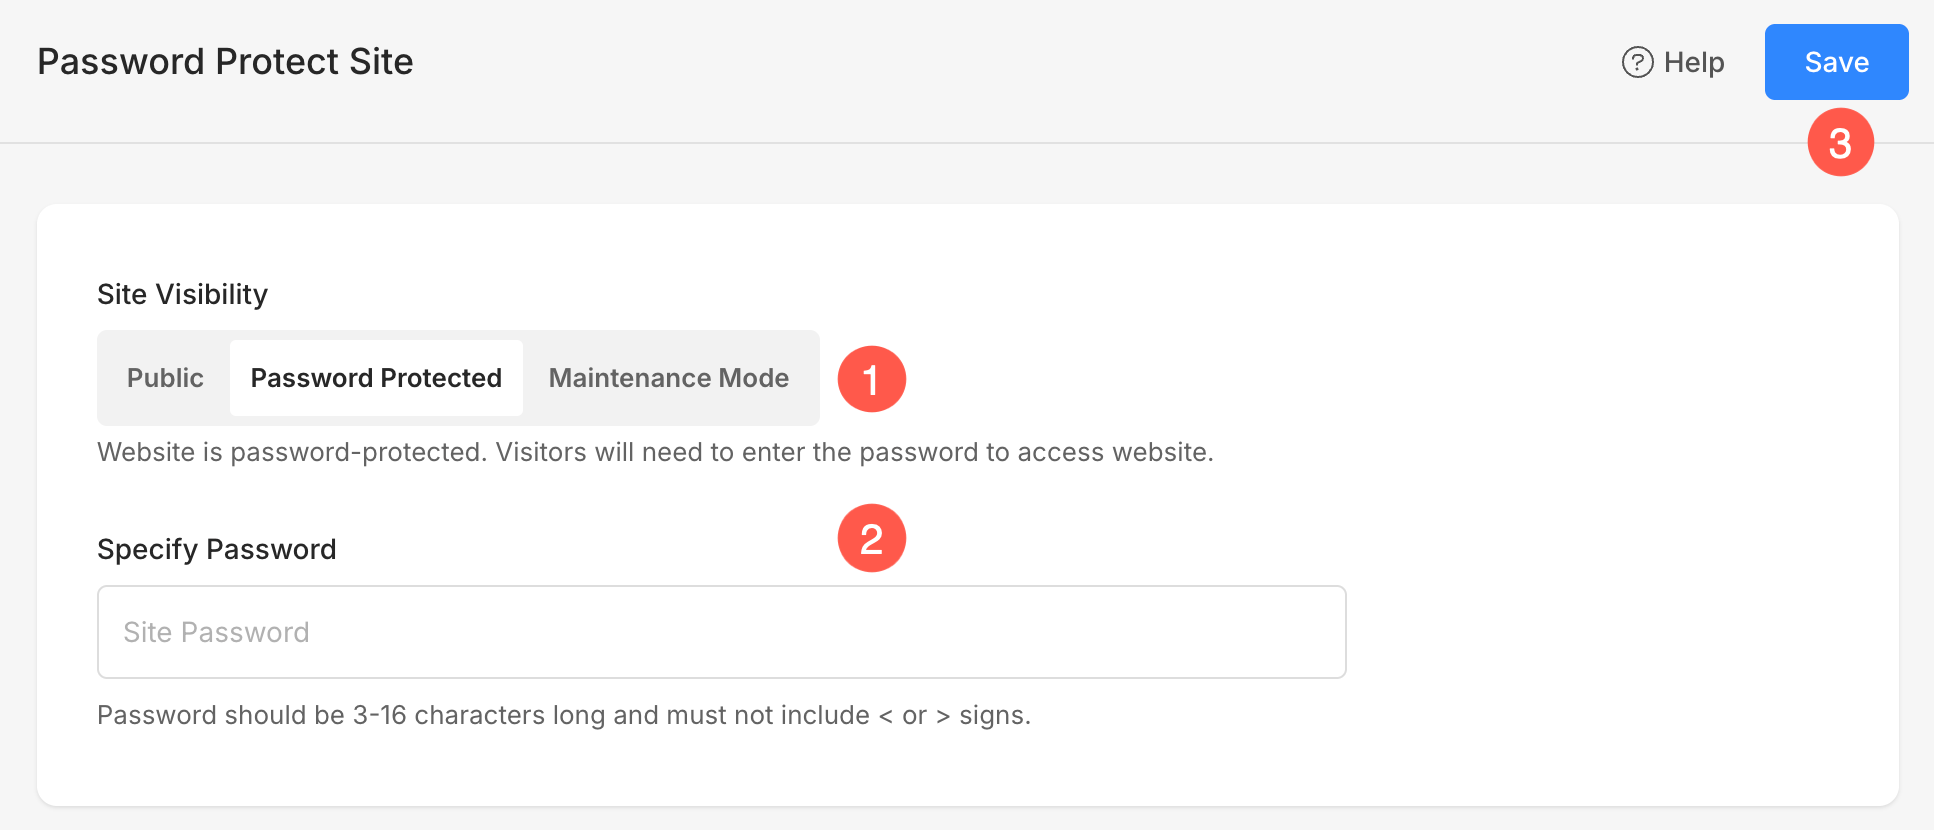
On the right-hand side, you will have the options to manage the Site Visibility:
- Site Visibility
-
- Public: The website is available to all visitors without any restrictions.
- Password Protected: Only visitors with the password you set can access the website.
- Maintenance Mode: Temporarily restrict access to your website, typically used when making major updates.
- Specify Password: Specify a password that users will require to visit the website. This option will be visible only when Password Protected option is selected.
- Hit Save button to publish the changes on the live site.
Scheduler
With the Scheduler option, you can automate when password protection or maintenance mode becomes active and when it should end.
- Enable or disable the Scheduler (1) from here.
- Specify the Start and End date (2) for the scheduler so that your website goes into the password-protection / maintenance mode and then goes live automatically at a specified date.

Text and Background image
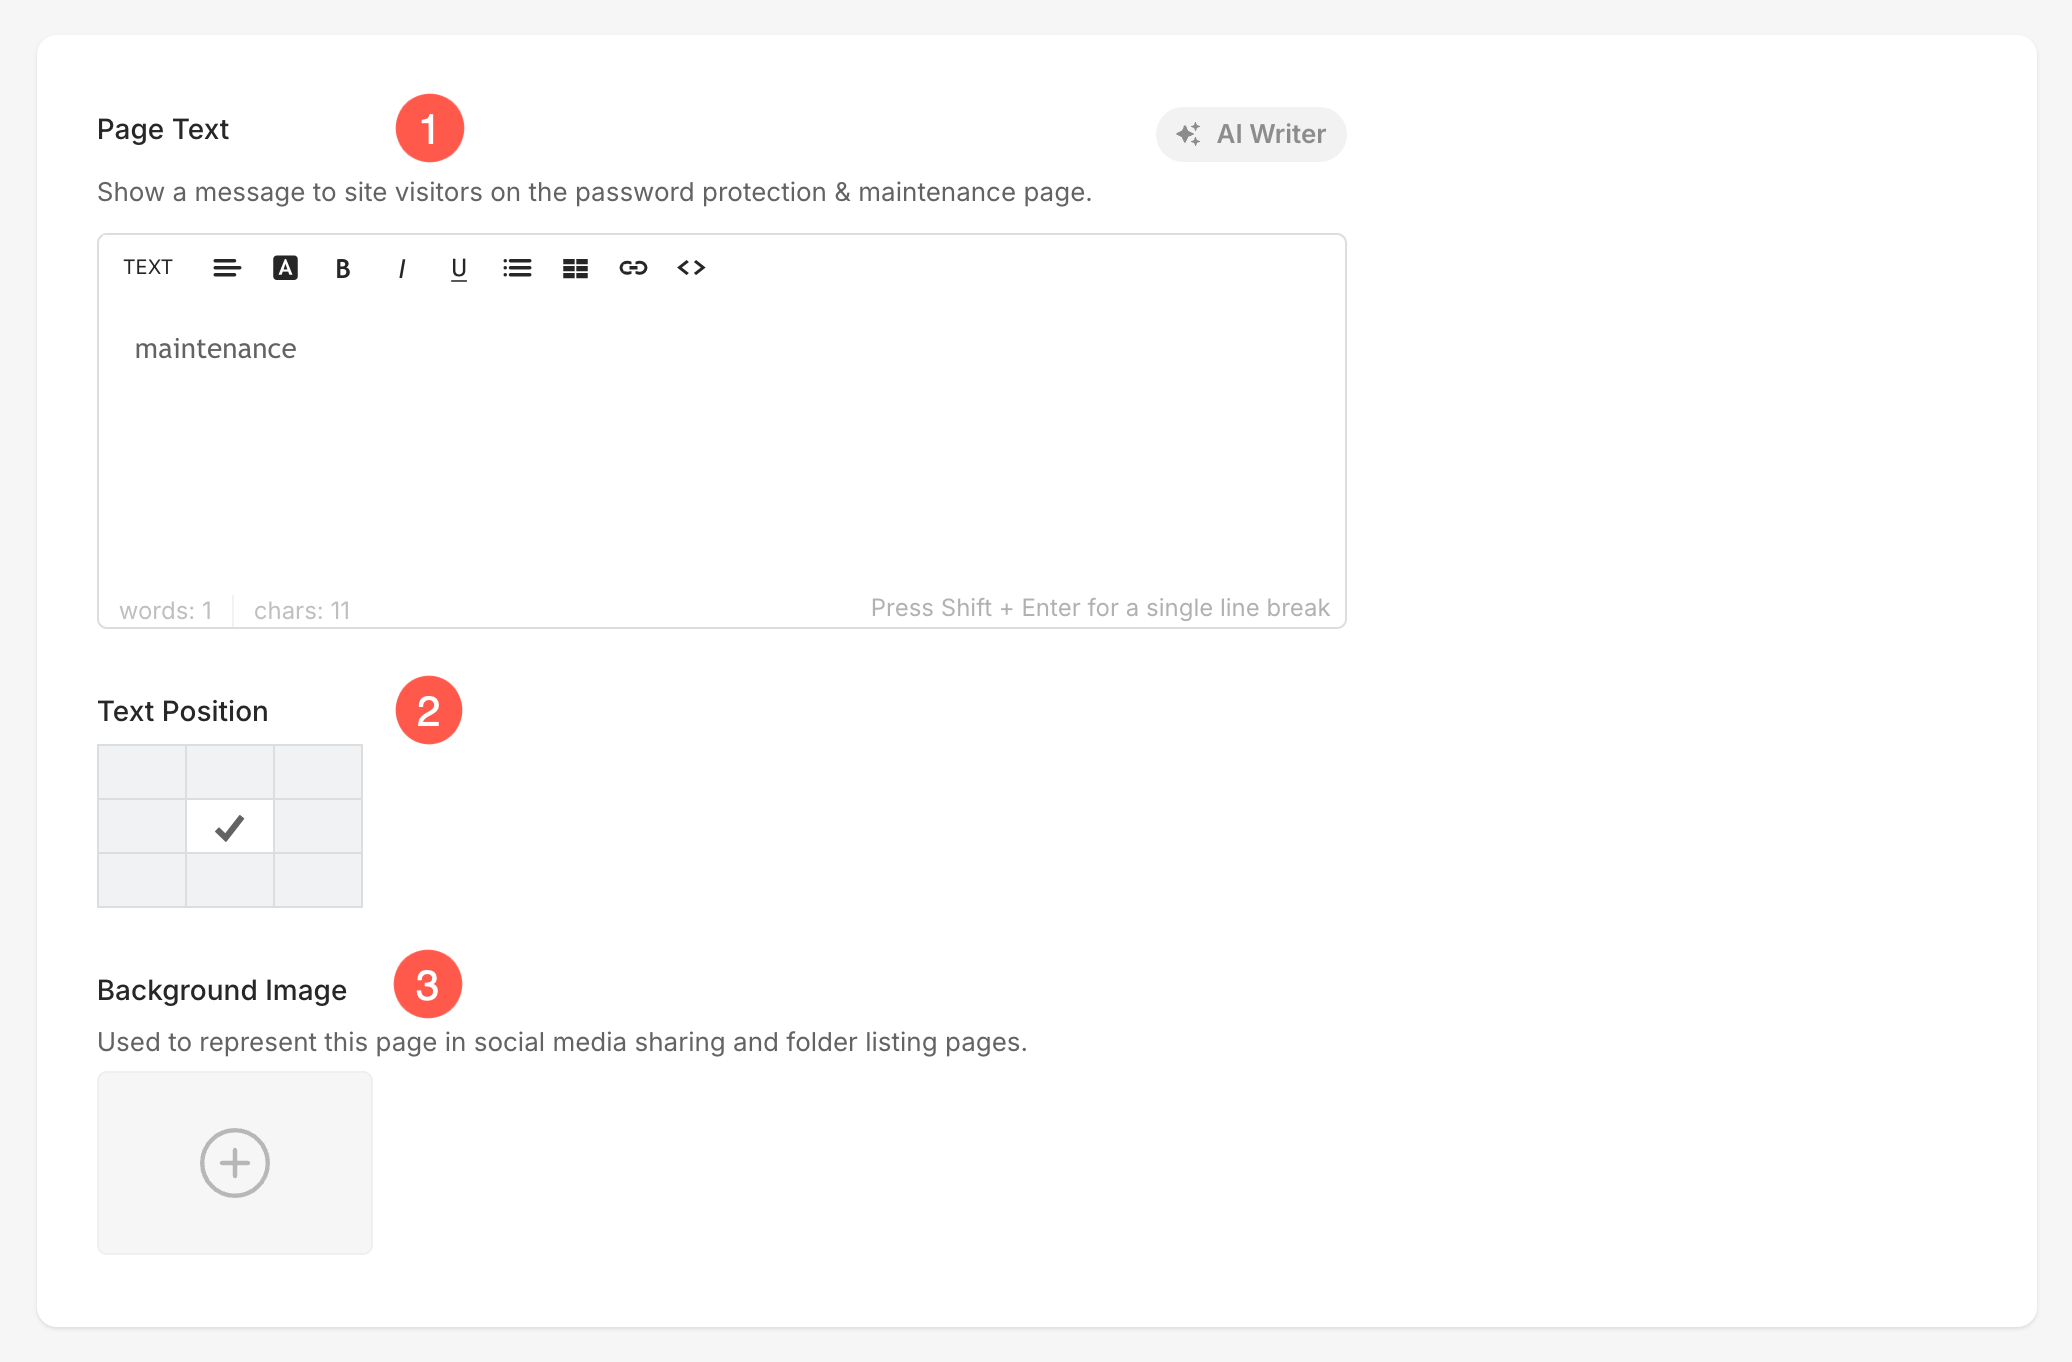
You can personalize the appearance of the password protection or maintenance mode page by customizing the page text and background.
- Page Text: Add a message to be displayed on the page, such as instructions or a note about when the site will be available.
- Text Position: Adjust where the text appears on the page (e.g., center, top, bottom).
- Background Image: Upload a custom image to be used as the background for the page, enhancing the visual appeal.
Social Links
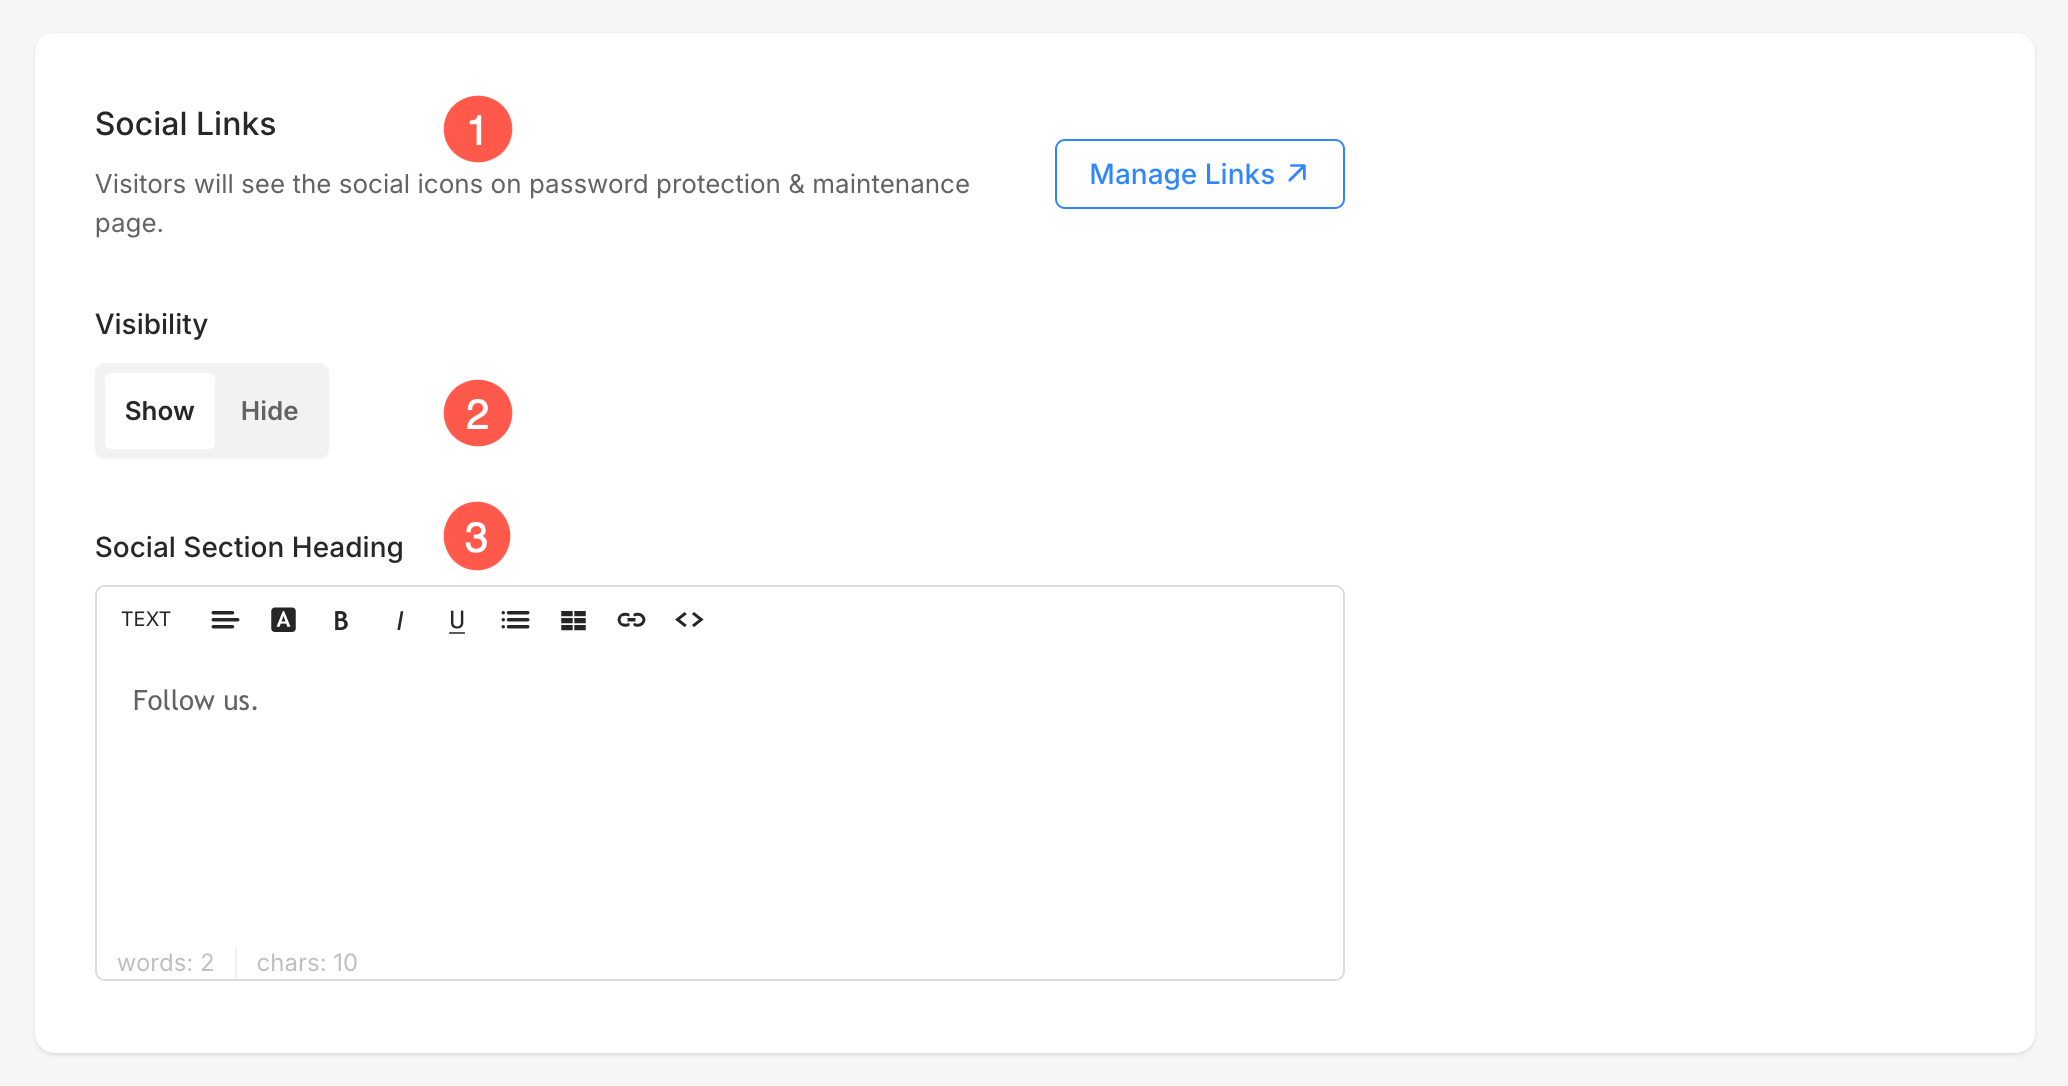
Make your site’s social presence accessible even when it’s password-protected or in maintenance mode.
- Social Links: You can manage the Social links that are added to your website by clicking on the Manage Links button.
- Visibility: Enable or disable the display of social links.
- Social Section Heading: Specify a heading for the social icons, such as “Follow Us” or “Stay Connected.”
Newsletter
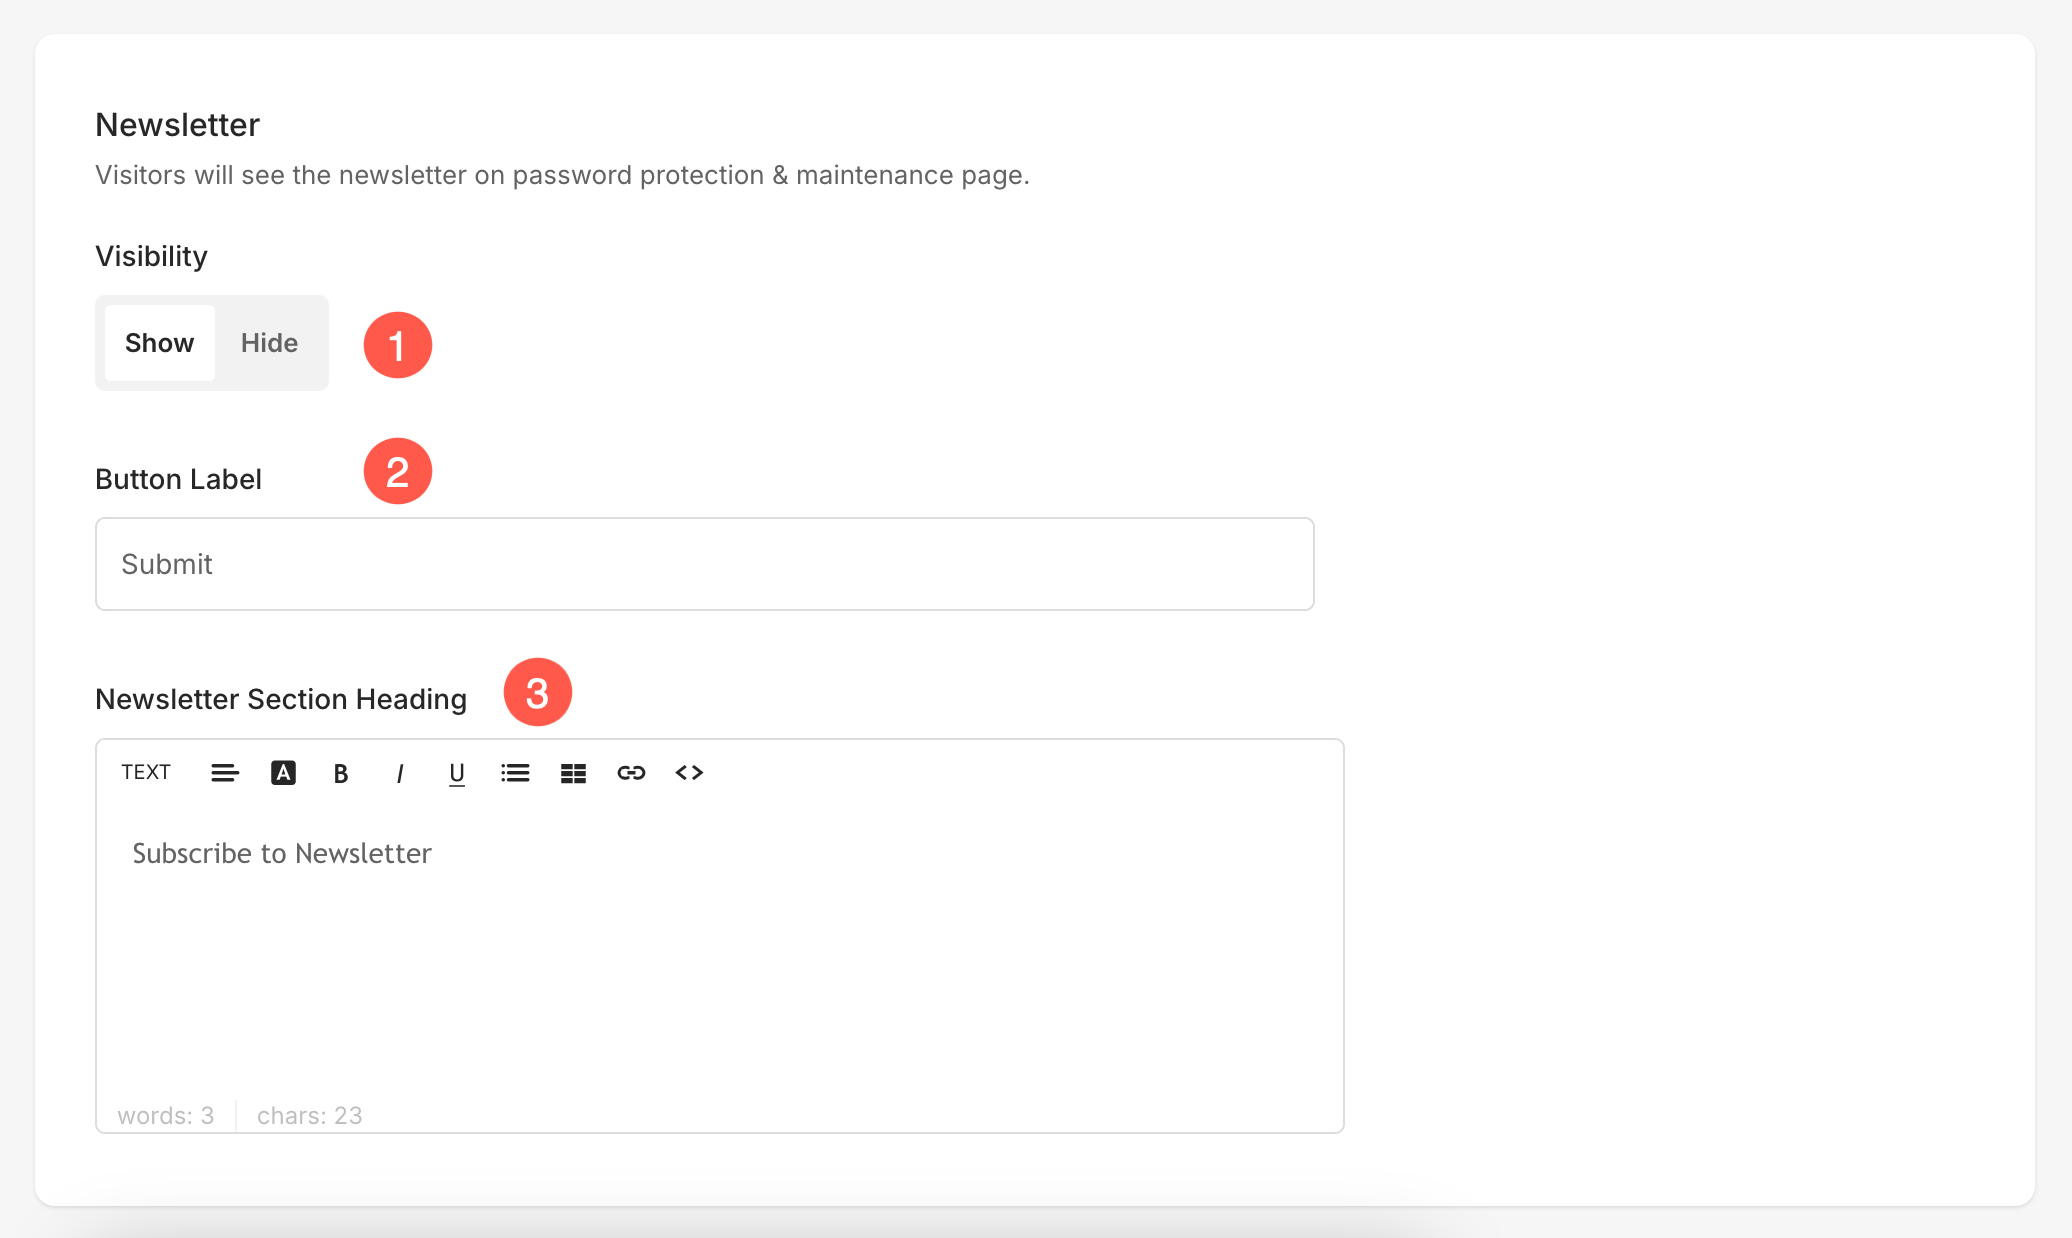
Allow visitors to subscribe to your newsletter even when the site is restricted.
- Visibility: Manage the visibility of a newsletter over the password-protected page. By enabling this, visitors with/without your website password can be added to your mailing list.
- Button Label: Specify the button label for your newsletter (e.g., “Subscribe Now”).
- Newsletter Section Heading: Specify a heading for the newsletter, such as “Stay Updated.”
View and disable password protection page
View the page
To view the password-protected page of your website, enter the website URL in an incognito window. This will be the page that your website visitors will be landing on.
Disable password protection
- Choose the Public option under Site Visibility and save the settings.
- Now, your site will be visible to everyone.
