An Album is a group of galleries that you can share with anyone publicly or privately.
After you have created an album, you can invite users to proof your images by sending them an invite email.
In this article:
Share an Album
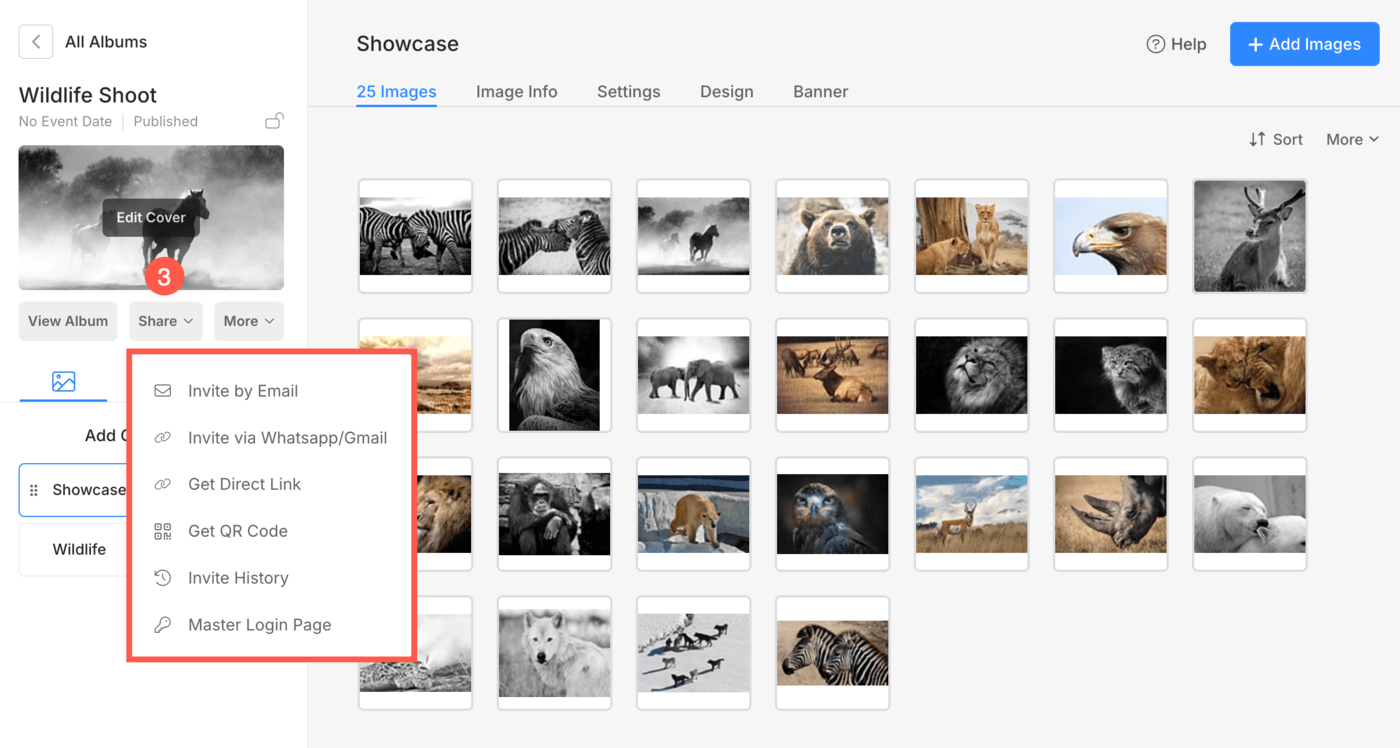
- Enter Album title (1) in the Search Bar.
- From the related results, click on the Album that you are searching for (2) under Client Galleries.

- You will now reach the Album page.
- Click on the Share (3) button below the album cover photo to open the album-sharing options.
Share by Email
To send the Email invite, follow these steps:
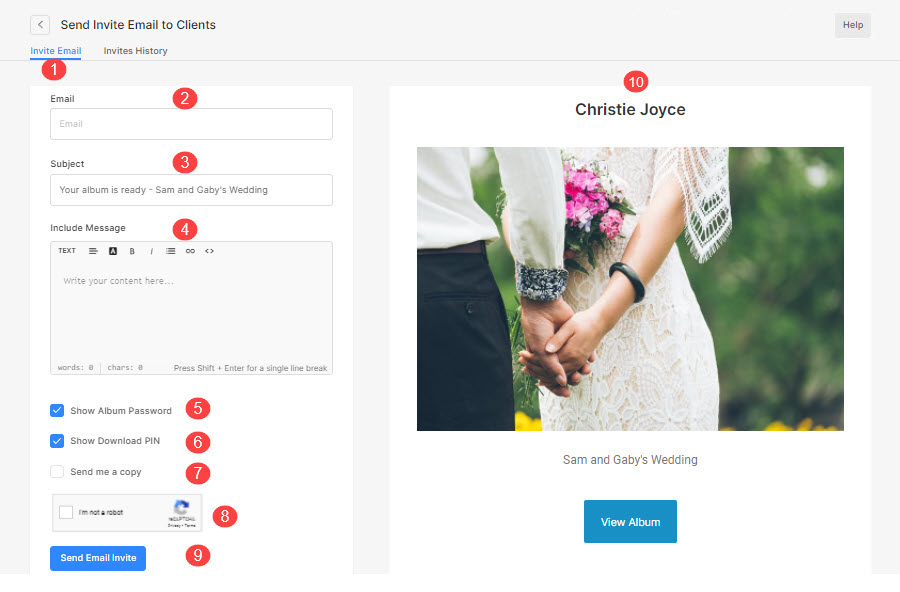
- Click on Invite by Email tab on the Share with Clients page.
- You can send the email invite to one or up to 3 email addresses (separated by commas).
- Specify the Subject of the email invite.
- Add some description to the email body.
- Enable this option to show the Album Password.
- Enable this option to show the Download Pin.
- Send a copy of the email to your email address.
- You need to verify the Google captcha in order to send the email invite.
- Once you have specified the above fields, click on Send Email Invite button to send the email.
- You can review your drafted mail on the right side.
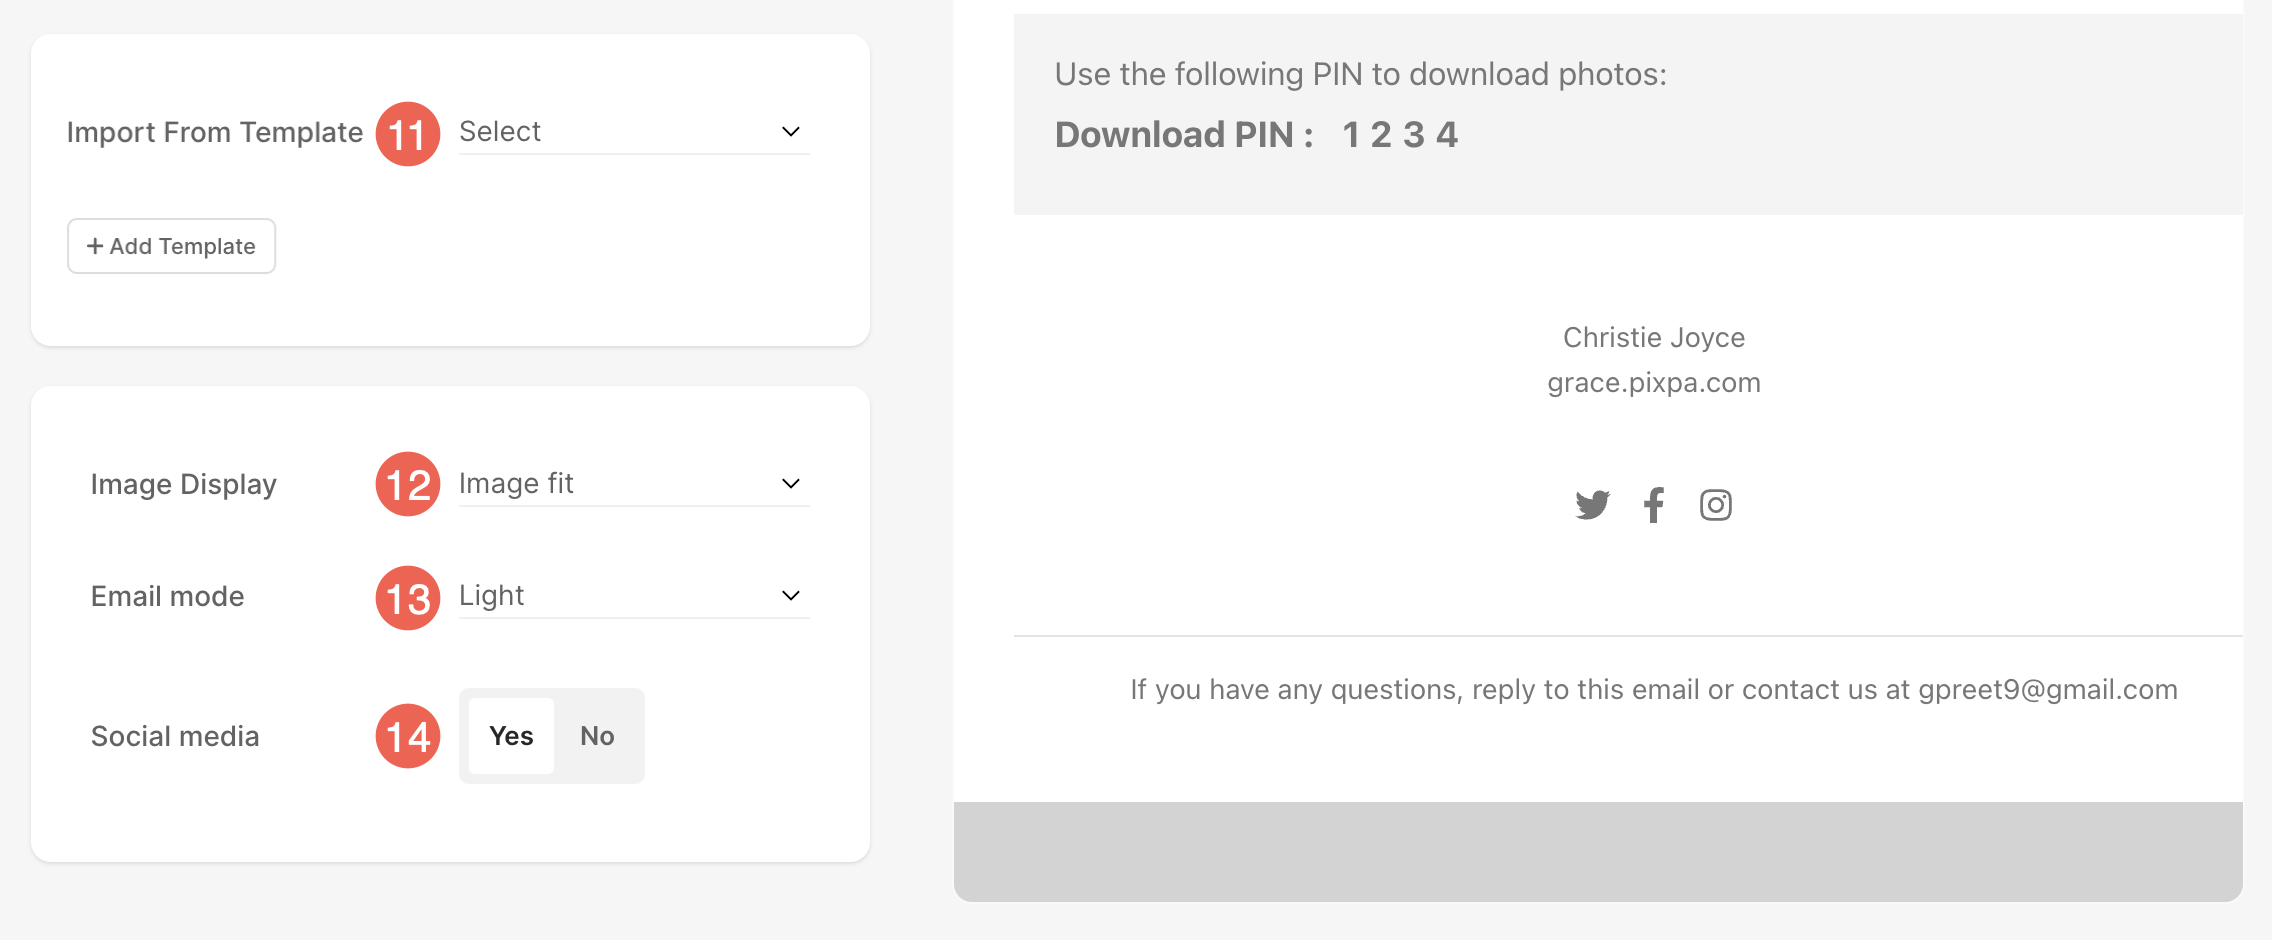
- Import an Email Template from the list of templates that you have created. The E-mail templates feature allows you to create preset templates, simplifying the process of sharing invites with clients or notifying them about album expiry reminders. You can also create new template by clicking on + Add Template button. Learn more.
- You can choose between Full Bleed or Image Fit for displaying image in the invite email. The Album Cover Image will be automatically incorporated here.
- The Email mode option allows you to choose from Light or Dark-themed emails.
- Choose if you want to include your Social Media icons inside the invite email or not.
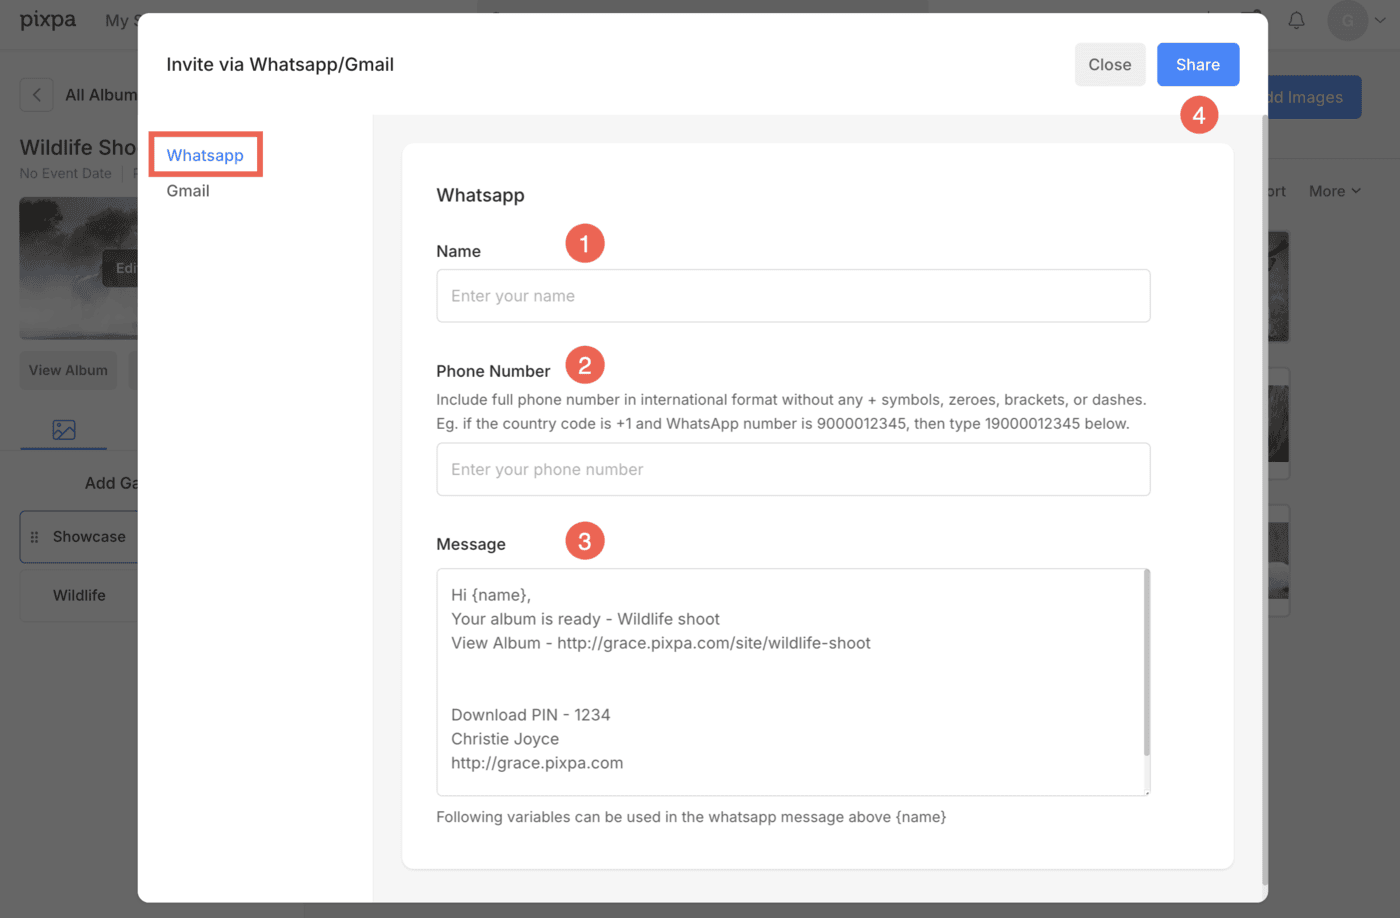
Invite via Whatsapp/Gmail
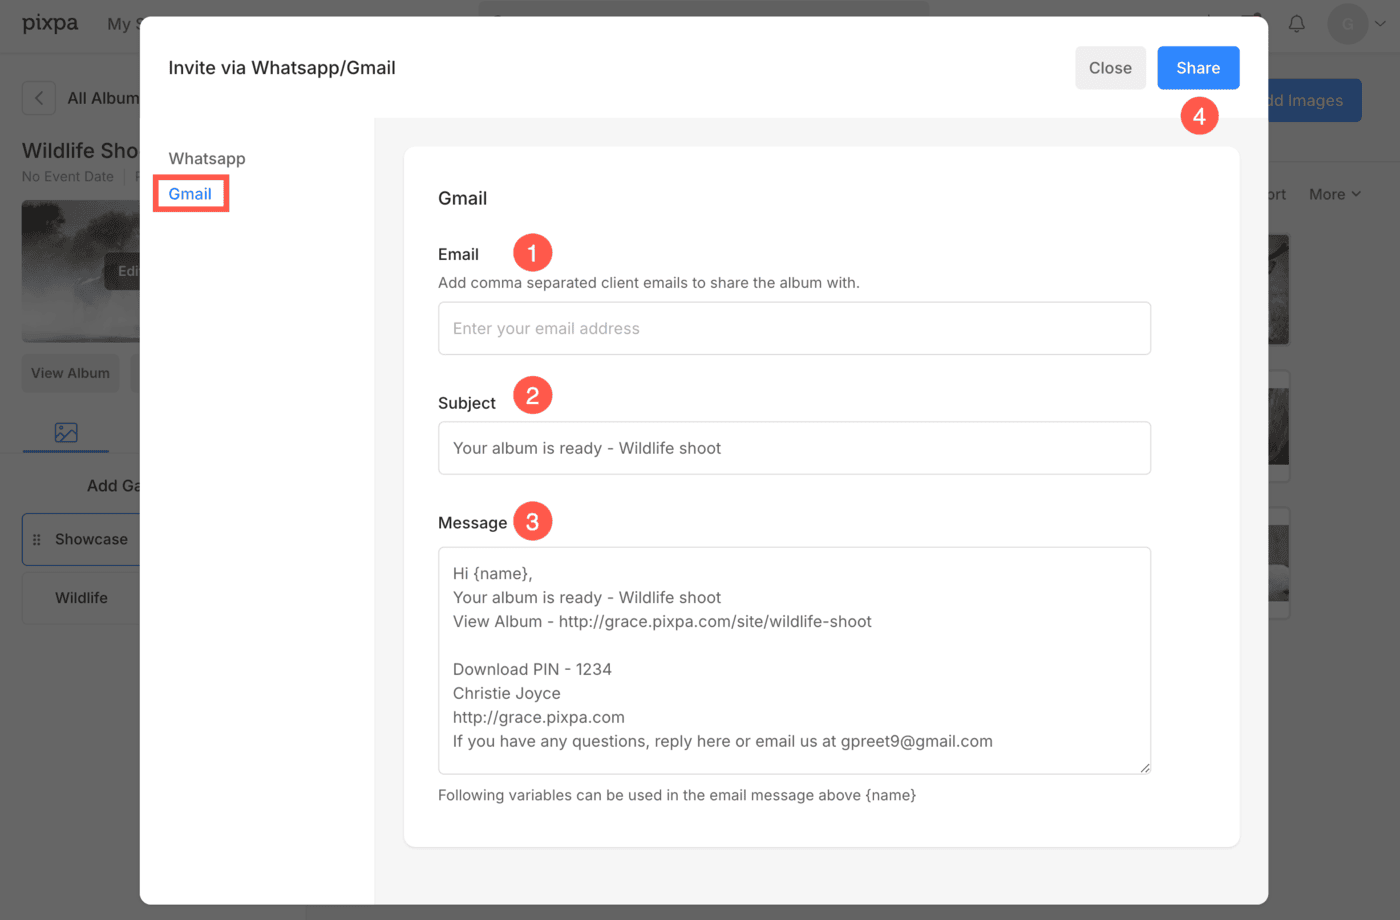
Invite via Gmail
- Enter the Email Address of the client. You can also enter multiple email addresses by separating them with commas.
- Specify the Subject for email.
- Specify the Message for client. By default, system will generate the basic details of the album. You can customize this according to your preference as well.
- After specifying all the details, Share the album.
Invite History
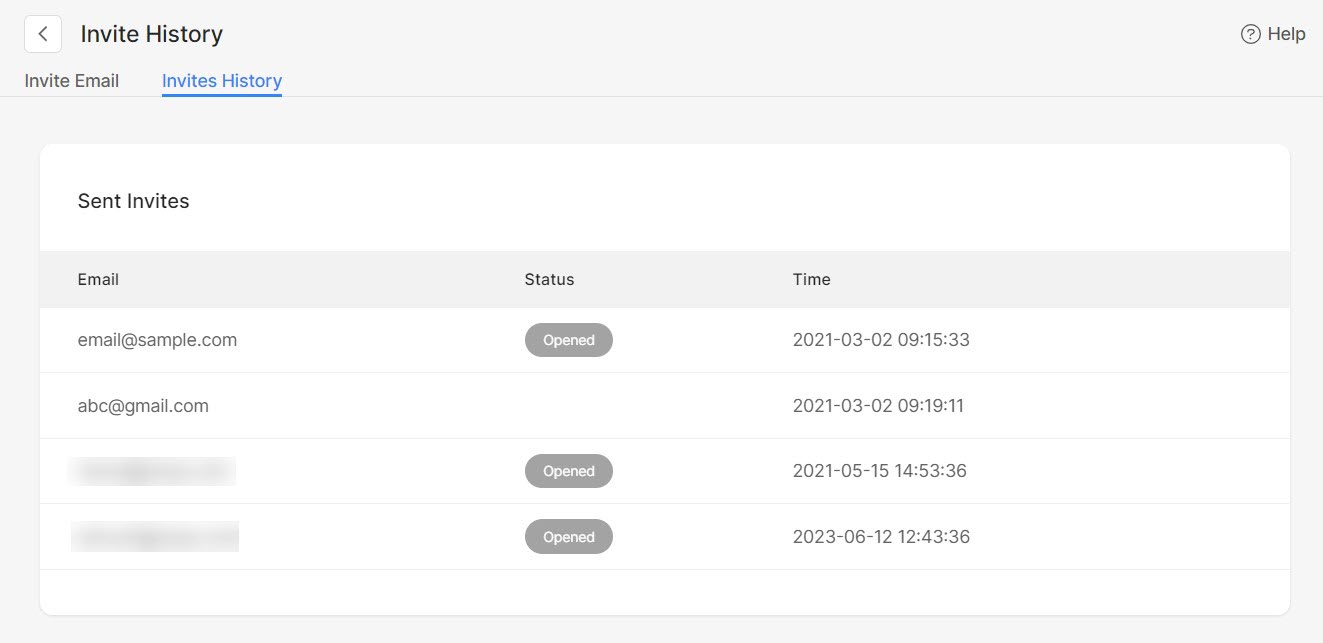
- Click on the Invite History tab to view all the invites sent.
