Pages are made using Pixpa’s PageBuilder that lets you create any kind of informative page by arranging and editing content blocks using simple drag and drop tools.
Here’s a demo page.
The Dynamic Page builder lets you create any kind of information-based page using many dynamic components and add them in a few clicks.
You can arrange, organize, edit and customize these content blocks to create unique pages for showing your content.
Pages are used for a variety of purposes like providing any textual content, showcasing a few images, videos, testimonials, for the About Me/Contact page, and many other purposes.
In this article:
Add a New Page
To add a new page to your website, follow the steps mentioned below:

- Inside the Website section, you will see Plus + (3) icon under the Header menu as well as Footer menu. Click on one of them where you would like to add a page.
- A pop-up will show up allowing you to add a new Page (4) to your website.

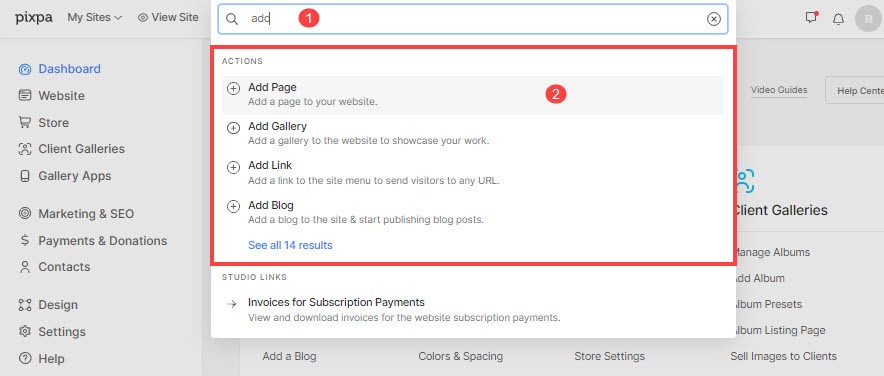
Alternatively, you can use Pixpa’s search option to add a new page. Following are the steps:
- Enter add page (1) in the Search Bar.
- You will see the related results.
- Click on the Add Page option (2) under Actions.

- Next up, specify a Name (1) to your new Page and click on the Continue (2) button.

Choose a Page Layout
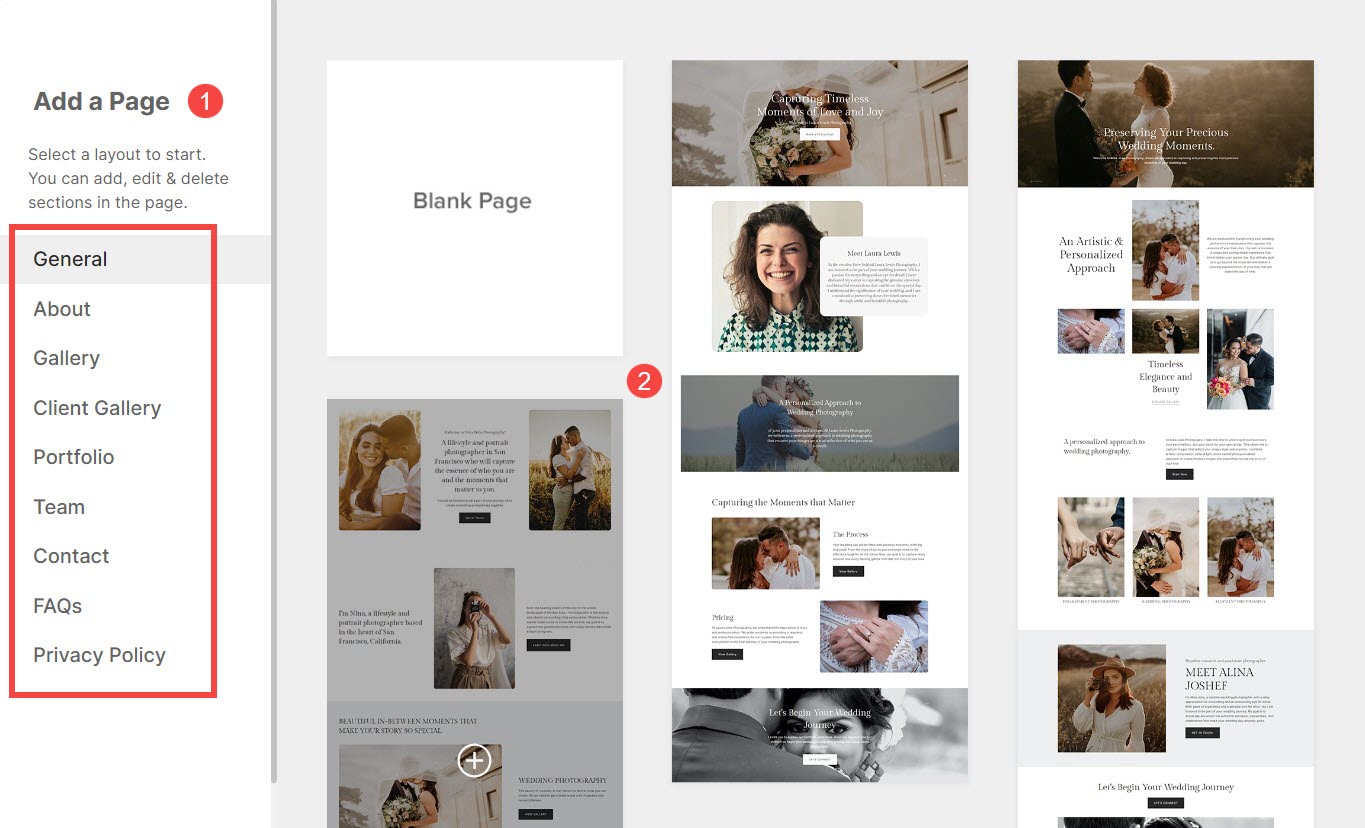
- In the next screen, you will have the option to choose the type of page you are looking to add to your website.
- You can choose from options (1) like a General page (for home page), About, Contact, Gallery, Portfolio, FAQ page, and Landing Page for ready pages.
- You can also start with a Blank page (2).

Edit a Page
If you have added a blank page, you can add different sections to it.
- To add a section, click on the Blue Plus (+) icon.

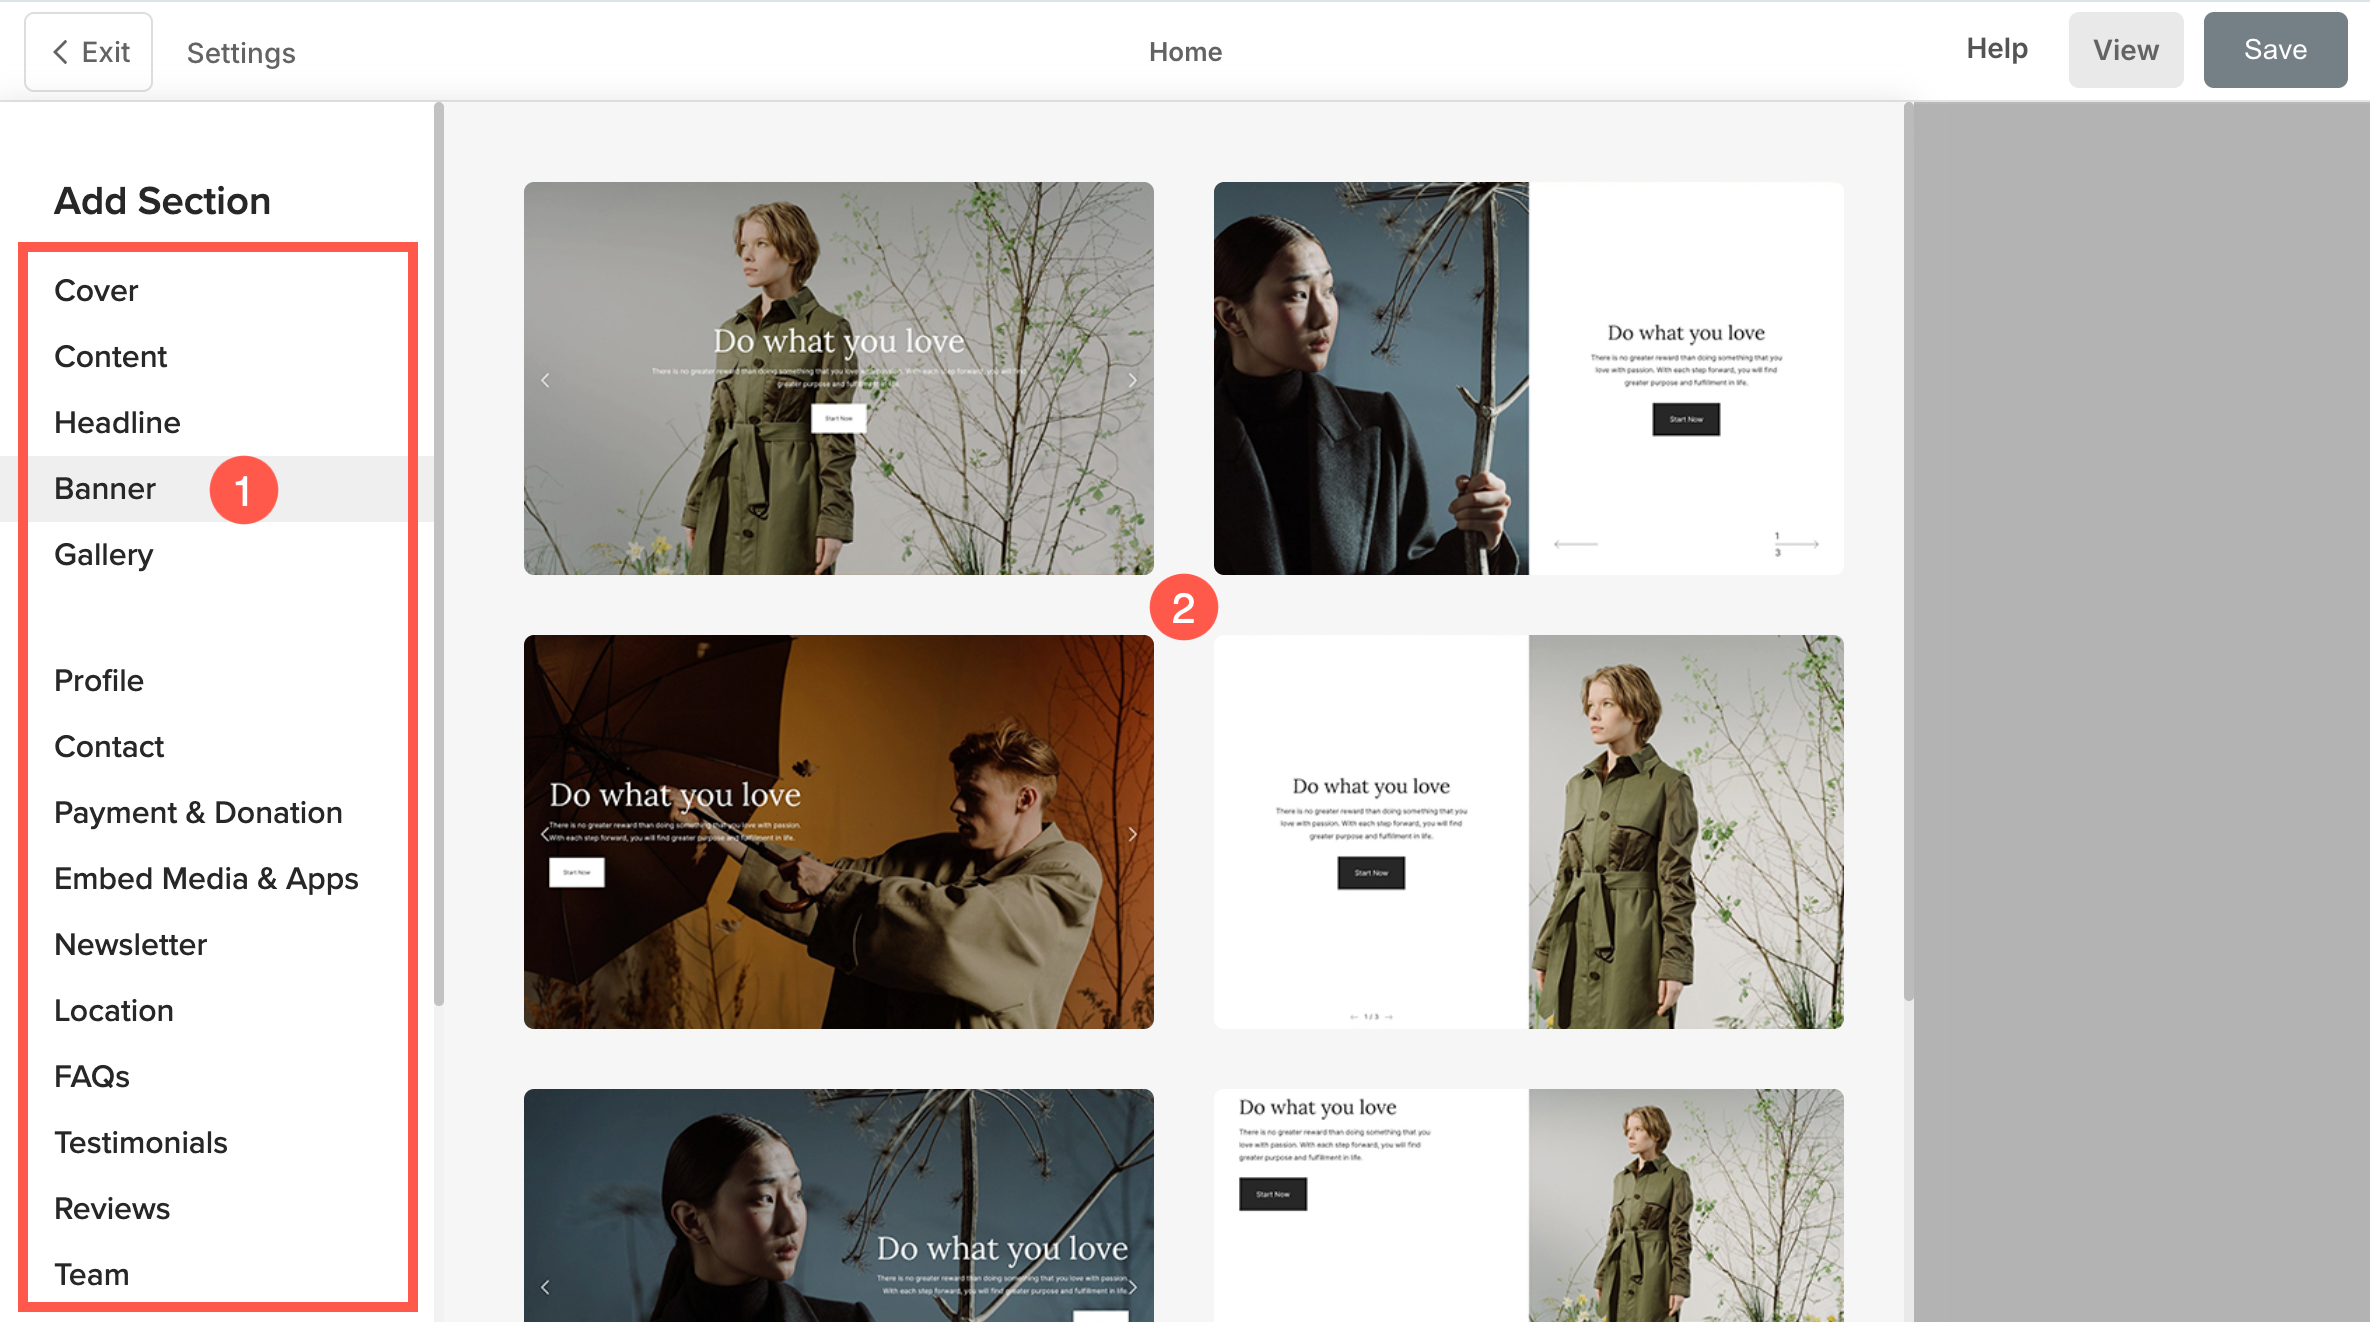
- A sidebar will pop-up allowing you to choose from all the sections.
- Select (1) the section that you want to add and choose a layout (2) for it.

The section will be added to your page. To learn more about different sections and how to edit them, click here.
Save and View Page
- Now, you can edit the page, and add sections or snippets to it.
- Finally, Save (1) your changes and View (2) the page.

