To connect your domain with your Pixpa website, you need to create 2 records in your domain DNS panel.
- www CNAME record pointing to domains.pixpa.com
- And a root domain redirect to http://www.rootdomain
However some domain providers do not provide the root domain redirect option. In such cases, we recommend you to connect your domain using Cloudflare.
You need to setup your Cloudflare account and manage your domain DNS records from there. It’s free for personal use.
Here are the steps to manage your domain through Cloudflare
1. Create Cloudflare Account
- If you do not have a Cloudflare account, you need to create your account first.
- Click on Signup at the top right corner to set up your Cloudflare account.

2.Add Domain
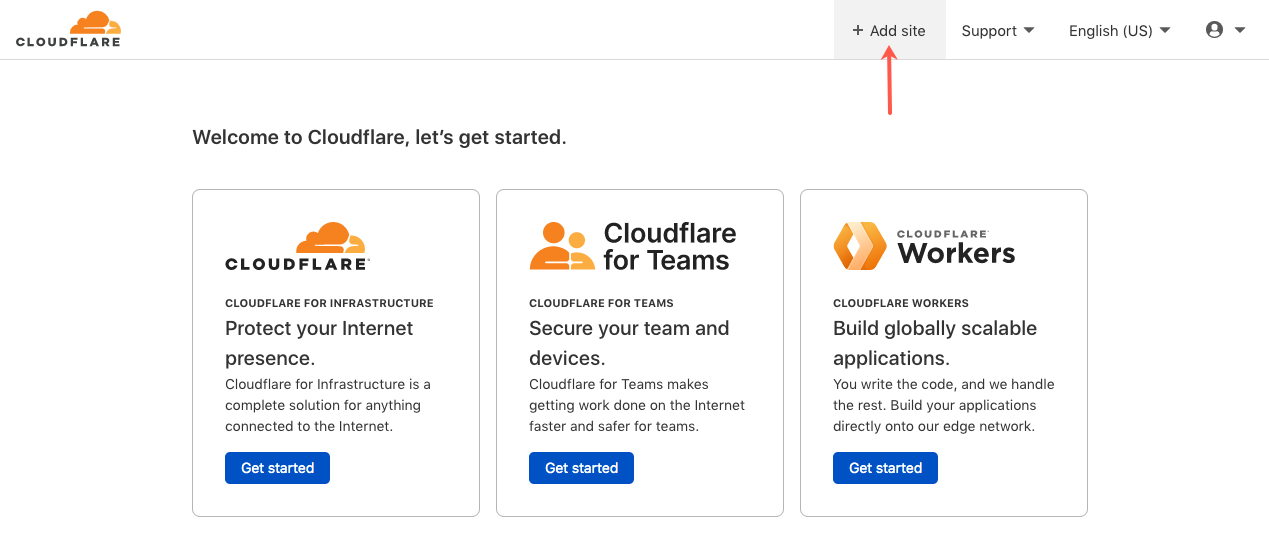
- As you have created your account, click on Add Site in the top navigation

- On the next screen, add your domain name which you want to connect with your Pixpa website and click on Add Site

- On the next screen, you will get the option to choose a plan.
- Scroll down to choose the Free Plan and click on Continue.

- Cloudflare will now export all your domain existing DNS records. Click on the Continue button at the bottom.
- Cloudflare will provide you with Name Servers for your domain.
- Now, you need to update the Name Servers of your domain to Cloudflare Name Servers and save your changes.

3. Add Records
- Click on DNS in your Cloudflare DNS panel.
- Add a www CNAME record pointing to domains.pixpa.com by clicking on the Add Record button.
- You need to set the Proxy status as DNS only and TTL as 1 min for the CNAME record.
- Add an A record pointing your root domain or “@” to 192.0.2.1

- Now click on SSL / TLS and choose the option of Edge Certificates
- Scroll down and enable the toggle in Always use HTTPS

Now we need to set up the domain forwarding, click on Rules option
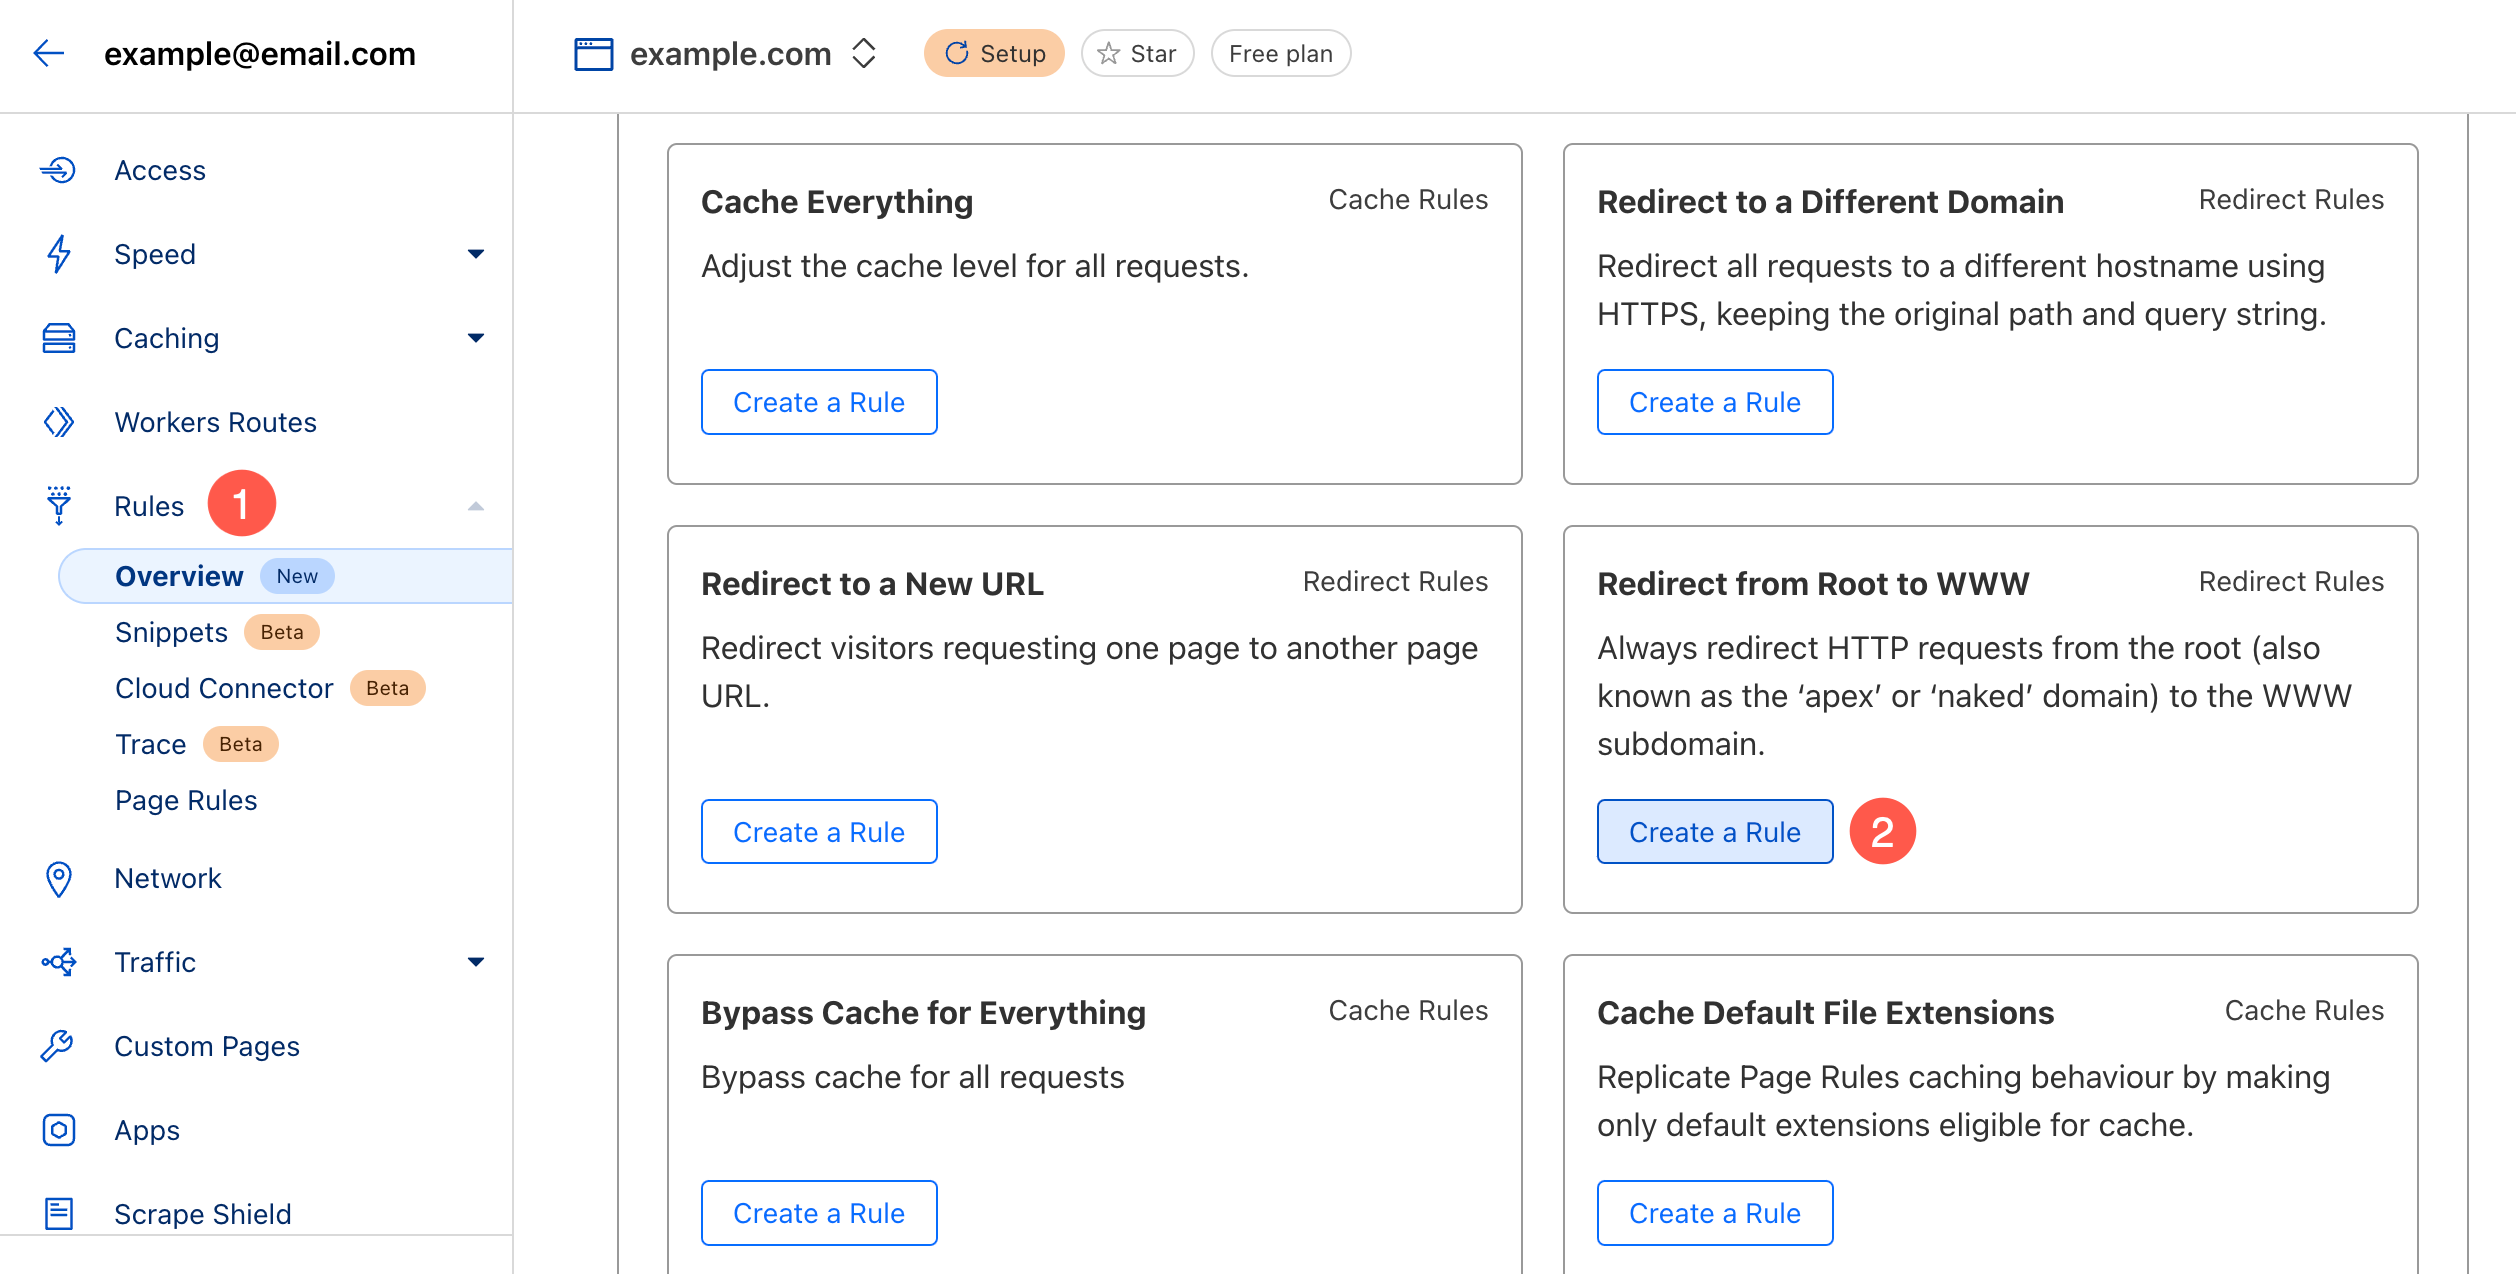
- Click on Rules (1) button in the left sidebar and select Redirect from Root to WWW (2) option.

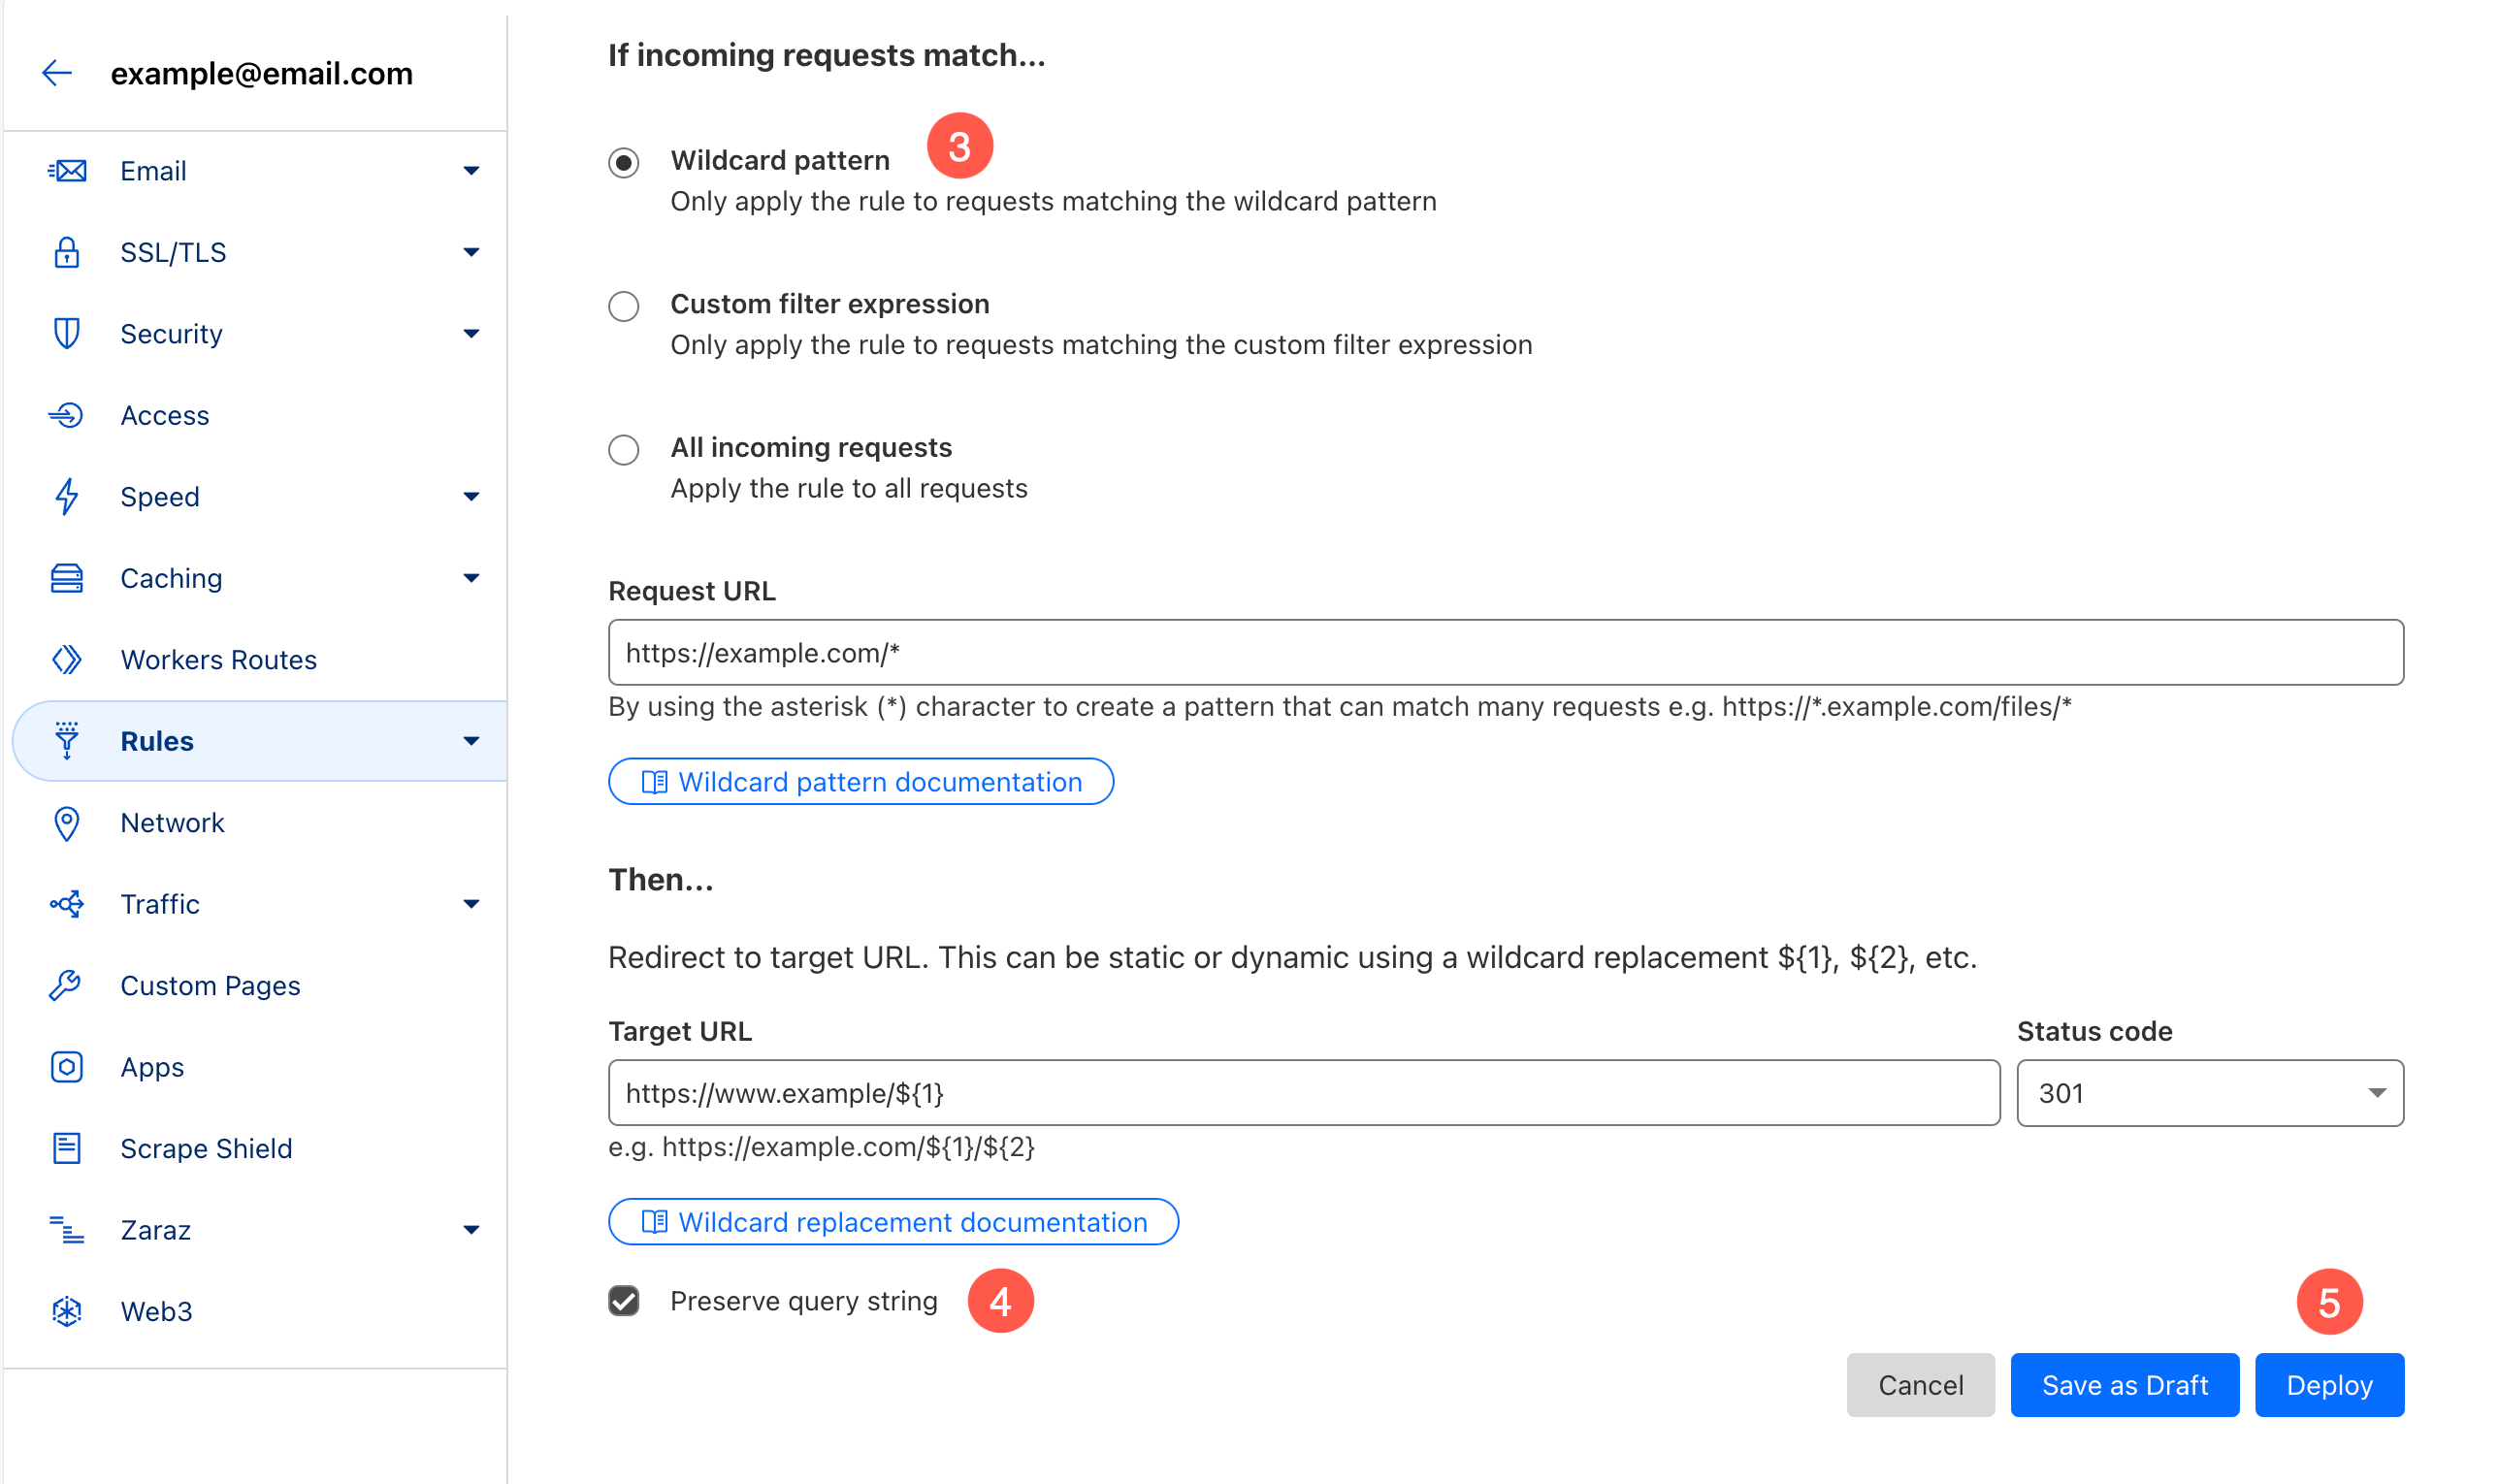
- Select Wildcard Pattern (3) option and enable Preserve Query String (4) checkbox.
- Click on the Deploy (5) button to save your changes.

Now, make a Go Live Request from the Studio
Once you have completed the above steps, you can then submit a Go Live request now.
- Go to the Pixpa dashboard.
- Search for ‘domain’ and click on the first search result.

You’ll reach the Site Domain Name page.
Enter your domain name with “http://www” prefix as http://www.amrishmudgal.in in Connect your Domain Name section as shown in the image below.
Here amrishmudgal.in a domain name is an example in this help article. Request you to replace it with your domain name.

In case you face any issues, you can go to the member section and share your domain invite at support@pixpa.com after adding your domain and updating the NameServers.
As we get the access, we will make the required changes from our end to connect your domain with the Pixpa site.

