To connect your domain name registered on Namecheap.com, follow these steps:
1. Go to the Namecheap website and click on the Dashboard button on the right top. Enter your username and password to sign in to your account.
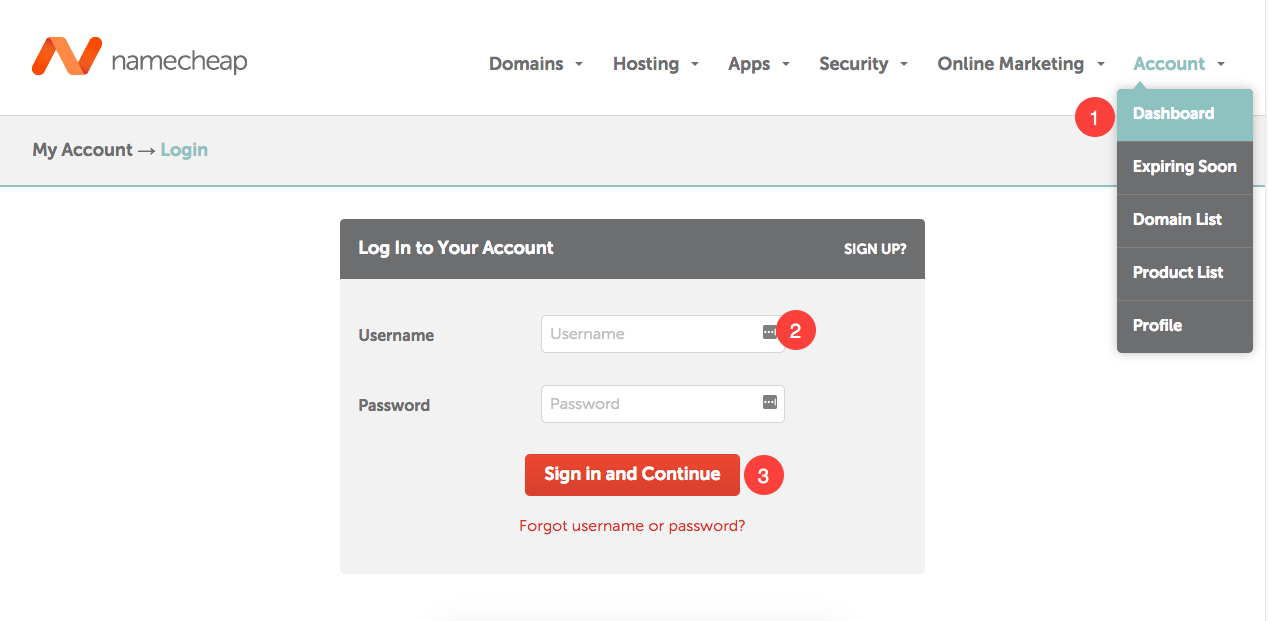
2. Go to Domain list now. You would see all your purchased domains here. Now find the domain that you want to connect Pixpa website and click on the Manage button next to it.
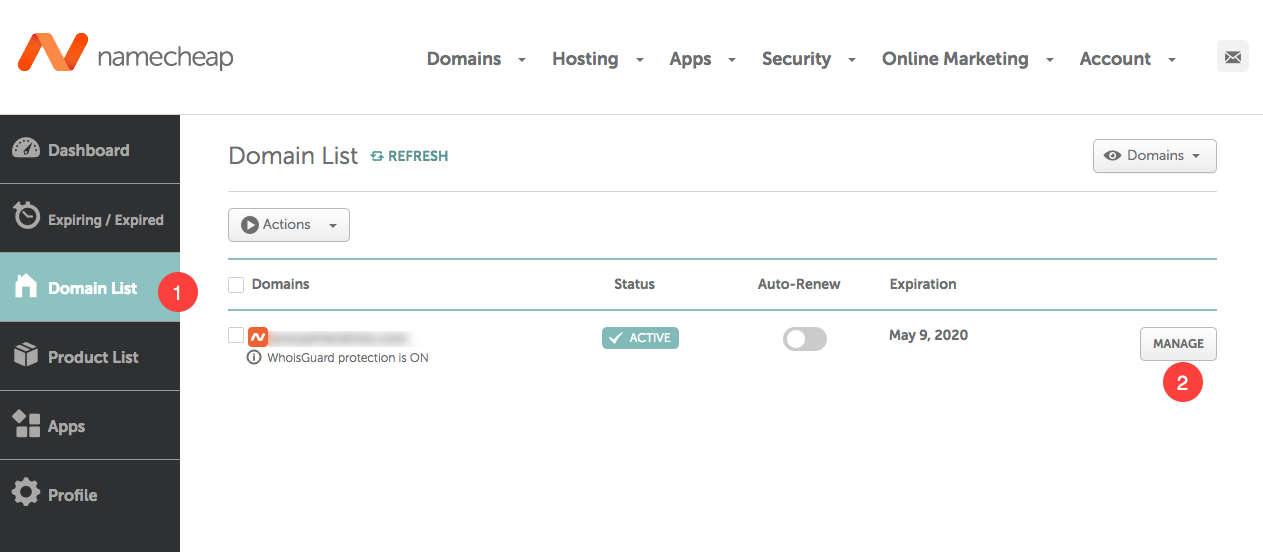
3. Click on the Advanced DNS tab. You will see all your DNS records here. Now click on Add New Record tab.
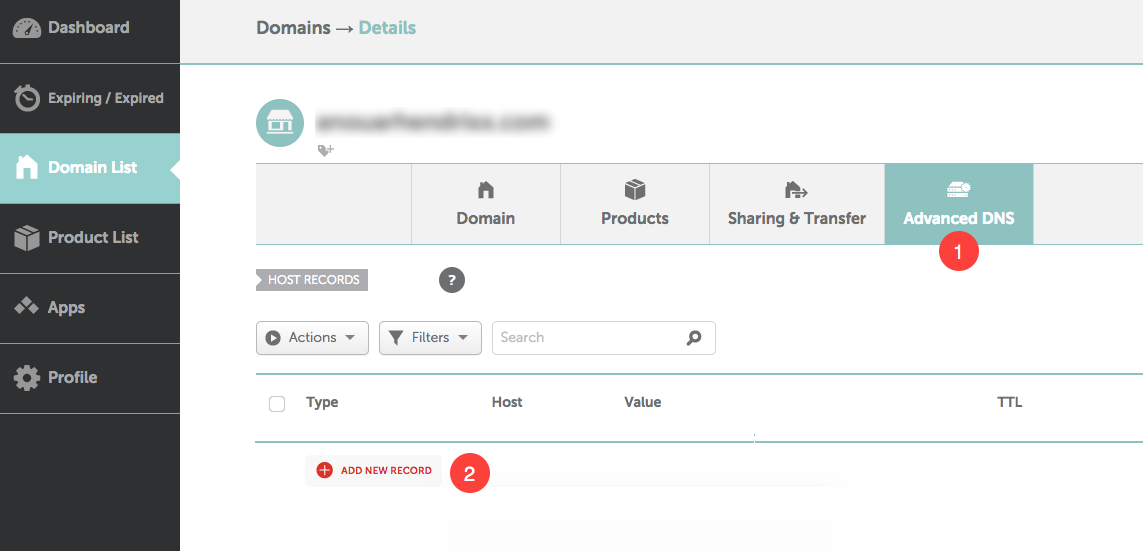
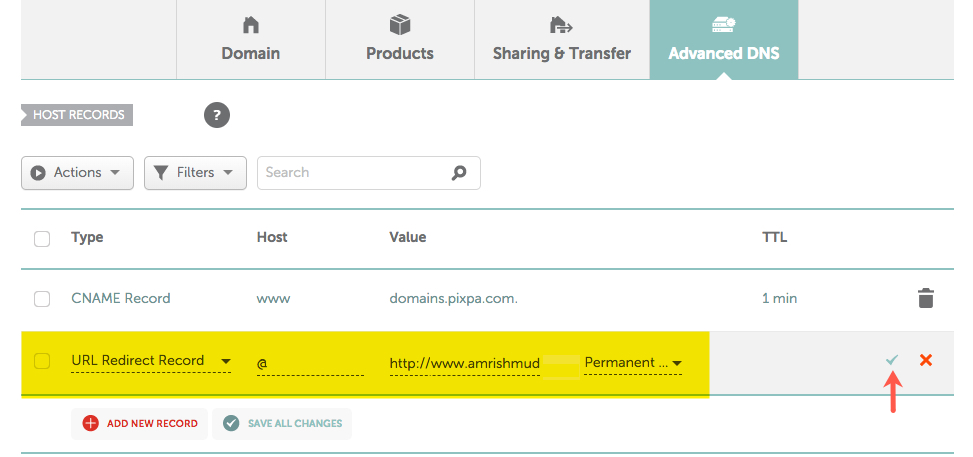
4. Here you need to create a www CNAME record. Select CNAME record (as Type), www (as Host), domains.pixpa.com (as value) and 1 min (as TTL).
Hit the green check button to save this record.
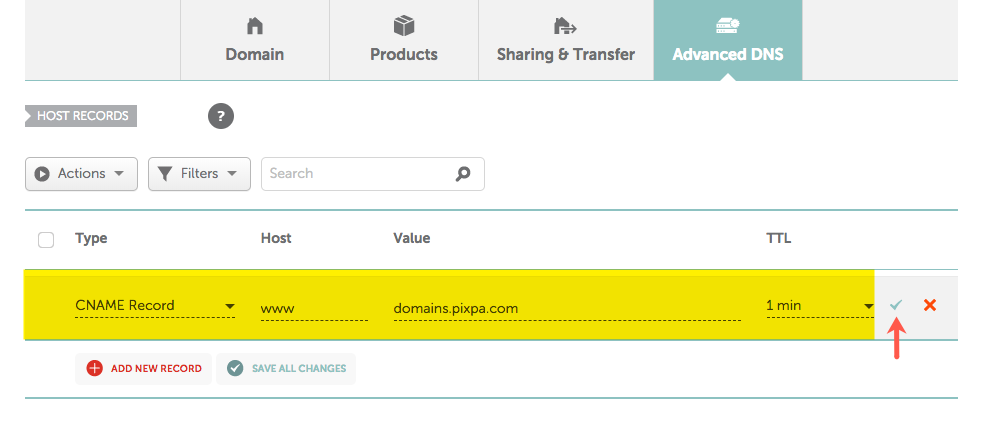
5. Now you need to add a domain redirect/forwarding. Click on Add New Record tab again. Select URL Redirect Record (as Type), @ (as Host), your domain name with http://www prefix (as value) and choose 301 permanent redirect.
Example: If your domain name is “amrishmugal.in” then type “http://www.amrishmudgal.in” in the value field shown below. Hit the green check button to save this record.
Now, Make a Go Live Request in the Studio
Once you have completed the above steps, you can then submit a Go Live request now.
- Go to the Pixpa dashboard.
- Search for ‘domain’ and click on the first search result.

You’ll reach the Site Domain Name page.
Enter your domain name with “http://www” prefix as http://www.amrishmudgal.in in Connect your Domain Name section as shown in the image below.
Here amrishmudgal.in a domain name is an example in this help article. Request you to replace it with your domain name.

If you need any assistance at any point through the process, email us at support@pixpa.com.
