This article guides you to connect a GoDaddy domain with your Pixpa website.
In this article:
Connect your domain name registered on Godaddy.com:
1. Go to the GoDaddy website and click on the Sign In button on the right top.

2. Enter your username/email/customer number and password to Sign In to your account.

3. Go to the top right section and click on the My Products tab.

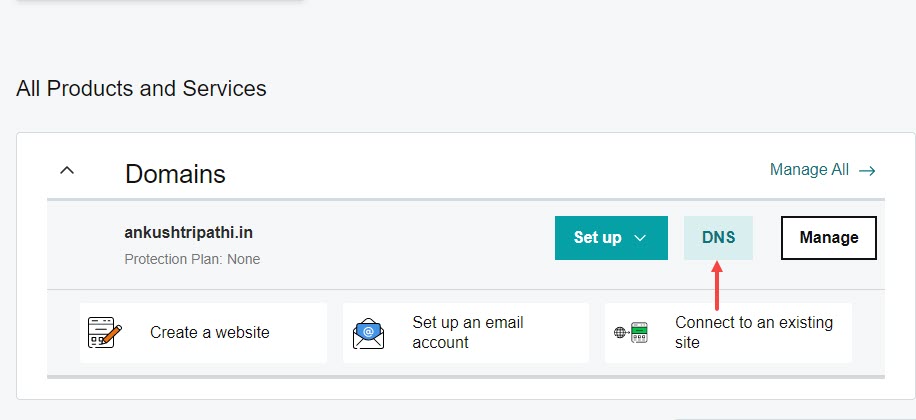
4. In the My Products section, you would see all your purchased domains. Now find your domain that you want to connect to the Pixpa website and click on the DNS button next to it.
For example, I want to connect ankushtripathi.in with my Pixpa website here.

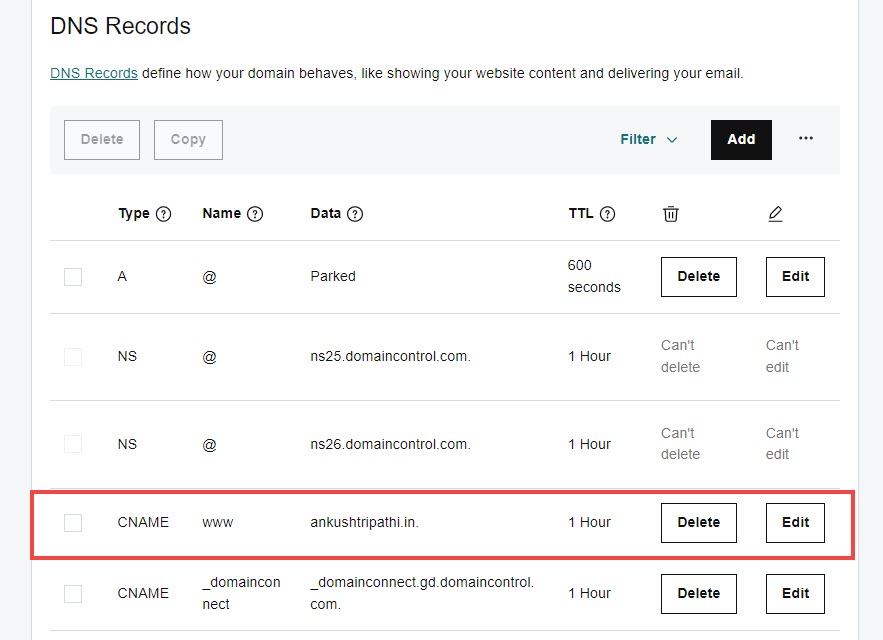
5. You will see DNS Management (as shown in the image below). In DNS Management, go to the www CNAME record and Delete it (as shown in the image below).

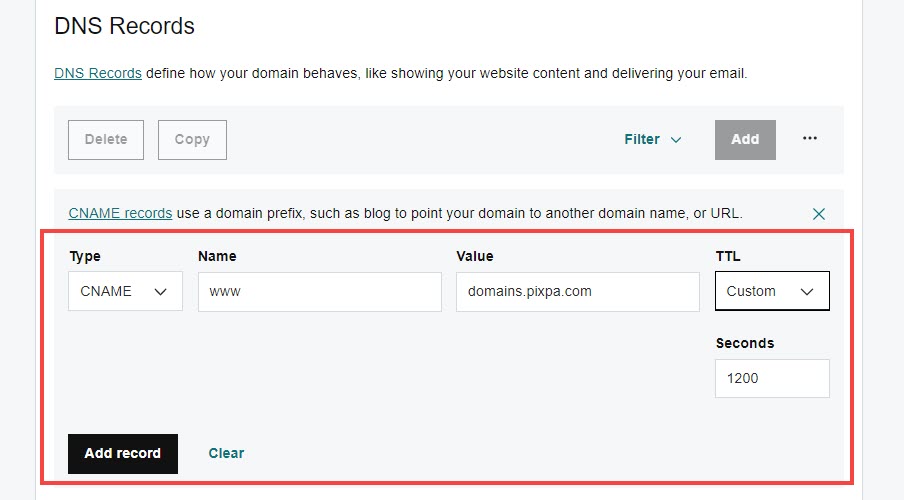
6. Now, click on the Add button to add a new CNAME record.
You need to choose CNAME as the Type, www as Name, domains.pixpa.com as Value, and 1/2 hour or any time as TTL. Finally, hit the Add record button.

7. Now, scroll down the page, go to Forwarding Settings and click on the Add Forwarding text link of the Domain.

8. Add your domain name here (1) with the www prefix.
Example: If your domain name is “amrishmudgal.in” then type “www.amrishmudgal.in” in the field shown below.
Select the Permanent (301) option (2) as the Forward Type. Then, click on the Save button (3).

Step 2: Make a Go Live Request from the Pixpa Studio
Once you have completed the above steps, you can then submit a Go Live request now.
- Go to the Pixpa dashboard.
- Search for ‘domain’ and click on the first search result.

You’ll reach the Site Domain Name page.
Enter your domain name with “http://www” prefix as http://www.amrishmudgal.in in Connect your Domain Name section as shown in the image below.
Here amrishmudgal.in a domain name is an example in this help article. Request you to replace it with your domain name.

