Once you create a Gallery, you can import items from any other gallery on your Pixpa website.
You can import items from:
- One Website Gallery / Gallery App to any Website Gallery / Gallery App.
- One E-commerce / Client Gallery to any E-commerce / Client Gallery.
- Page galleries appear under website galleries in the import list.
You cannot however import images from the Website Galleries to Client Galleries / Ecommerce Galleries or vice versa. You cannot import images from one Pixpa website to the other.
You can import the existing (already uploaded to Pixpa studio) images this way to your destination gallery, eliminating the step of uploading the images again.
The imported items will be added randomly (inside a gallery). However, you can rearrange them.
In this article:
Import images in Website Gallery
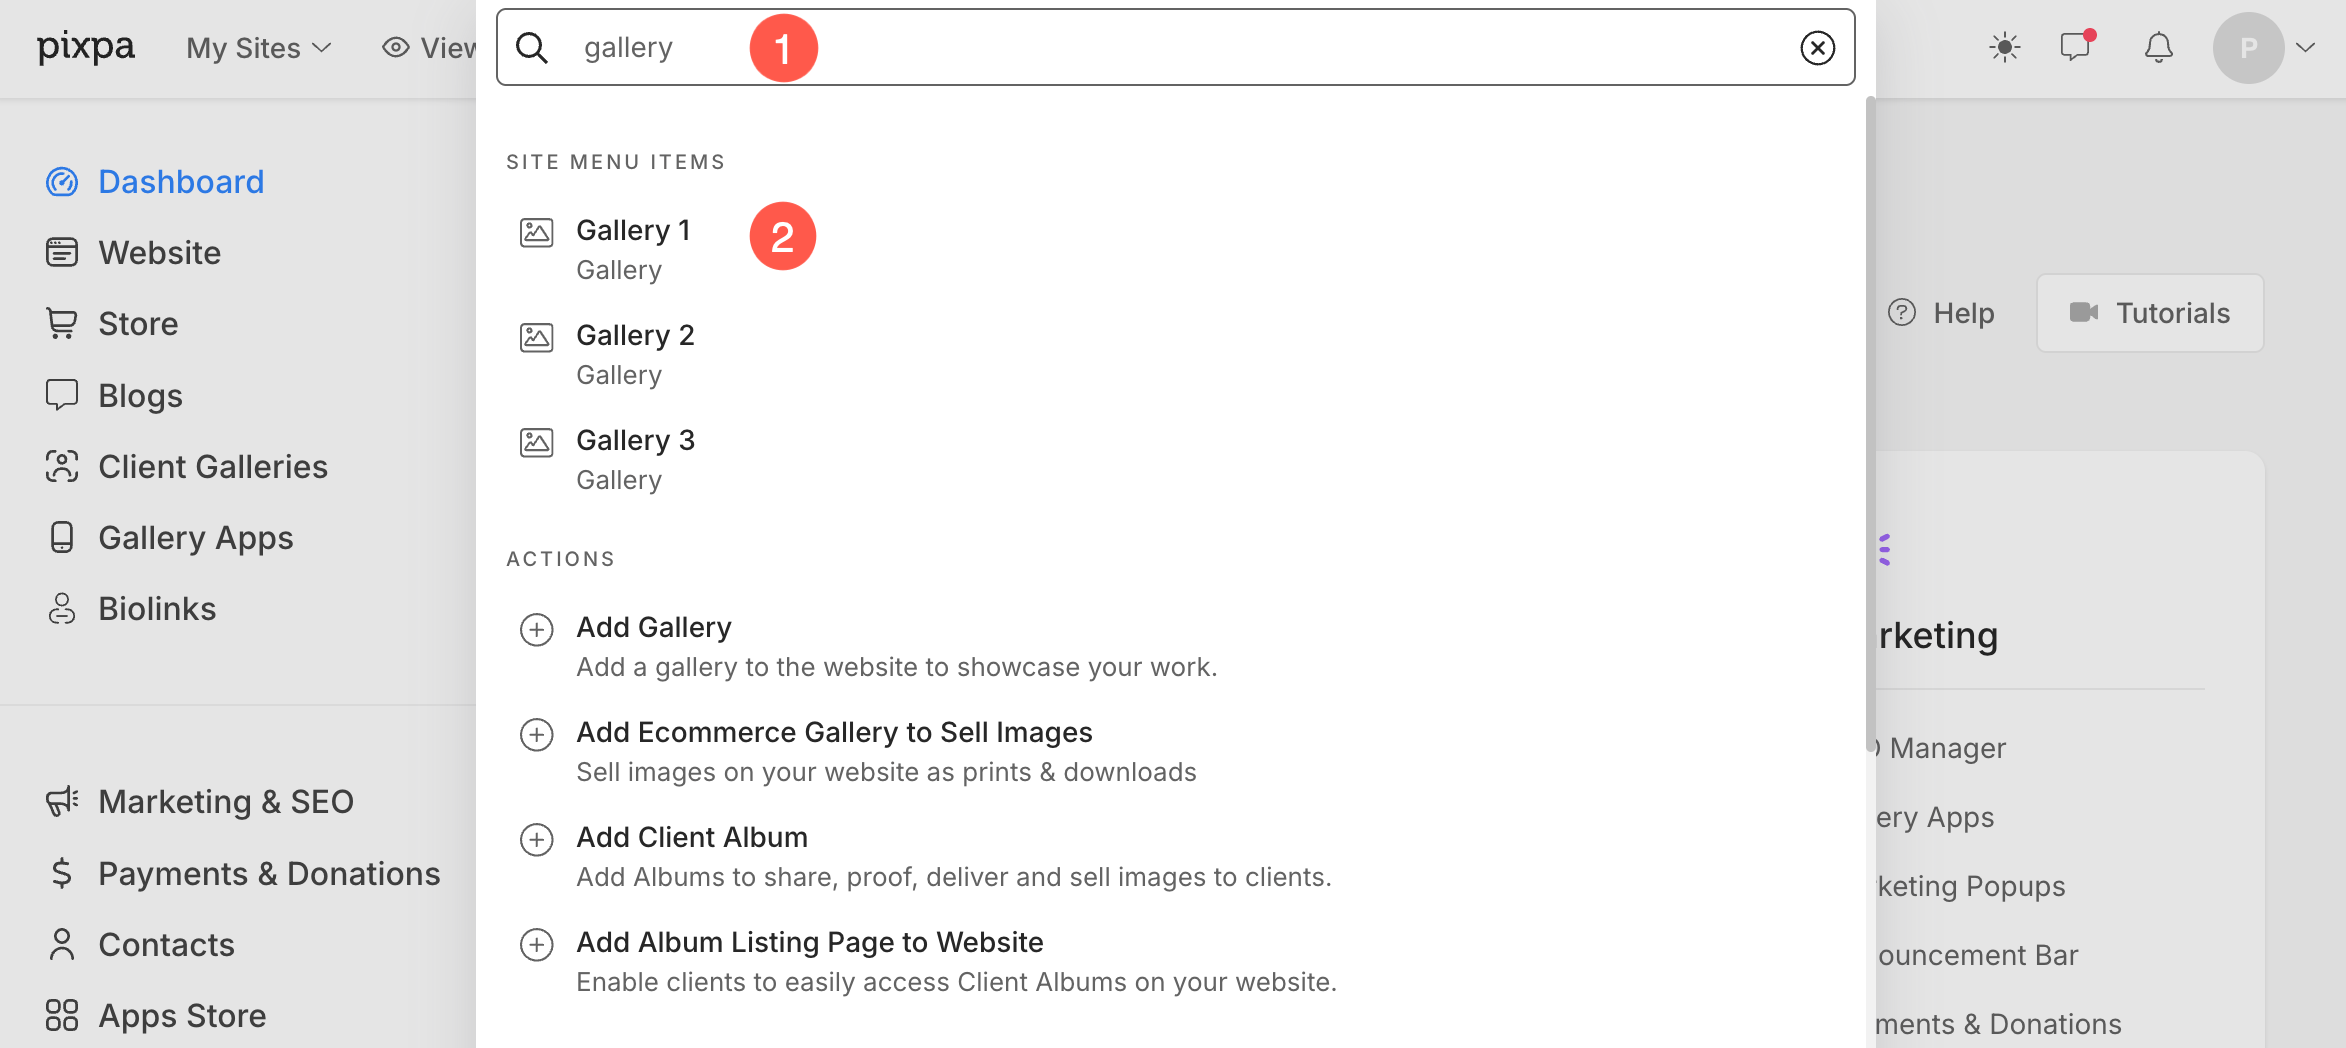
- Enter the gallery title (1) in the Search Bar.
- From the results, find the gallery (under Site Menu Items) that you want to work on and click on it (2).
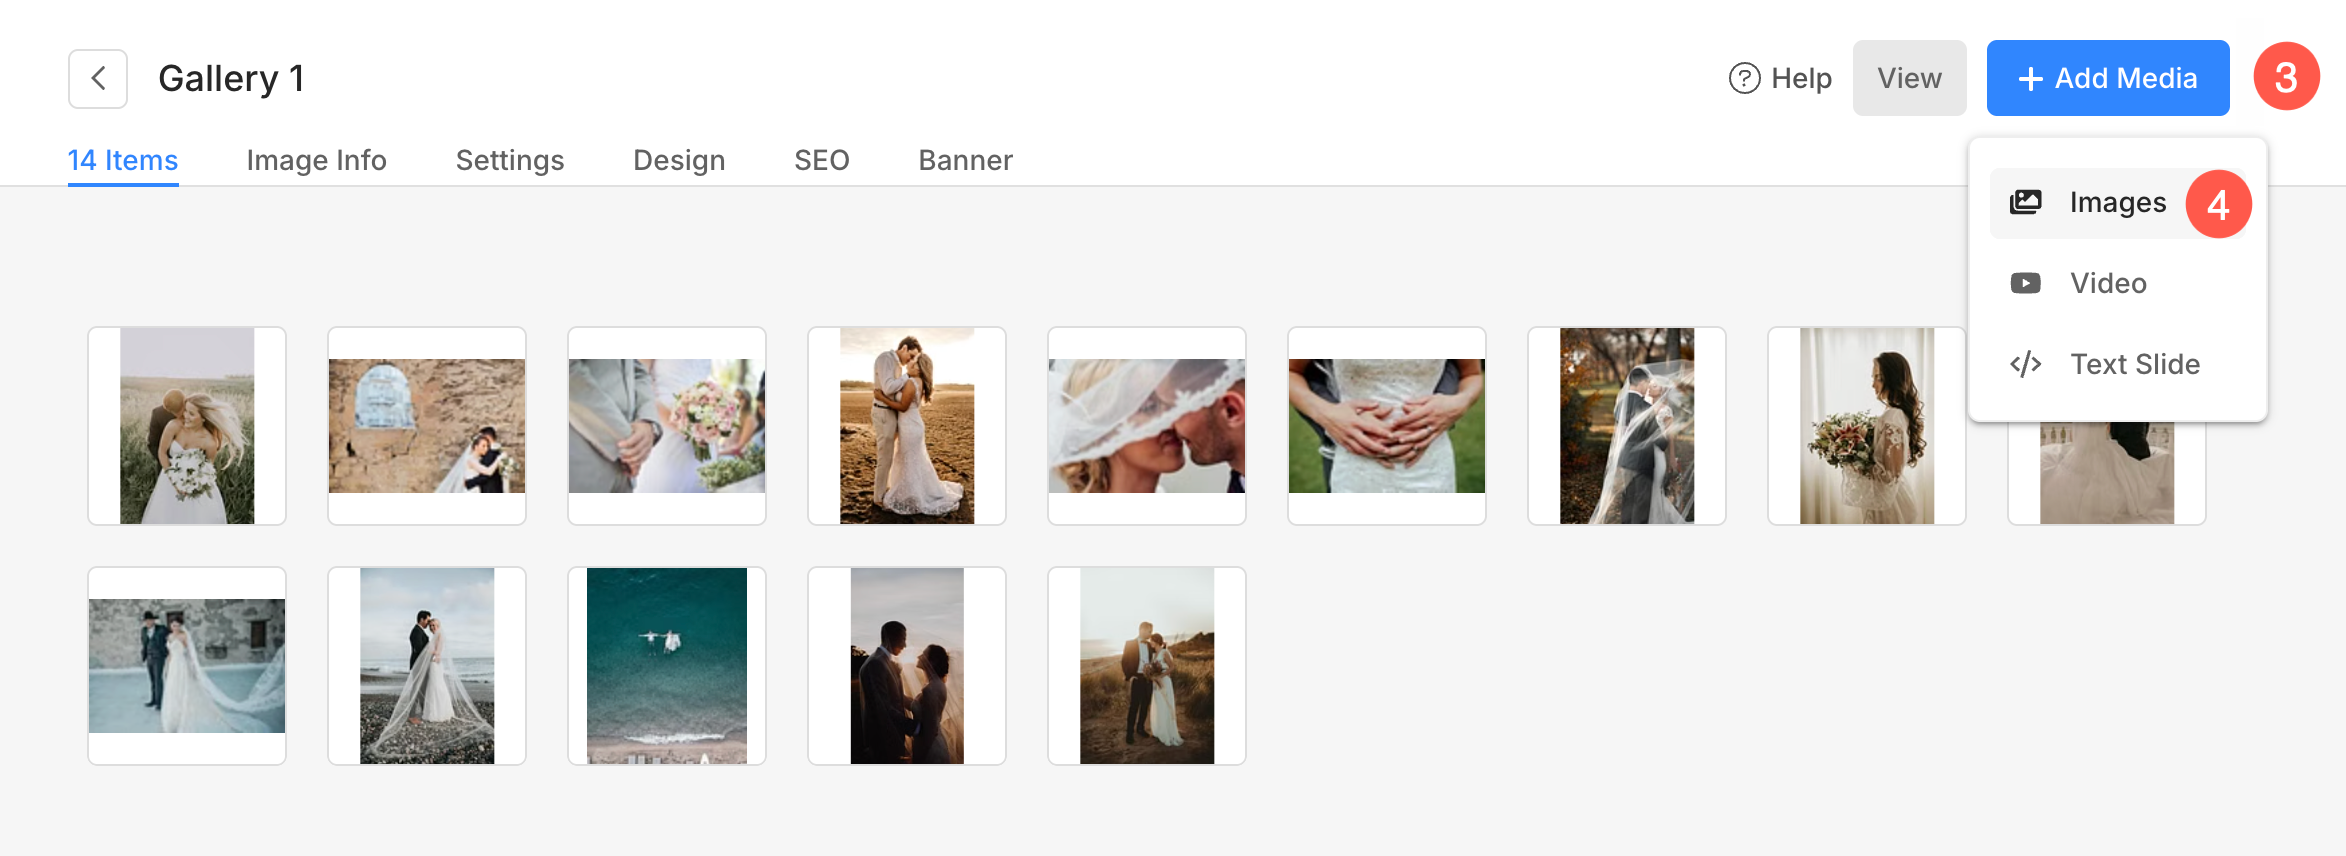
- Under the gallery, click on + Add Media (3) button and select Images (4) option.
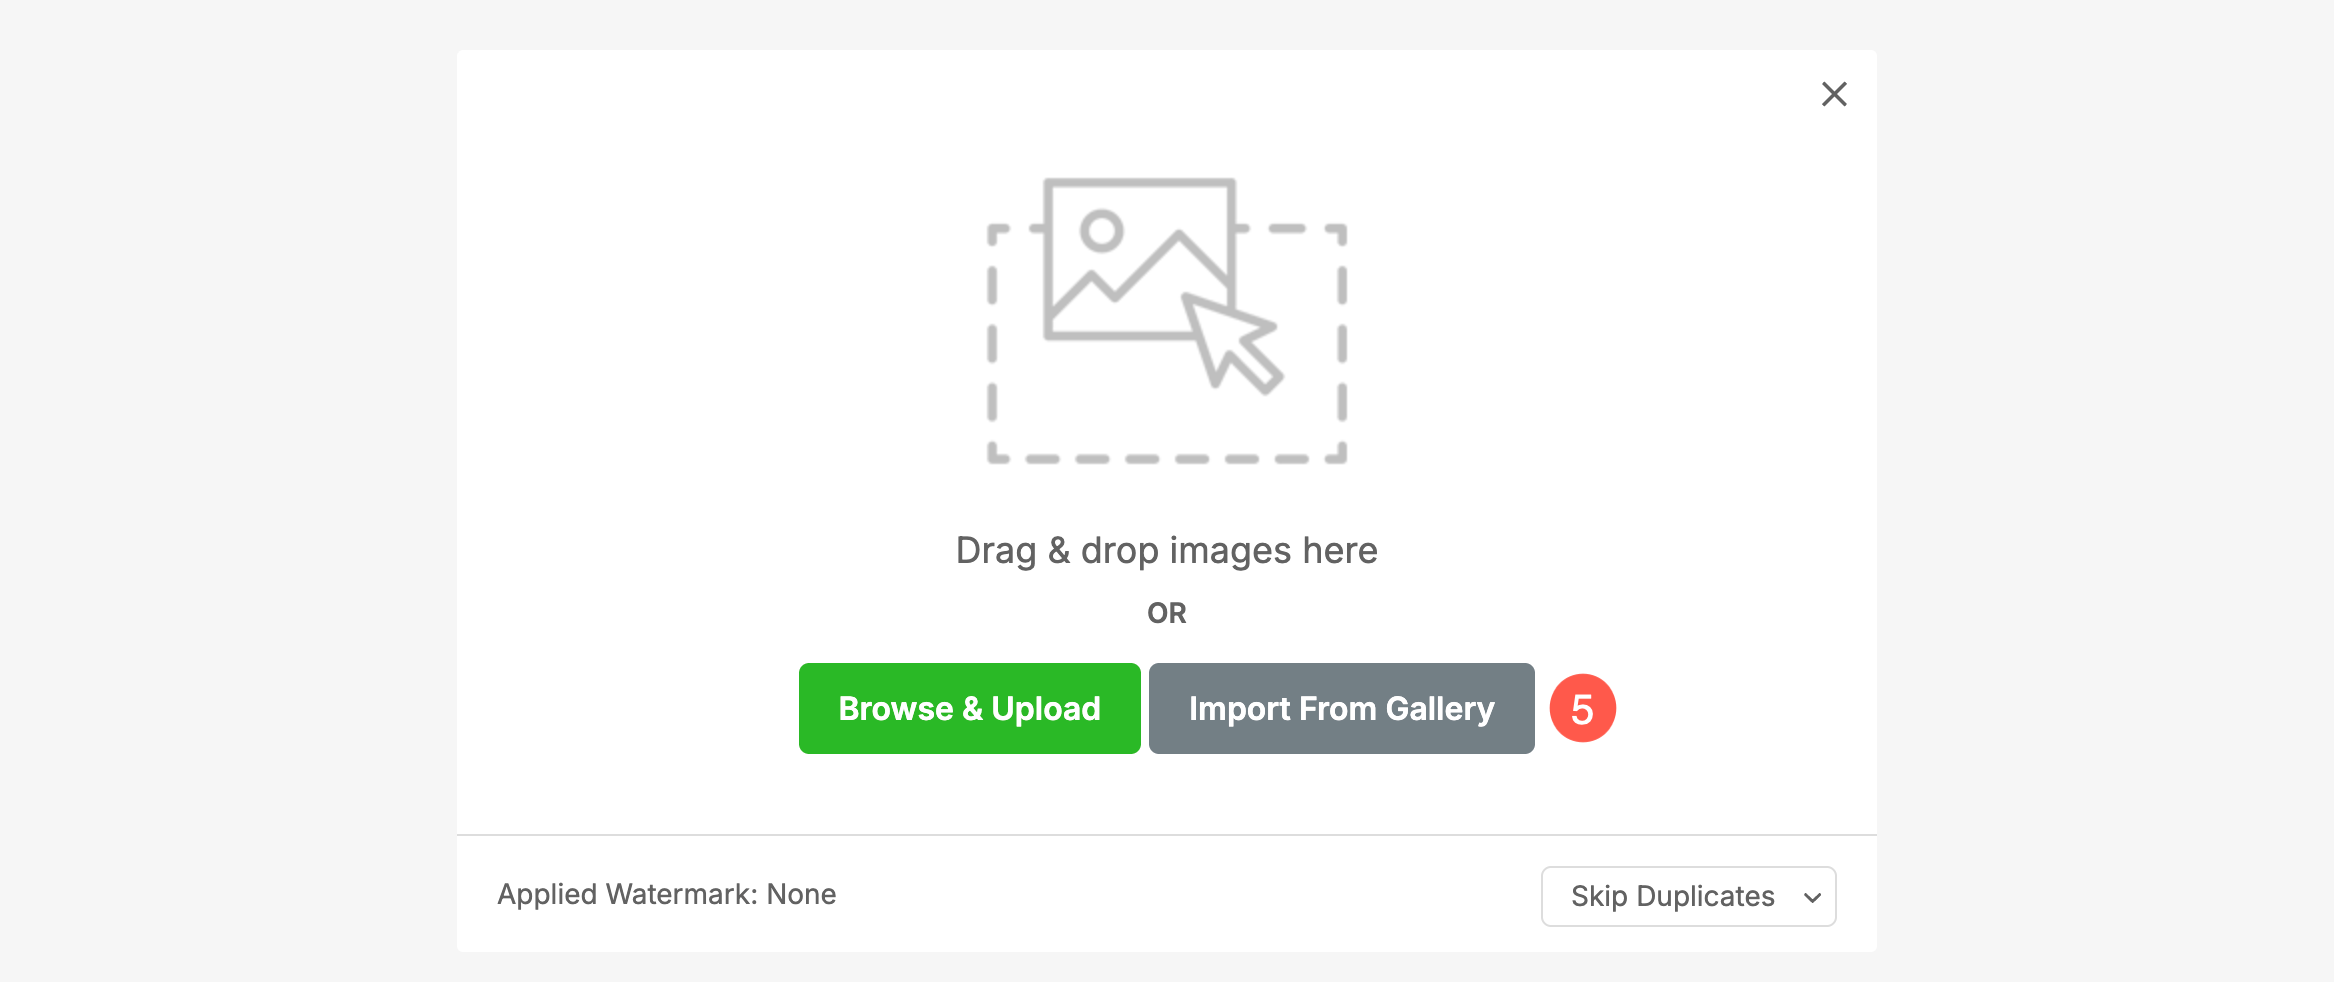
- From the popup, select Import From Gallery (5) option.
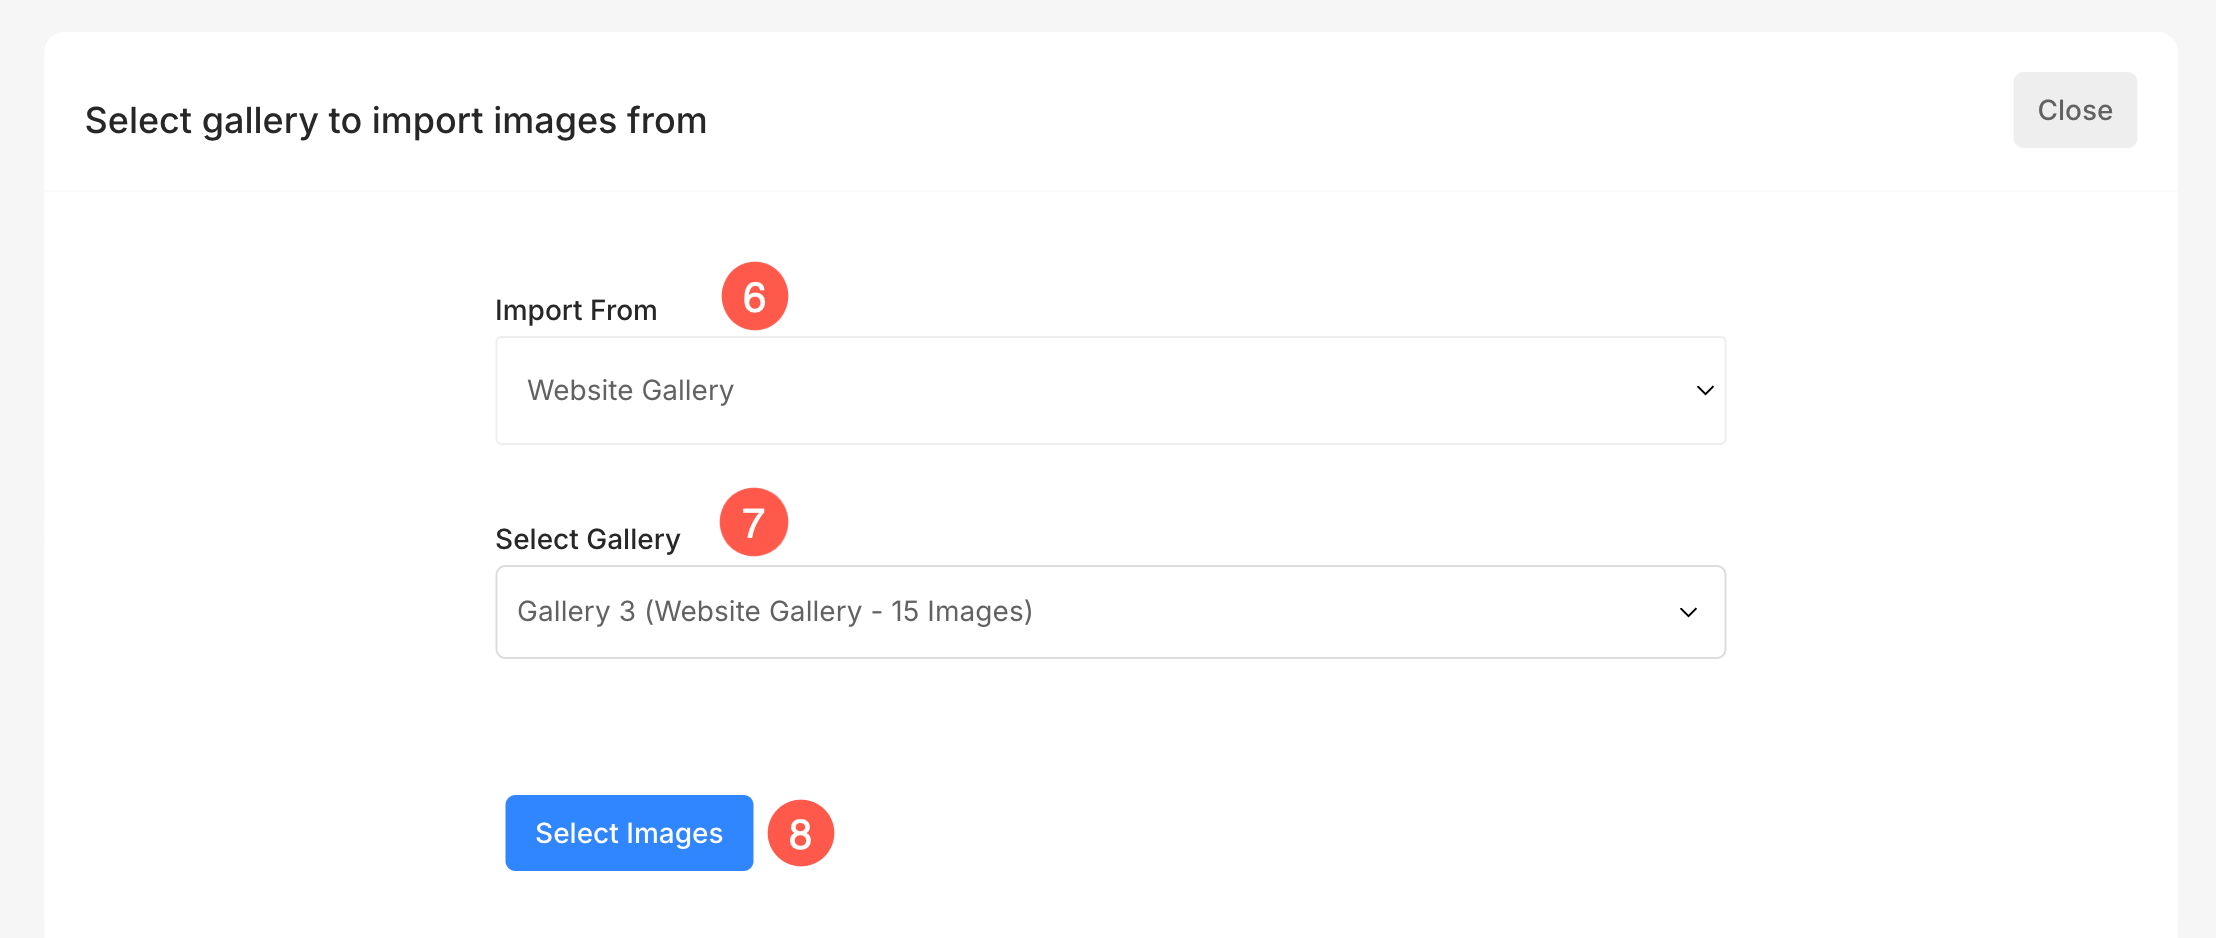
- A new window will open from where you can select whether you want to import the images from Website Gallery or Gallery App (6).
- Select the Gallery or Gallery App (7) from where you want to import the images and click on Select Images (8) button.
- Now, select the images (9) that you want to import.
- You can also Select All (10) the images and Clear (11) the selection.
- Once you have selected the images, click on Import (12) button.
- From the dropdown, you can Copy (13) the images or Move (14) them.

The items will now be imported to the gallery.
Import images in Client Gallery
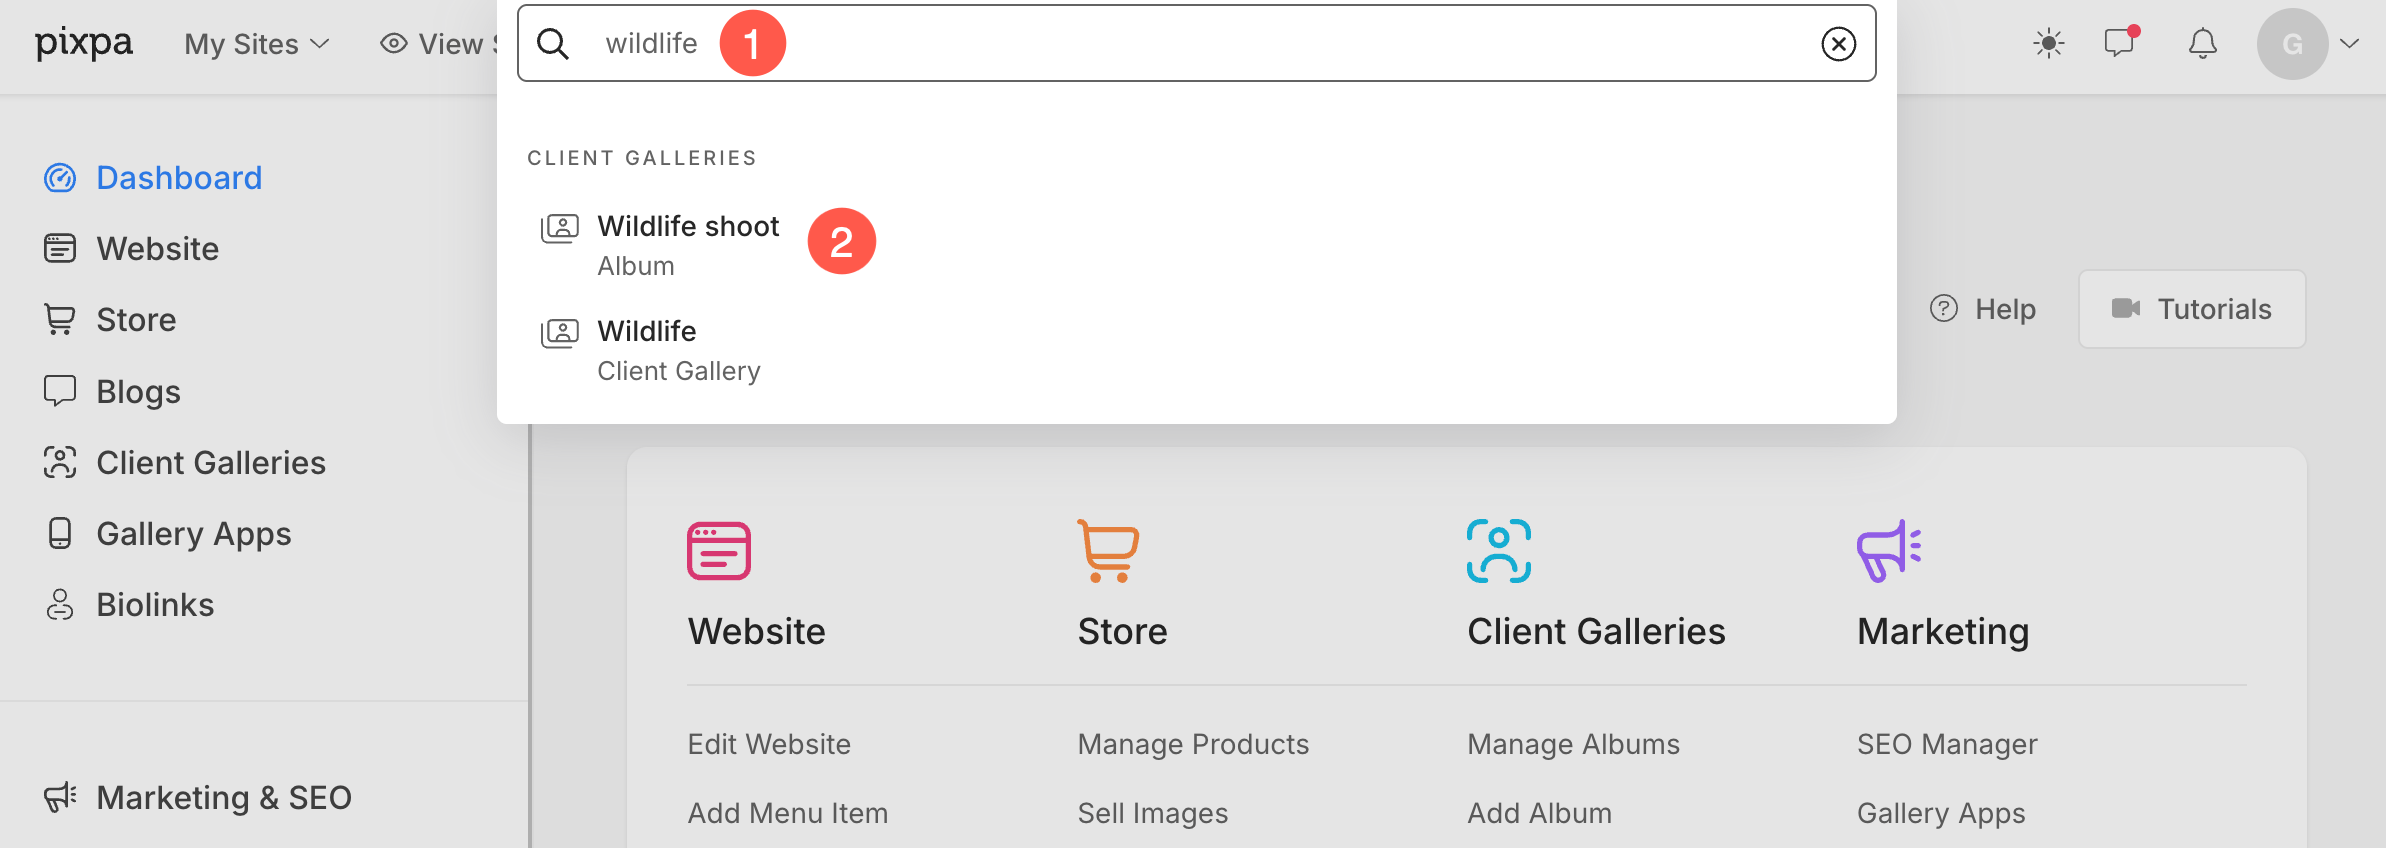
- Enter the album title (1) in the Search Bar.
- From the results, find the gallery (under Client Galleries Items) that you want to work on and click on it (2).
- Under the album, select the gallery (3) wherein, you want to import the images and click on + Add Images (4) button.
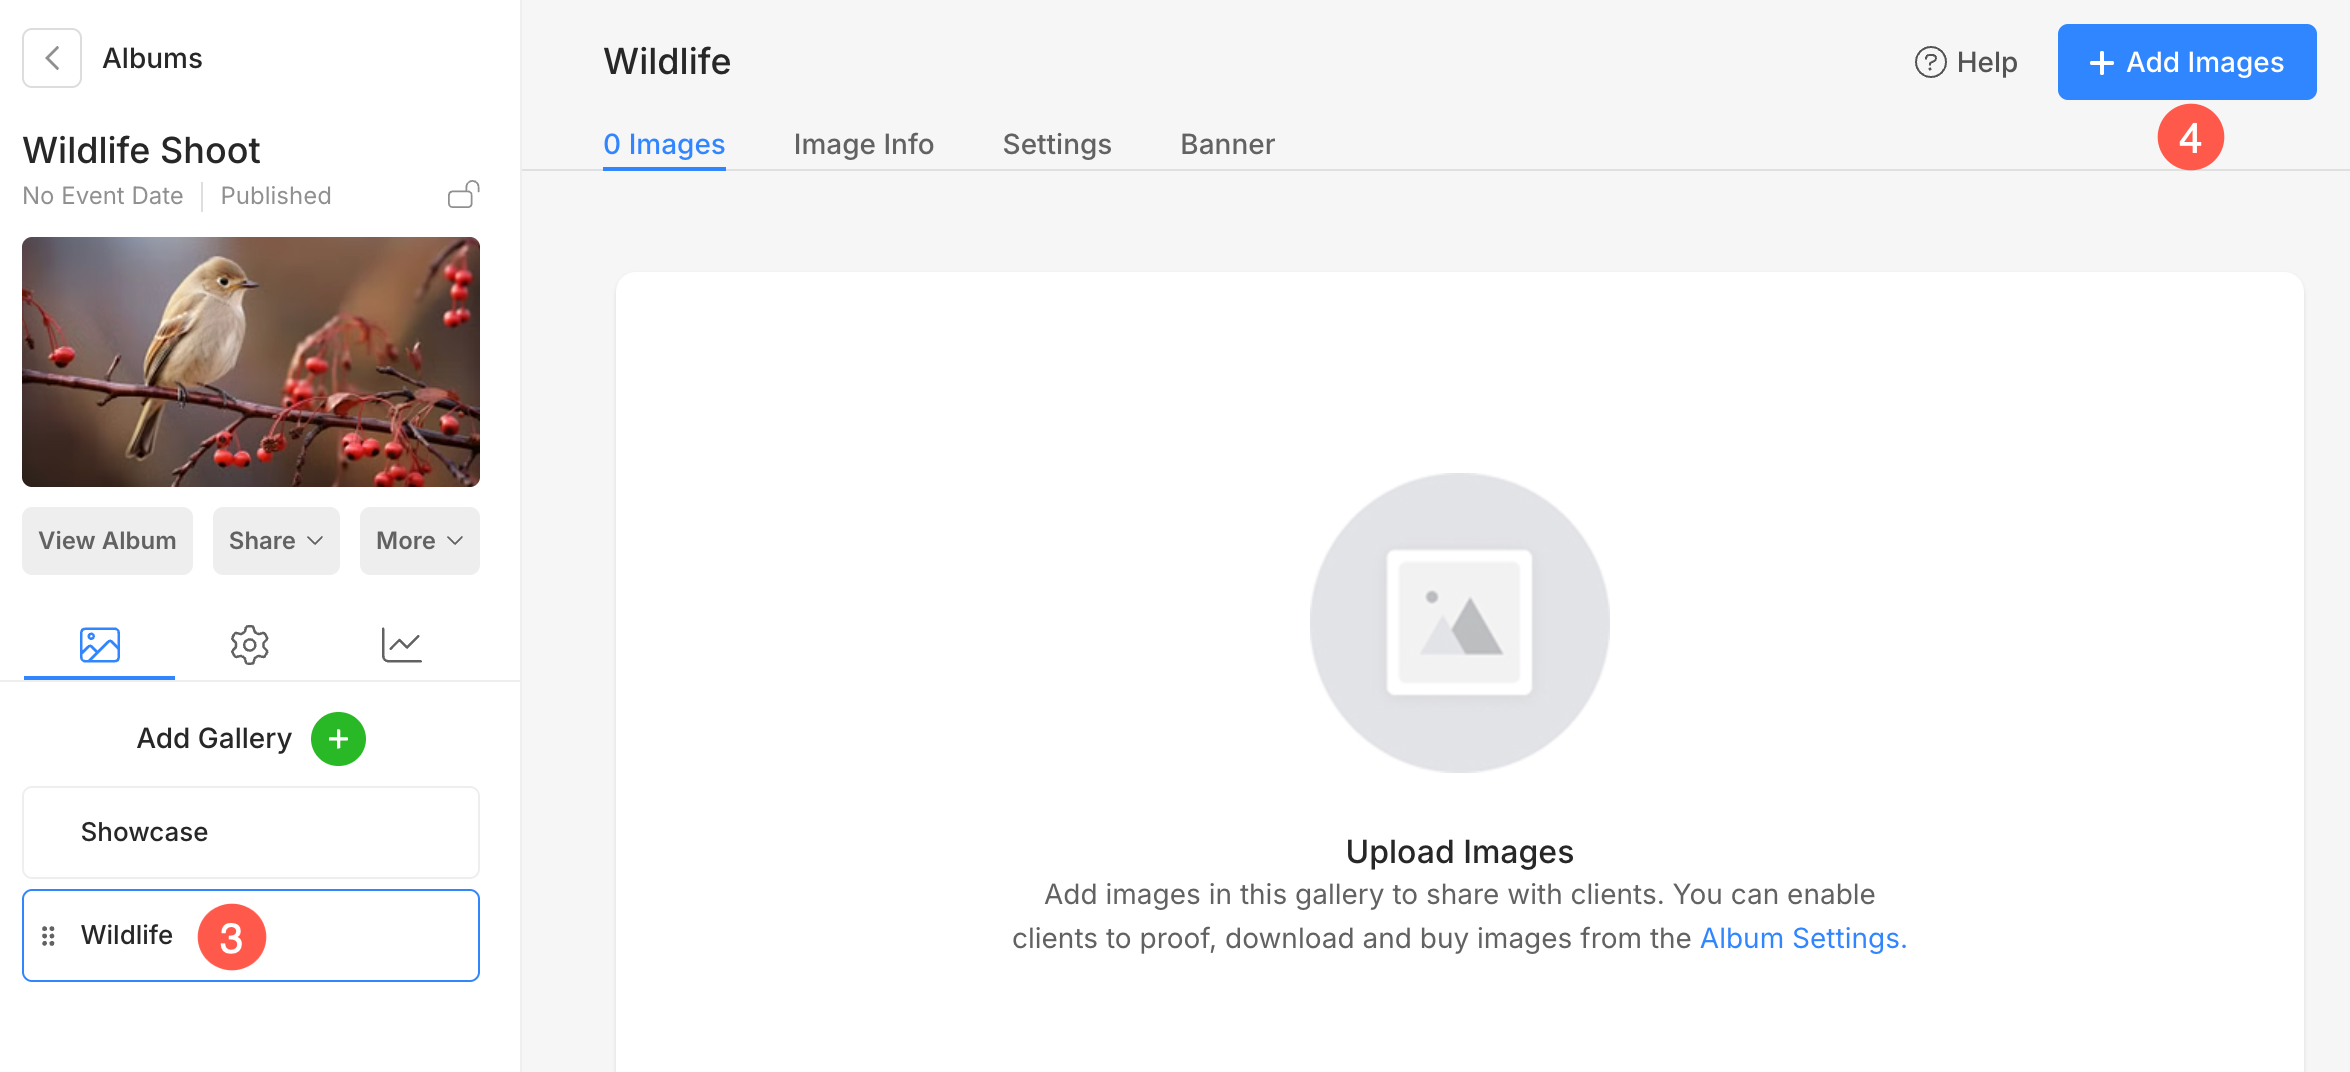
- From the popup, select Import From Gallery (5) option.
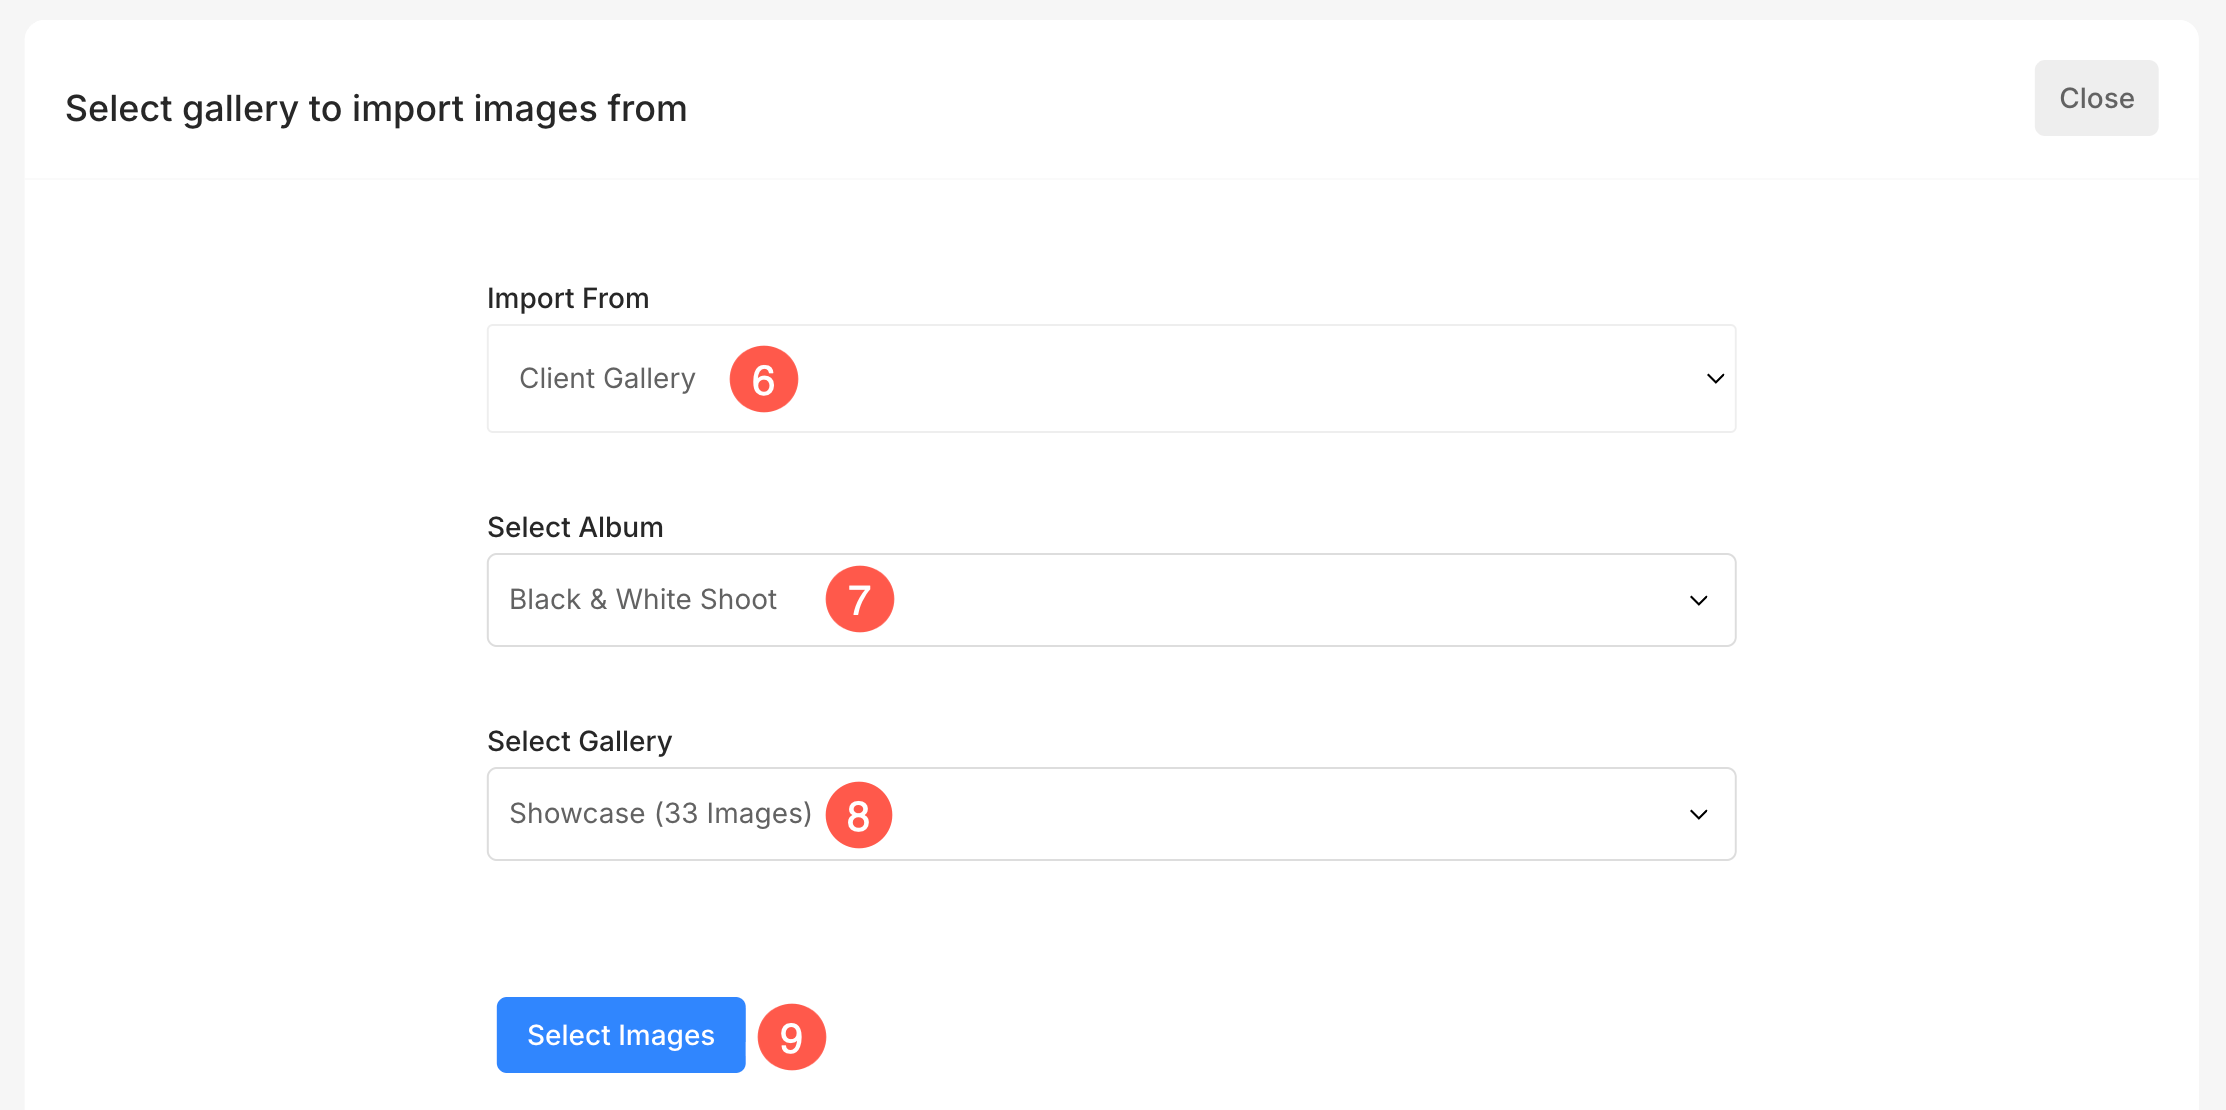
- A new window will open from where you can select whether you want to import the images from Client Gallery or E-Commerce Gallery (6).
- If you select Client Gallery option in the previous step, then you need to select the Album (7).
- Finally, select the Gallery (8) from where you want to import the images and click on Select Images (9) button.
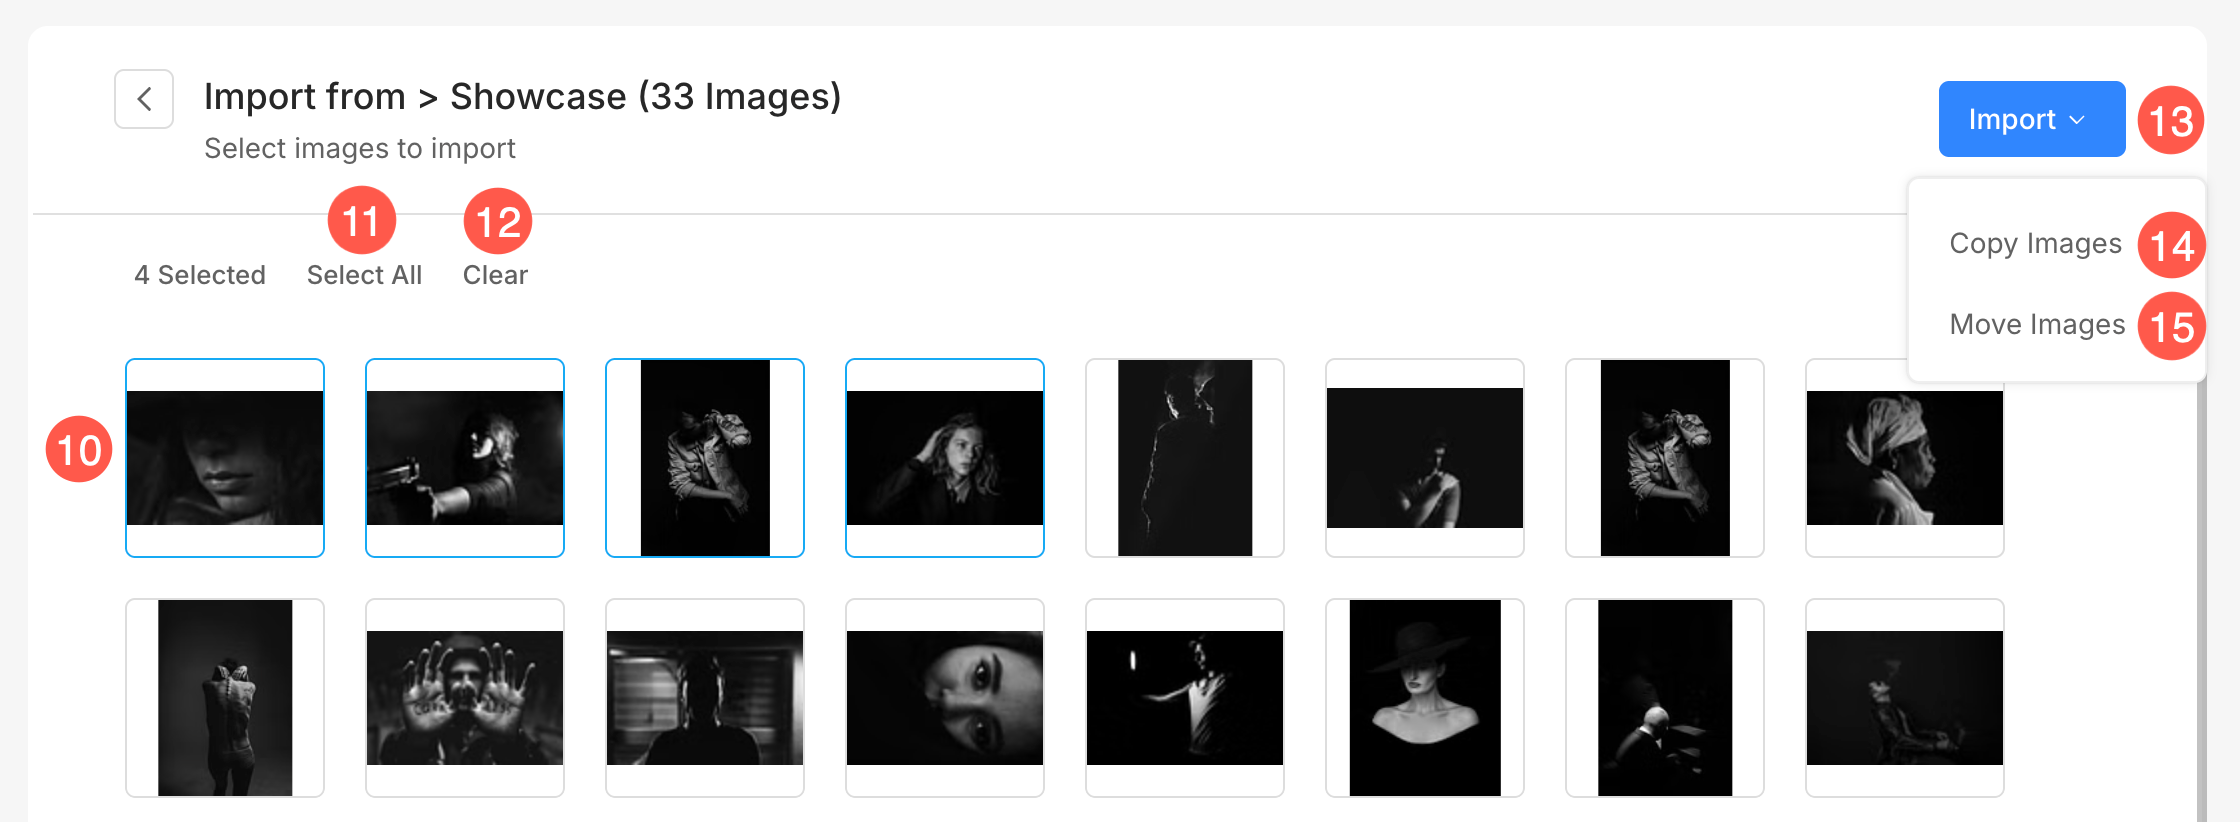
- Now, select the images (10) that you want to import.
- You can also Select All (11) the images and Clear (12) the selection.
- Once you have selected the images, click on Import (13) button.
- From the dropdown, you can Copy (14) the images or Move (15) them.
The items will now be imported to the gallery.