You can design the appearance of blog posts on your website using the options in Blog Post Design. From here, you can choose which information will show up along with your post.
Blog post page styling
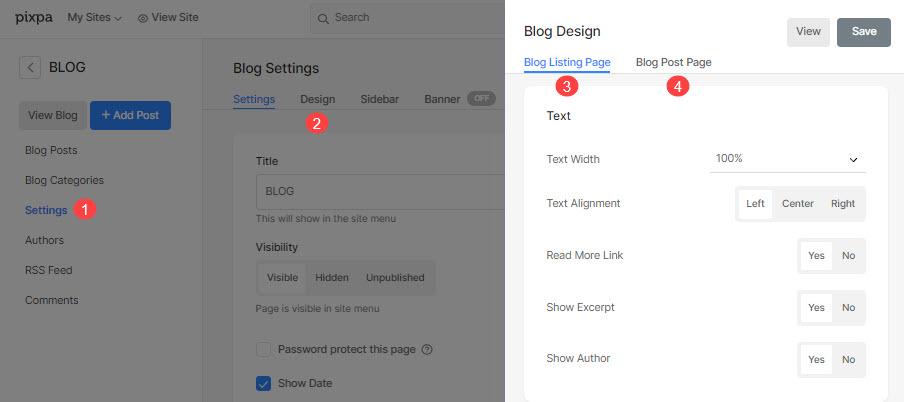
To design your blog, go to the Blog Settings (1) and click on the Design (2) tab. This will open up a drawer on the right-hand side, where you can edit your:
- Blog listing page (3) and
- Blog post page (4).
Also check: Blog Settings.

Blog Post Page
The style options are listed below:
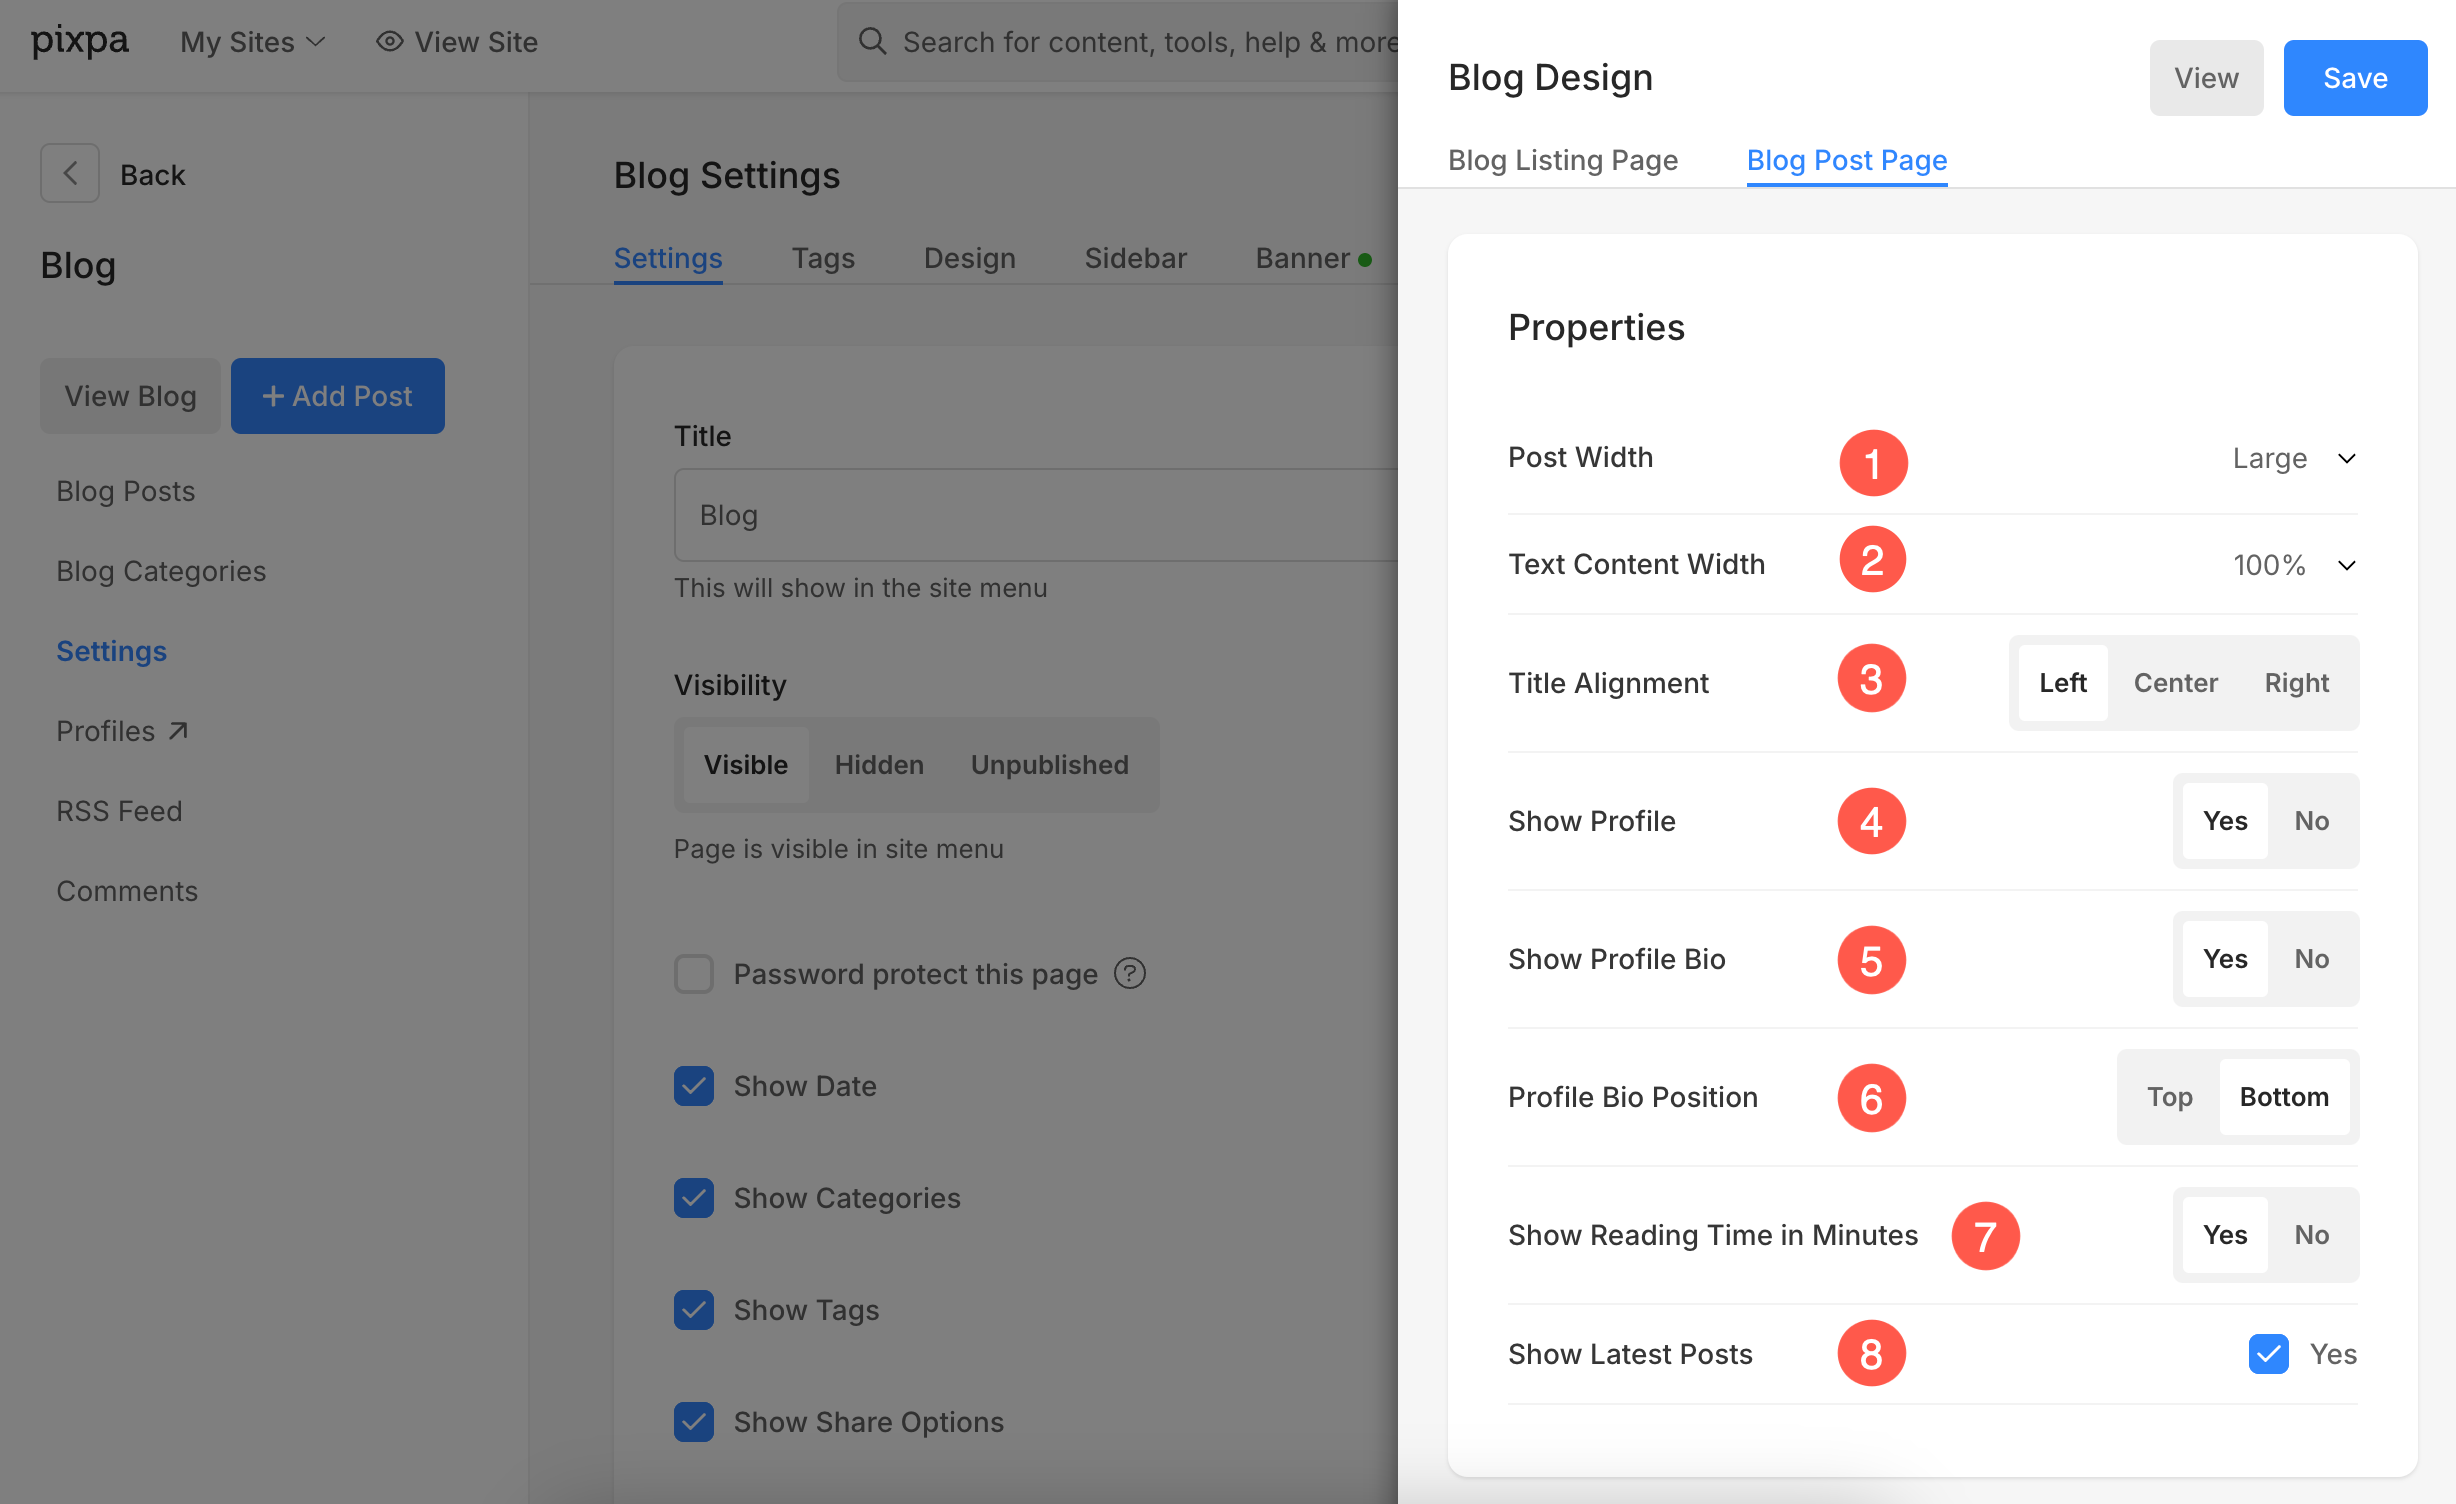
Properties
1. Post Width
Select the width of the blog post.
2. Text Content Width
Set the width of the text on your blog post.
3. Title Alignment
Set the alignment of the blog post title.
4. Show Profile
Select Yes to display the author on your blog post page. Learn more about Profiles.
5. Show Profile Bio
Display the Bio / Description of the Profile / Author which you can specify from the Profiles section.
6. Profile Bio Position
Select if you want to display the profile bio at the top of the blog post or at the bottom.
7. Show Reading Time in Minutes
Select Yes to display the estimated time taken to read the post.
8. Show Latest Posts
Check this to display your latest posts below the blog post.

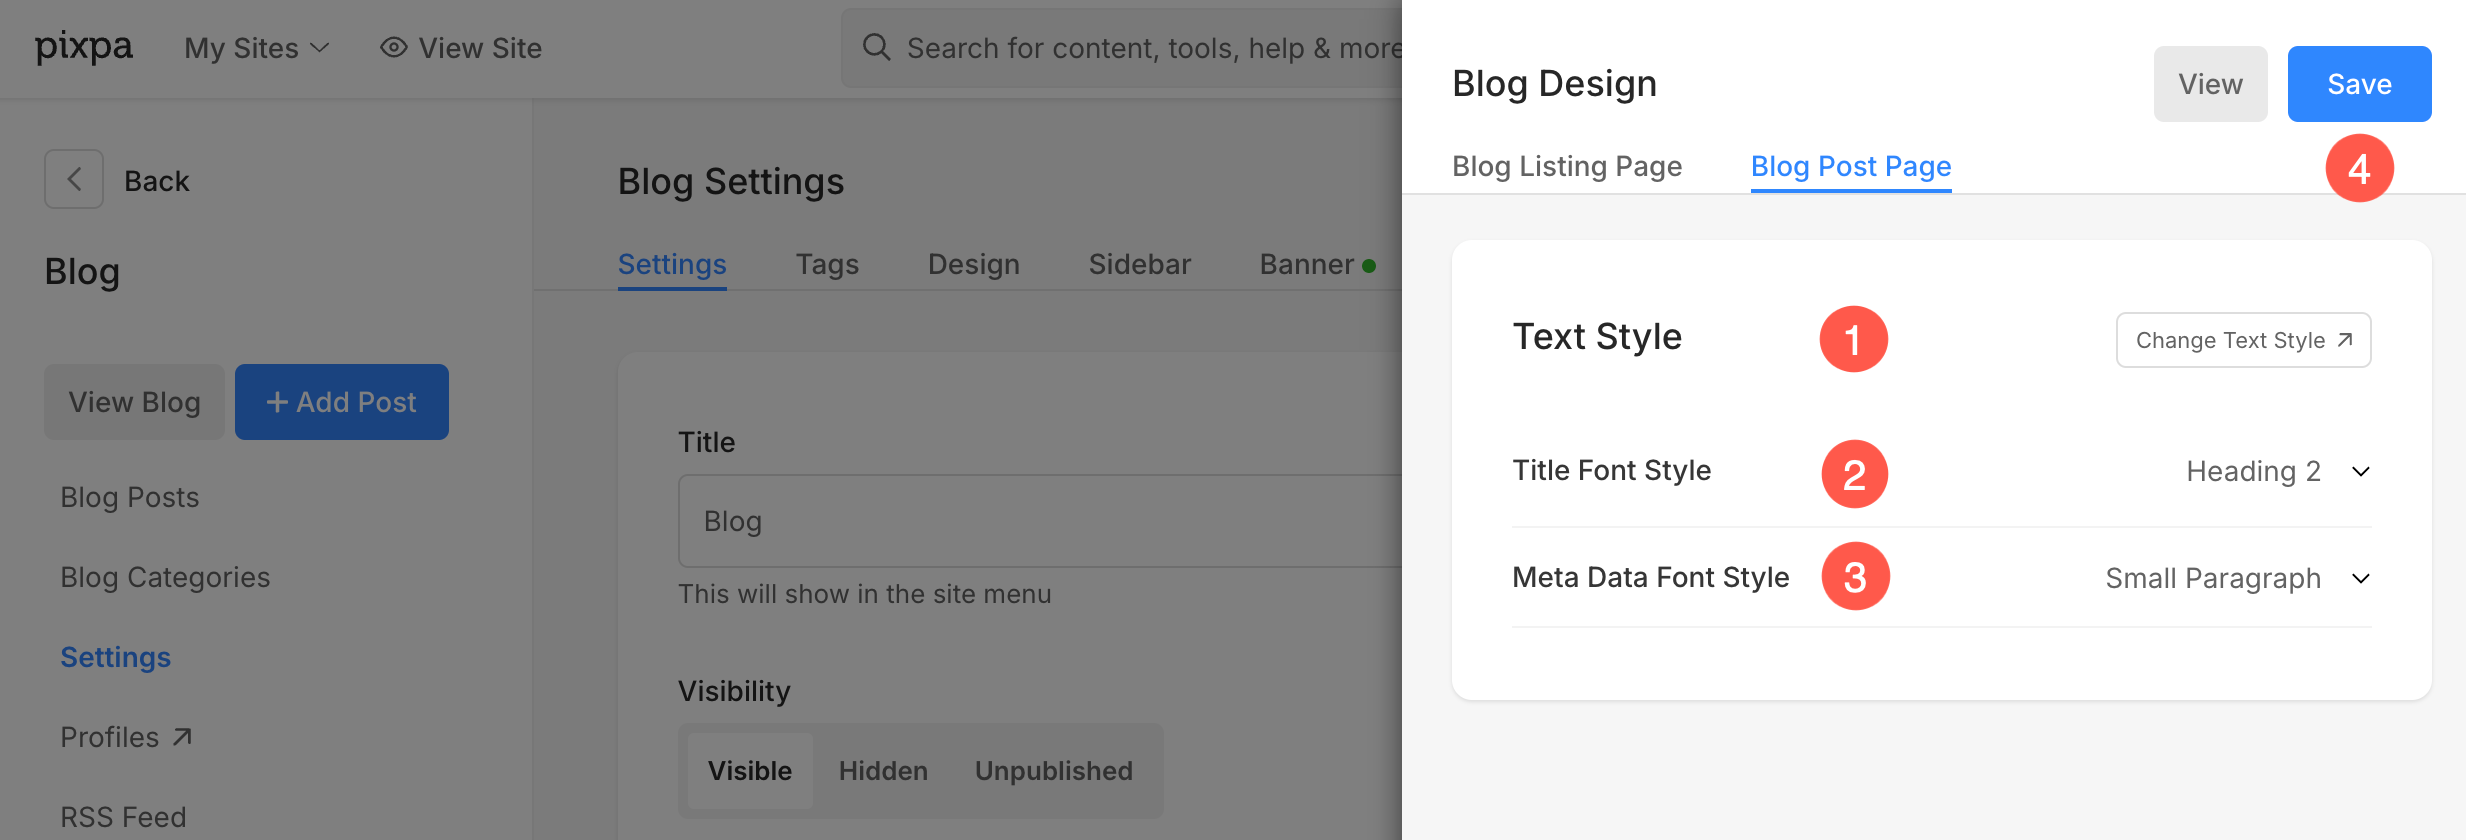
Text Style
1. Text
Click on the Change Text Style button to manage the global font styles. See: Website Text styles.
2. Title Font Style
Select the font style of the title of your blog post.
3. Meta Data Font Style
Select the font style of the author and date on the blog post.
4. Save your changes.

