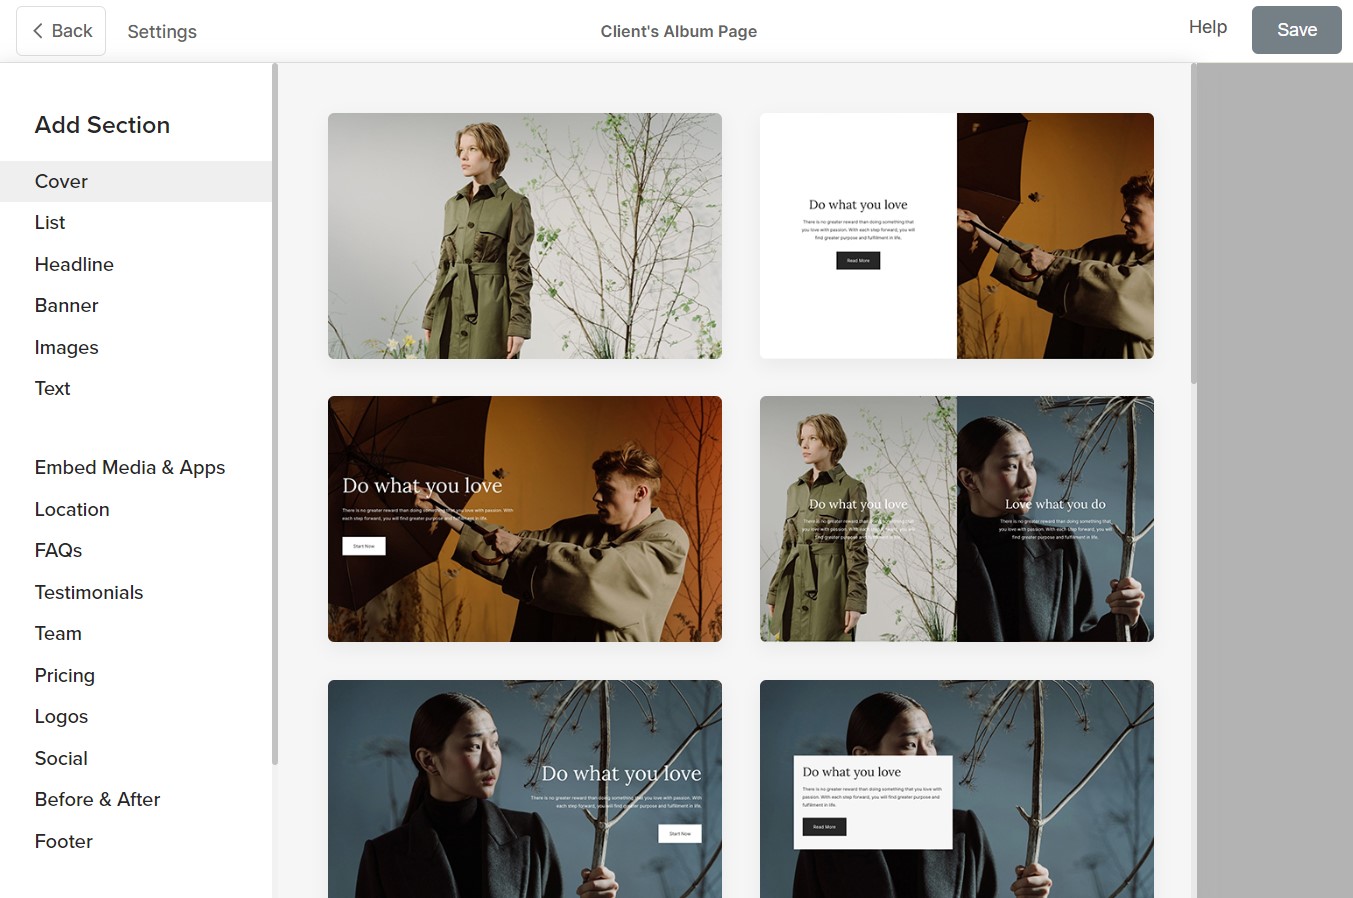
Pixpa’s page builder empowers you to craft informative pages effortlessly, allowing you to arrange and edit content sections seamlessly through intuitive drag-and-drop tools.
Utilizing the Album Pages option, you can create a page with diverse sections and easily incorporate it into one or multiple albums.

In this article
Add an Album Page
To add an Album page, follow the steps mentioned below:
- From the Dashboard of the studio, click on Client Galleries (1) section.

- Click on Settings (2) option and Album Pages (3) tab.
- Click on + Add Album Page (4) button.

- A popup will appear where you can enter the Page Title (5).
- Close (6) popup without creating a new page.
- After entering the title, hit Save (7) button to add a new album page.

Album Page Options
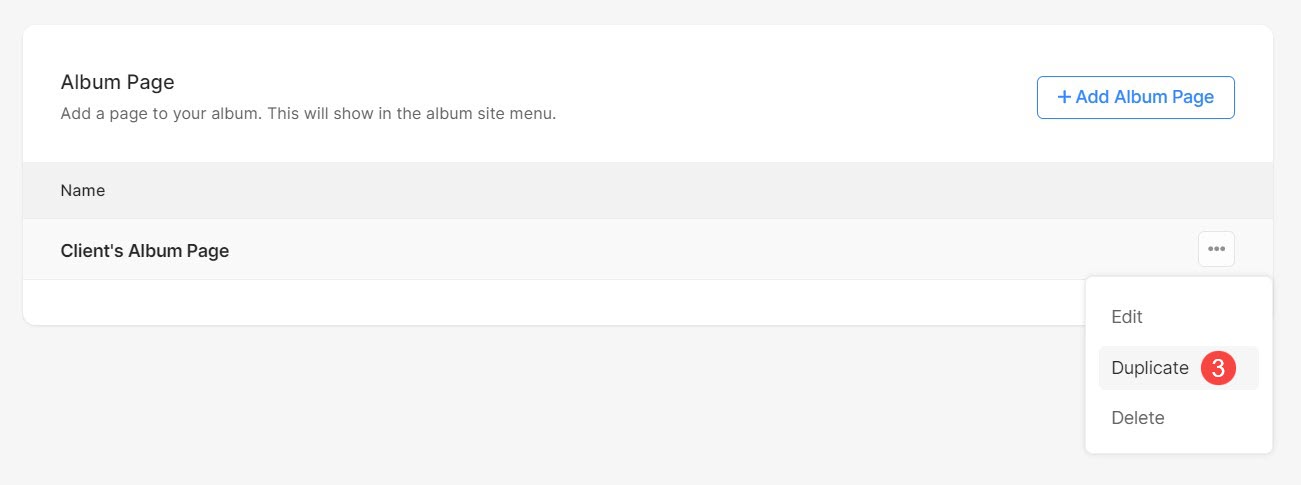
By clicking on three dots (1) icon, you will see the following Album page options:

Edit an Album Page
Customize the page by adding and arranging various sections based on your choices and preferences.
- To edit a page, click on Edit (2) option.

- The editing screen (page builder) will open up from where you can add sections and customize the page.

Learn more about editing a page.
Duplicate Album Page
Using the Duplicate option, you can easily create multiple copies of an existing album page. All the content of existing page will also get duplicated on the new page.
- To create a copy of an existing page, click on Duplicate (3) option.

Delete Album Page
- To delete an Album page, click on the Delete (4) option.

Apply Album Page to an Album
To add an album page to a client gallery album, follow the steps mentioned below:
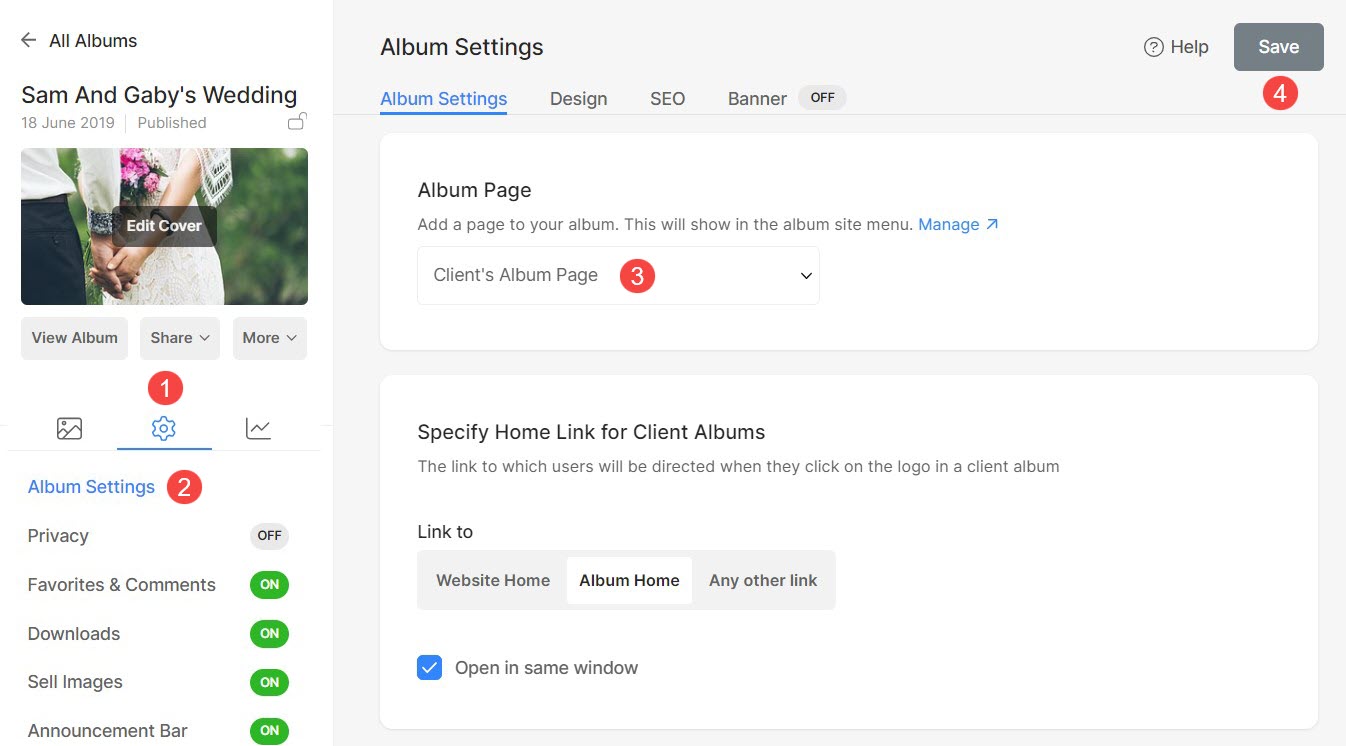
- Open the album to which you want to add the page and click on Settings (1) icon.
- Click on Album Settings (2) option to open the Album Settings page.
- Scroll through the page to find Album Page (3) option.
- From the dropdown, select a page and Save (4) the changes.

The Album Page will now be applied to that particular album.
