For your website to be indexed and ranked by search engines, you need to optimize your website.
The most important step in this process is to add relevant metadata (title and description) for your website so that search engines will read and index your website.
The SEO metadata can be easily defined for your website in Pixpa.
In this article:
- Add SEO metadata for your website
- Add SEO metadata for a gallery
- Add SEO metadata for a folder
- Add SEO metadata for a page
- Add SEO metadata for a store
- Add SEO metadata for store categories
- Add SEO metadata for store products
- Add SEO metadata for client galleries
- Add SEO metadata for Album Listing page
- Bulk update SEO metadata for website pages
Add SEO metadata for your website
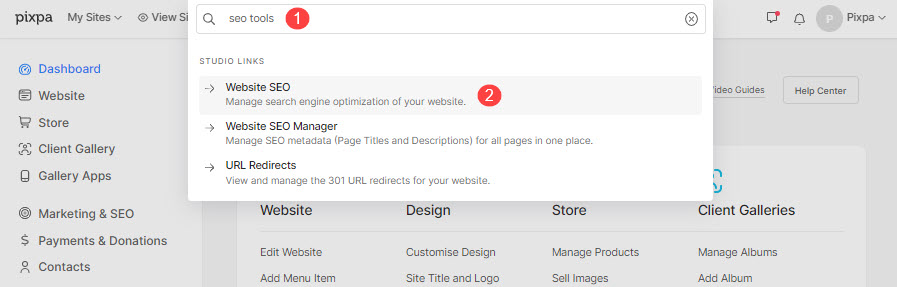
- Enter SEO (1) in the Search Bar.
- From the results, click on the Website SEO (2) option.
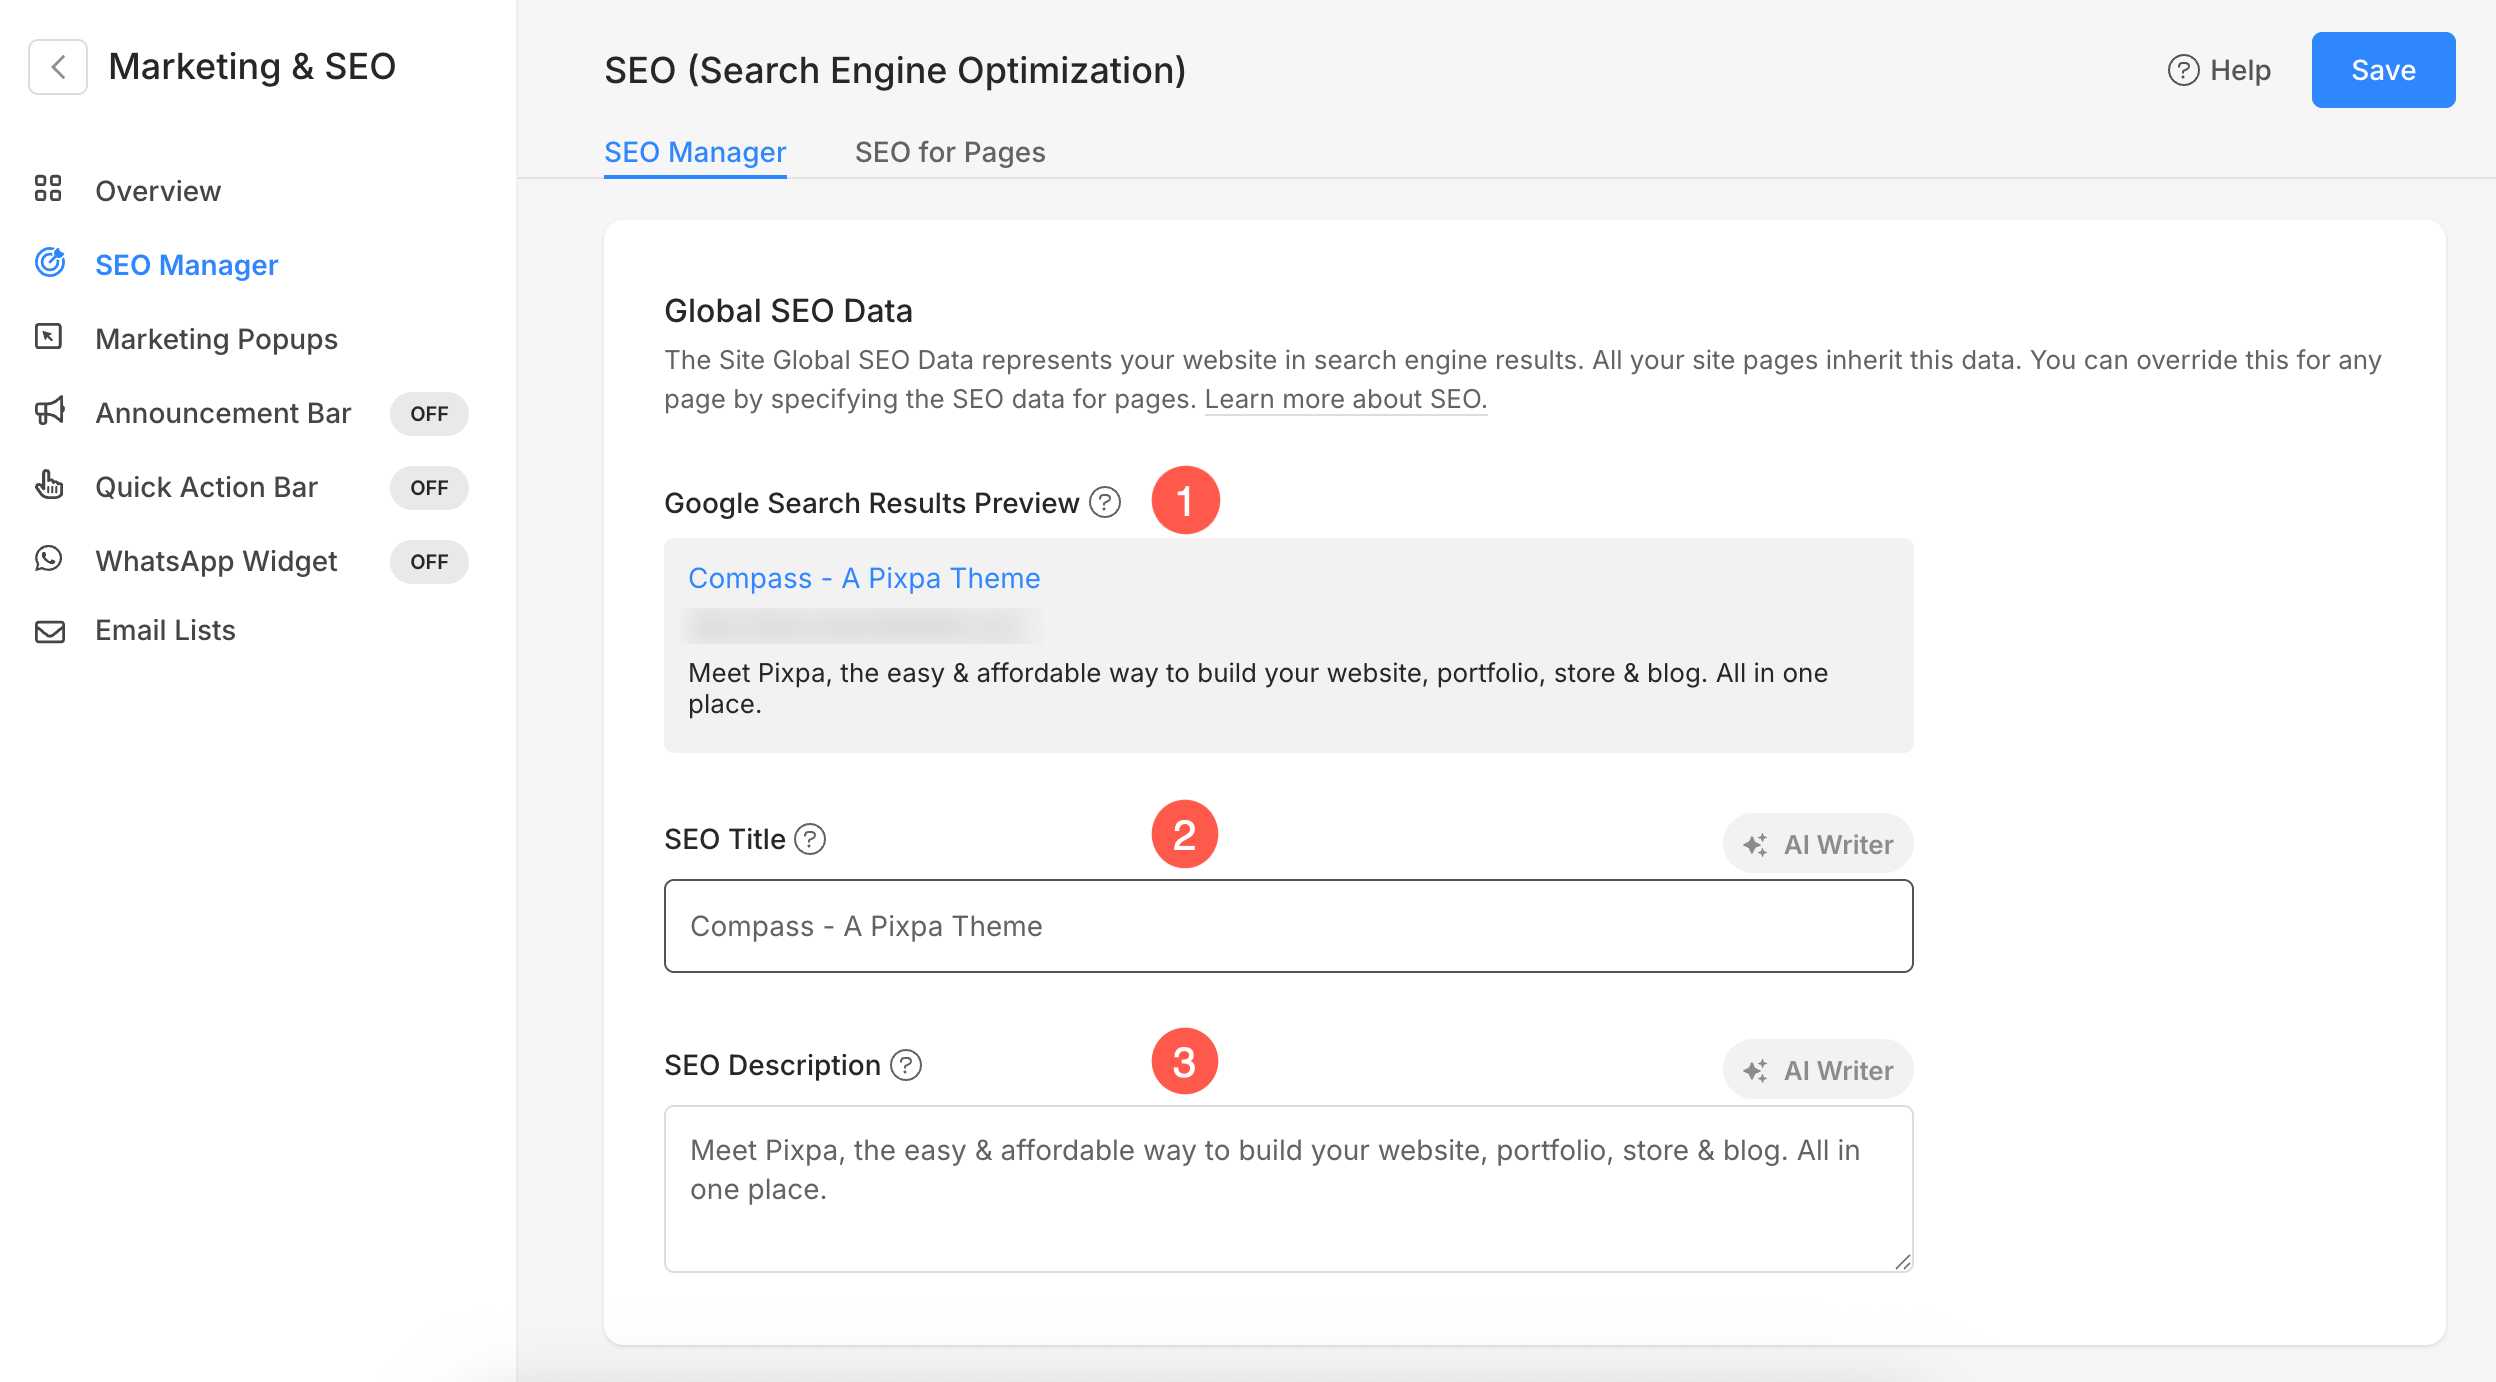
- You will now reach the SEO page.
- Here you can enter the relevant SEO metadata for your website. This data is used globally for your website across all the content items.
- You can specify unique SEO metadata for any content item individually from its settings section to override this global SEO metadata.
The options included on this page are:
- Google Search Results Preview: This is the Google search result preview with SEO metadata added by you.
- SEO Title:
- SEO Description: This would be shown by search engines for your website in the search results along with the title. It should be between 150-160 characters.
Add SEO metadata for a Gallery
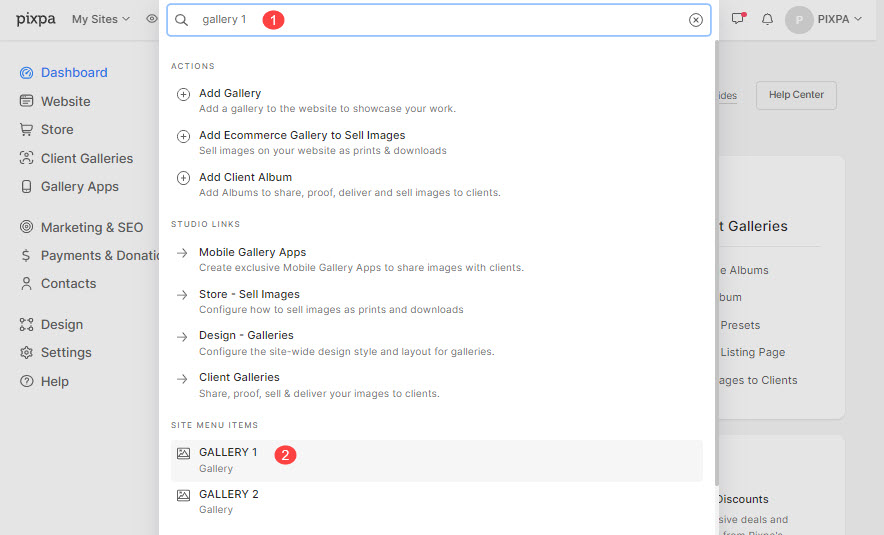
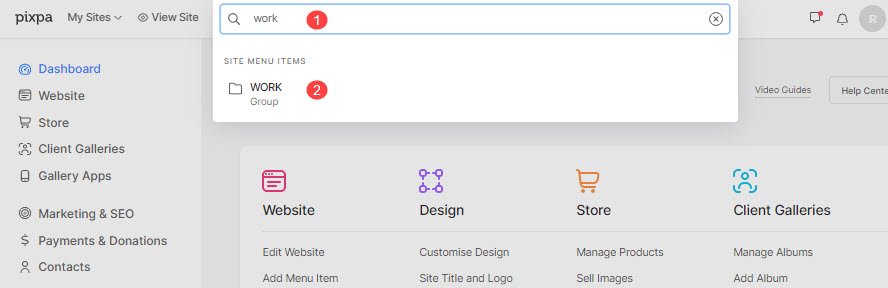
- Enter the gallery title (1) in the Search Bar.
- From the results, find the gallery (under Site Menu Items) that you want to work on and click on it (2).
- Next up, click on the Settings (1) tab. You would see all the settings of this particular gallery on the right side.
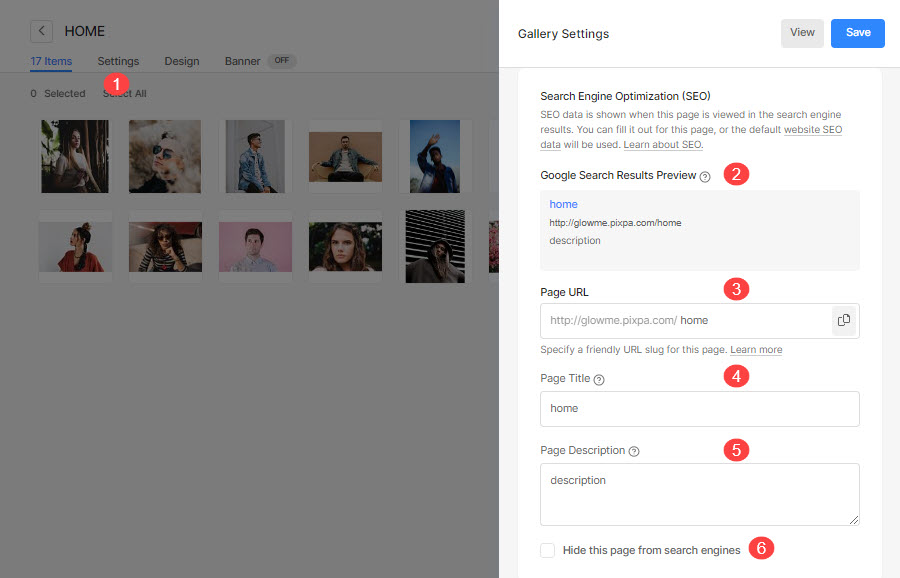
- Scroll down until you find the Search Engine Optimization (SEO) section.
- This is the Google Search result preview (2) of this gallery.
- You can edit your gallery URL using the Page URL (3) option.
- Add your Page Title (4) and Description (5).
- You can also hide this gallery from the search engines by clicking on Hide this page from search engines (6).
- Save your changes.
Add SEO metadata for a Folder
- Enter the folder title (1) in the Search Bar.
- Click on the folder (2) under Site Menu Items.
- This will take you to the folder settings page.
- Under Folder Settings, scroll down until you find the Search Engine Optimization (SEO) section.
- This is the Google Search result preview (1) of this gallery.
- You can edit the URL for the folder listing page with Page URL (2).
- Add your Page Title (3) and Description (4).
- You can also hide this gallery from the search engine by clicking on Hide this page from search engines (5).
- Save your changes.

Add SEO metadata for a Page
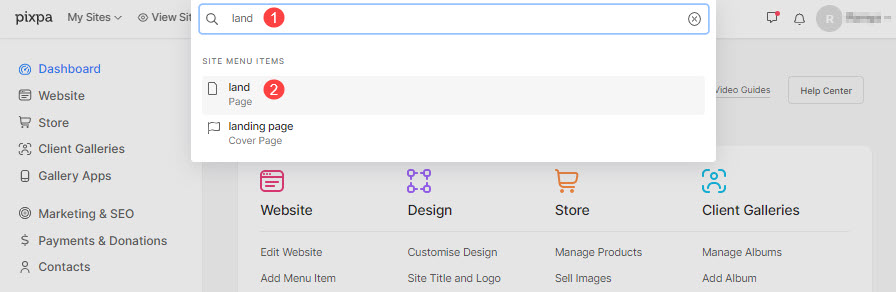
- Enter the page title (1) (that you want to edit) in the Search Bar.
- Click on page (2) under Site Menu Items.
- You would now reach the page builder.
- Click on the Settings button to view the page settings.
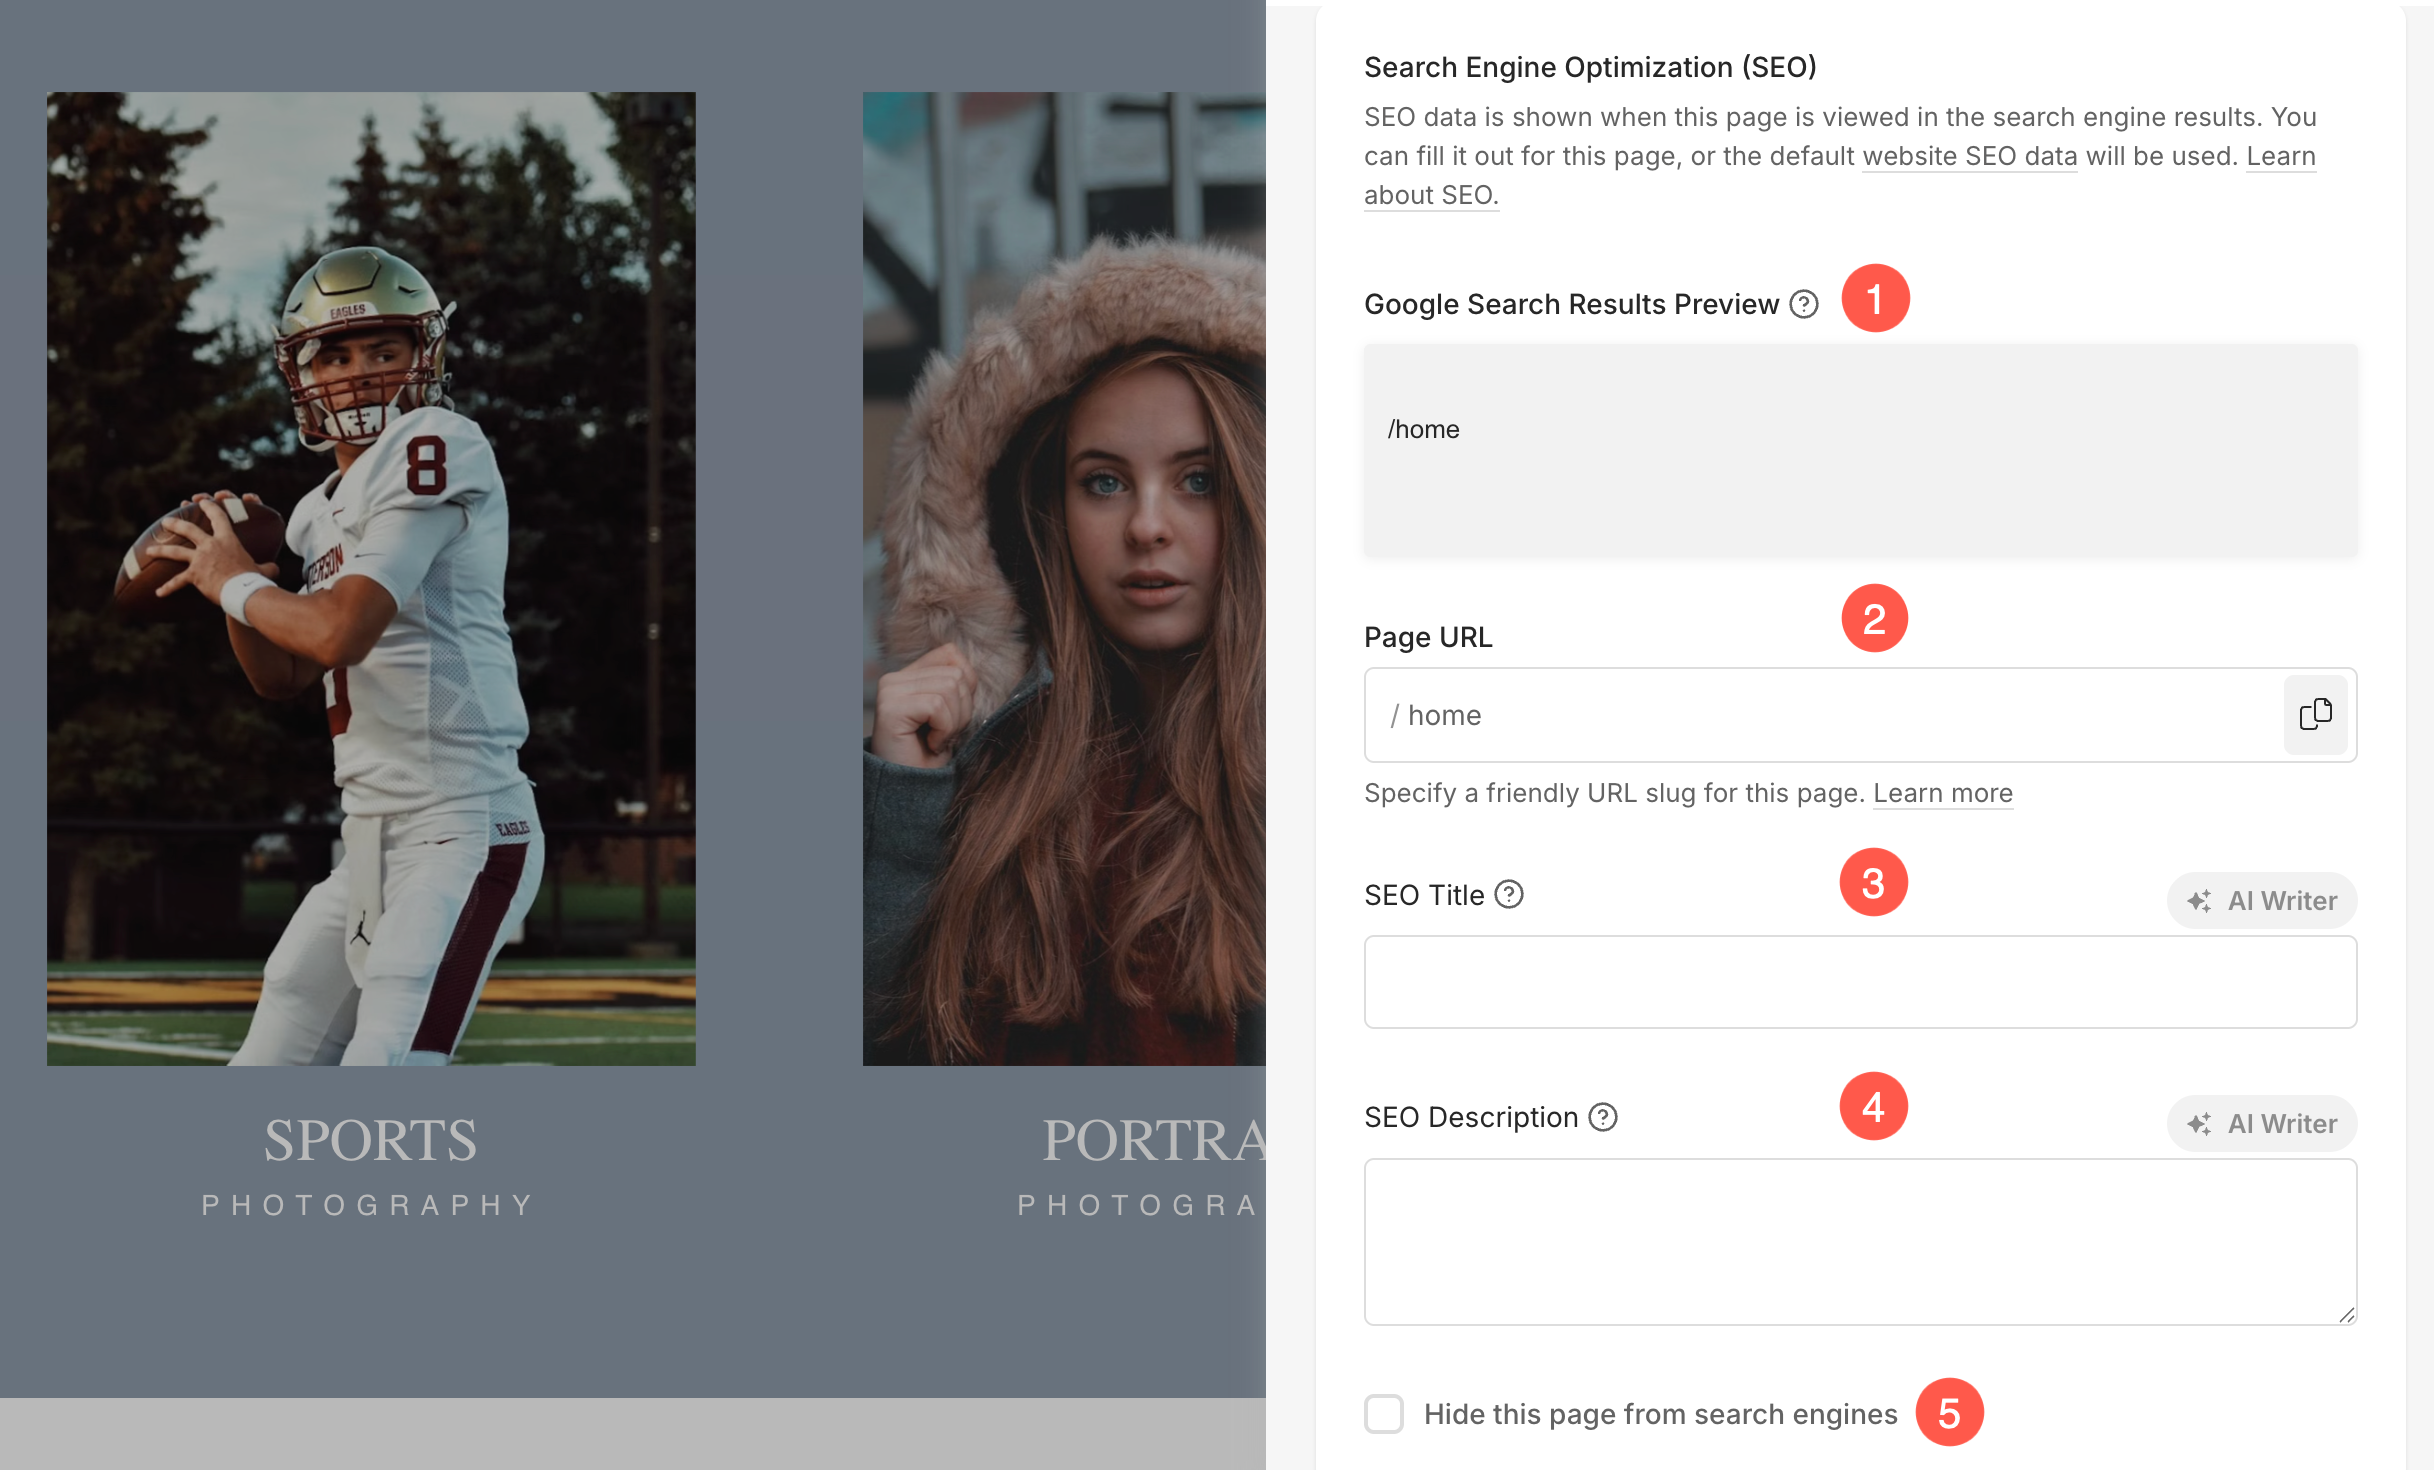
- Under the Page Settings, scroll down until you find the Search Engine Optimization (SEO) section.
- This is the Google Search result preview (1) of this gallery.
- Edit your gallery URL with Page URL (2).
- Add your Page Title (3) and Description (4).
- Hide this gallery from the search engine by clicking on Hide this page from search engines (5).
- Save your changes.
Add SEO metadata for Store
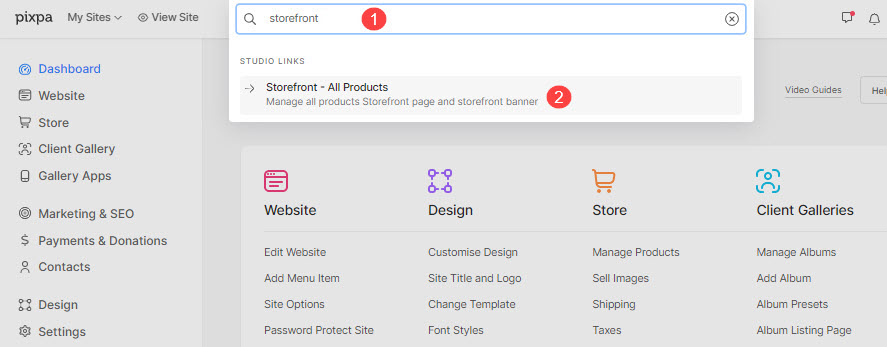
- Enter storefront(1) in the Search Bar.
- From the related results, click on the Storefront – All Products option (2) under Studio Links.
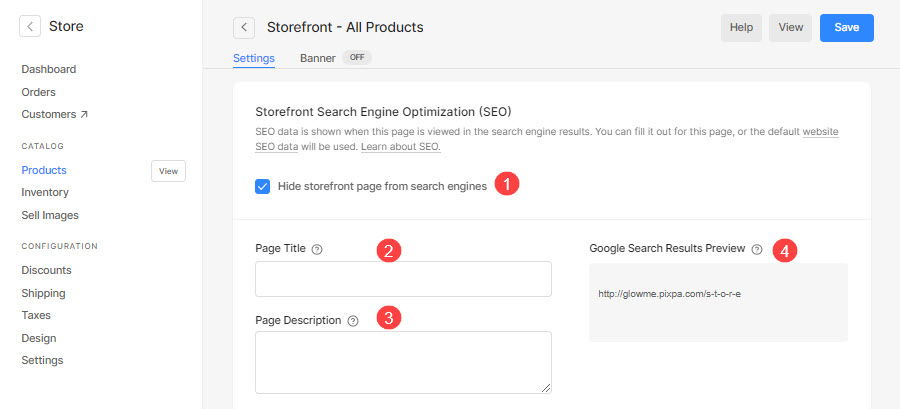
- You will now reach the Storefront – All Products page.
- Scroll down until you find the Search Engine Optimization (SEO) section.
- You can hide this gallery from the search engine by clicking on Hide this page from search engines (1).
- Add your Page Title (2) and Description (3).
- This is the Google Search result preview (4) of this gallery.
- Save your changes.
Add SEO metadata for Store Categories
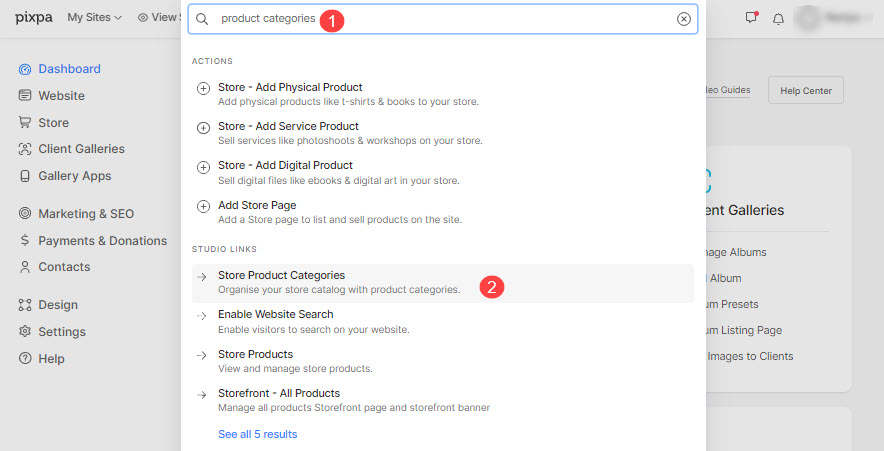
- Enter product categories (1) in the Search Bar.
- From the related results, click on the Store Product Categories option (2) under Studio Links.
- You will now reach the Categories page.
- On this page, you would see the list of all the categories that already exist.
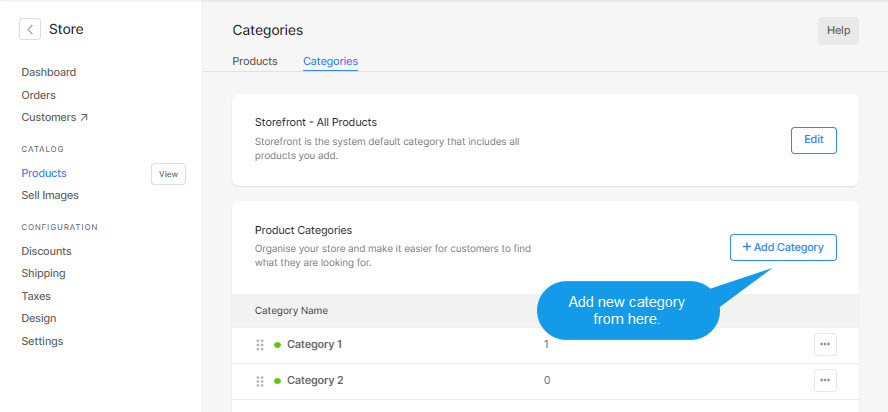
- Move your cursor to the particular category and click on it.
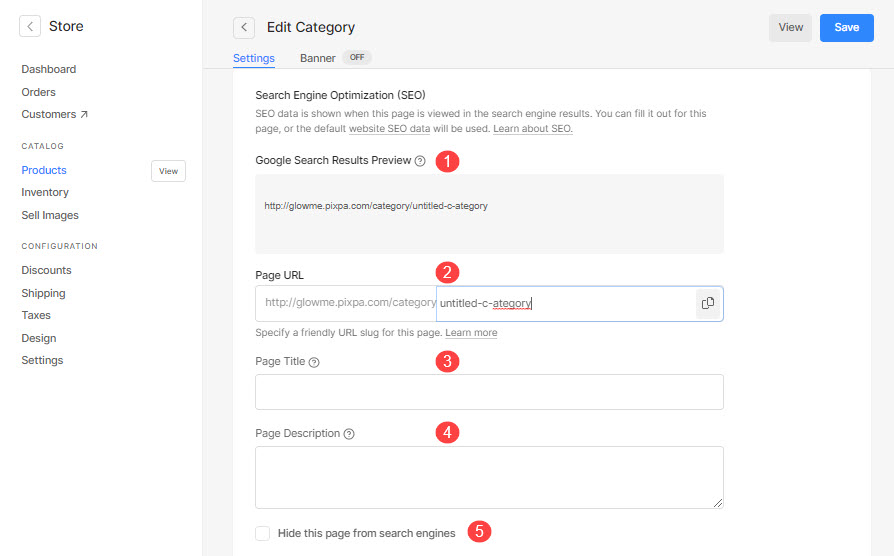
- Under Edit Category, scroll down until you find Search Engine Optimization (SEO).
- This is the Google Search result preview (1) of this category.
- You can edit your category URL with Page URL (2).
- Add your Page Title (3) and Description (4).
- You can also hide this category from the search engine by clicking on Hide this page from search engines (5).
- Save your changes.
Add SEO metadata to Store Products
- Enter store product name (1) in the Search Bar.
- From the related results, click on the particular product (2) under Store Products.
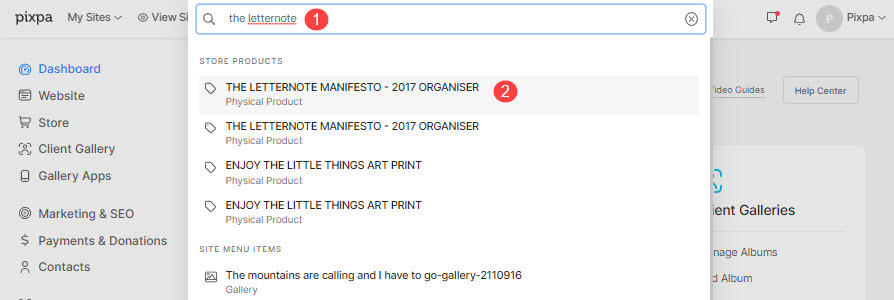
- You will now reach the Product Edit page.
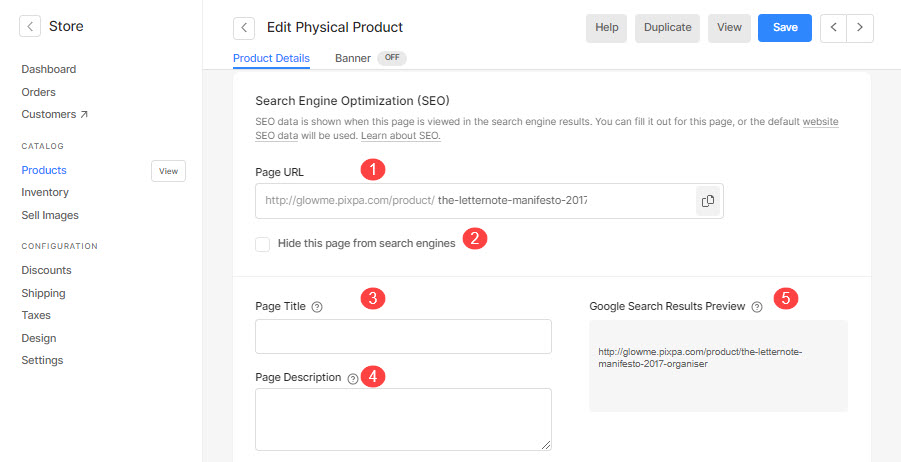
- Scroll down until you find Search Engine Optimization (SEO).
- You can edit this product’s URL with Page URL (1).
- You can also hide this product from the search engine by clicking on Hide this page from search engines (2).
- Add your Page Title (3) and Description (4).
- This is the Google Search result preview (5) of this product.
- Save your changes.
Add SEO metadata for Client Gallery Albums
- Enter Album title (1) in the Search Bar.
- From the related results, click on the Album that you are searching for (2) under Client Galleries.
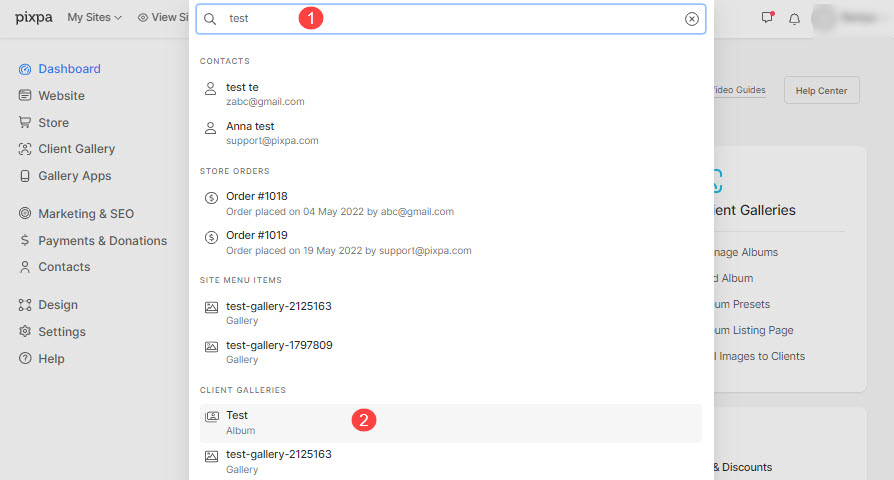
- You will now reach the Album page.
- Click on the Settings (3) tab and then on the Settings (4) option.

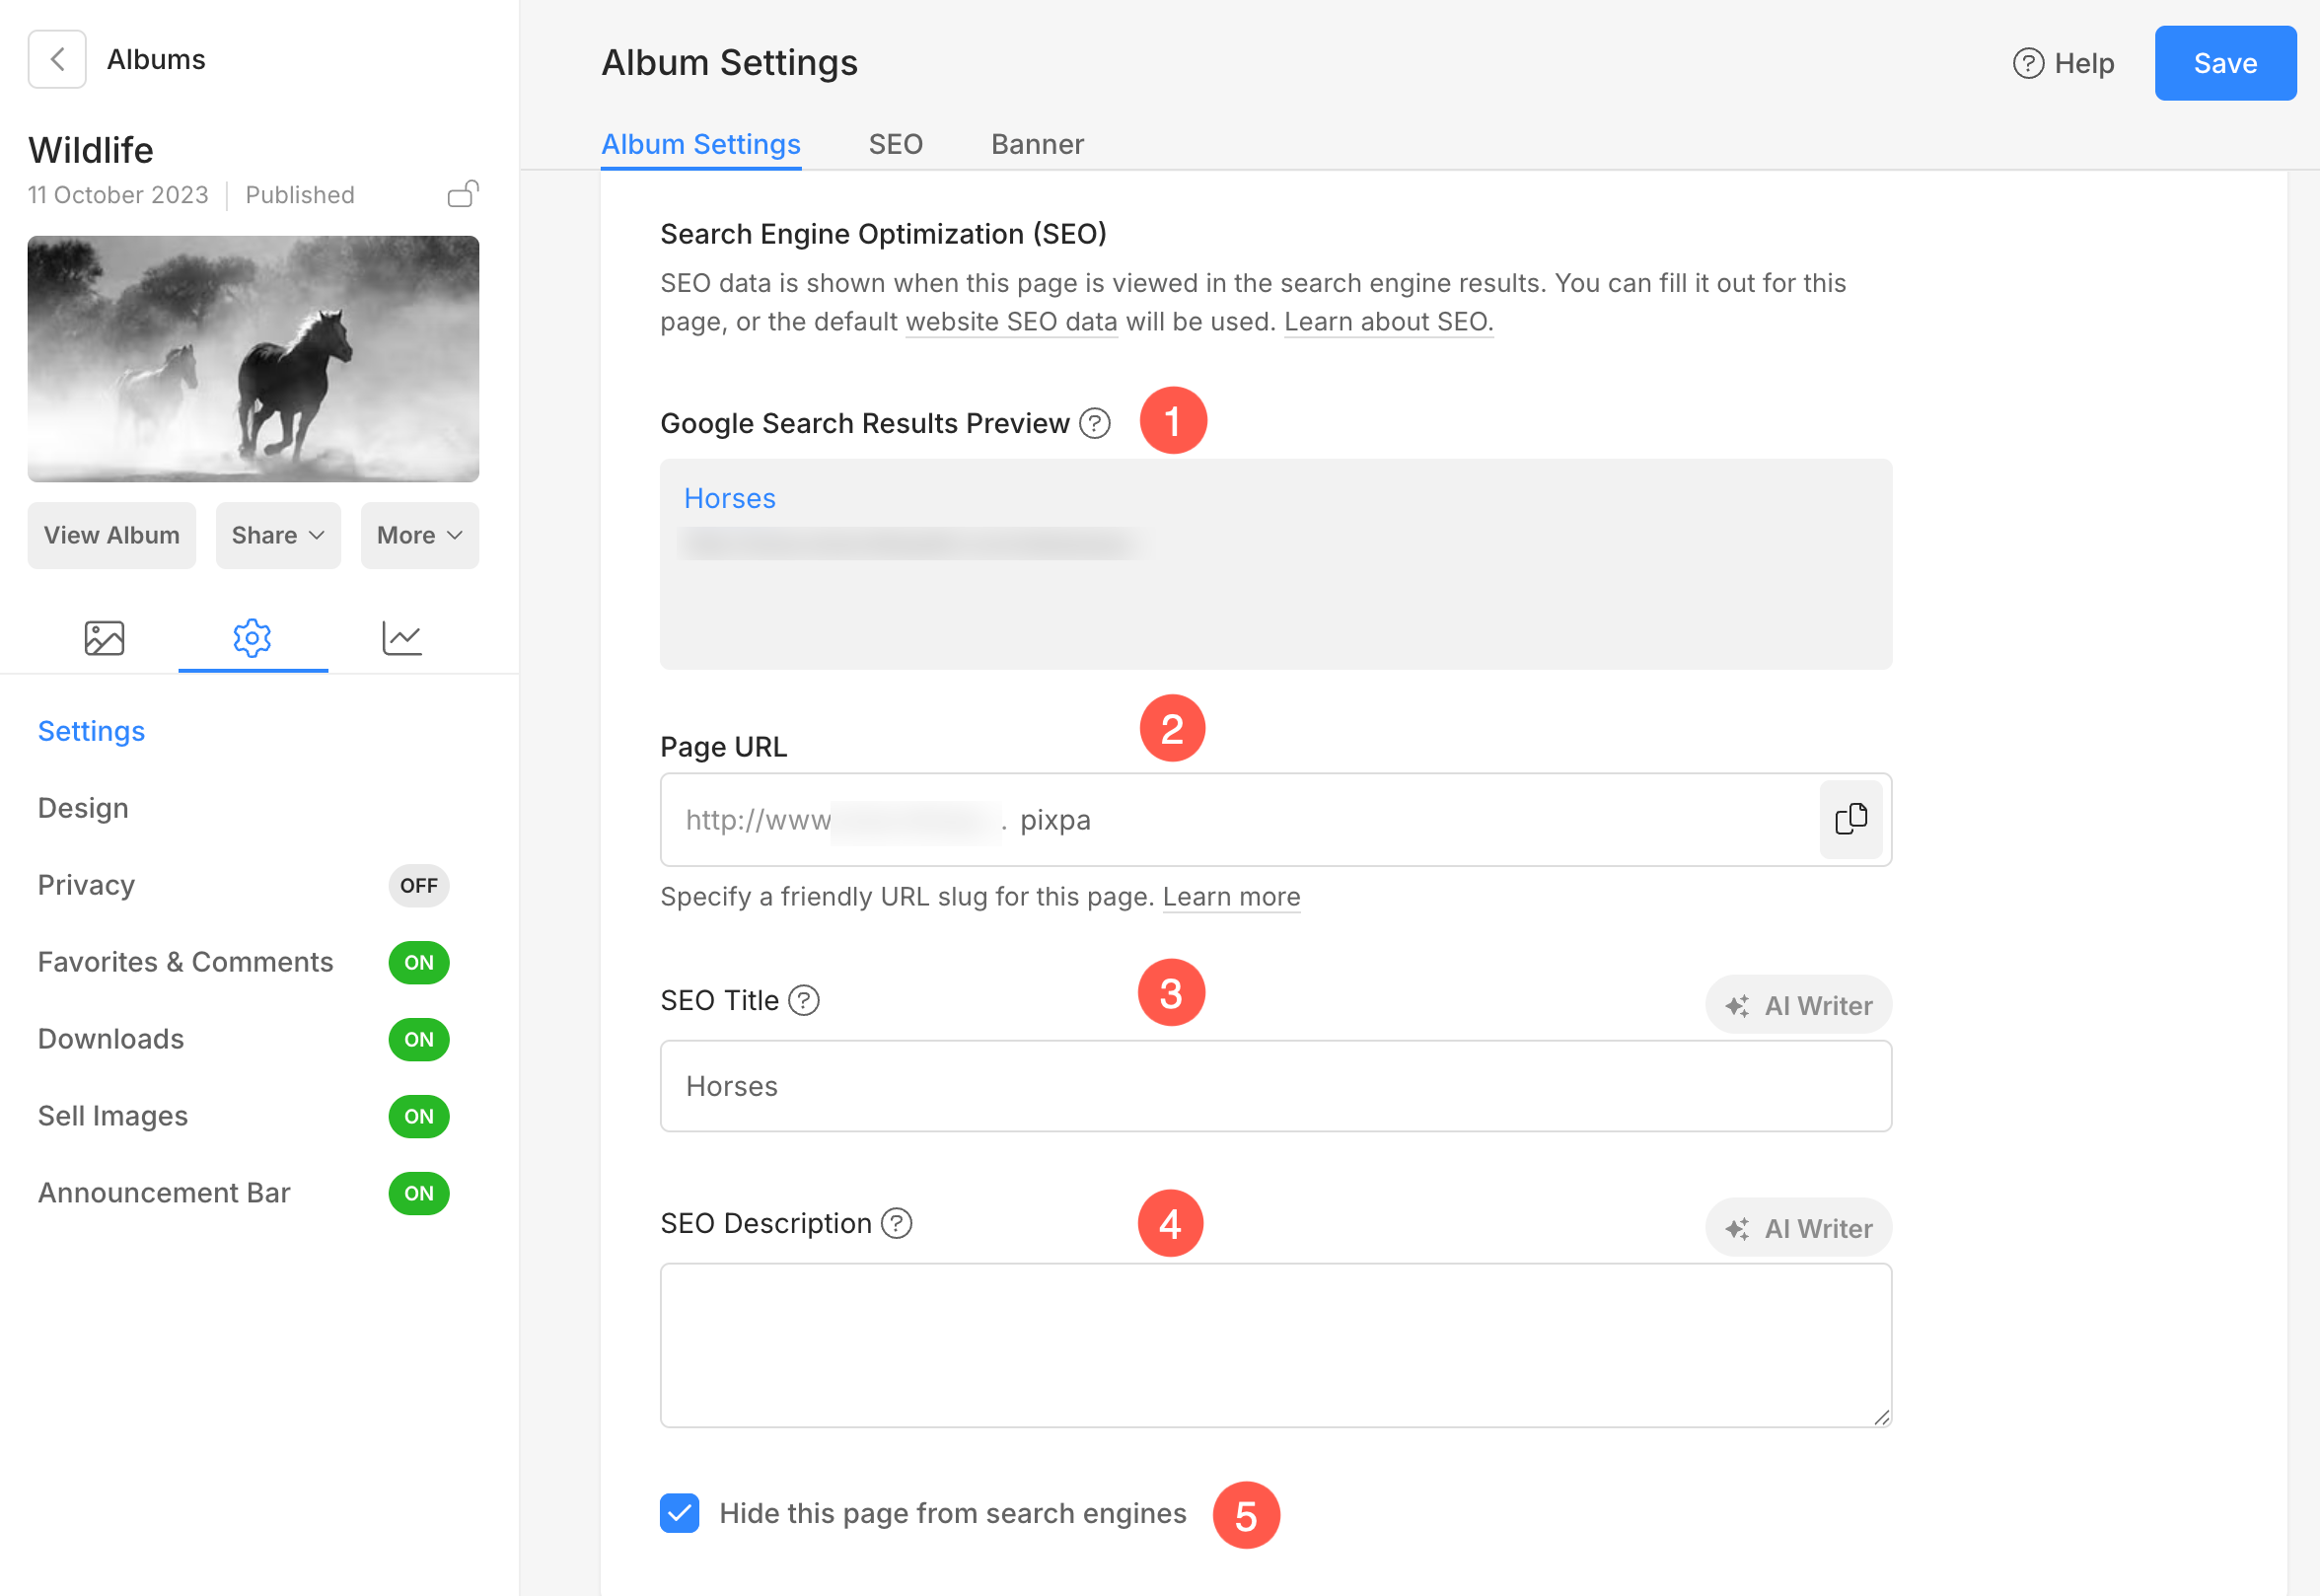
- Under Settings, scroll down until you find Search Engine Optimization (SEO).
- This is the Google Search result preview (1) of this album.
- You can edit this album’s URL with Page URL (2).
- Add your Page Title (3) and Description (4).
- You can also hide this album from the search engine by clicking on Hide this page from search engines (5).
- Save your changes.
Add SEO metadata for Client Spotlight Page
- Enter album listing page (1) in the Search Bar.
- From the related results, click on the Manage Album Listing Page option (2) under Studio Links.
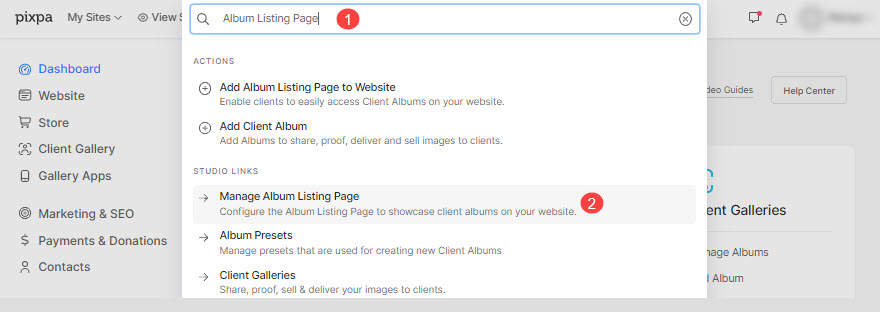
- You will reach the Album Listing Page where you can manage its settings.
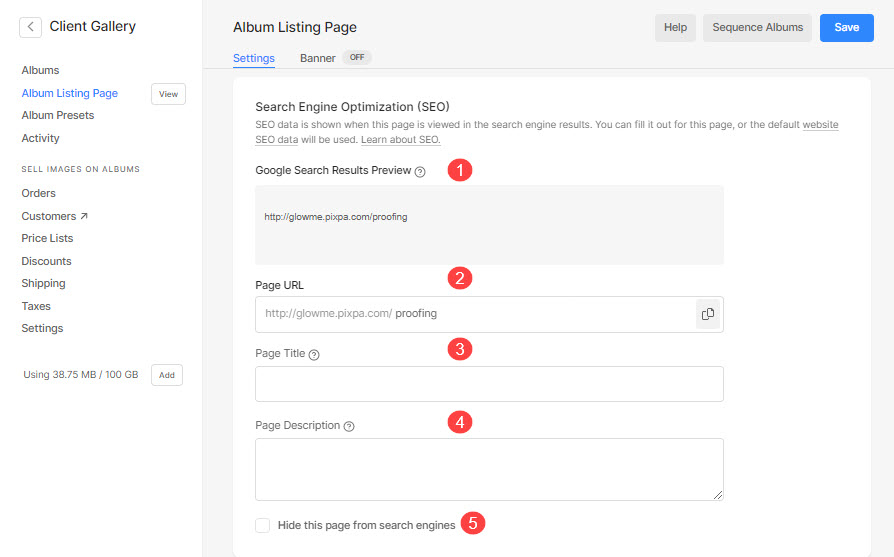
- Under Settings, scroll down until you find Search Engine Optimization (SEO).
- This is the Google Search result preview (1) of this page.
- You can edit this listing page URL with Page URL (2).
- Add your Page Title (3) and Description (4).
- You can also hide this album from the search engine by clicking on Hide this page from search engines (5).
- Save your changes.
Bulk edit SEO metadata for website pages
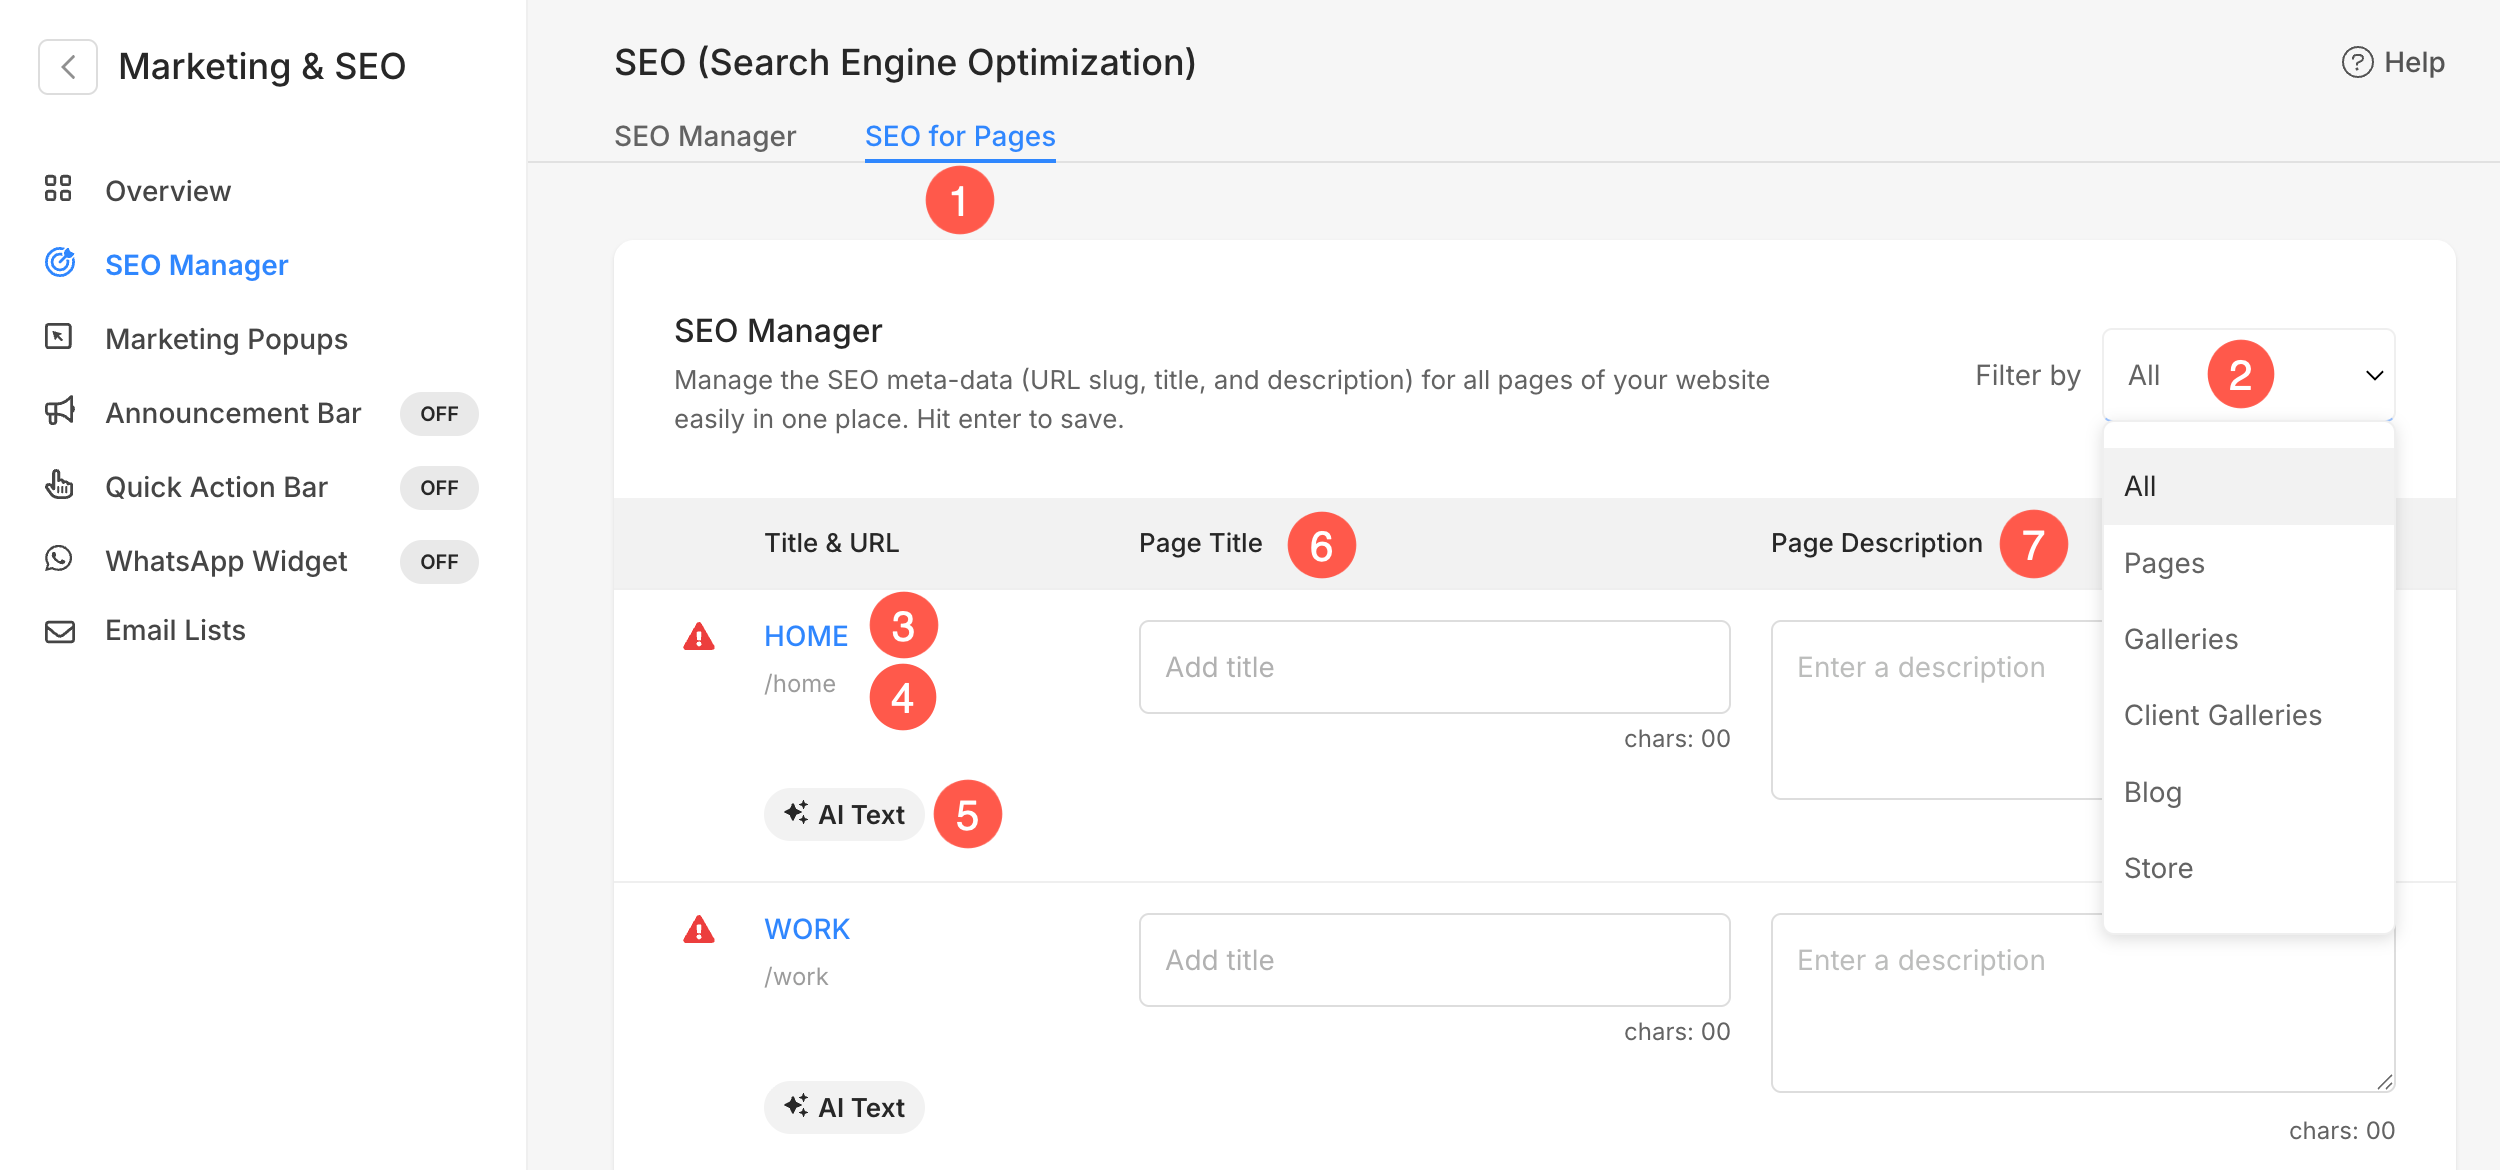
Pixpa gives you the option to add the SEO metadata for all the pages added in the studio in one go from the SEO Manager.
- SEO for Pages – Click on the SEO for Pages tab to view and update the SEO Metadata for the pages
- Filter by – Filter among all the pages, galleries, and other content items in the SEO Manager.
- Title – Menu Title of the page.
- Slug – URL (slug) of the page.
- AI Text – Click this button to auto-generate SEO-friendly page titles and descriptions using AI. Learn more.
- Page Title – Add SEO Title for the page.
- Page Description – Add SEO Description for the page.