Once you have set up a Print Vendor, you need to create a print vendor price list and apply it to your eCommerce-enabled gallery(s).
A Price List is a set of Print products, Merchandise, Self-fulfillment products, and Digital download options.
In this article:
- Add Items to the print vendor price list
- Print Vendor product types
- Add/Edit Self-fulfillment Items
- Add/Edit Digital Items
Add Items to the Print Vendor price list
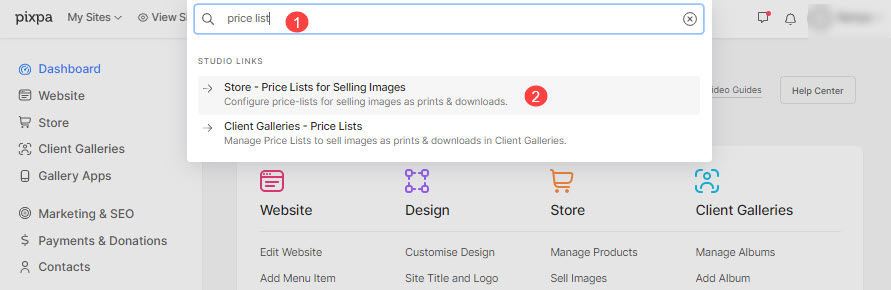
- Enter price list (1) in the Search Bar.
- From the related results, click on the Store – Price Lists for Selling Images option (2) under Studio Links.
- You will now reach the Price Lists page under Sell Images.
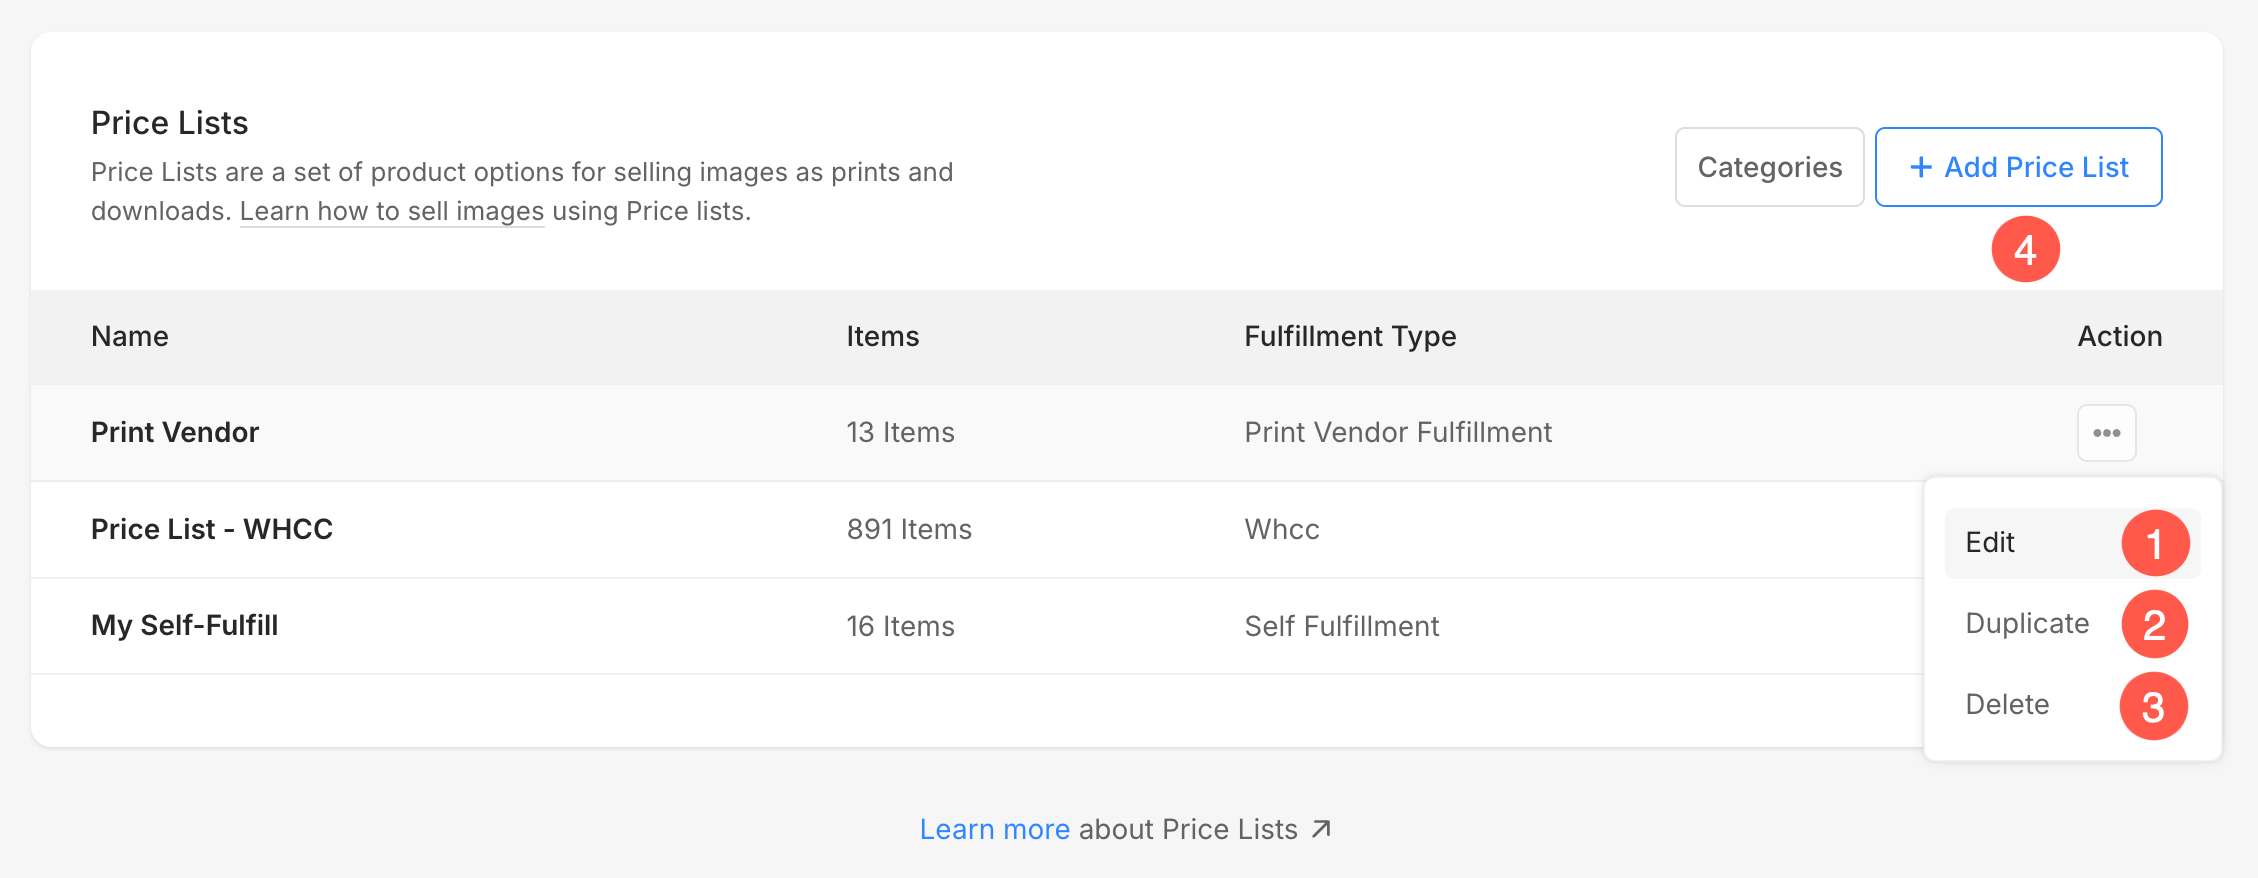
- You would see all your price lists here along with your Print Vendor price list.
- Or click on the + Add Price List button on the right top to add a new price list.

- Click on the respective print vendor price list to add items to it.
- You would see all your price lists here along with a default price list i.e. My Self-Fulfill.
- You can also Edit (1), Duplicate (2), or Delete (3) any existing price lists from here by clicking on the setting icon.
- Click on the + Add Price List (4) button on the right top to add a new price list.
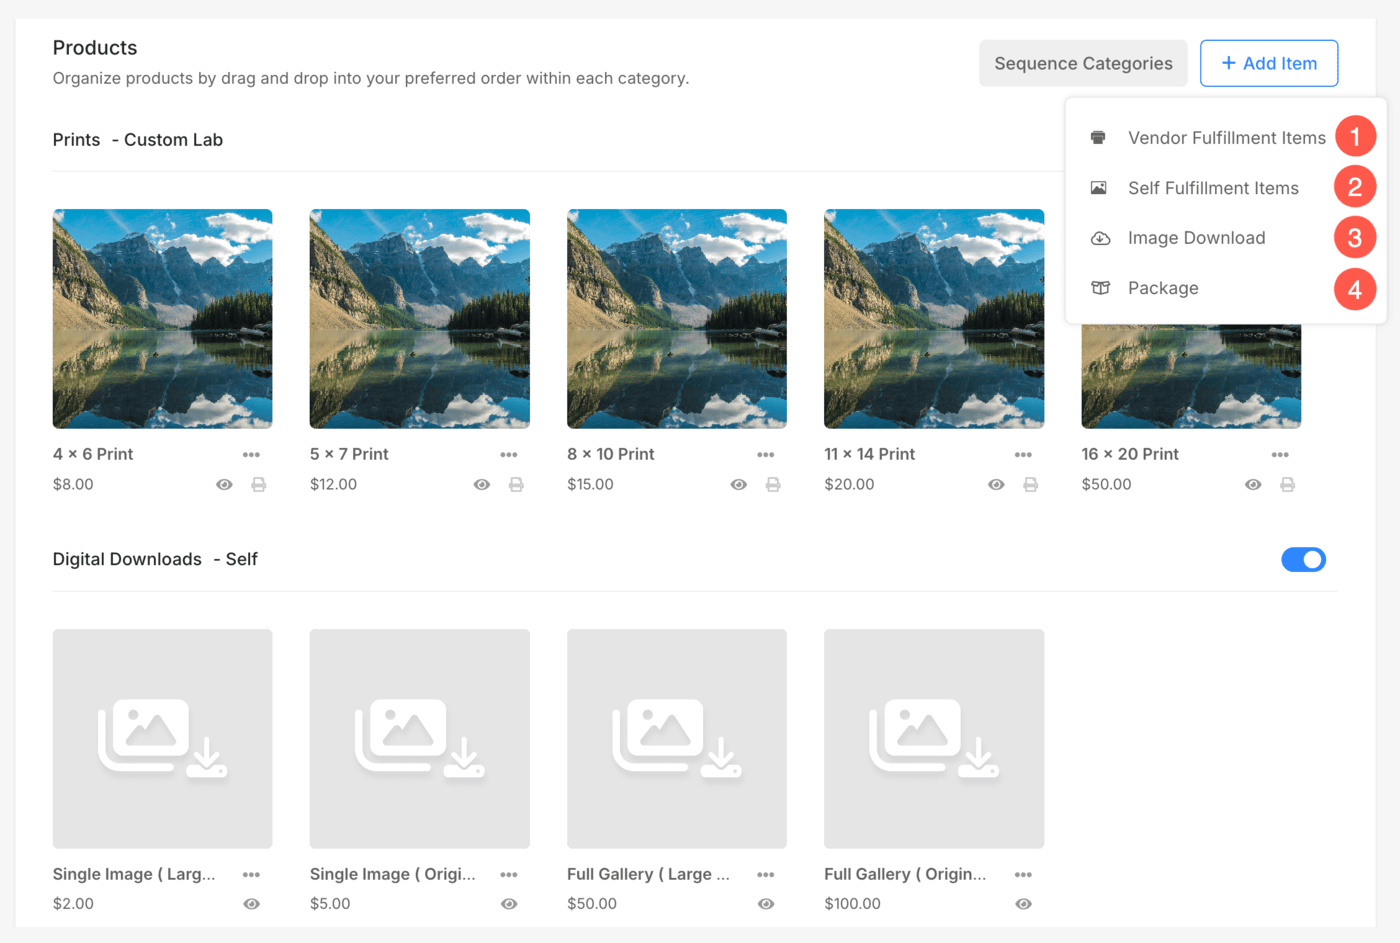
You can add 4 types of items:
- Vendor Fulfillment item – Sell items that the Print Vendor would process. Know more.
- Self-fulfillment item – Sell items that you would ship (tees, prints, and other products). Know more.
- Image Download – Sell download-ready digital files (music, software, video, etc). Know more.
- Package – Sell multiple items bundled together as a single package. Learn more.
Add/Edit Self-fulfillment items
You can sell any self-fulfillment or physical product that you would ship (like tees, prints, and other products).
Product Details
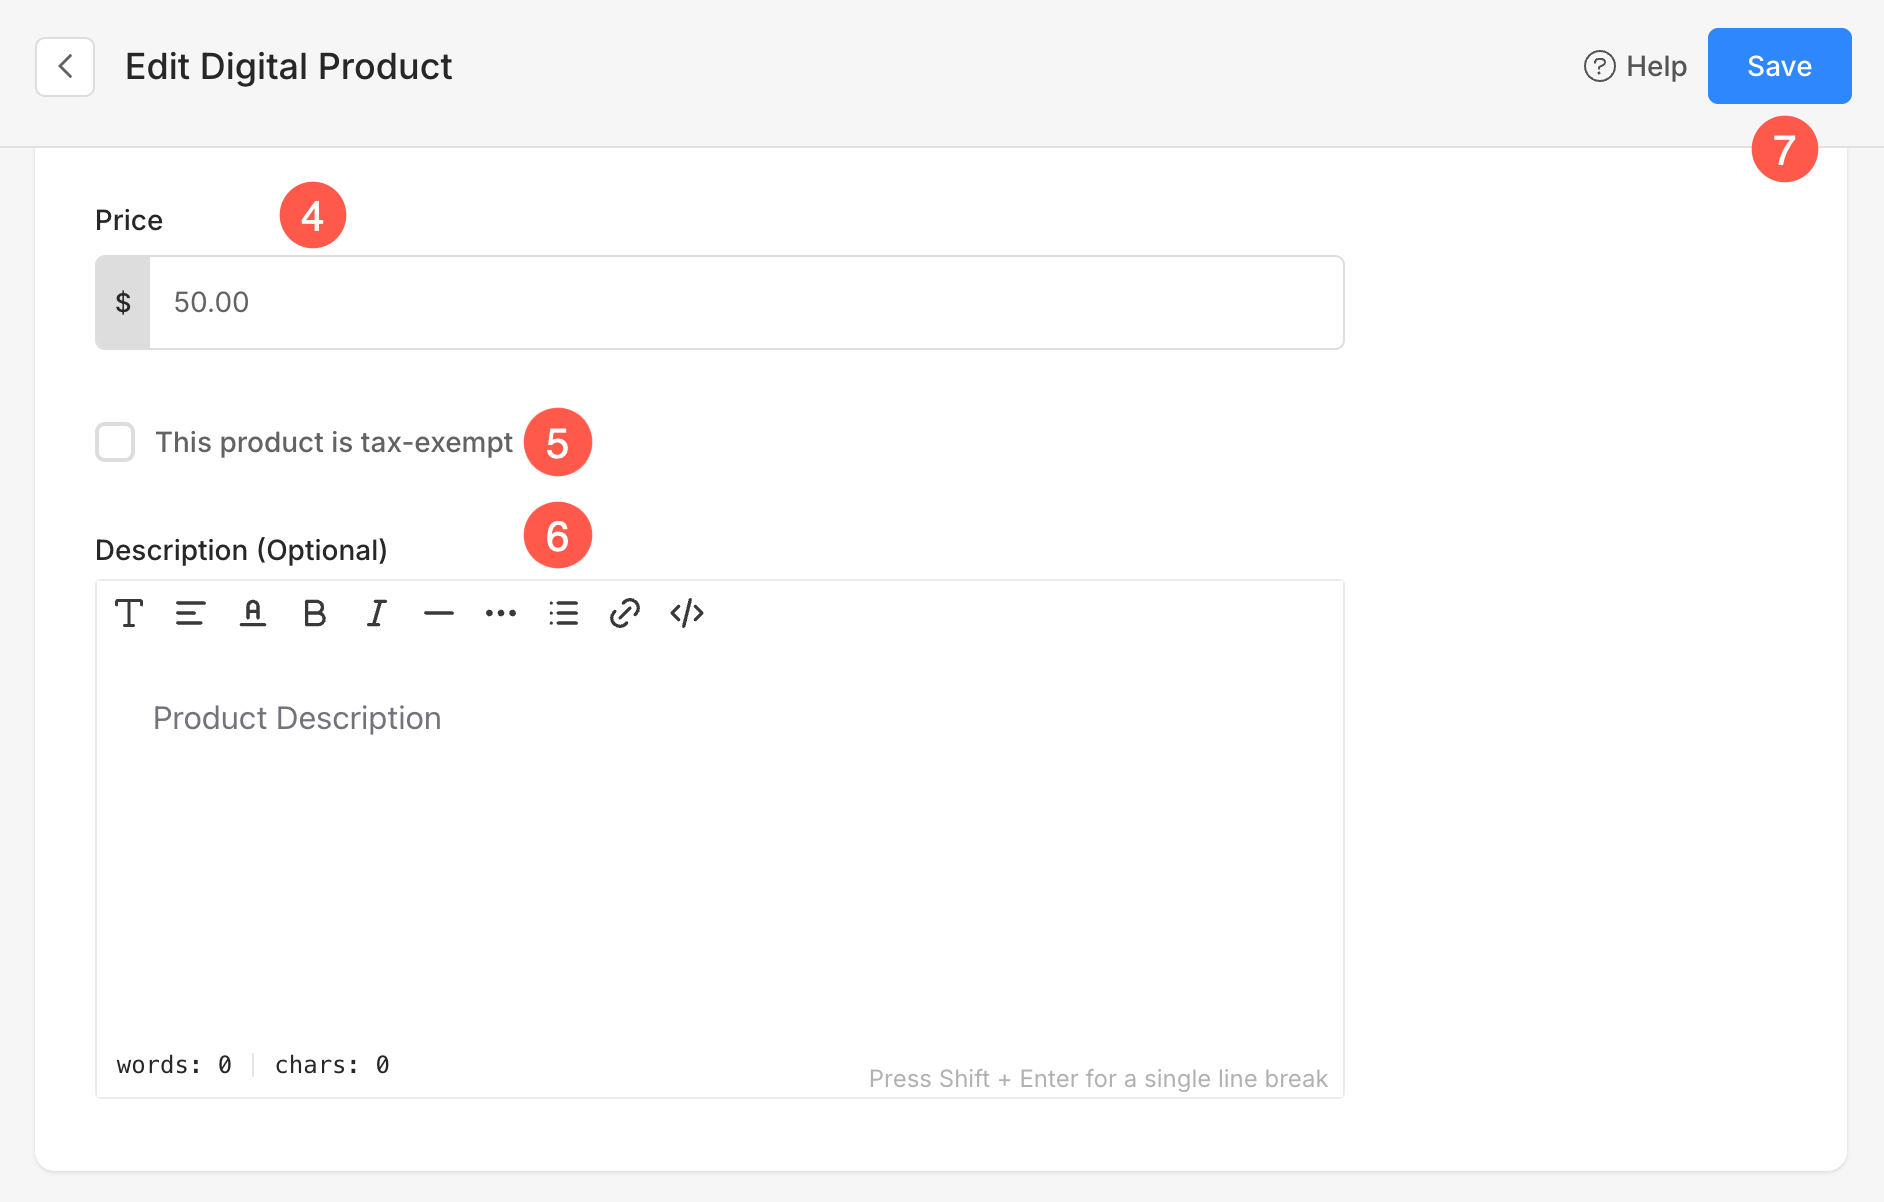
- Item Title – The name of your product
- Price – The default price of your product.
- Category – You can group your products into various categories. Like all print sizes will come in the print category & canvas sizes come in the canvas category.
Also See: Add a category in the eCommerce galleries store. - This product is Tax-exempt – Check in this option to remove/exempt tax on this particular product.

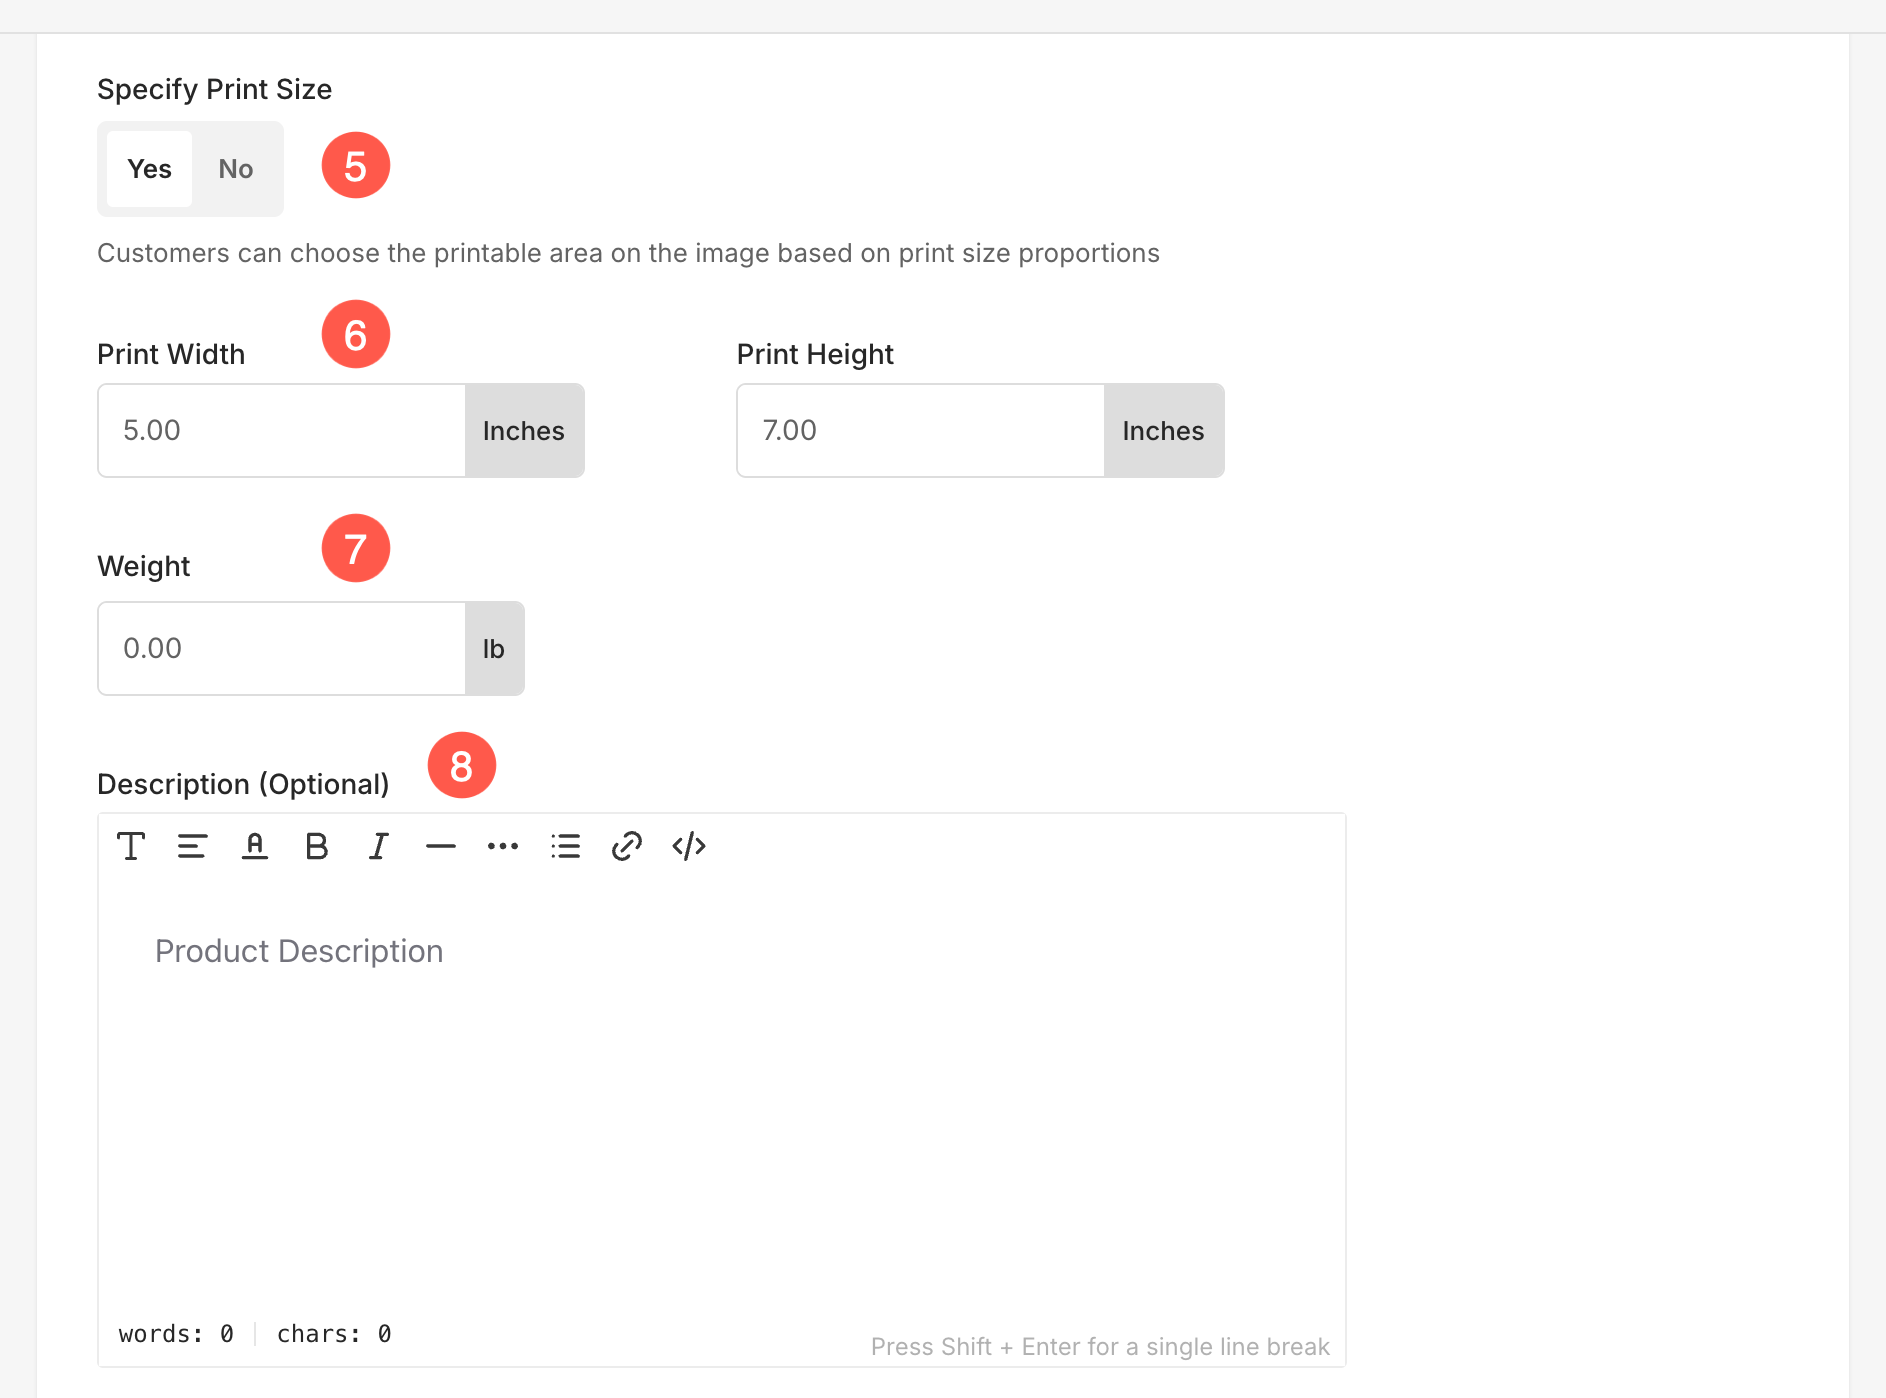
- Choose whether to enable users to specify the image crop area for printing. If it’s not a print product, just select No.
In this case, there will be no crop on the cart page. - Print Width/Height – Specify the width and height of the print product here. Based on the specified size, the system would generate a crop on your image.
The user would be able to move the crop and select the required area that should be printed if the crop is smaller than the actual image. - Weight – Specify the weight of the product.
- Description – Add your product description. It would reflect on clicking on the information icon next to the product name on the cart page.
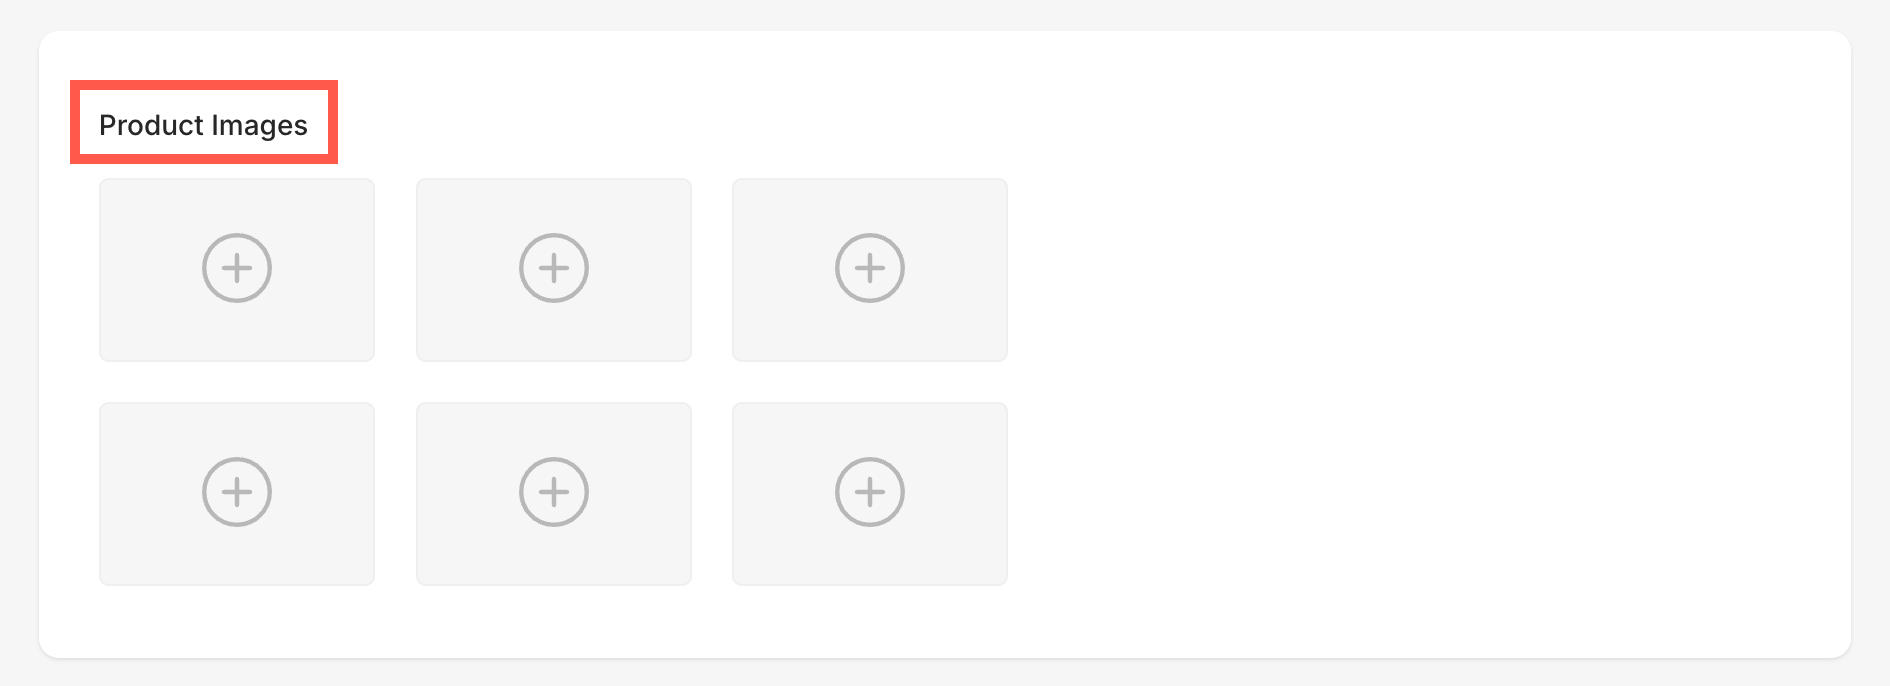
Product Images
This option allows you to upload images for the product, serving as a visual sample for customers. The uploaded images are displayed in the cart when the product is added.
You can upload up to a maximum of 6 images for each product.
Product Options
Product options allow you to create multiple variations of a product by adding different choices such as size, color, or other attributes.
- Enable Product Options: Toggle this option to enable product variations. When enabled, the product’s pricing, weight, and other details will be determined based on the selected product options.
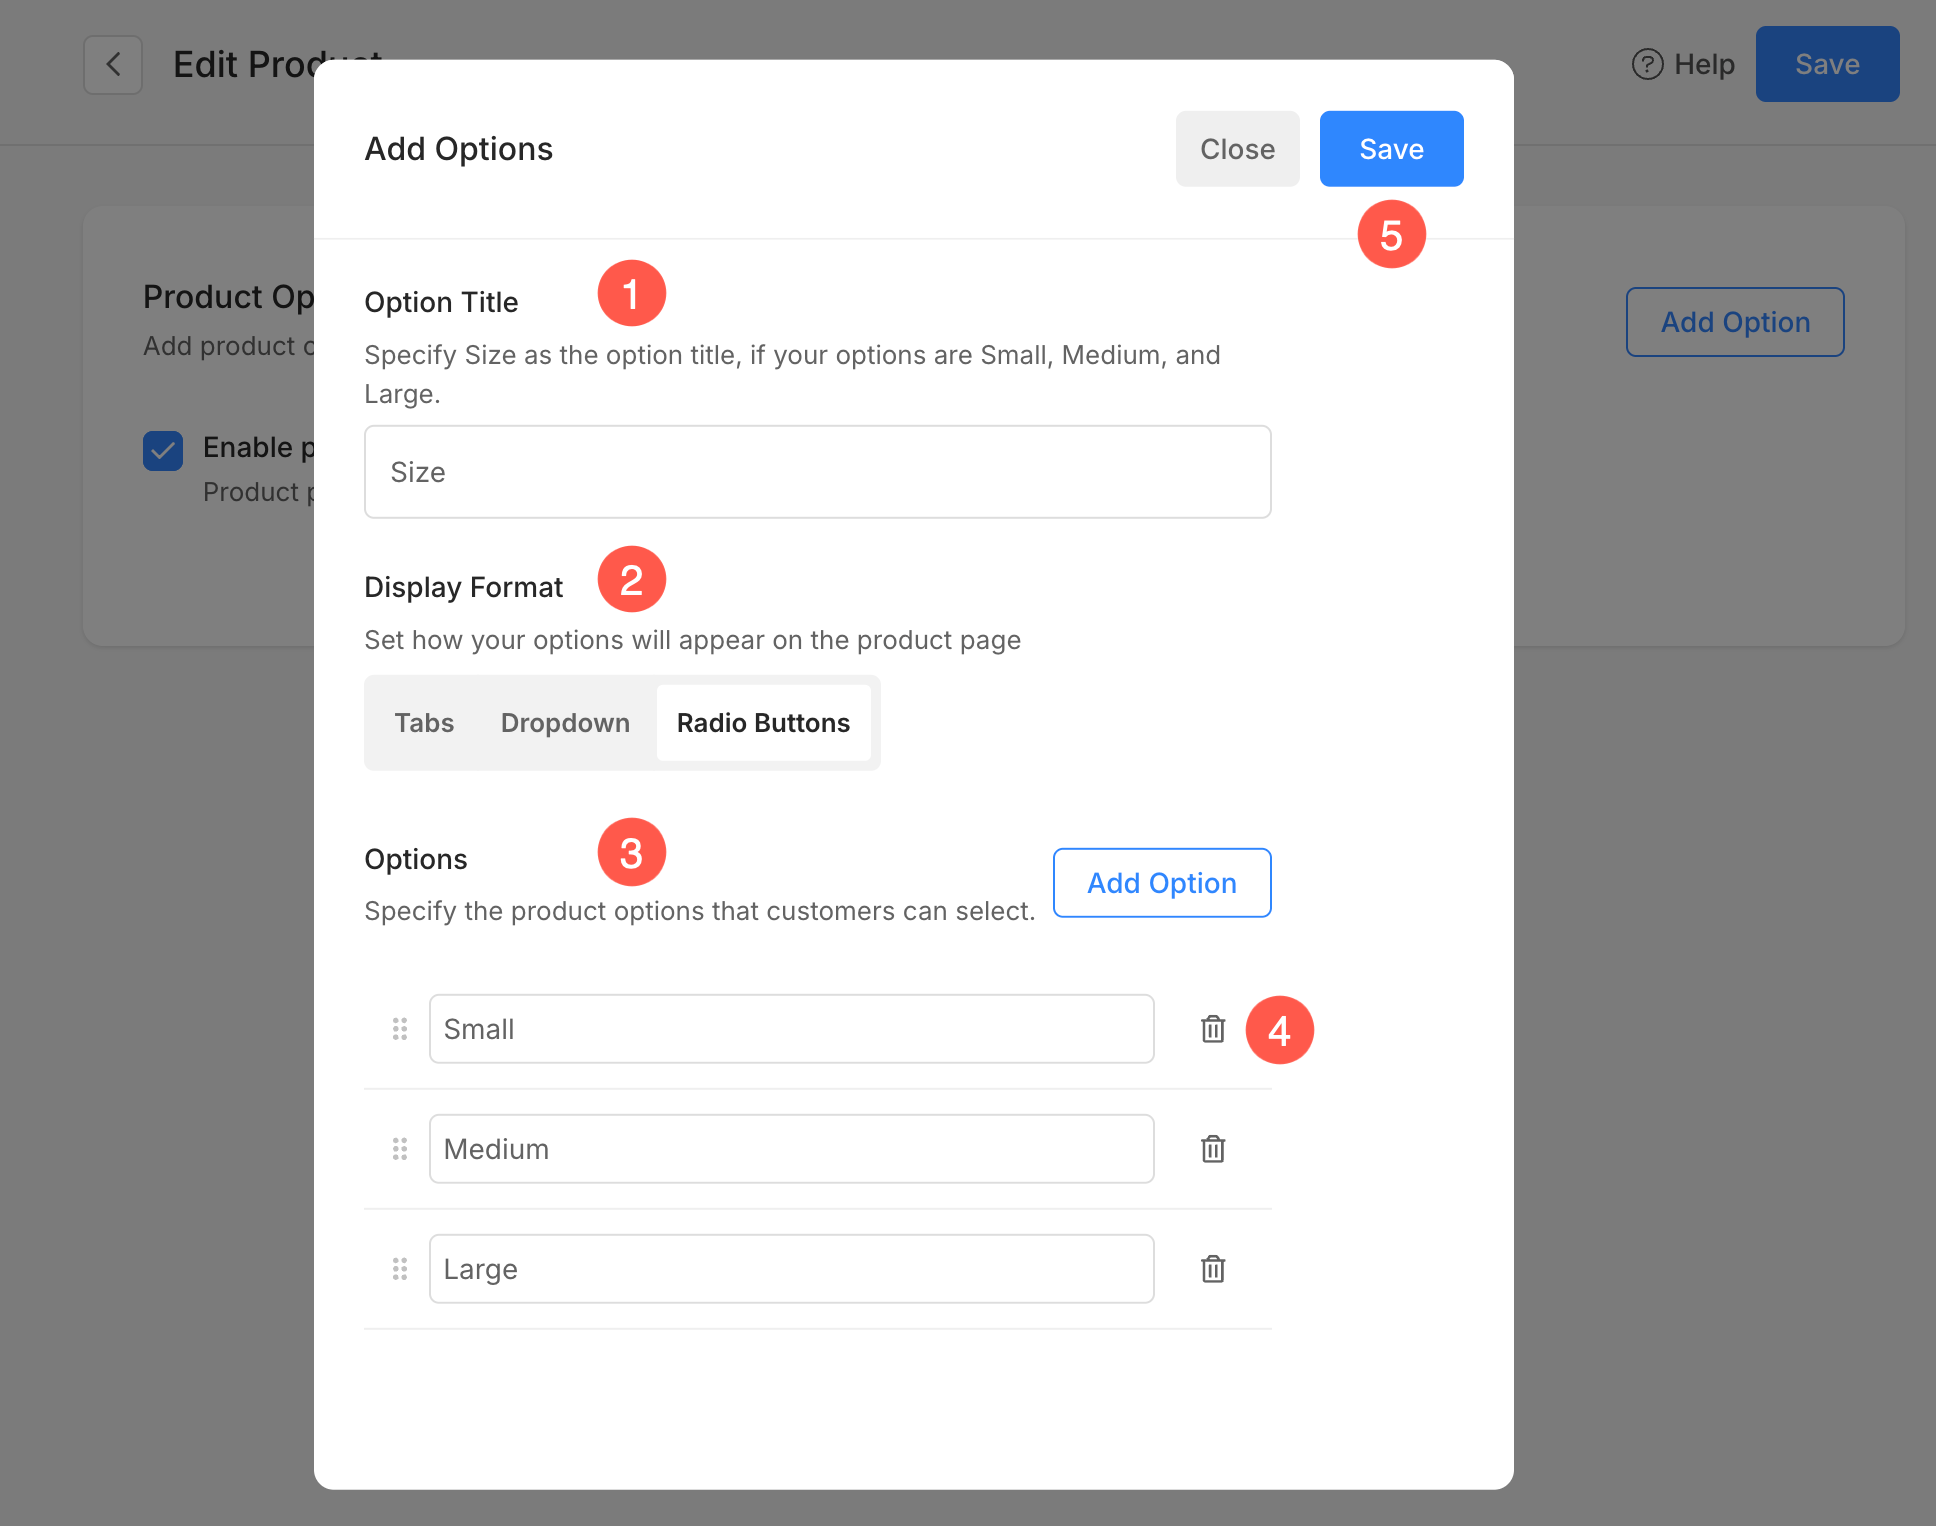
- Add Option: Click on the “Add Option” button to define product variations. You can add multiple options such as size, material, or custom attributes to give customers more flexibility in selecting their preferred variant.

Add Option:
- Option Title: Enter a title for the option, such as “Size” if the product has variations like Small, Medium, and Large.
- Display Format: Choose how the options will be displayed on the product page: Tabs, Dropdown, or Radio Buttons.
- Options: Add the specific variations for the product, such as different sizes or colors.
- Delete Option: Click the trash icon next to an option to remove it from the list.
- Save: Once all options are added, click Save to apply changes to the product.
Add an Image Download
You can sell download-ready digital files (music, software, video, etc). For adding an image download, you need to specify the below information:
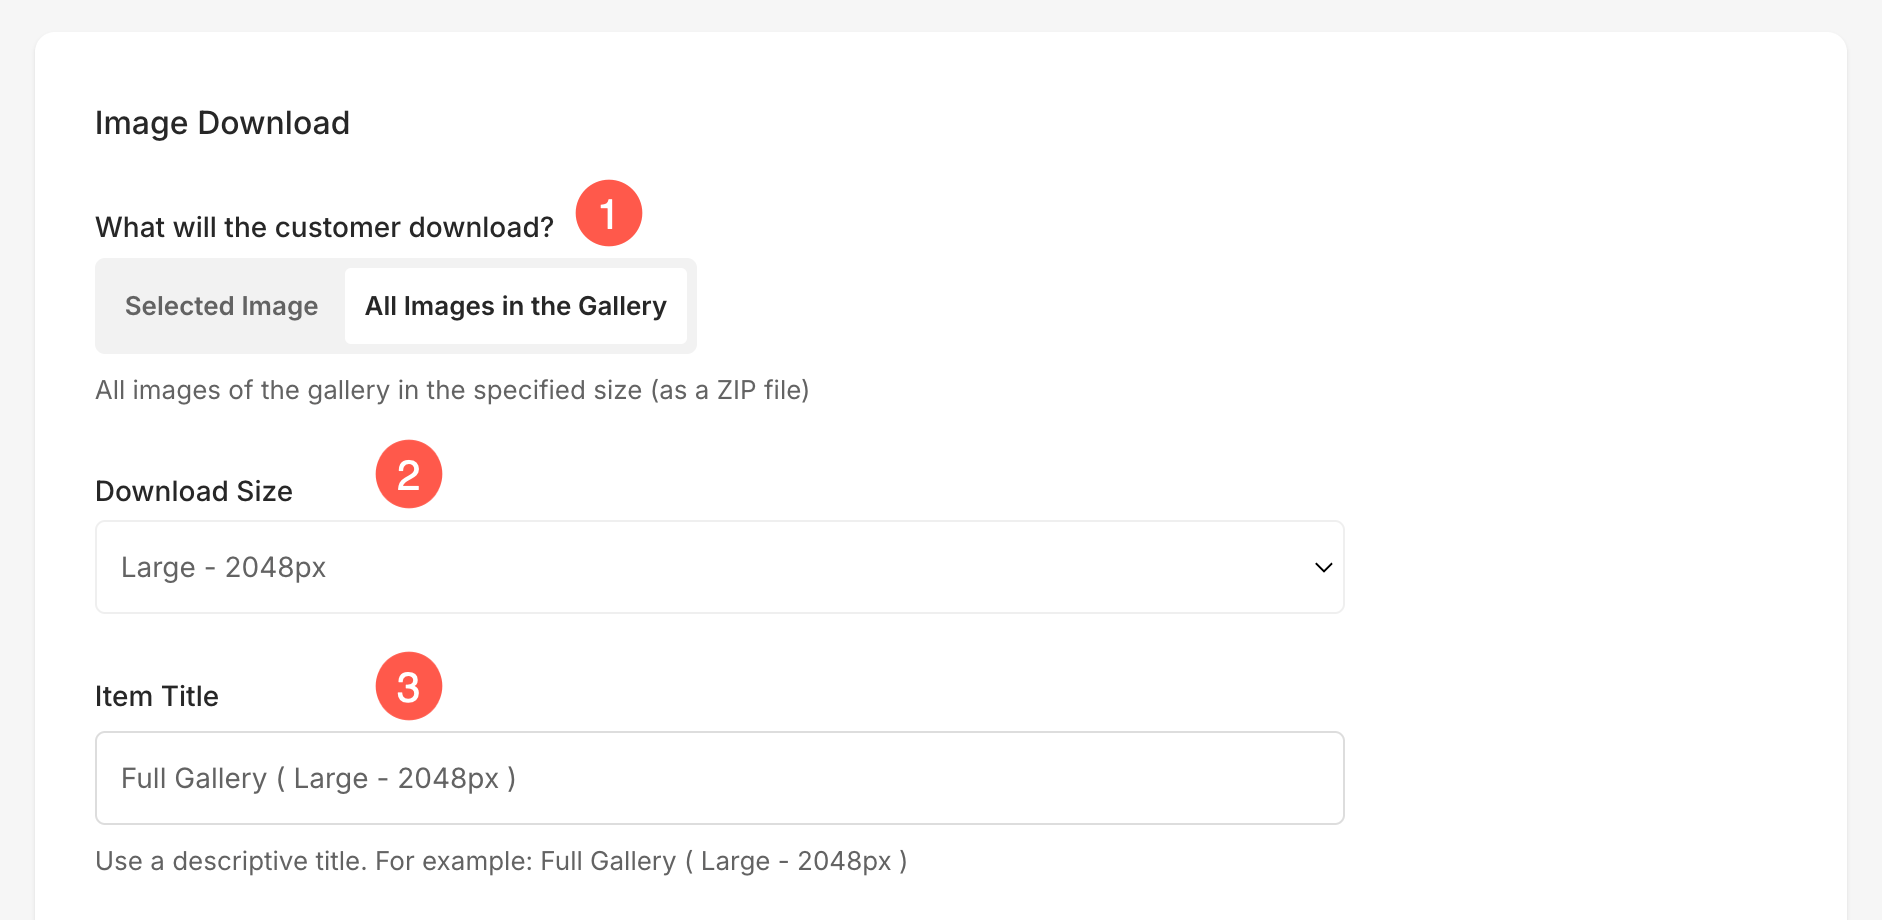
- What will the customer download? You can allow your customer to download or buy either a single image one by one or a complete gallery in one go.
- Download size: You can allow your customer to download or buy various versions of your images like Original file, Large 2560px, medium 1200px, and small 600px.
- Item Title: The name of your product.
- Price: The default price of your product.
- This product is Tax-exempt: Check in this option to remove/eliminate the tax on this particular product.
- Description: Add your product description. It would reflect on the cart page by hovering on the product name.
- Save: Click here to save the product.