Live chats are an efficient way to increase your sales.
Let visitors contact you through the WhatsApp chat widget from anywhere on your website. It allows your customers to contact you in real-time via chat or message you when you are offline.
To add the widget to your Pixpa website, follow these steps:
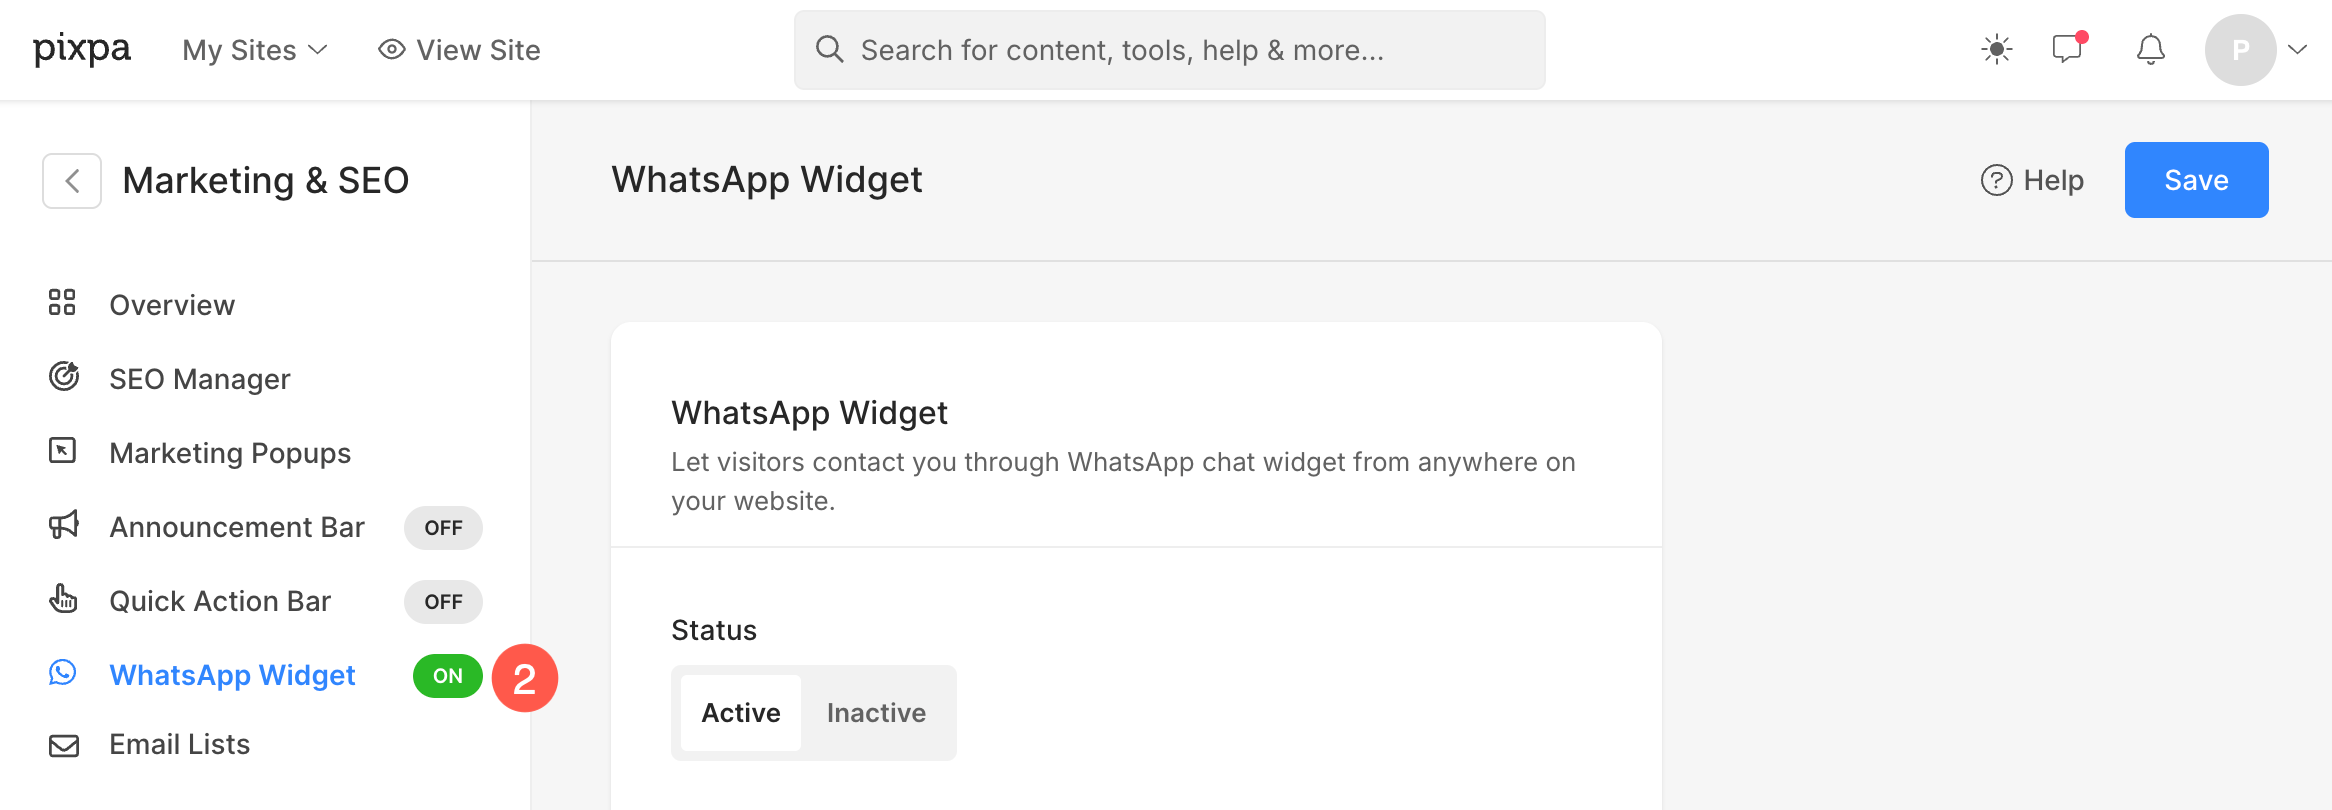
- Go to the Marketing & SEO section (1) from the Dashboard.

- Click on the WhatsApp Widget option (2) on the left sidebar.
- You will now reach the widget editing page.
From here, you will be able to manage the:
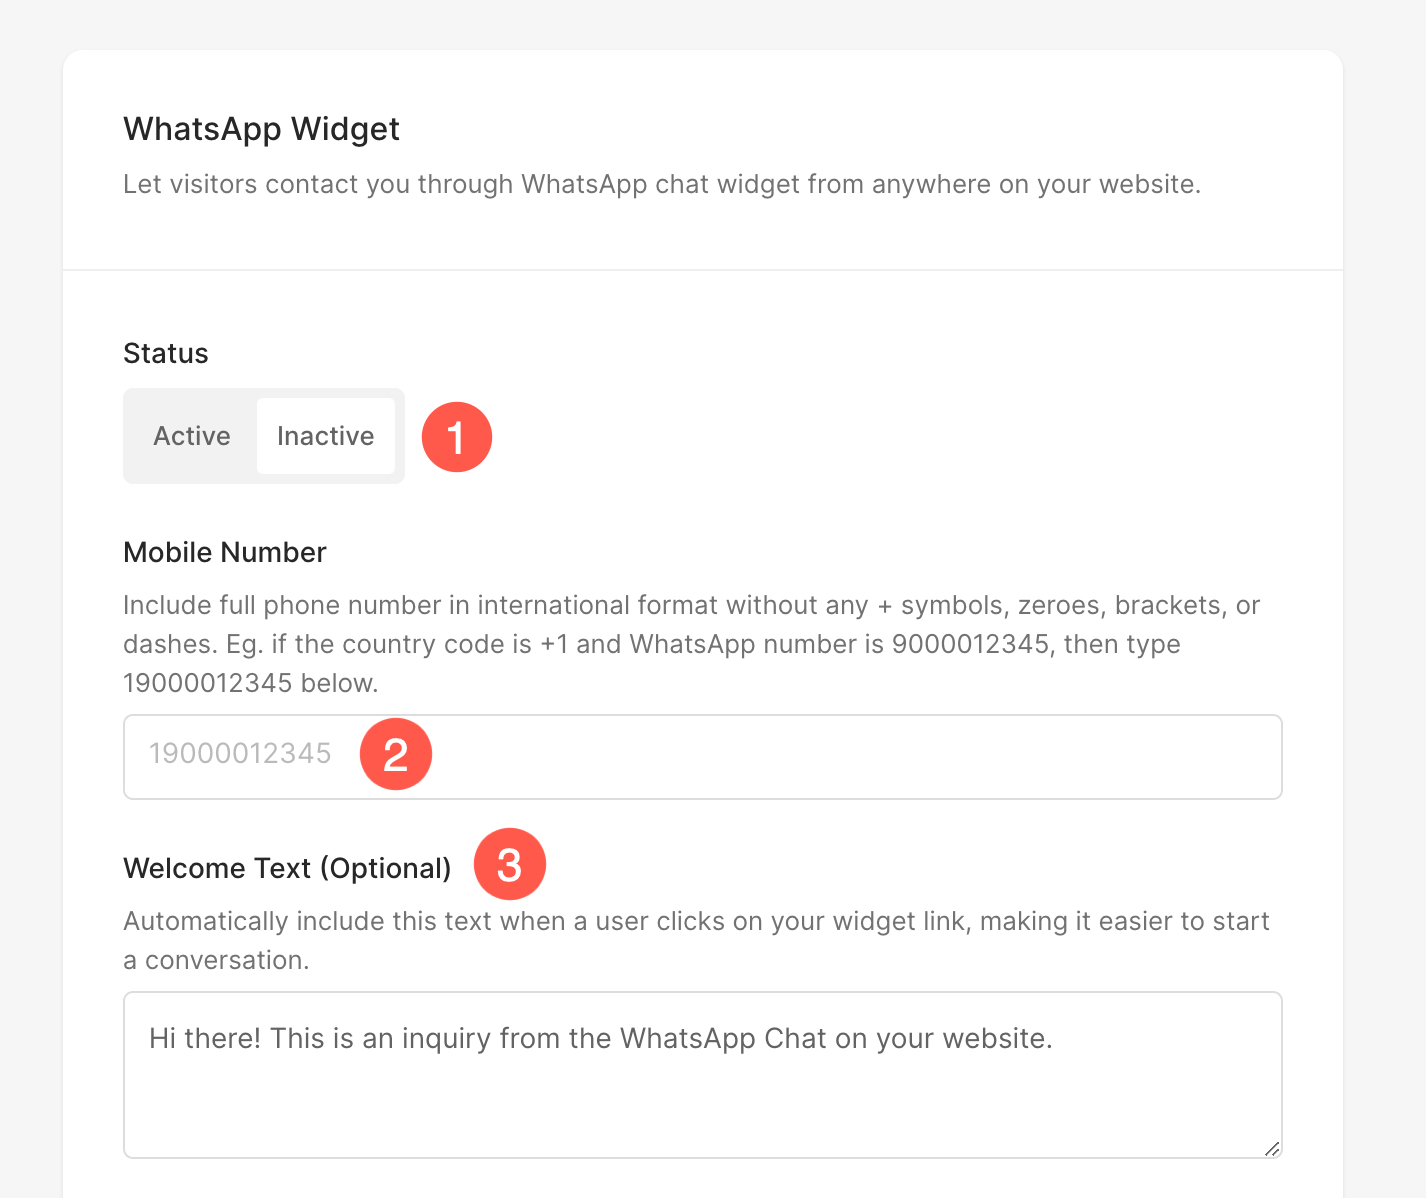
- Status – Choose to make the widget active or inactive.
- Mobile Number –
- Welcome Text (Optional) – This text appears when a user clicks on your widget link. You can enter any warm, welcoming, or informative text making it easier to start a conversation.
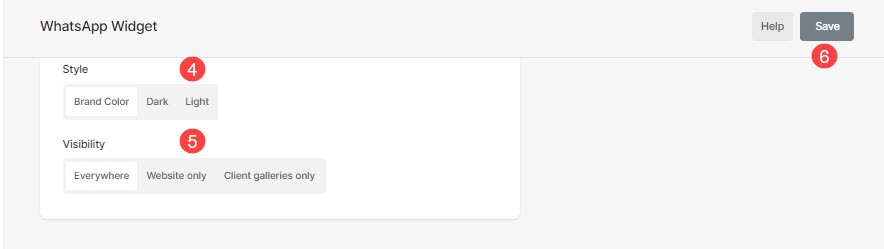
- Style – Choose the style of the widget. It can be lighter (recommended when your website background is in a darker shade), darker (recommended when your website background is in a lighter shade), or the default brand color.
- Visibility – Choose where to show this widget.
- Choose to show it everywhere.
- Choose to show it only on the website pages (store pages too). It will not show up on the Client Galleries pages.
- Choose to show it only on the Client Galleries Album pages. It will not show up on Client Galleries – Album Listing Page and website pages.
- Hit the Save button.
- Finally, the widget will appear on your website similar to this:

- When the user clicks on the widget, it shows the below page incorporating the Welcome Text that you have specified above.
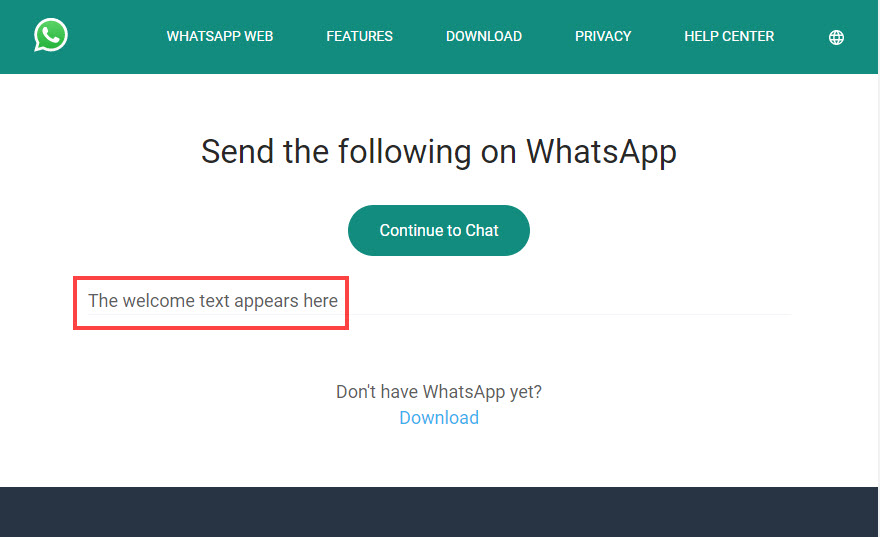
- The user can click on the Continue to Chat button and proceed further.
Voila! You have successfully added the WhatsApp widget to your website.