Add the section on any of your pages and show your Instagram feed or social icons. These icons will be linked to the profiles you have specified in the social links. It is most frequently added to the prefooter.
The Instagram feed on any page will pull images from your Instagram and update them automatically. To integrate Instagram for pulling the feed, visit the Settings > Integrations page.
In this article:
- Add Instagram section
- Manage Instagram
- Style your Instagram Feed
- Troubleshoot Instagram
- The Social Icons section
Add Instagram section to page
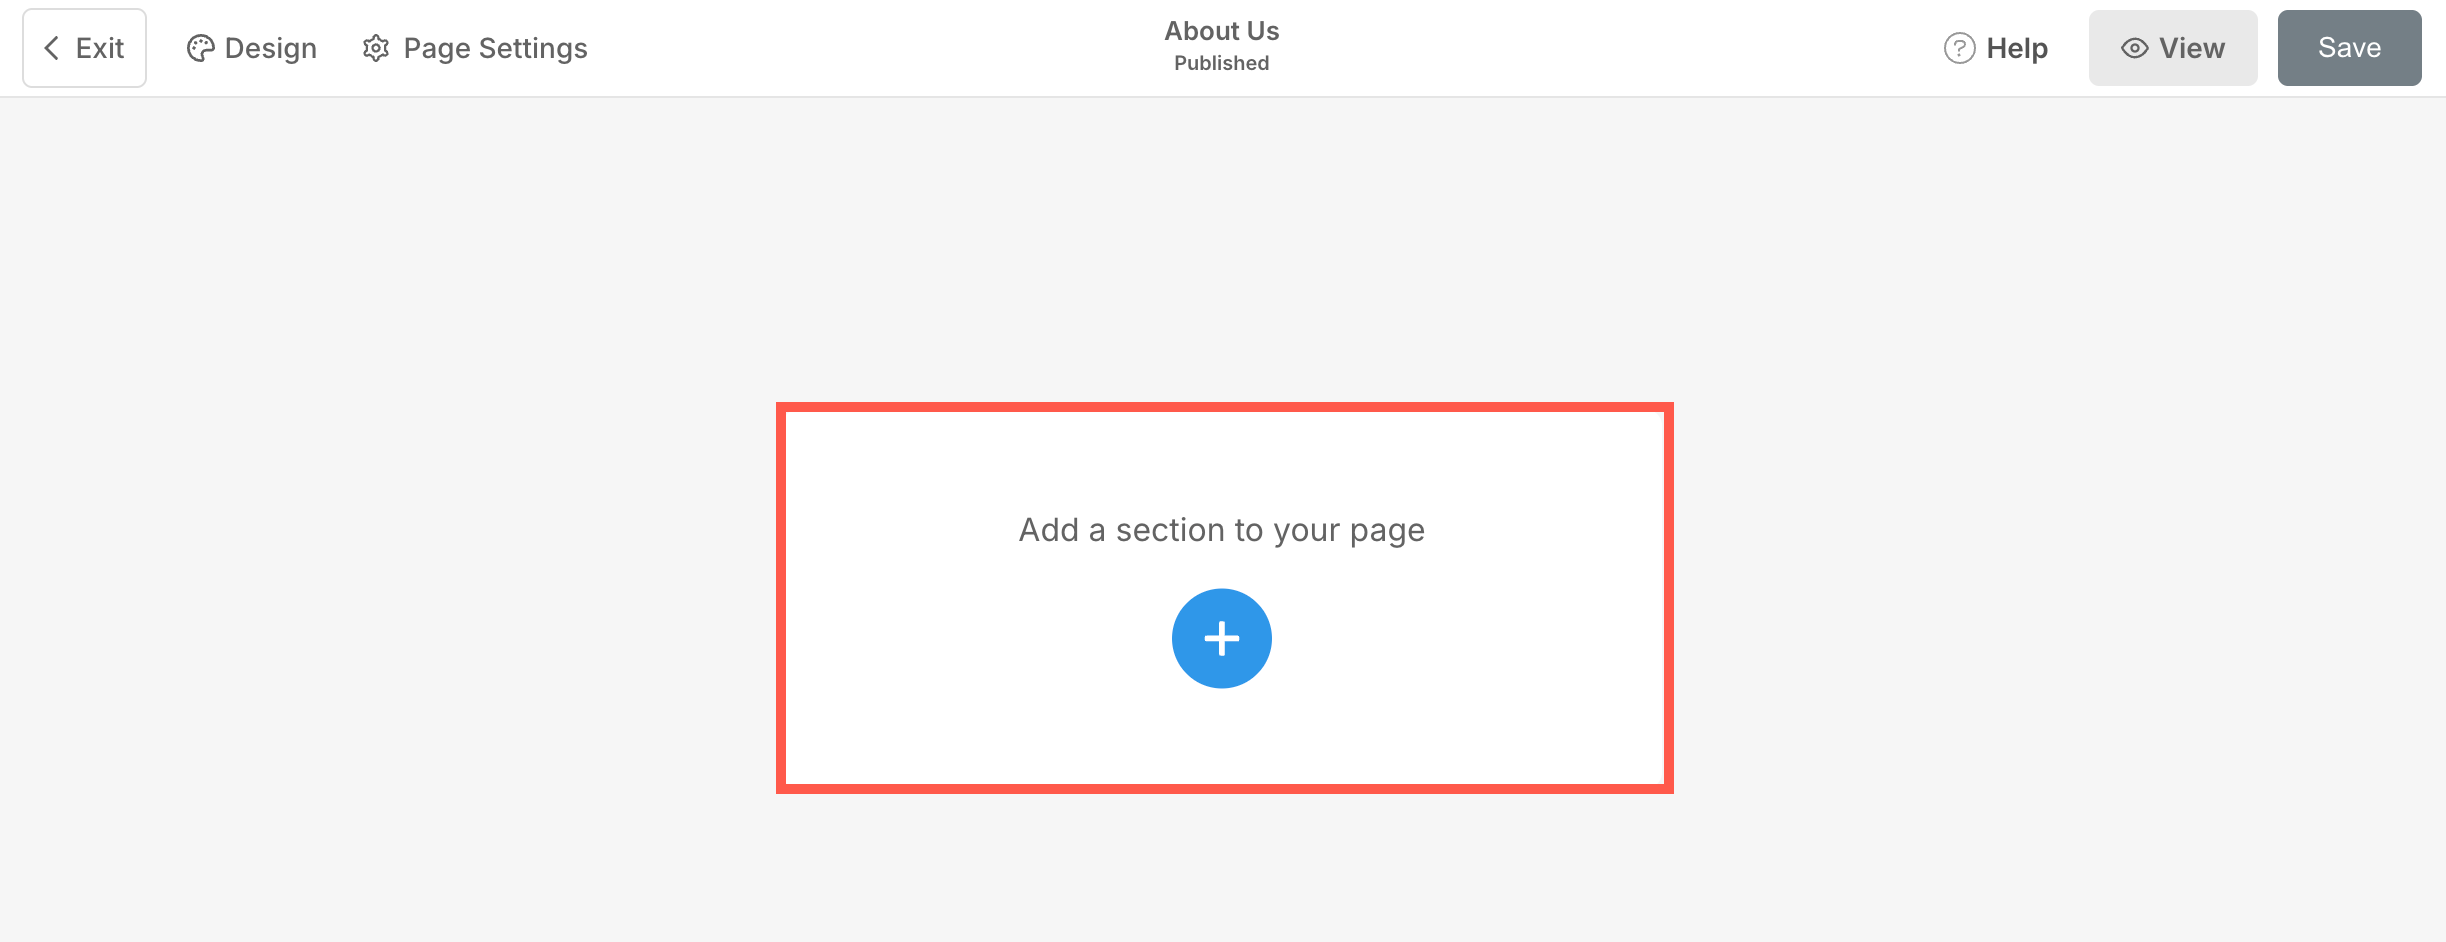
- A section can be added to a page. You can either add a section to an already existing page or create a new page within your website.
- On your page, click on the blue + icon to add a New Section to your page.
- You will now see the section categories on the left side.
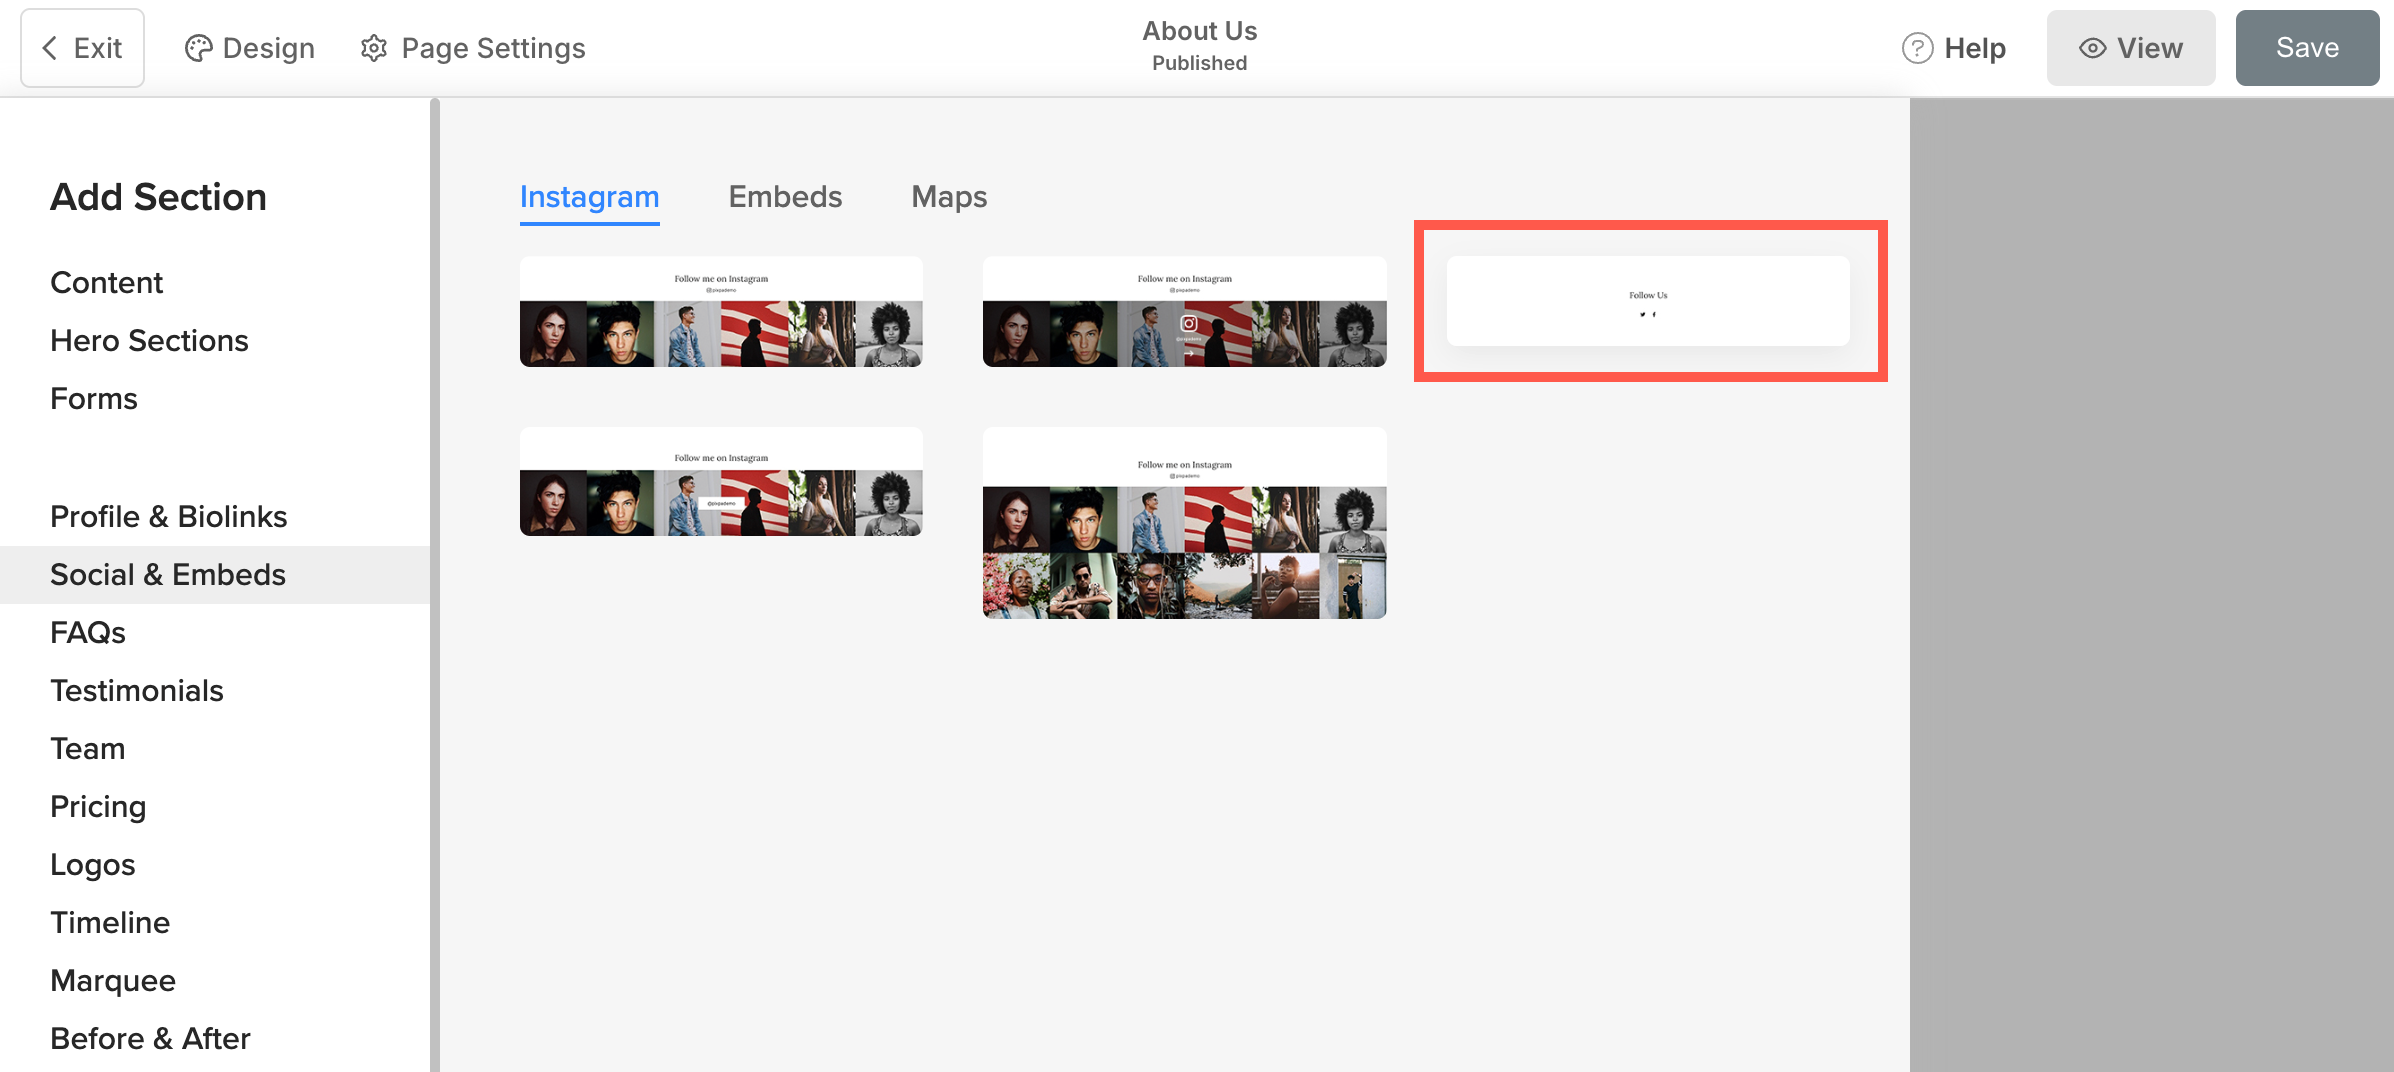
- Choose the Social & Embeds (1) category and click on the Instagram tab (2) where you can choose from different layouts of the Profile (3) section.
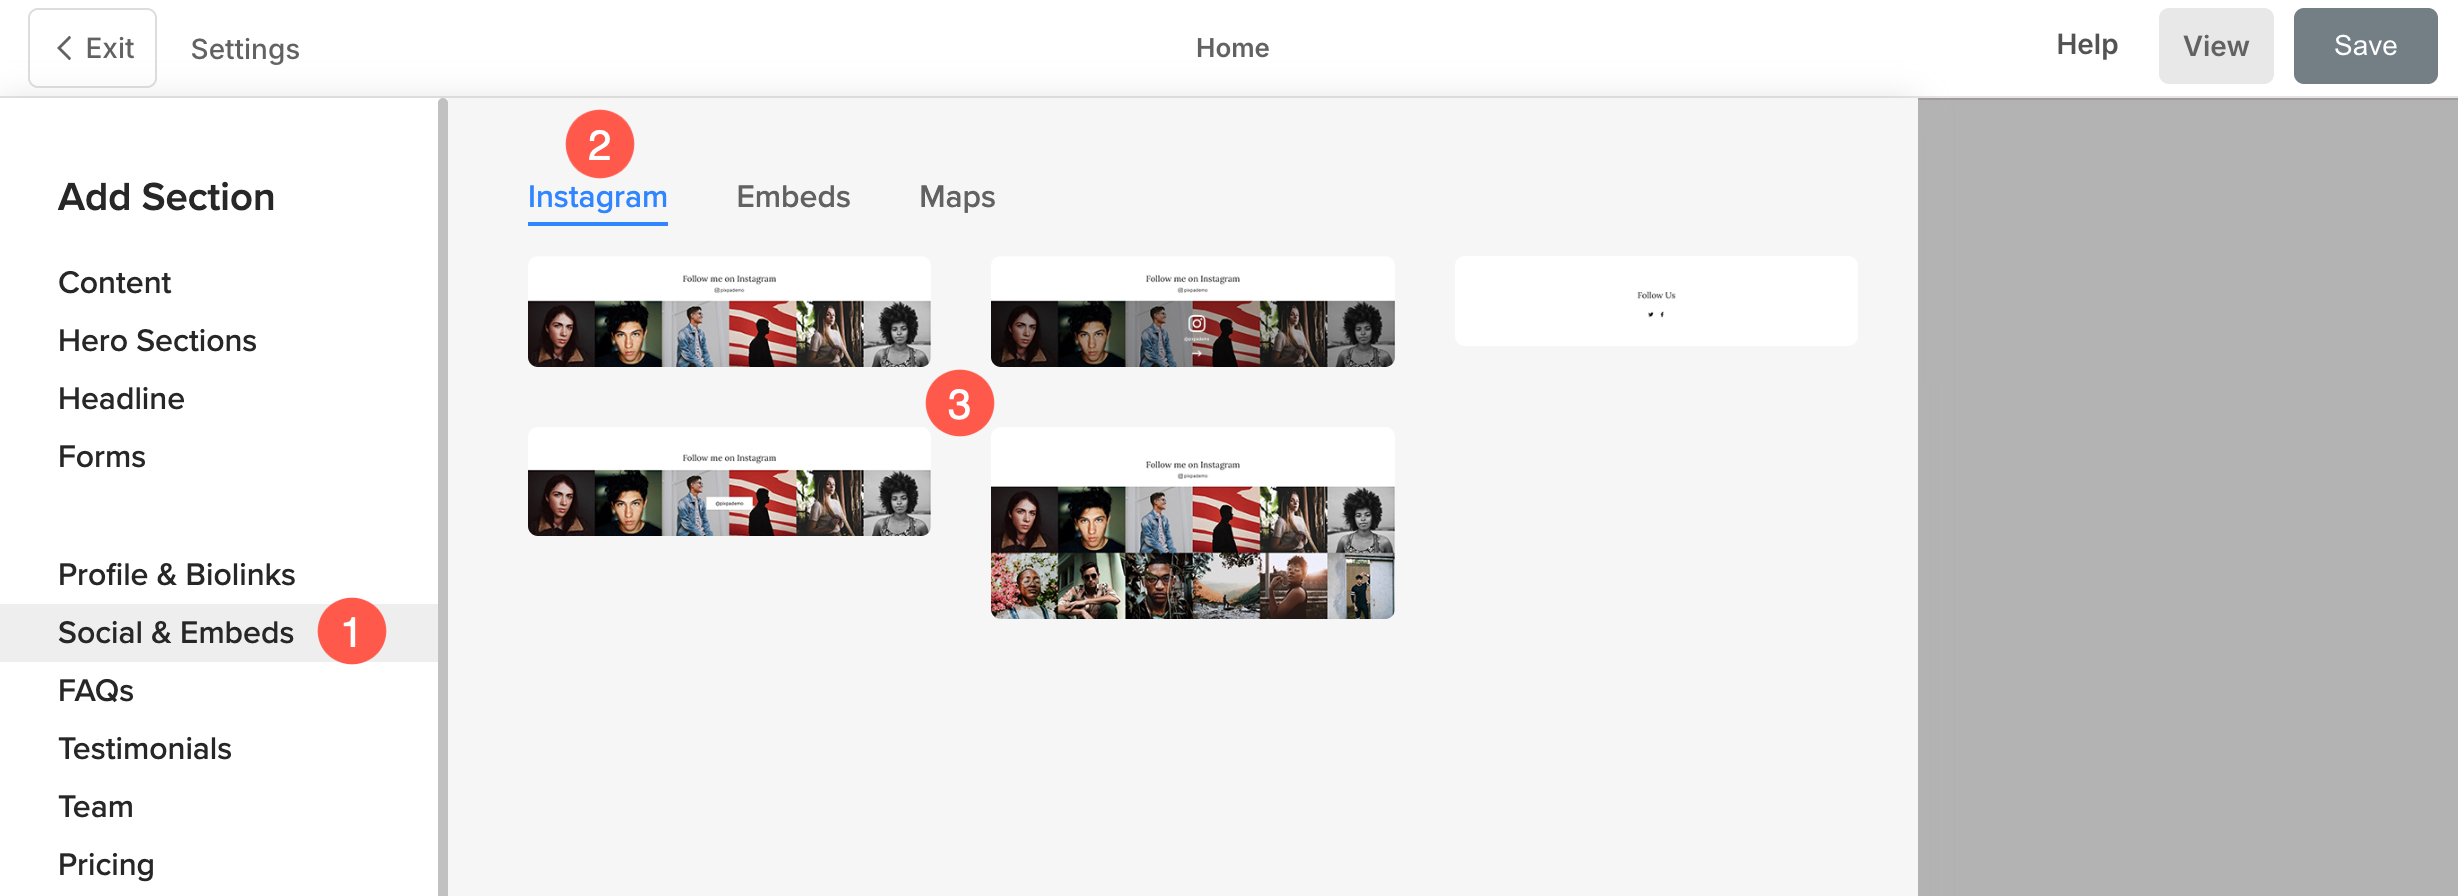
- Choose any section layout (2) and click on it to add it to your page.
Manage Instagram
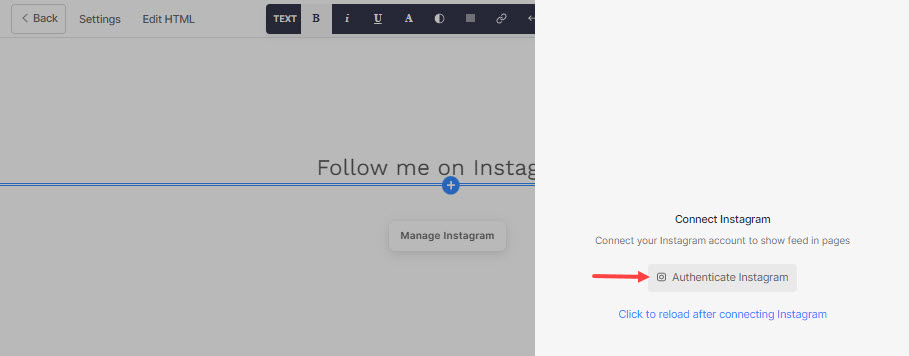
- In the next step, the selected Instagram section would be added to your page canvas area. Click on the Edit Social button now.

- On clicking, you will see the Authentication Instagram option on the right-hand side. Click on it.
- You would be redirected to Instagram for your account authentication in a new tab. Put in your username and password to authenticate your Instagram account.
- After you log in to Instagram, your account will get verified, and you will be redirected to the Integrations page.
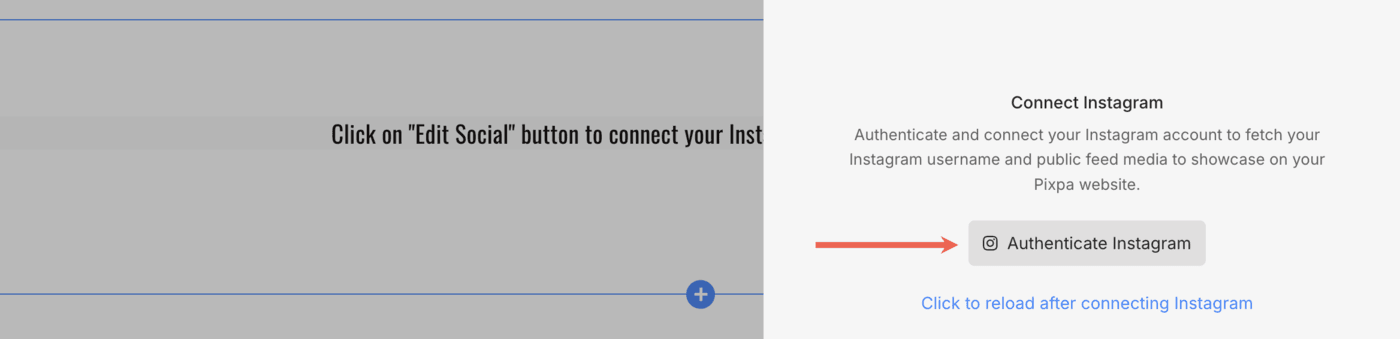
- Now, go back to the page (where you have added a social section) and click to reload link to refresh the feed.

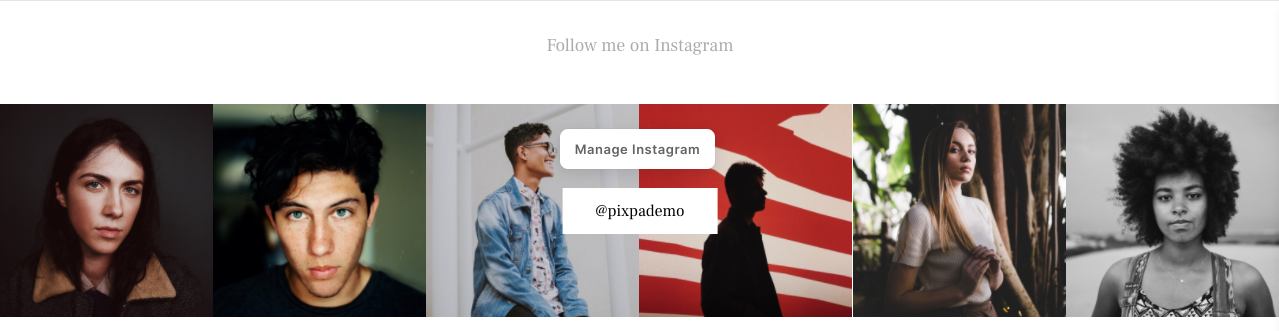
- Now, you would see your Instagram feed and other section settings on your page. Click on the Save button to publish the changes on the live site.
Style Your Instagram Feed
- Click on the Manage Instagram button.
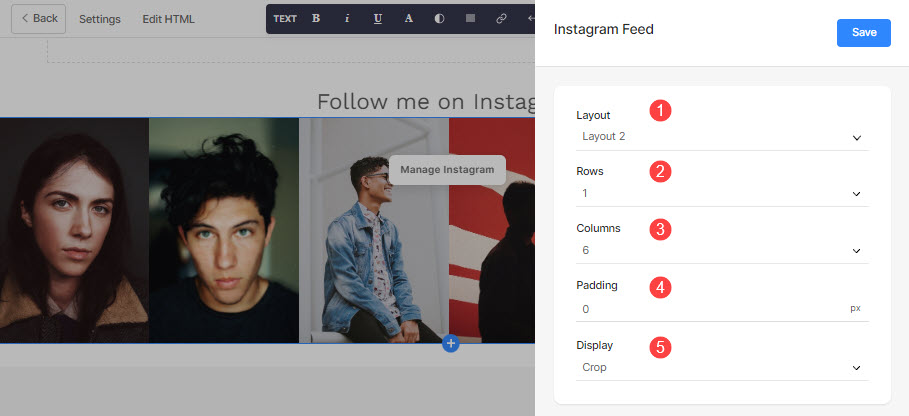
- Choose the layout (1) for the Instagram feed.
- Show up to 4 rows (2) of your Instagram feed.
- Set the number of Columns (3) for the feed. You can choose from 3 to 8 columns.
- Add padding (4) between your Instagram feed images.
- Show the feed images as Fit in the column or as cropped (5).
Troubleshoot Instagram
If you’re missing a collaboration post, it might not show up in your Instagram Feeds. Currently, the Instagram APIs we use don’t support collaboration posts.
If you upload a post directly to your account and tag another user in a collaboration, it should appear in your Instagram feeds.
However, if another user uploads a post and tags you as a collaborator, it won’t be displayed. Unfortunately, Facebook/Instagram hasn’t disclosed all the exceptions, thus we’re waiting for their developers to provide support for collaboration posts to ensure they’re correctly displayed in our Instagram Feeds.
Follow the steps mentioned below if you see error while authenticating Instagram
- Go to the Instagram settings.
- Search for the option – App Website Permissions
- Under App Website Permissions go to Apps and Websites.
If PixpaGallery2020 is there, remove it and then try authenticating Instagram again.
The social icons section
- To add the social icons section to your page, click on the marked layout of the Instagram section.
- Click on the Edit Content button to manage the social icons.
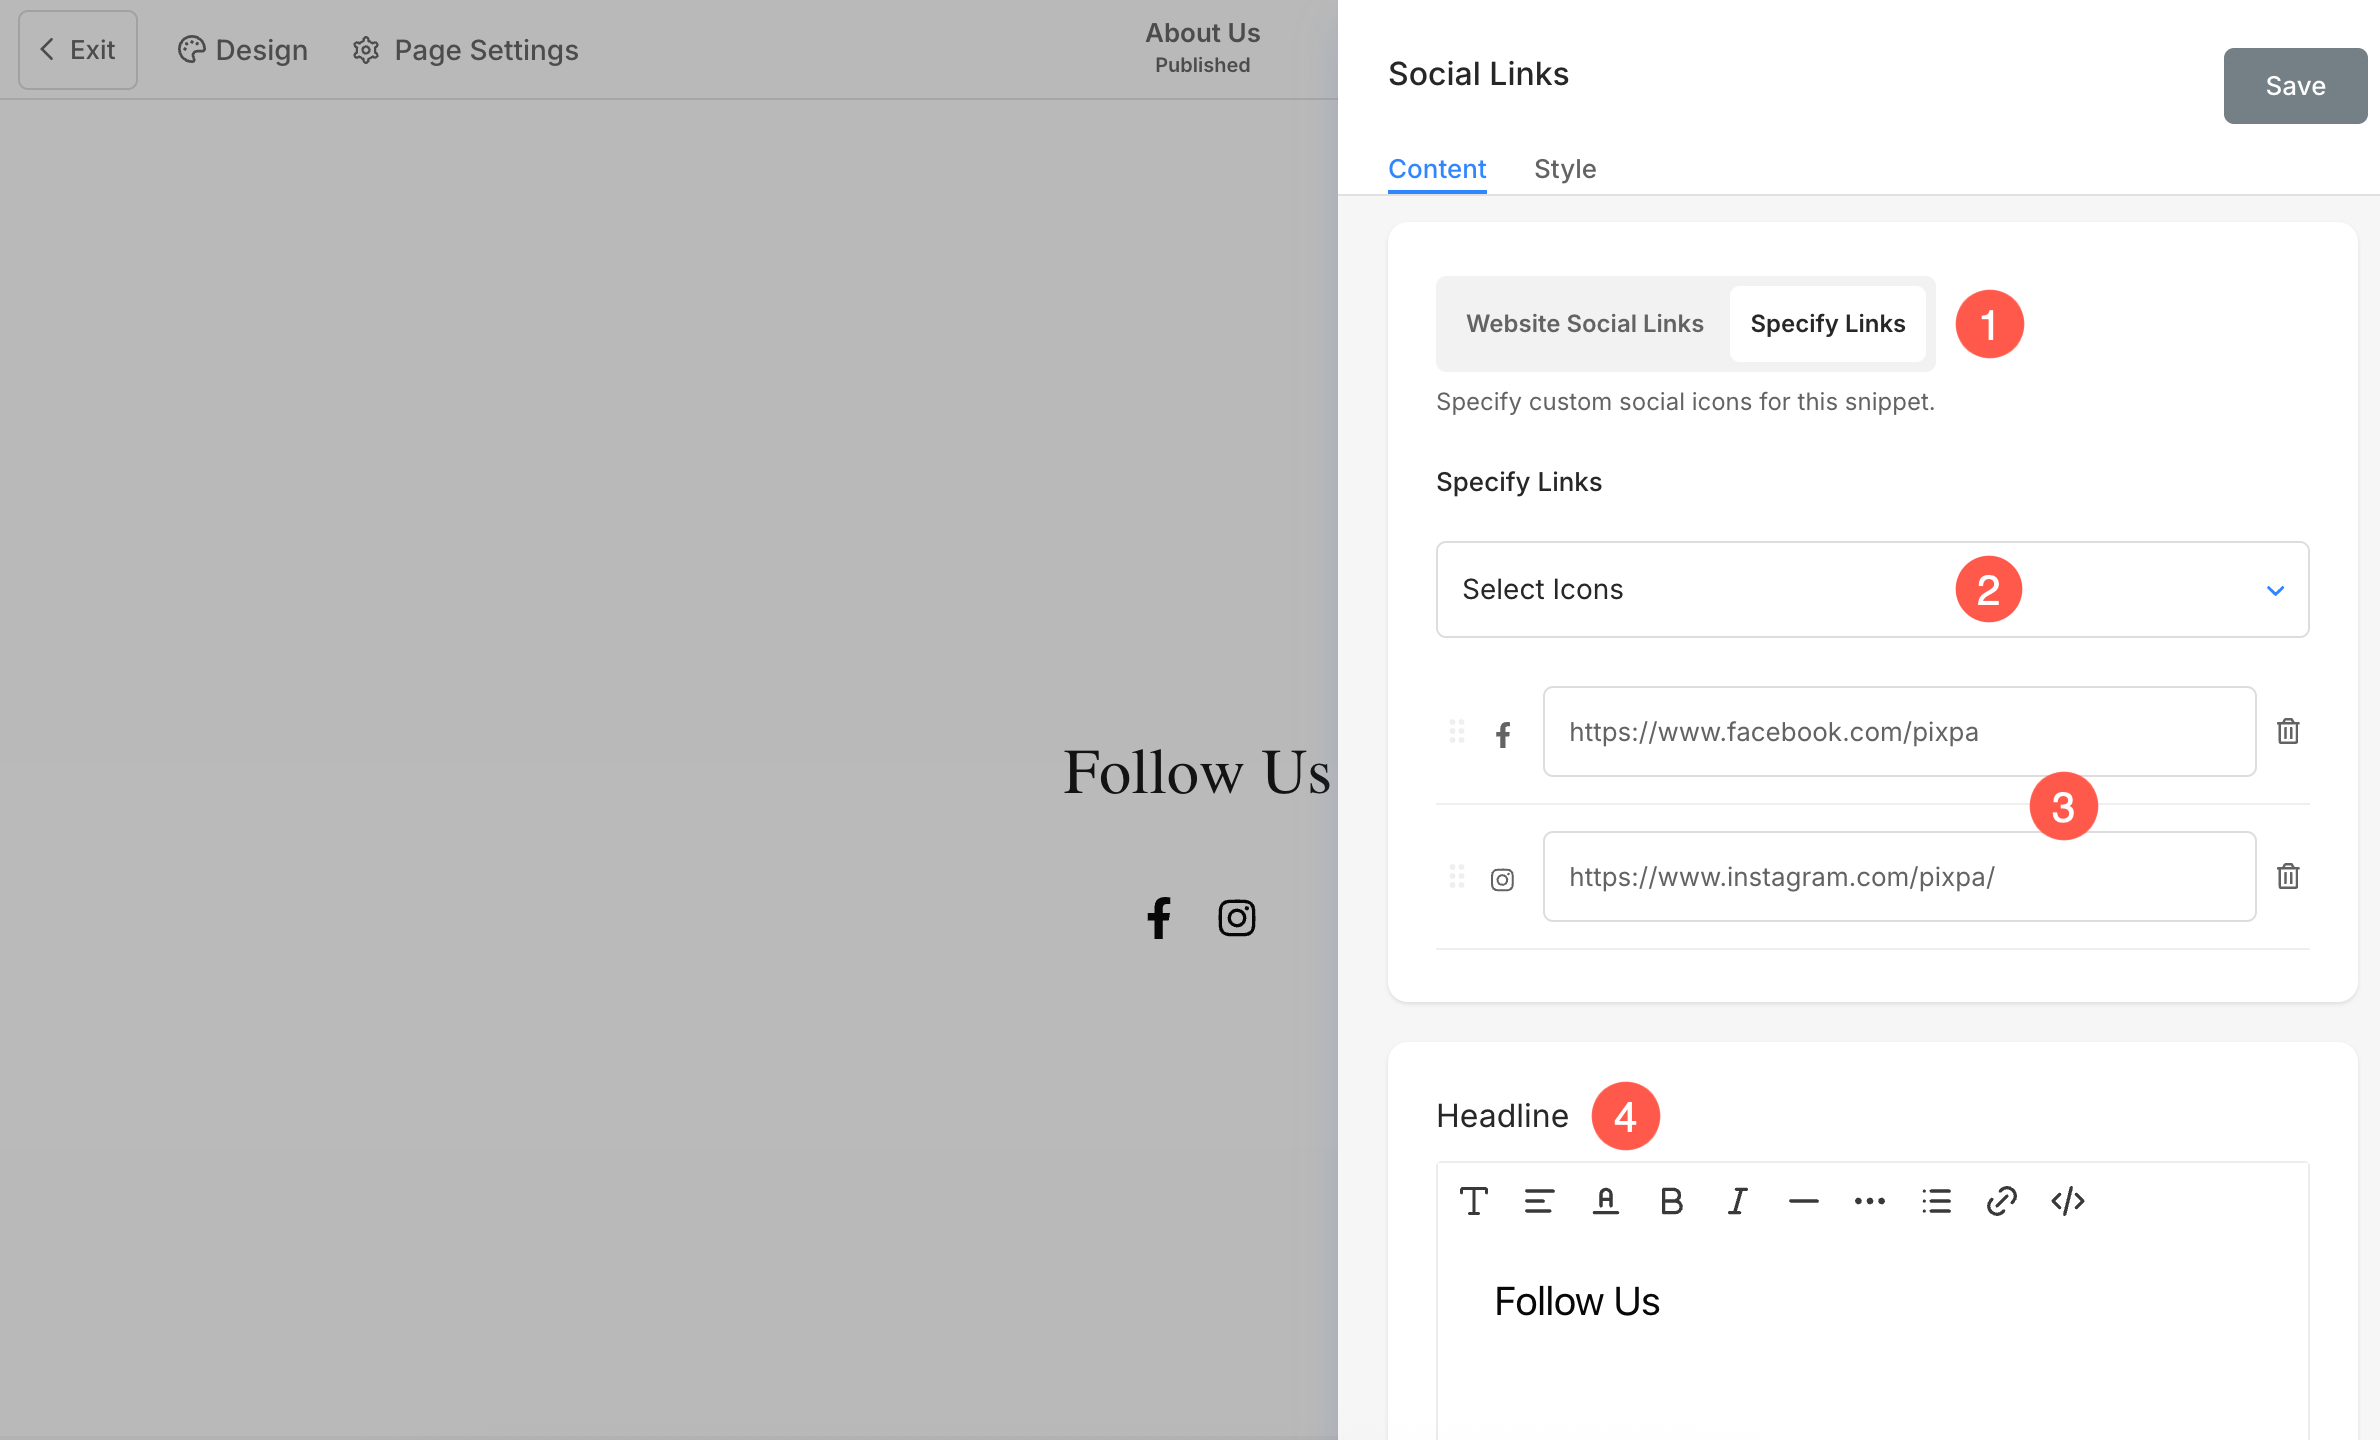
From the Manage Social Icons drawer, you can:
- Choose which links (1) get displayed here.
- In case you have selected the Website Social Links option, the social icons that exist on your website header or footer will be displayed here.
- Otherwise, you can specify the social icon (2), and then, enter the profile link (3).
- Specify the headline (4) of the section.
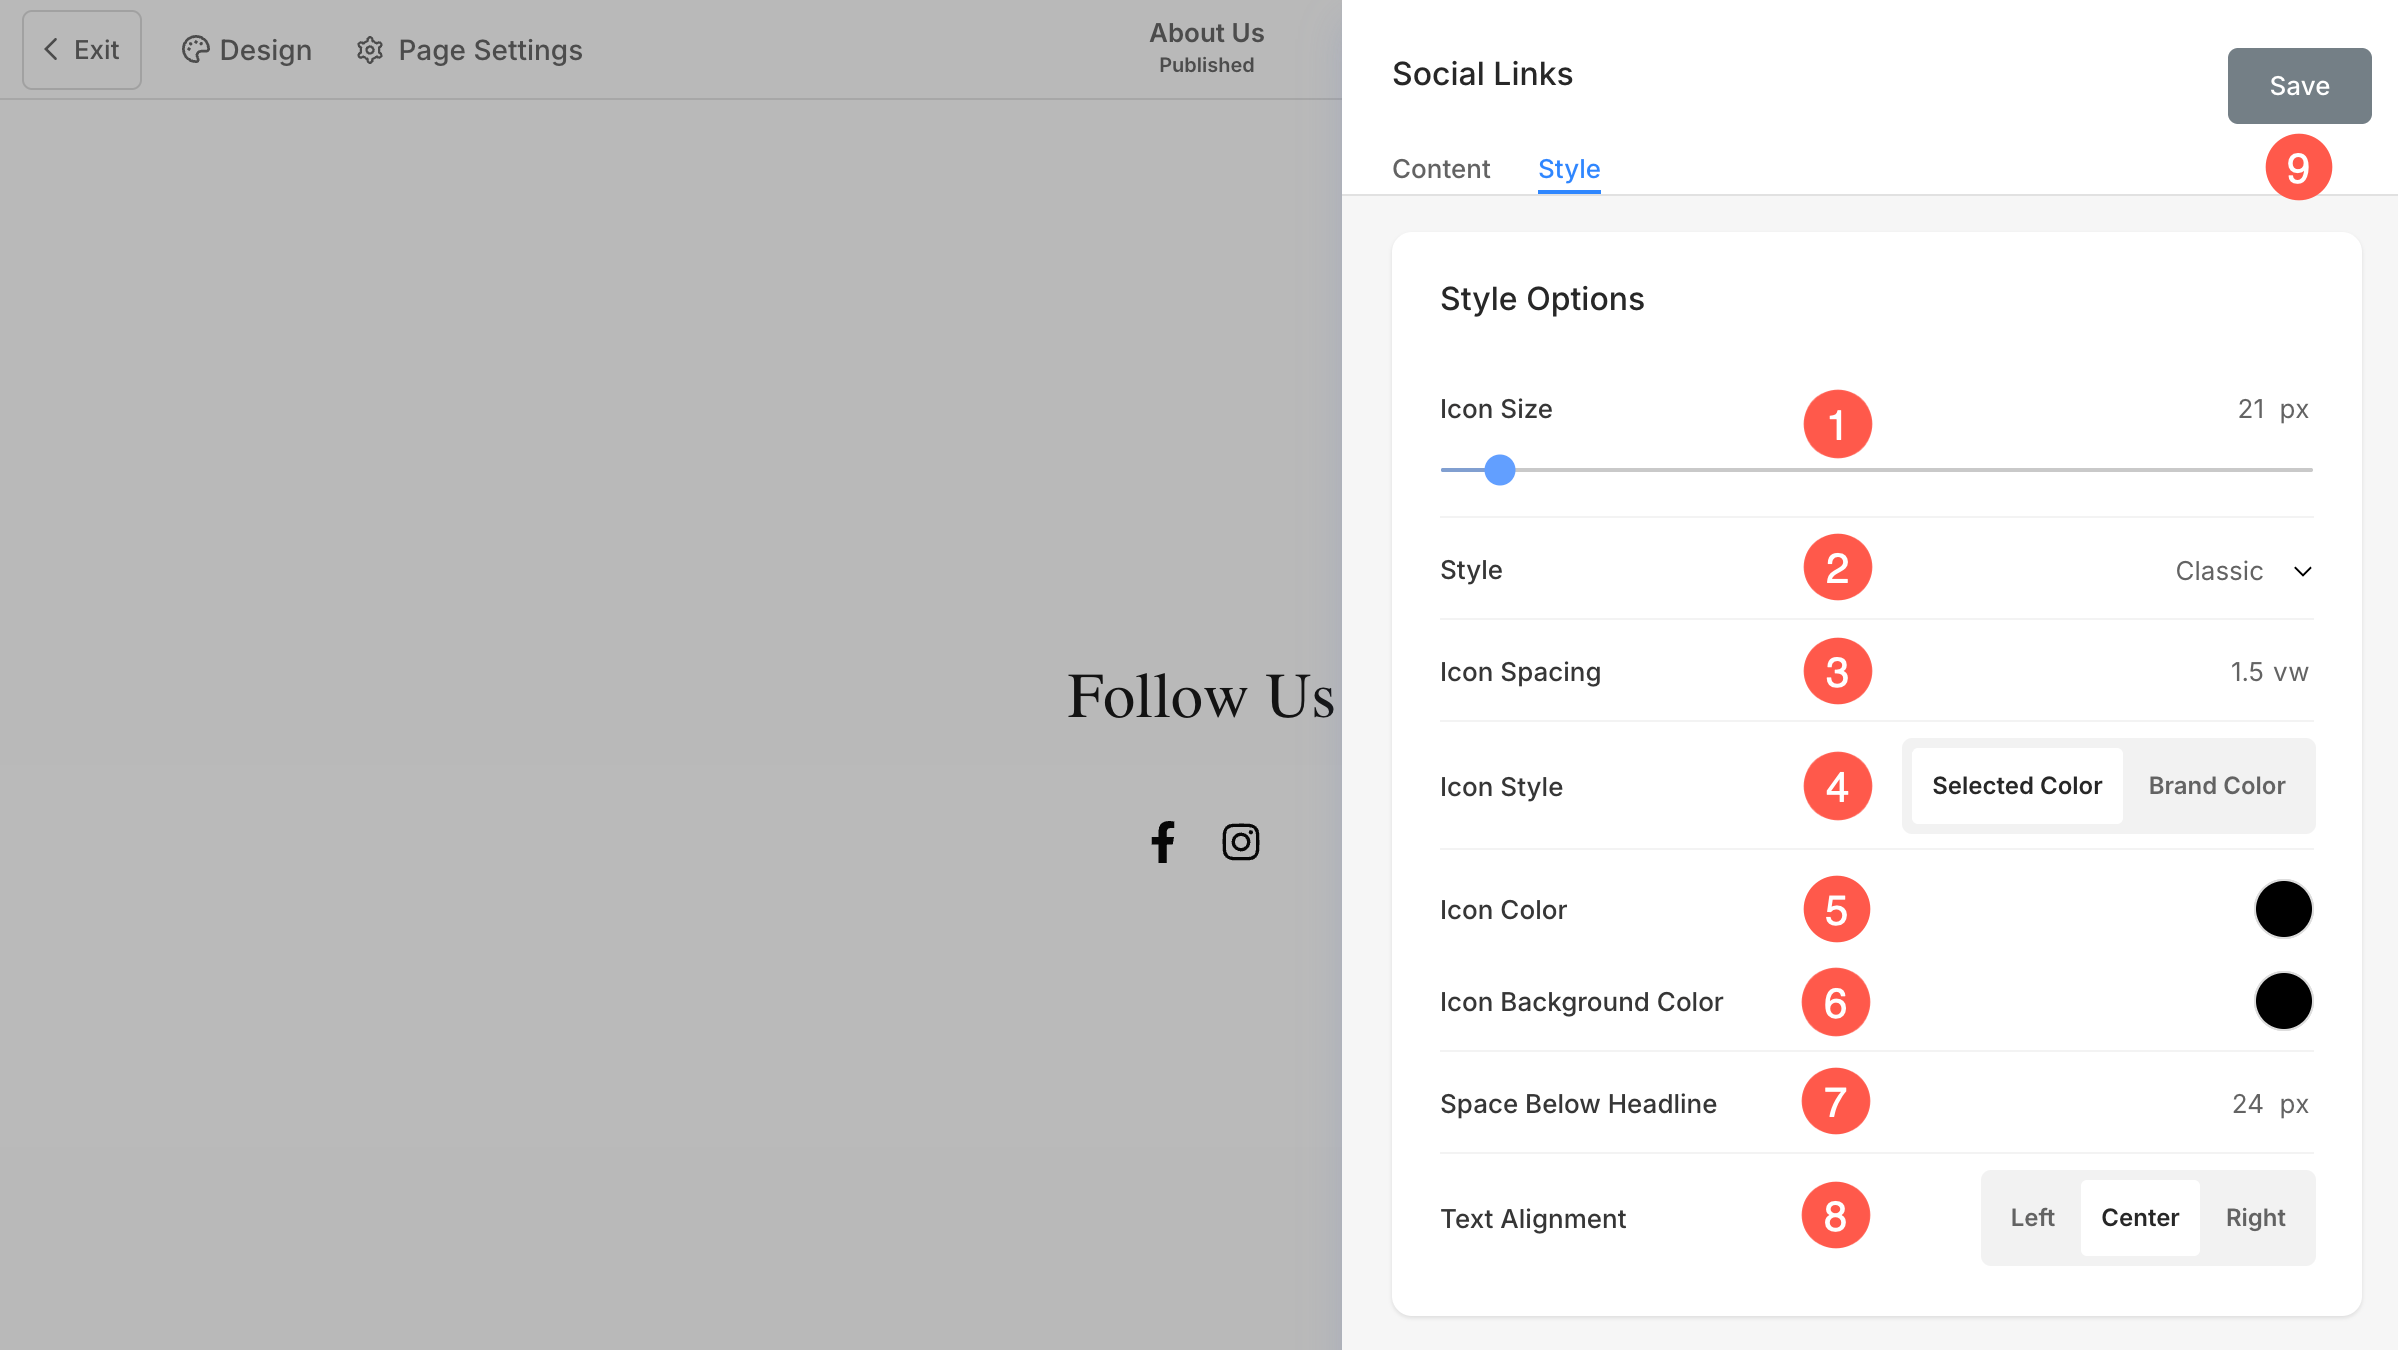
Style Options
- Adjust the Icon Size to increase or decrease the size of the social icons.
- Choose the Style of the social icons from the available options.
- Set the Icon Spacing to control the distance between each icon.
- Select the Icon Style as either Selected Color or Brand Color.
- If Selected Color is chosen, specify the Icon Color.
- Set the Icon Background Color if applicable to the selected style.
- Adjust the Space Below Headline to control the spacing between the heading and icons.
- Choose the Text Alignment for the section as left, center, or right.
- Click the Save button to apply the changes.