A Gallery is the foundation of any portfolio website.
The key use of galleries is to show multiple images/videos at once. Exhibit your images/videos and engage your website visitors using Galleries. You can add a gallery and customize it to achieve the look you want.
In this article:
Here’s a demo gallery.

This article explains how to create rich media galleries in Pixpa.
Add a Gallery

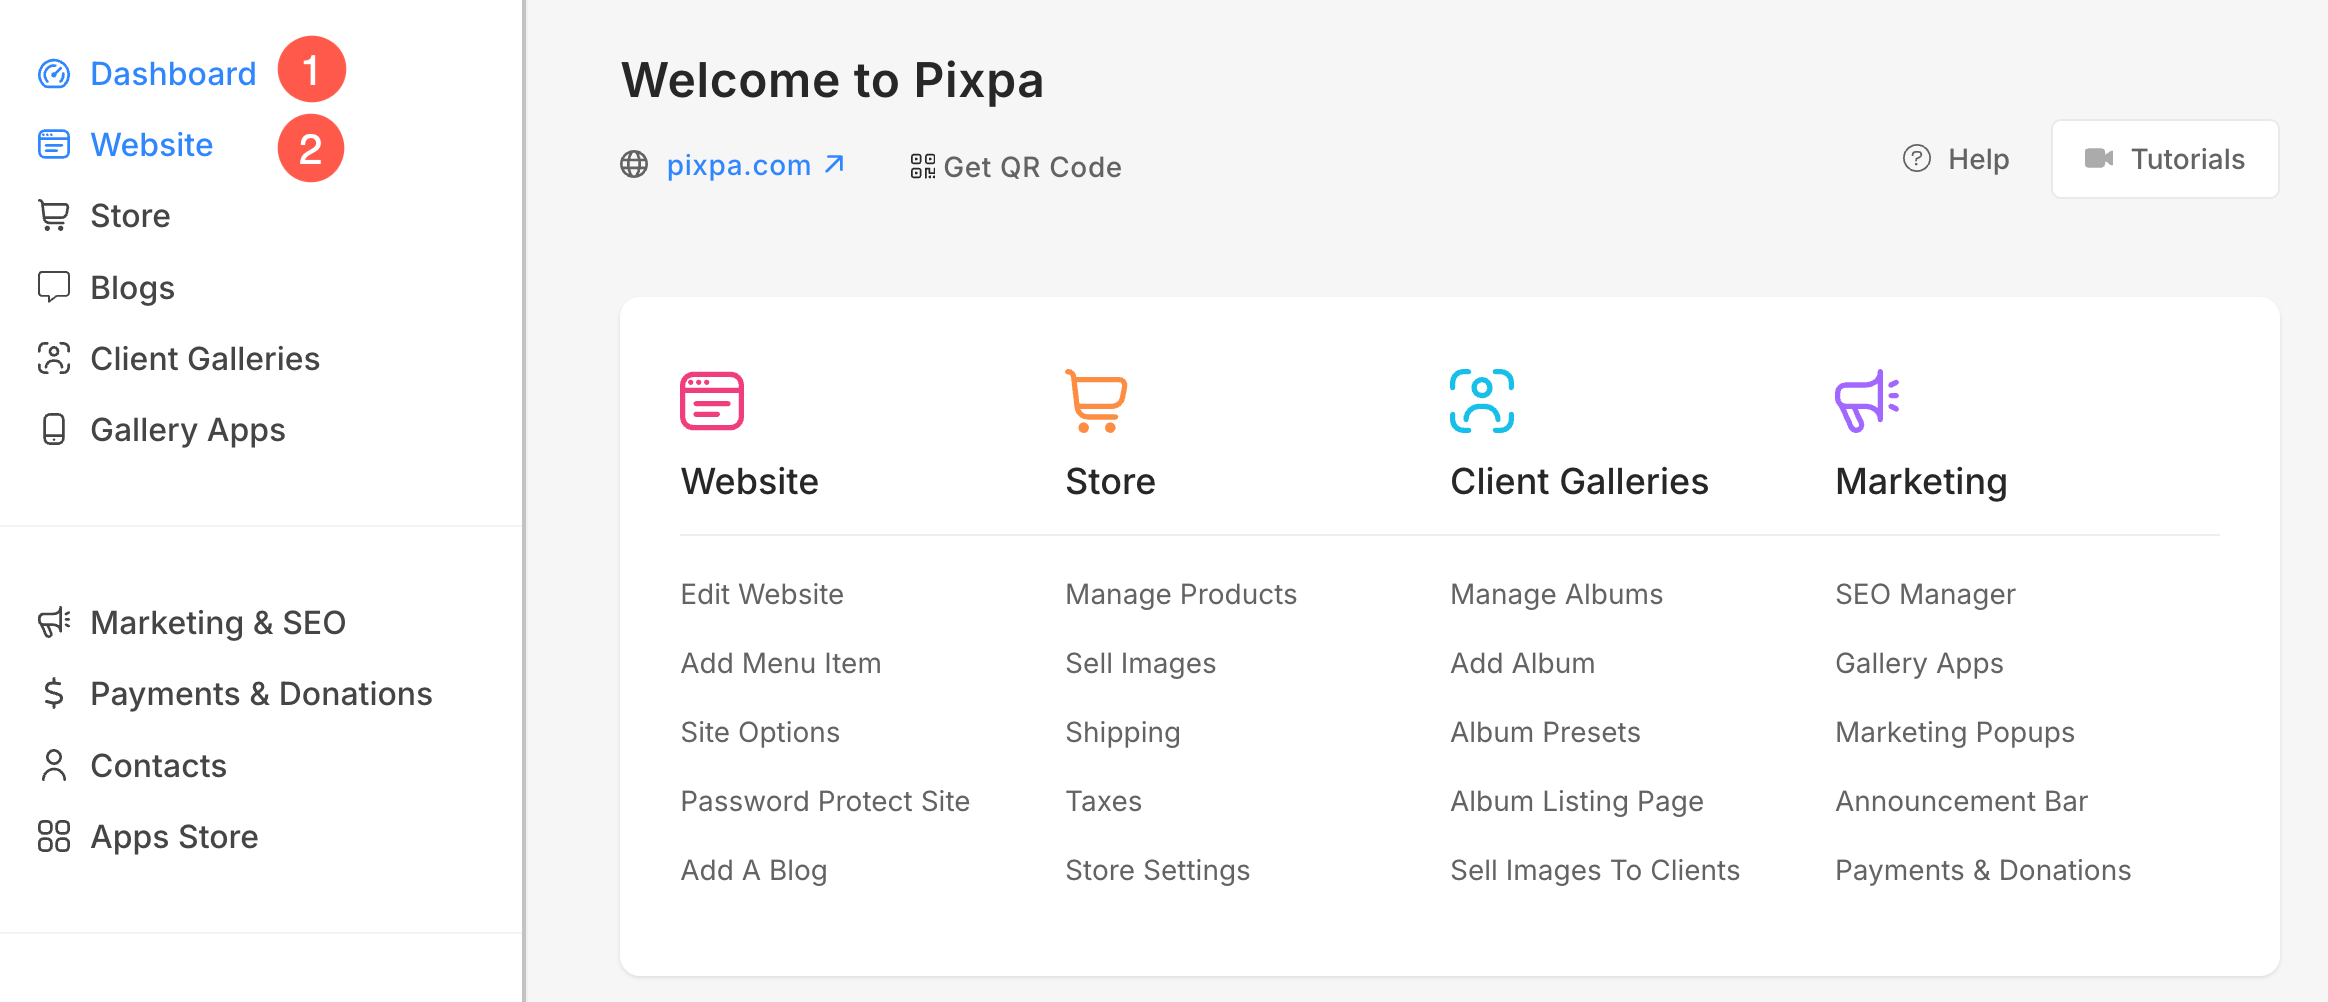
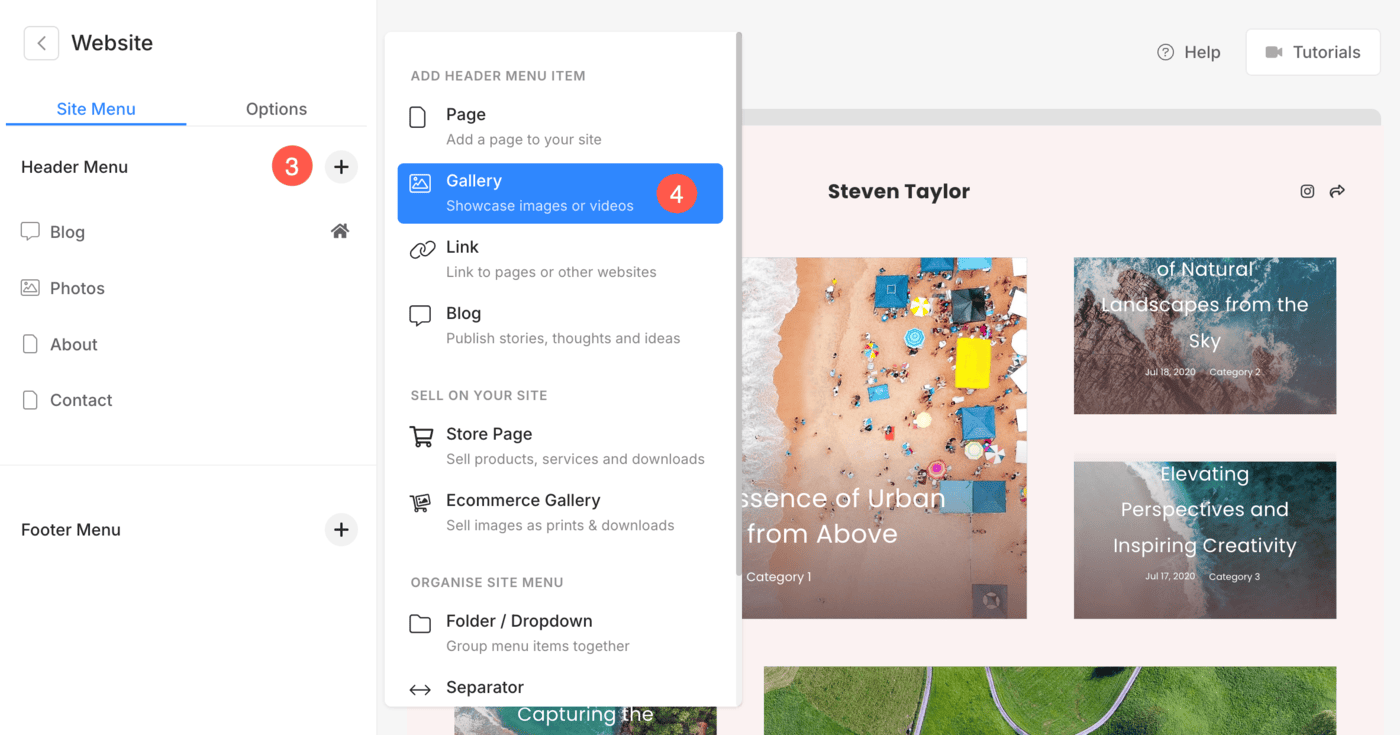
- You will see a Plus (+) (3) icon under the Header Menu. Click on it.
- A popup will open from where, you can add a Gallery (4) to your website.

- Specify a name for your new gallery.
- That’s it. The gallery is added now.
- You would see this gallery on your Website menu at the last. You can drag and drop the same to a desired position on the Website menu.
Gallery Overview
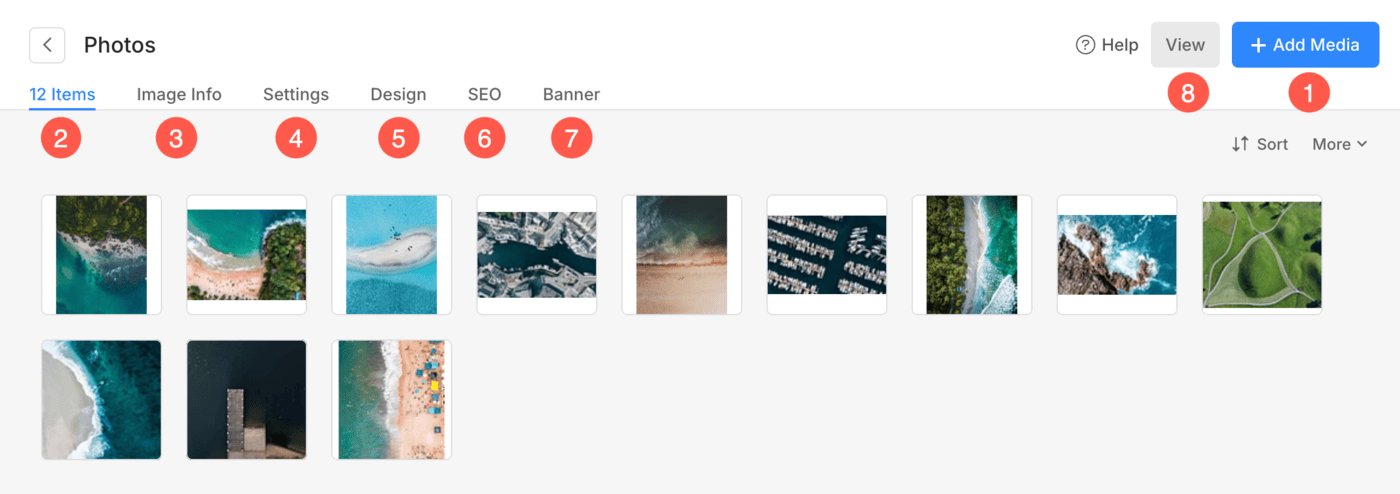
As you add the gallery, you would be able to add your items (Images, Videos, and HTML slides), manage settings, manage the design, and enable the banner in the gallery.
- Click on the Add Media (1) button to add any Images, Videos, or HTML slides.
- See the total number of items (2) in the gallery.
- Specify Captions (3) for images.
- Manage settings (4) of the gallery.
- Edit the particular gallery design (5) like layouts, grid spacing, display modes, grid hovers, and much more.
- Manage the SEO (6) settings of the gallery.
- Enable a full-width Banner (7) on the gallery top or bottom.
- Click View (8) to preview your gallery.

