Announcement Bar is a great feature available on websites built on Pixpa. You can use it for many purposes.
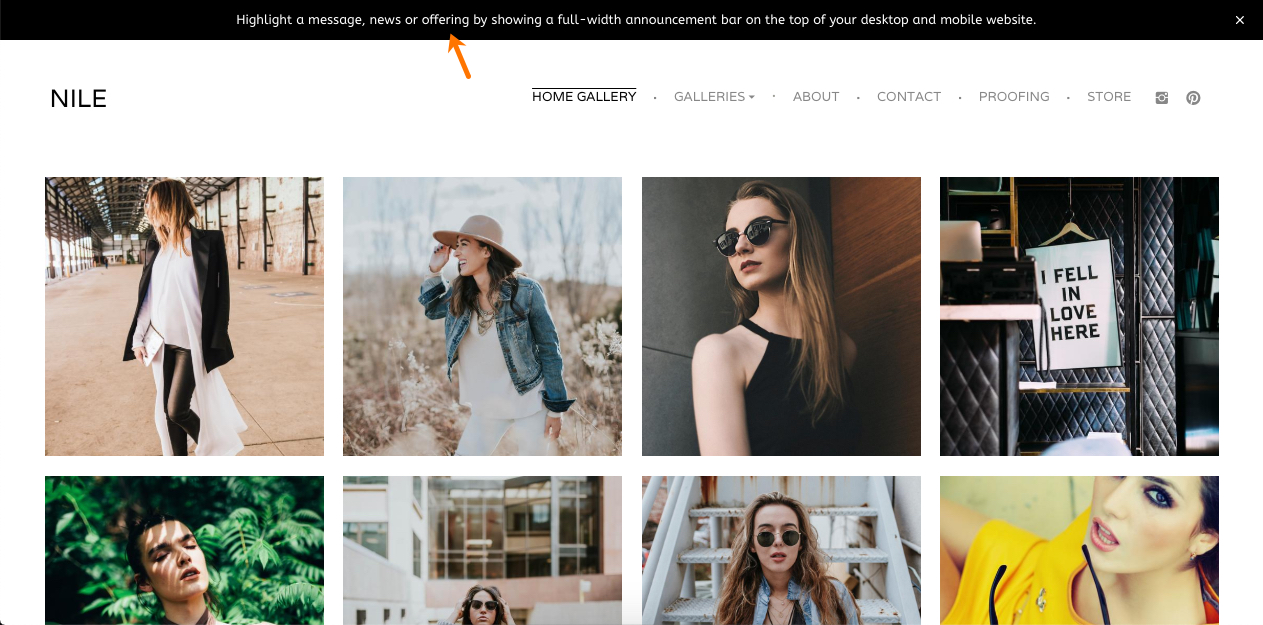
The Announcement Bar is a full-width bar that sits right on top of your website (above the header) and hence becomes the first thing that your site visitors will notice.
This makes it a great place to highlight any important information that you want your site visitors to see and not miss out.
You can style the announcement bar according to your website design, add a link to the whole bar, or just to a portion of the text in it.
The Announcement Bar appears on all pages of your website until the site visitor decides to close it by using the X button on the right corner.
In this article:
- Announcement Bar
- Announcement Text
- Schedule Announcement
- Call to Action Links
- Announcement Bar Style
- Reset Visibility
Build your Announcement Bar
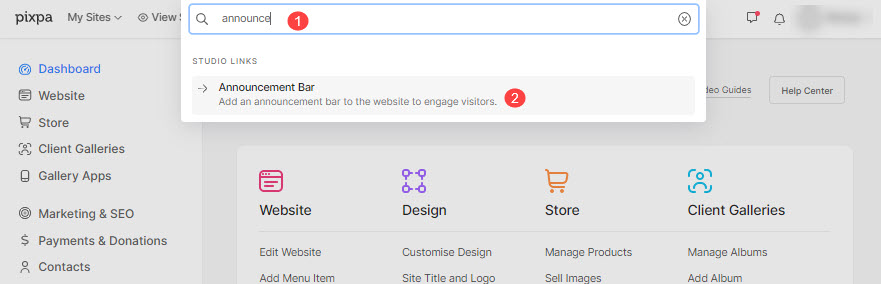
- Enter Announcement (1) in the Search Bar.
- From the related results, click on the Announcement Bar option (2) under Studio Links.
- You will now reach the Announcement Bar (3) page.
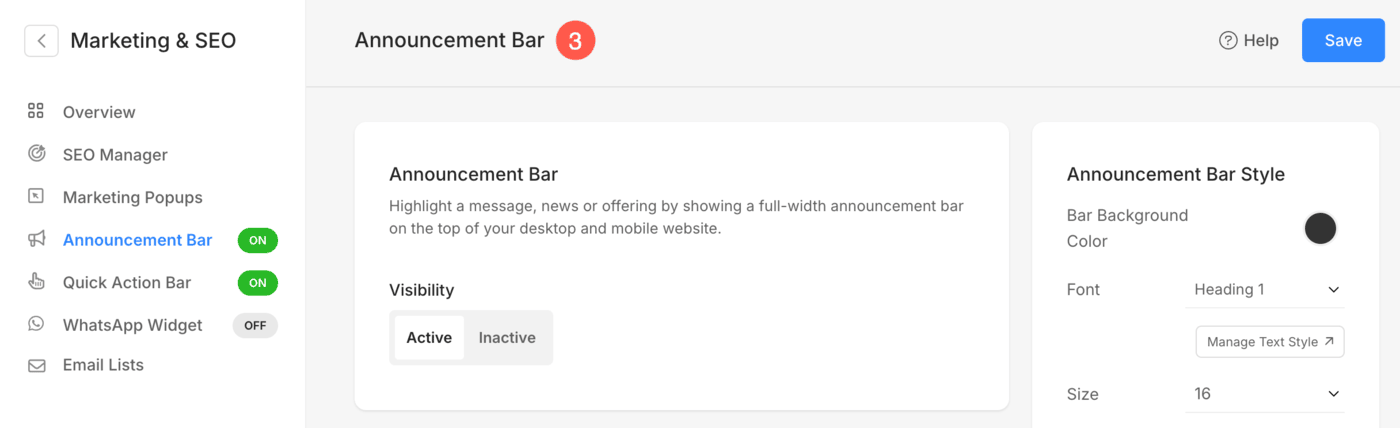
Announcement Bar
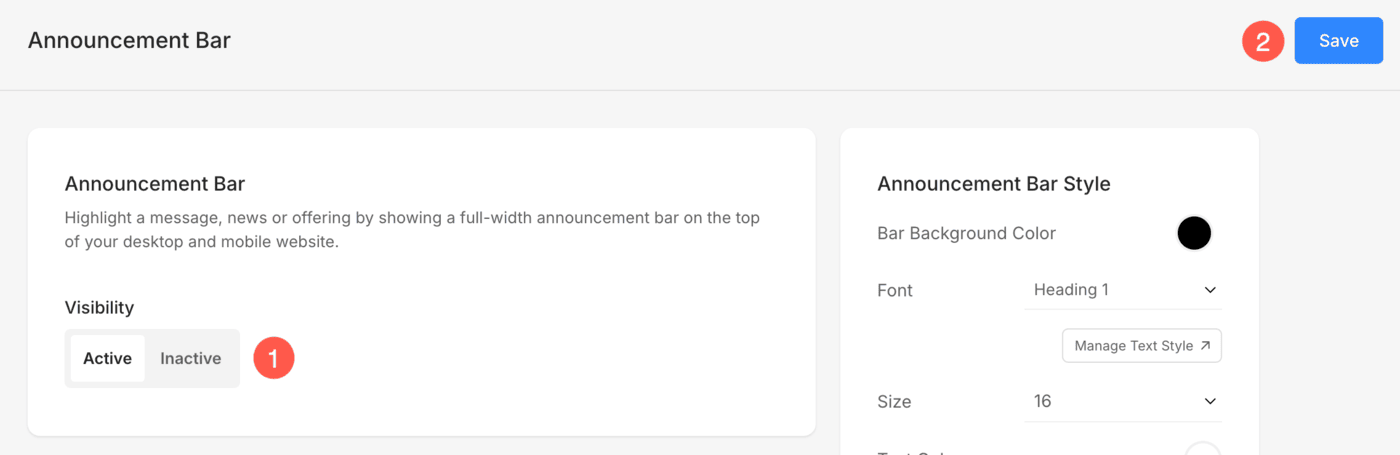
- Set the Visibility of Announcement bar as Active or Inactive.
- Save the changes.
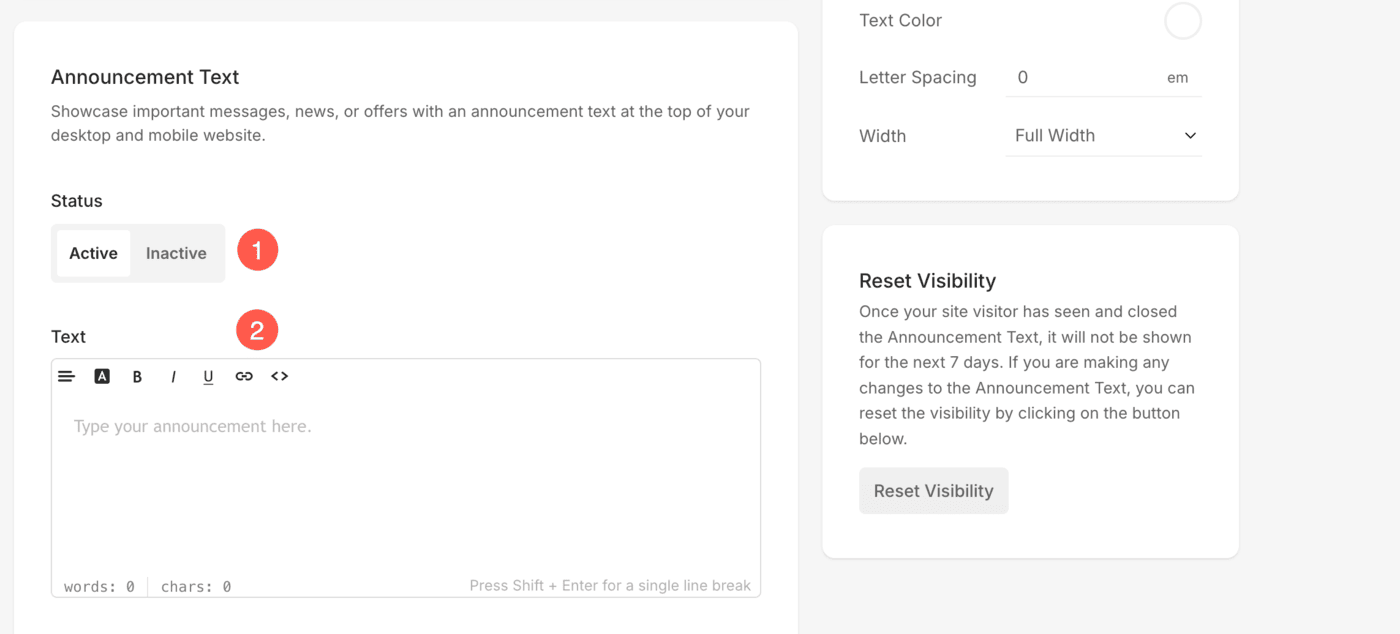
Announcement Text
- Status: Set the visibility status of text under under announcement bar as Active / Inactive. You don’t need to delete the text in order to remove it from the website.
- Text: Specify the text to display in the announcement bar.
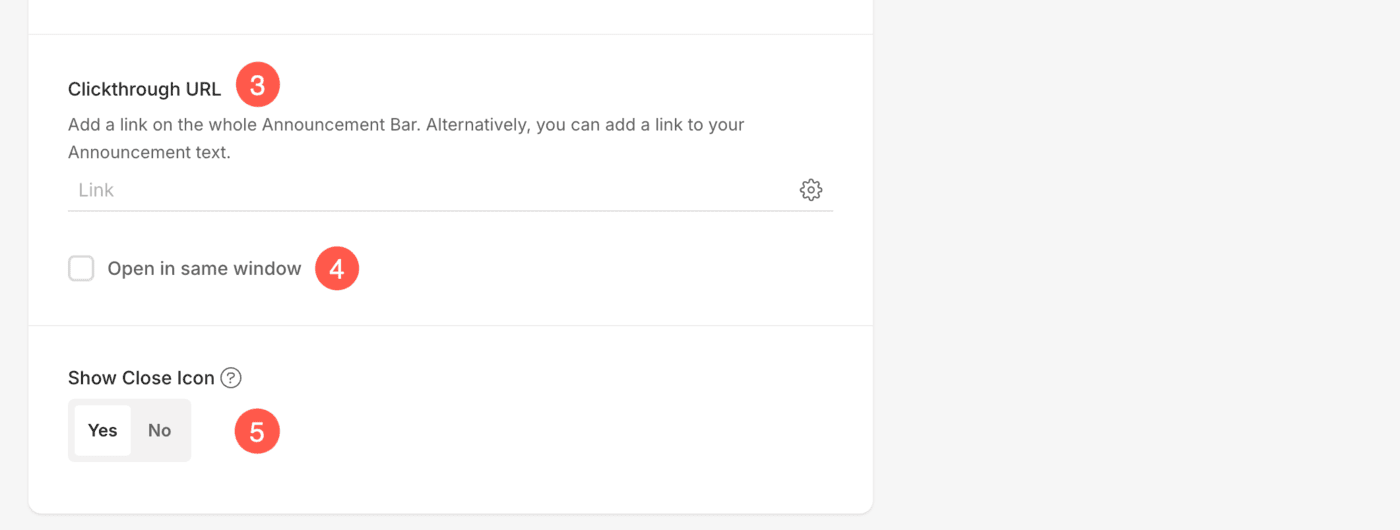
- Clickthrough URL:
- Open in same window: Tick this checkbox to open the link of the clickthrough URL in the same window.
- Show close icon: Select Yes to enable the close ‘X’ icon on the announcement bar.
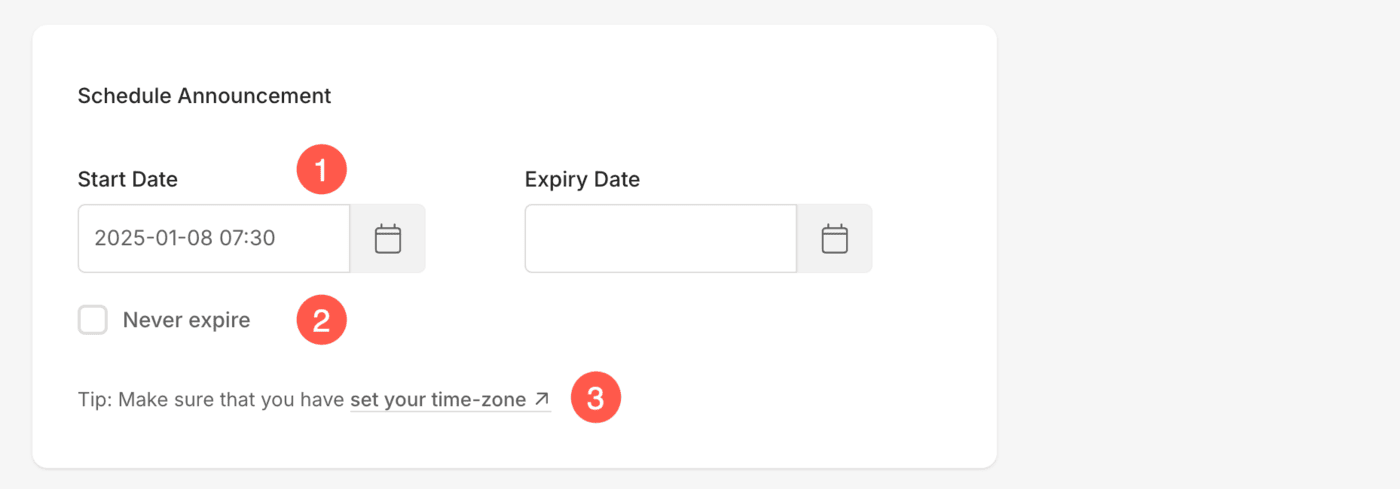
Schedule Announcement
- Schedule Announcement Bar: Schedule the appearance of the announcement bar from a particular date. Select the date from the date-picker under Start Date.
- Never Expire: Tick this checkbox to ensure that the announcement bar doesn’t expire and will always be visible unless disabled.
- Ensure your time zone is correctly set to ensure the announcement displays and expires at the intended times.
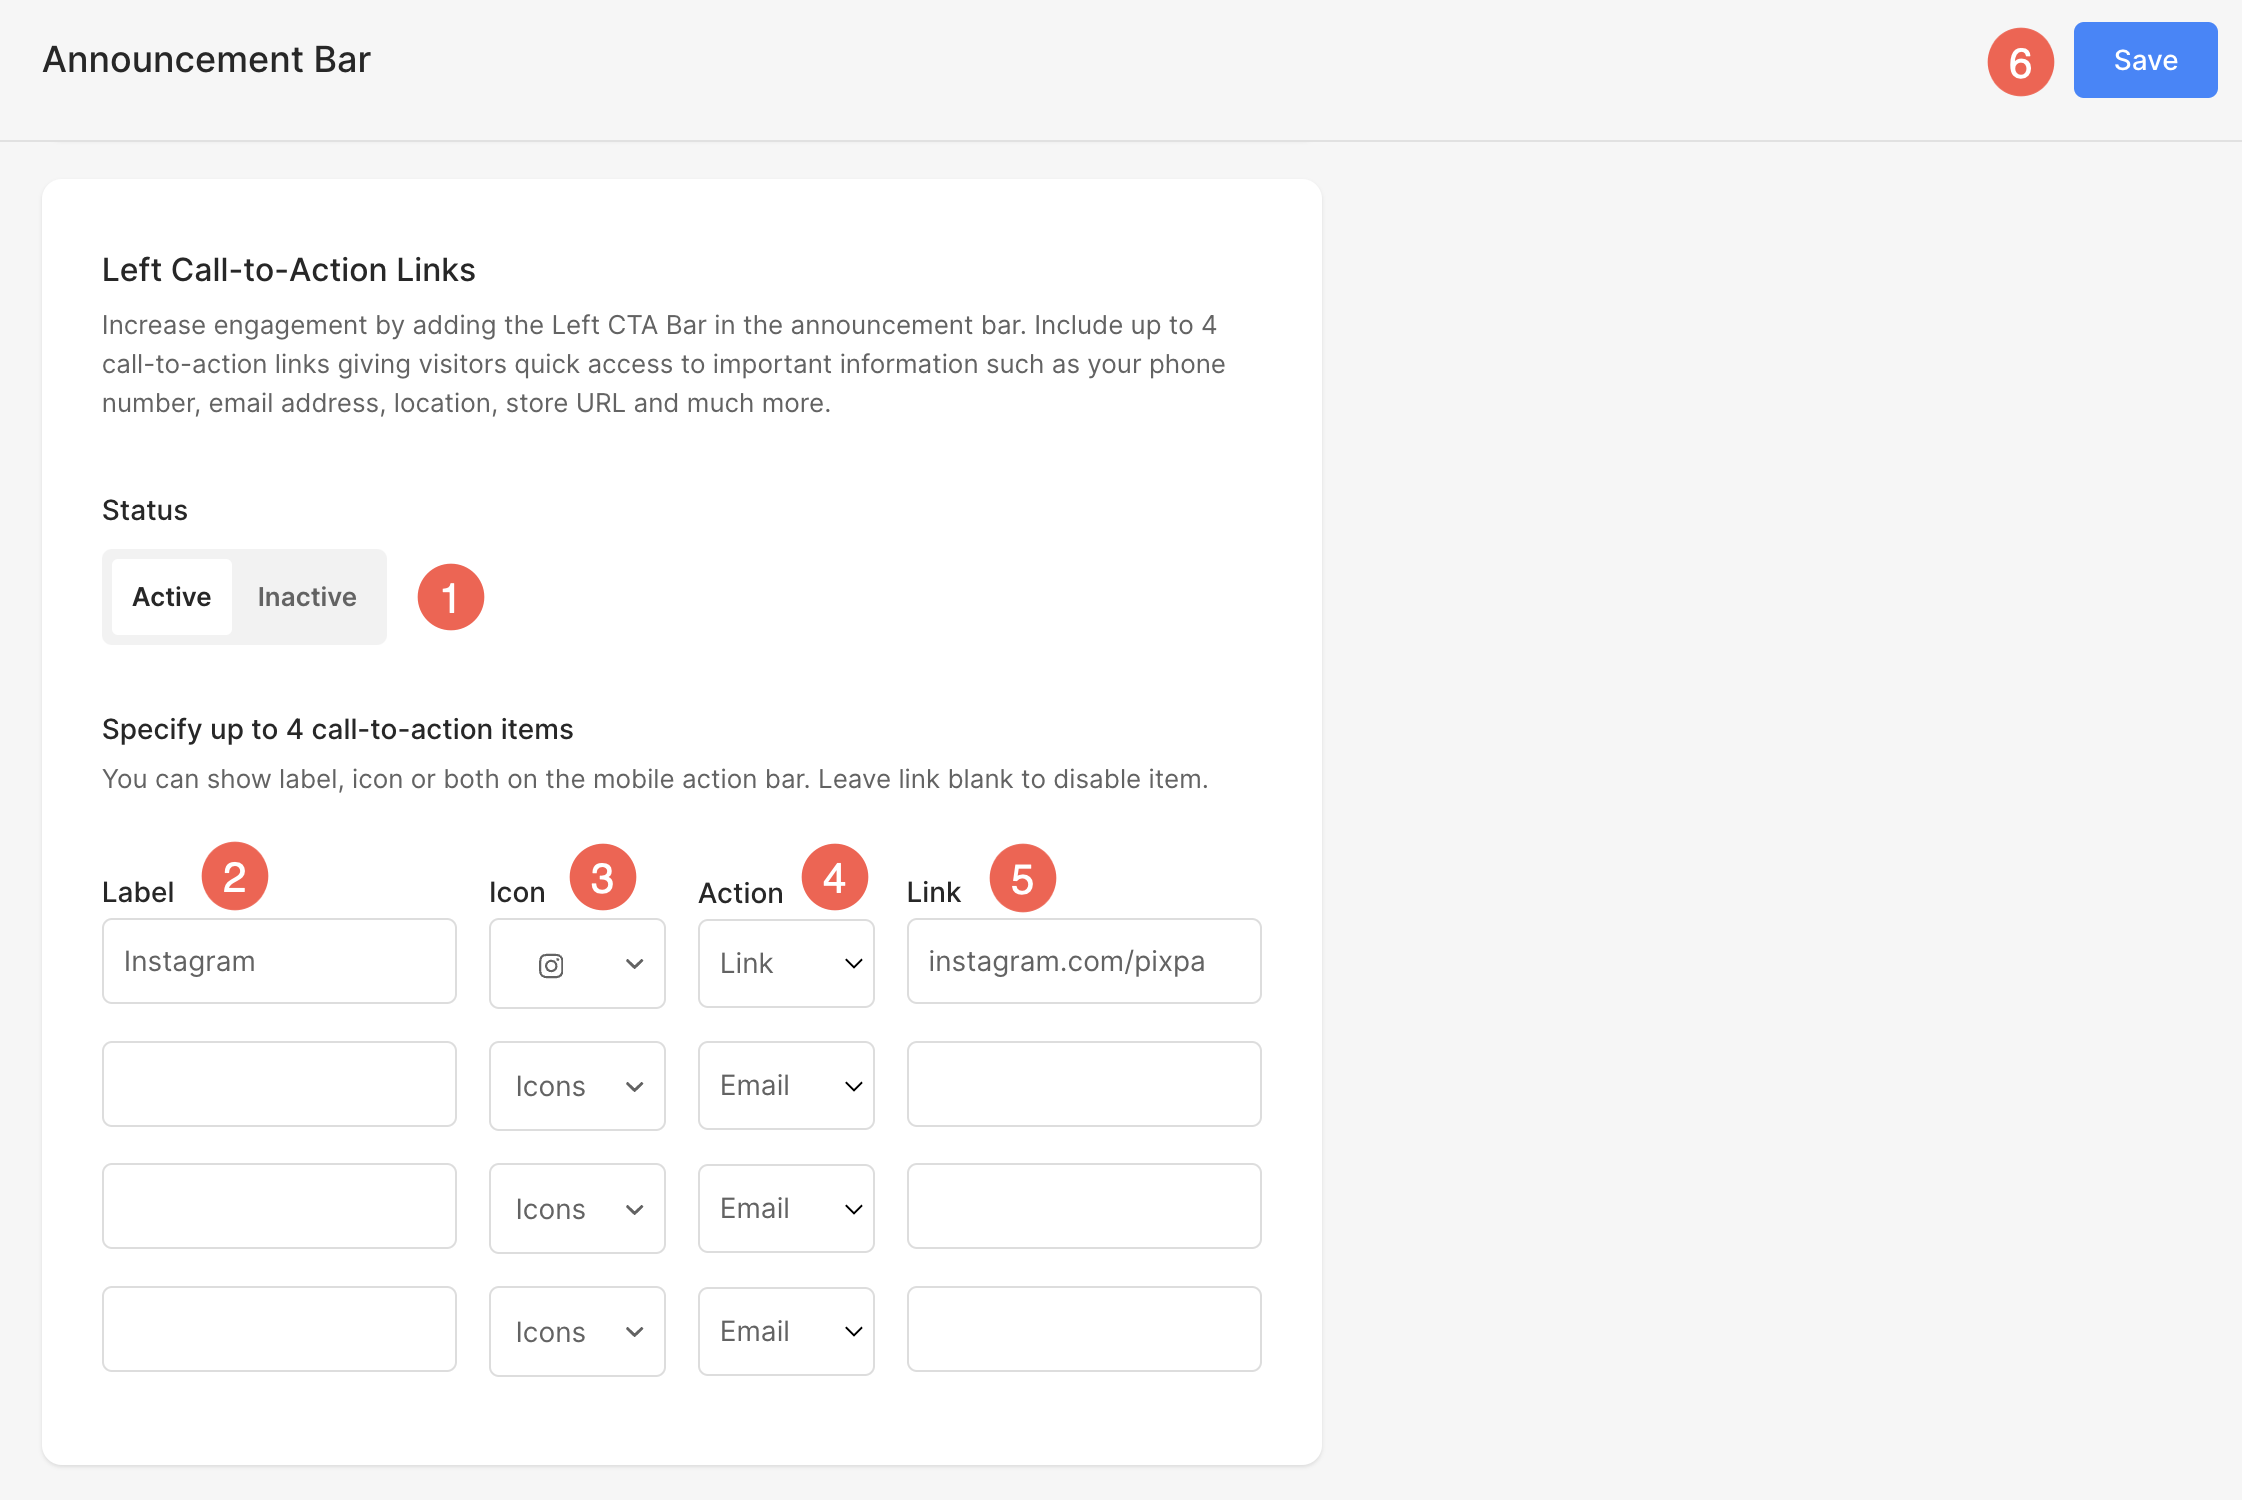
Call to Action Links
A Call to Action (CTA) is a concise prompt, often in the form of a button or link, that encourages users to take a specific action.
The announcement bar in Pixpa provides a prime location to feature impactful CTAs. You can place CTA links on both the left and right sides ensuring maximum visibility and encouraging user interaction.
- Enable / Disable the Call to Action links inside the Announcement Bar.
- Specify Labels for different CTAs that you have added.
- You can select an Icon that will be displayed along with the label.
- Select an Action for the CTA. You can select from Email, Number, Link, and External Link.
- Specify the Link or the related data according to the option you have selected in the previous step.
- After making the changes, click on Save button to keep the changes.
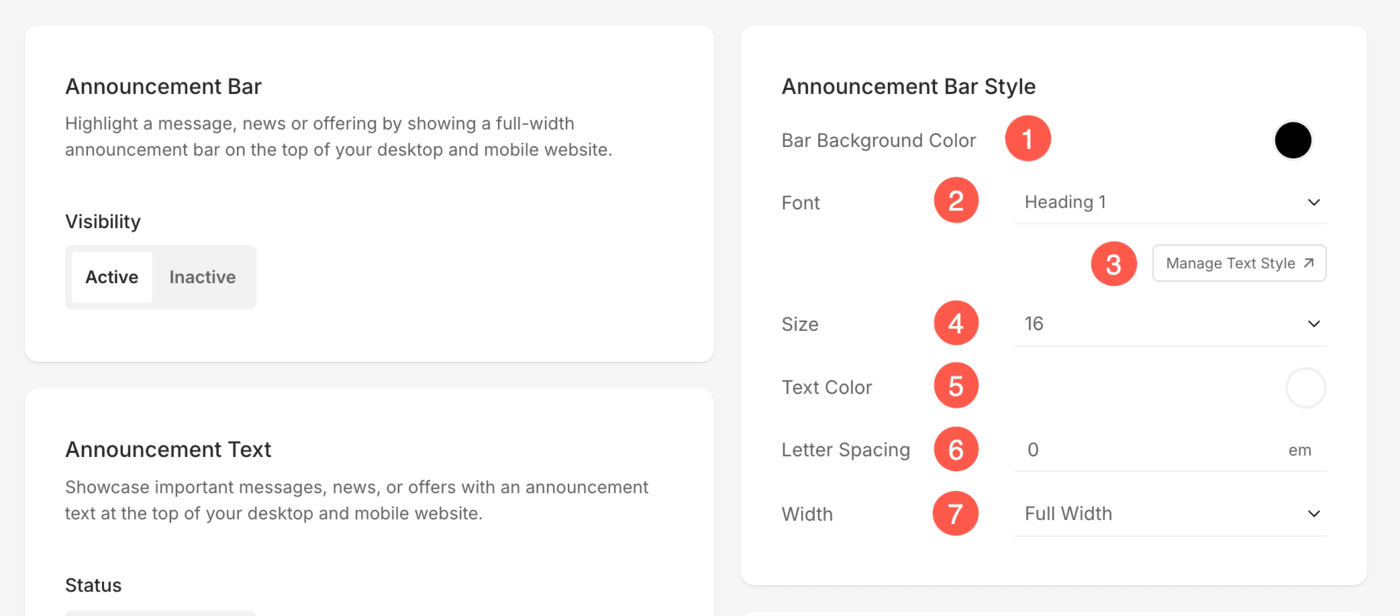
Announcement Bar Style
- Bar Background Color: Set the background color of the announcement bar.
- Font: Choose the font style for the announcement text.
- Manage Text Style: Click on the Manage Text Style button to visit the Design section and manage your font sizes and styles.
- Size: Adjust the font size of the announcement text.
- Text Color: Select the color for the announcement text.
- Letter Spacing: Define the spacing between letters in the announcement text.
- Width: Set the announcement bar to full-width or Site-width. You can manage the site width from here.
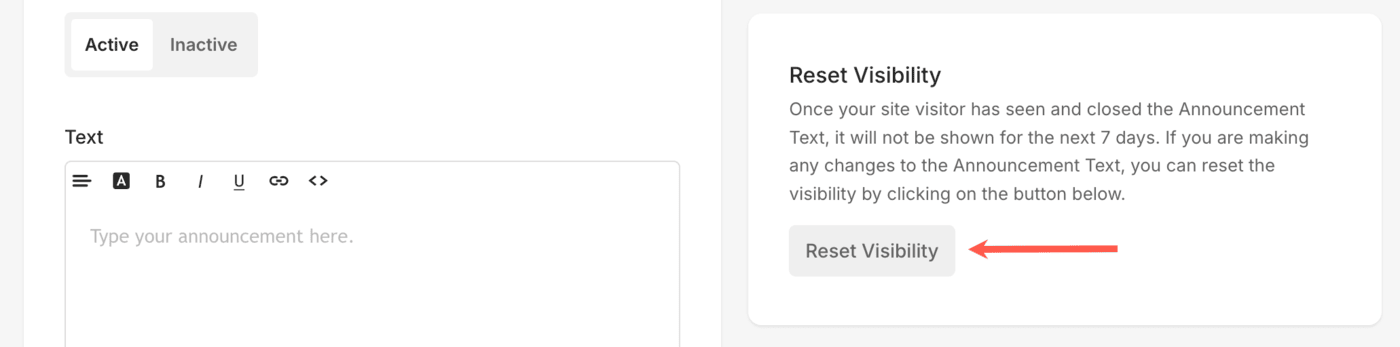
Reset Visibility
Reset visibility –
See in action
Do check out the demo site where you can see the announcement bar in action.