Pixpa enables you to hide the pre-footer on specific pages of your website. You can visit the settings of the menu item and unselect the show pre-footer option.
Enable and add content to Pre-footer

- Under the Options (3) tab, you can manage the Prefooter (4) of your website.

Alternatively, you can use Pixpa’s search option to add/customize the Prefooter.
- Enter prefooter (1) in the Search Bar.
- You will see the related results.
- Click on the Website Prefooter option (2) under Studio Links.

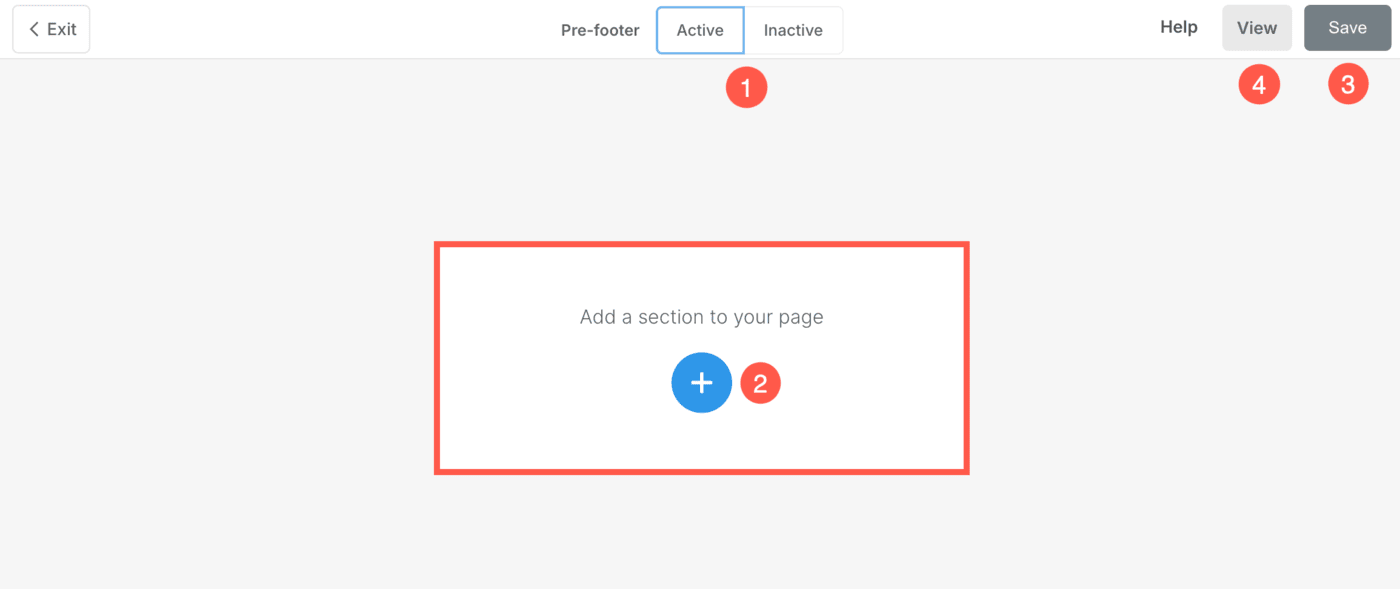
- On clicking on it, you would see a page where you would be able to make changes using the drag-and-drop page builder.
- You can add the snippets onto the page canvas from the left sidebar that opens up when the blue + icon is clicked.
- From this page, you can:
- Set the status of the pre-footer as Active or Inactive (1).
- Add a new section (2) to the prefooter.
- Click on the blue + icon to add a new section. You can filter from different types of sections where you have the option to choose the section layout.
- Save (3) your changes.
- View (4) the pre-footer on the live site.


