You can easily automate the process of syncing your Pixpa client gallery orders with external tools like Google Sheets, CRMs, or email platforms using Zapier.
This integration allows you to centralize your order data, streamline inventory and fulfillment workflows, share order updates with your team, or trigger customer notifications—all in real time.
In this article:
What all you need
Before getting started, ensure you have:
- A Pixpa website with client gallery.
- A Google account with Google Sheet prepared to collect the form responses.
- A Zapier.com account (free or paid) to create automation workflows.
How it works
- Pixpa Sends Order Data – When a new order is placed or an existing order is updated, Pixpa sends the details to a Zapier.com webhook.
- Zapier.com Processes the Data – Zapier checks whether the order already exists in your connected Google Sheet.
- New Orders Are Added – If it’s a new order, a new row is created in the sheet with all order details.
- Existing Orders Are Updated – If the order already exists, the sheet row is automatically updated with the latest info.
- Runs in Real Time – The entire process is automated and keeps your sheet in sync with your store—no manual work needed.
Step by step guide
Create a Google Sheet
- Login to your Pixpa account and go to the Client Galleries (1) section.
- Click on Preferences (2) tab and enable Push Order Data to Zapier.com (3) toggle.
- Click on Copy Header Row (4) button and Save (5) the changes.

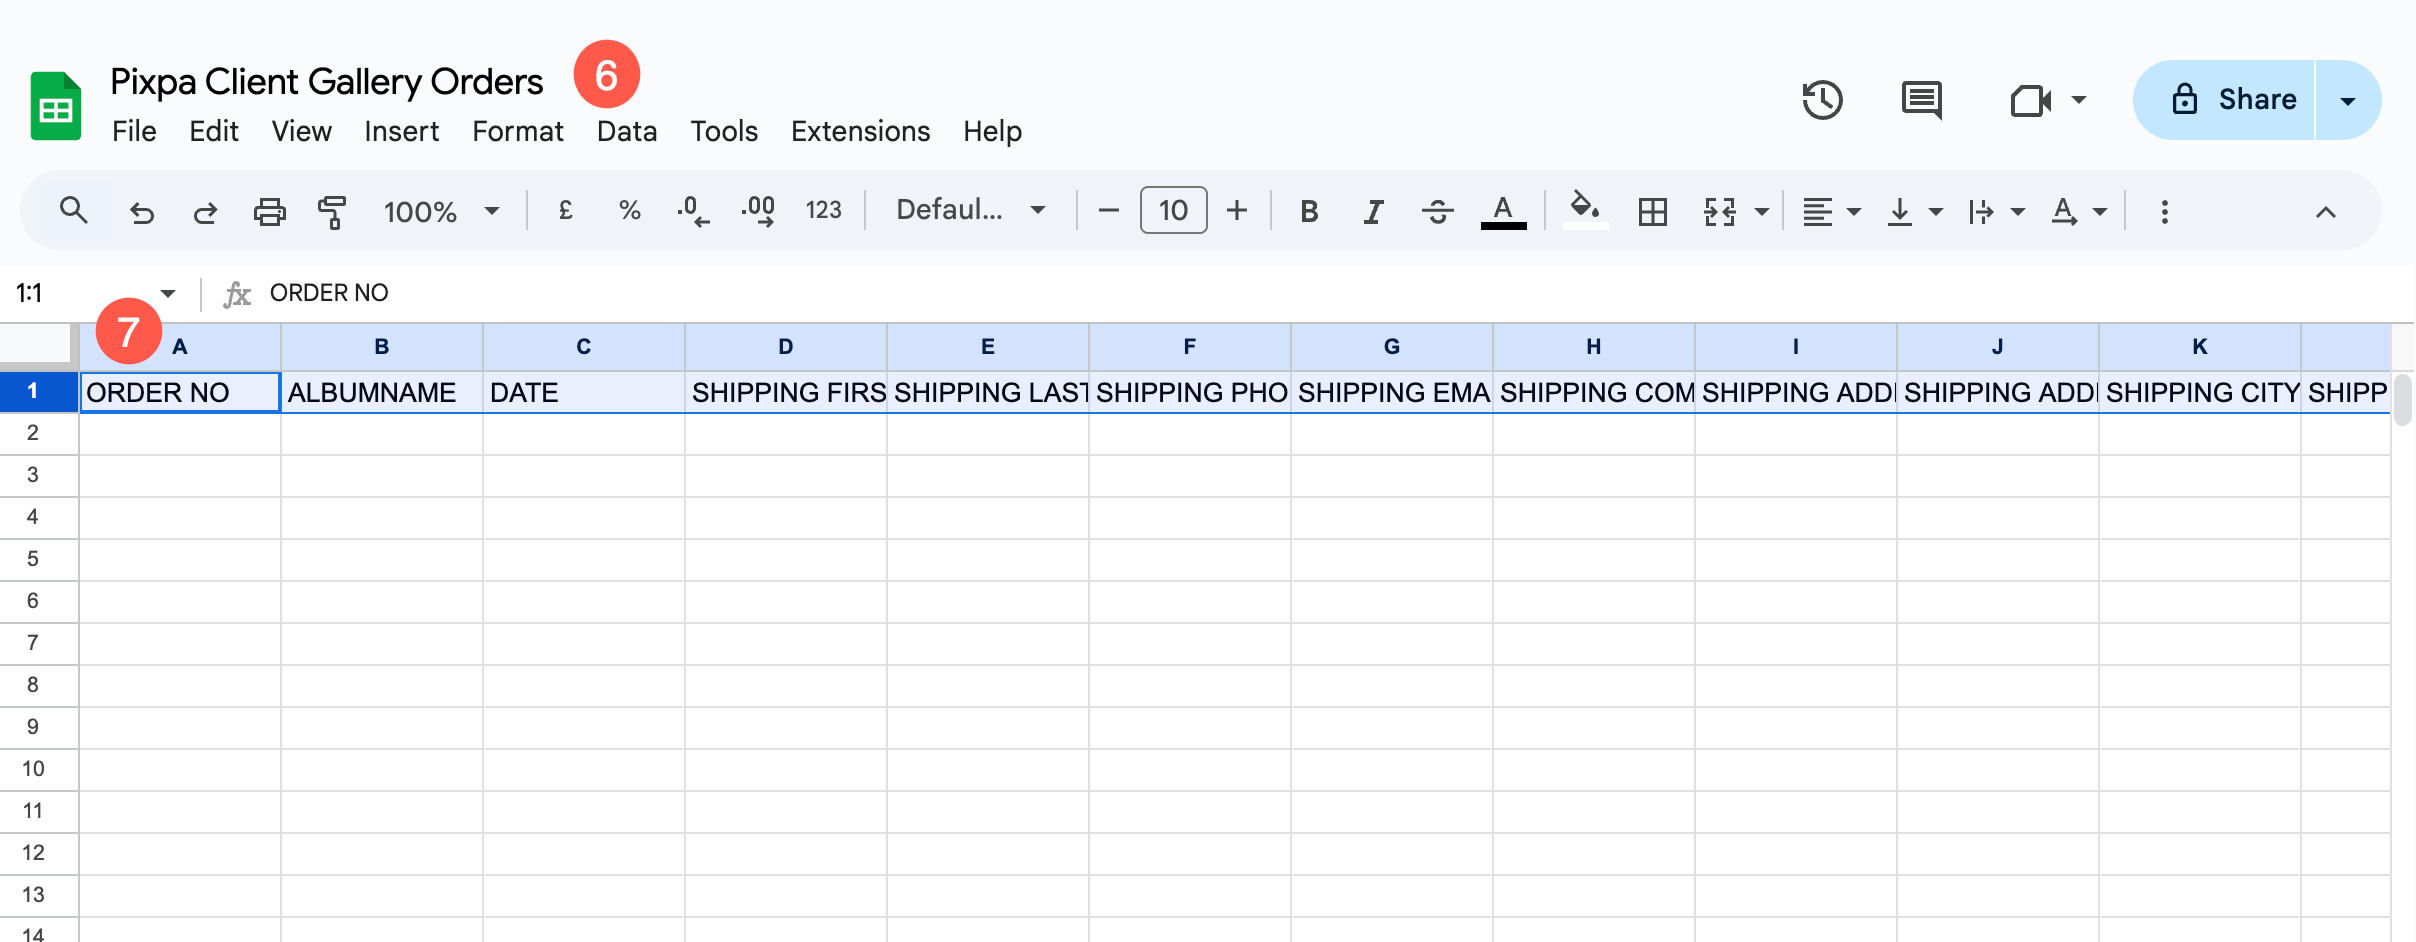
- Now, login to your Google account and create a new Spreadsheet.
- Specify an identifiable name (6) for the sheet and paste the Header Row (7) data in the first row of the sheet.
Create a Zap in Zapier.com
- Create a new account in Zapier.com or login to your account if you already have one.

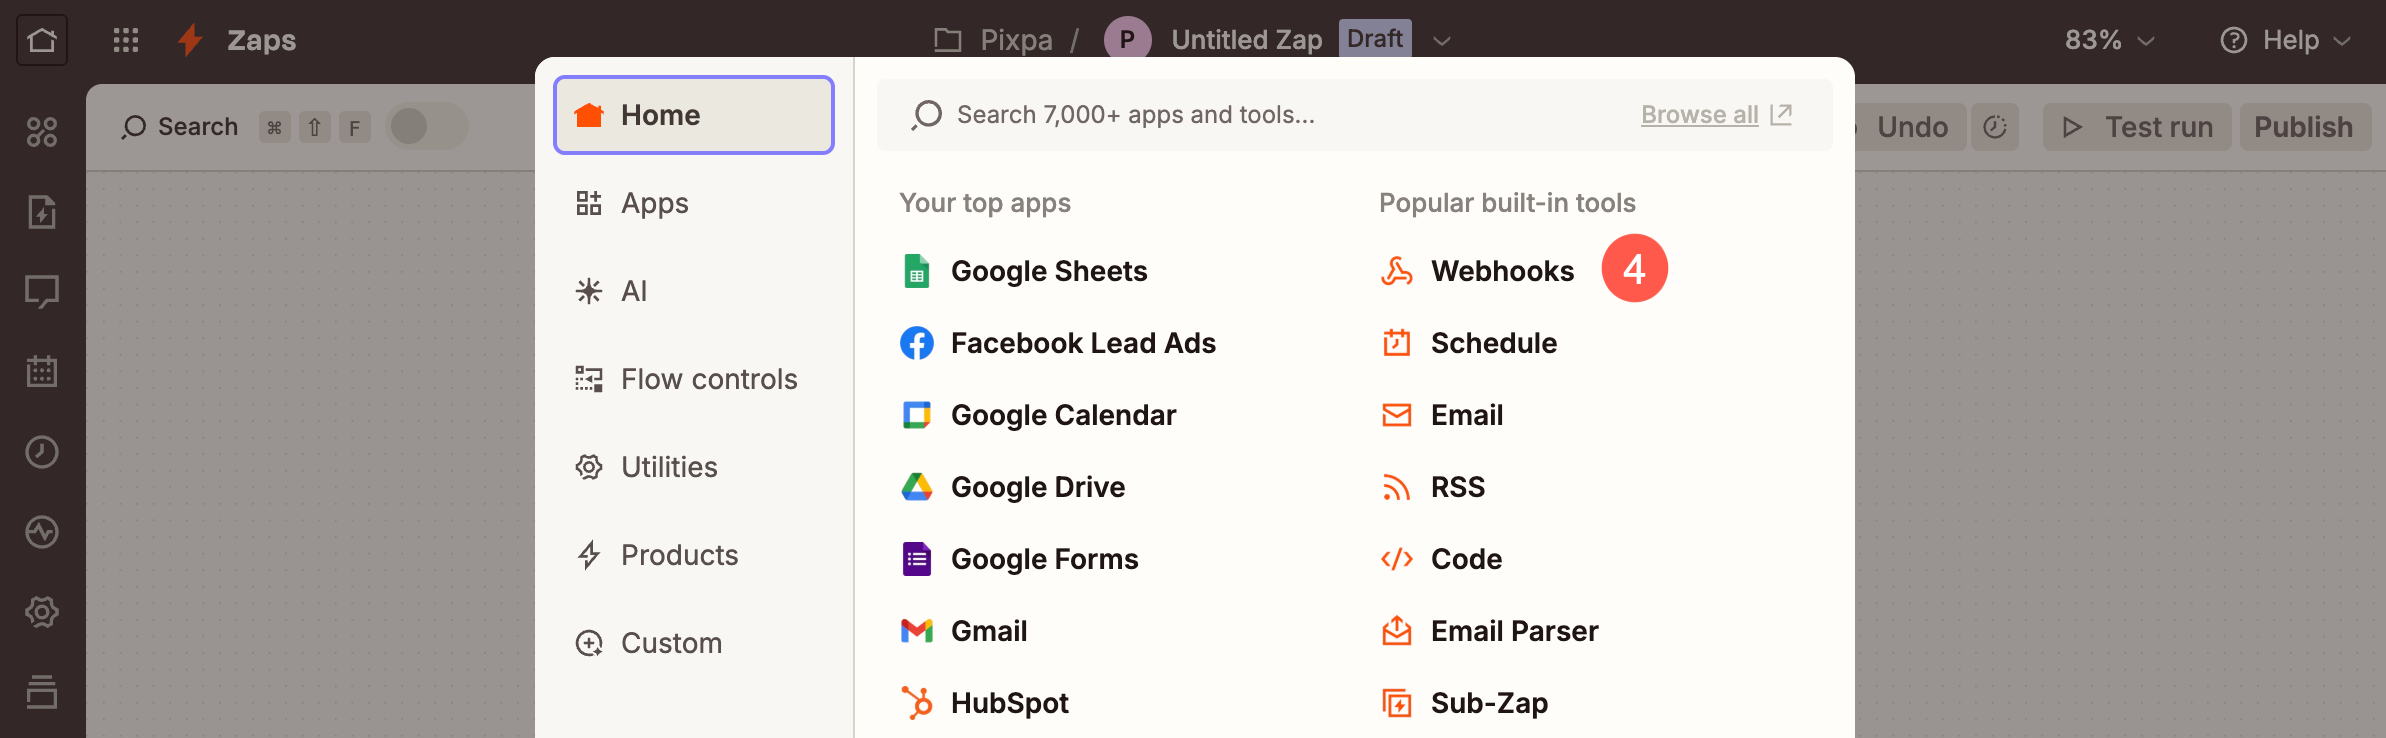
- Under your Zapier.com account, go to the Zaps (1) section and click on + Create Zap (2) button.

- Click on Trigger (3) button.
- A popup will open from where you need to select Webhooks (4) option.
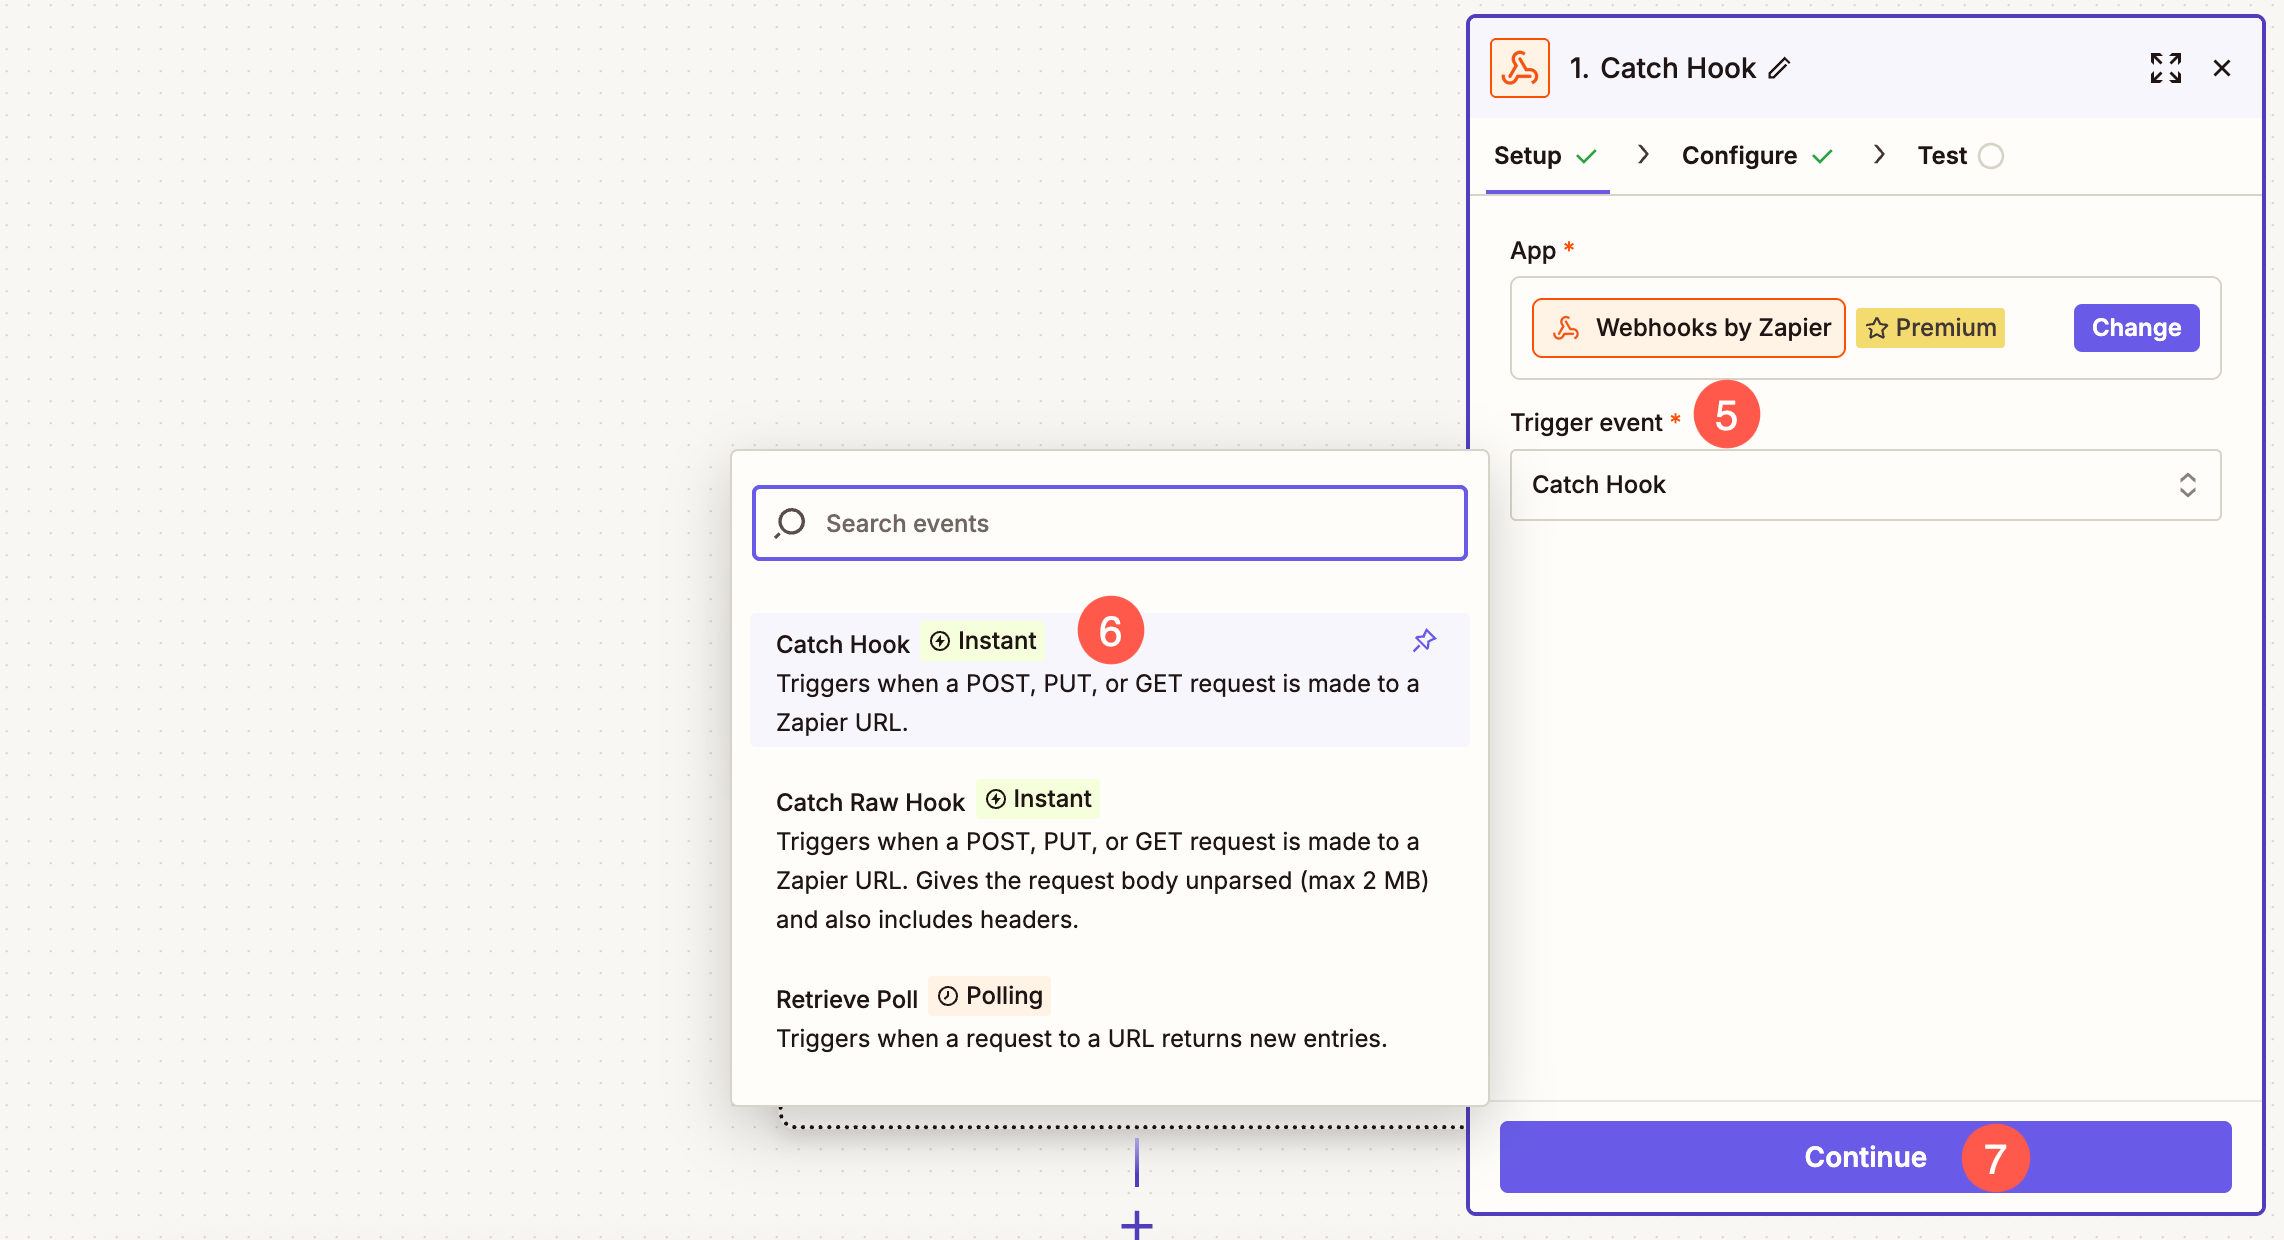
- Under the Setup tab, click on Trigger event (5) dropdown and select Catch Hook (6) option.
- Click on Continue (7) button to proceed.
- Under the Configure tab, do not make any changes and simply click on Continue button.
- Now under the Test (8) tab, click on the Copy button (9) to copy the unique URL generated by Zapier.
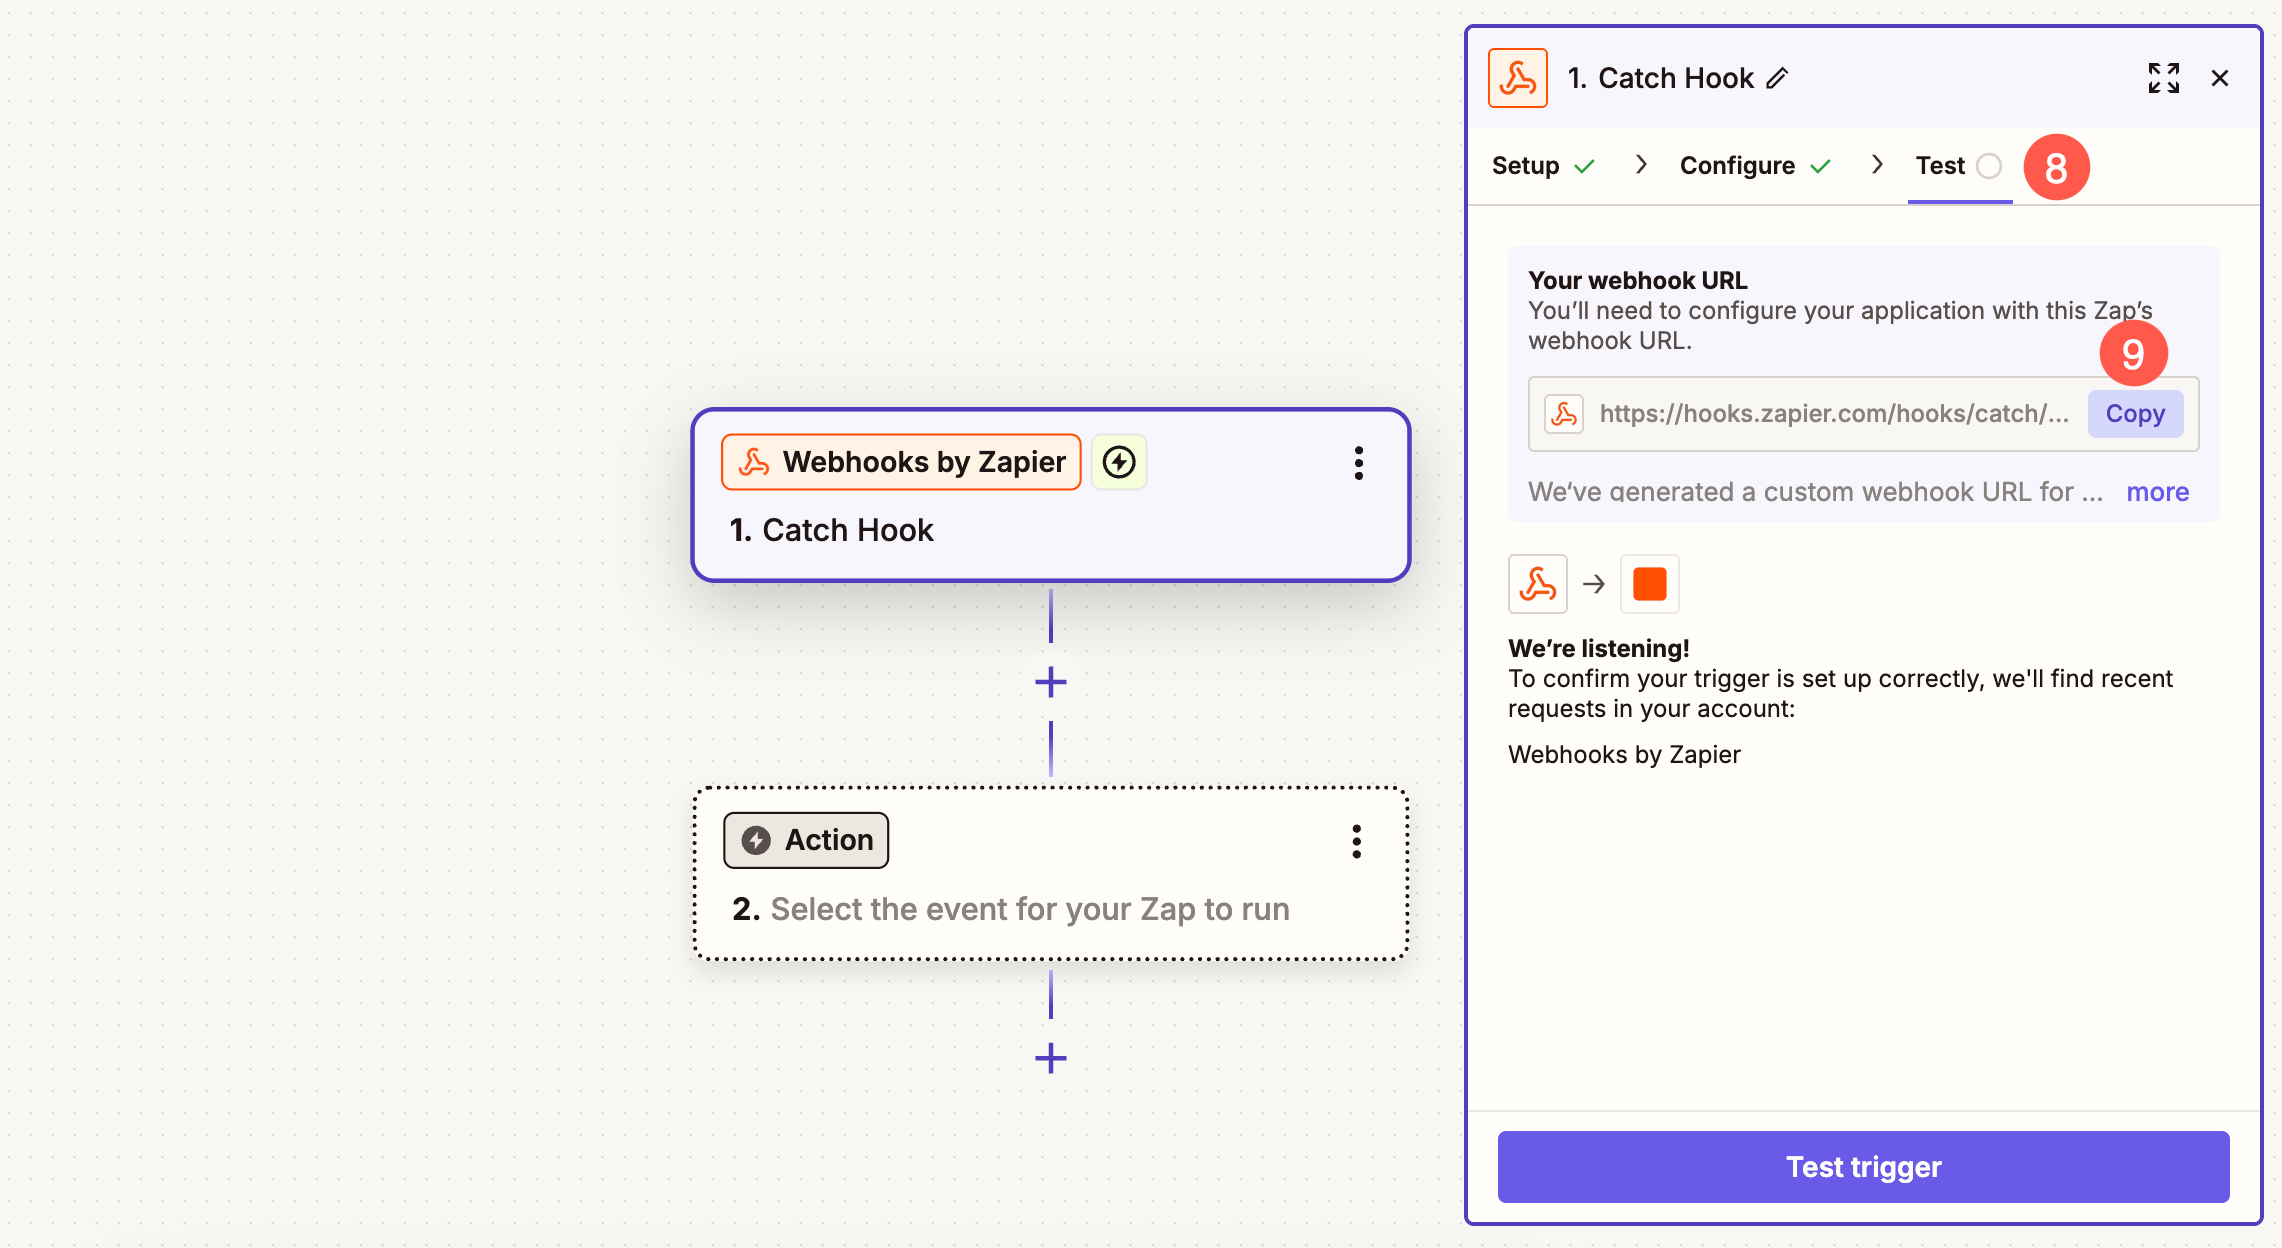
- Paste the unique URL (10) in Push Order Data to Zapier.com field and Save (11) the changes.

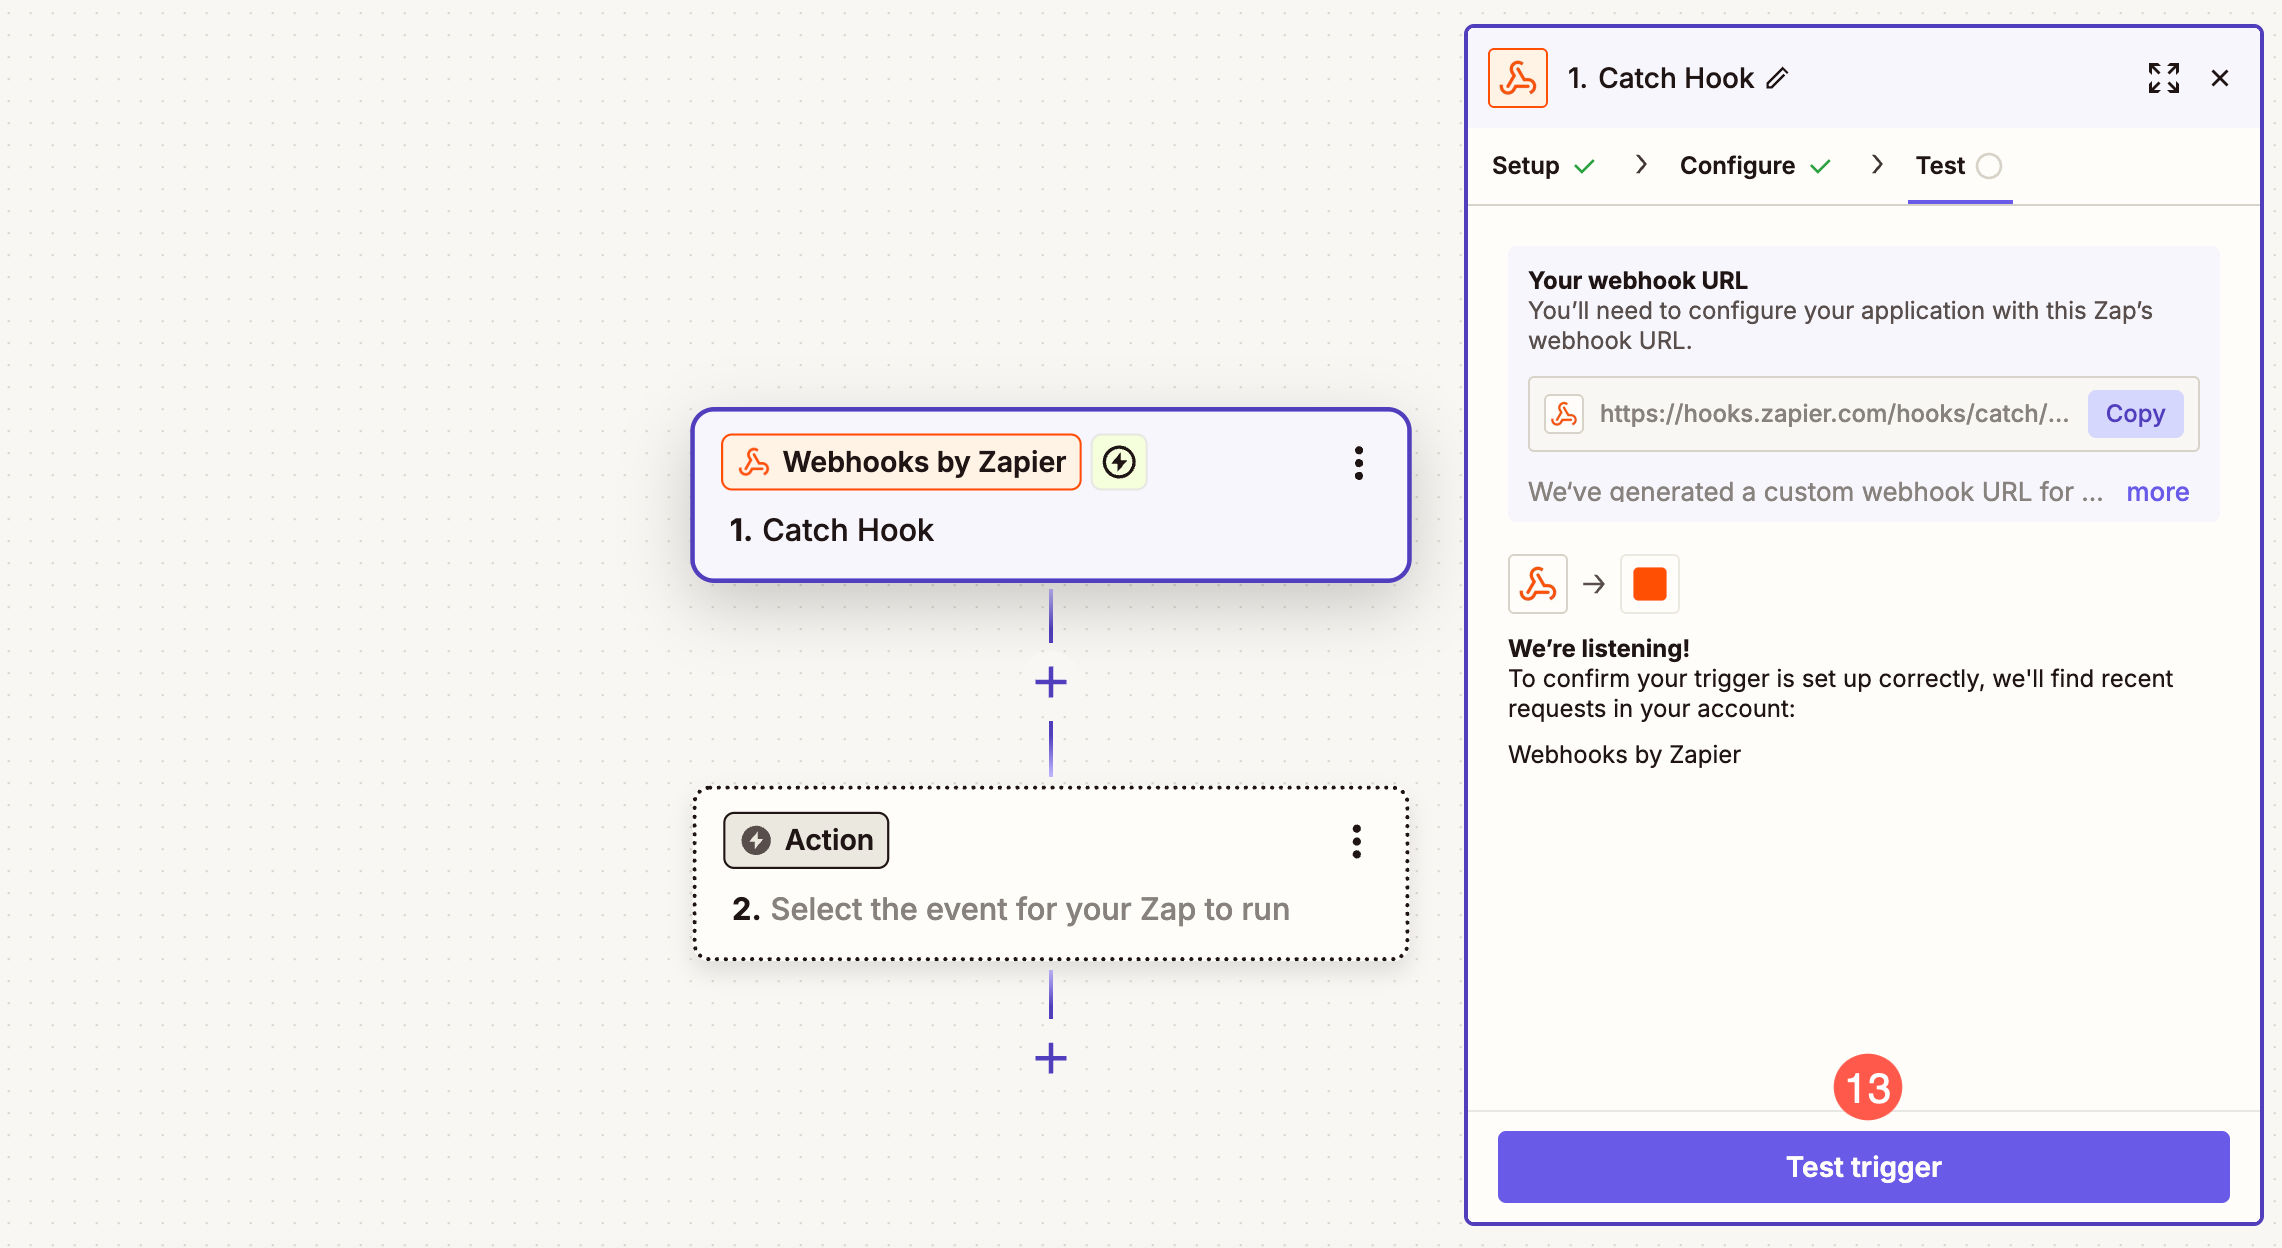
- As soon as you click on Push Sample Data button, open your Zapier account and click on Test Trigger (13) button.
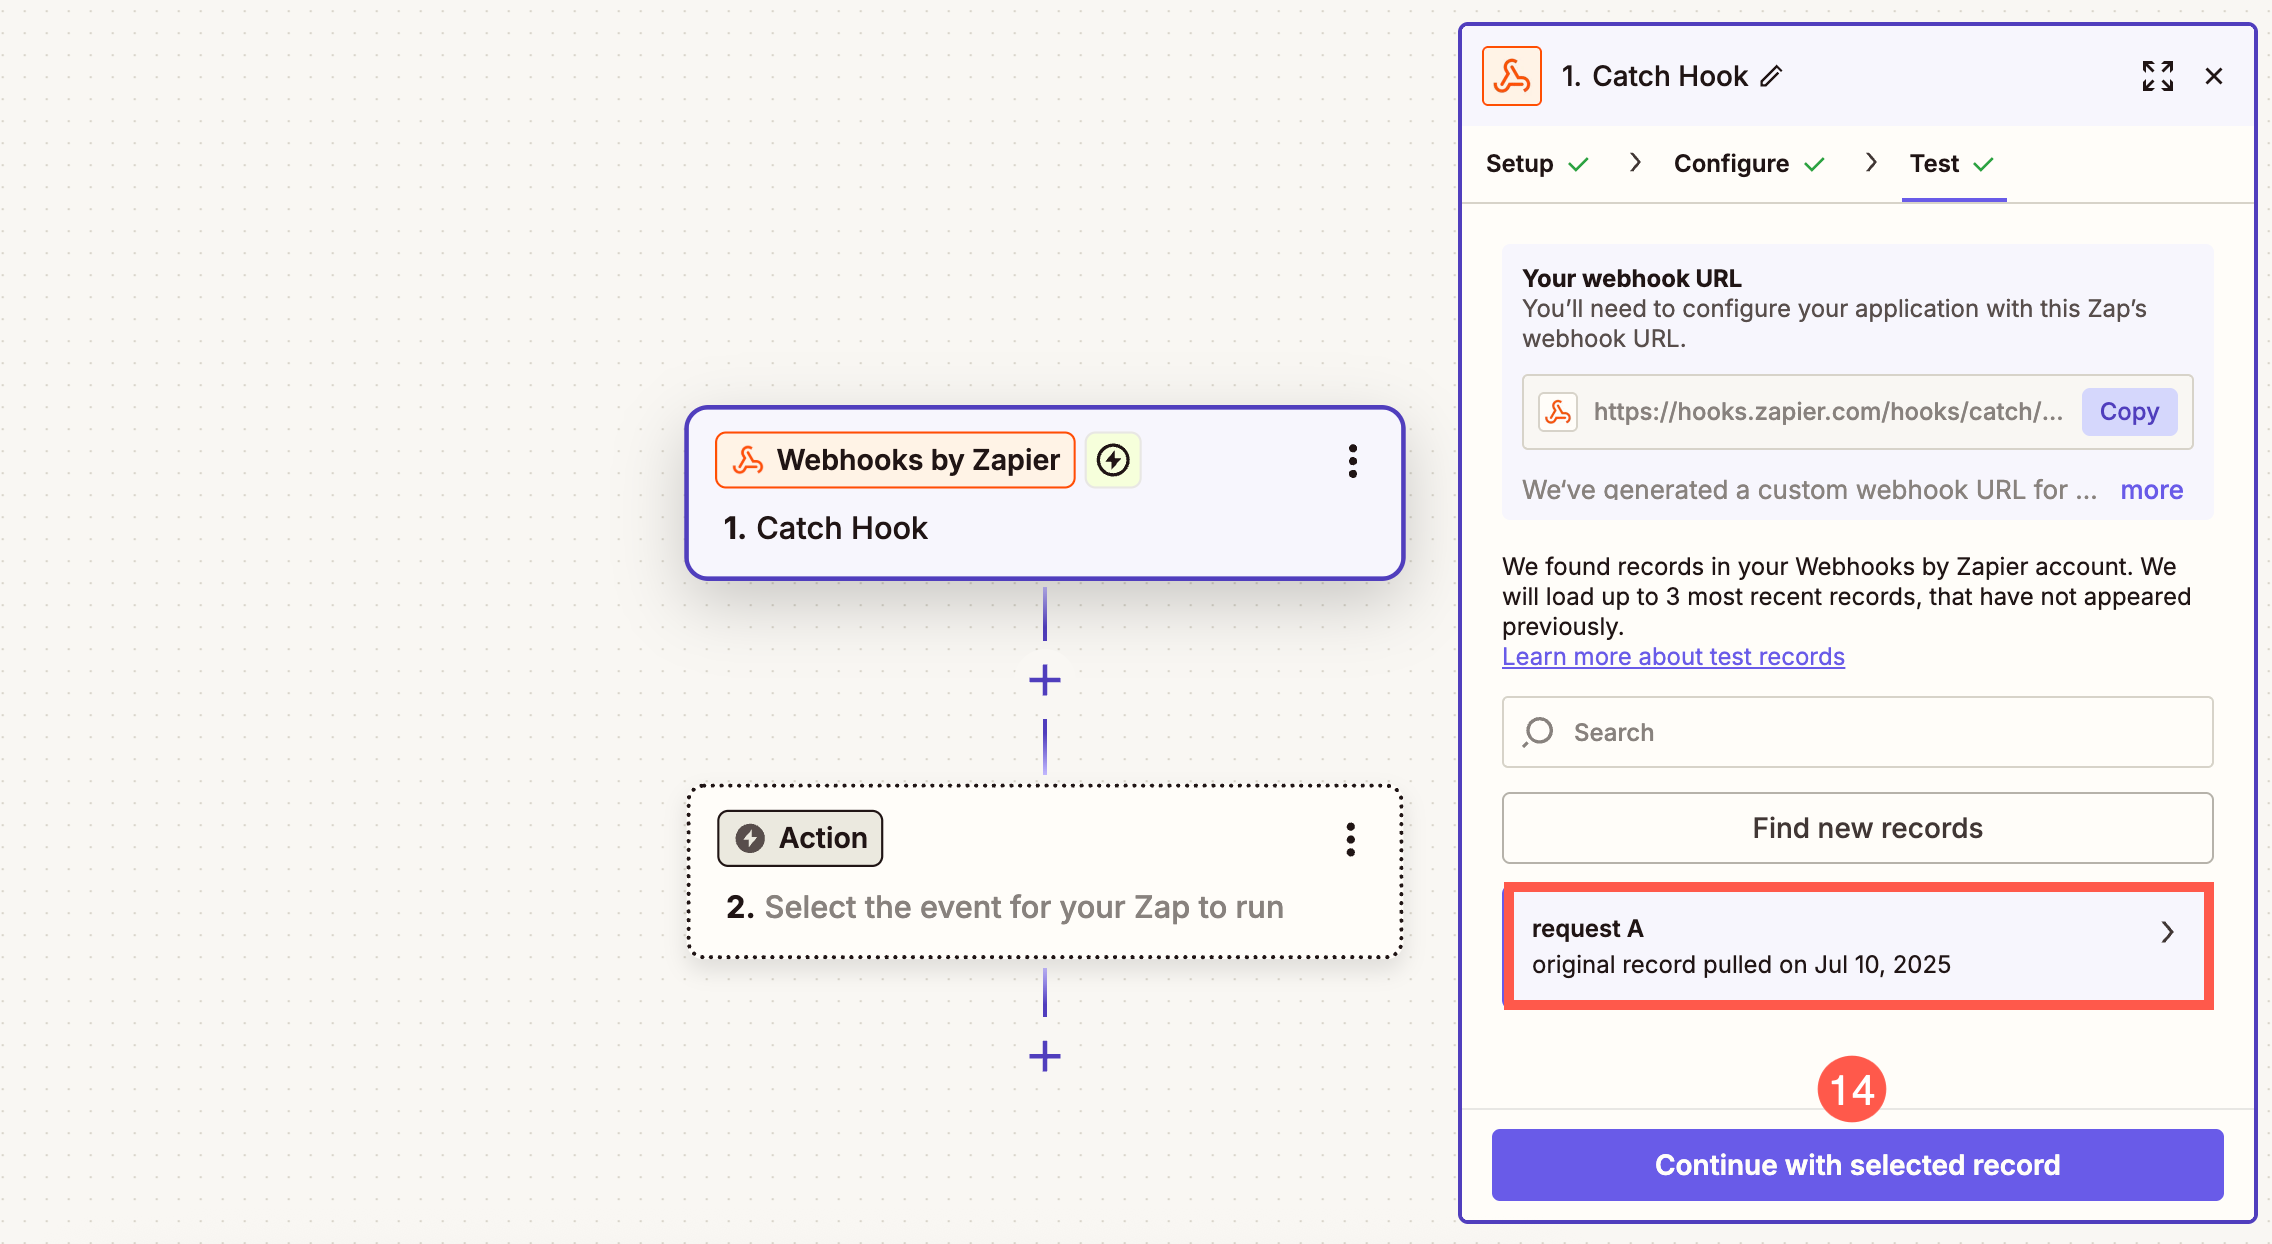
- Zapier will fetch the data that you pushed from your Contact form and verify the request.
- Click on Continue with selected record (14) button.
Add Google Sheet in Zap
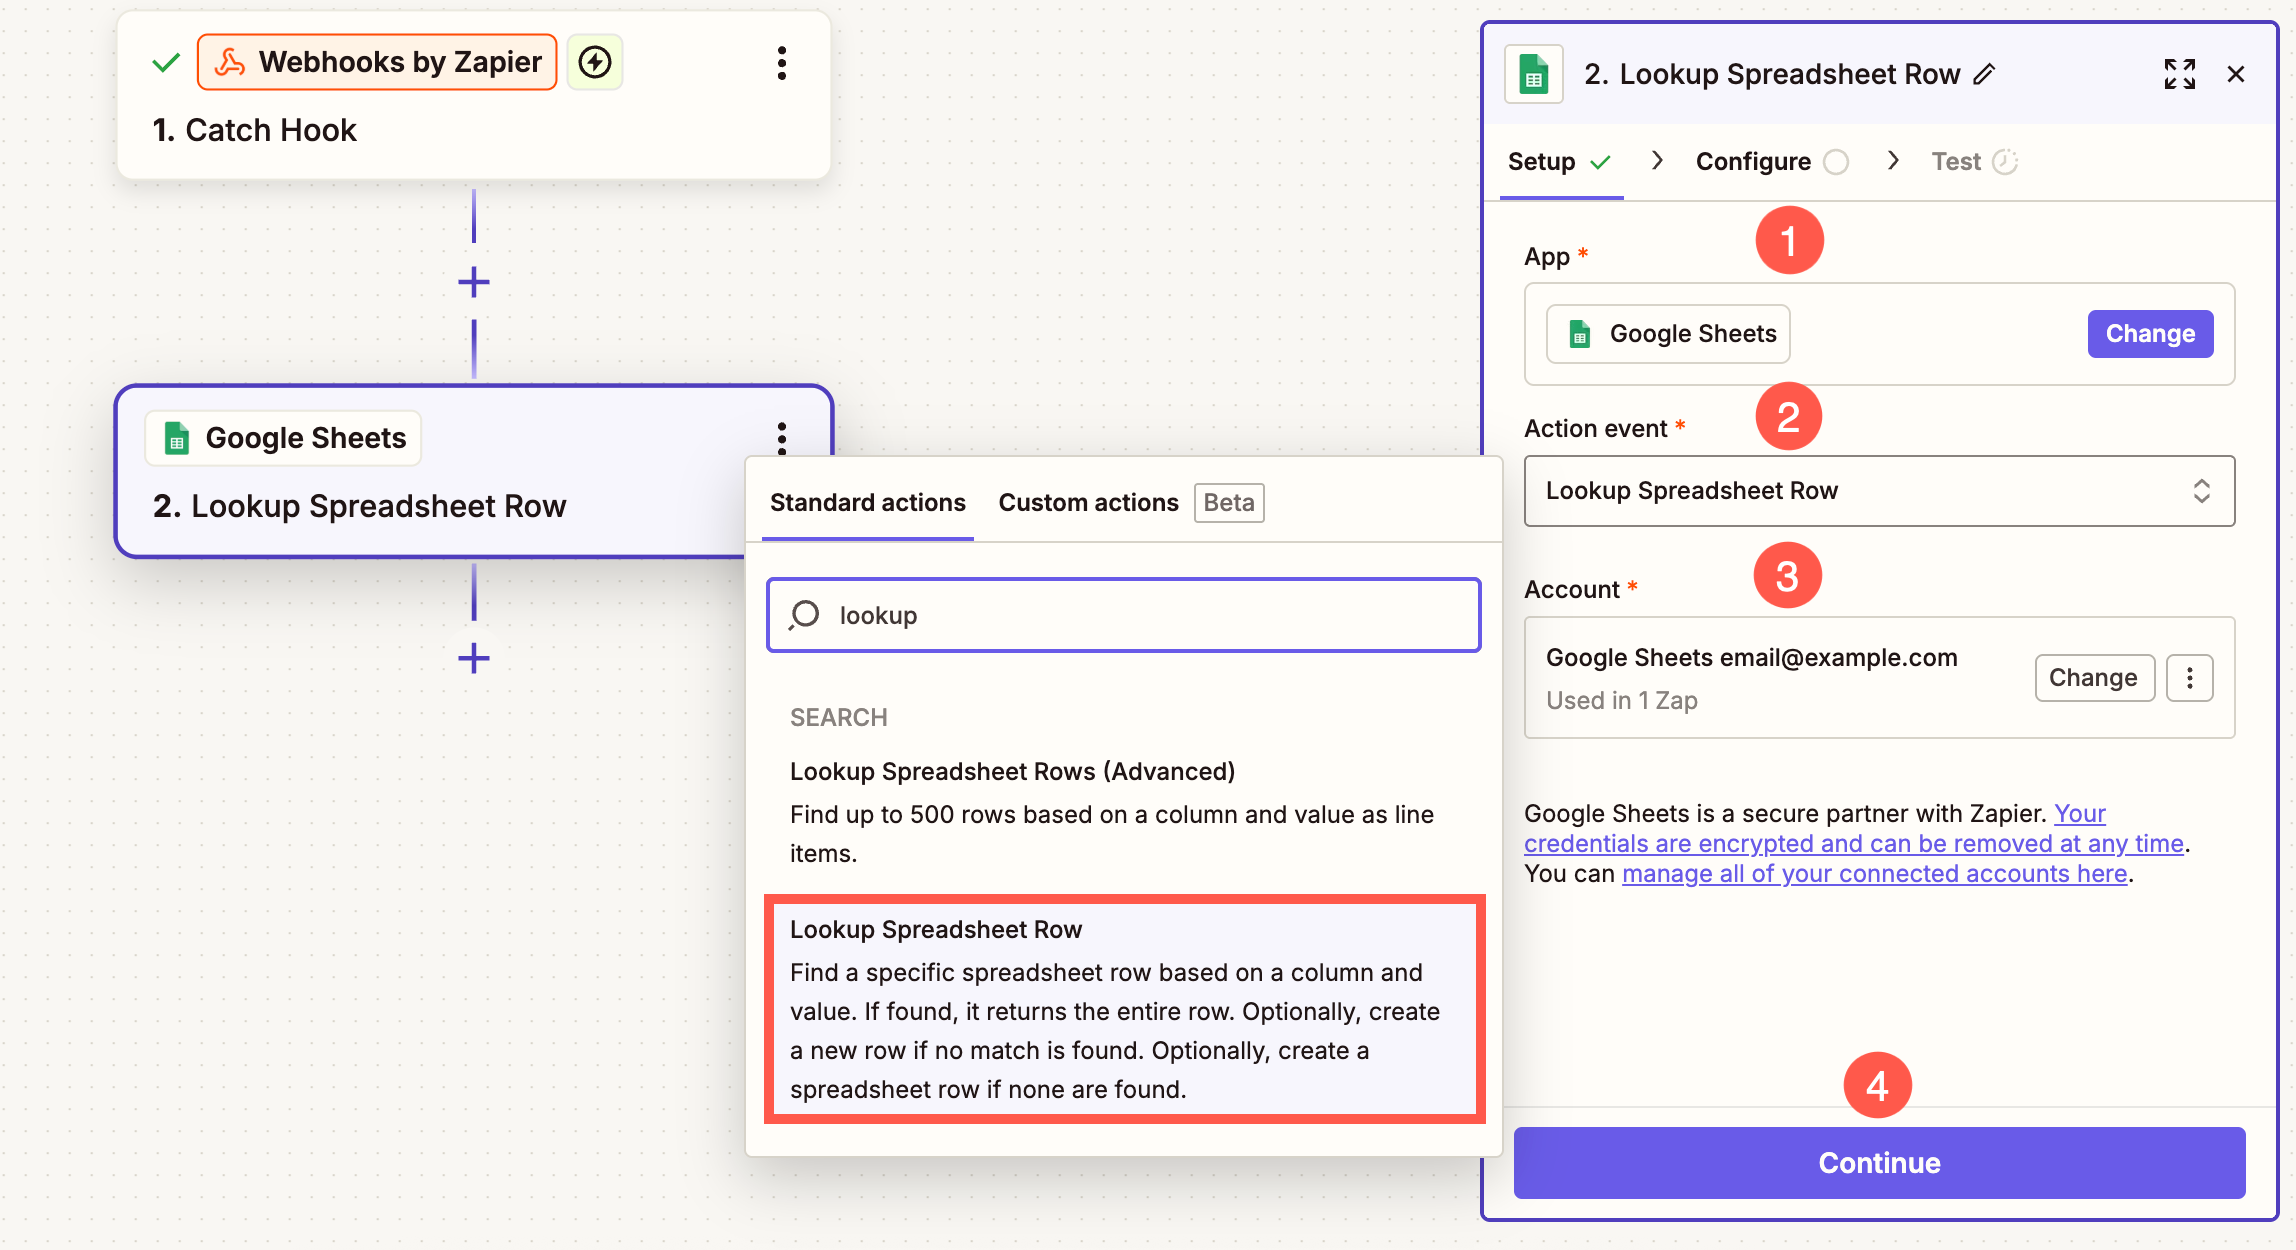
- Select Google Sheets (1) for the App field.
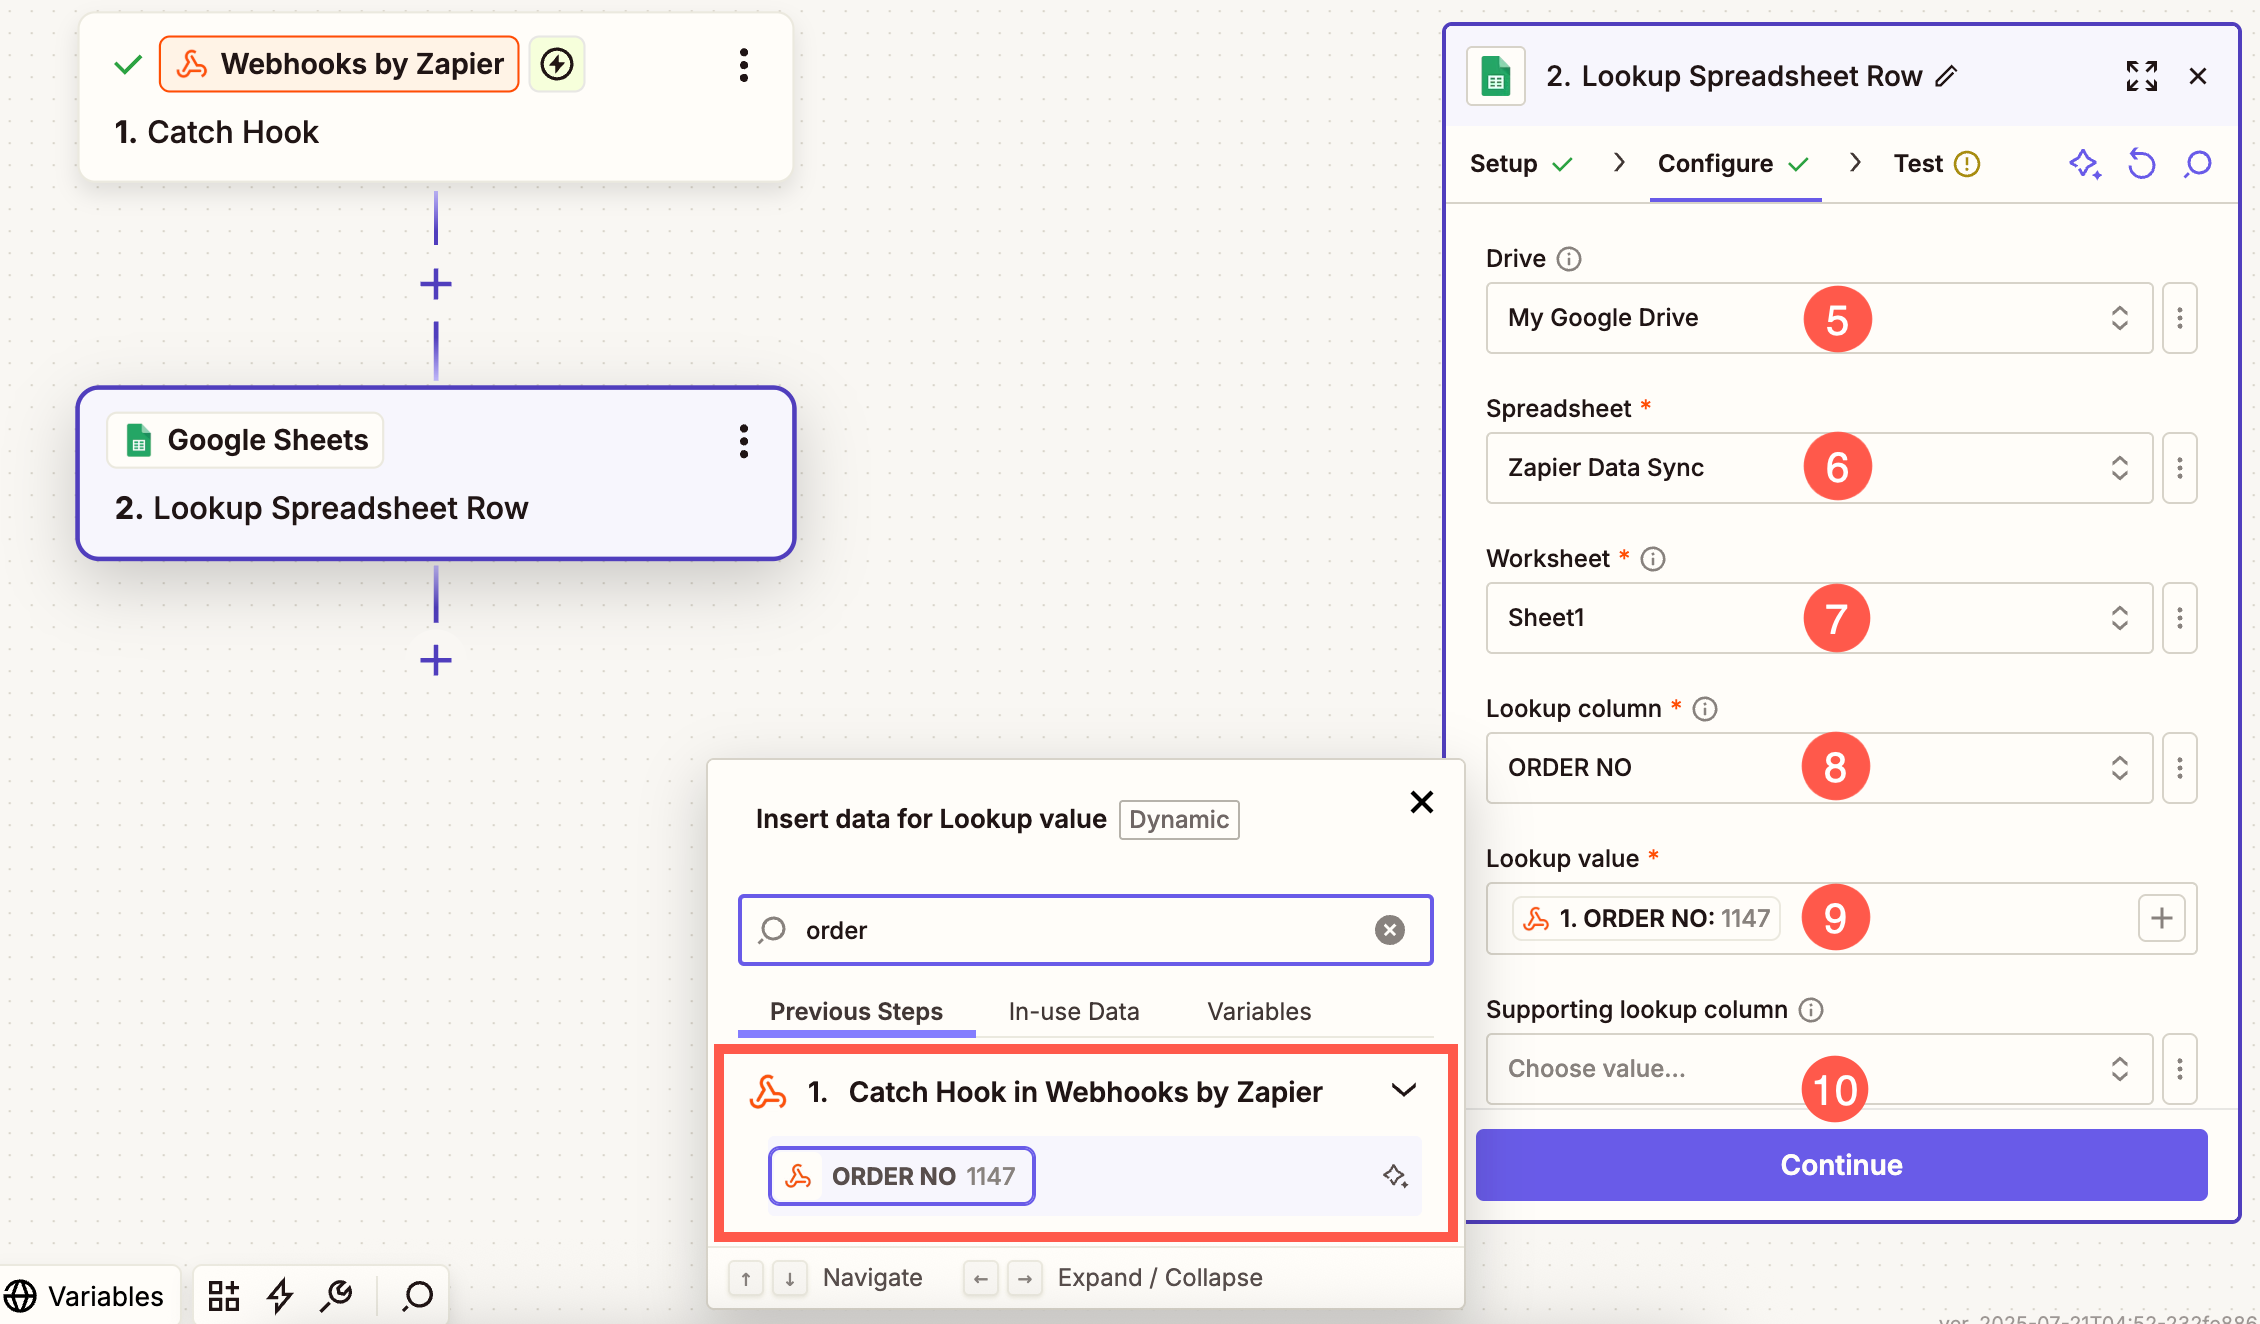
- Under Action Event (2) dropdown, select Lookup Spreadsheet Row.
- Select your account (3) where you have created the spreadsheet and click on Continue (4) button.
- Select the Drive (5) , Spreadsheet file (6) and the Worksheet (7) where you want the data to be synced. You can search among all the available sheets. Click on Refresh button if the spreadsheet is not showing up.
- Under Lookup Column (8) and Lookup Value (9), select ORDER NO. from the sidebar.
- Now, click on Continue (10) button.
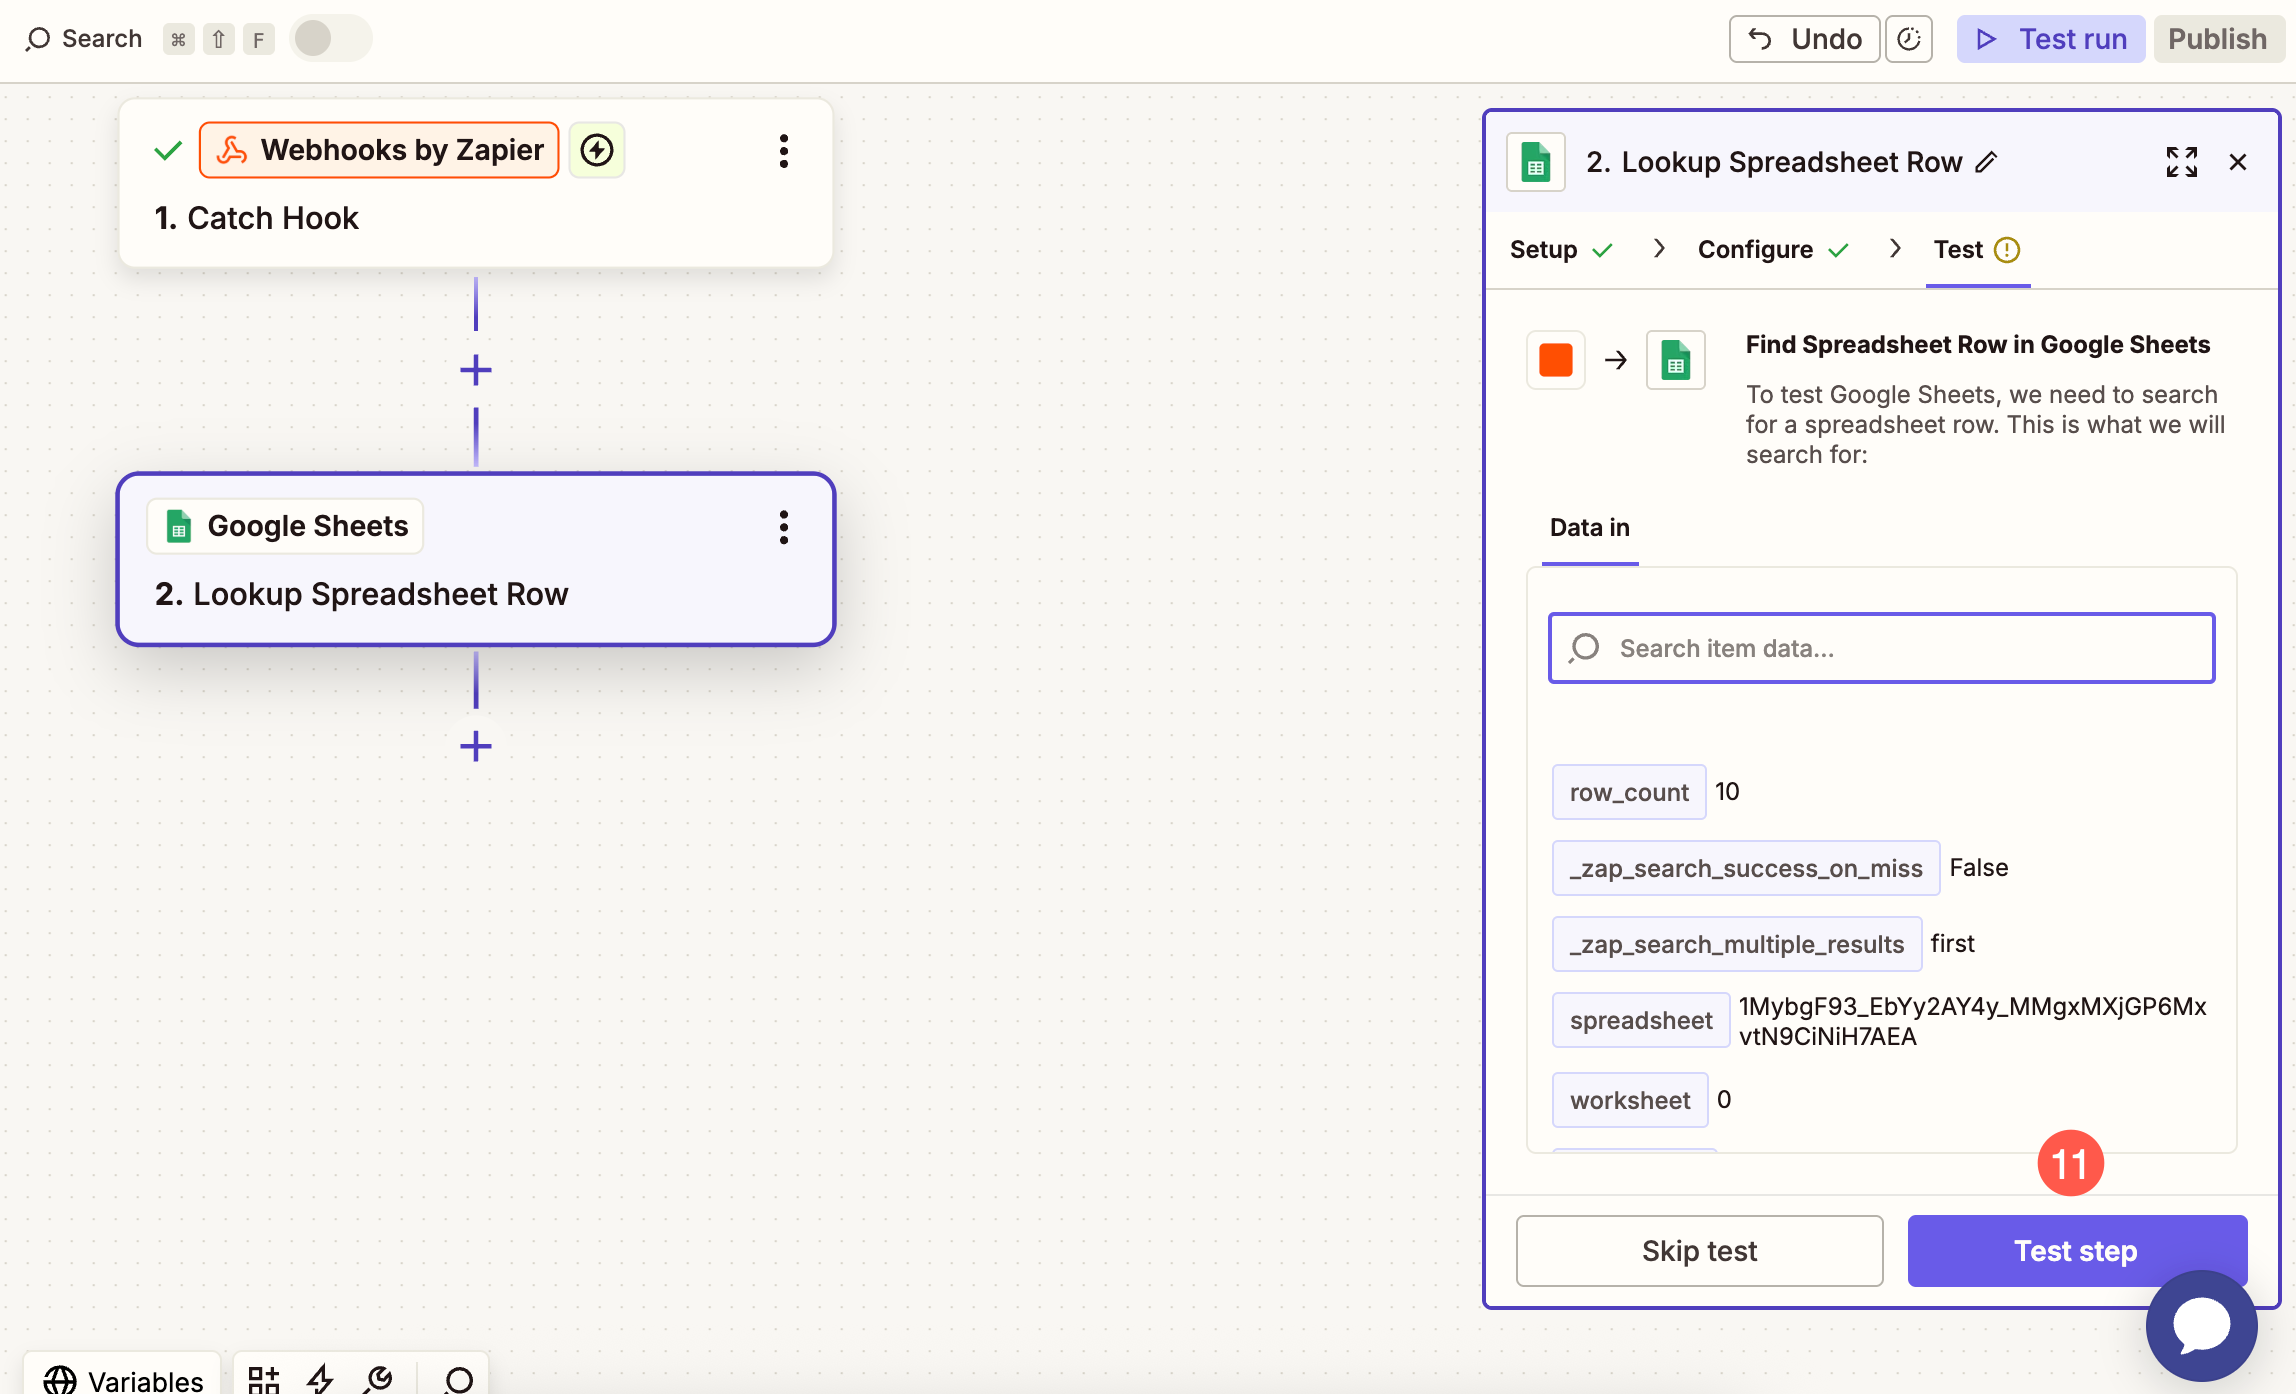
- Now, click on Test Step (11) button. This will save the changes.
Add Path in the Zap
Since your zap will be processing both new orders and updates to existing orders, it’s important to add a Path in Zapier.com.
A path allows you to split your workflow into different branches so you can define separate actions, such as adding a new row for a new order or updating an existing row for an order change, all within the same zap.
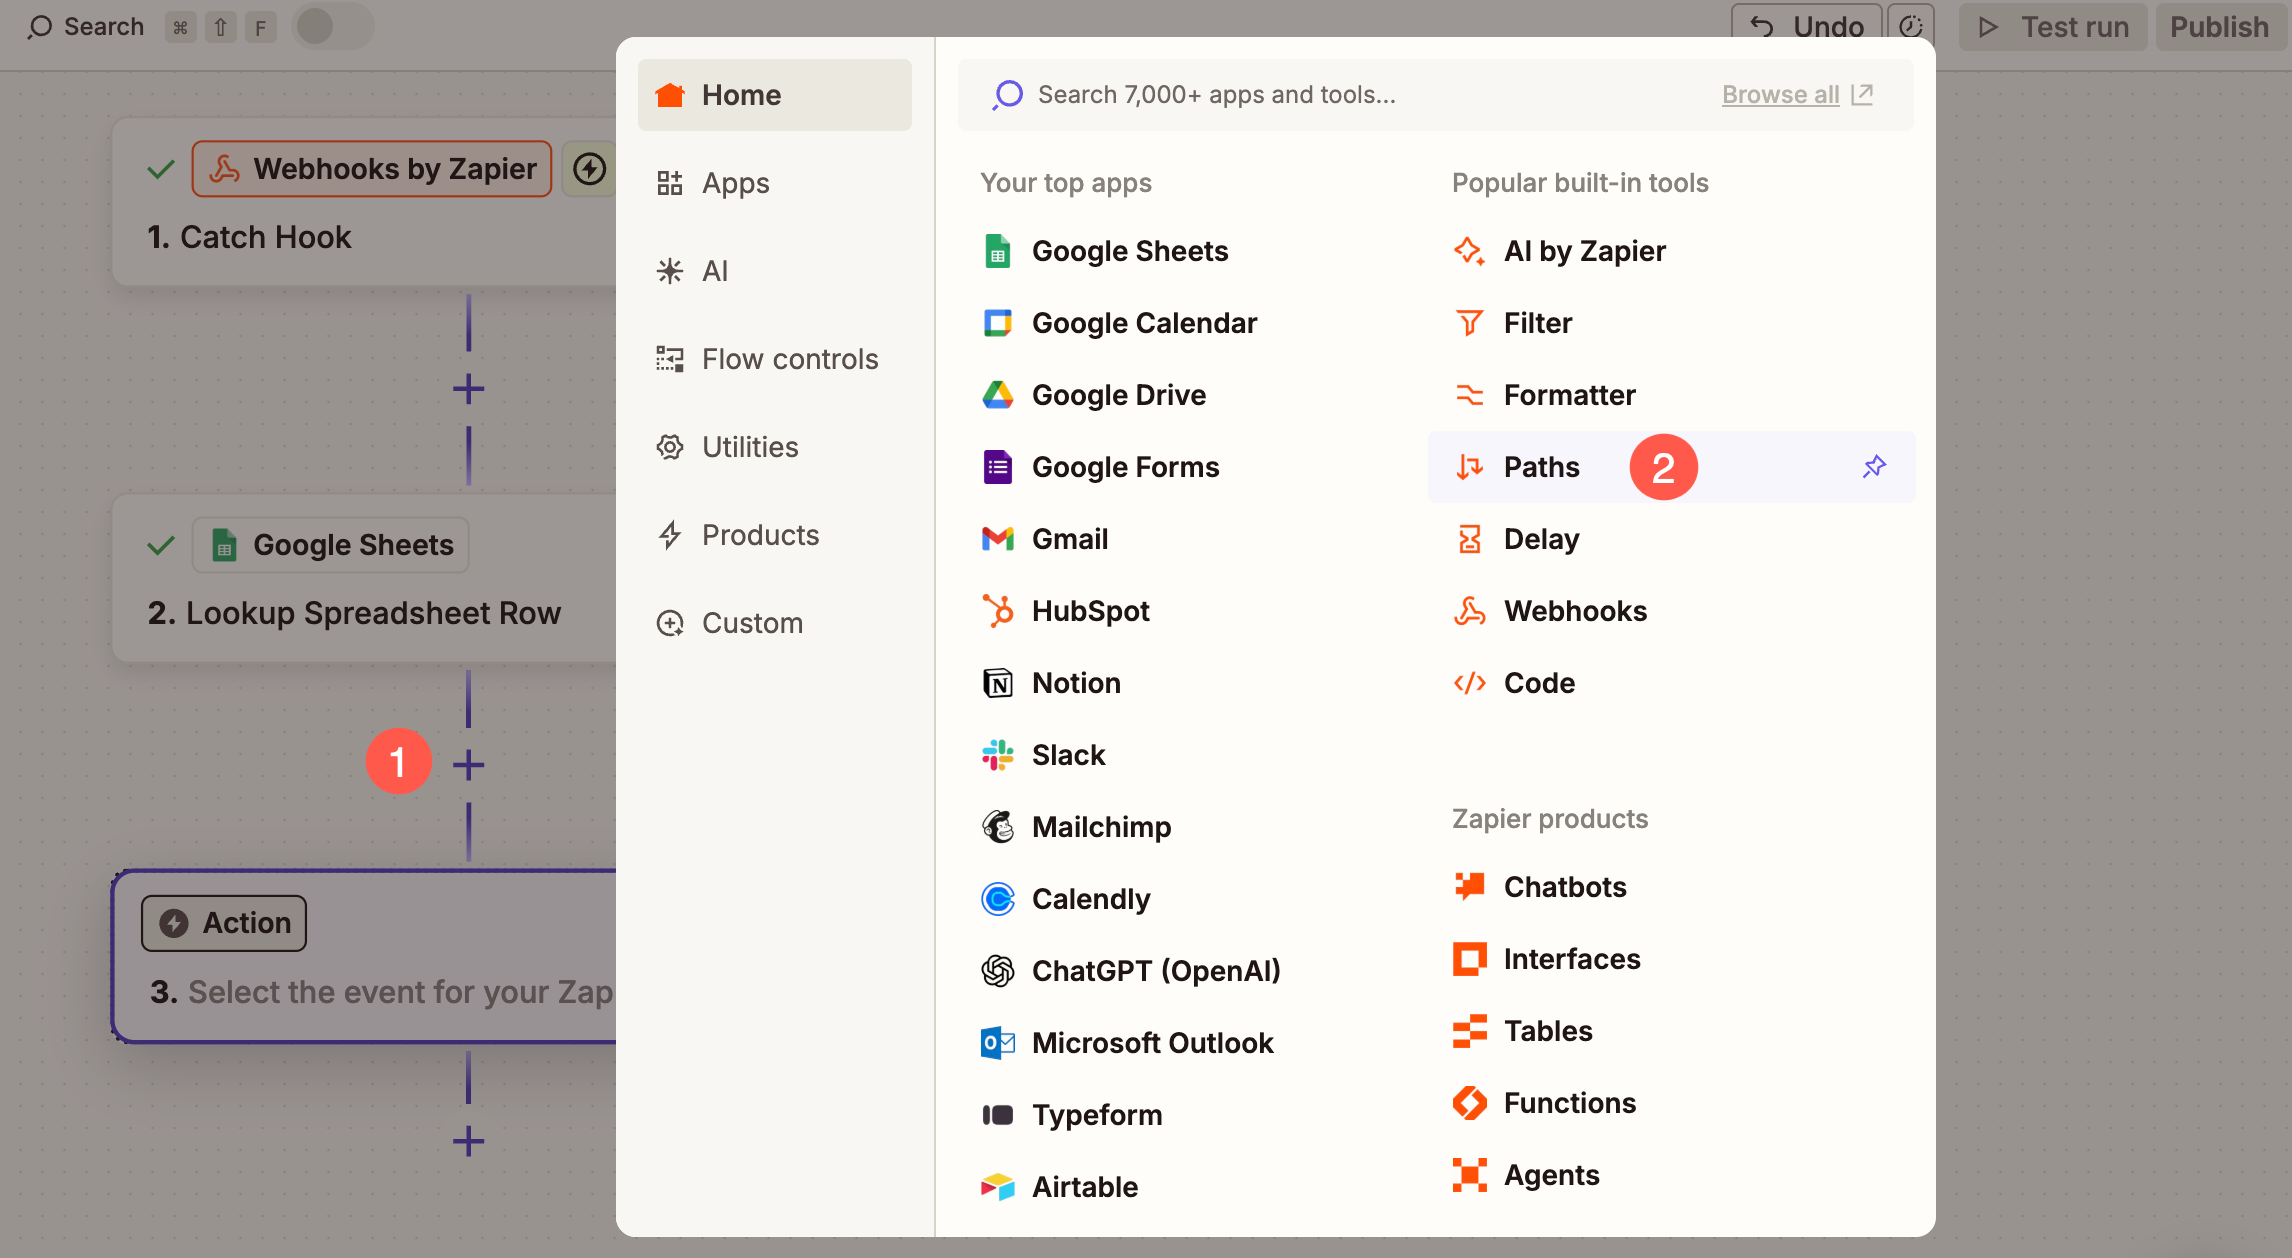
- Click on the + button (1) to add another module to the zap and select the Path (3) option from the popup.
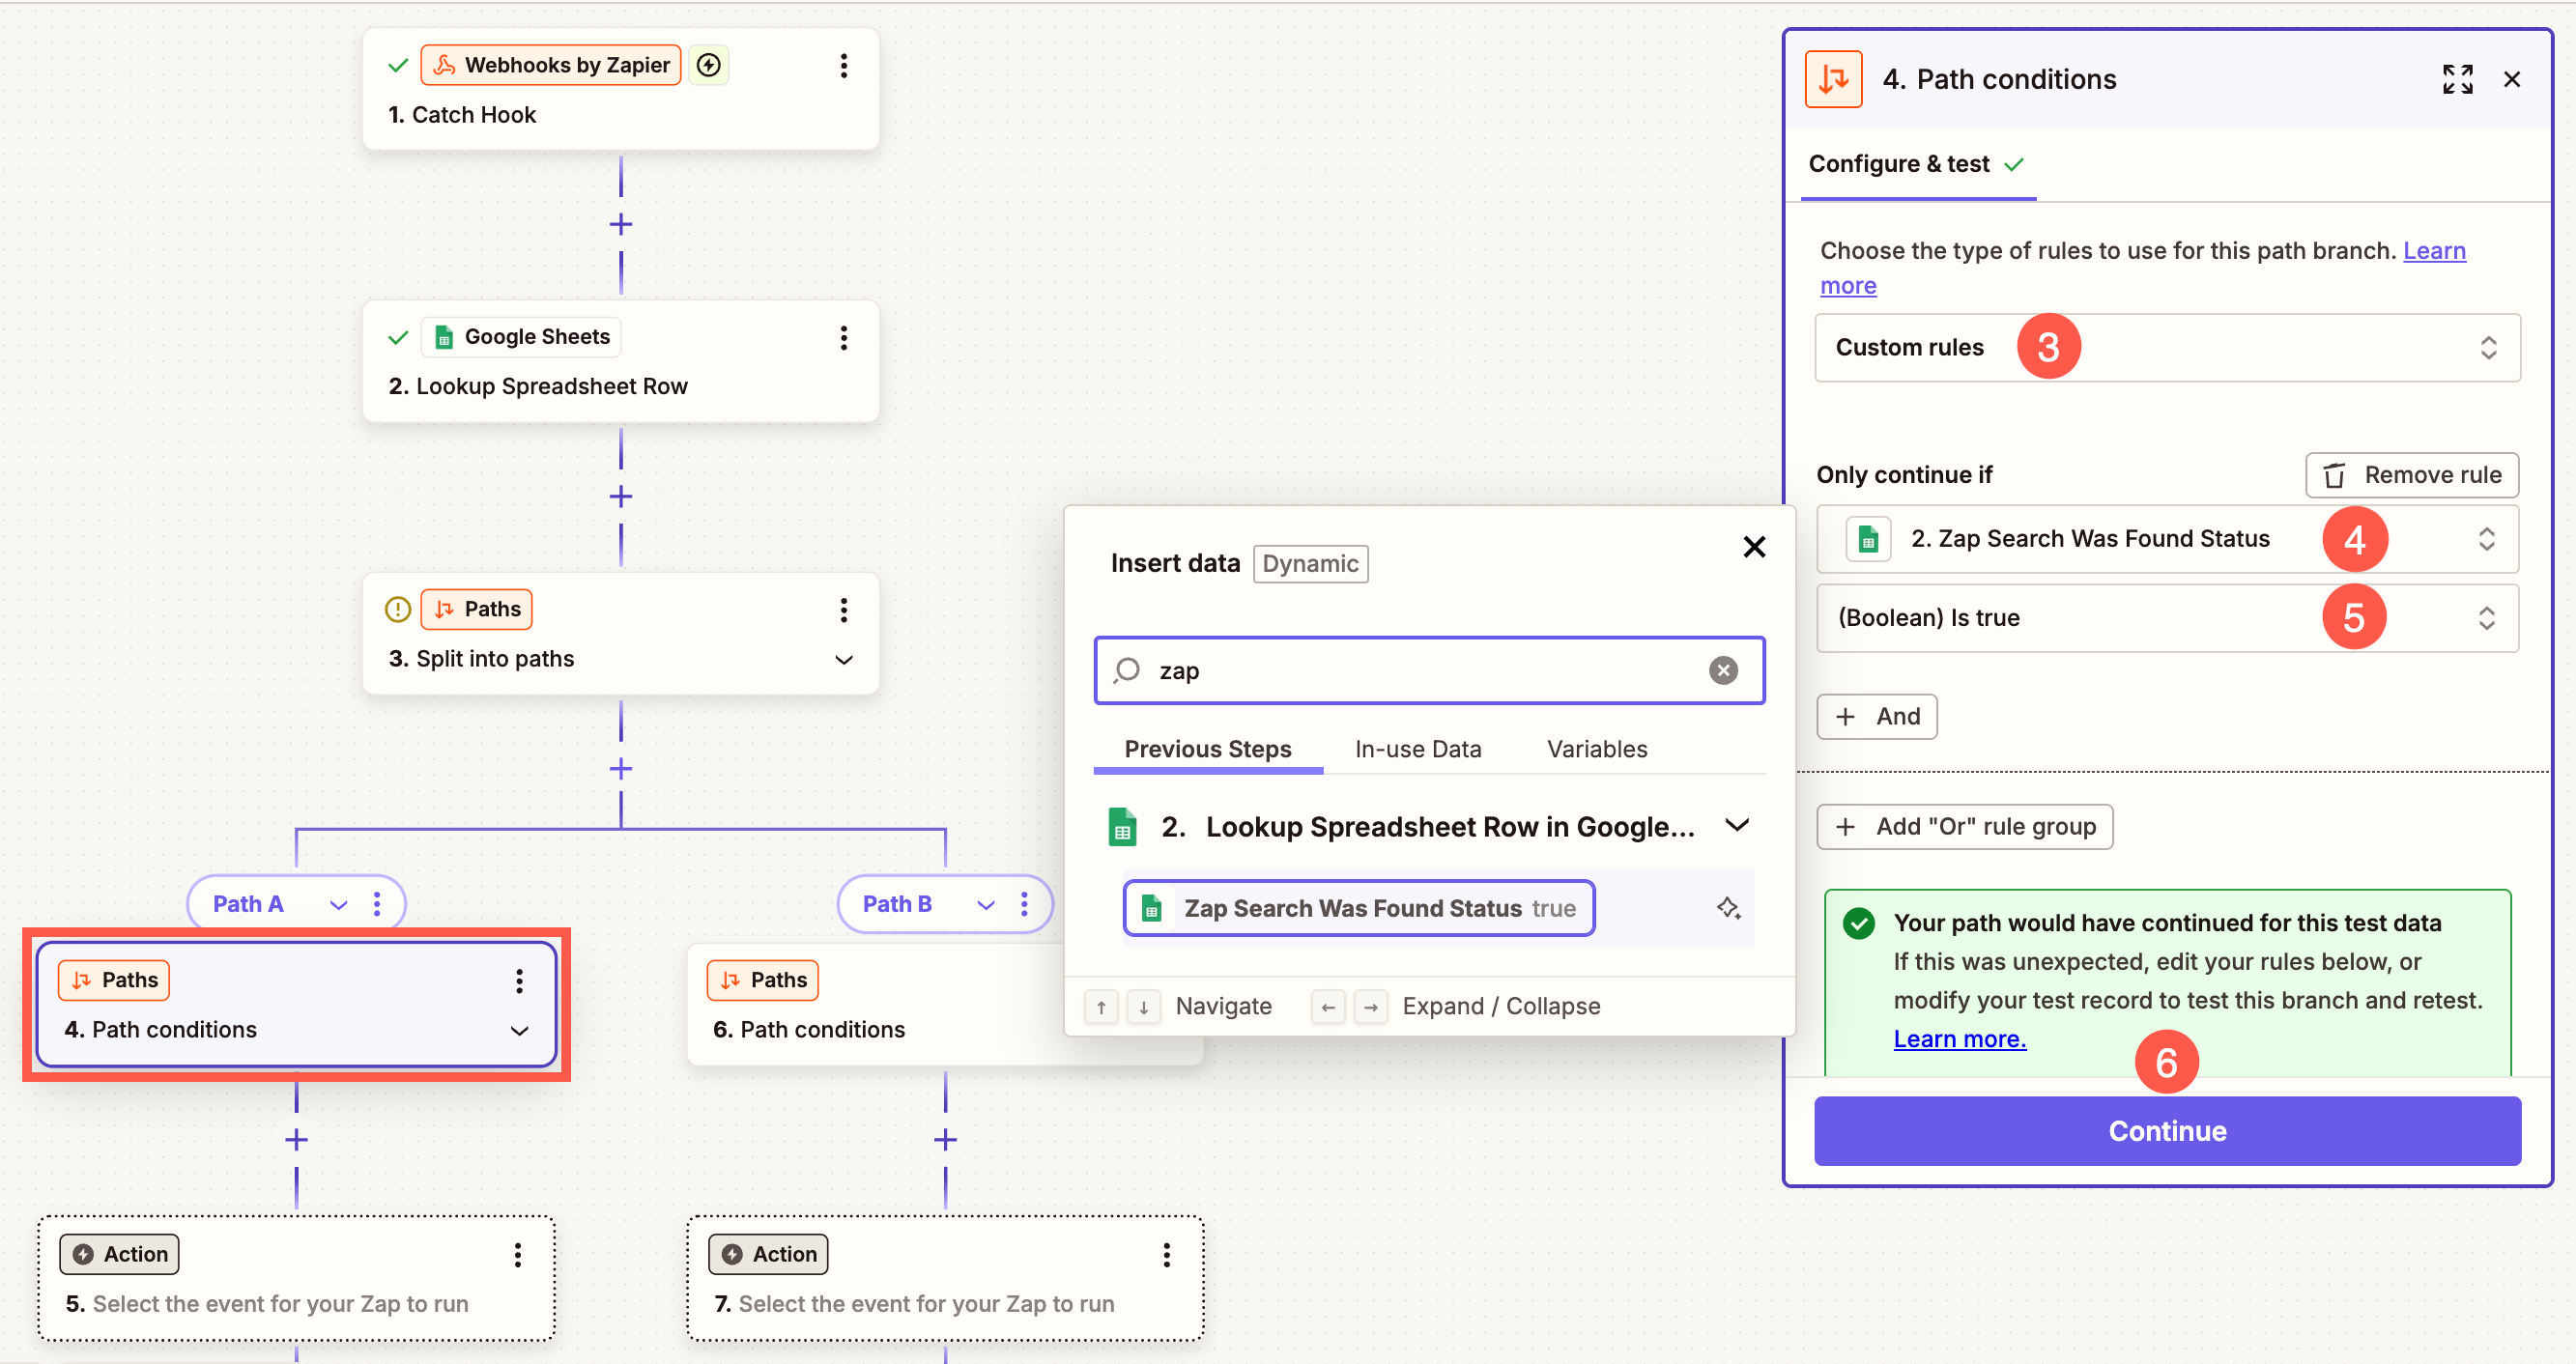
- You will now see two paths created. Select the first Path.
- Make sure that Custom Rules (3) option is selected for the type of rules option.
- Under Only Continue if field, enter Zap in the search field and select Zap Search Was Found Status (4) from the search results.
- For Condition, select (Boolean) Is true (5) option and hit Continue (6) button.
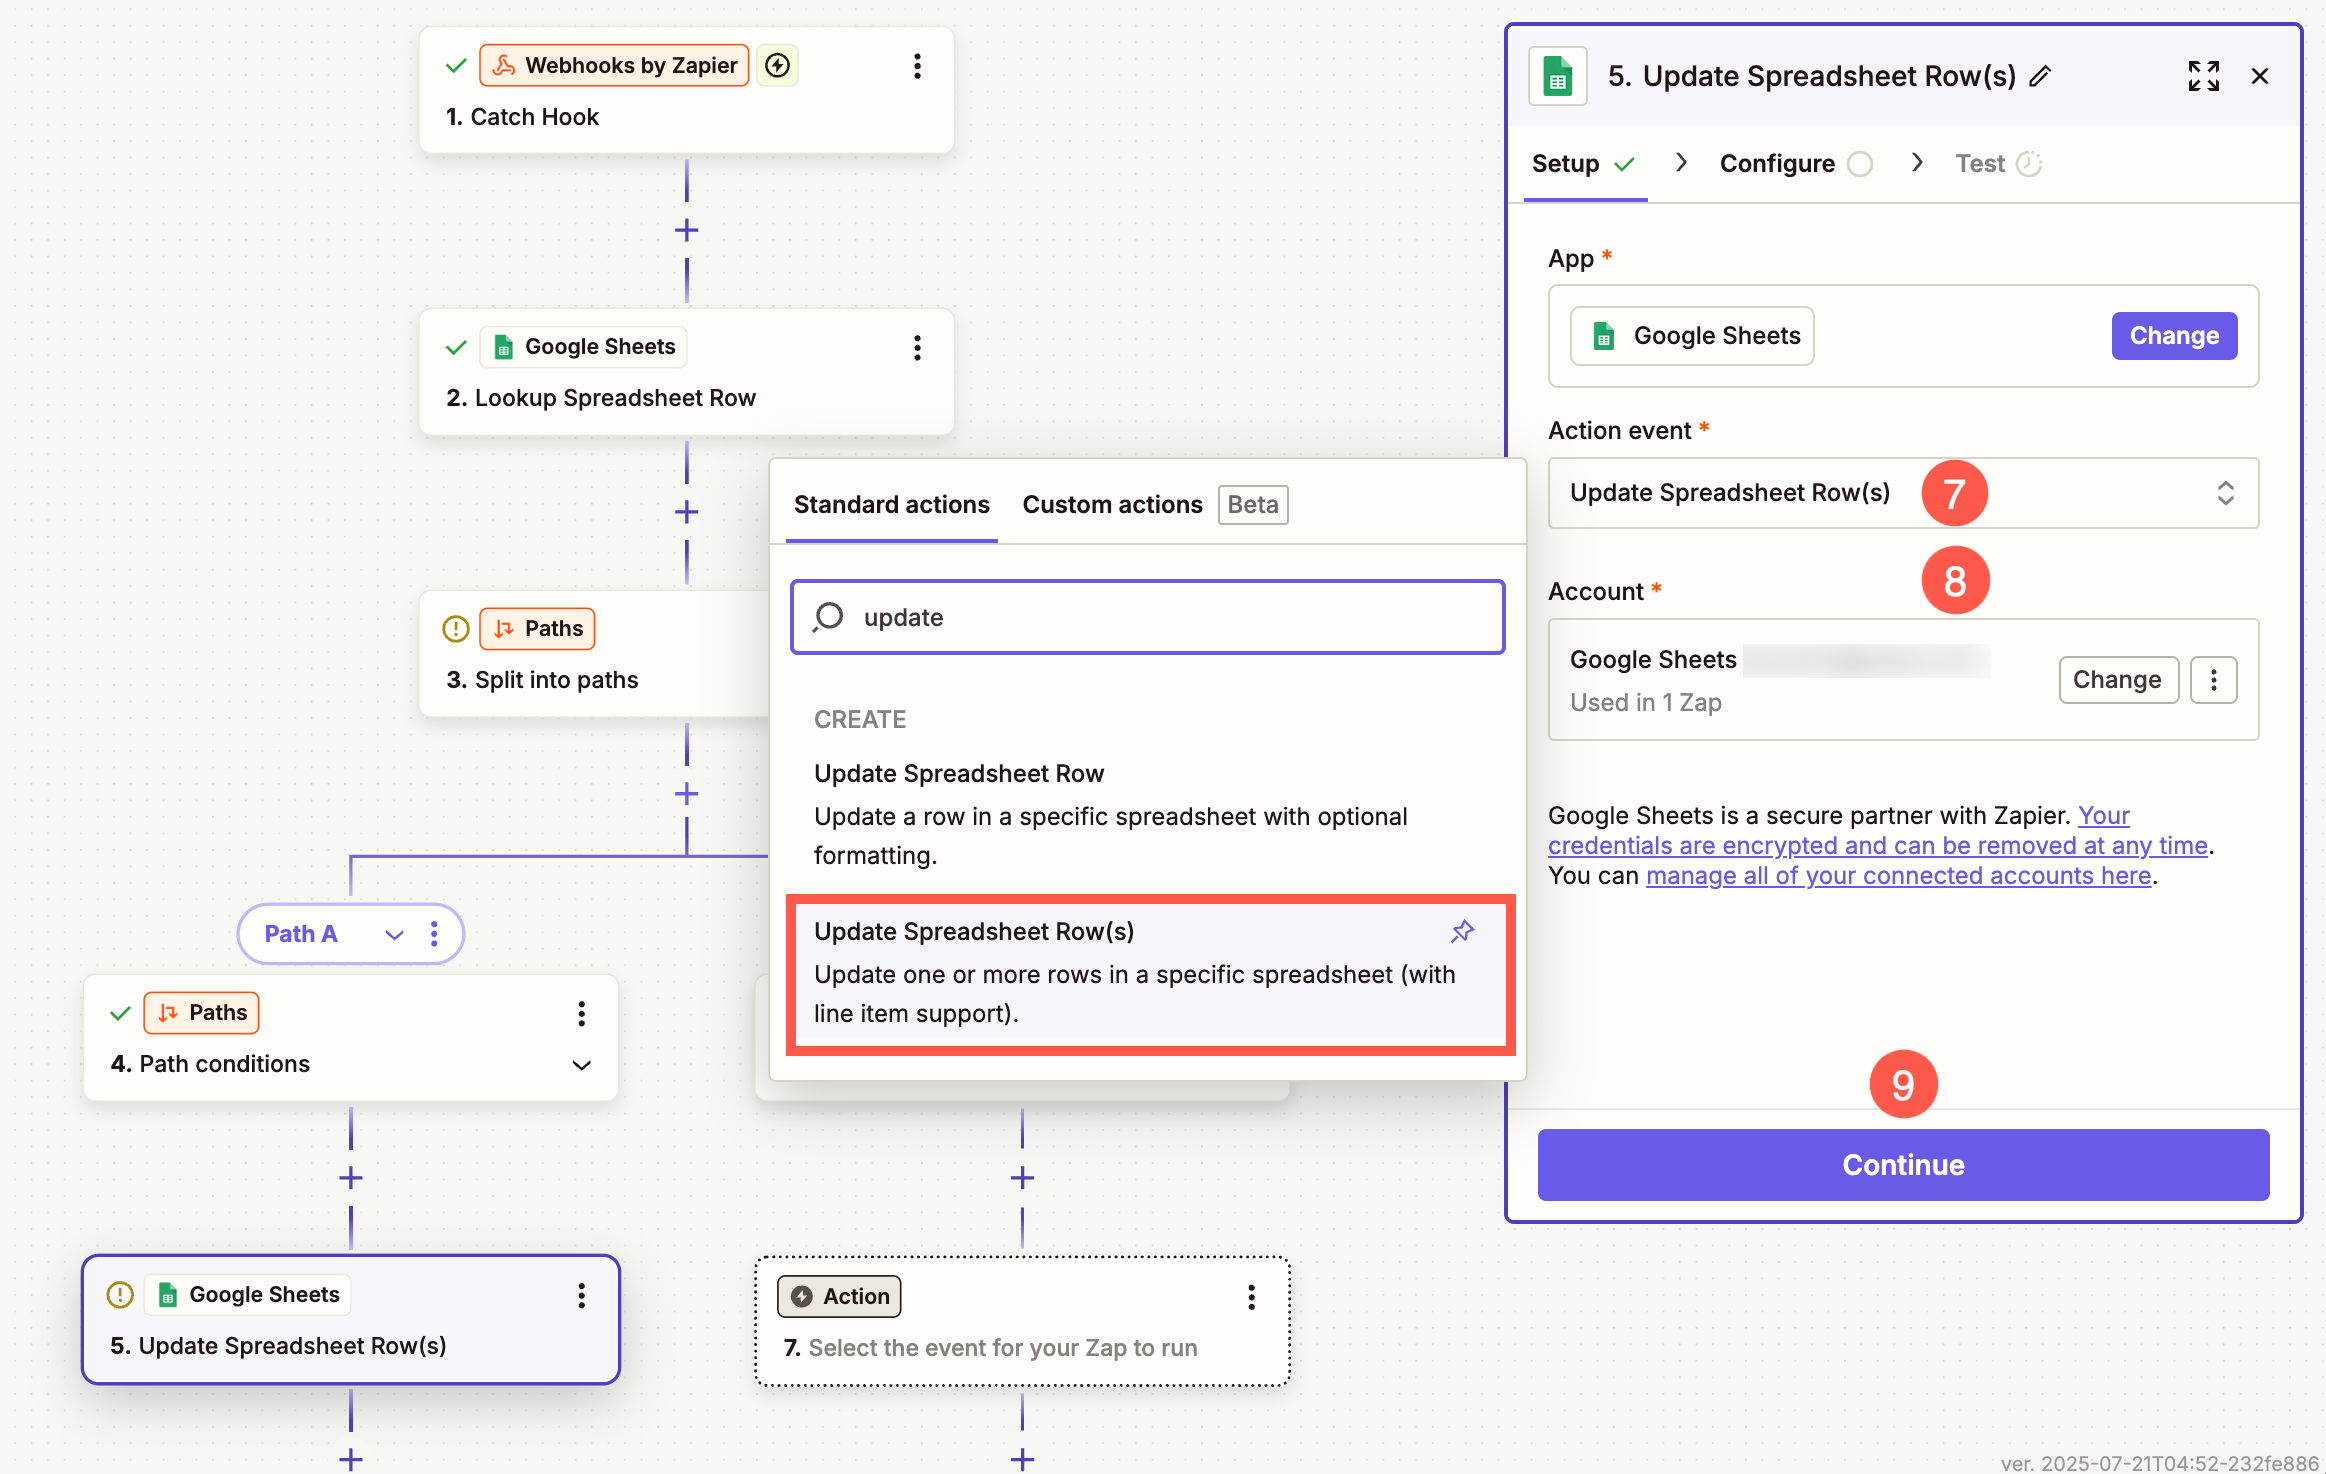
- Now select Spreadsheet option from the popup.
- Under Action Event field enter update in the search field and select Update Spreadsheet Row(s) (7) option from the search results.
- Select the Account (8) in which you have created the Spreadsheet and hit Continue (9) button.
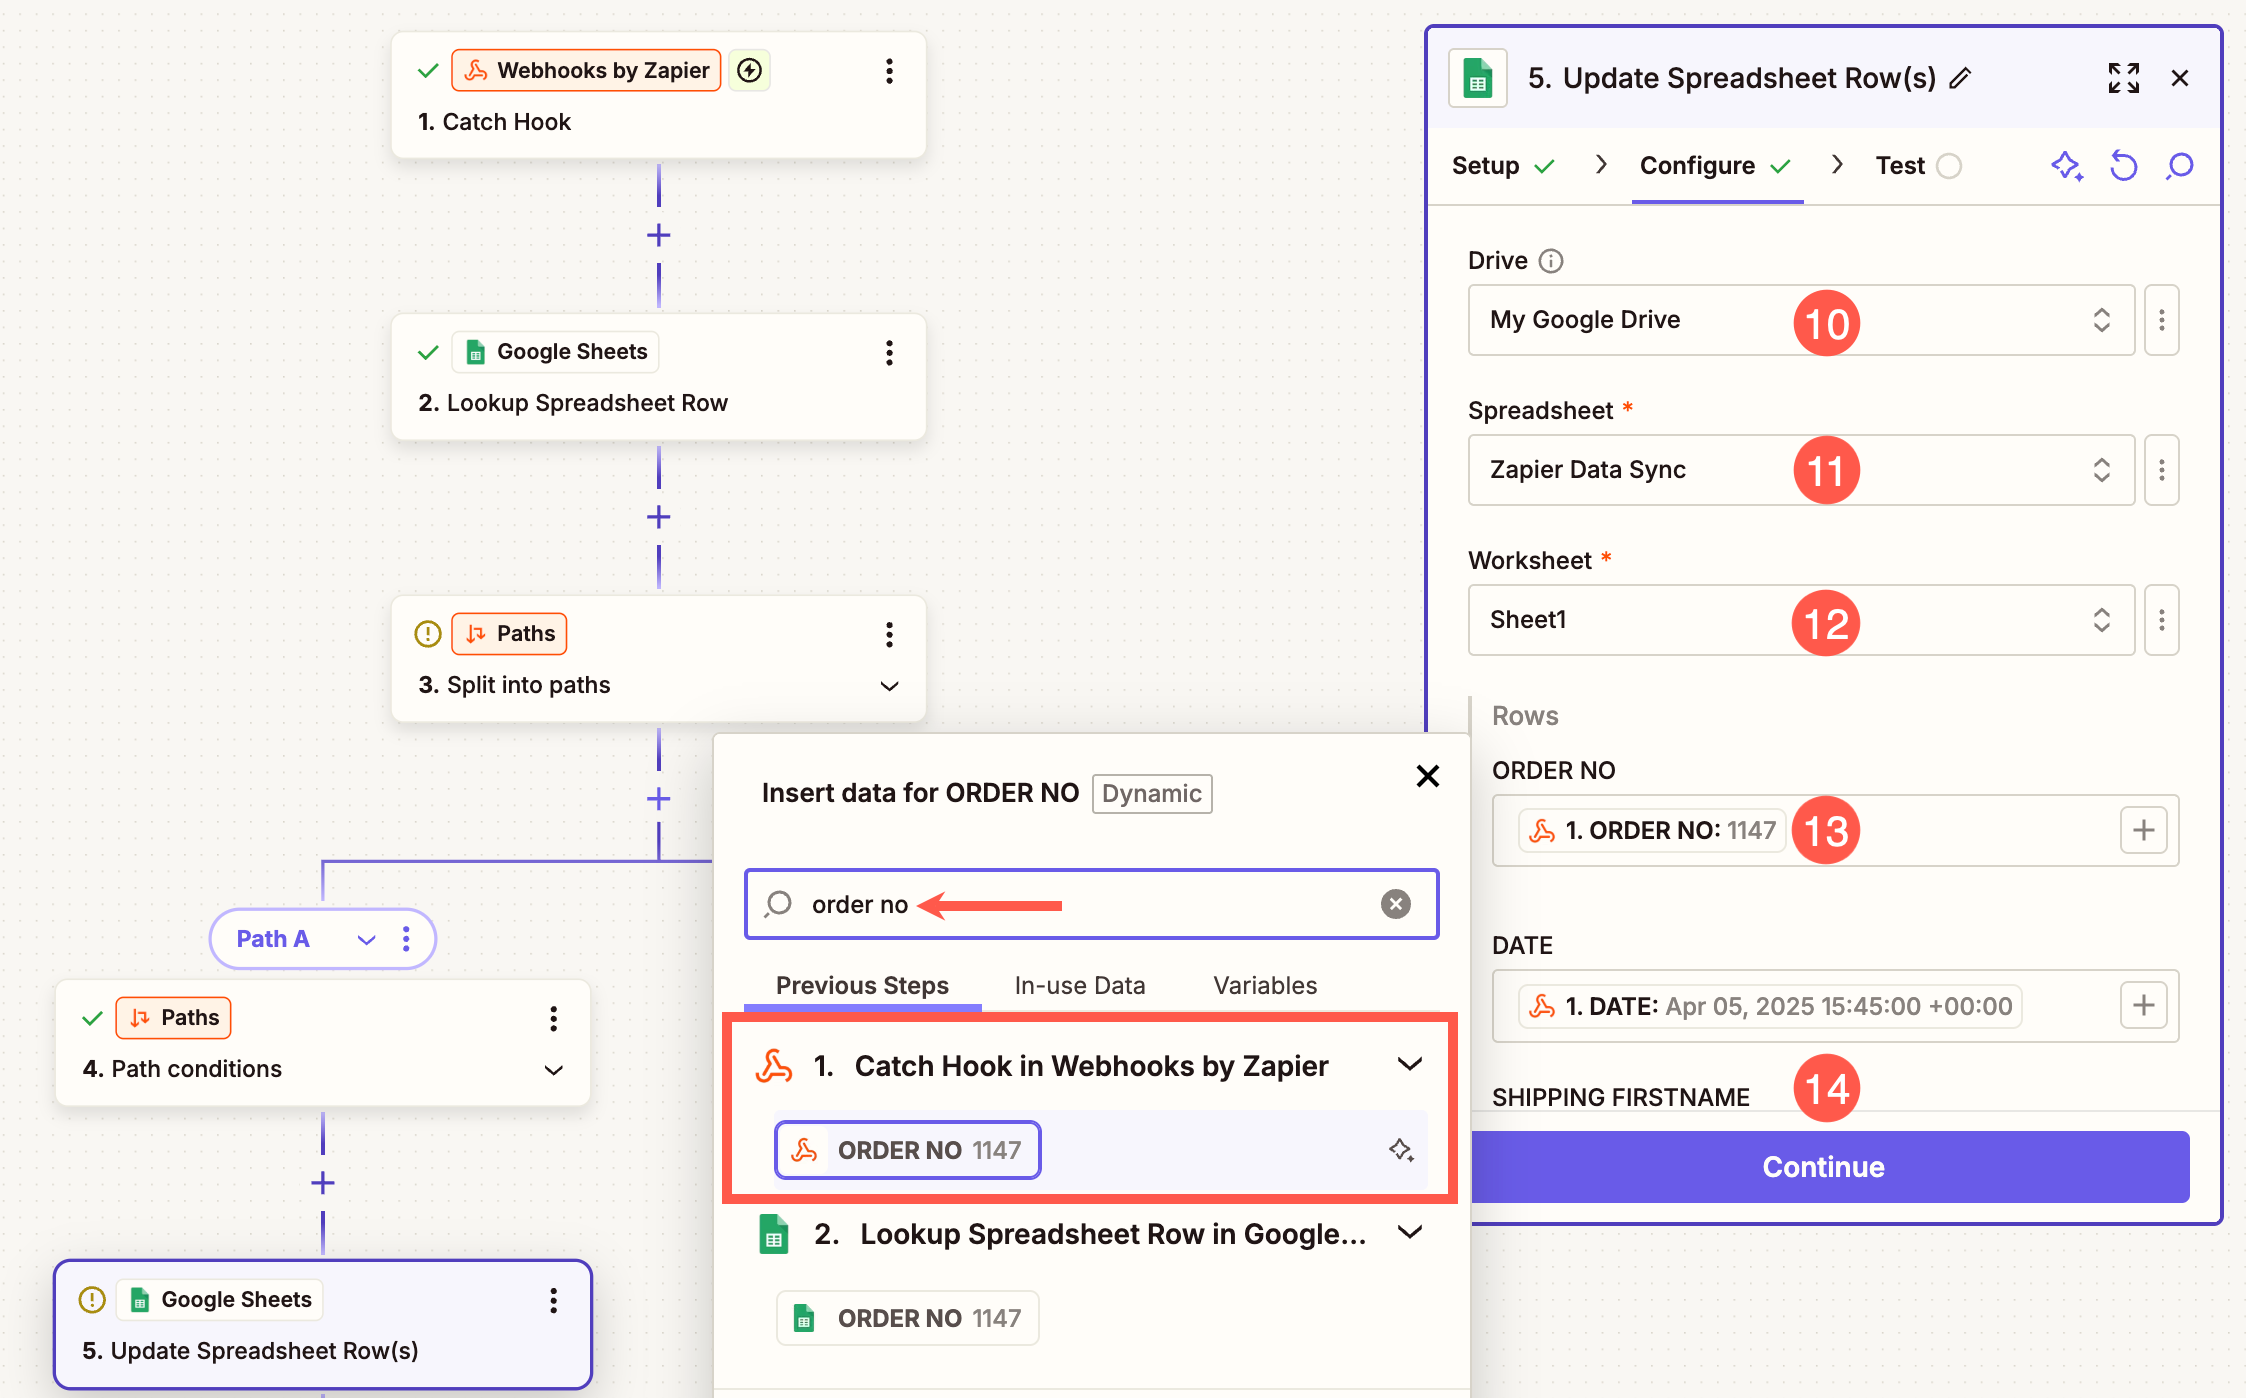
- Select the Drive (10), Spreadsheet (11) and Worksheet (12) where you want the data to be synced.
Mapping Fields
Now, you need to map the correct fields to ensure the order details sync properly to your Google Sheet.
In the Rows section (13), you will need to match each column of your Google Sheet to the corresponding data from your order. Use the search bar to look for the required fields (such as Order No, Date, Shipping First Name, etc.).
Now, you need to configure the second path. Select Path B.
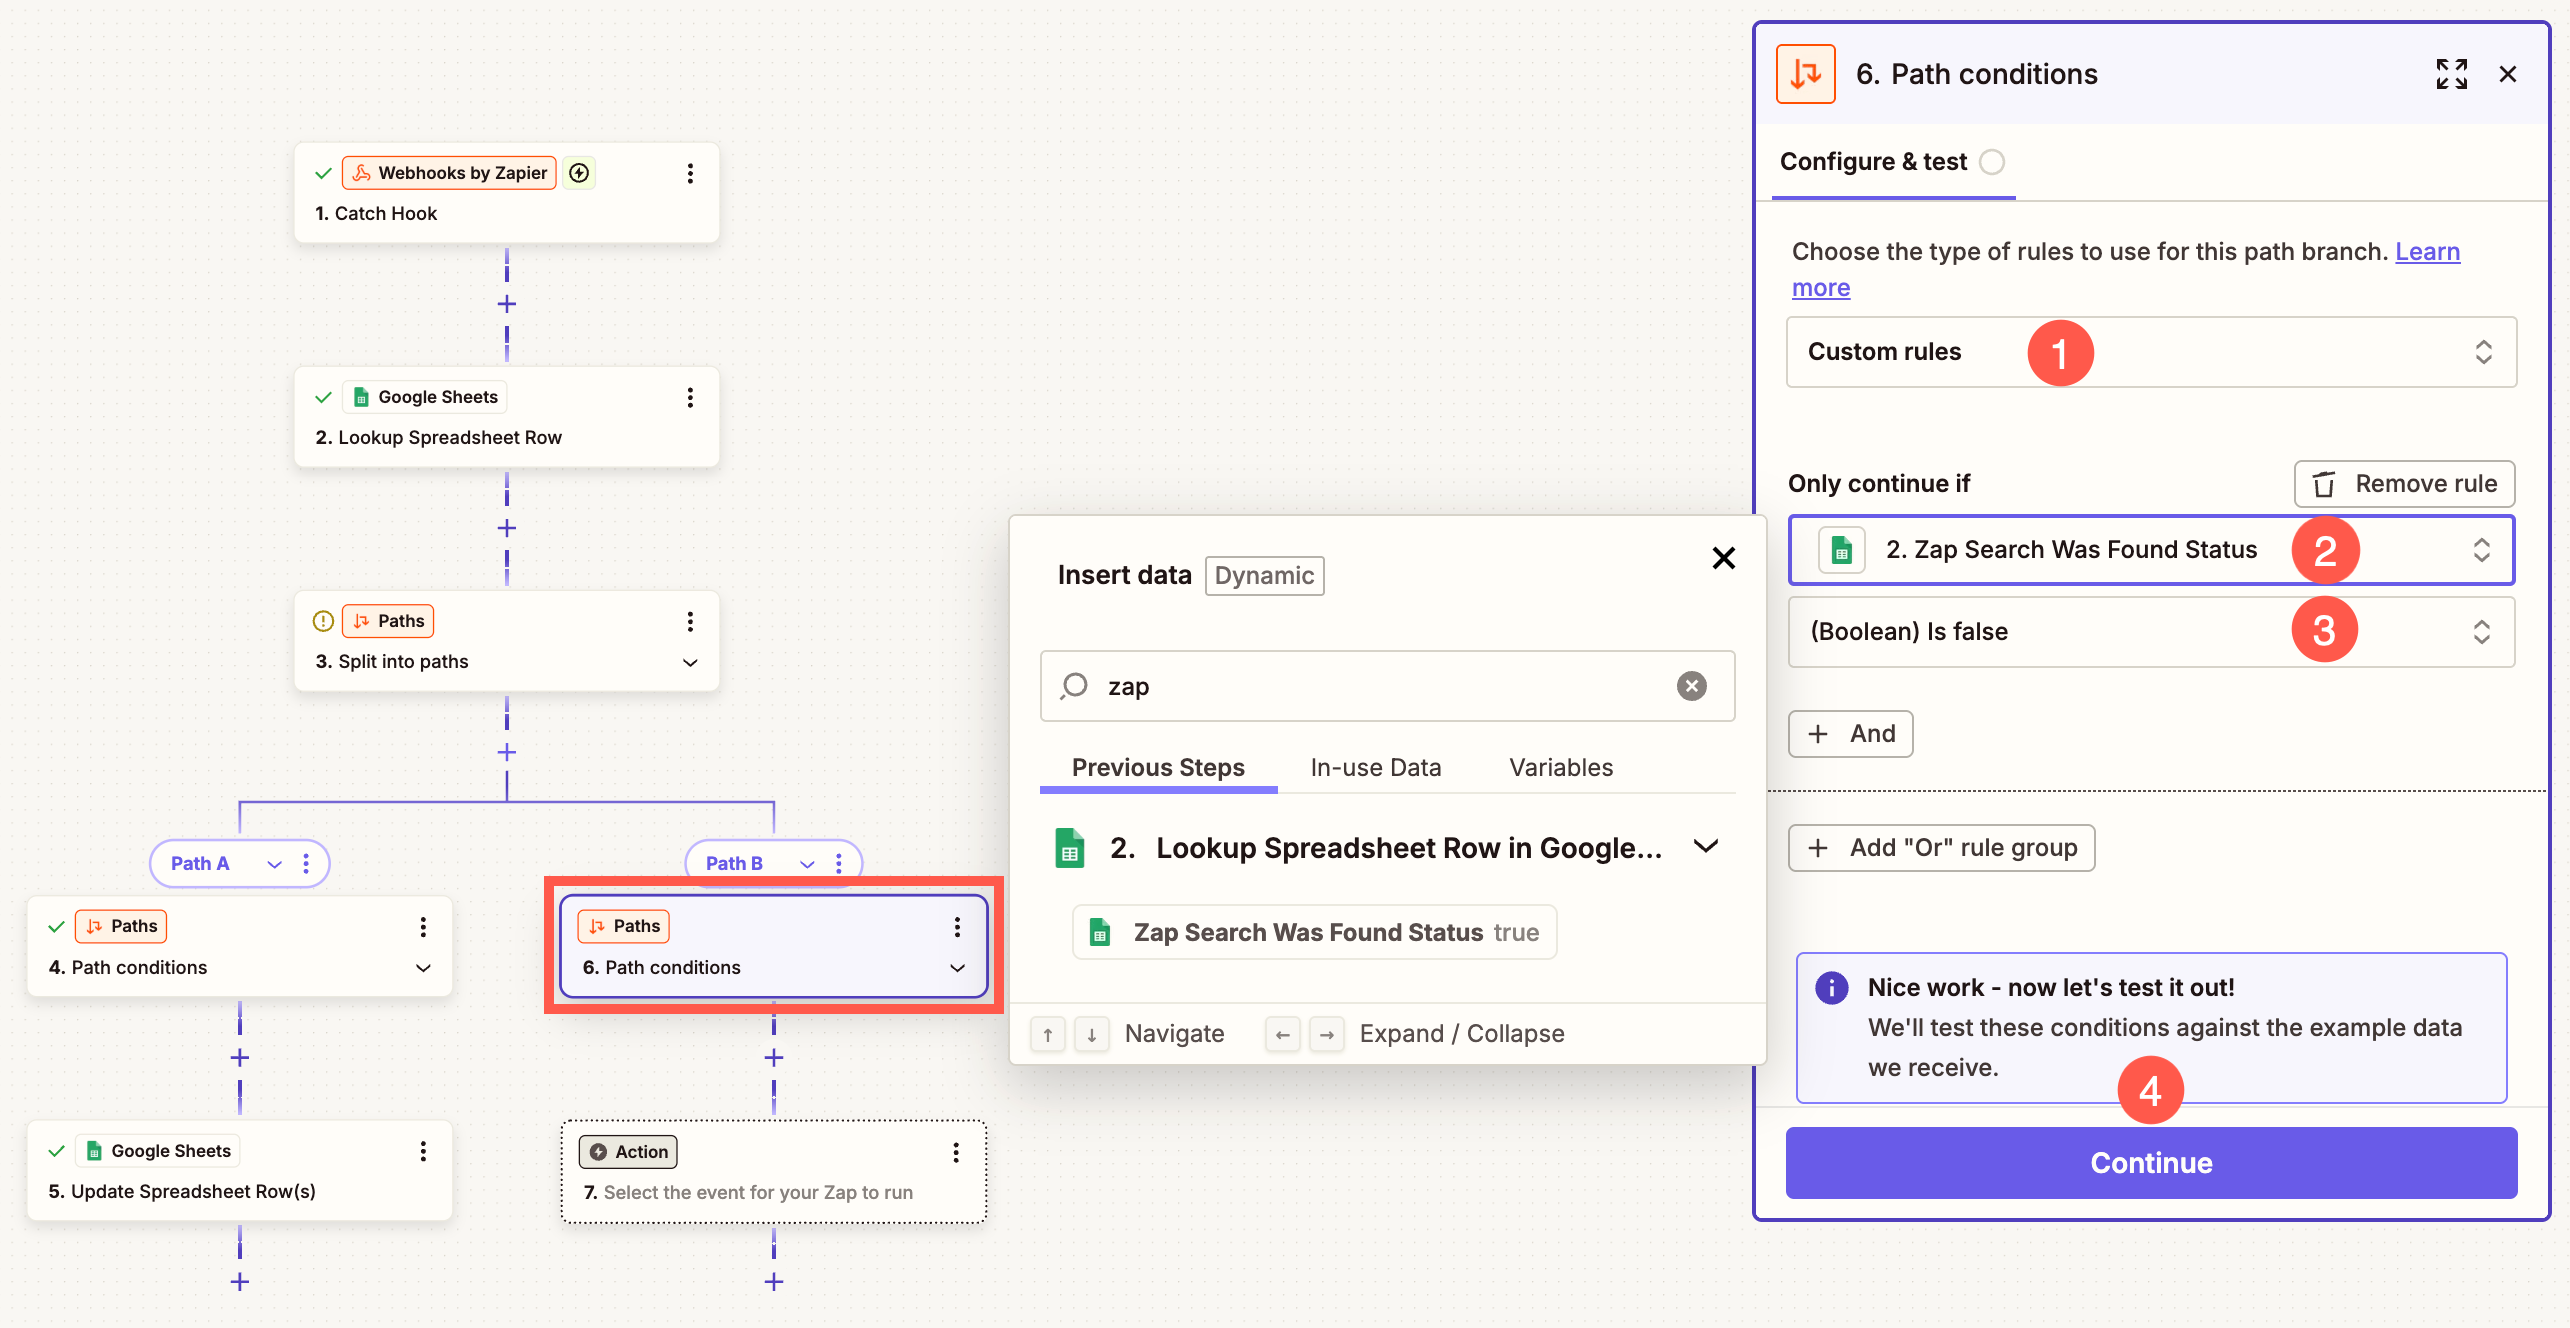
- Make sure that Custom Rules (1) option is selected for the type of rules option.
- Under Only Continue if field, enter Zap in the search field and select Zap Search Was Found Status (2) from the search results.
- For Condition, select (Boolean) Is false (3) option and hit Continue (4) button.
- Now select Spreadsheet option from the popup.
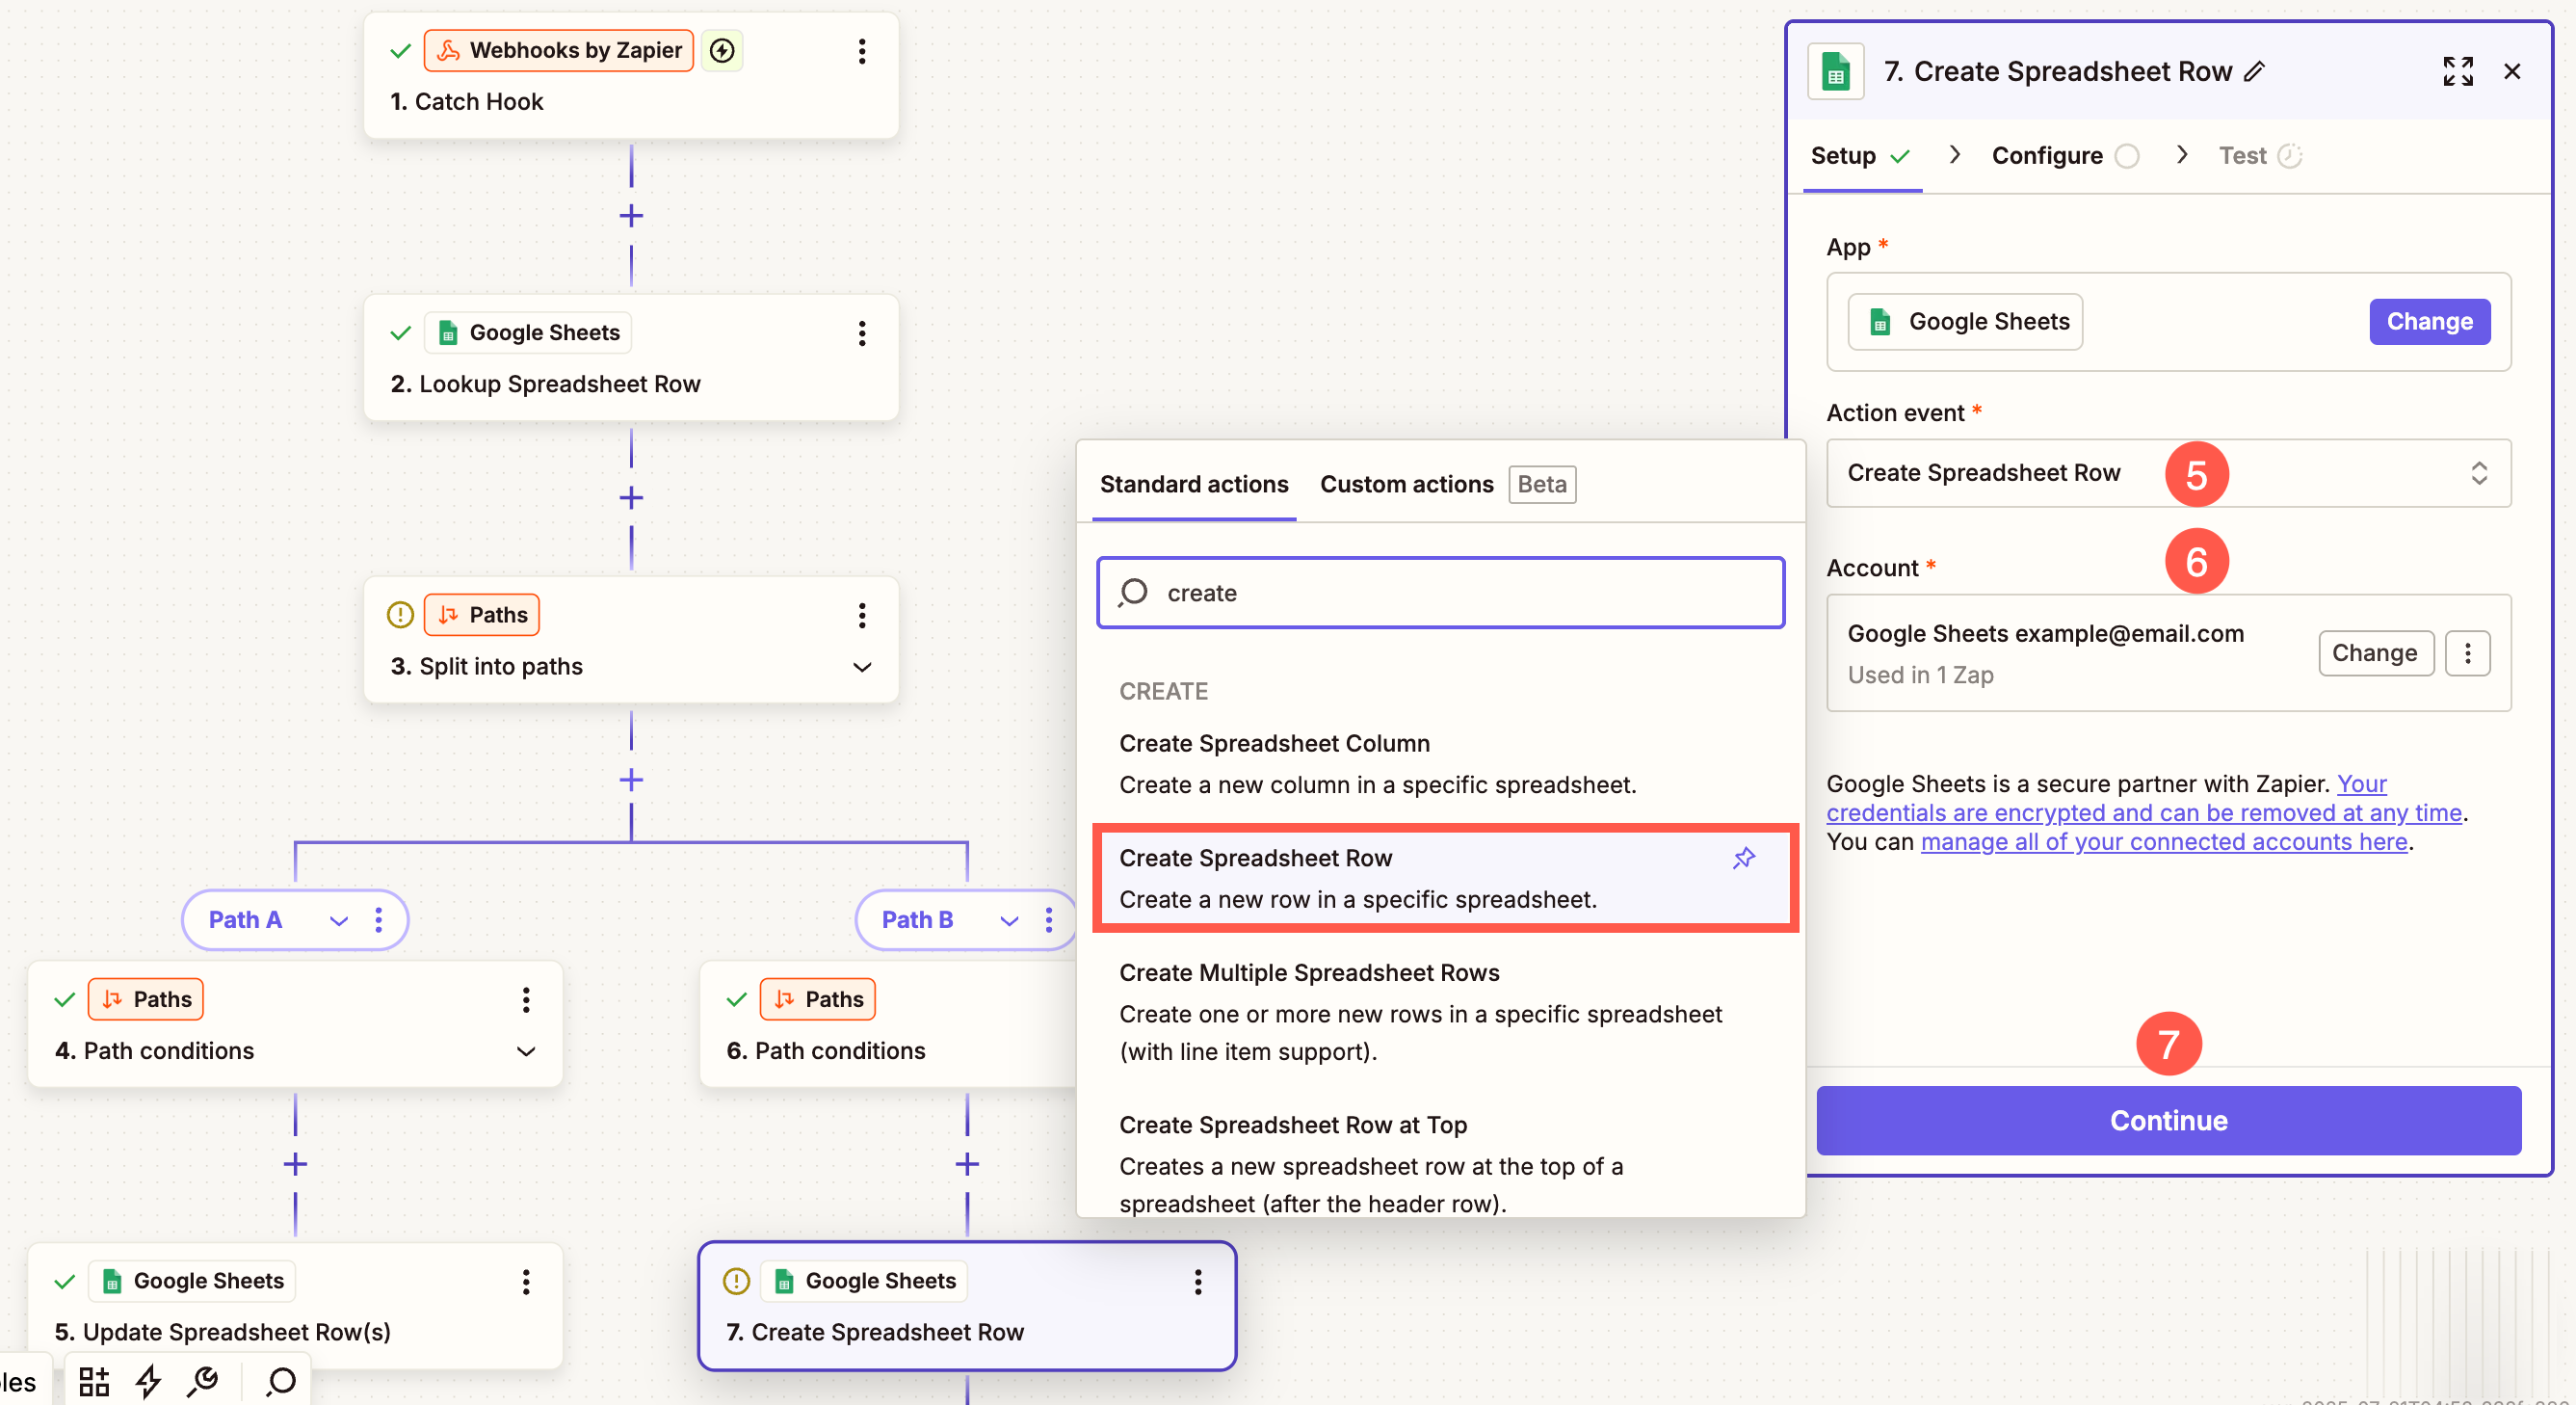
- Under Action Event field enter create in the search field and select Create Spreadsheet Row (5) option from the search results.
- Select the Account (6) in which you have created the Spreadsheet and hit Continue (7) button.
Mapping the Fields – Just like you mapped the fields for Path A, you will need to map the fields for Path B as well. Follow the same steps to ensure the correct data is selected from the Catch Hook in Webhooks by Zapier section when setting up Path B. Know more.
After mapping the fields, click on the Test button and finally, Publish the changes.
Your Pixpa Client gallery is now fully integrated with Google Sheets. Every time a new order is placed or an existing order is updated, the corresponding data will be automatically added or updated in your sheet—no manual effort required!